In addition to my primary work at Crocoblock, I occasionally take on small side projects. On the one hand, I do it out of curiosity; on the other, to avoid losing touch with working on real client projects, since our product is specifically aimed at this audience.
One such project was helping a friend with his online sports nutrition store. Recently, he asked me to update the hero section of his website. Until then, a classic banner with promotional information was created as a single image. Because there’s no in-house designer, keeping the banner up to date was a constant headache, even when all that was needed was a minor text tweak.
The task was to make this block more flexible and easier to edit. And now I’ll explain how, using JetEngine, I managed to do it literally in 30 minutes.
Task Description
So, this is exactly what needed to be done:
- Replace the existing hero section with a new one.
- The elements in the new hero section, including the accent image, main text, supporting text, button texts, and button links, had to be editable from the WordPress dashboard. This way, for example, it would be possible to quickly change the message in the hero section or update the link without touching the image.
Alternatively, you can update only the image (which is now easy to generate with AI) while keeping the same text. - To make it easier for the site admin and reduce the chance of accidentally breaking something on the page, I decided to put the hero section settings on a separate settings page in the dashboard.
- Since the site uses the native Block Editor, the banner should be added to the page as a block. This way, it would be easy to work with when changing the page layout. An easier option would be to make it a shortcode, but a dedicated block looks more natural and understandable when editing the page.
In short, this is the result I want:
- Flexible hero section with separate editable elements.
- Simple and safe editing process directly in the admin panel.
- Integration into the Block Editor for seamless use.

Task Implementation Using a Custom Solution (Classic Tools)
First, let’s imagine how I would implement it in a traditional way, using a custom solution.
In this case, several separate PHP, JavaScript, and CSS files would be required, so it would be best to organize this as a standalone plugin. Preparing the structure would take some time. It’s quick if you’ve already done similar small plugins before and, of course, have some coding skills, but it’s still 10 to 15 minutes.
Next, we move on to the settings page, and here we have two separate tasks:
- The page interface.
- Develop the way settings will be saved there.
Since my next step would be to create a block for the Block Editor, and therefore use React, Webpack, and NPM, it makes sense to use the same stack for the settings of the Option page interface. WordPress has excellent tools for speeding up development with this stack:
- The NPM package @wordpress/scripts – this package helps quickly set up the build of final scripts and styles from JSX and SCSS files.
- The library of ready-made UI components with a convenient Storybook where you can find descriptions and usage examples – Gutenberg Storybook.
Saving settings in this case is most convenient via an AJAX callback. In this article, I won’t delve into the details of how exactly this is done, but will limit myself to a rough estimate of the time required for both parts: UI and data functionality.
Depending on whether you use AI tools or not, and, most importantly, on your prior experience, this task takes between 40 and 90 minutes.
Now, the final part is creating the block itself. As I mentioned earlier, we’ll use React, Webpack, and NPM to add the block to the editor, plus a PHP callback for rendering the block with the settings created earlier. Add some CSS for the front end so it looks the way we want. Again, this is just a rough estimate of time: depending on your tools and experience, the task will take an additional 30 to 90 minutes.
Therefore, the total estimated time is between 80 and 195 minutes. That’s not too much, but in the worst-case scenario, it’s more than three hours of clean work time. In reality, with distractions from other tasks or everyday needs, it can take almost a whole working day, which is significant.
Solving the Same Task with JetEngine
Now let’s see how I implemented this task with JetEngine. This site already had JetEngine installed, since I had used it earlier for other tasks.
Moving on to the settings. Again, we have two tasks: interface and functionality to save settings. JetEngine solves both with one tool: Options Pages.
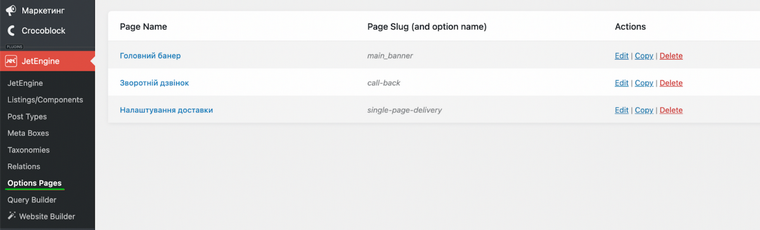
I added dedicated fields for all hero section elements:
- Image;
- Heading;
- Subheading;
- Primary button text;
- Primary button link;
- Secondary button text;
- Secondary button link.
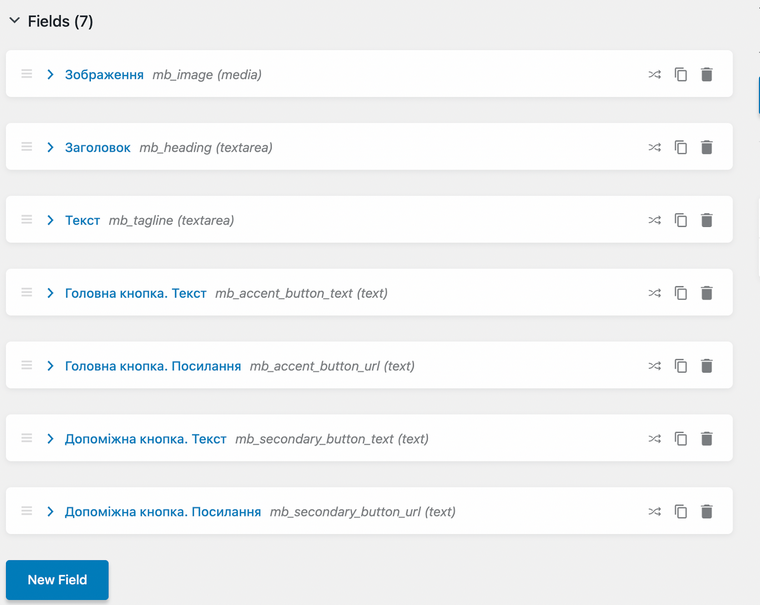
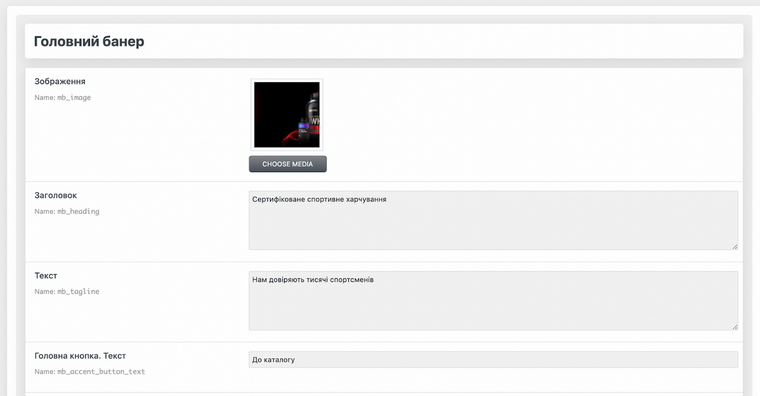
As a result, now I have both the UI for adding these settings and the saving mechanism. Time spent: about 5 minutes.
Now, it’s time for another important thing – the block itself. JetEngine has a relatively new feature that not many people know about or have tried yet – Components.
In a nutshell, the JetEngine’s Component features a block builder if you’re using the Block Editor, or a widget builder for Elementor, or an element builder for Bricks.
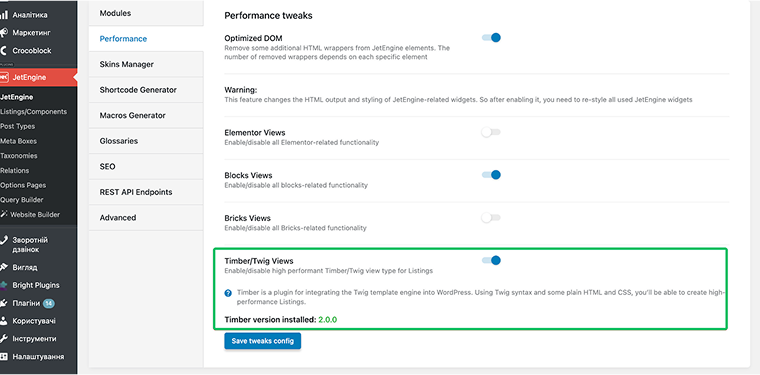
Now, it’s time to choose which editor to use for building the structure of this, as JetEngine supports four editors for creating Components and Listing Templates: Twig, Block Editor, Elementor, and Bricks. You can activate or deactivate unused ones in JetEngine > JetEngine > Performance tab.
Considering my experience with HTML/CSS and my desire to have full control over the final HTML structure, I chose Timber/Twig views. Overall, for tasks like this, I strongly recommend this option, as you are essentially using classic HTML/CSS to build the internal structure of the component (block, widget, or element, depending on where you use it later). You also have AI tools or ready-made structures examples from CodePen and similar resources to streamline the process, especially if you are not so familiar with HTML/CSS.
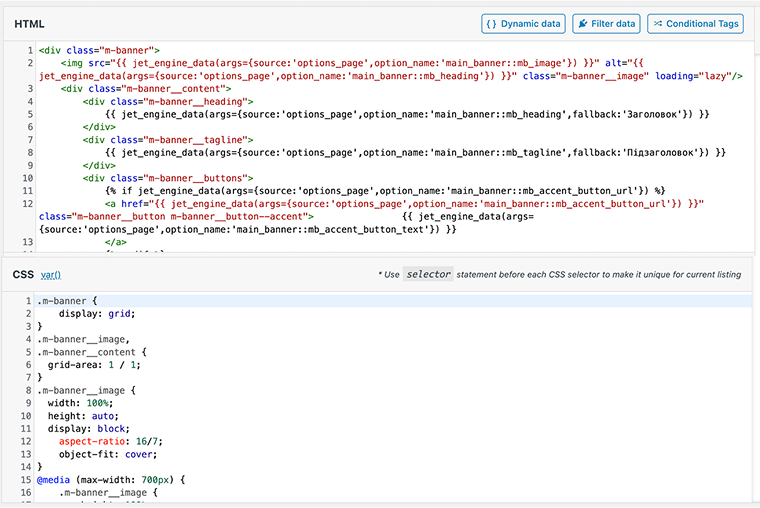
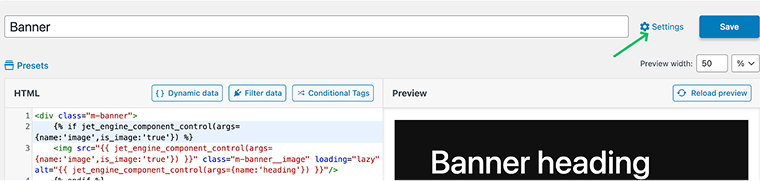
So, all I had to do was go to JetEngine > Listings/Components, choose Timber/Twig as an editor, and there:
- create the HTML structure of the component;
- output values from the settings into it;
- add the necessary CSS.
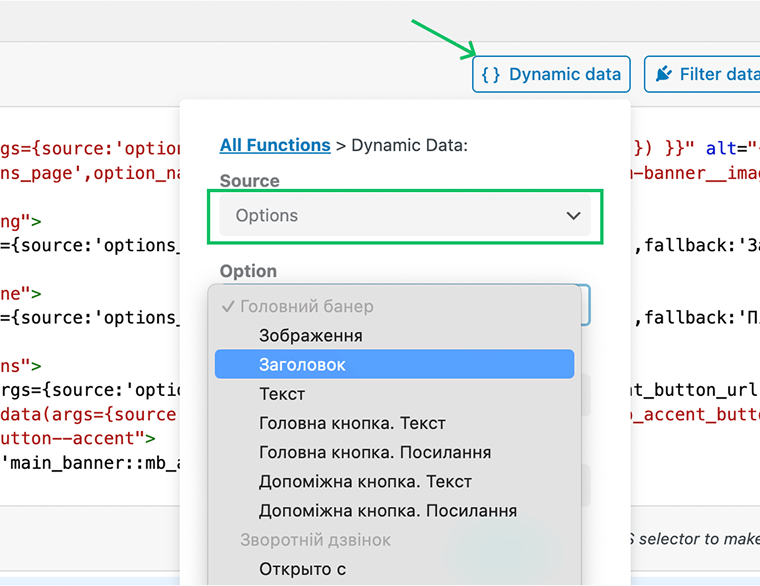
To pull the dynamic values into the component, I used Dynamic Data, which integrates with Options Pages and allows you to choose what to output in the component’s content via a simple interface. As you can see, here I have the list of fields I’ve created for an Option page earlier:
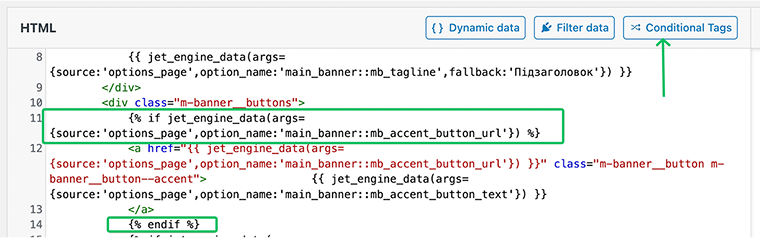
I also used JetEngine’s Dynamic Visibility feature (Conditional Tags) to display buttons only if links are provided. This allows the site administrator to create a more flexible hero section with minimal effort.
The component is ready. Now, I can simply select it like a normal block in the editor and add it to the page.
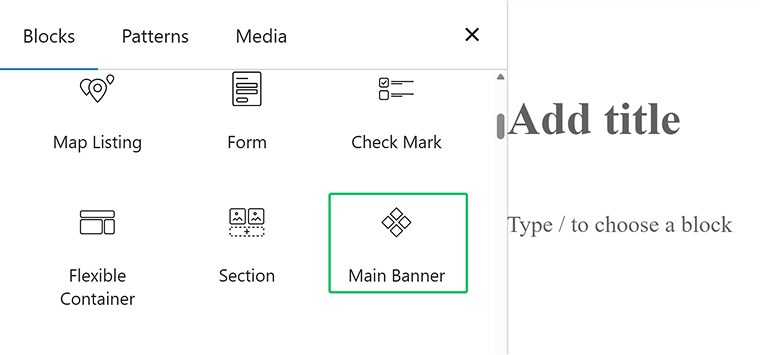
Done.
Approximate time to create the block: 20-30 minutes.
All operations were performed directly in the site’s admin panel, as working on the component did not impact the site’s overall stability. Even the final testing was safely done on the live site – I just added the ready block to a private page and checked everything.
This not only speeds up the workflow but also simplifies it, since there’s no need to switch between multiple tools, not to mention having knowledge of code development tools and PHP.
Bonus
The only drawback of this case is that it doesn’t fully showcase the power of Components. Since I decided to put all the settings on an Option page, the block itself has no additional settings. What I mean is that the content of all the elements on the Option Page can be edited directly in the page editor, so every time you reuse the block, you can make changes.
On one hand, the way I’ve implemented it in the example above is convenient for the site administrator, since they can quickly and safely edit the settings. On the other hand, we’re limited to only one version of the banner. In my case, this wasn’t a problem, since the task explicitly required only one such element on the site.
But in general, it would be good to bypass this limitation. And this is also easy to do. We can simply move the same settings from the Options Page directly into the block itself – JetEngine provides all the necessary options for this.
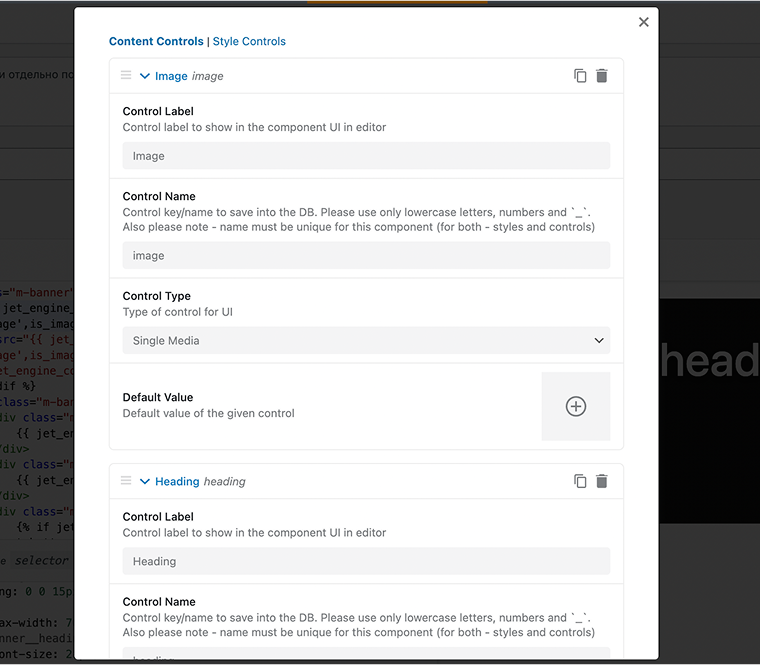
We just need to add the corresponding fields in the component settings:
You will see the dialog window with all the settings you may need to create a Control (types supported: image, text, textrarea, rich text, select, select media):
And then use these fields in the component’s content instead of values from the Options Page.
Here you can see it in the Twig markup:
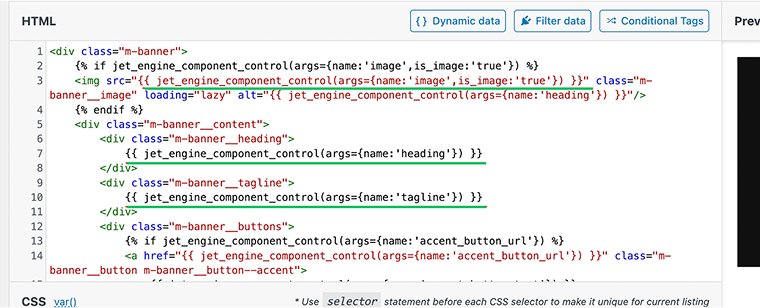
Done. Now, when adding the block to a page, I can set the image, text, and links separately for each block and get banners with unique content on different pages.

Of course, you can use this component in Elementor or Bricks as well, not only the Block Editor. Also, the editor you use for building a component (Twig in my case) doesn’t influence the choice of an editor you use further for creating your website pages.
You can download this component and install it on your site here: Download Component.
To install:
- Go to JetEngine > Skins Manager > Import Skin.
- Upload the downloaded file.
- Important! Before proceeding, make sure Timber/Twig Views are activated.
FAQ
A static image makes every update dependent on a designer. By separating text, images, and links, you can update content quickly and keep the site fresh.
JetEngine’s Options Pages and Components let you build a flexible hero section in under 30 minutes.
Dynamic components save time and reduce errors. Instead of editing the same element across multiple pages, you update it once, and changes are applied everywhere it’s used.
Reusable blocks let you repeat static content, but JetEngine components can be fully dynamic, pulling data from custom fields, taxonomies, or user input, offering much greater flexibility.
Conclusion
Crocoblock plugins provide many tools for optimizing and speeding up website development. Some are obvious – like creating CPTs, meta fields, listings, and filters. Others, like today’s case, come from combining different tools that at first glance don’t seem fit for the task. There are many more useful features, as JetEngine alone can easily replace over ten premium plugins. So, all the powerful tools are in your hands!
