Whether you’re selling digital goods, physical products, or subscription services, having the right payment system in place can make all the difference. For WordPress users, there are countless plugins available, but finding the right one to meet your needs requires careful consideration.
Table of Contents
- WPForms: Accept Credit Card Payments
- JetFormBuilder: Accept Credit Card Payments
- EasyDigitalDownloads: Accept Credit Card Payments
- FAQ
- Conclusion
Imagine a bookstore specializing in exclusive and collectible items—limited-edition books, signed copies, and even digital collectibles. This type of business demands versatile payment solutions that cater to different scenarios, such as one-time purchases, subscriptions, and digital downloads. Fortunately, WordPress offers several plugins that can make managing these transactions a breeze.
In this article, we’ll explore how to build a payment flow with WPForms to accept credit card payments and similar experiences in JetFormBuilder and EasyDigitalDownloads. Each plugin has unique strengths, and we’ll demonstrate how to use them based on the bookstore’s needs.
My demo bookstore offers limited-edition collectible editions. I’ll cover three use cases in which users can order a physical collectible and its digital edition.
WPForms: Accept Credit Card Payments
So my WPForms could accept credit cards free, I need to install the plugin first.
Create a form
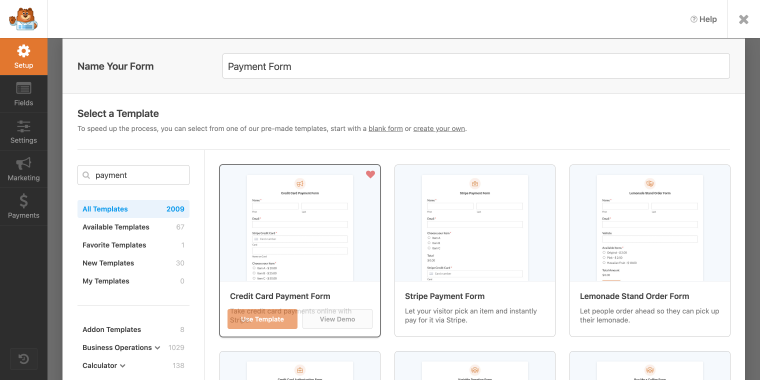
In the WPForms builder, I’ll create a new form for the subscription service by going to WordPress Dashboard > WPForms and then clicking on the “Add new form” button. In a new window, I’m going to select a template for my form.
In the Name Your Form field, I’ll enter the form field name “Payment Form.” In the Select a Template section, I’ll use the search field to find a relevant template like the Credit Card Payment Form.
Then, I’ll click the “Use Template” button to use this template.
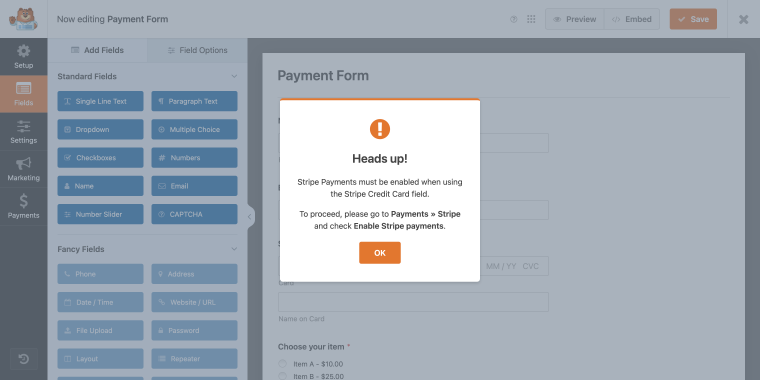
Once I’m in the form editing mode, I’m warned that I need to enable Stripe to accept payments through this form.
Since the plugin prompts us to enable payments, let’s do it right now. I’ll go to the WordPress Dashboard > WPForms > Payments and click on the “Get Started” button.
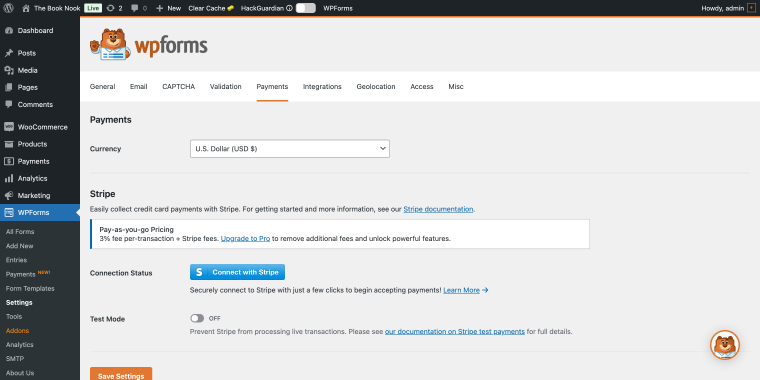
Alternative path: WordPress Dashboard > WPForms > Settings > Payments.
In the Stripe section, there’s a blue button that says, “Connect with Stripe.” Once I click it, I’ll be redirected to the Stripe website, where I can verify my business and make it eligible to accept payments.
After completing the verification process, I’ll click the “Save Settings” button to safely return to editing the form itself.
Since I’ve used the form template, I need to adjust some fields accordingly.
Default form fields structure:
- Name field — in this field, users can enter their first and last names;
- Email field — in this field, users can enter their email addresses;
- Stripe Credit Card field — here, users can enter their credit card details;
- Multiple Items field — here, the website owner can enter the types of products users can buy through the form; I’ll replace this field with a similar Single Item field;
- Shipping field — in this radio field, users can choose the type of shipping. I’ll replace it with a Single Line Text field where users can enter the shipping address;
- Total field — here, we’ll see the total amount users will pay at checkout.
I’d like to fine-tune the Single Item field a bit. In the Field Options, I’m going to set the Item Type value to “Hidden” so I won’t have to make the user select this product on the front end.
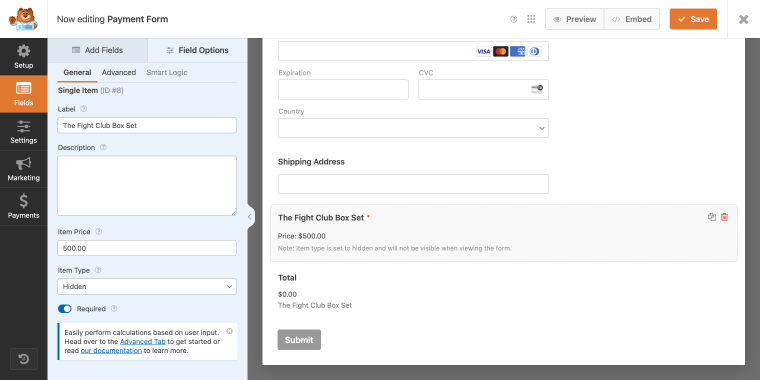
This way, the Total field will immediately display the price I’ll charge at checkout, and users will see only the Total field on the front end.
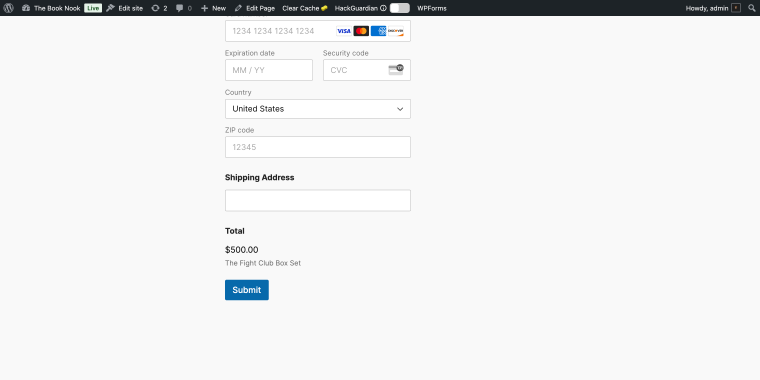
Now, let’s test the form.
Test the payment process
Before making the form live, I’ll use it in the Test Mode, which allows me to check if transactions are processed correctly. I’ll switch to test mode in Stripe to simulate transactions and ensure payments are processed correctly.
Checkout step 1 — submitting the form.
I’m going to enter the user’s details, including name, last name, and email.
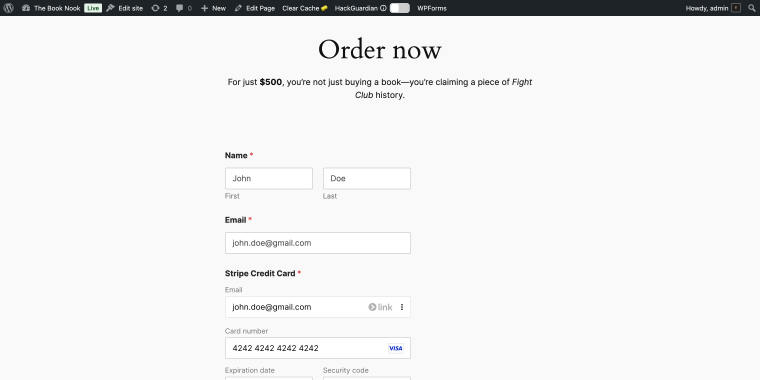
Then, I’ll use the test card number to test the transaction process.
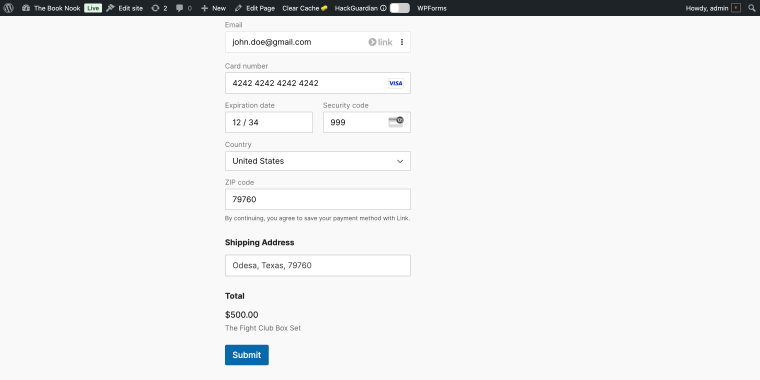
After clicking the “Submit” button, the form displays the loading wheel, followed by a success message.

Then, I can go to WordPress Dashboard > WPForms > Payments to check if the transaction was recorded correctly.
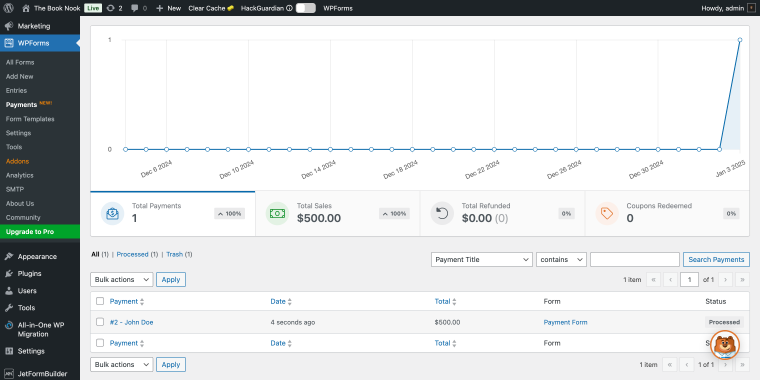
The transaction was successfully recorded, which means that I’ve done everything correctly, and I can make the form live.
That’s all one needs to do to accept credit card payments in the WPForms plugin. Now, let’s look at alternative flows that we can build with the JetFormBuilder and EasyDigitalDownloads plugins.
JetFormBuilder: Accept Credit Card Payments
I’ll begin by installing the JetFormBuilder plugin on my WordPress website. After installation, I’ll go to WordPress Dashboard > JetFormBuilder > Settings > Payment Gateways to activate the switch Enable Gateways so I can use PayPal as my payment method.
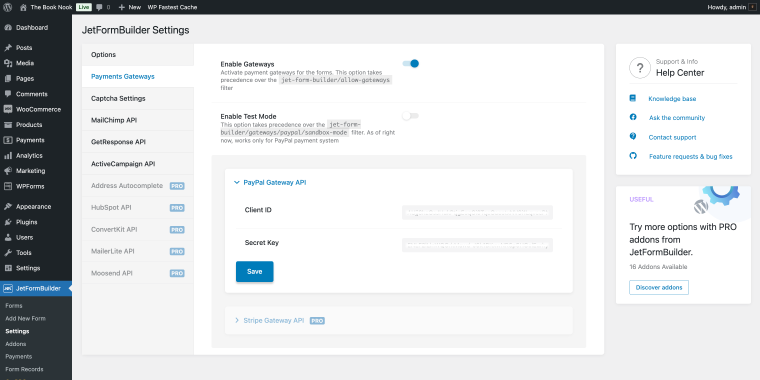
In the PayPal Gateway API, I need to enter your PayPal account credentials following these steps to get your Client ID and Secret Key:
- log in or sign up by selecting Log in to Dashboard;
- go to Apps & Credentials;
- for new accounts, a Default Application is available in the REST API apps section. To create a new project, click Create App;
- copy the Client ID and Client Key associated with your application.
When done, I’ll click on the “Save” button.
Create a form
I’ll follow the path: WordPress Dashboard > JetFormBuilder. To speed up the form-building process, I’ll import a ready-made template to my website.
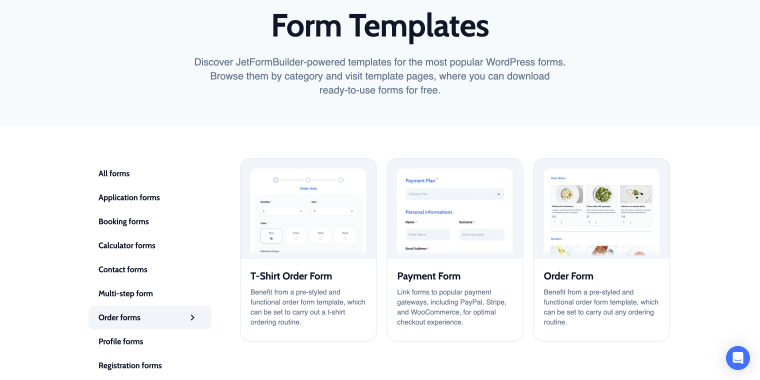
To import the form template .json file, I’ll follow the path: WordPress Dashboard > JetFormBuilder and click on “Import Form” at the top of the page. This will create a form with a ready-made set of fields.
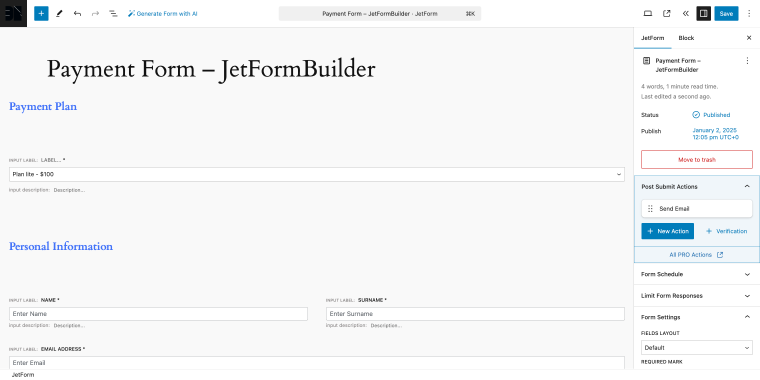
After importing the form template file, I’ll make minor changes to fine-tune the result. Upon default, the form template contains the following set of fields:
- Select Field — to display the product;
- Text Field — to collect users’ info including “Name”, “Last Name,” and “Email”;
- Checkbox Field — to get the user’s confirmation to proceed to checkout;
- Action Button — to submit the form.
Since I’ve already added PayPal credentials in the plugin settings, I need to fine-tune the Gateway Settings and add minor tweaks to the fields.
I’m going to add the Textarea Field so that users can enter delivery address details. Under JetForm > Gateway Settings, I’ll click on the “Edit” button to open the Edit PayPal Checkout Settings pop-up.
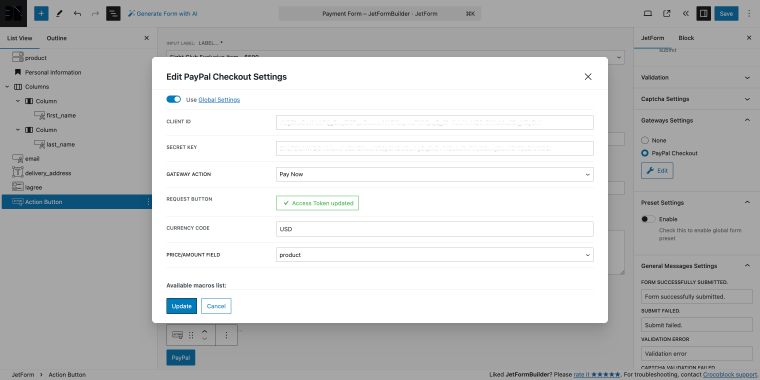
In the pop-up, I need to enable the Use Global Settings switch. The CLIENT ID and SECRET KEY will be automatically filled with information I previously submitted in the PayPal Gateway API section.
- GATEWAY ACTION — in this field, I need to pick the payment scenario. In the dropdown, I’ll select “Pay Now”;
- REQUEST BUTTON — is the button that synchronizes the access token;
- CURRENCY CODE — in this field, I need to enter the currency code, which is “USD”;
- PRICE/AMOUNT FIELD — in this select field, I need to choose the form field that displays the product, which is the “product” field;
- PAYMENT SUCCESS MESSAGE — in this field, I can change the success message. I’ll add the value “Payment successful”;
- PAYMENT FAILED MESSAGE — in this field, one can change the failed message. I’ll add the value “Payment failed”.
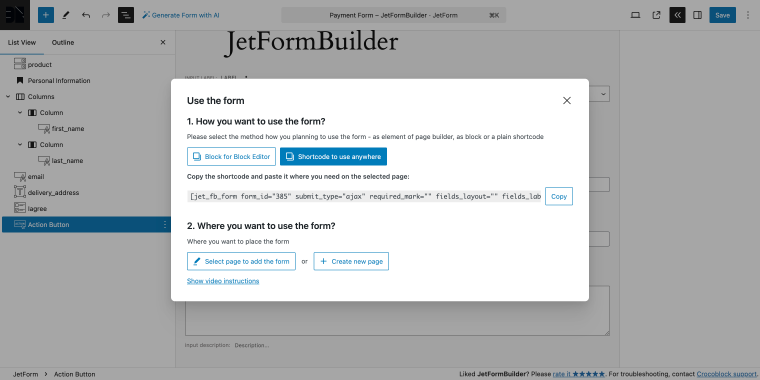
When done, I’ll click on the “Update” button to save or “Cancel” to discard. My form is ready to be embedded into the page; I’ll click on the “Publish” button and double arrows button to trigger the Use the form pop-up where I can get the shortcode.
Testing the payment process
Before making the form live, I’ll test it using PayPal’s sandbox mode.
Checkout step 1 — submitting the form.
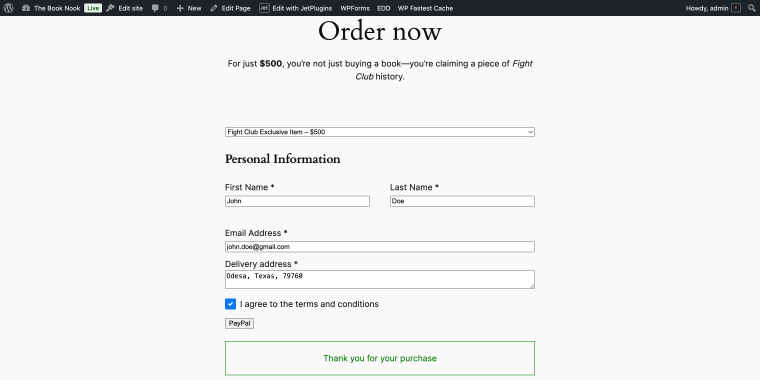
After filling out all the form fields and clicking on the “PayPal” button, a success message will appear: “Thank you for your purchase.”
Checkout step 2 — logging into PayPal.
Then, I’ll be redirected to PayPal checkout, where I need to log into my account to be able to pay with a credit card.
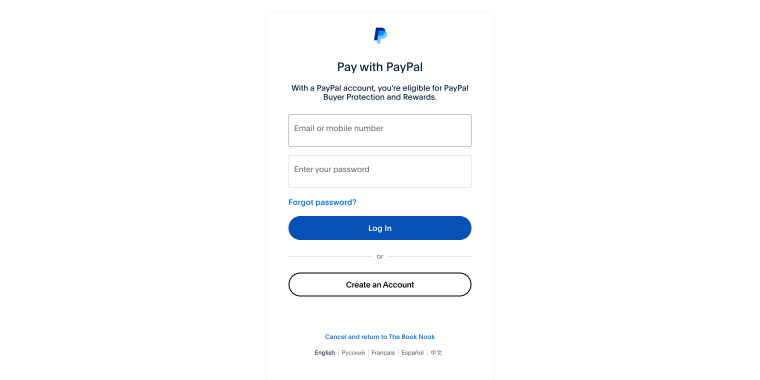
Checkout step 3 — making a payment.
This is the final step, and I need to click on the “Complete Purchase” button to pay for my order.
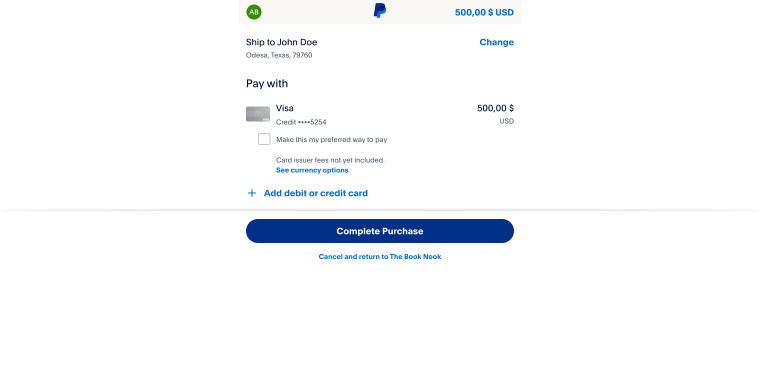
That’s all one needs to do to accept credit card payments for free in the JetFormBuilder plugin. Now, let’s see how I can do it with the EasyDigitalDownloads plugin.
EasyDigitalDownloads: Accept Credit Card Payments
In the first two cases, I used the WordPress form plugins, which worked perfectly for their roles. For the third case, I’ll use a plugin that’s just right for selling digital products by accepting credit card payments.
First, I need to install the EasyDigitalDownloads plugin on my WordPress website, and then I can proceed.
Set up a free payment gateway and add a product
Right after activating the plugin, I’ll be redirected to the onboarding page, where I can add all my store data and connect Stripe to my website.
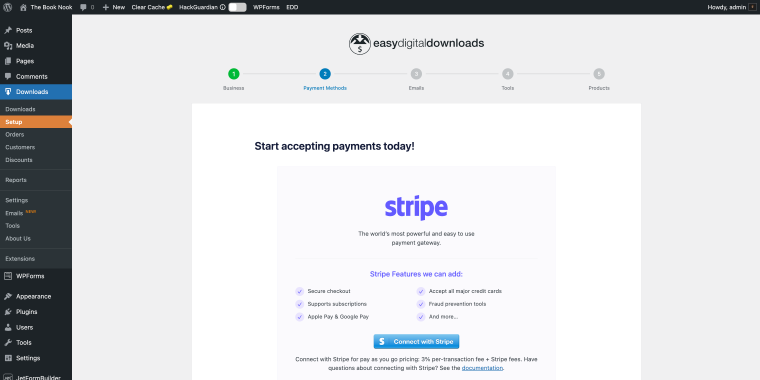
During the last step of the onboarding process, I’m offered to add my first product, which is exactly what I will do.
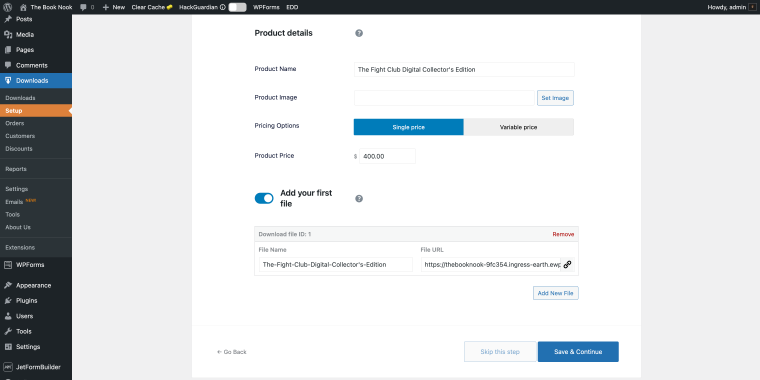
The Products step contains a set of fields that one can easily fill, including the following fields:
- Product Name — a field that allows you to add the product’s name;
- Product Image — a field that will enable you to add the product’s image;
- Pricing Options — a field that allows you to choose between a “Single price” or “Variable price” by clicking a corresponding button;
- Product Price — a field that will enable you to add the product’s price;
- Add your first file — a switch that reveals the file upload field when turned on.
When done, I’ll click on the “Save & Continue” button.
Since I’ve already added my product, I can easily embed it into my landing page using the following shortcode:
[downloads ids="xxx" columns="1"]The “xxx” value I need to replace with the ID of my product, which is “405.” To get the product ID, go to WordPress Dashboard > Downloads > Downloads. The ID is located to the left of the “Edit” button in the list of products. When added, the shortcode will display a product name (with a link to the product page) and a purchase link that leads us to the checkout.
Test the payment process
Now, it’s time to perform a test purchase to ensure that payments, downloads, and order confirmations work seamlessly.
Checkout step 1.
Since there’s no submission form, I must click on the “Purchase” button.
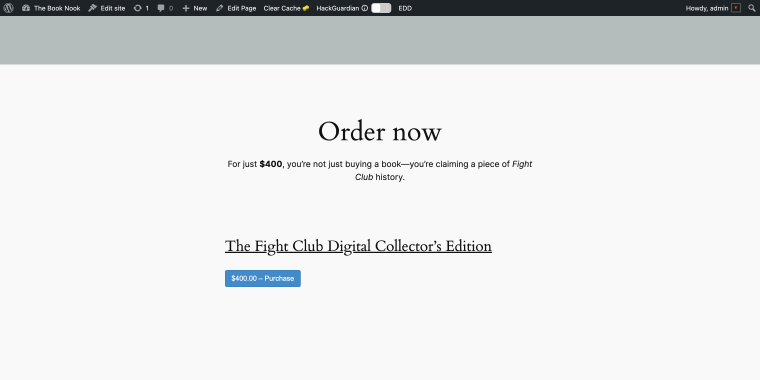
Right after, a notification will appear: “Product added to the cart.” At the same time, the button label will be replaced with “Checkout.” By clicking it, I’ll be redirected to the Checkout page.
Don’t forget to click the “Credit card” button under the Select Payment Method section.
After filling in all the information on the Checkout page, I’ll click on the “Purchase” button. Since I’ve added the correct credit card information, I’ll be charged the necessary amount and then redirected to the Confirmation page.
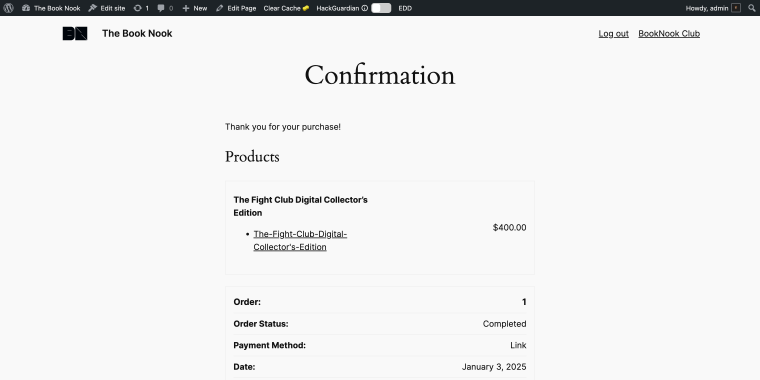
Everything works perfectly fine, and my bookstore can accept credit card payments using the EasyDigitalDownloads plugin.
FAQ
Yes, all the plugins offer test modes to ensure everything works correctly before your customers make real payments.
Yes, whether you run an online store, subscription service, or sell digital products, such plugins can adapt to your needs.
The plugins I described use secure payment gateways that adhere to industry standards for data protection and encryption.
Conclusion
Integrating credit card payment options on your WordPress website doesn’t have to be complicated. With plugins like JetFormBuilder and EasyDigitalDownloads, I’ve created payment experiences that are as simple as WPForms accept credit card payment abilities. Whether you’re selling unique collectibles, managing subscriptions, or offering digital products, these tools make it easy to set up secure, efficient checkouts.
Following the instructions in this guide, you’ll be able to accept payments from a global audience while enhancing customer convenience. Choose the plugin that best meets your requirements, and start processing credit card payments today!
