How to Filter by Relation Meta
This tutorial explains creating a custom SQL query for JetEngine Relation to filter posts by a Relation meta field.
Before you start, check the tutorial requirements:
- JetEngine plugin installed and activated
- JetSmartFilters plugin installed and activated
Create SQL Query in Query Builder
Begin with creating a custom query in the JetEngine Query Builder. Go to WordPress Dashboard > JetEngine > Query Builder and press “Add New.”
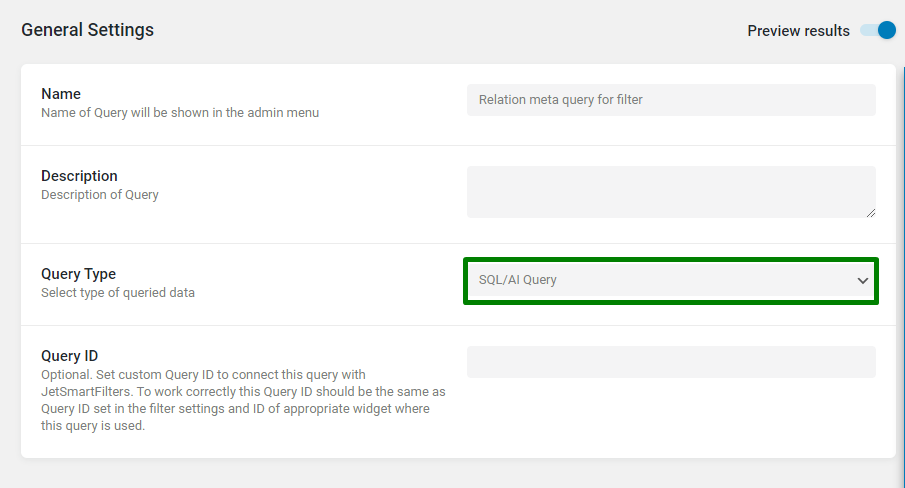
Give a Name to the query, a Description if desired, and set Query Type to “SQL/AI Query.”
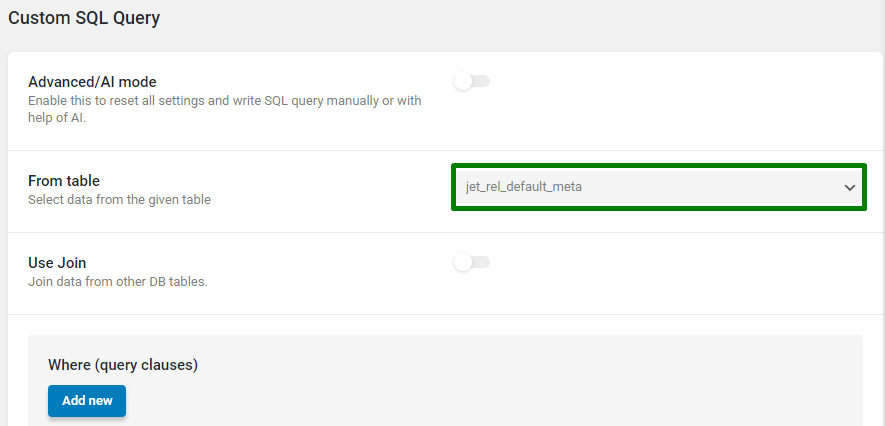
In the Custom SQL Query section, add a “jet_rel_default_meta” From table as the source of pulling the values from the relation meta fields.
Remember that the “jet_rel_default_meta” table should be selected if you keep Register separate DB table in the Relation settings disabled.
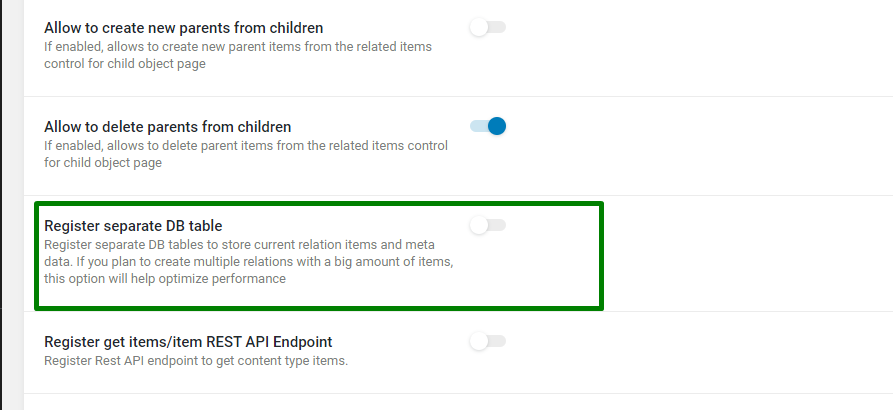
If you have this toggle in the enabled state, a separate table is created in the database, which has a different name like “jet_rel_81_meta”, where “81” is substituted with the Relation ID from your website.
So, in this case, a respective table should be selected in the From Table field.
Next, add the Where (query clause), which specifies the meta field of the relation by which the filtering is to be performed. Select “meta_key” as a Column, which is “Equal” (Compare field) to your relation meta field name mentioned in the Value field.
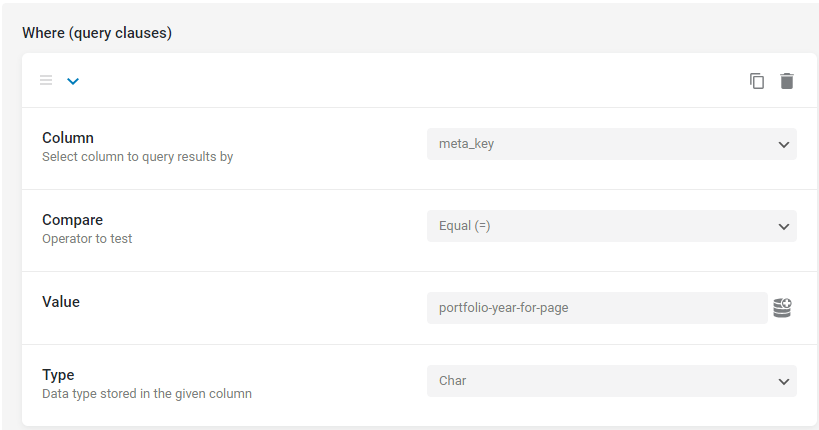
The following clause is needed if the option Register separate DB table is disabled.
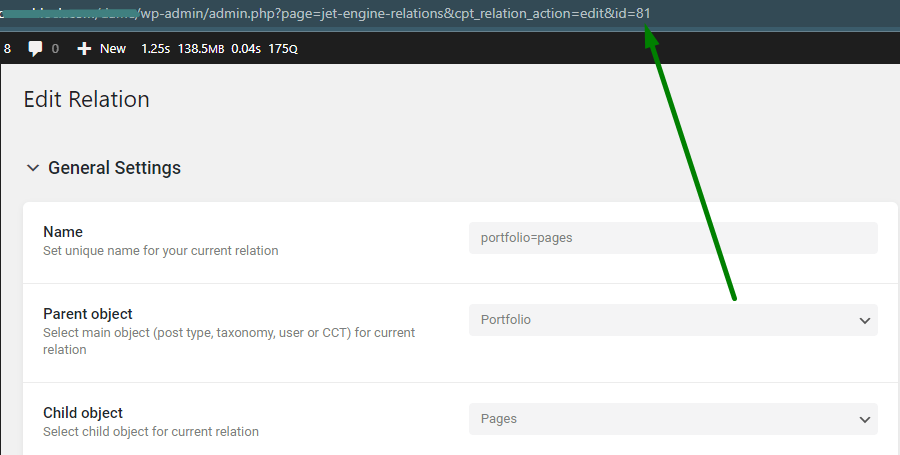
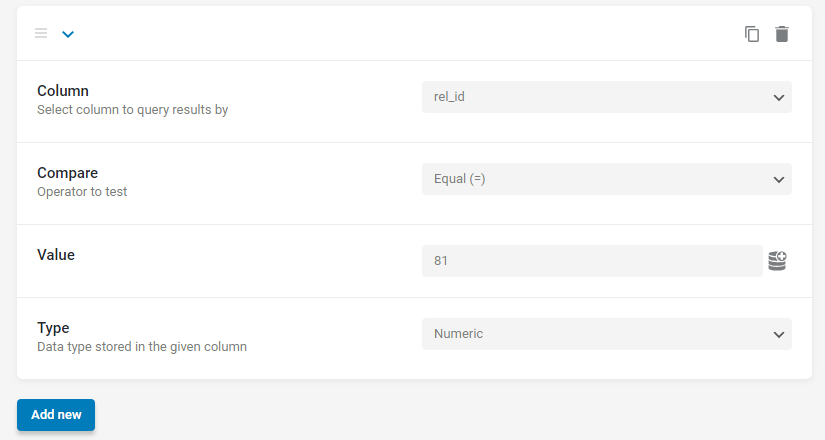
In this case, the “rel_id” value should be set as a Column, “Equal” as Compare operator, and the ID of the relation needs to be specified in the clause as the Value. As was shown earlier, you can find the ID of the relation in the URL on the Relation editing page.
Also, mind changing the Type option to “Numeric.”
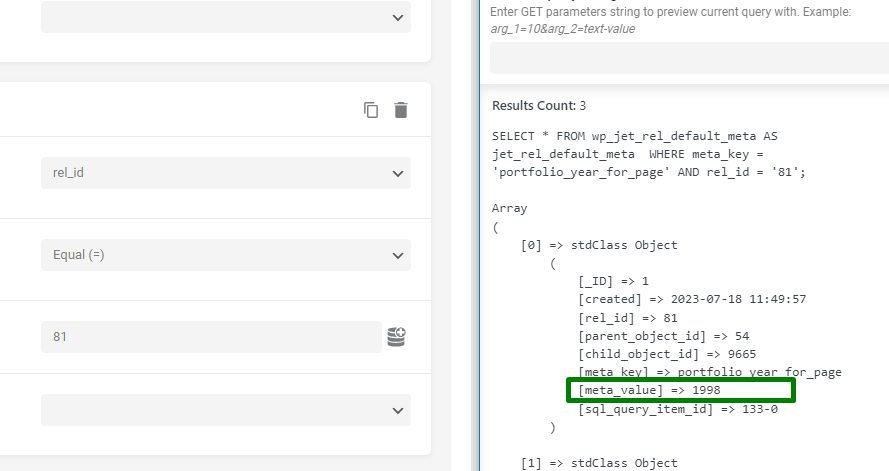
In the query results preview, you can see the “meta_value” column stores the value from the Relation meta field based on which the filter will be built.
As the query is completed, you can save it.
Make Filter in JetSmartFilters
Now proceed with creating a filter using the JetSmartFilters plugin.
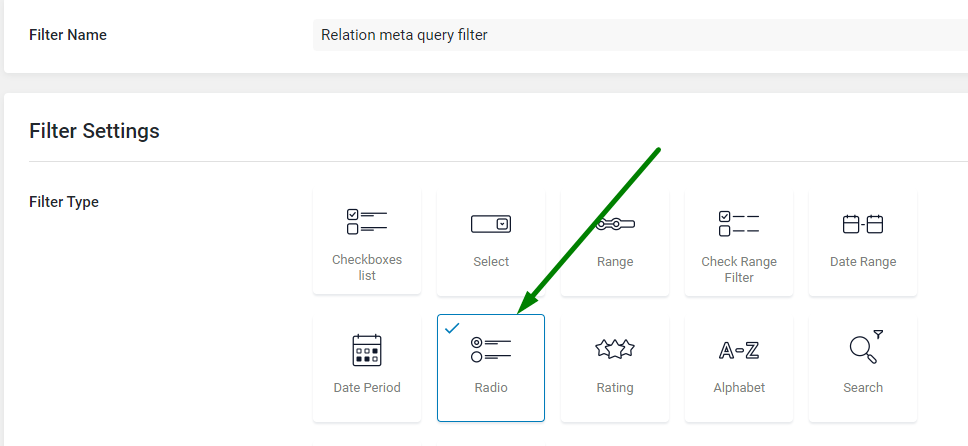
Go to WordPress Dashboard > Smart Filters > Add New and select a needed type of filter. In the described case, we chose a “Radio” Filter Type.
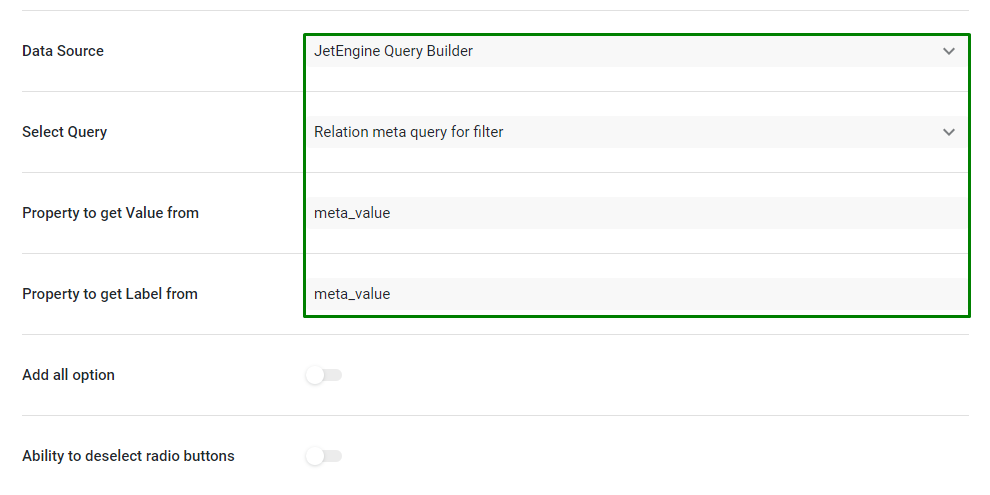
Next, pick a “JetEngine Query Builder” Data Source, and select a custom query from the previous step.
The Property to get Value from and Property to get Label from should be completed with “meta_value”.
The last setting in the filter setup is the Query Variable, by which the filtering is performed. It should be “meta_value” as well.
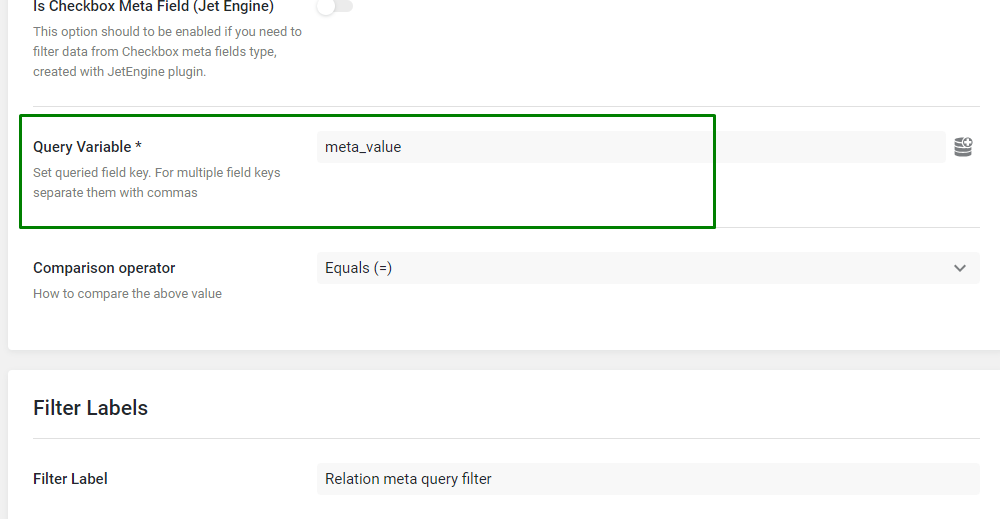
The filter setup is completed; it can be saved now.
Create SQL Query in Query Builder
At this stage, we need to create another custom query that will be the source of the Listing template used in the Listing Grid widget to show the filtered results.
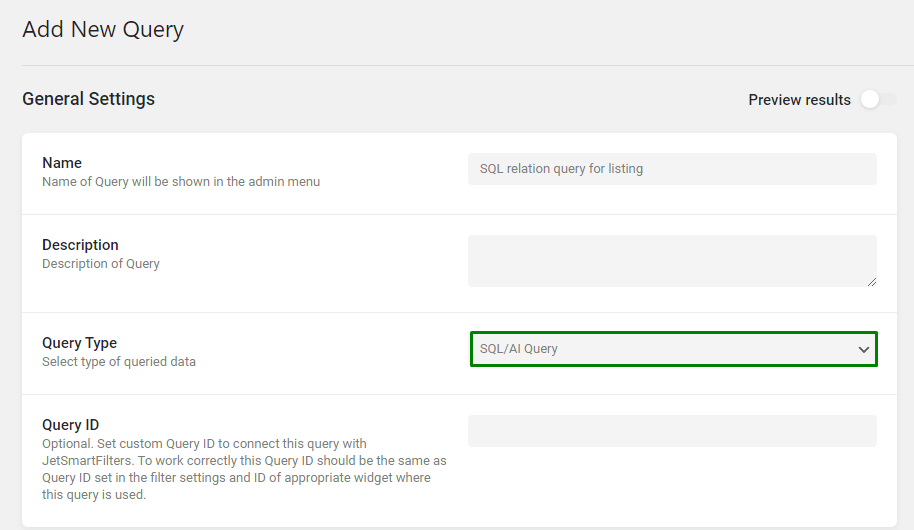
Go to WordPress Dashboard > JetEngine > Query Builder, and add a new custom query of “SQL/AI Query” Query Type.
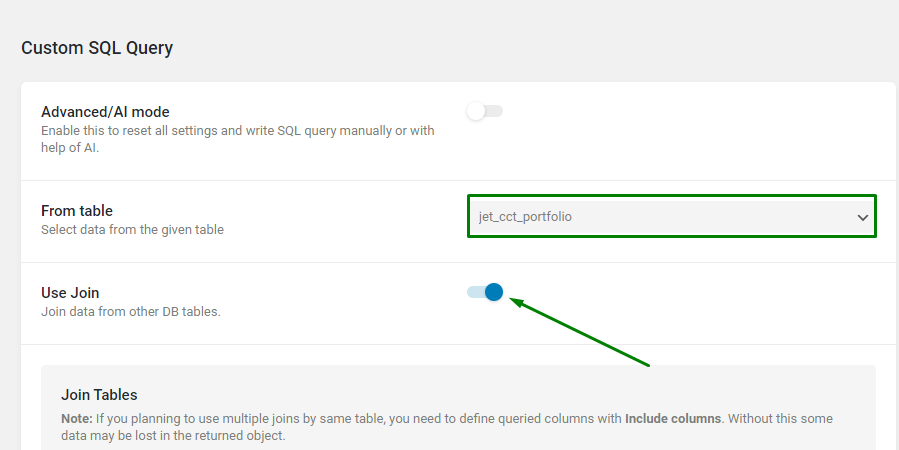
Choose a table where an item from the relation is stored which is to be filtered.
In the described case, it is the CCT. Therefore, a CCT table is selected accordingly. If you want to filter a post type used in the relation, pick a “posts” table.
After it, enable the Use Join toggle.
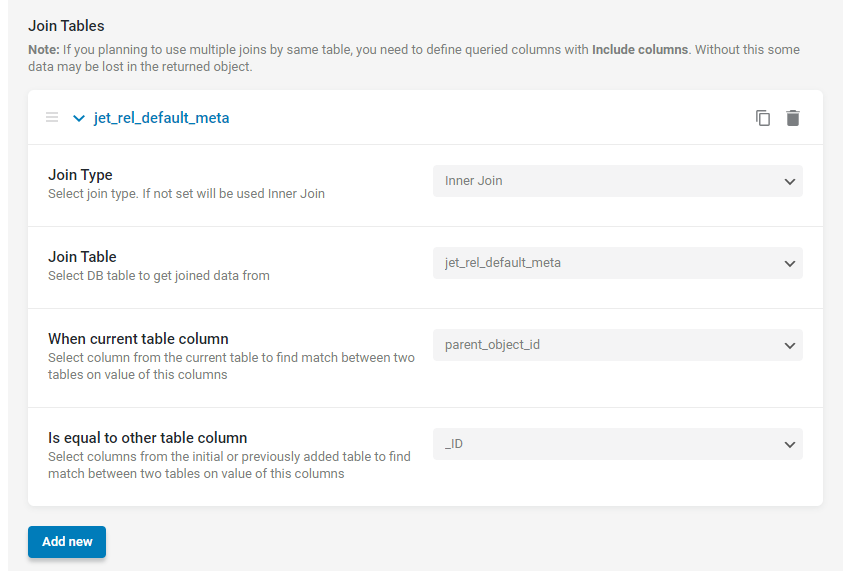
After turning on the toggle, pick “Inner Join” as a Join Type, and join the “jet_rel_default_meta” table.
When current table column field should be completed with an option corresponding to the item in the relation that will be filtered.
In the provided case, a CCT that is a parent item in the relation will be filtered, which is why the “parent_object_id” is chosen.
Is equal to other table column should be set to CCT’s “_ID” or “ID” in case a “posts” table was added previously.
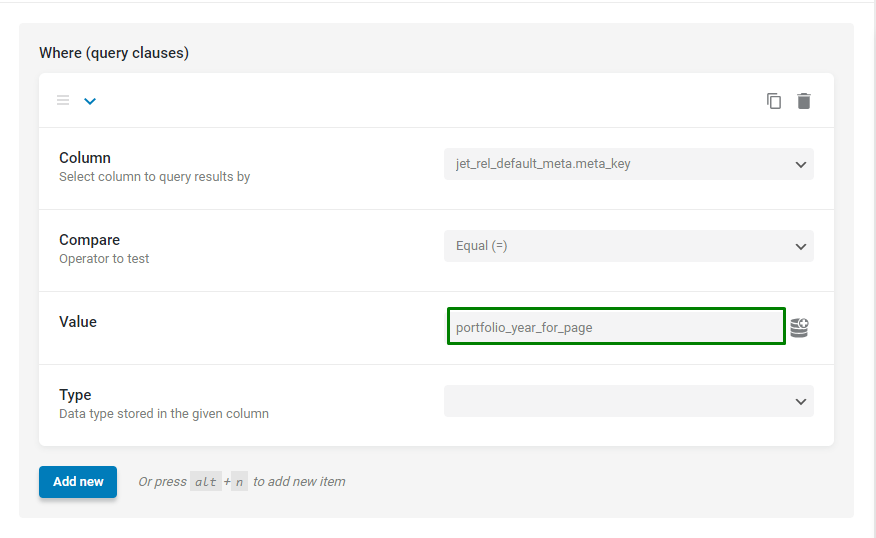
Next, add an item in the Where (query clauses) section, and specify a “jet_rel_default_meta.meta_key” Column to be “Equal” (Compare field) to the Relation meta field name (Value field.) With this clause, the posts will be pulled which have a value in the meta field of the relation.
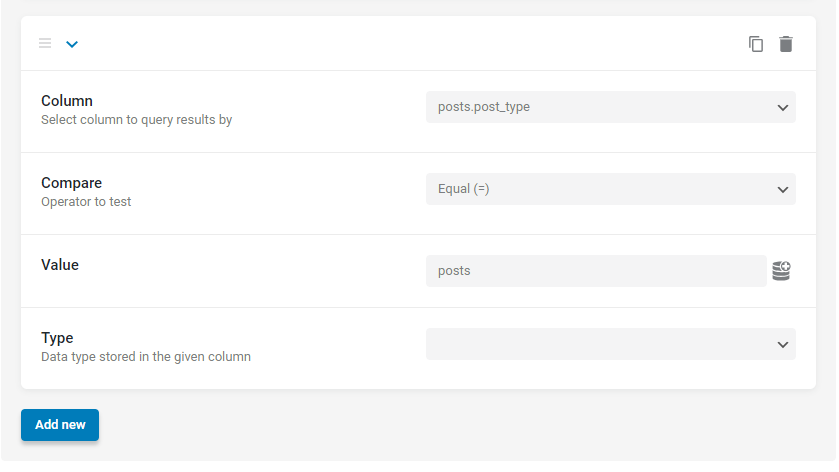
If you use a post type instead of a CCT in the relation which is to be filtered, you may also need to specify a post type in the query. You should select “posts.post_type” to be “Equal” to a desired post type slug.
The custom query is done at this point, so it can be saved.
Build Listing Template for Custom Query
Go to WordPress Dashboard > JetEngine > Listings, and click the “Add New” button.
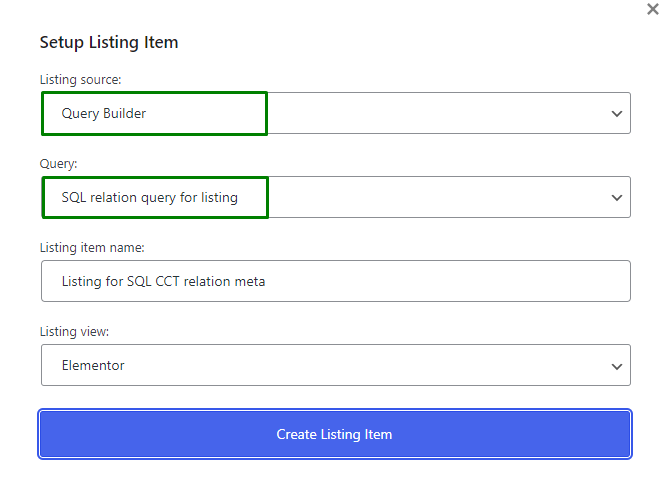
The Listing source should be set to “Query Builder” and the query created in a previous step should be picked in the Query field.
Complete the Listing item name and pick the Listing view. Press the “Create Listing Item” button.
In the Listing template, you can add a Dynamic Field widget to pull data from the custom query.
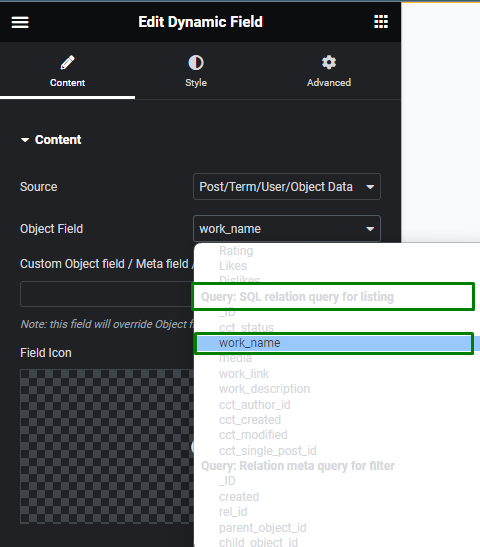
You can use a “meta_value” Custom Object field/ Meta field / Repeater key to show a value from a Relation meta field.
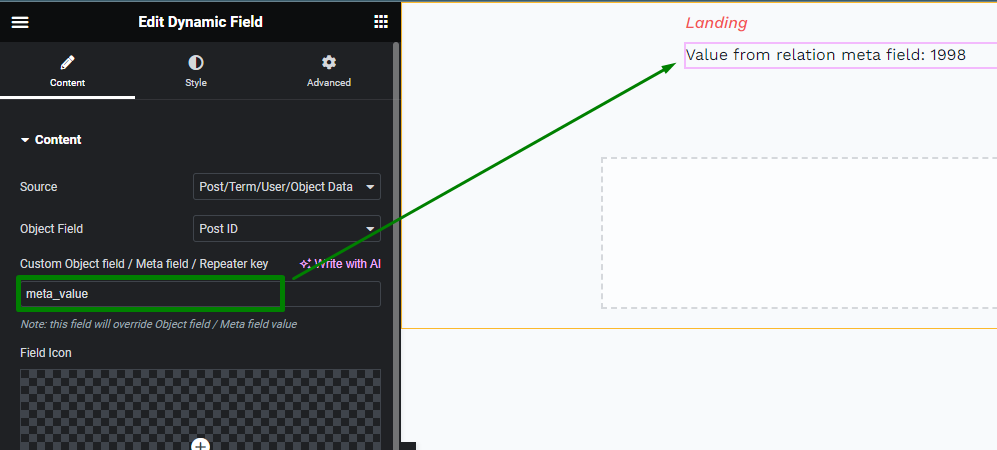
Once you added all other needed fields, the Listing template can be saved.
Check Filtering on the Front End
Add the filter and Listing Grid widget to a page to check the result.
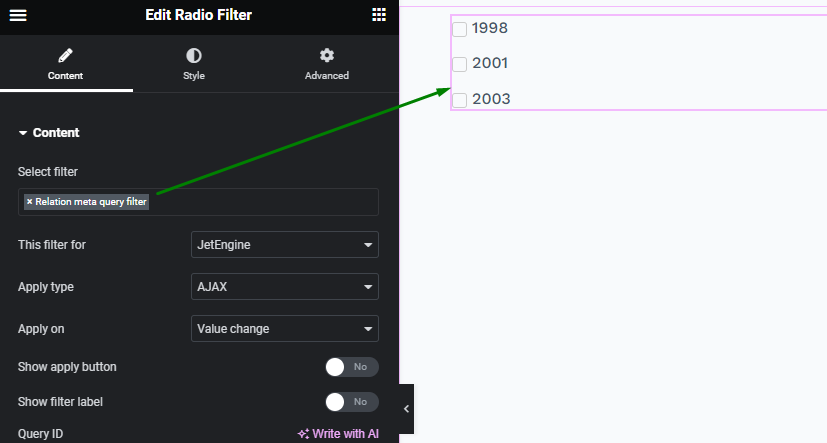
In the Listing Grid widget, select a Listing template that was built in a previous step.
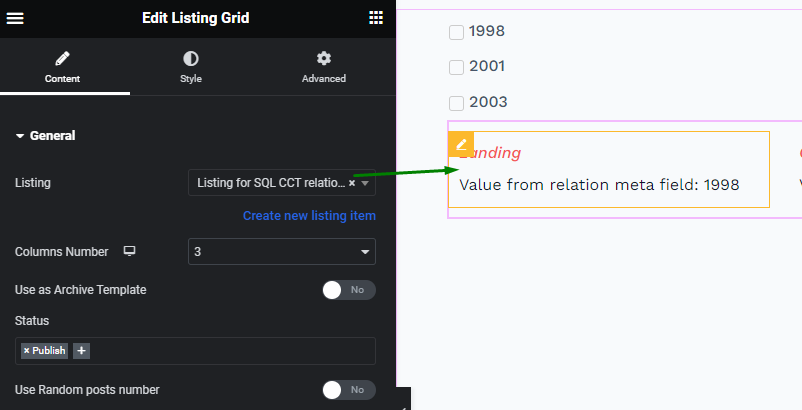
The setup is done; check the filtering on the front end.
When an option is picked in the filter, a respective item with the filtered value in the Relation meta field is displayed in the Listing Grid accordingly.
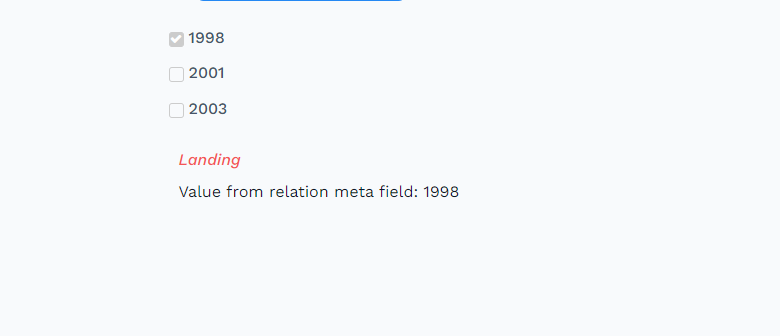
Now you know how to build SQL queries and a filter to create filtering by a relation meta field on your website using the JetEngine and JetSmartFilters plugins.