How to Create Custom Content Type Listing Template in Elementor
The Listing template feature determines the layout of how one item looks in a grid. This tutorial explains how to create a Listing template for the Custom Content Type to display its data in the Listing Grid widget.
Before you start, check the tutorial requirements:
- Elementor (Free version)
- JetEngine plugin installed and activated
Check the Custom Content Type
Let us first check a Custom Content Type for which a Listing template can be created.
Go to JetEngine > Custom Content Types and see if there is any existing CCT. If you don’t have any CCT, create one.
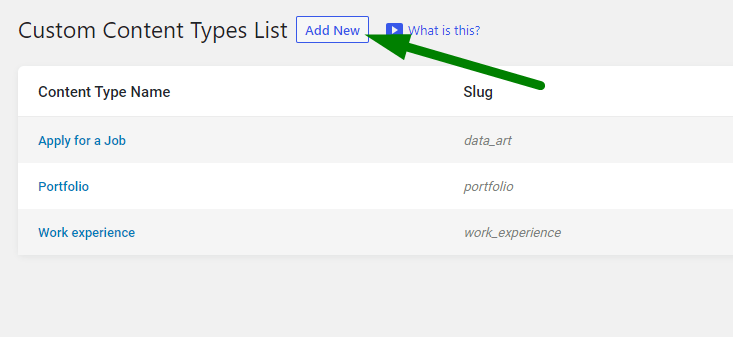
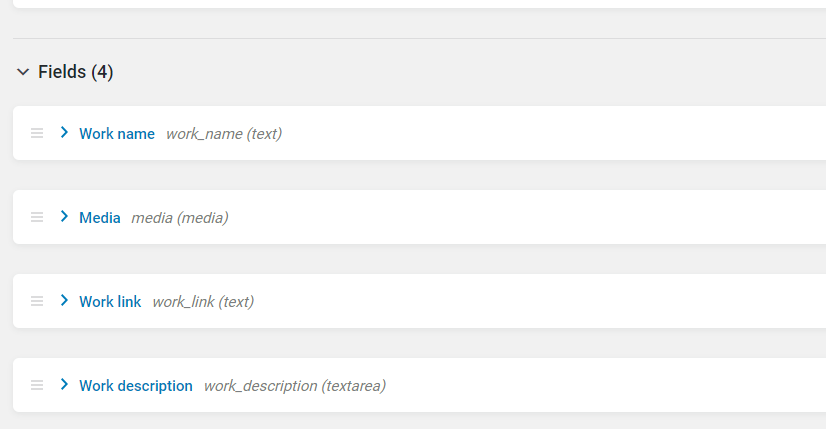
We will revise an existing Custom Content Type to ensure we have custom fields to output.
So we added these four meta fields to display them in the Listing Grid later. Don’t forget to hit the “Update” button to save changes.
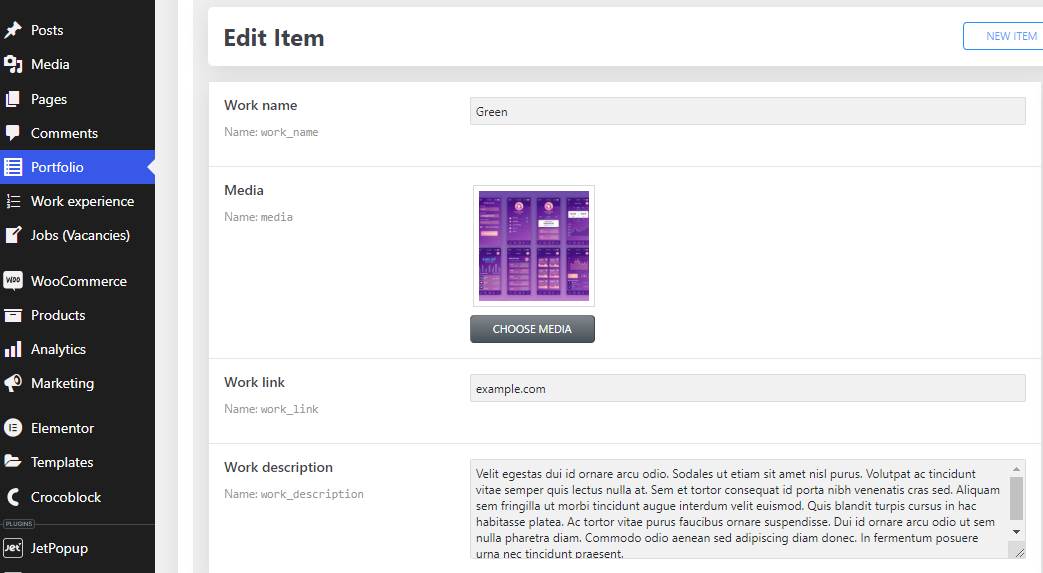
You also need to fill in these custom fields on the edit CCT item page so there is content to show.
Do not forget to save the CCT item after editing it.
Create a Listing Template
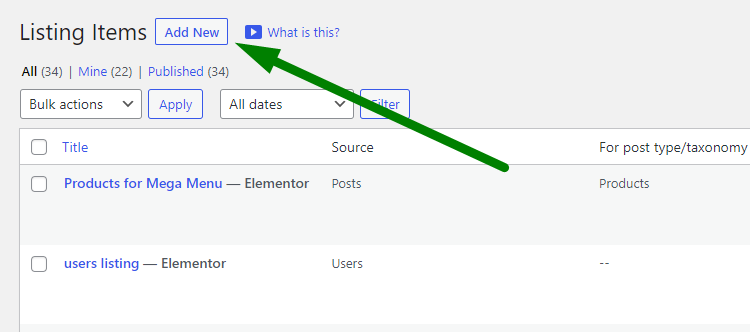
Now we can go to JetEngine > Listings and press the “Add New” button.
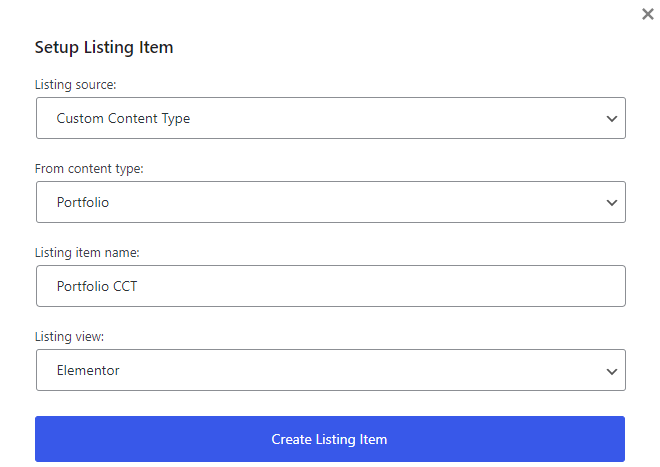
Select the “Custom Content Type” option as the Listing source and pick a content type for which you want to create the Listing. You also need to write a Listing item name and click the “Create Listing Item” button.
Once you are in the editor, you can add the Dynamic Field widget to pull data from the CCT.
The Source should be “Post/Term/User/Object Data.” In the Object Field, you will see a block of fields from the needed Custom Content Type.
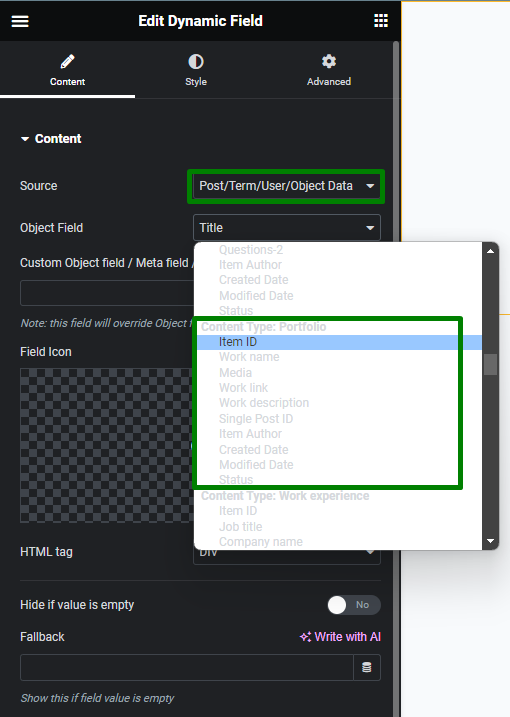
You can add multiple Dynamic Field widgets to output each CCT field.
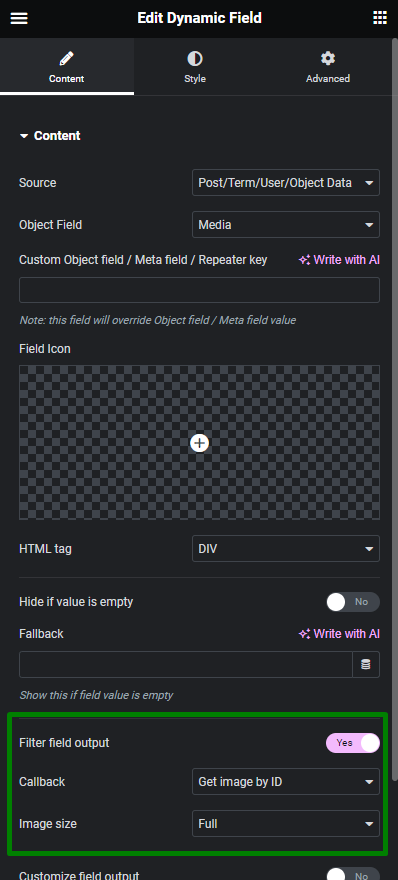
Keep in mind that some custom fields also need to have a Callback applied to display the data.
In the screenshot below, you can see a Media field, which stores an image by ID and has the “Get Image by ID” Callback activated to show the image instead of just its ID.
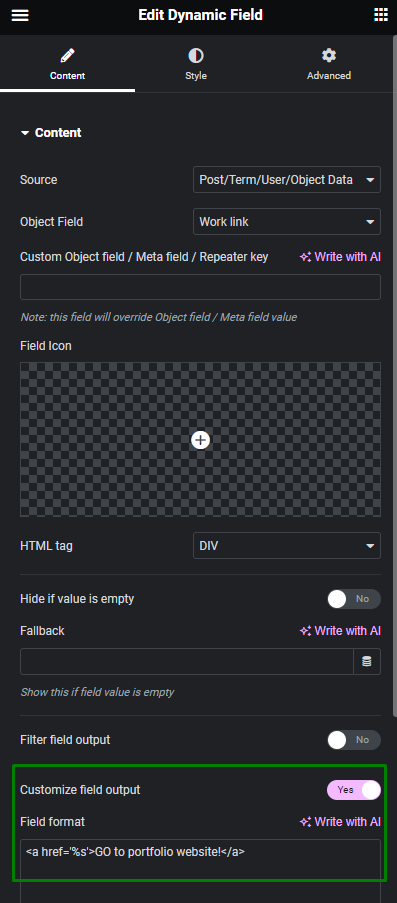
A field with a link can be output using the Customize field output option. We added the HTML tag <a> to create a clickable link.
Let us also check another example. There may be a case when multiple fields need to be output using just one widget in case you need to combine values.
This can be achieved by shortcodes because multiple shortcodes can be utilized within just one widget.
To create a shortcode, you can use a tool called the Shortcode Generator provided by the JetEngine plugin.
Go to JetEngine > JetEngine, and enter the Shortcode Generator tab. The settings of the Shortcode Generator are the same as in the Dynamic Field widget. Just select the needed Source and Object Field.
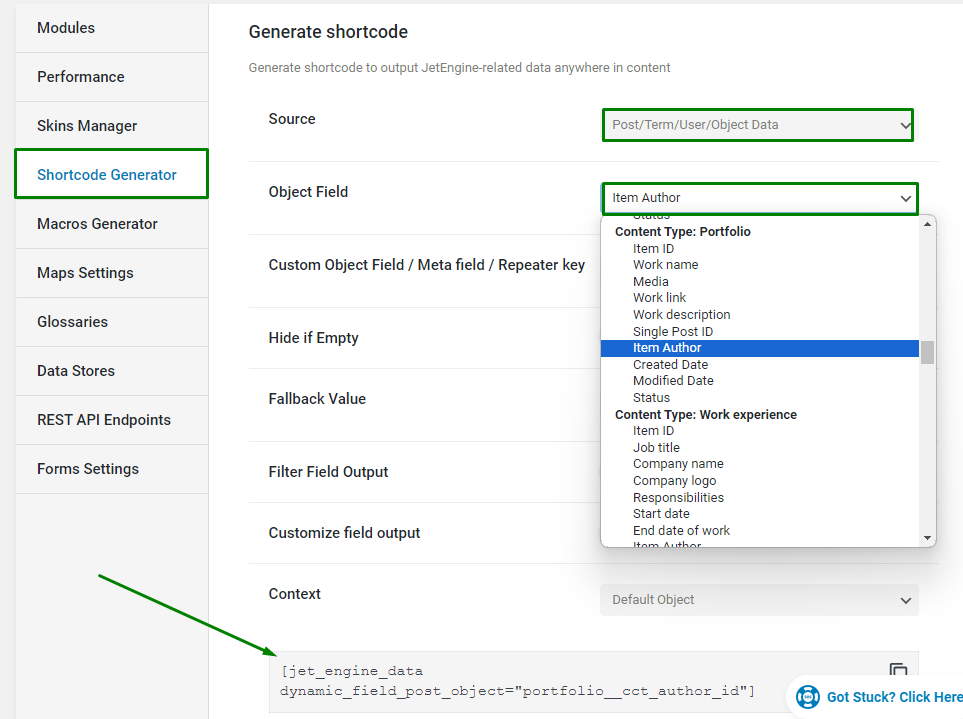
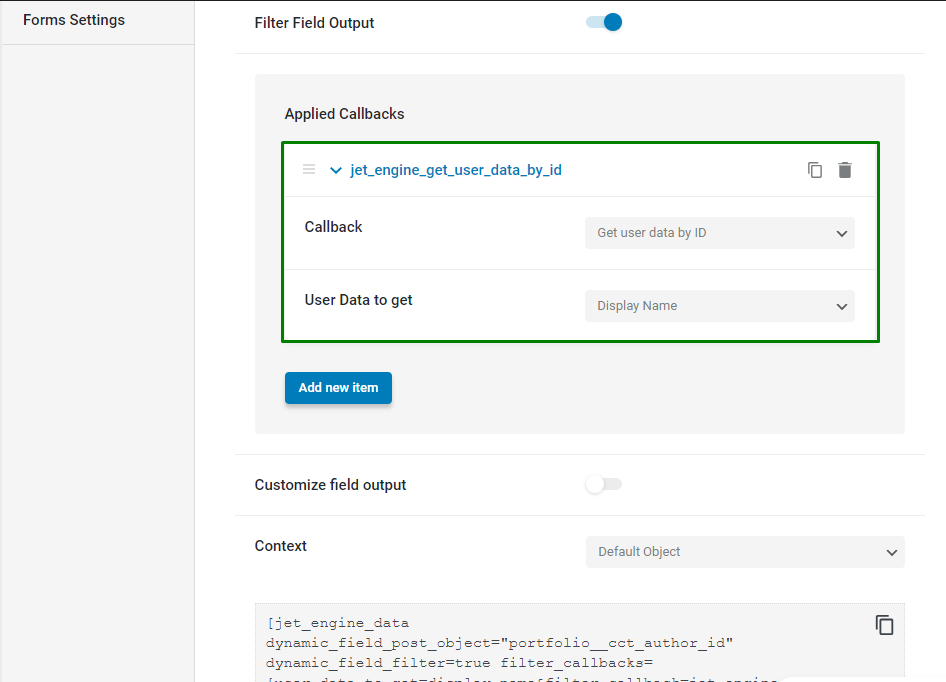
Note, the “Item Author” field has the user ID as a value. Therefore, we also enabled the Filter Field Output option and applied the “Get User data by ID” Callback to transform the user ID into its “Display Name.” After that, we copied the shortcode that was generated at the bottom of the page.
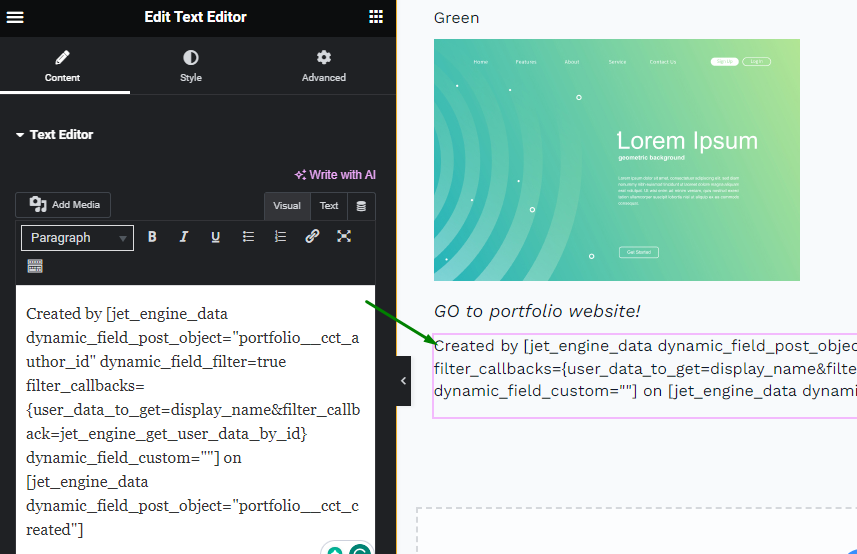
We generated a shortcode for the “Item Author” and “Created Date” fields. Using the Text Editor widget, we added the shortcodes of both fields and wrote the needed text.
Once you added all the necessary fields, the Listing template can be saved by pressing the “Update” button.
Check Results on the Front End
Let us output the Listing template on a page to check the outcome.
Open a page or a template in the Elementor editor, and add the Listing Grid widget.
Select the Listing template for CCT that has just been created. Then adjust other settings in the Listing Grid if needed, and save the template.
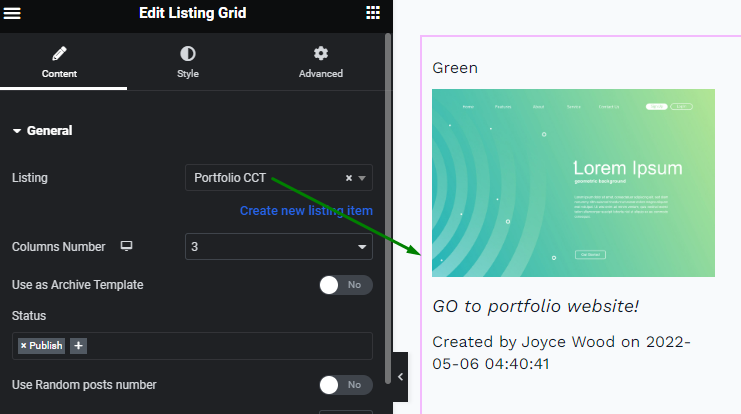
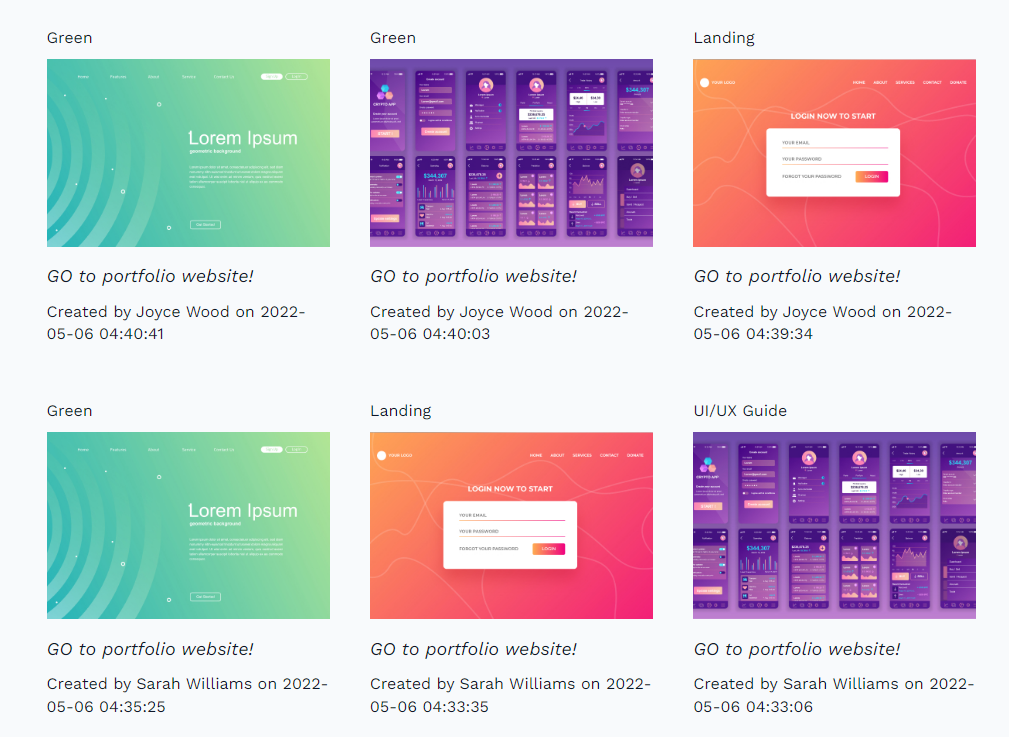
Proceed to the front end. The Listing Grid shows the CCT items displaying the fields as configured using dynamic widgets and shortcodes.
That’s it. Now you know how to create a Listing template for the Custom Content Type to display its data in the Listing Grid widget.