How to Use the Manage Capacity Feature for Efficient Appointment Scheduling
Discover the process of creating flexible booking systems with the Manage Capacity feature in JetAppointment. Learn how to allow multiple clients to book appointments simultaneously while maintaining smooth and efficient scheduling.
Before you start, check the tutorial requirements:
- JetApppointments plugin installed and activated
- JetFormBuilder plugin installed and activated
The Manage Capacity feature in JetAppointment allows businesses and service providers to manage the number of clients who can book a specific service at the same time. This feature is particularly useful when multiple clients can be served simultaneously, such as in medical practices, fitness classes, or workshops.
In this tutorial, we will walk through configuring and using the Manage Capacity feature to accommodate different appointment scenarios based on your specific service needs.
Enable the Manage Capacity Feature
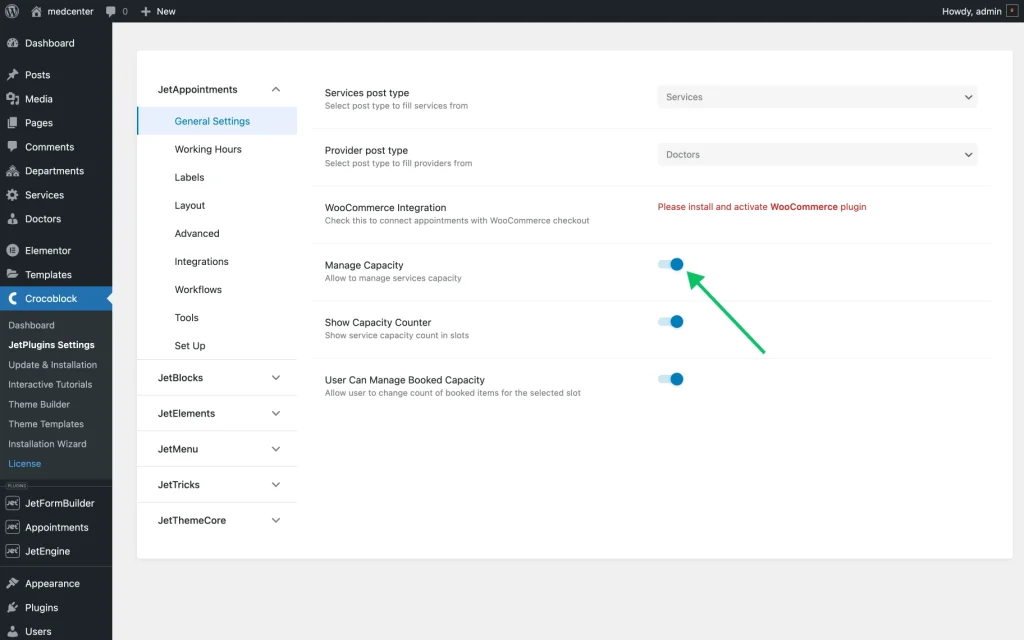
To enable the feature, follow the path: WordPress Dashboard > Crocoblock > JetPlugins Settings > JetAppointments > General Settings, and enable the Manage Capacity switcher.
You can also enable additional features that appear when the Manage Capacity switcher is activated:
- Show Capacity Counter — a feature that is deactivated by default. When this switcher is enabled, it displays the service capacity count in appointment time slots;
- User Can Manage Booked Capacity — a feature that is deactivated by default. When this switcher is enabled, users can adjust the number of booked items for a selected slot.
Build a Case Scenario
In our case scenario, the Sports medicine service offers three appointment slots for a specific date, with three doctors available to attend to patients.
Each patient can book one of the available slots for their appointment.
Since there are three doctors, the system allows for three patients to be seen simultaneously, utilizing the Manage Capacity feature to ensure all slots are efficiently booked without overlap.
Set Capacity limit
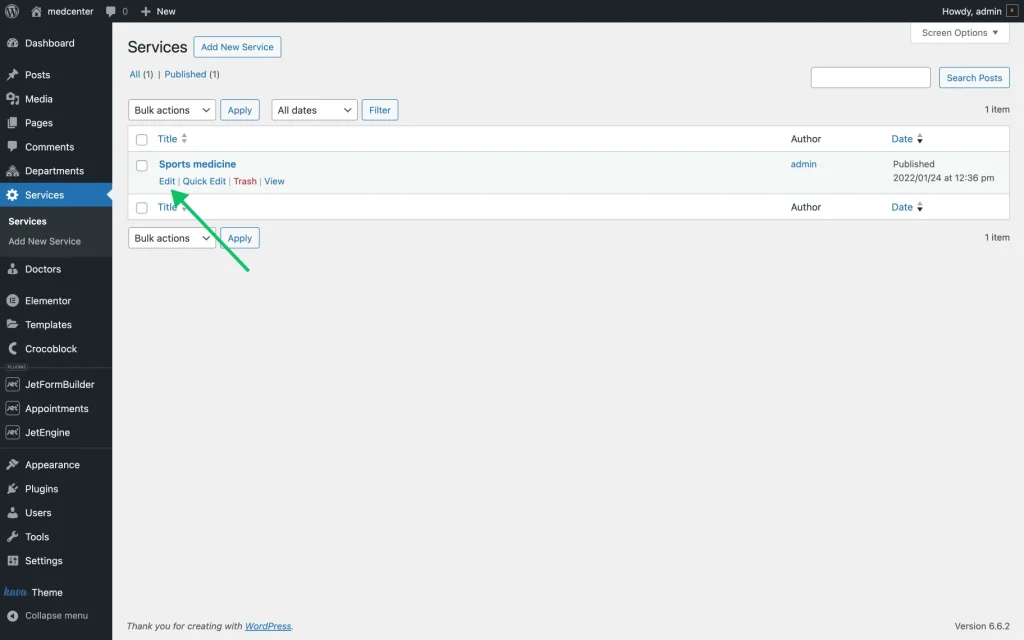
To change the number of available slots, go to the Services section in your WordPress Dashboard, pick the service you want to adjust, and click “Edit.”
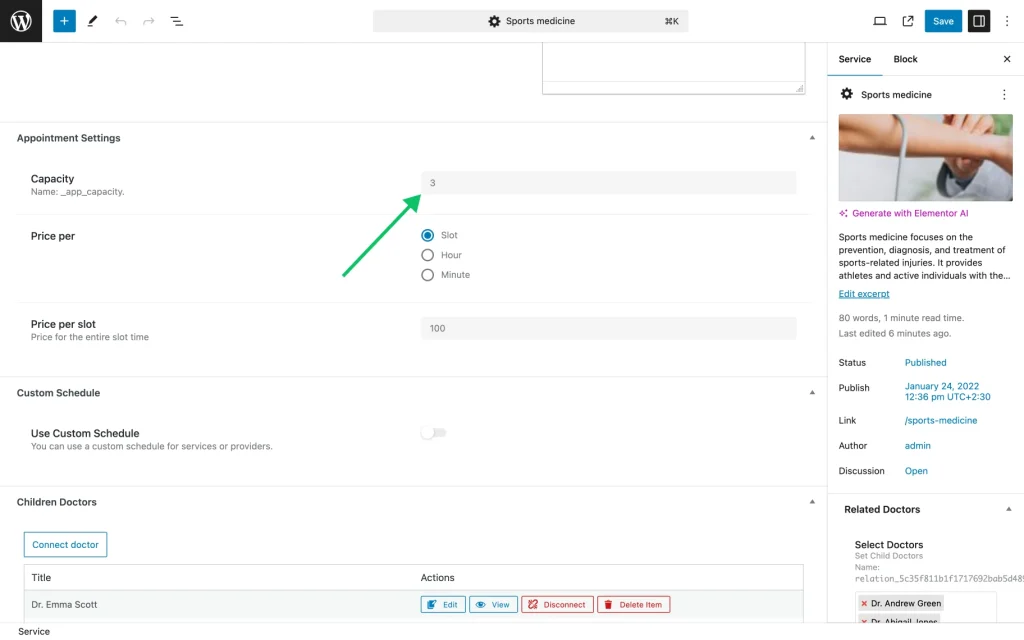
Scroll to the bottom of the service page and, within the Appointment Settings section, alter the value in the Capacity field. In our case, it’s set to “3.”
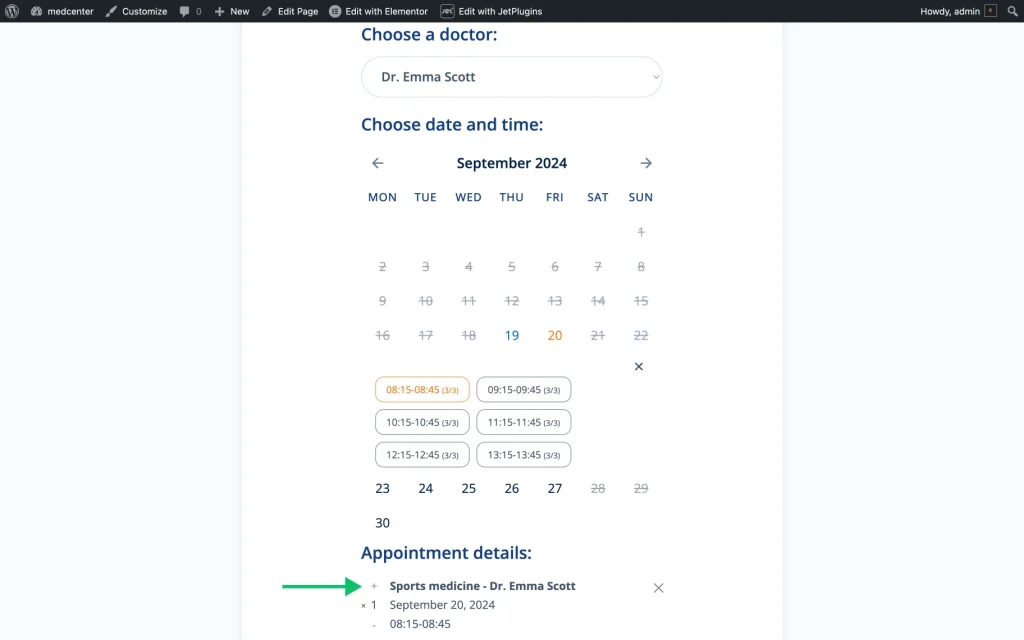
Now, when a client books a specific appointment through the booking form, each time slot will have a capacity counter next to it, presented as a fraction — “3/3” (meaning that three slots out of three are available), as well as the “+” / “-” (“plus” and “minus”) icons in the Appointment details section that allow the user to book additional slots.
In general, the Manage Capacity could be set up to allow flexibility for users. For example:
- for group services, like a fitness class or a seminar, a user may book the needed amount of slots depending on the number of people that they want to invite;
- for exclusive services, like a private consultation or a one-on-one session, the user might be able to book all available slots for that period.
This feature allows the booking system to adapt to different needs, offering more flexibility for services with varied requirements.
That’s all; now you know how to use the Manage Capacity feature provided by the JetAppointment plugin for WordPress websites.


