How to Create JetBooking WooCommerce Additional Services Attributes
From this guide, you will find out how to create JetBooking WooCommerce additional services attributes with the JetBooking plugin for WordPress.
Before you start, check the tutorial requirements:
- WooCommerce plugin installed and activated with products added
- JetBooking plugin installed and activated with the “WooCommerce based” Booking mode activated
Create Attributes and Their Terms
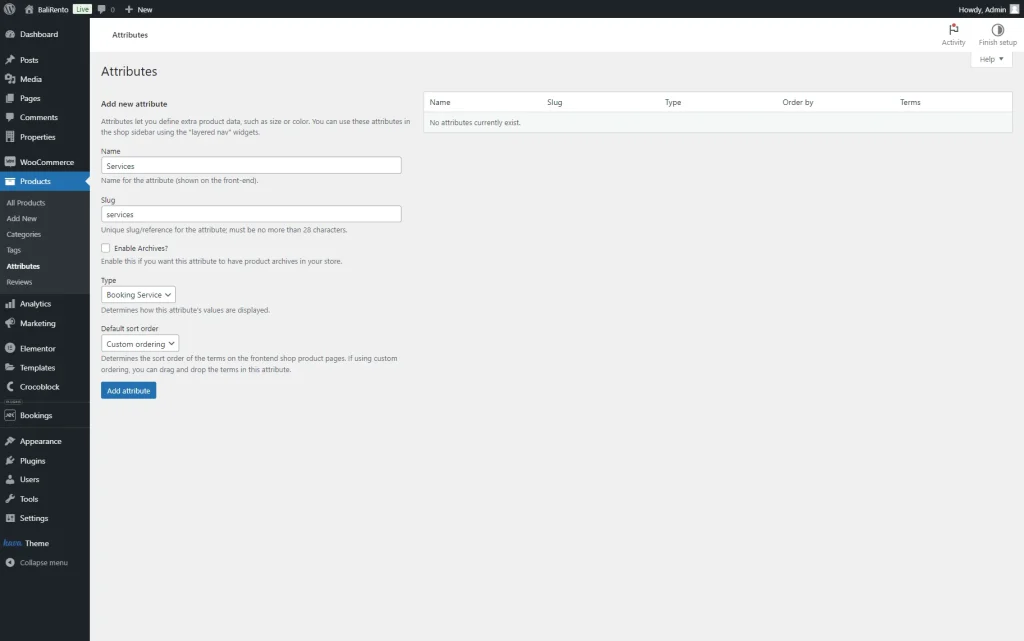
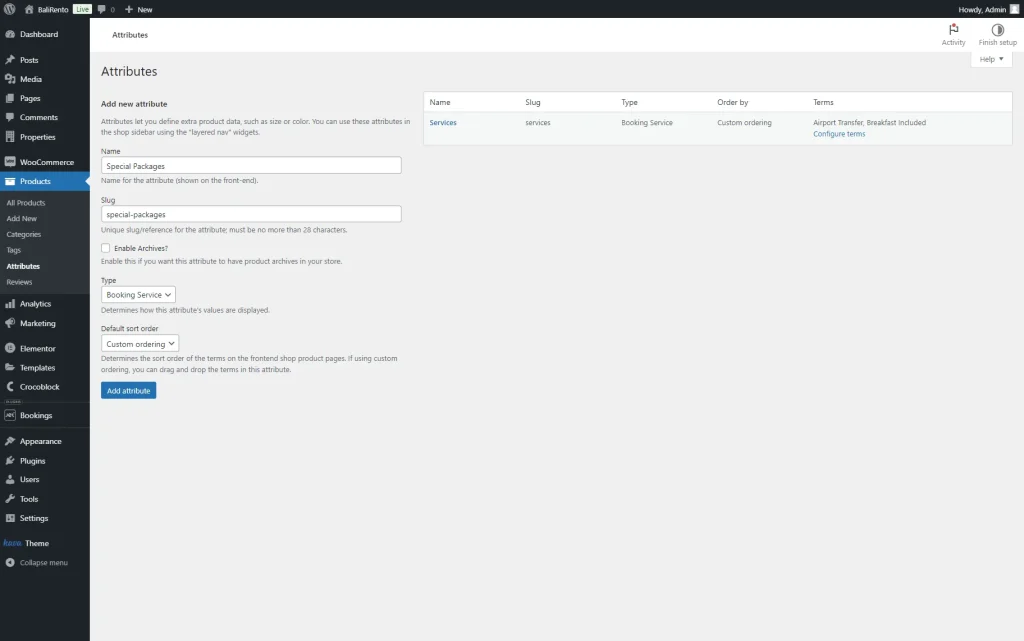
To start, go to WordPress Dashboard > Products > Attributes of the WooCommerce section.
Complete the Name and the Slug fields for the new attribute.
In the Type selector, pick the “Booking Service” option and press the “Add attribute” button.
For example, we create the “Services” attribute.
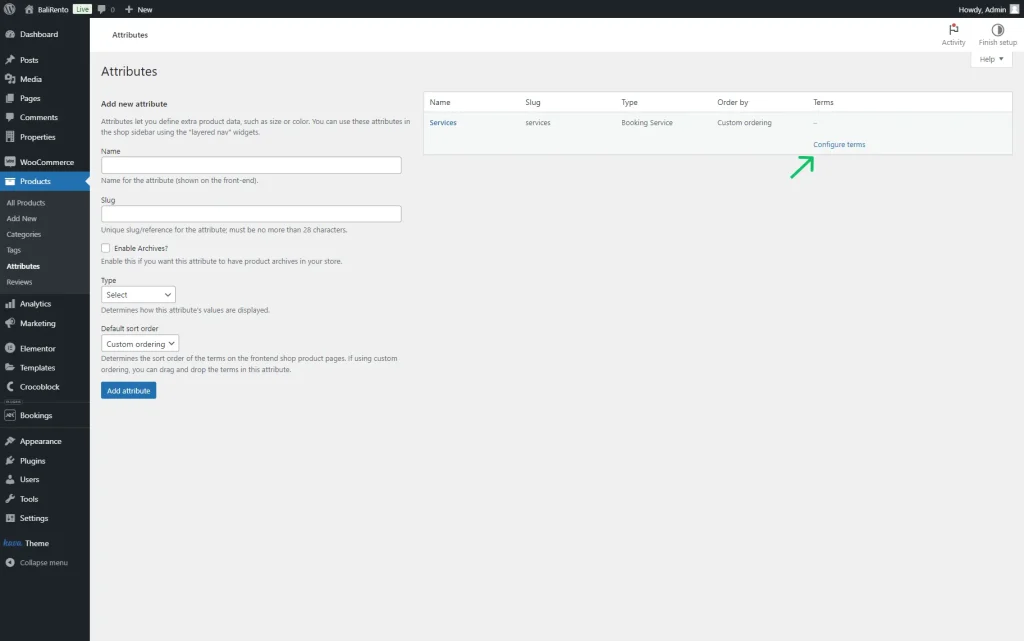
To add terms to the attribute, click the “Configure terms” button next to the added attribute.
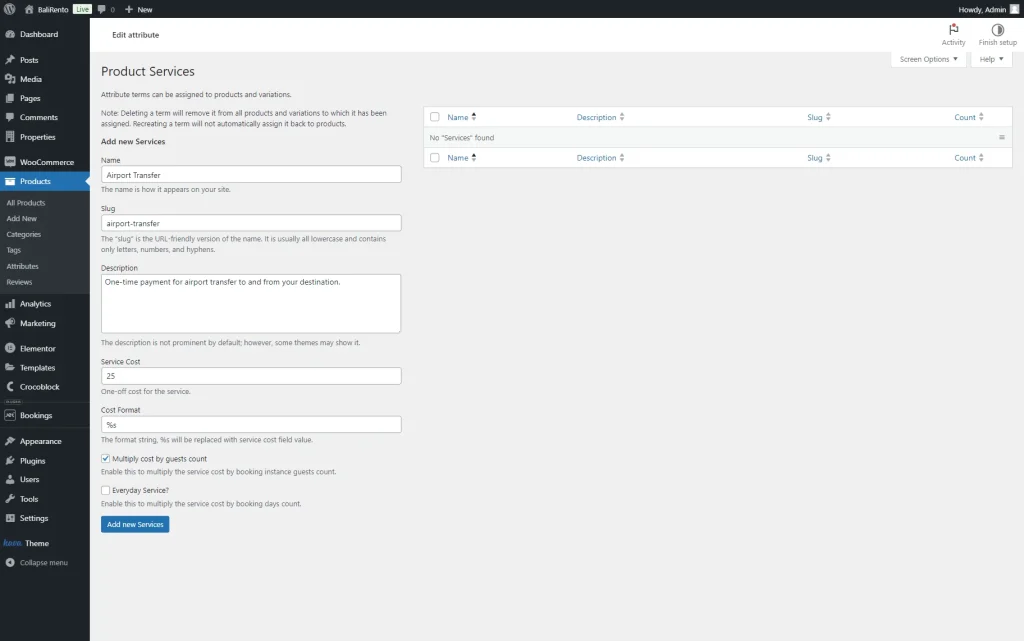
Complete the Name and the Slug for the term. Optionally, add the Description.
In our case, we create the “Airport Transfer” term (Name) with the “airport-transfer” Slug and “One-time payment for airport transfer to and from your destination.” Description.
Then, set the Service Cost. In our case, it’s “25.” You can also set the price in the “00.00” format, like “19.99” if needed.
The Cost Format field can be customized as desired. However, it should always include the “%s” value to display the price.
Also, you can activate the Multiply cost by guest count checkbox. It will multiply the configured service price by the guest count. For instance, in our example, we activate this checkbox so the airport transfer will be multiplied by the number of selected guests.
Check more information about this feature in the How to Manage Guests in WooCommerce Based Booking Mode tutorial.
One more checkbox you can activate is called Everyday Service?; when it is activated, the service will be multiplied by the number of booked days.
To save the term, press the “Add New…” button.
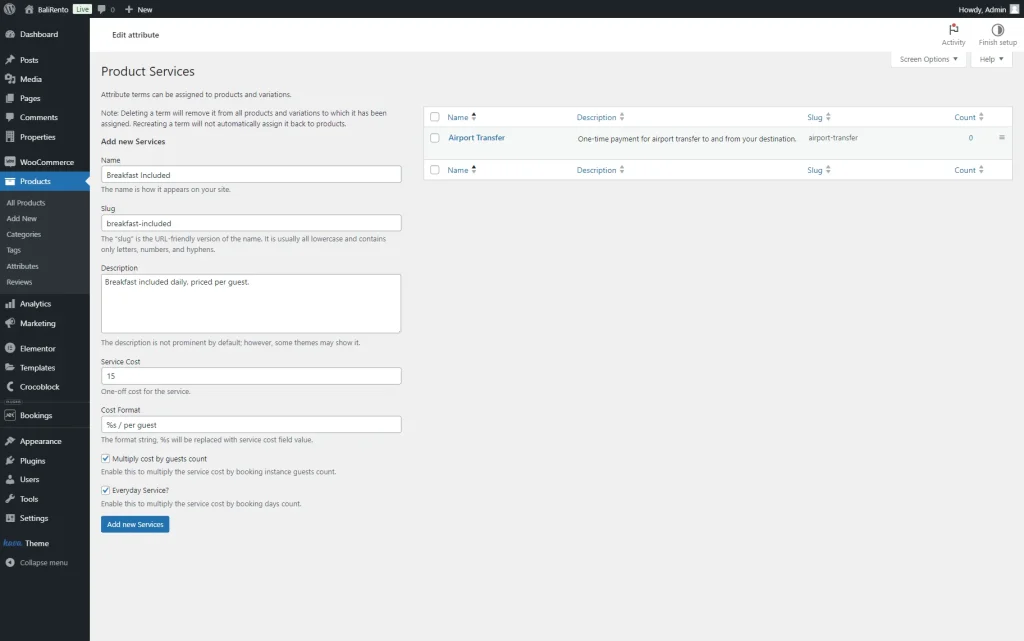
We create one more term. This time, it is “Breakfast Included” with the “Breakfast included daily, priced per guest.” Description and “15” Service Cost.
Also, we change the Cost Format to “%s / per guest” and activate both Multiply cost by guest count and Everyday Service? checkboxes to multiply the cost of the service, both by guests and days.
Don’t forget to save the term by pressing the “Add New…” button.
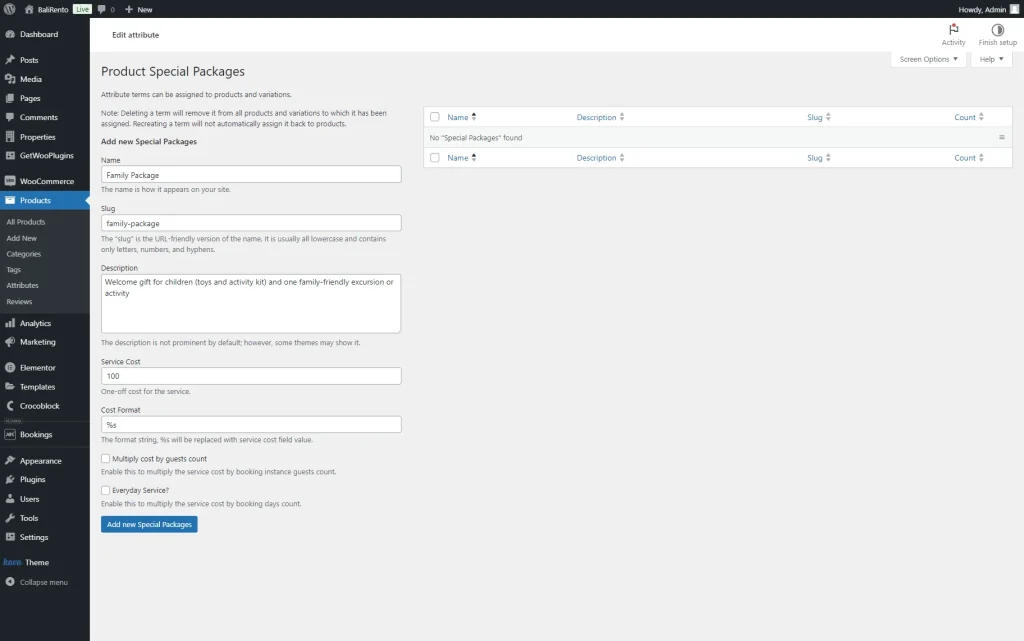
Then, we add one more attribute, “Special Packages” with the “Booking Service” Type and press the “Add attribute” button.
After clicking the “Configure Terms” button next to the added attribute, we add the “Family Package” term with the “Welcome gift for children (toys and activity kit) and one family-friendly excursion or activity” Description and “100” Service Cost.
This time, we don’t activate the Multiply cost by guest count and Everyday Service? checkboxes, as this service is intended to be a one-time charge and does not depend on the number of guests.
The term should be then added by pressing the “Add new” button.
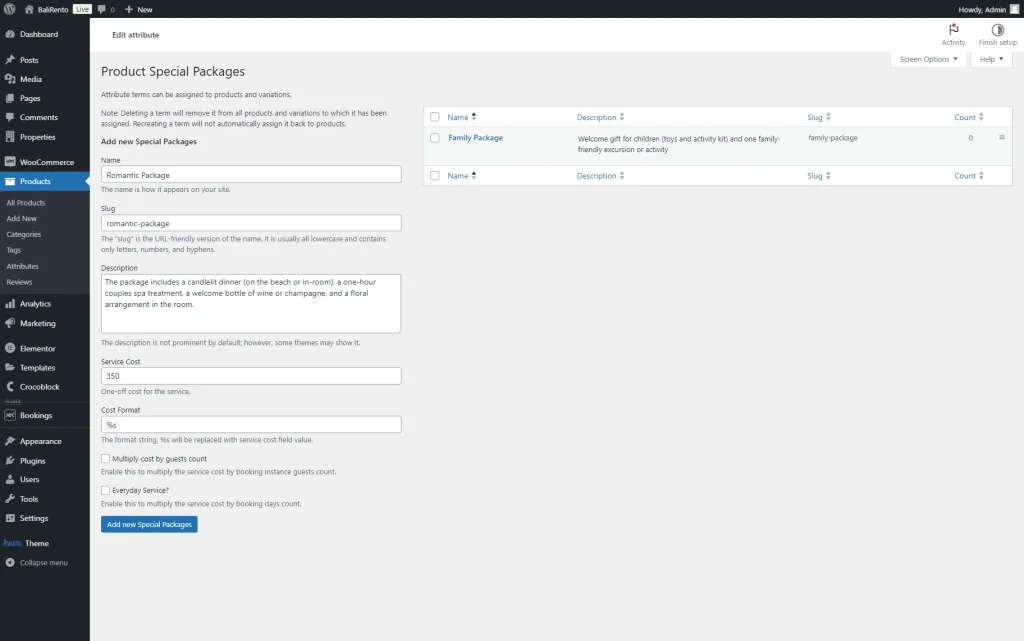
After that, we add one more term, “Romantic Package” with the Description and Service Cost.
This package is also a one-time service and does not depend on the number of guests, so we don’t activate the Multiply cost by guest count and Everyday Service? checkboxes as well.
To save the term, press the “Add New…” button.
Connect Attributes and Terms with Products
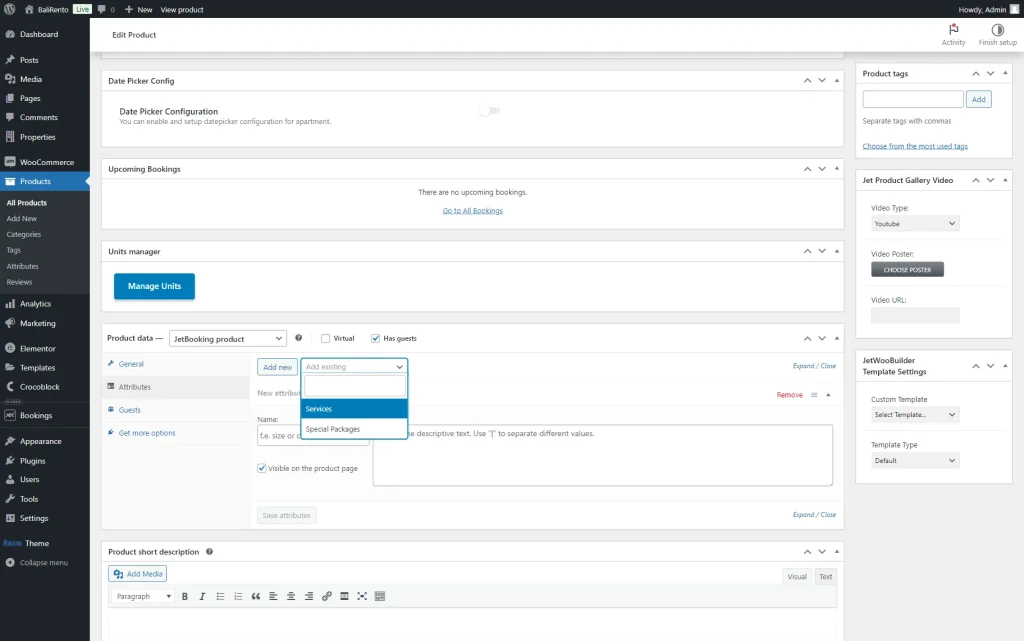
Now, we should connect the added attributes and their terms to products. So head to WordPress Dashboard > Products > All Products of the WooCommerce section and open one of the products.
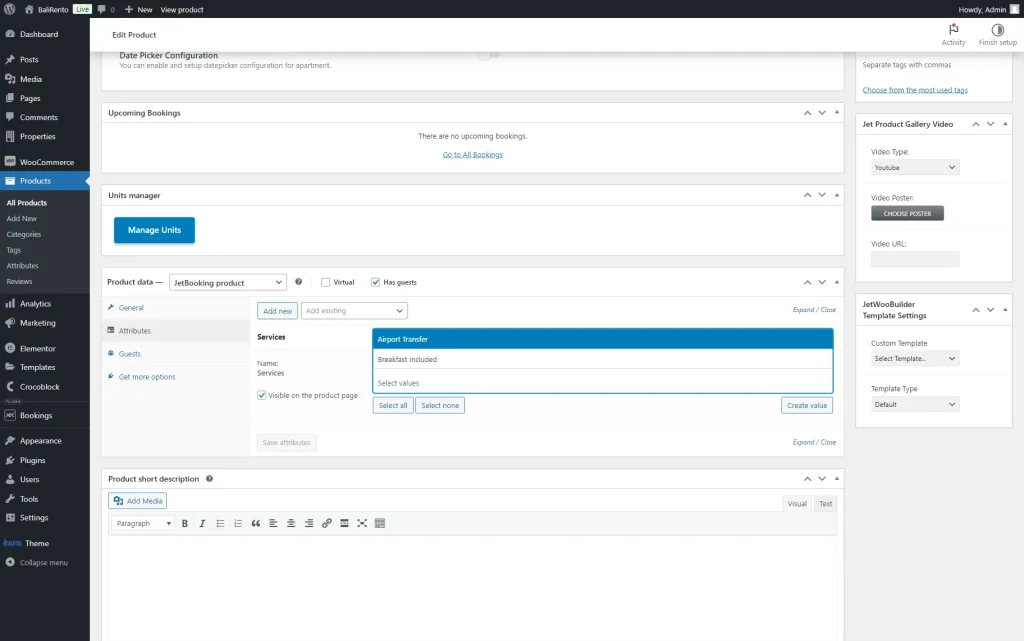
Open the Attributes tab and click the “Add existing” dropdown to open the list with the already-built attributes.
Pick one of the attributes and click its name to add it to the product.
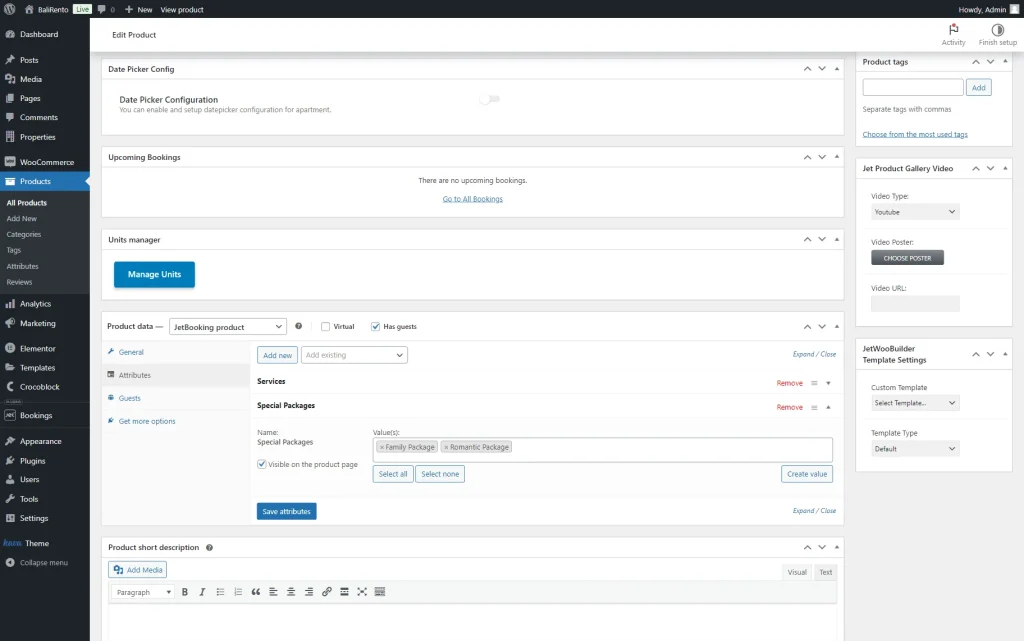
Then, press the empty area in the Value(s) field and pick the desired terms.
We repeat the same procedure with two attributes and click the “Save attributes” button.
Then, press the “Update” button to save the product and repeat the same procedure for all the needed products.
Check the Result
Proceed to the product page front end.
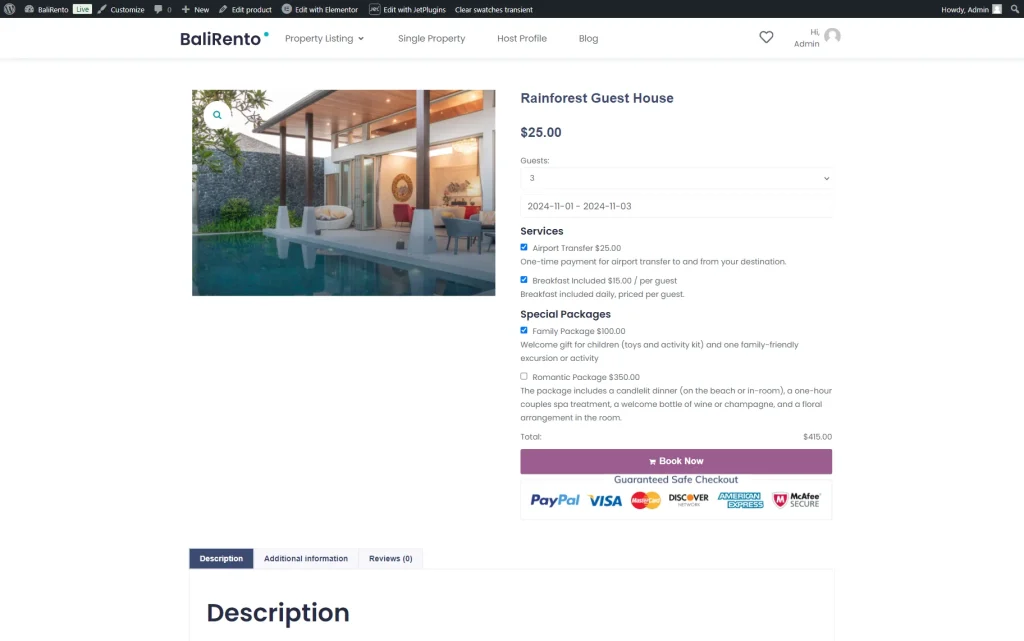
In our case, we want to book a “Rainforest Guest House.”
The price for the night is set to “$25.00”; we pick “3” Guests and select two nights for booking (“2024-11-01 – 2024 -11-03.”) So, now the total price is “150.”
Next, our added attributes and their terms are displayed. So we pick the “Airport Transfer,” the price of which is multiplied by the number of guests, which means “25” is multiplied by “3” and added to the current total price and equals “225.”
We also select the “Breakfast Included” option, the price of which (“15”) is multiplied by the number of guests (“3”) and the number of nights (“2”) and added to the current total price (“225”) and equals “315.”
The final service we pick is “Family Package,” which costs “100.” This price shouldn’t be multiplied by days and guests, so it is just added to the total price.
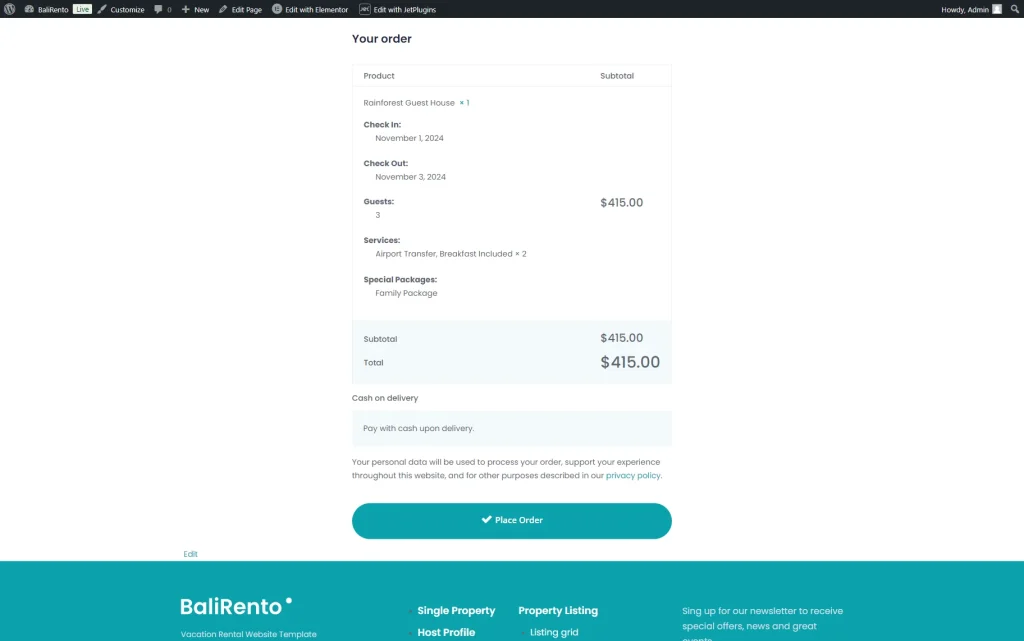
The total price is “415” now.
Once the services are selected, we press the “Book Now” button to make a booking.
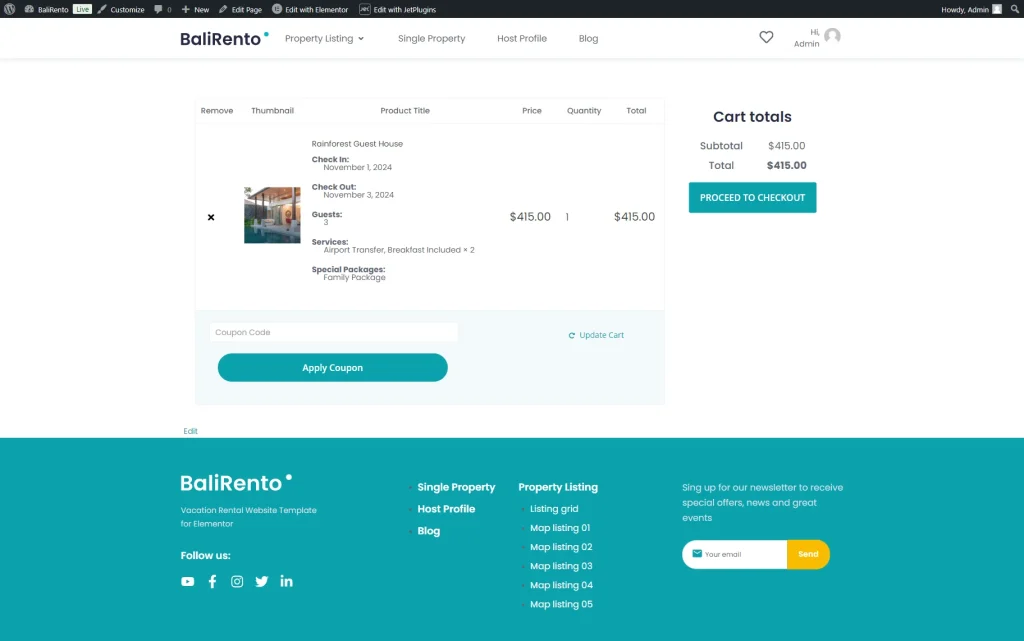
Now, we open the cart with the booking details. Here, press the “PROCEED TO CHECKOUT” button.
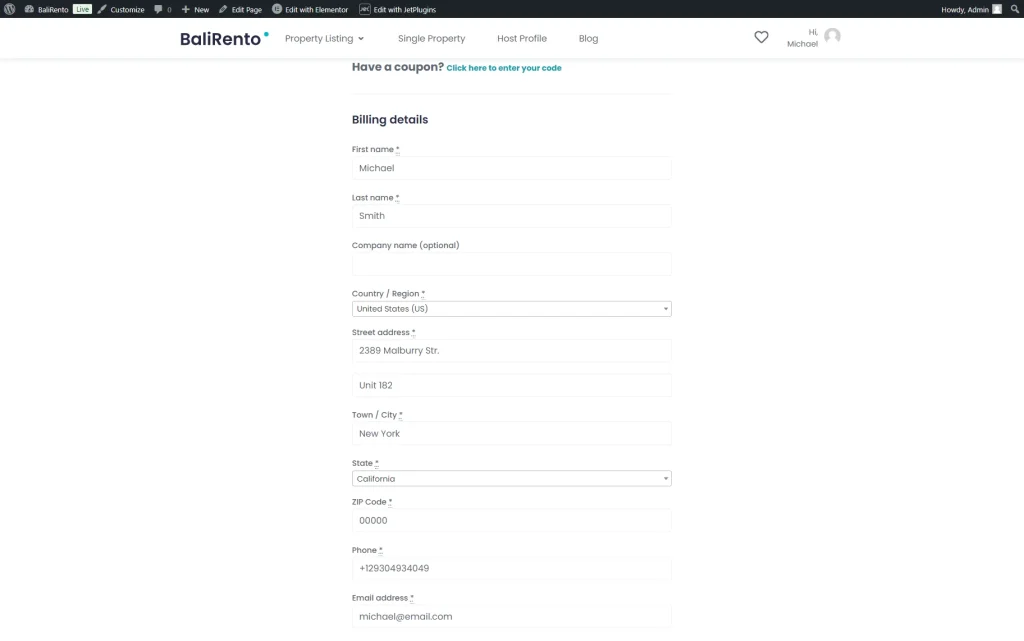
Now, we are redirected to the checkout page. Complete the billing details.
Check the order details and press the “Place Order” button.
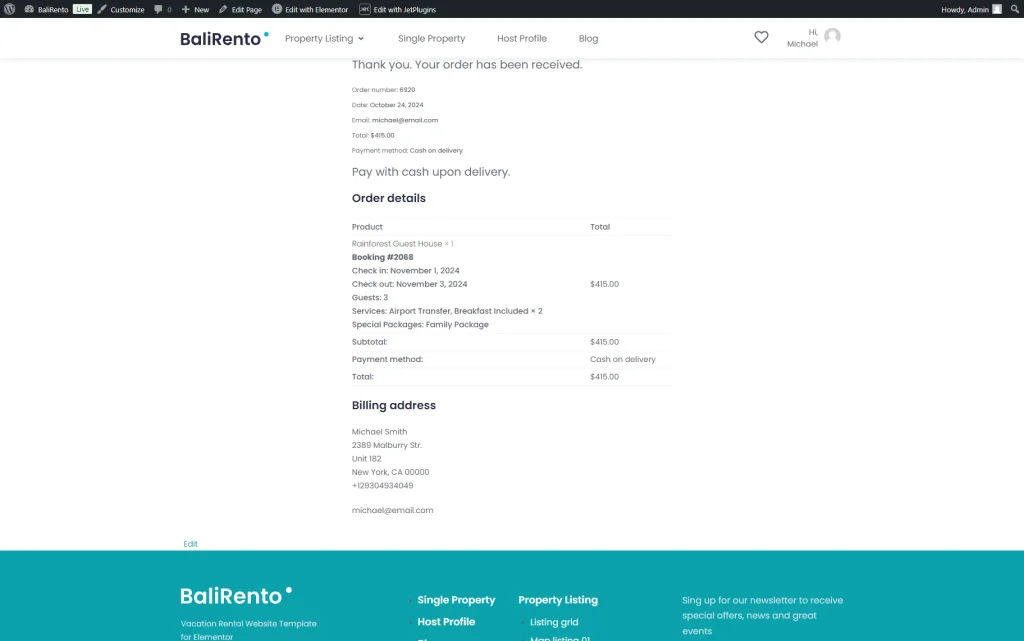
Ultimately, you are redirected to the “Thank You” page with the details of your booking order.
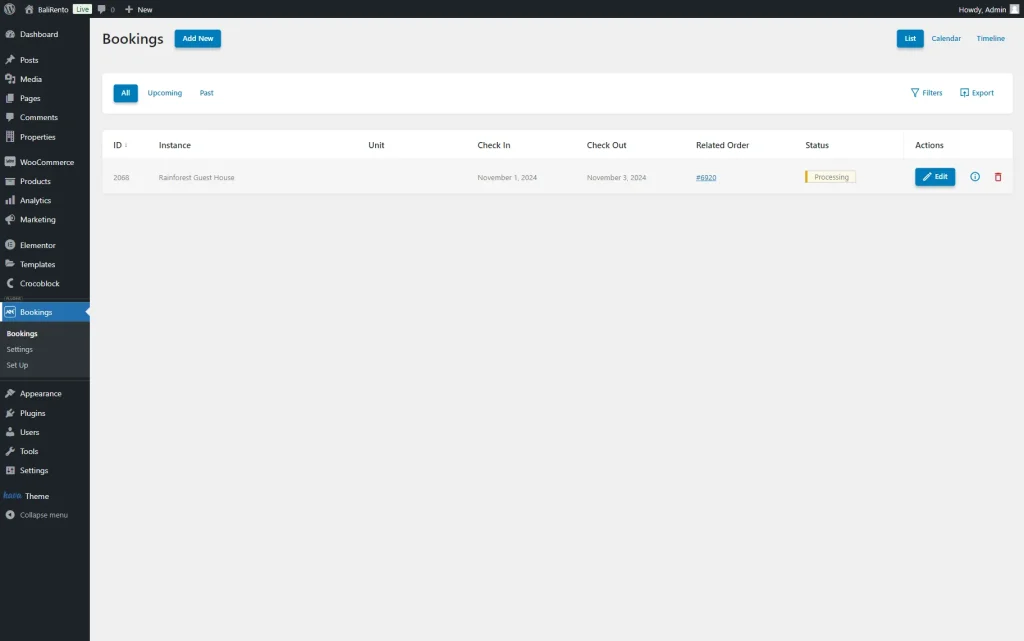
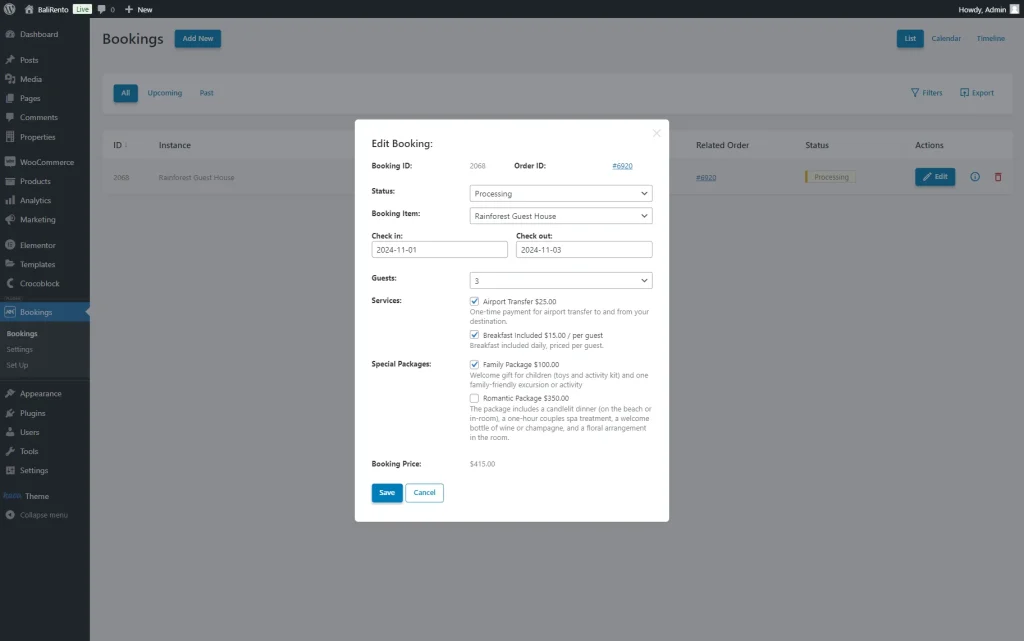
Head to WordPress Dashboard > Bookings to check the booking.
Find the made booking and press the “Edit” button to check the booking details.
In the Edit Booking pop-up, you can check the details of the made booking.
That’s all; now you know how to create WooCommerce additional services attributes with the JetBooking plugin for WordPress.
