How to Display the Variations Table on the Single Product Page
This tutorial explains how to display the variations table on the Single Product page. Apply different product table designs to different WooCommerce locations.
Before you start, check the tutorial requirements:
- WooCommerce plugin installed and activated
- JetProductTables plugin installed and activated
The JetProductTables allows you to set various product tables (with different columns, with filters or not, with different designs, for mobile layout, etc.) on different templates.
It can be achieved by applying presets to the WooCommerce standard locations or adding shortcodes to the custom templates.
We will describe a case of applying product tables with variations for variable products on the Single product page. Additionally, we will add another product table to the Product Categories archive.
Proceed to this tutorial to learn How to Create Variable Products in WooCommerce.
Product Tables on Standard WooCommerce Pages
Adjusting the Product Tables for the Single Product Page
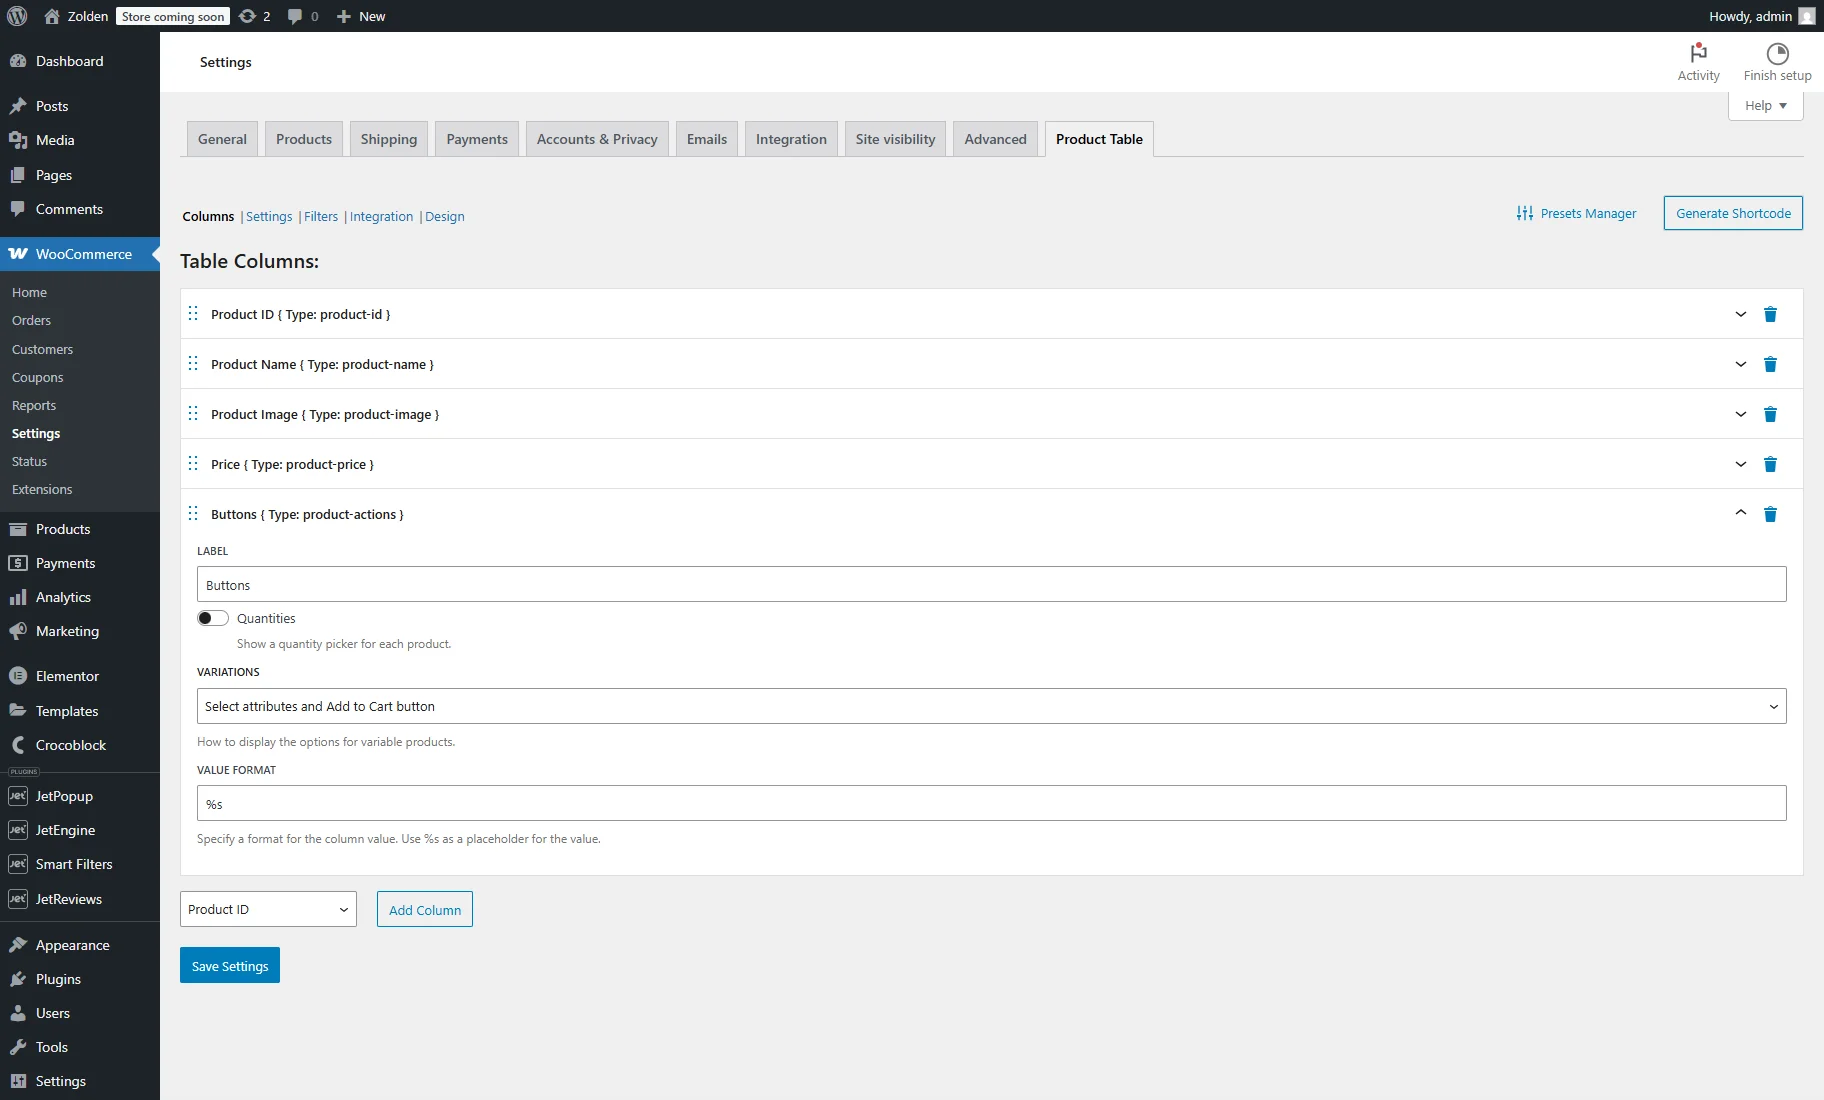
Go to WordPress Dashboard > WooCommerce > Settings > Product Tables tab.
Product tables for variations can be displayed in two locations on the WooCommerce Single Product page: Product Variations Tab and Product Variations in Body.
Set the columns and other settings as described in the How to Сreate and Set Up a Product Table tutorial.
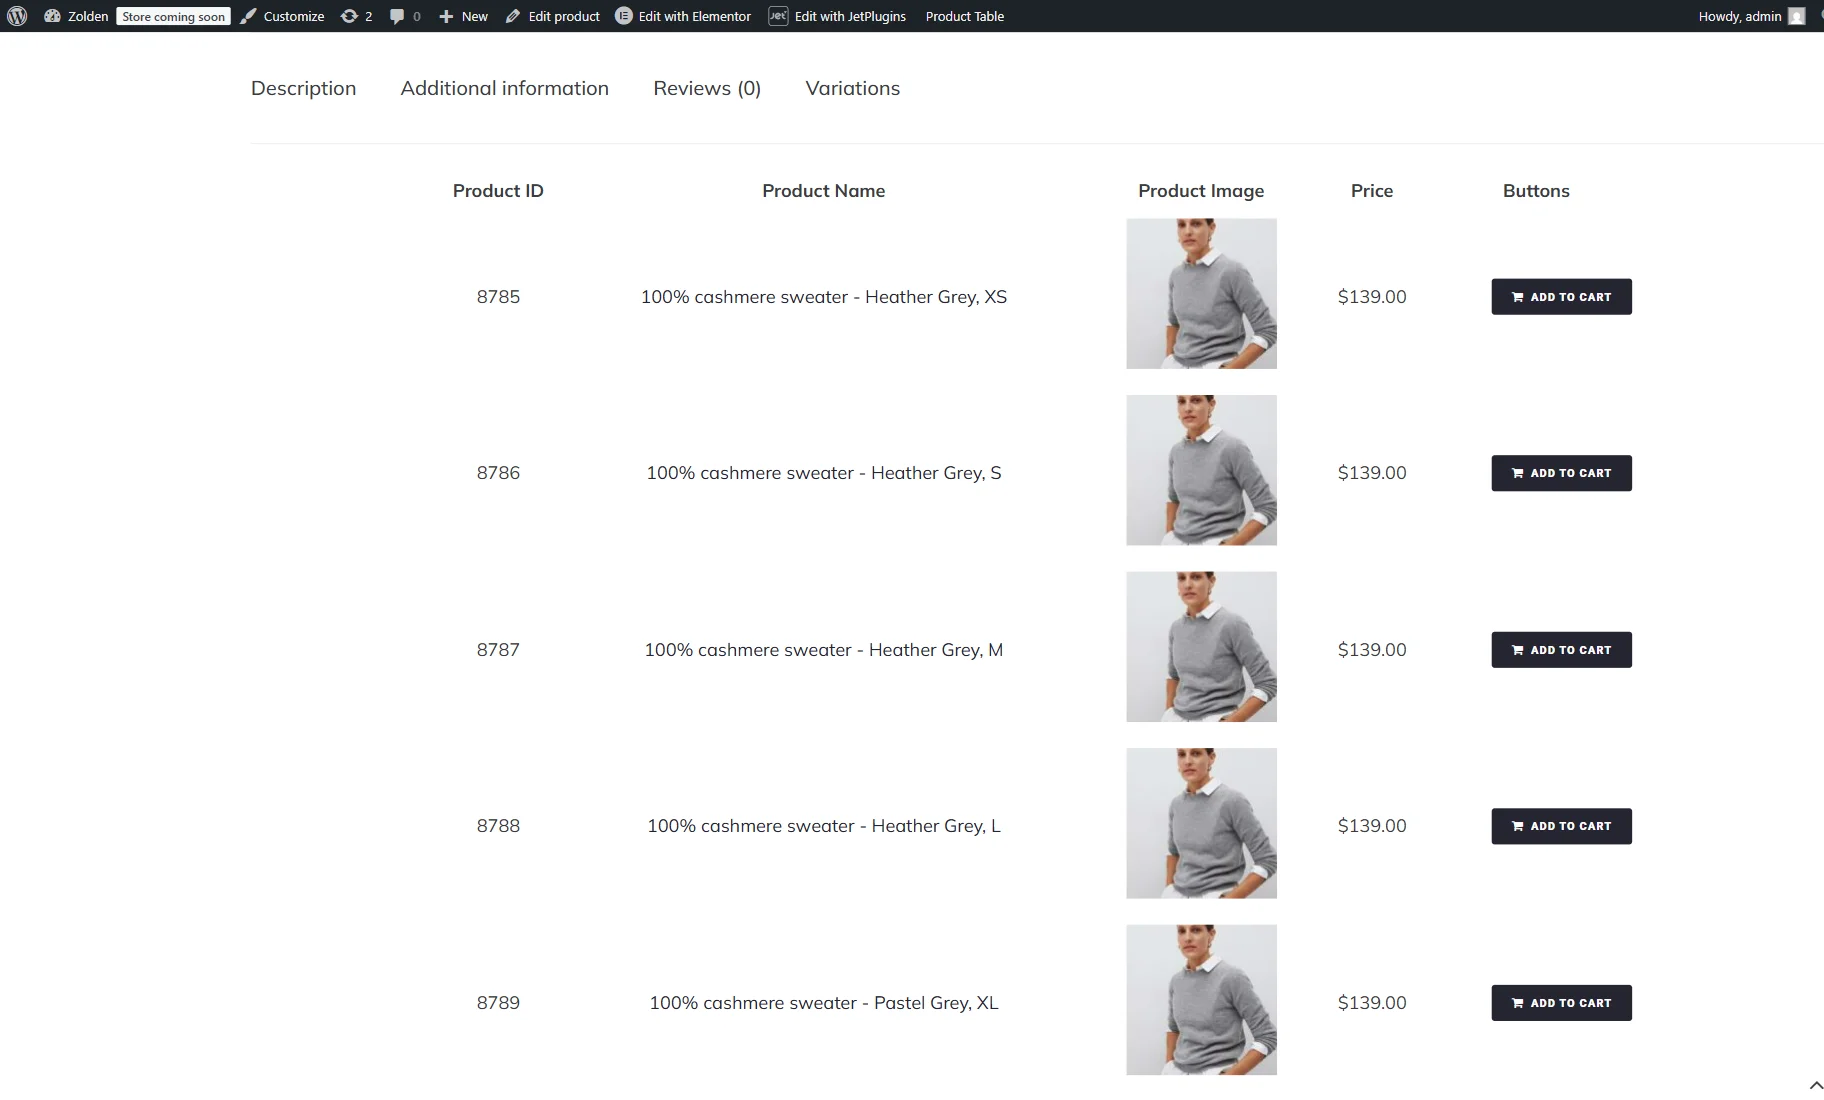
For example, we set five columns for the Product Variations Tab: “Product ID,” “Product Name,” “Product Image,” “Price,” and “Buttons.”

In the “Buttons” column, we keep the “Select attributes and Add to Cart button” option for the VARIATIONS dropdown. It means users can select attributes (e.g., color and size) and add a product to the cart right from the product table.
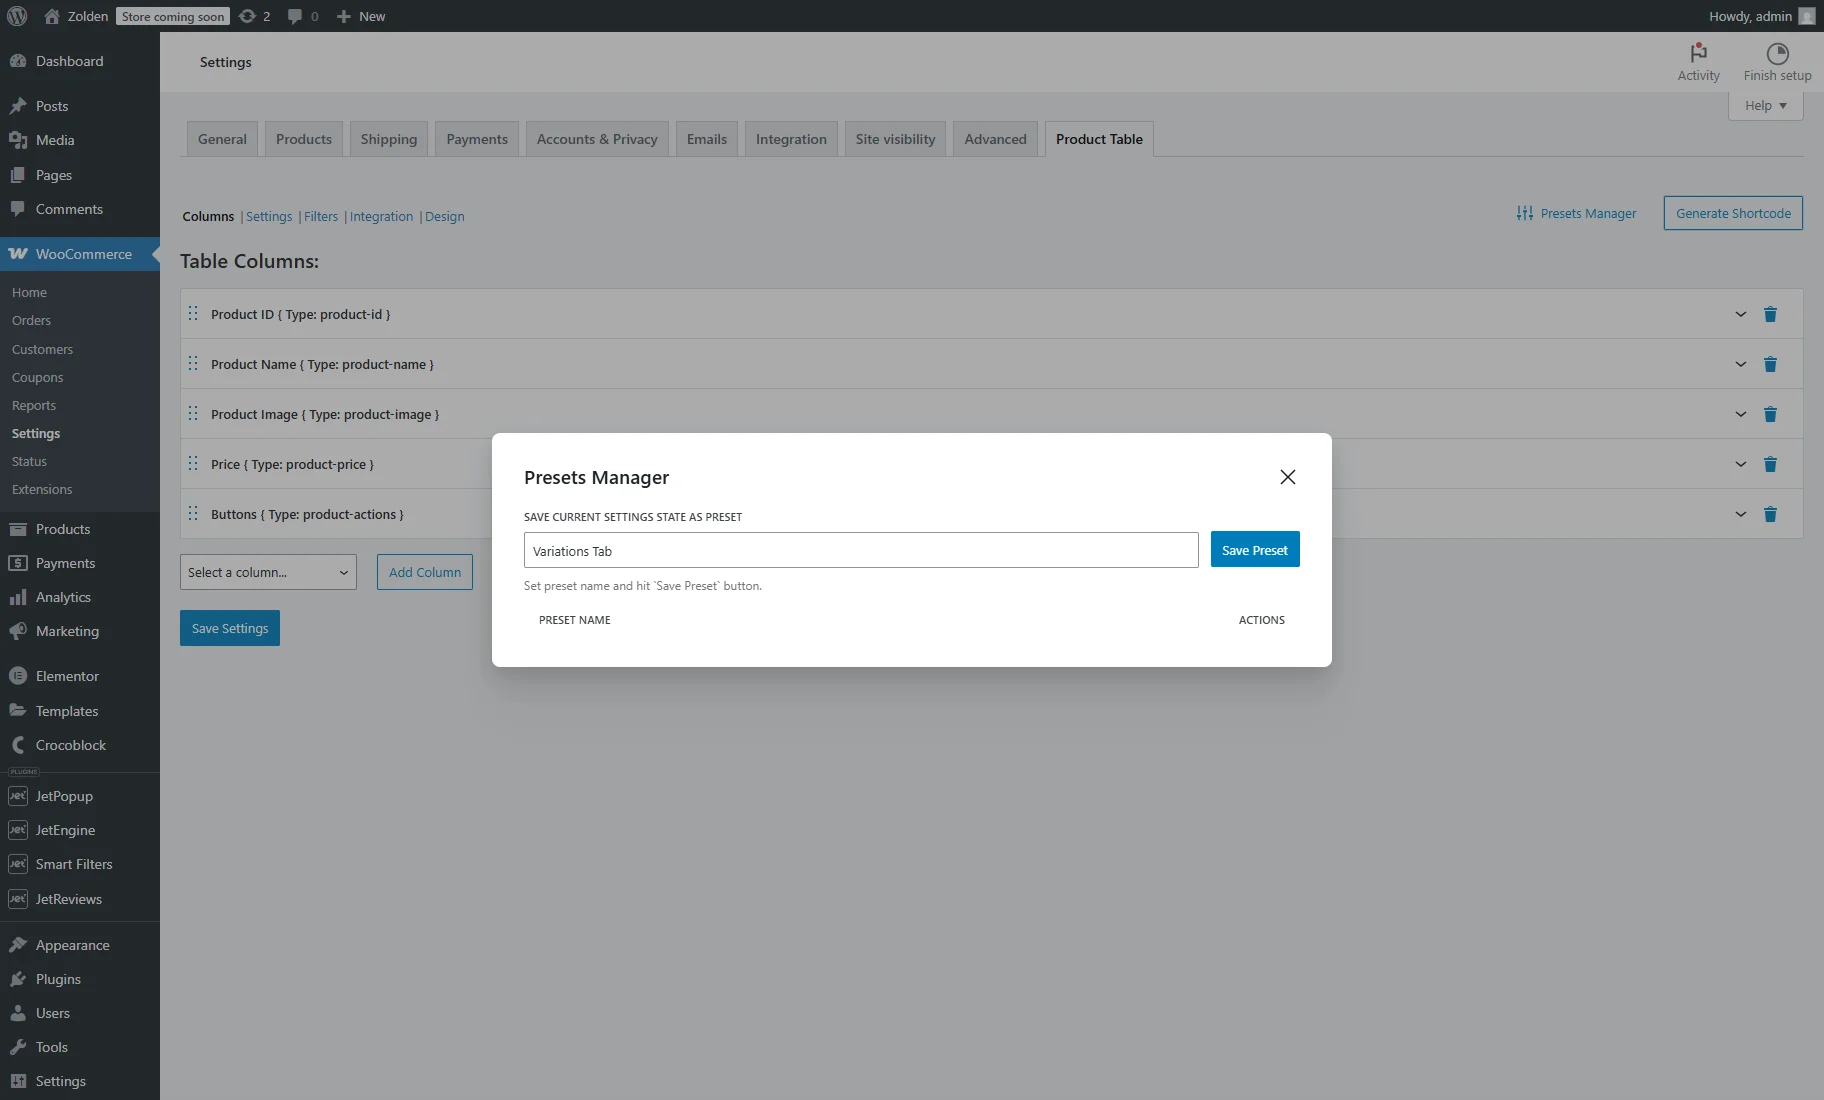
Then, the Settings, Filters, and Design tabs can be adjusted.
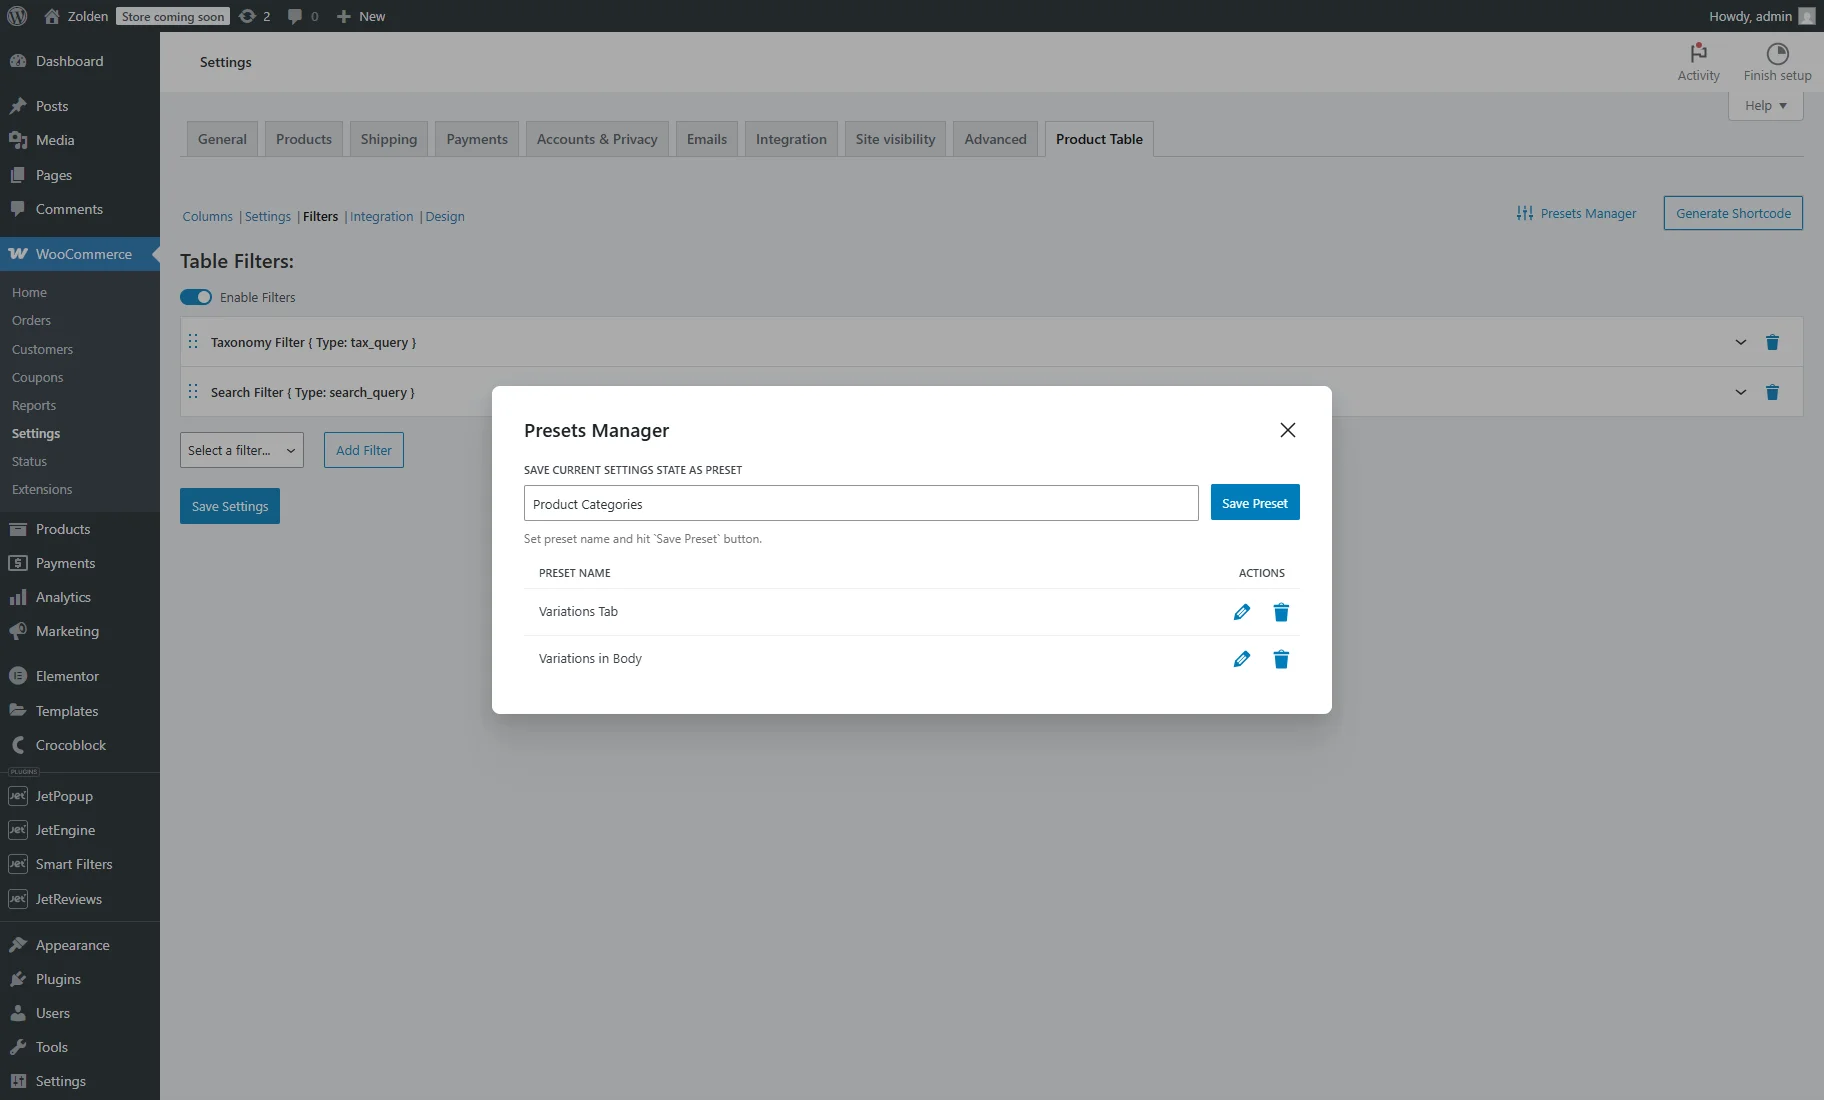
After that, press the “Presets Manager” button, enter the preset name into the textarea, and hit the “Save Preset” button.
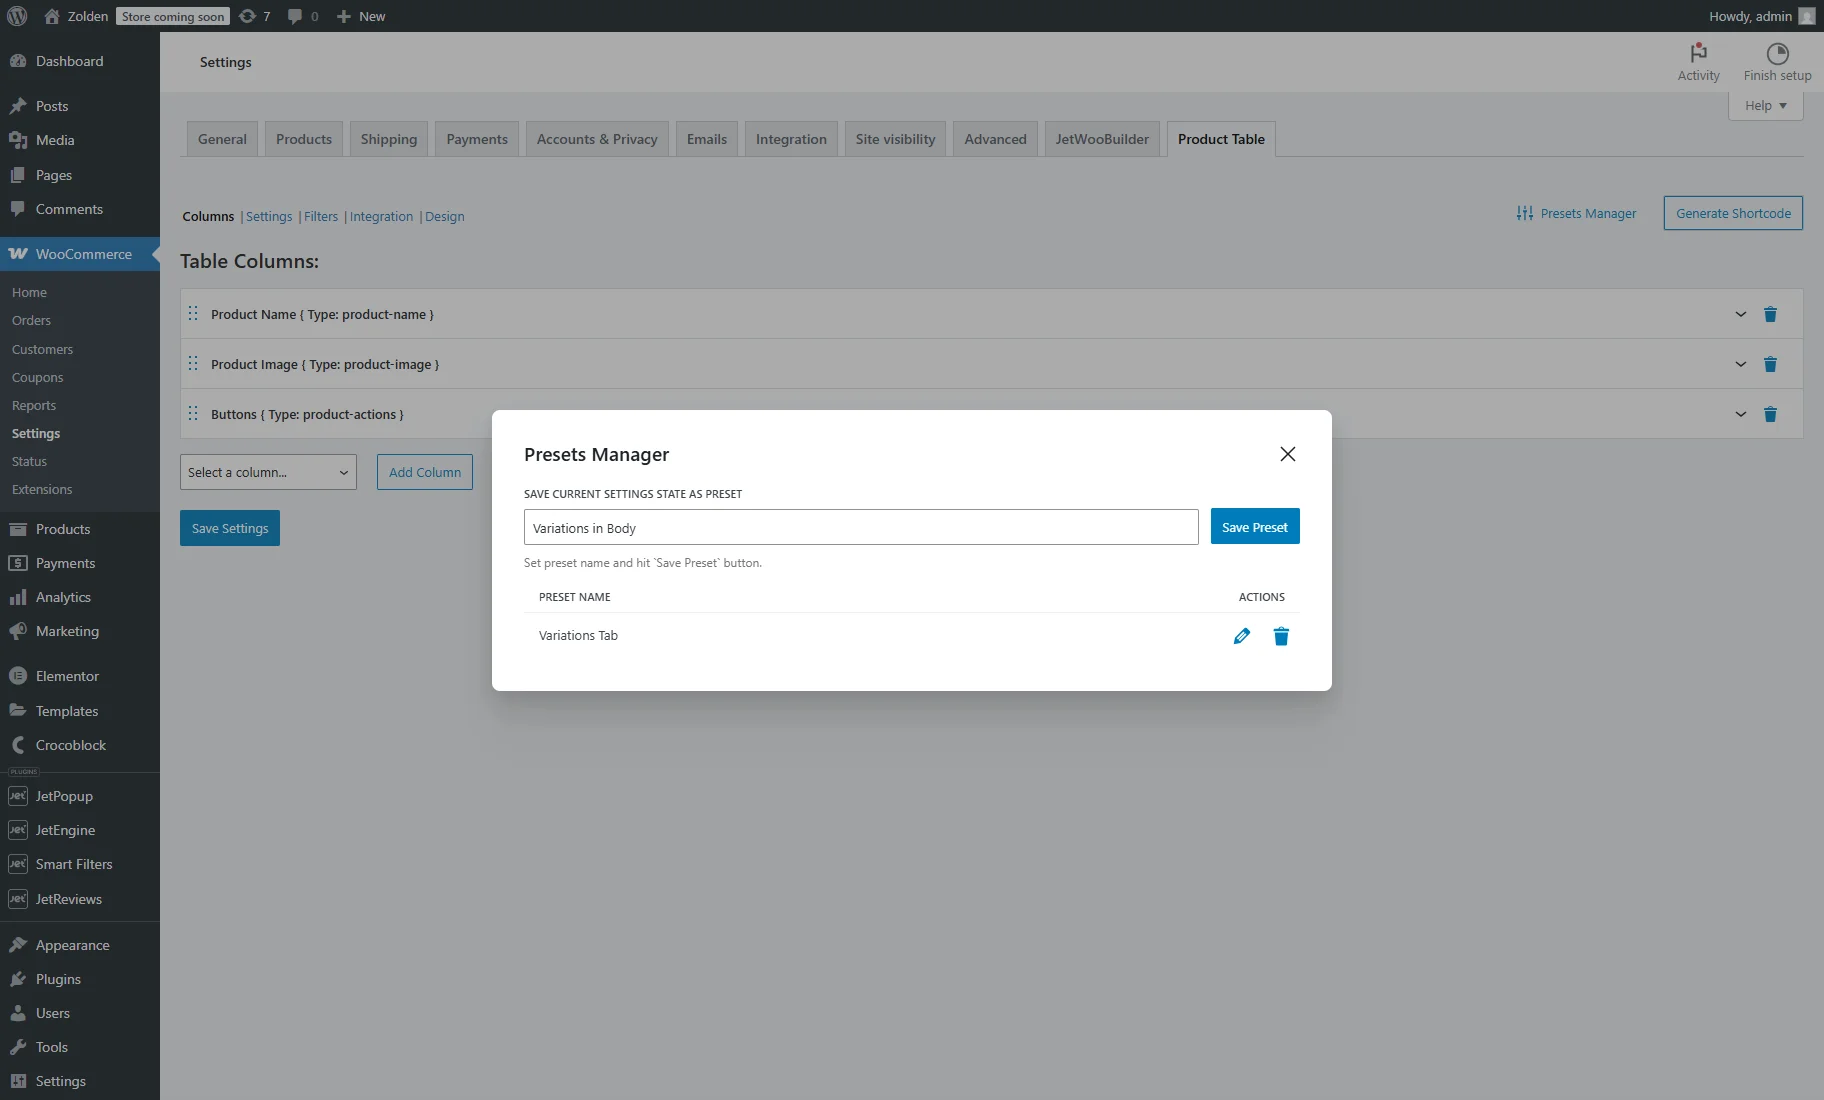
For the Product Variations in Body, we delete the “Product ID” and “Price” columns because the space will be limited in this location.
After customizing the Columns, Settings, Filters, and Design tabs, push the “Presets Manager” button, enter the preset name into the textarea, and hit the “Save Preset” button once again.
Modifying a Product Table for an Archive
As an example, we will create a separate product table for the Product Categories page.
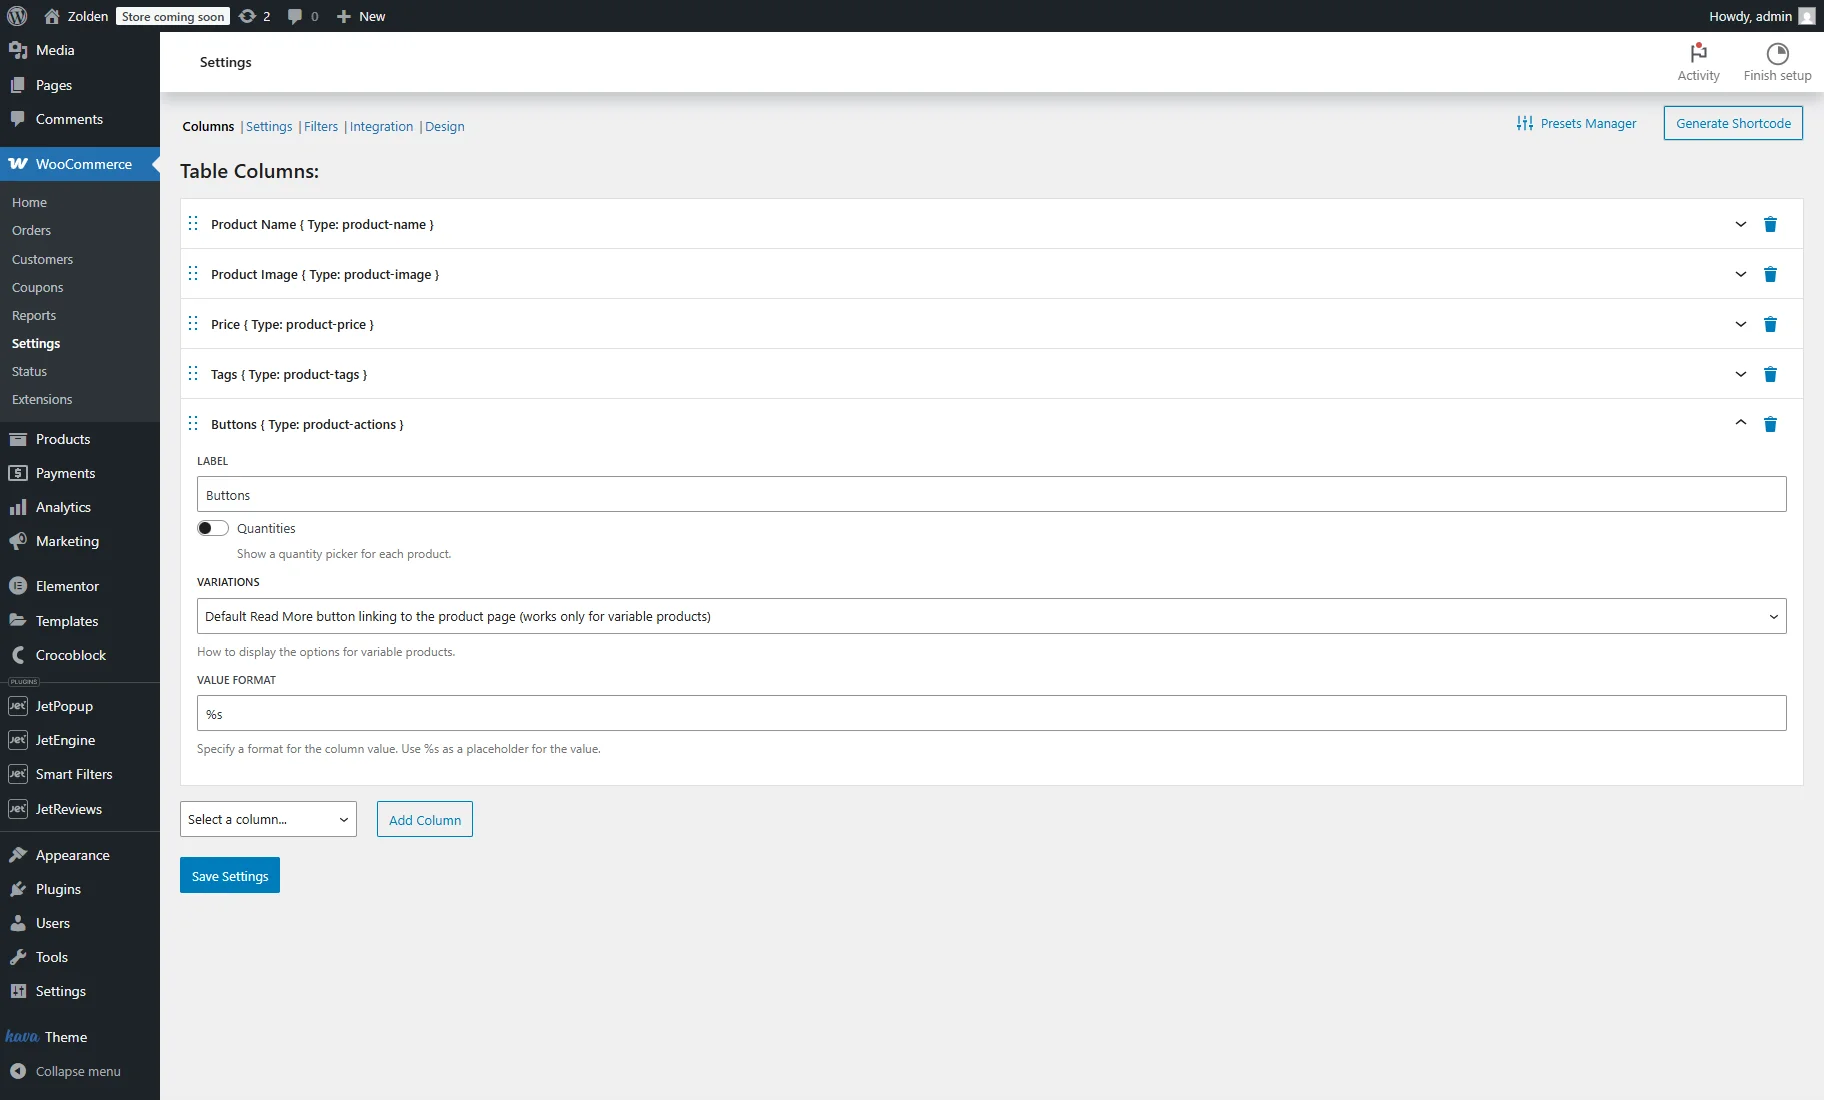
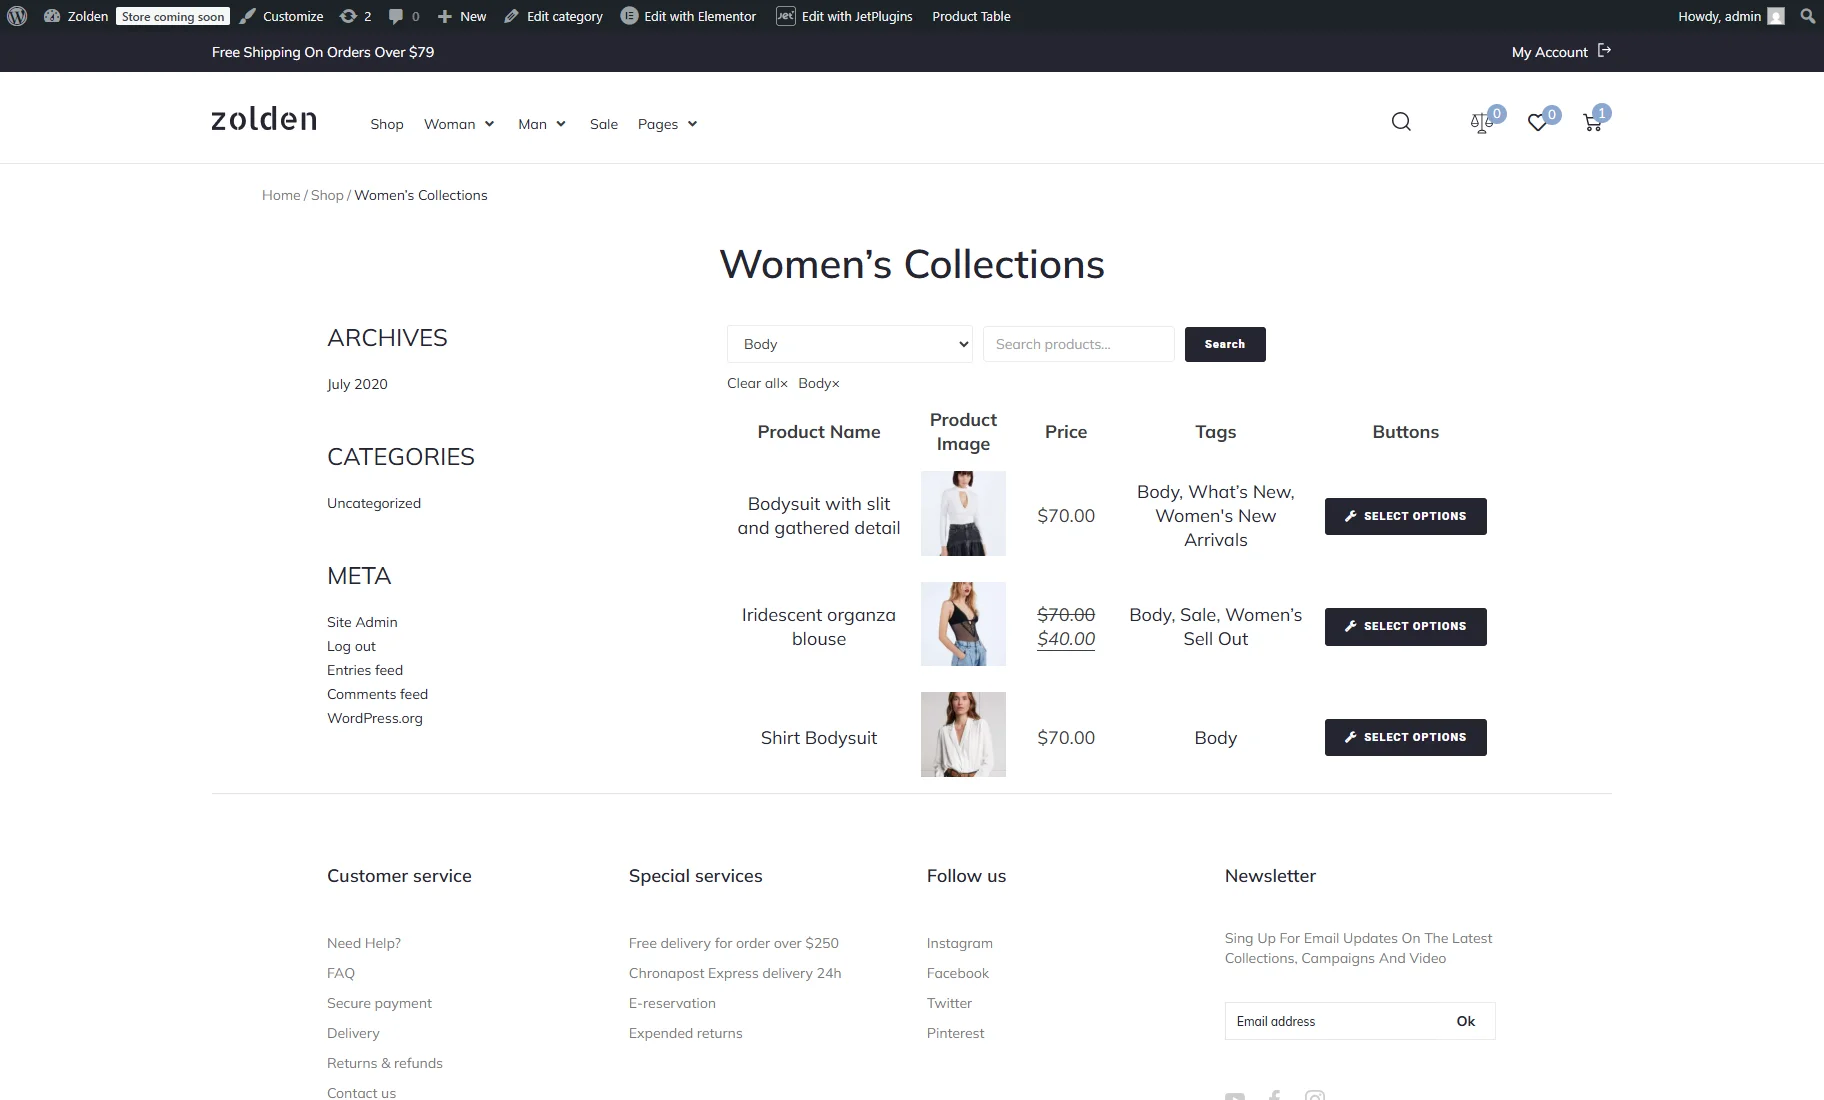
We set the “Product Name,” “Product Image,” “Price,” “Tags,” and “Buttons” columns.
In the “Buttons” column settings, we choose the “Default Read More button linking to the product page (works only for variable products)” option in the VARIATIONS dropdown.
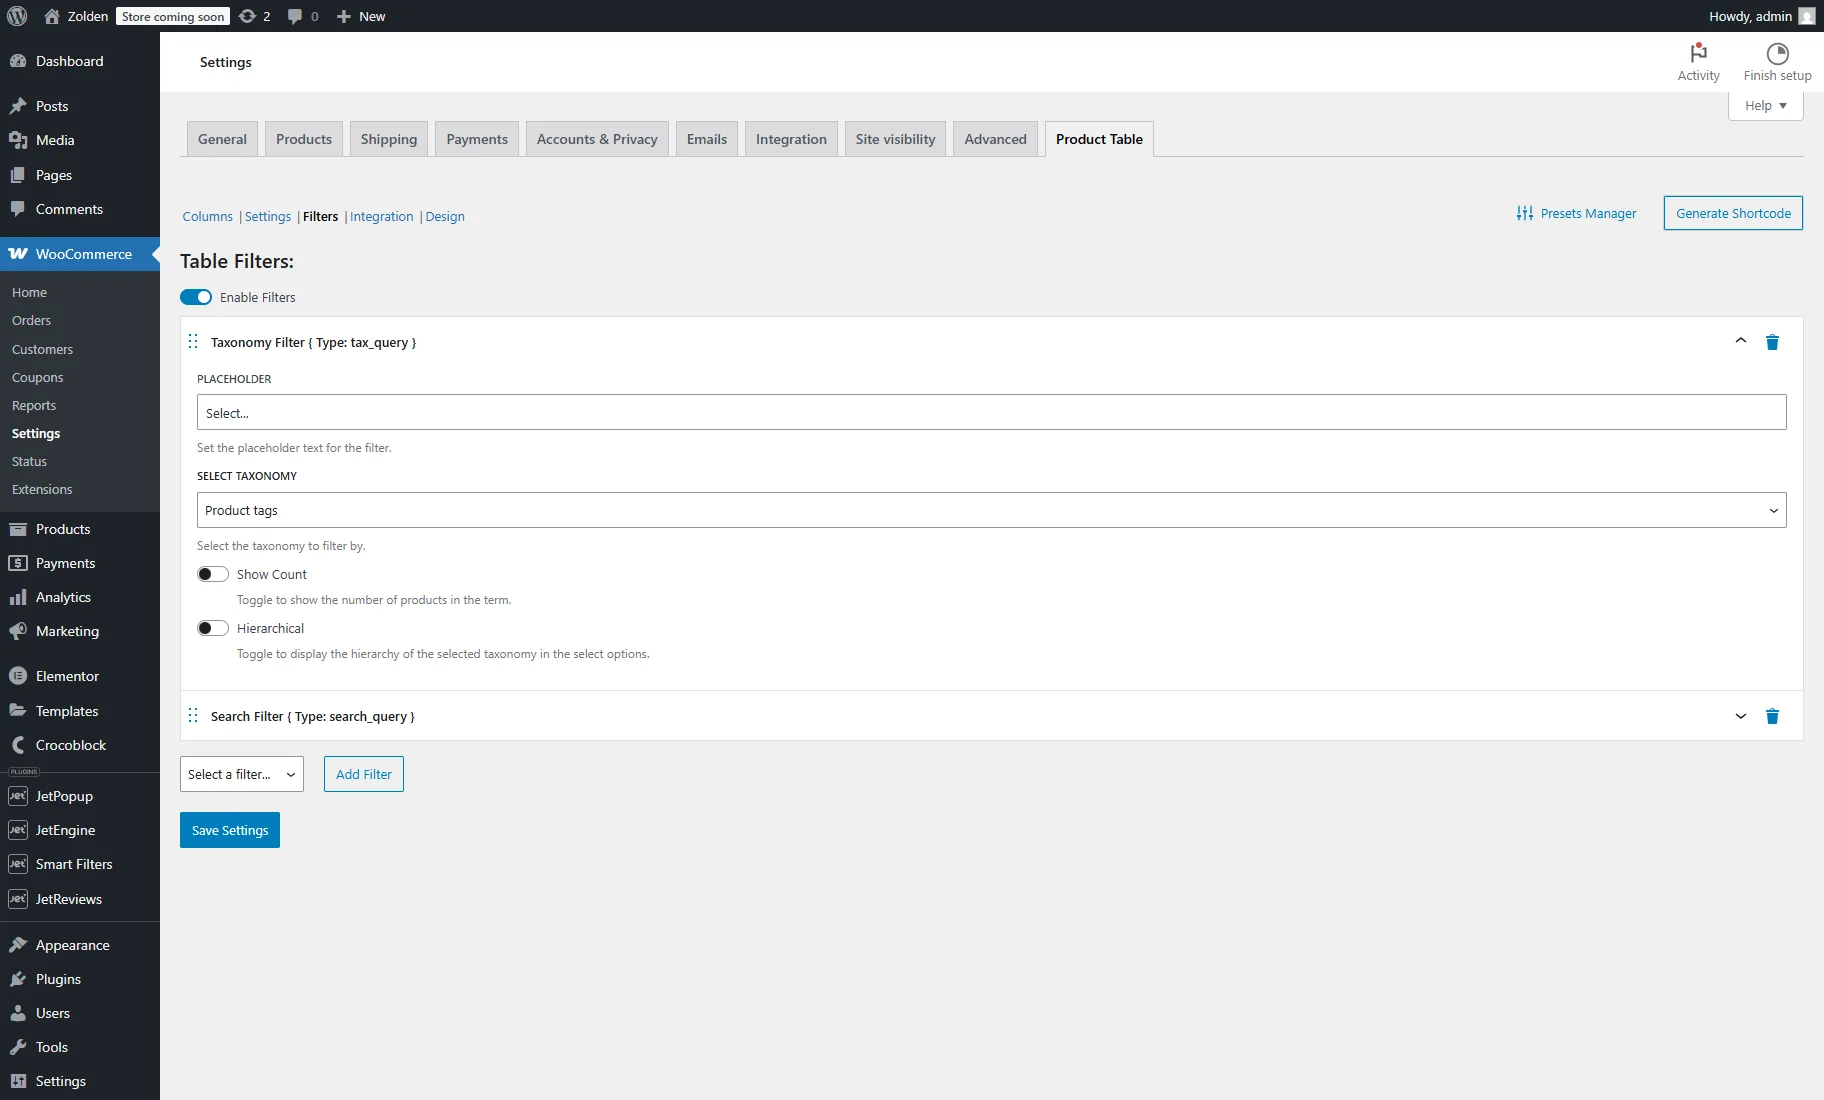
In the Filters settings tab, we activate the Enable Filters toggle, and two filters are added by default.
For the first “Taxonomy Filter,” we pick the “Product tags” option from the SELECT TAXONOMY dropdown.
For the second “Search Filter,” we keep its default settings.
After modifying all the settings, click the “Presets Manager” button, enter the preset name into the textarea, and hit the “Save Preset” button.
Setting Presets for the WooCommerce Locations
Head to the Integration settings tab.
We activate the USE PRESET toggles for the Product Categories, Product Variations Tab, and Product Variations in Body and set the required presets in the dropdowns.
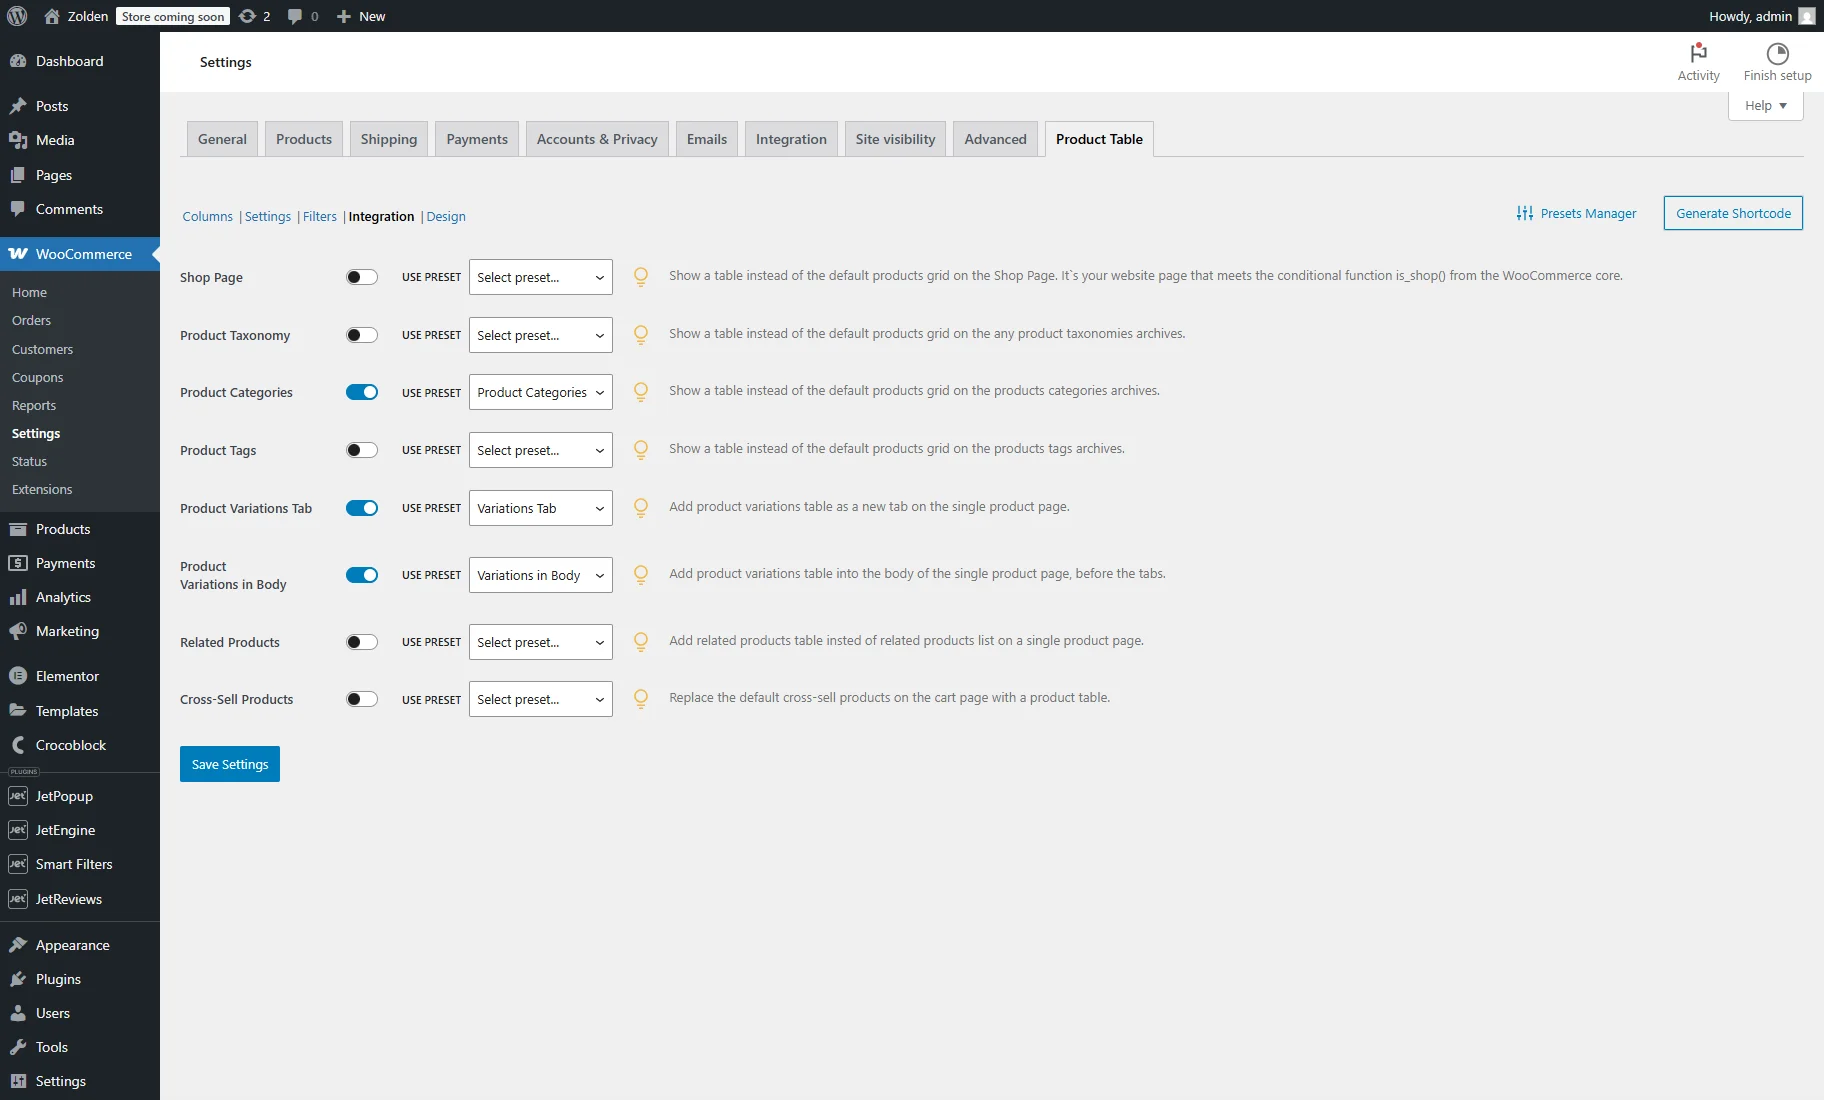
Click the “Save Settings” button.
Checking the Results
Open a product on the front end. The product table for the Product Variations in Body location is shown under the product summary. It shows all the product variations.
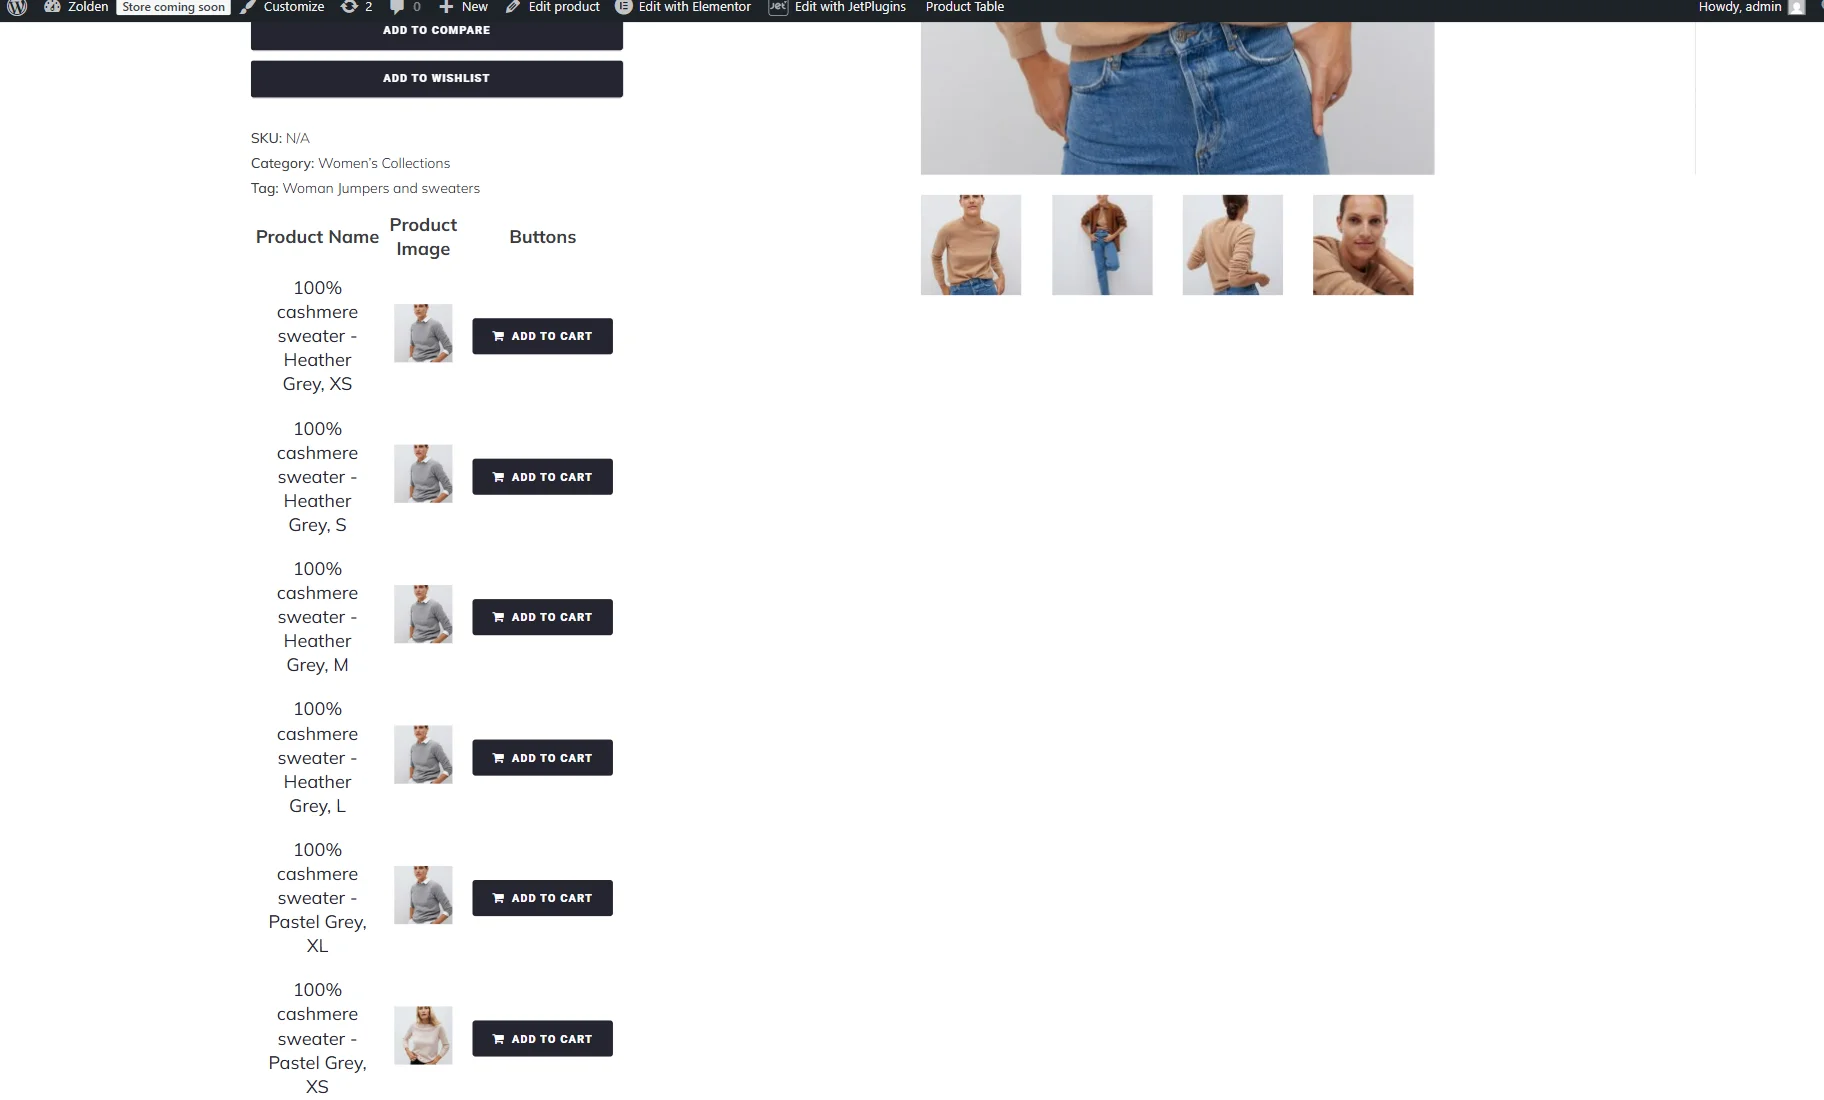
Also, the Variations tab appears under the product in the WooCommerce tabs. If we open it, it displays the product table with the variations.
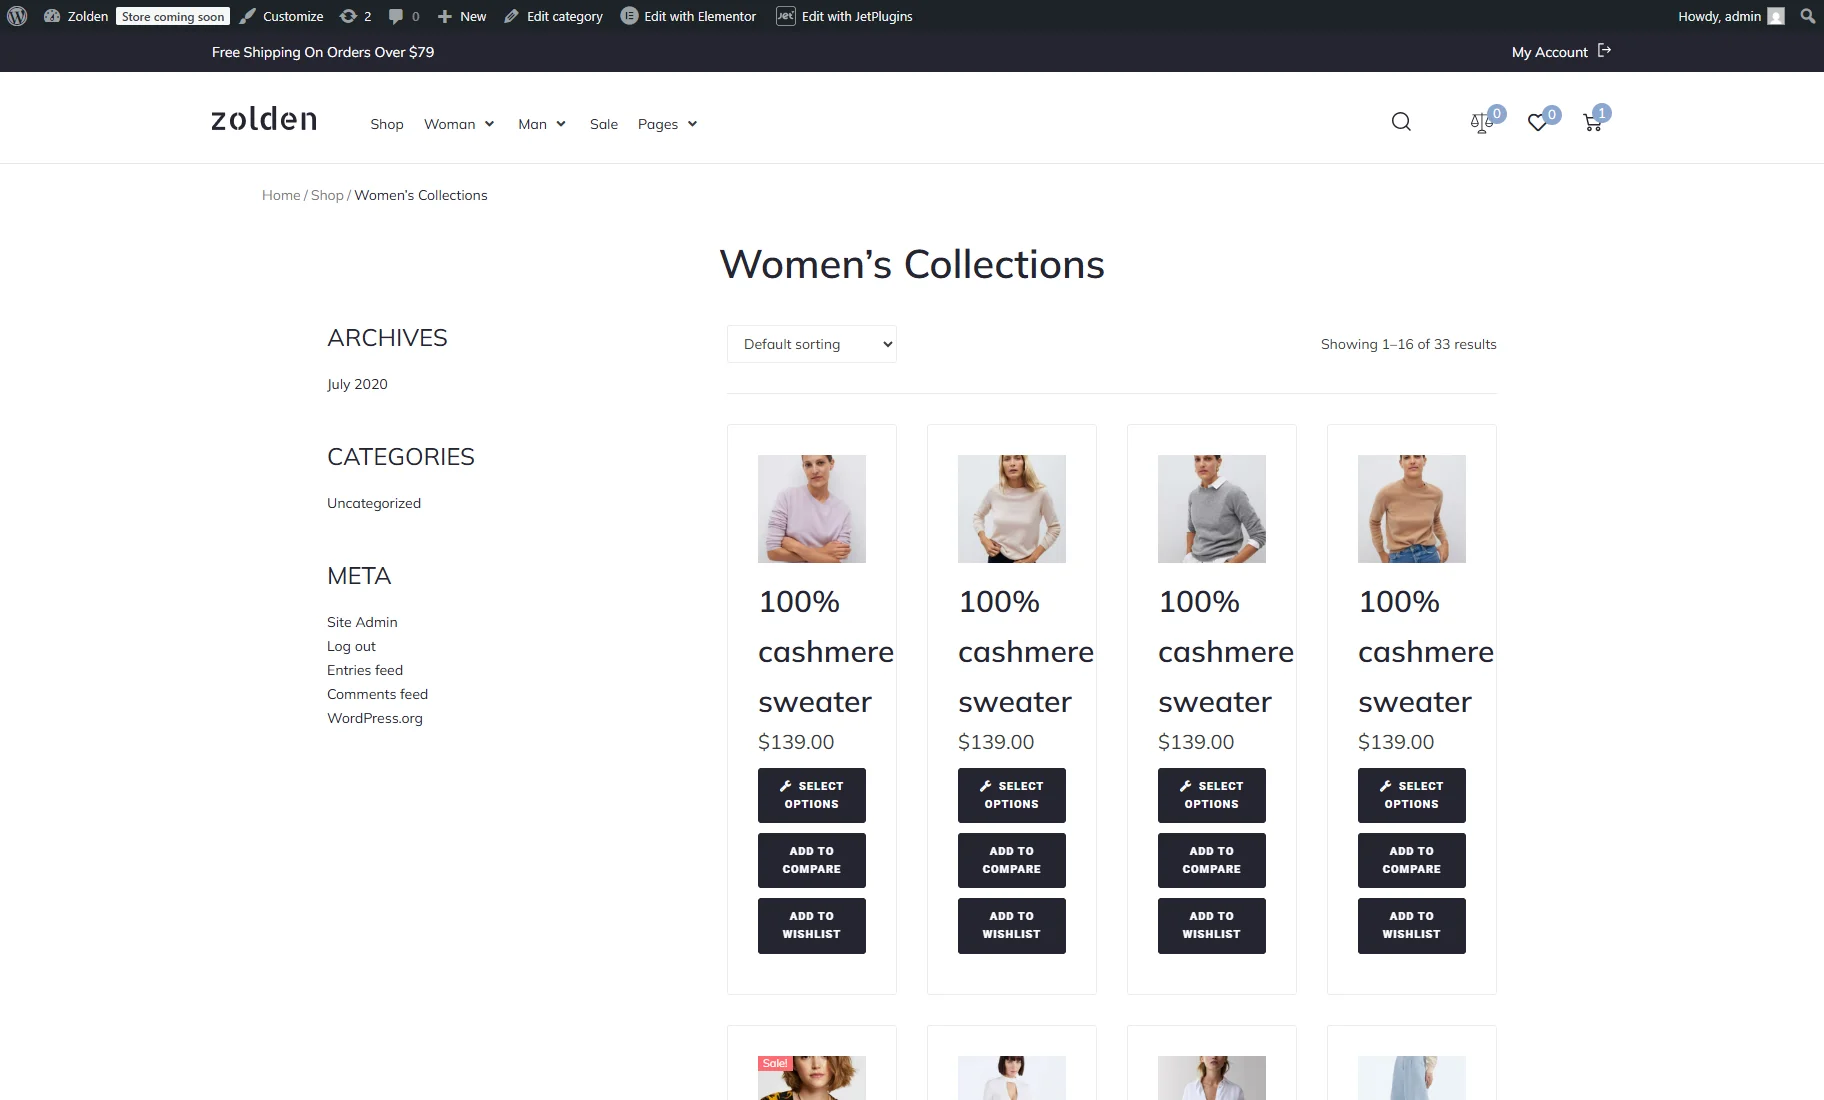
Then, open an archive of a product category. Before the preset was applied, the products were shown in a grid.
Now, it shows the product table with filters.
Product Tables on Custom Templates (by JetWooBuilder)
For this case, we will use the JetWooBuilder plugin for Elementor.
In the WordPress Dashboard > WooCommerce > Settings > Product Tables tab, set the columns and other product table settings.
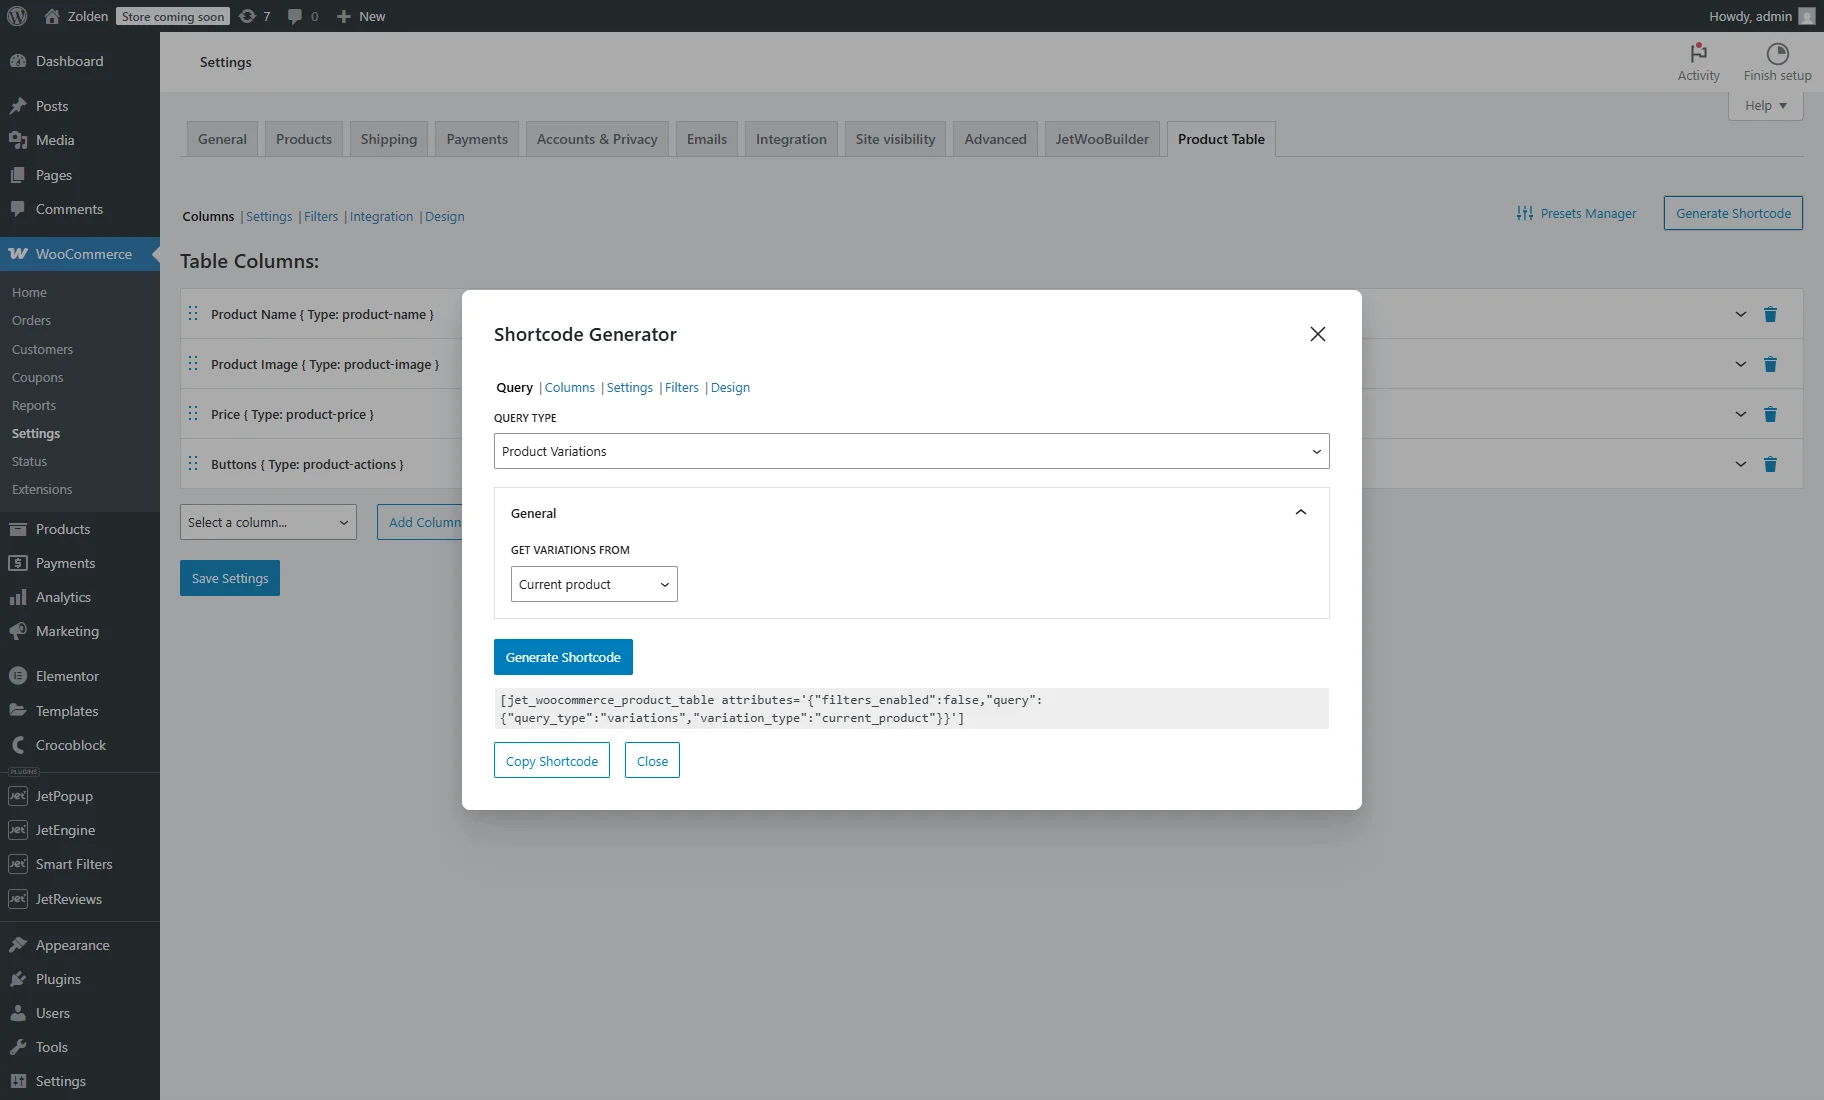
Then, hit the “Generate Shortcode” button. In the Query section of the pop-up, set the “Product Variations” QUERY TYPE. In the GET VARIATIONS FROM dropdown menu, pick the “Current product” option.
Now, click the “Generate Shortcode” button and then the “Copy Shortcode” button.
More info can be found in the How to Generate a Shortcode for Product Table tutorial.
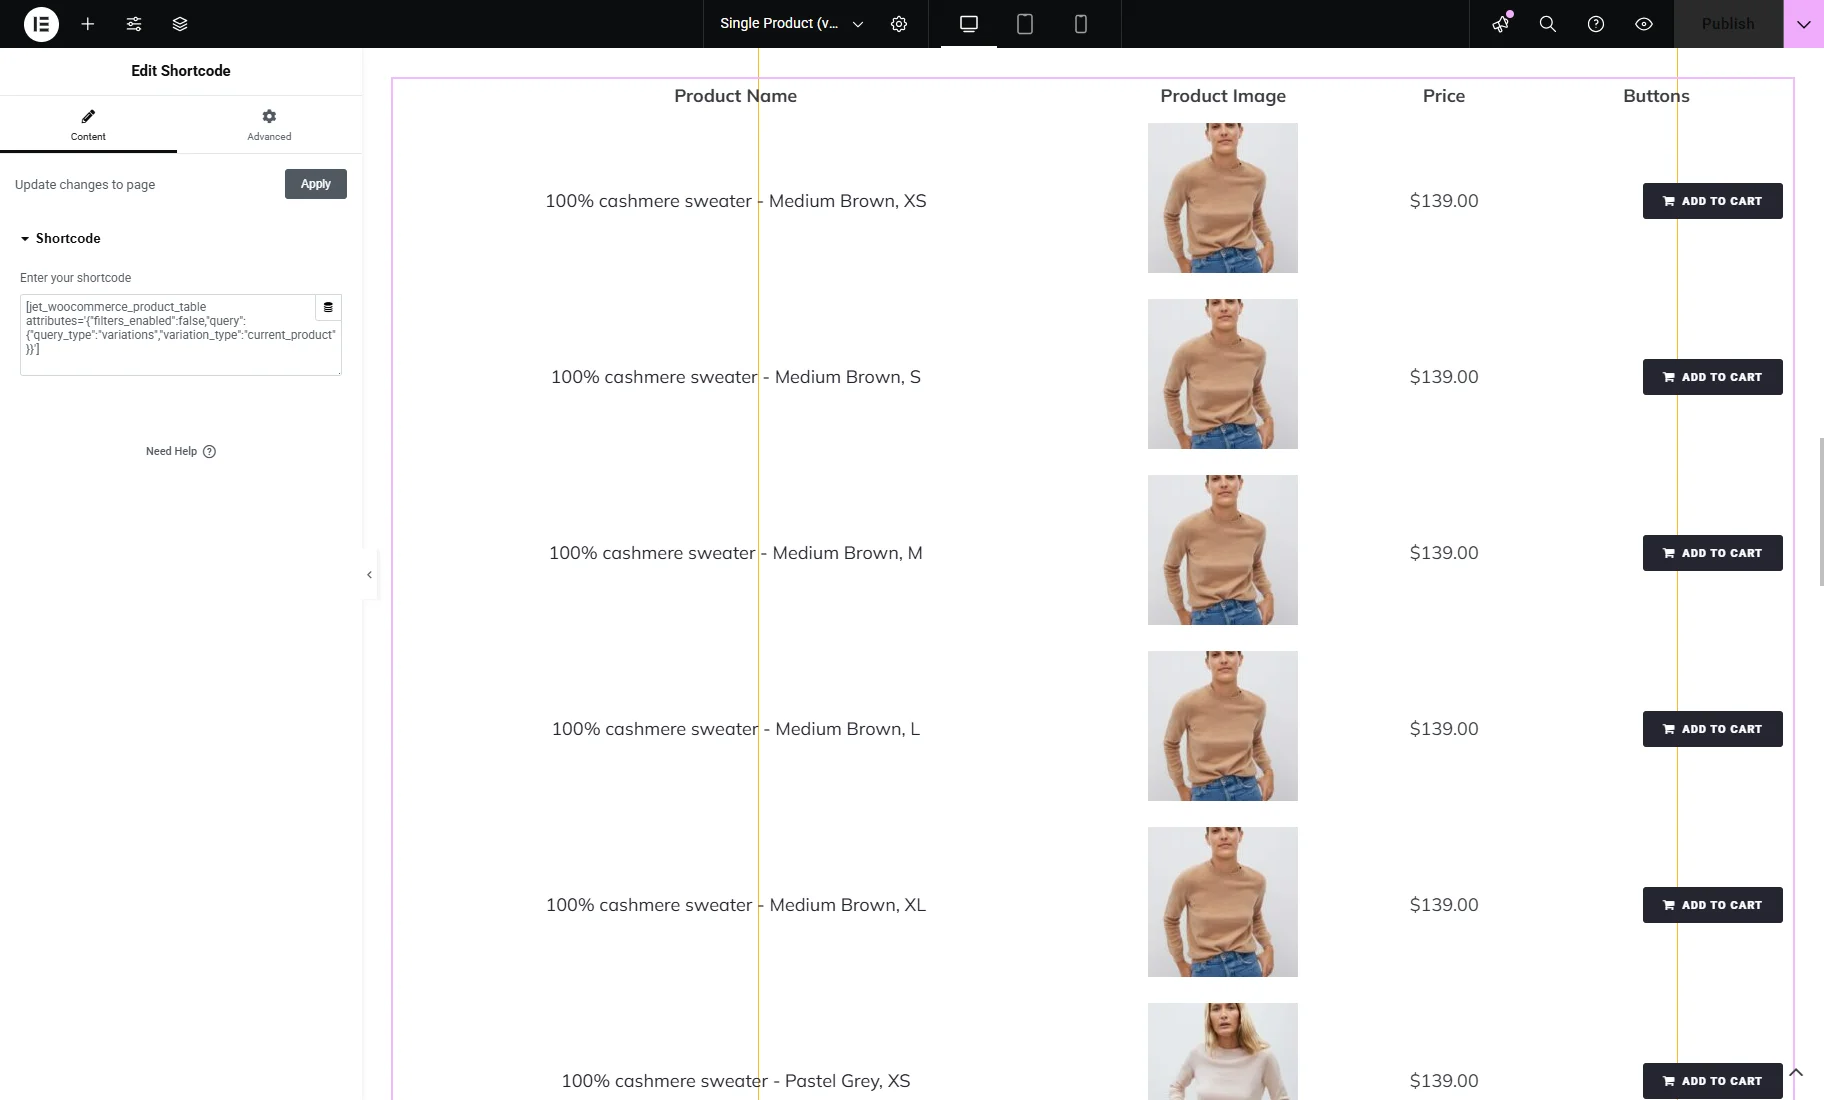
Next, you can open the Single Product Template in the Elementor editor from the WordPress Dashboard > Crocoblock > Woo Page Builder tab.
Here, add a Shortcode widget and enter the copied shortcode in the corresponding textarea field.
Using another shortcode, you can display a product table on the Products Archive template or Categories Archive template.
That’s all. Now you know how to display the variations table on the Single Product page and apply different product table designs to different WooCommerce locations with the JetProductTables plugin on your WordPress website.