How to Add a Booking Cancellation Functionality to the Site
Learn how to add booking cancellation functionality to your WordPress website with JetBooking. This guide covers the setup process and key settings.
Before you start, check the tutorial requirements:
- Elementor (Free version)
- JetEngine plugin installed and activated
- JetBooking plugin installed and activated
This tutorial shows how to enable booking cancellation in the WordPress JetBooking plugin and display it on your site. You will learn how to activate the feature, create a query and a listing to show booking details, add a dynamic cancellation link with a redirect, and manage its visibility for a smooth user experience.
JetBooking Settings
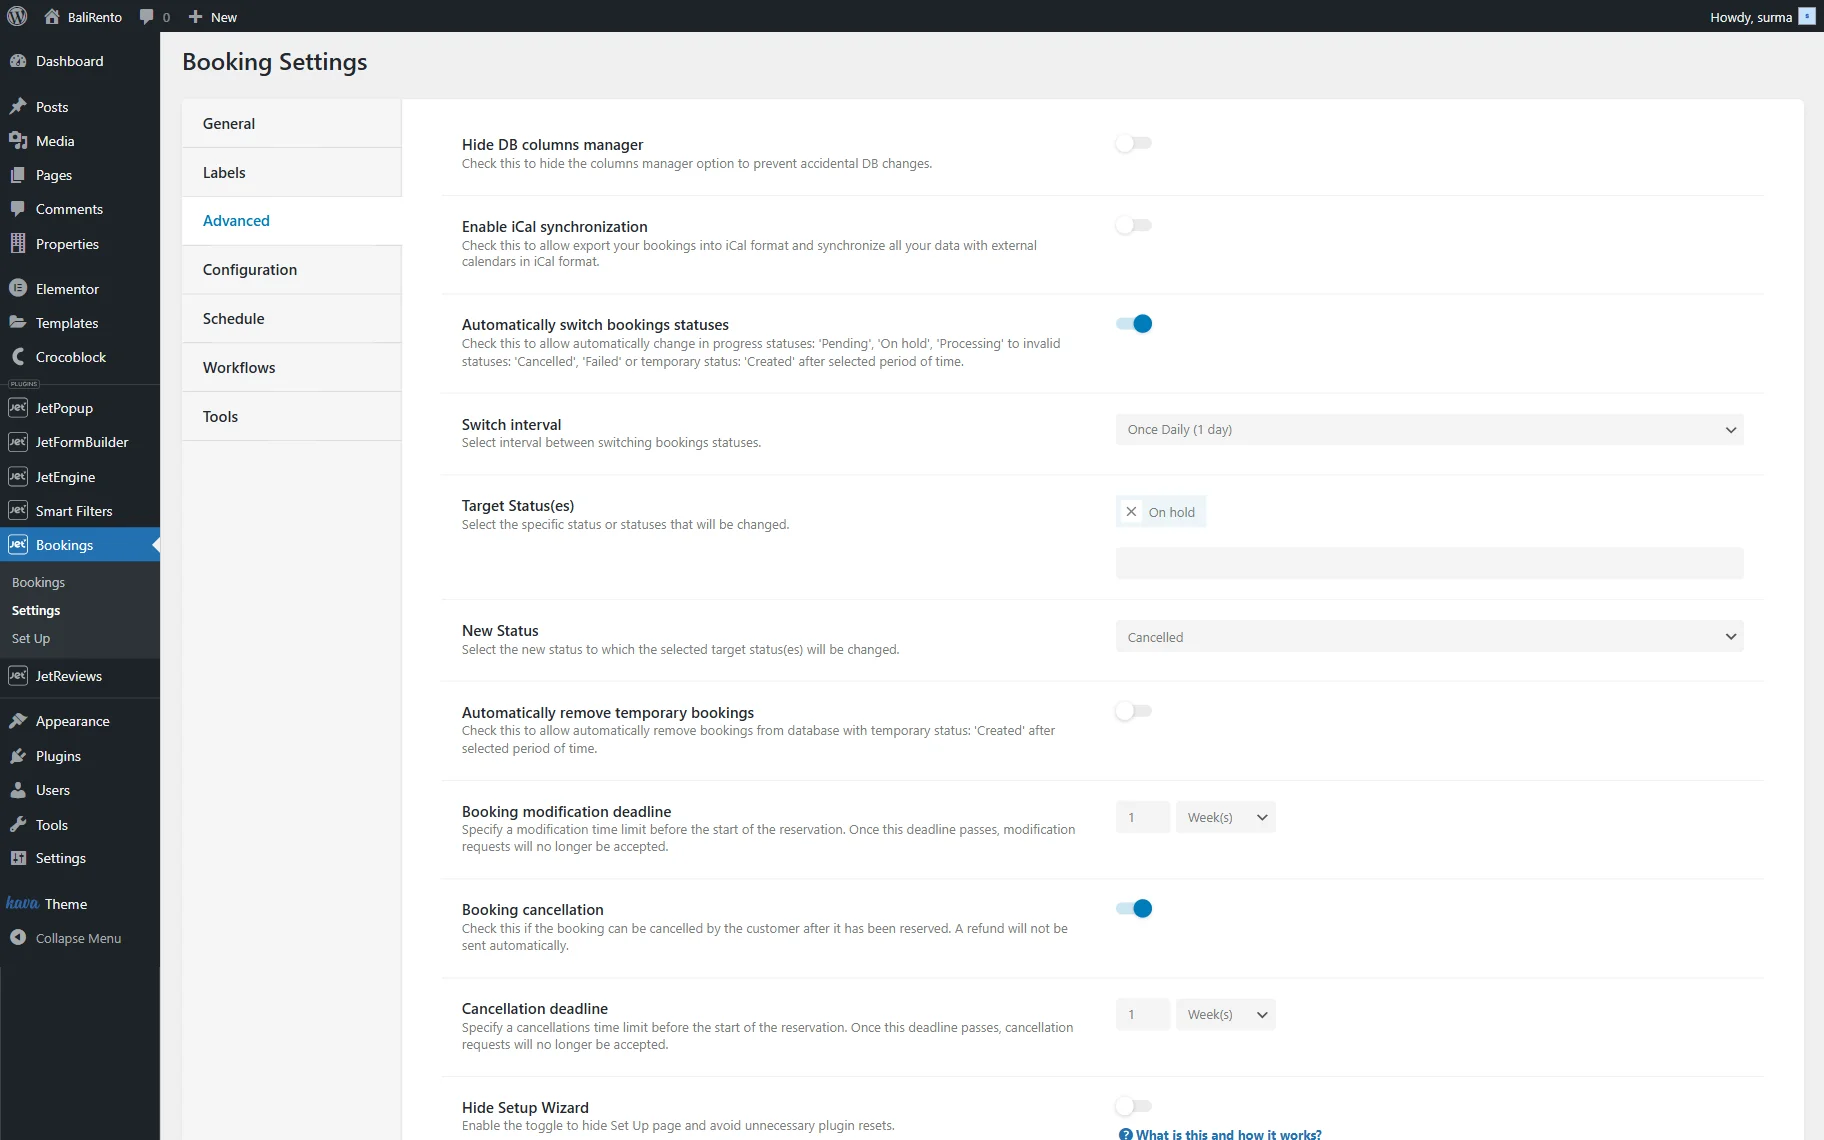
First of all, proceed to WordPress Dashboard > Bookings > Settings > Advanced and enable the Booking cancellation toggle. It allows the customer to cancel the booking after it has been reserved. A refund will not be sent automatically.
Additionally, the Cancellation deadline field appears, which allows specifying a cancellation time limit before the start of the reservation. Once this deadline passes, cancellation requests will no longer be accepted.
Set Up a Custom Query
Now, proceed to WordPress Dashboard > JetEngine > Query Builder and click the “Add New” button.
On the newly opened page, enter the query Name and select the “JetBooking Query” Query Type.
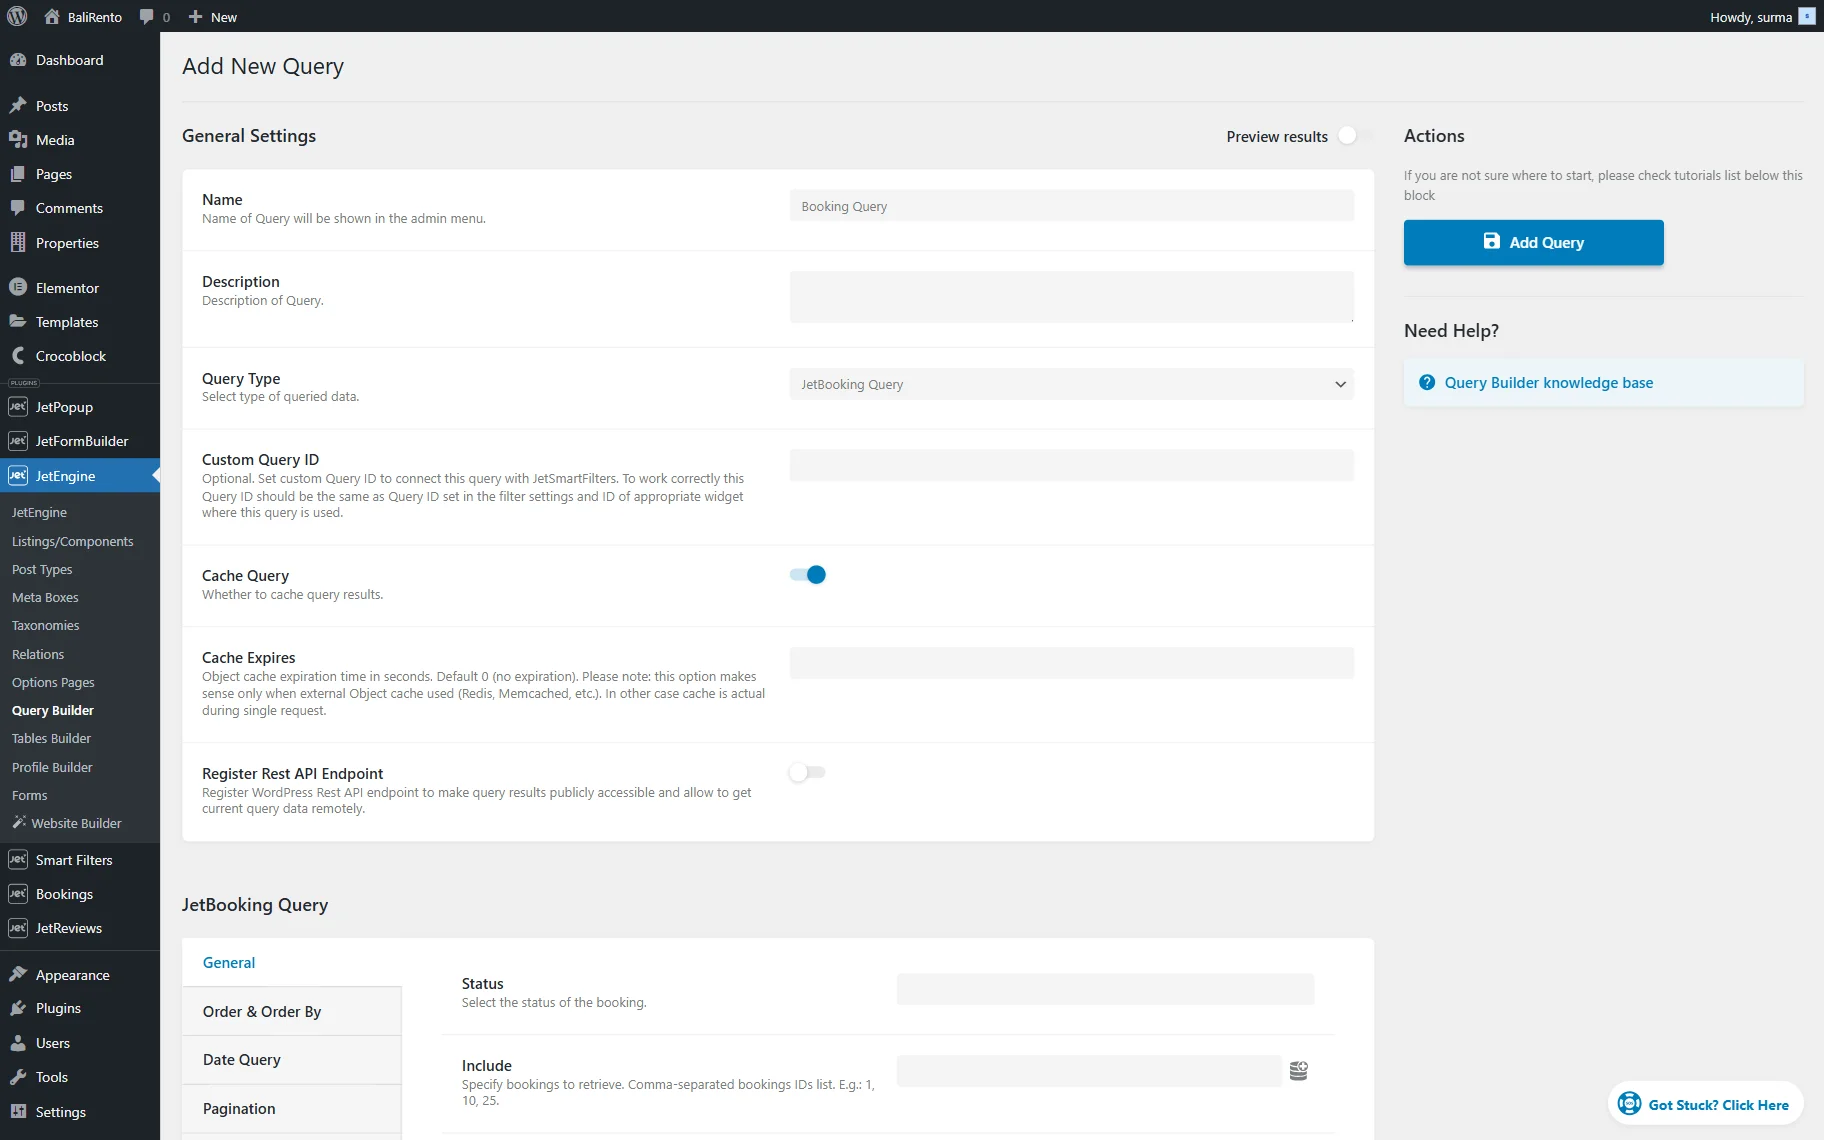
You can add some other settings to the query; we keep it simple in this case. Click the “Add Query” button once you are ready.
Create a Listing
Next, navigate to WordPress Dashboard > JetEngine > Listings/Components, and click the “Add New Item” button to set a Listing Template for the Query we created. In the newly opened pop-up, choose the “Query Builder” Listing source. Select the Query you created earlier. Enter the Listing item name and select the Listing view.
Then, click the “Create Listing Item” button.

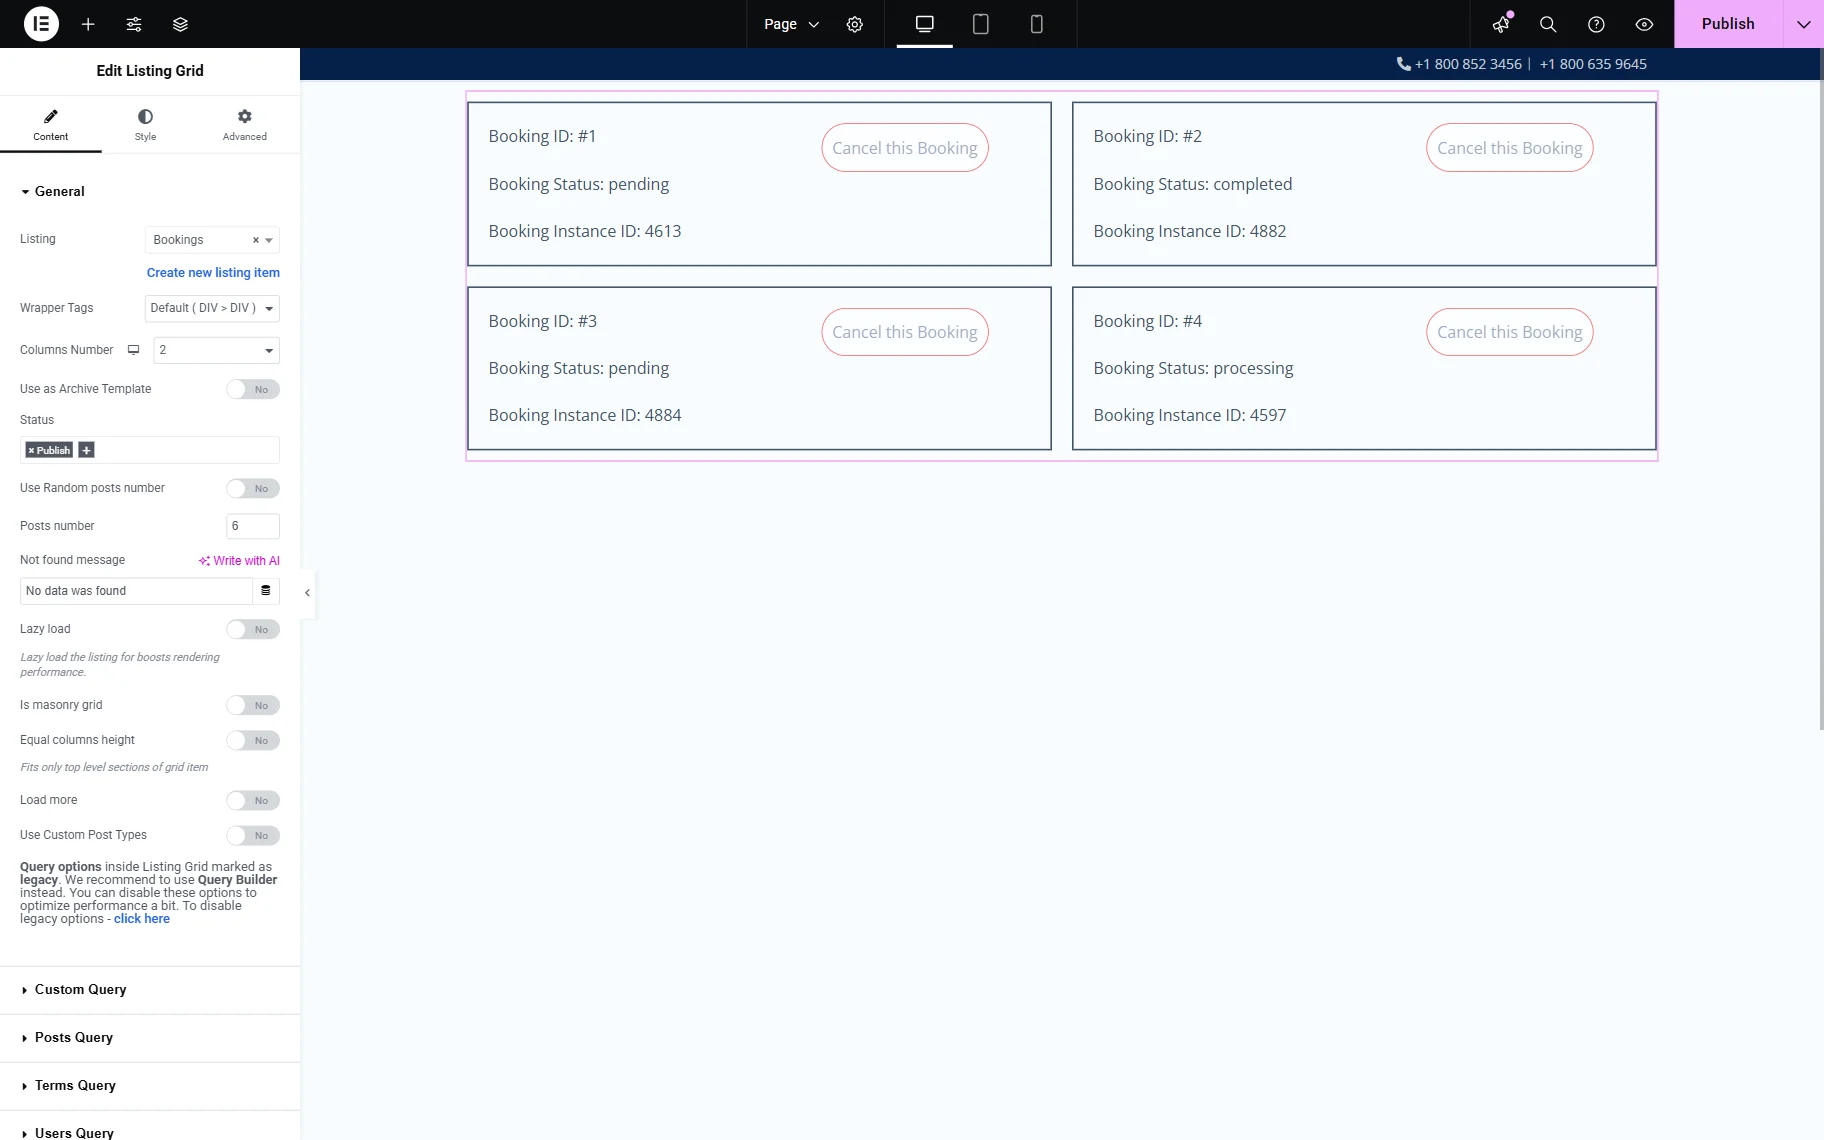
When the Elementor editing page is opened, you can display the booking data with the help of the Dynamic Widgets.
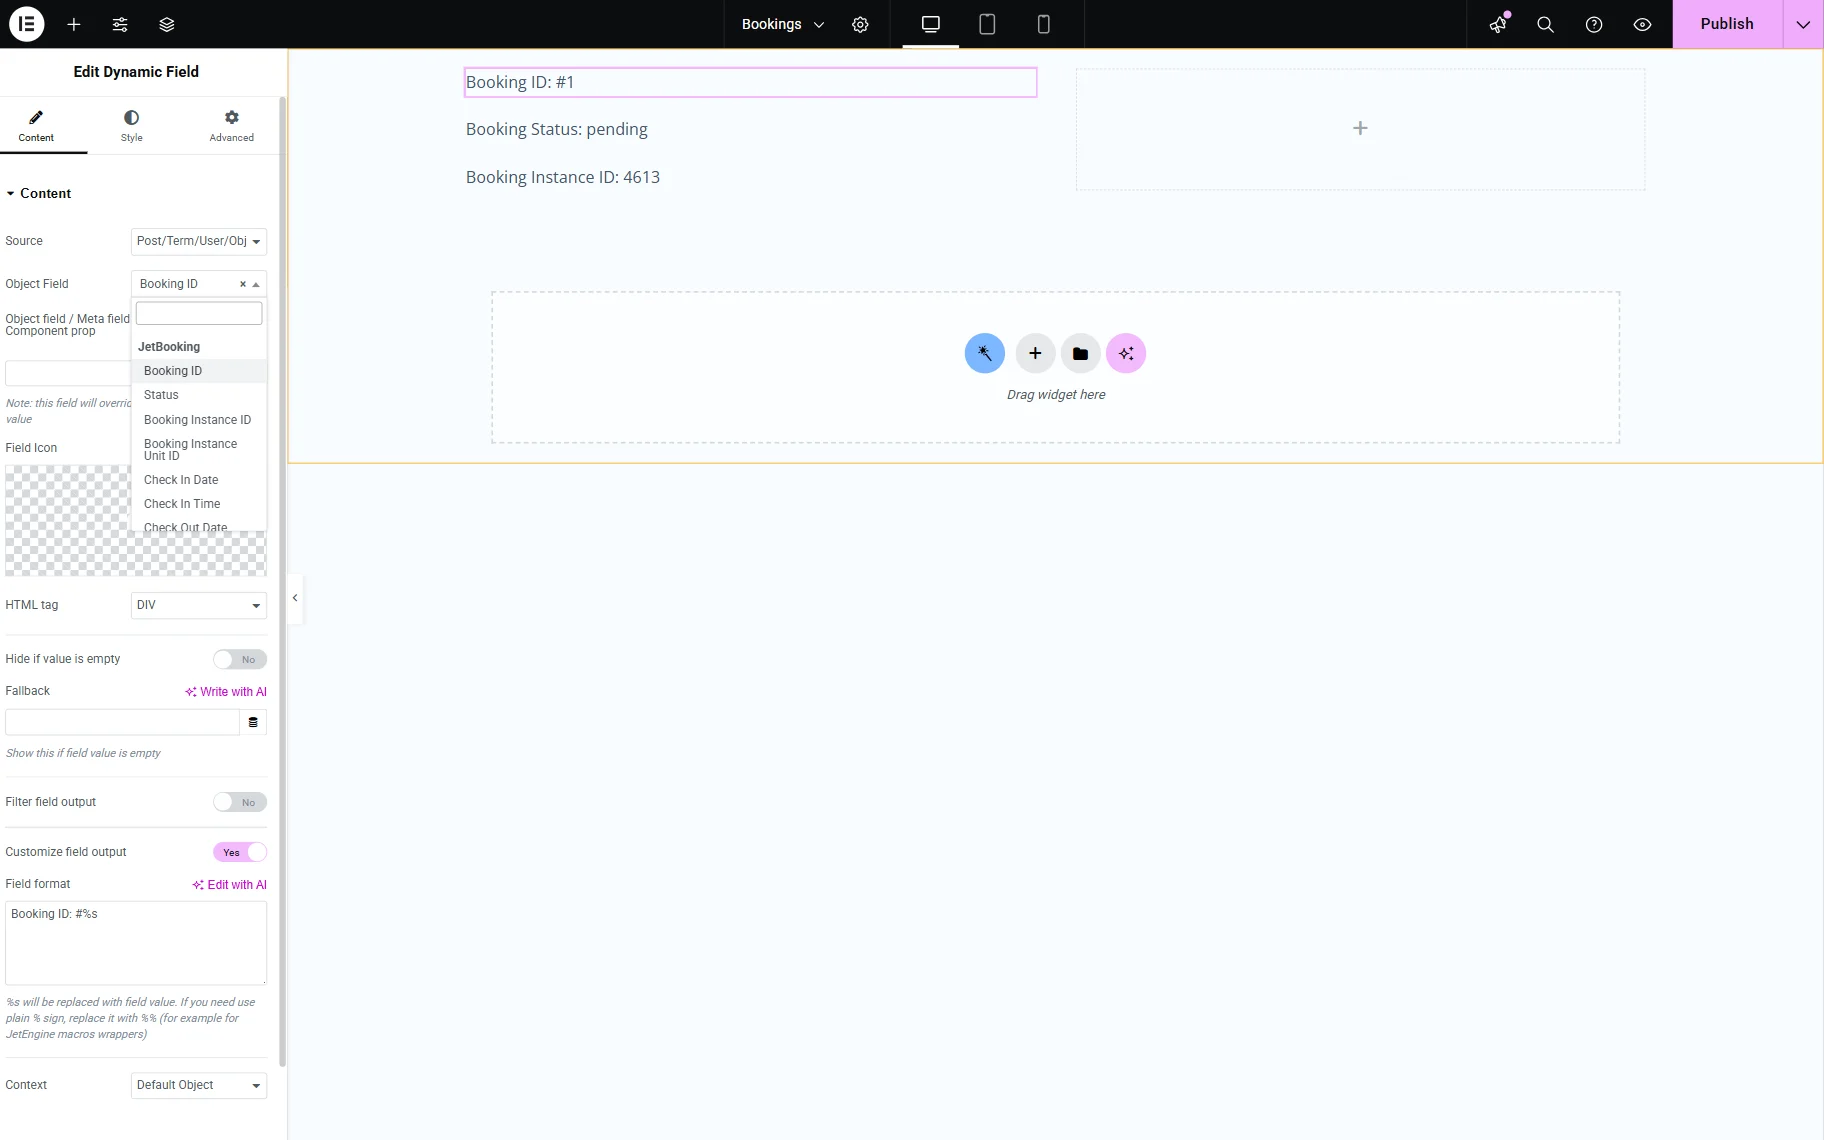
Add the Dynamic Link widget. In the Source field, scroll down to the JetBooking section and select the “Cancel Link” option. You can also add the Redirect URL.
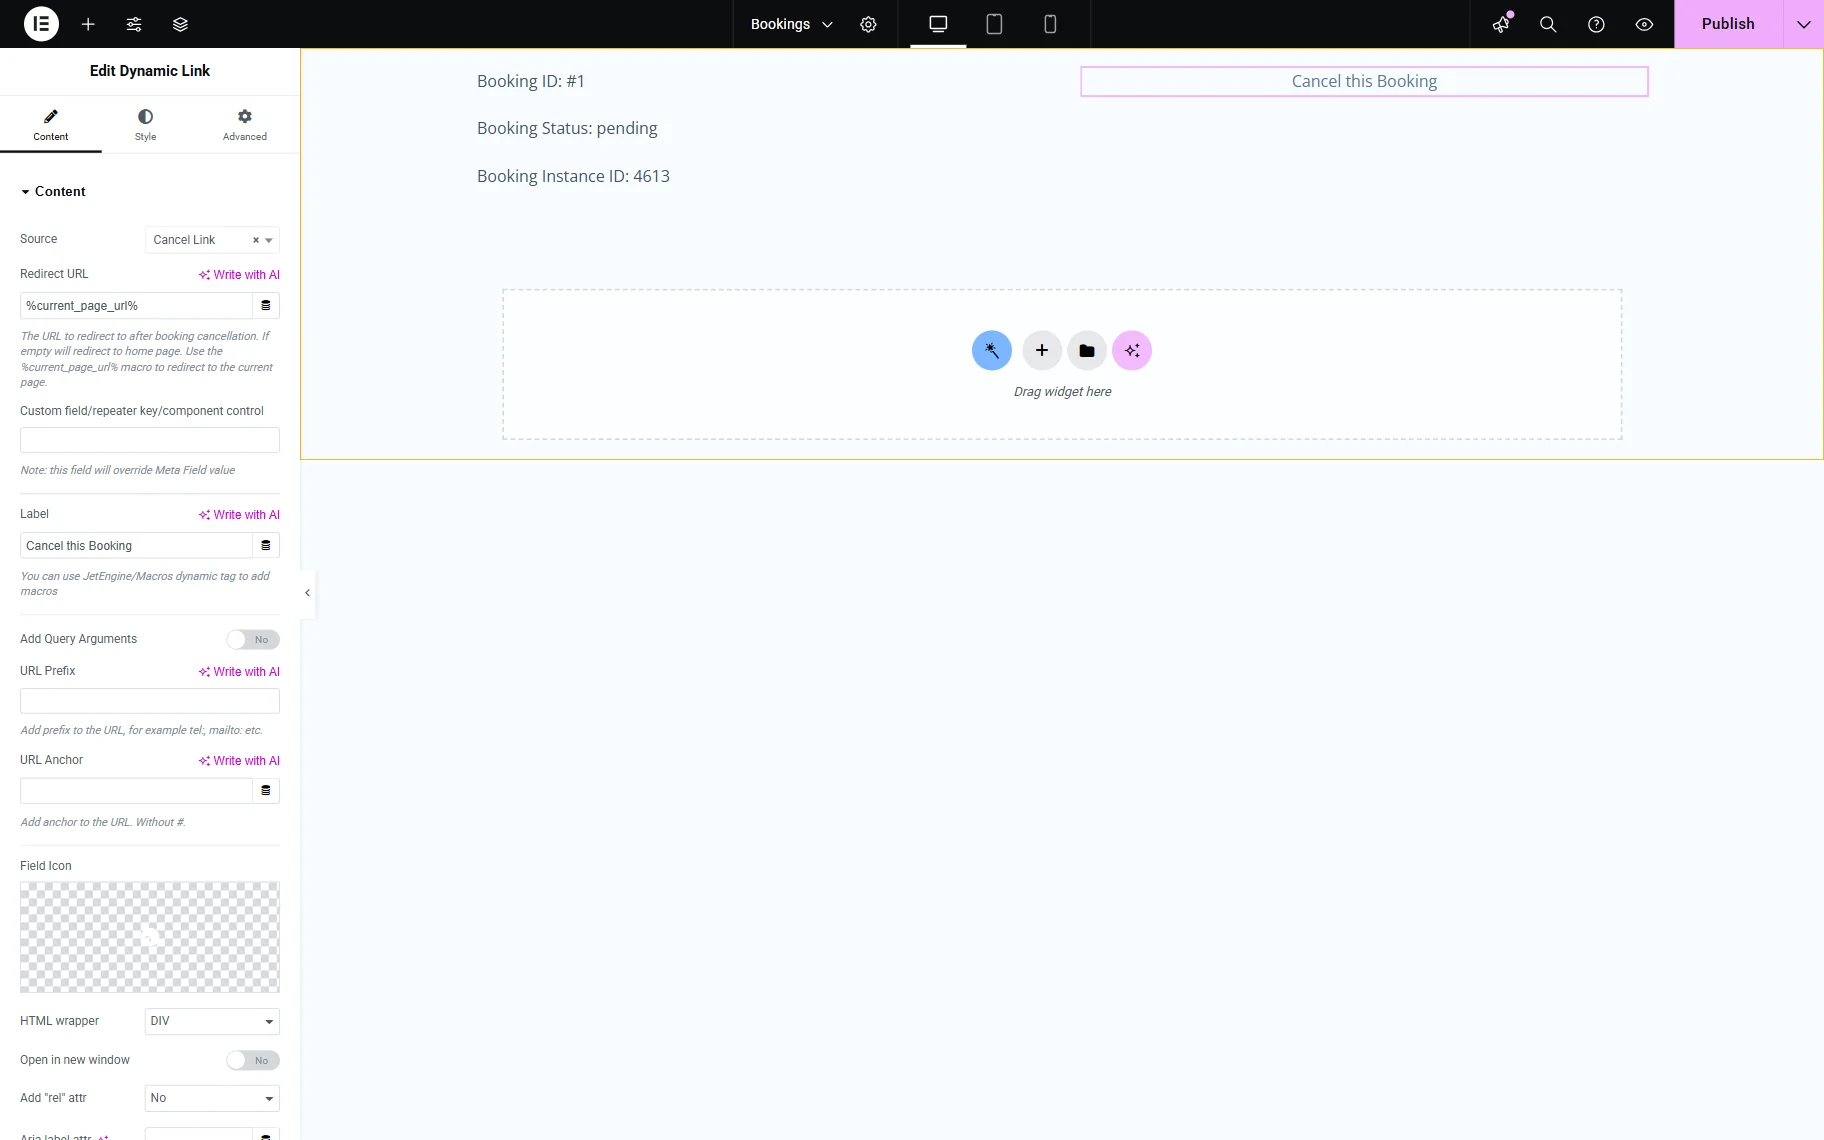
Optionally, the Dynamic Visibility setting for the Dynamic Link widget can be used to show the widget only when the booking is cancellable.

Once you are ready with the setup, click the “Publish” button.
Add the Listing to the Page
Proceed to the page where you need to add the listing. Open it in the Elementor editor and add the Listing Grid widget, and select the listing you created in the Listing field.
Click the “Publish” button once you are ready.
Check the Result
Proceed to the front end page. You can cancel any of the bookings here.
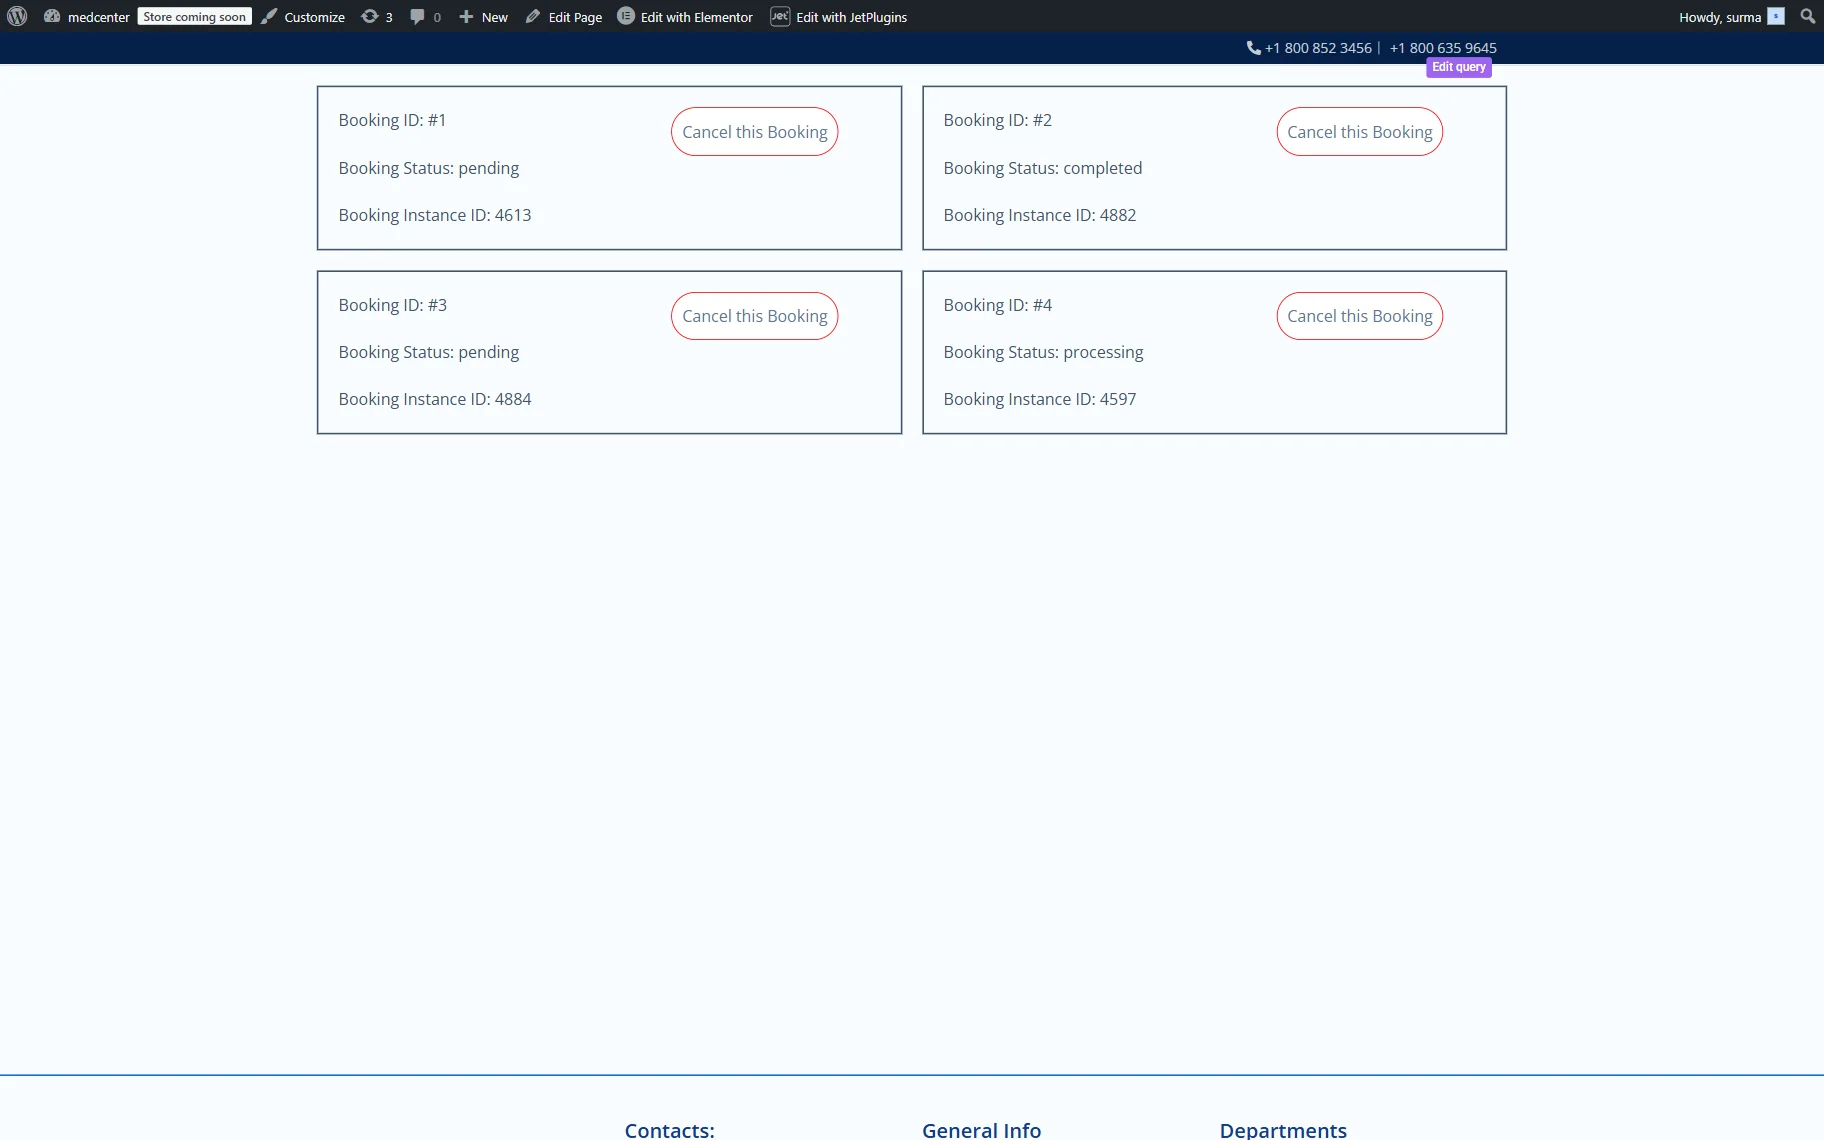
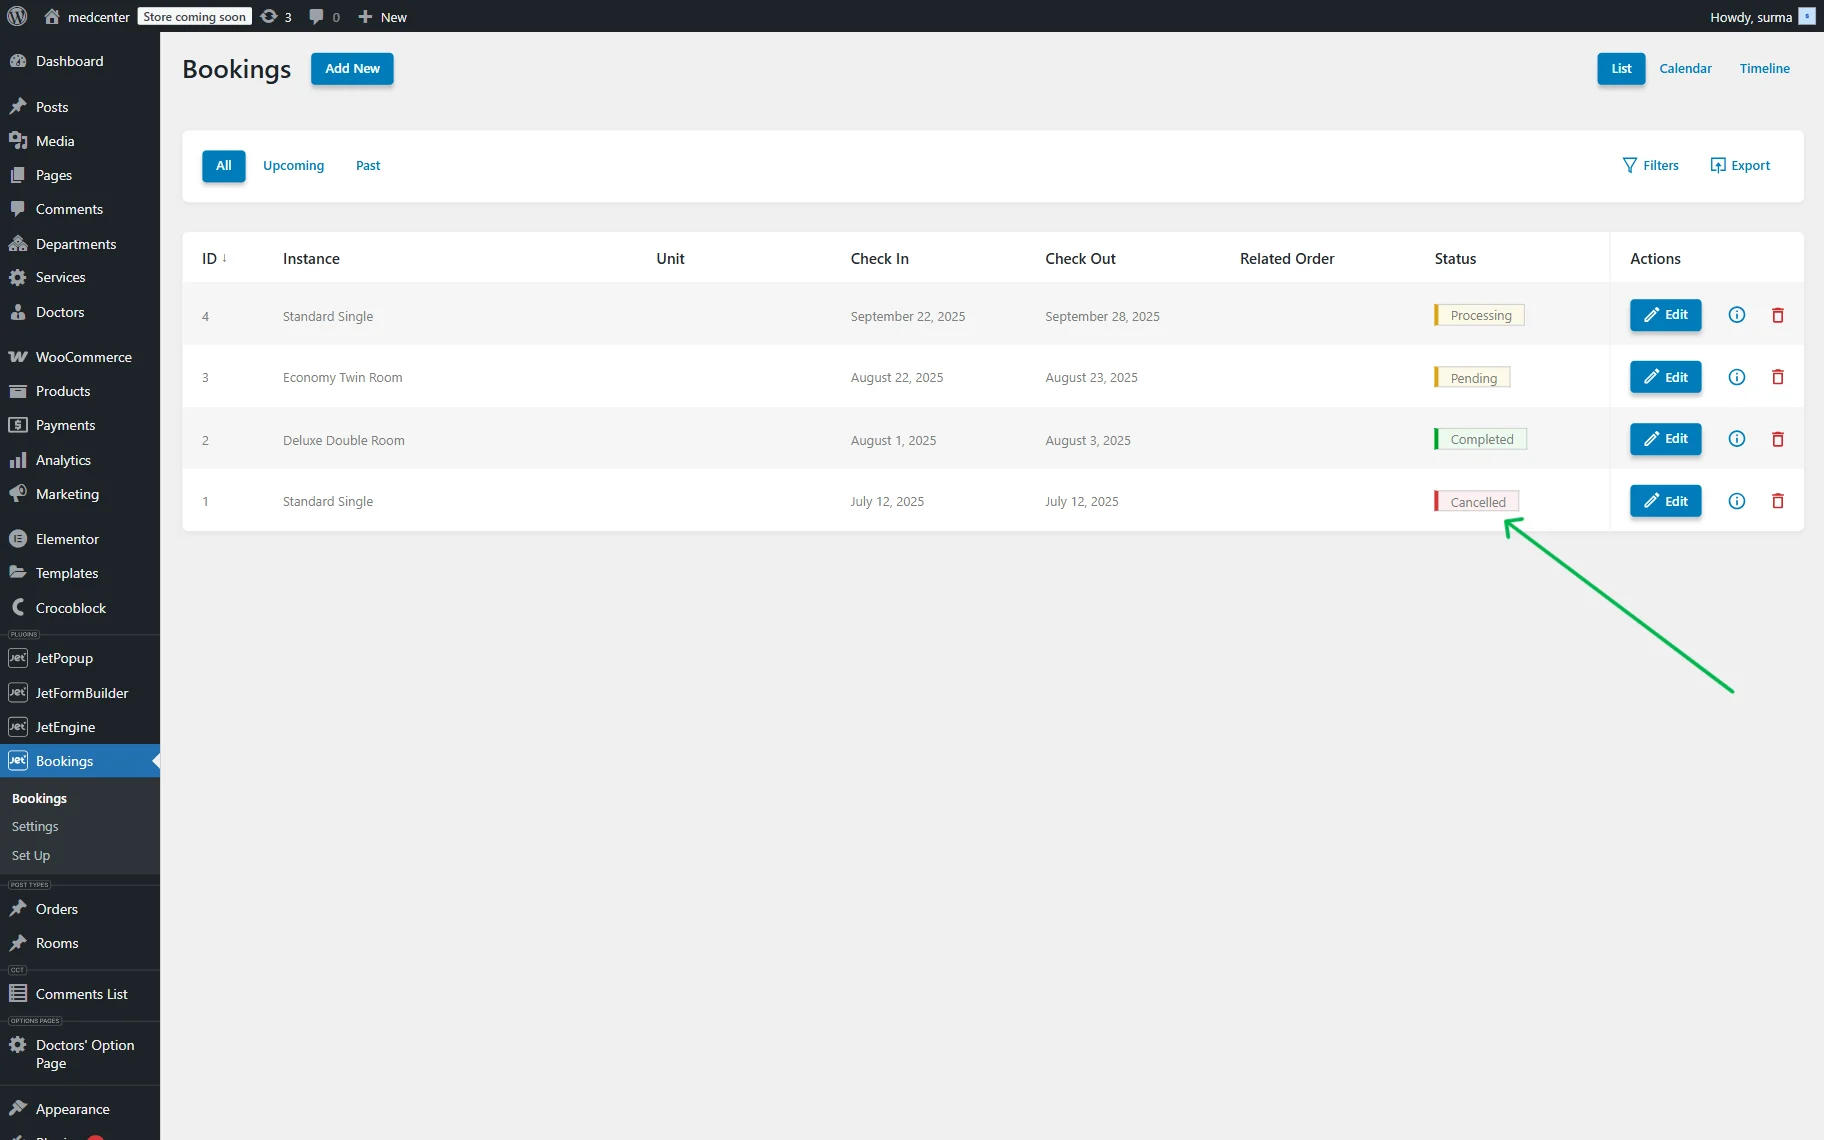
When we click the “Cancel” button for the booking item with the ID “1” and proceed to the WordPress Dashboard > Bookings > Bookings, the booking with the ID “1” is cancelled.
That’s it. Now you know how to enable booking cancellation in the WordPress JetBooking plugin and display it on your site.