How to Add Form to WordPress Website via Bolt
Learn how to add a form to your WordPress website using Bolt AI Builder, JetEngine, and JetFormBuilder. Generate a form from CCT, set up endpoints, create a prompt, and integrate it into your site.
Before you start, check the tutorial requirements:
- Bolt AI builder account
- JetEngine plugin installed and activated
- JetFormBuilder plugin installed and activated
- Formless Actions Endpoints addon installed and activated
In the previous How to Build a Listing with Filters via Bolt and How to Add Pagination to the Listing via Bolt tutorials, we described how to create a website with a listing, filters, and pagination.
Here, we uncover how to add a form for adding new items using the JetFormBuilder plugin and Formless Actions Endpoints addon.
As the source, we will use the same Custom Content Type. To learn how to add a form to a website with the Query Builder, you can follow the How to Add a Form to a WordPress Website via Lovable tutorial.
The WordPress and AI Builders Integration using Crocoblock: Bolt and Lovable Cases article provides more details about the AI Builders.
Create a Form
To generate a form for adding CCT items, go to the WordPress Dashboard > JetEngine > Custom Content Types, edit the required CCT, and click the “Create New Form” button.
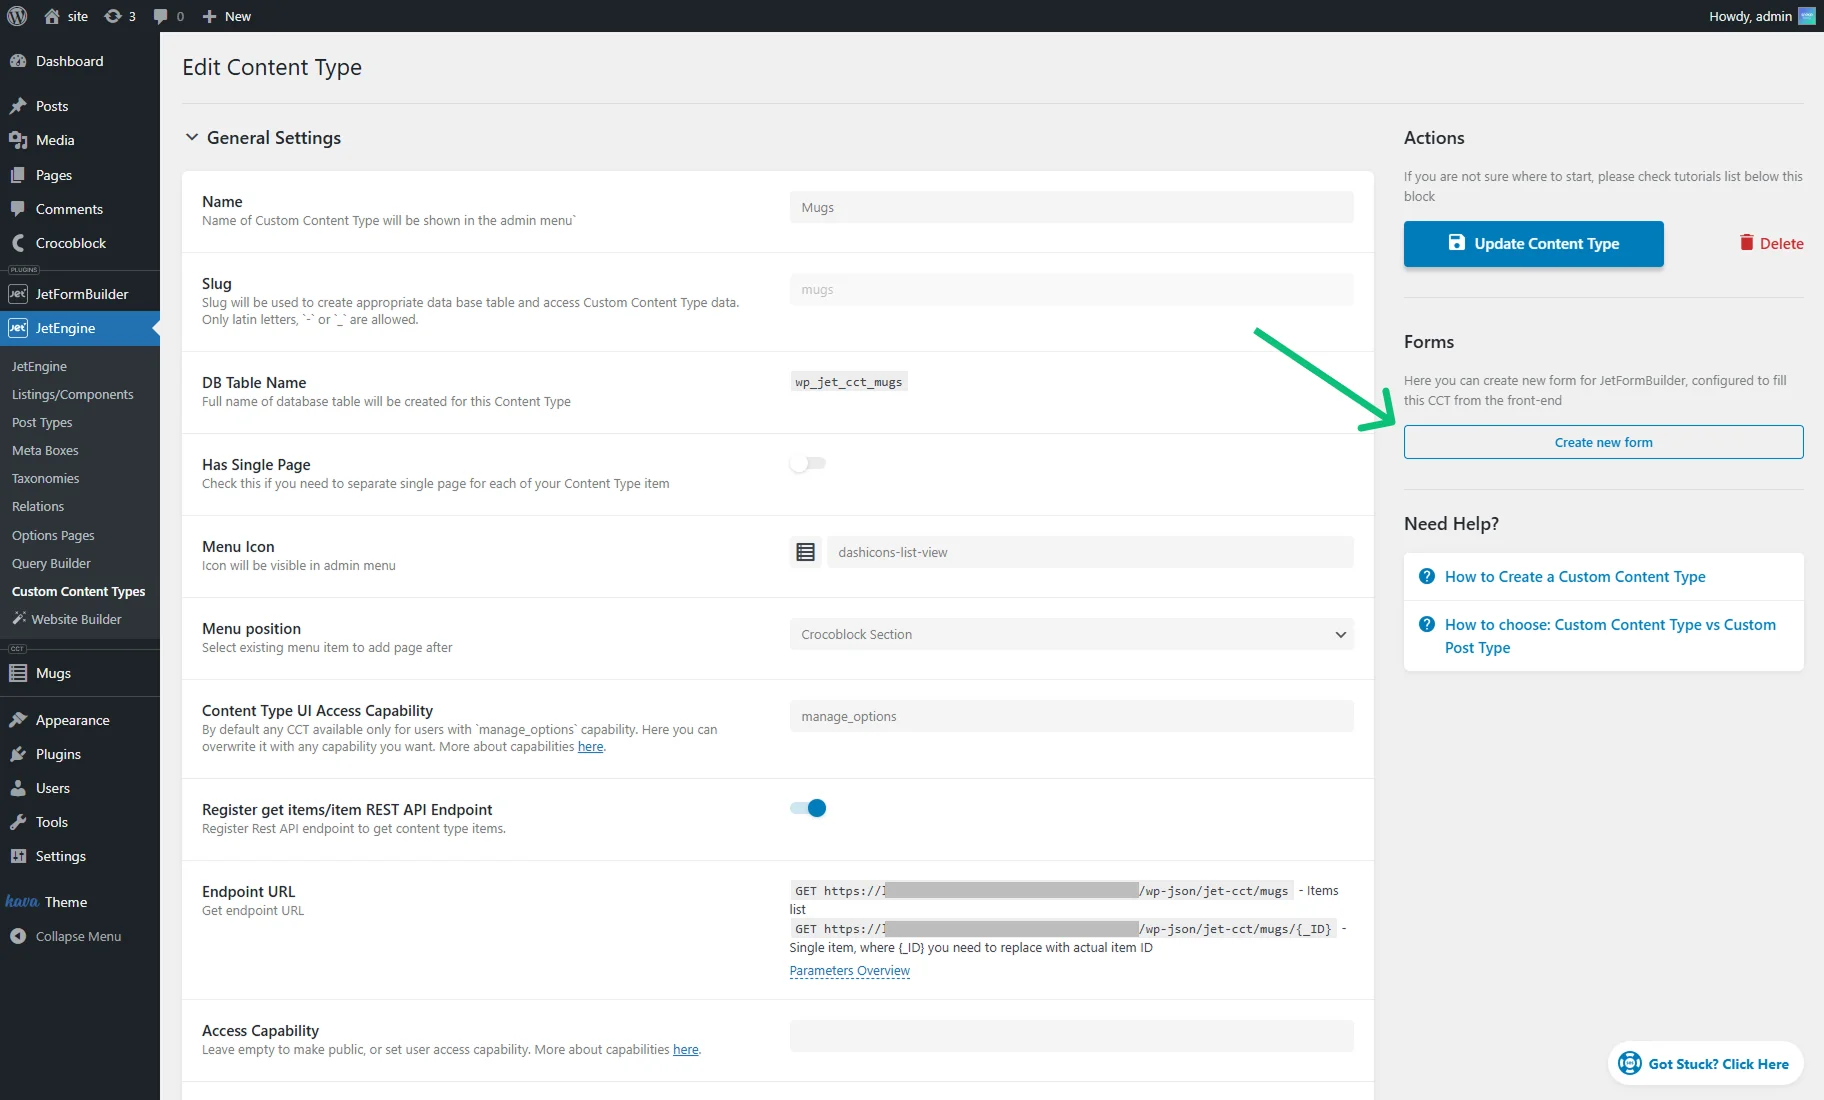
It will generate a form with fields that correspond to the CCT meta fields and the “Insert/Update Custom Content Type Item” post submit action.

Add a New Endpoint
More details can be found in the How to Set Up Front-end Submission and Approval System with Formless Actions Endpoints tutorial.
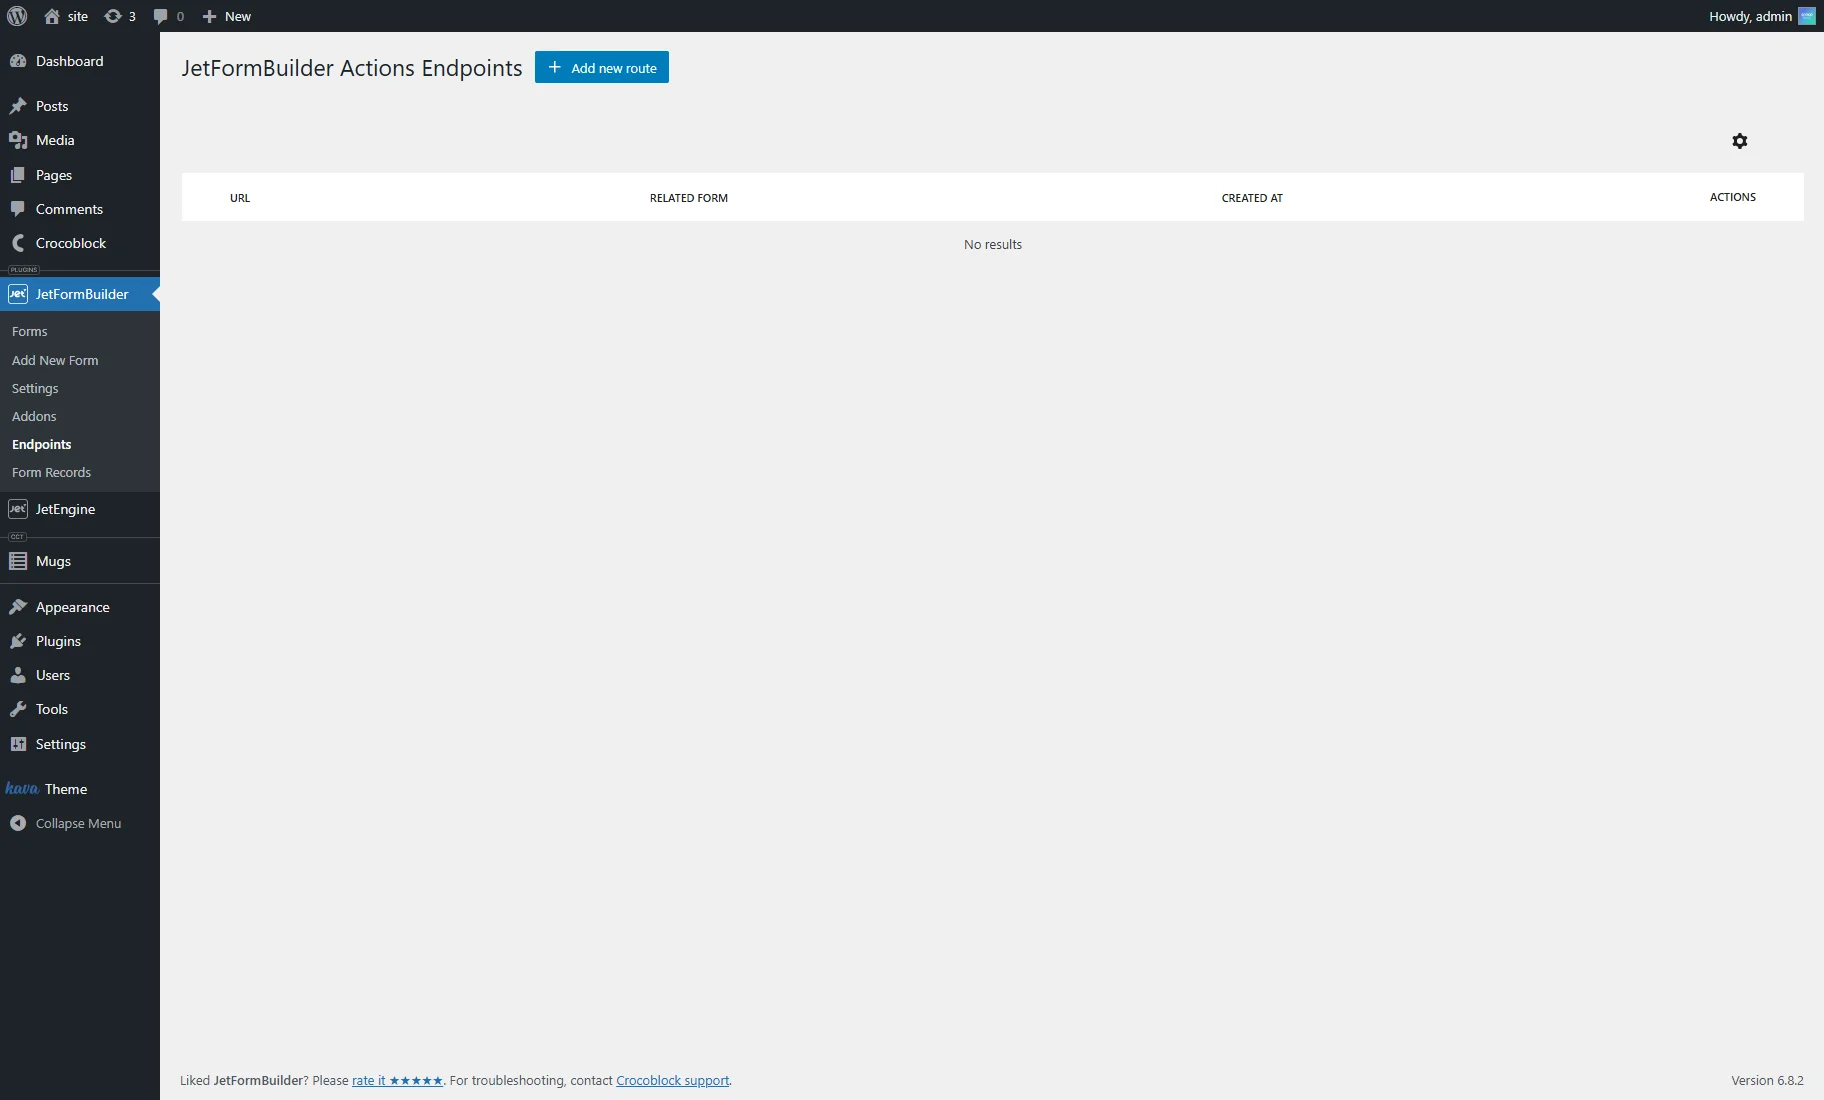
Go to WordPress Dashboard > JetFormBuilder > Endpoints and press the “+ Add new route” button.
In the Settings section, adjust such options:
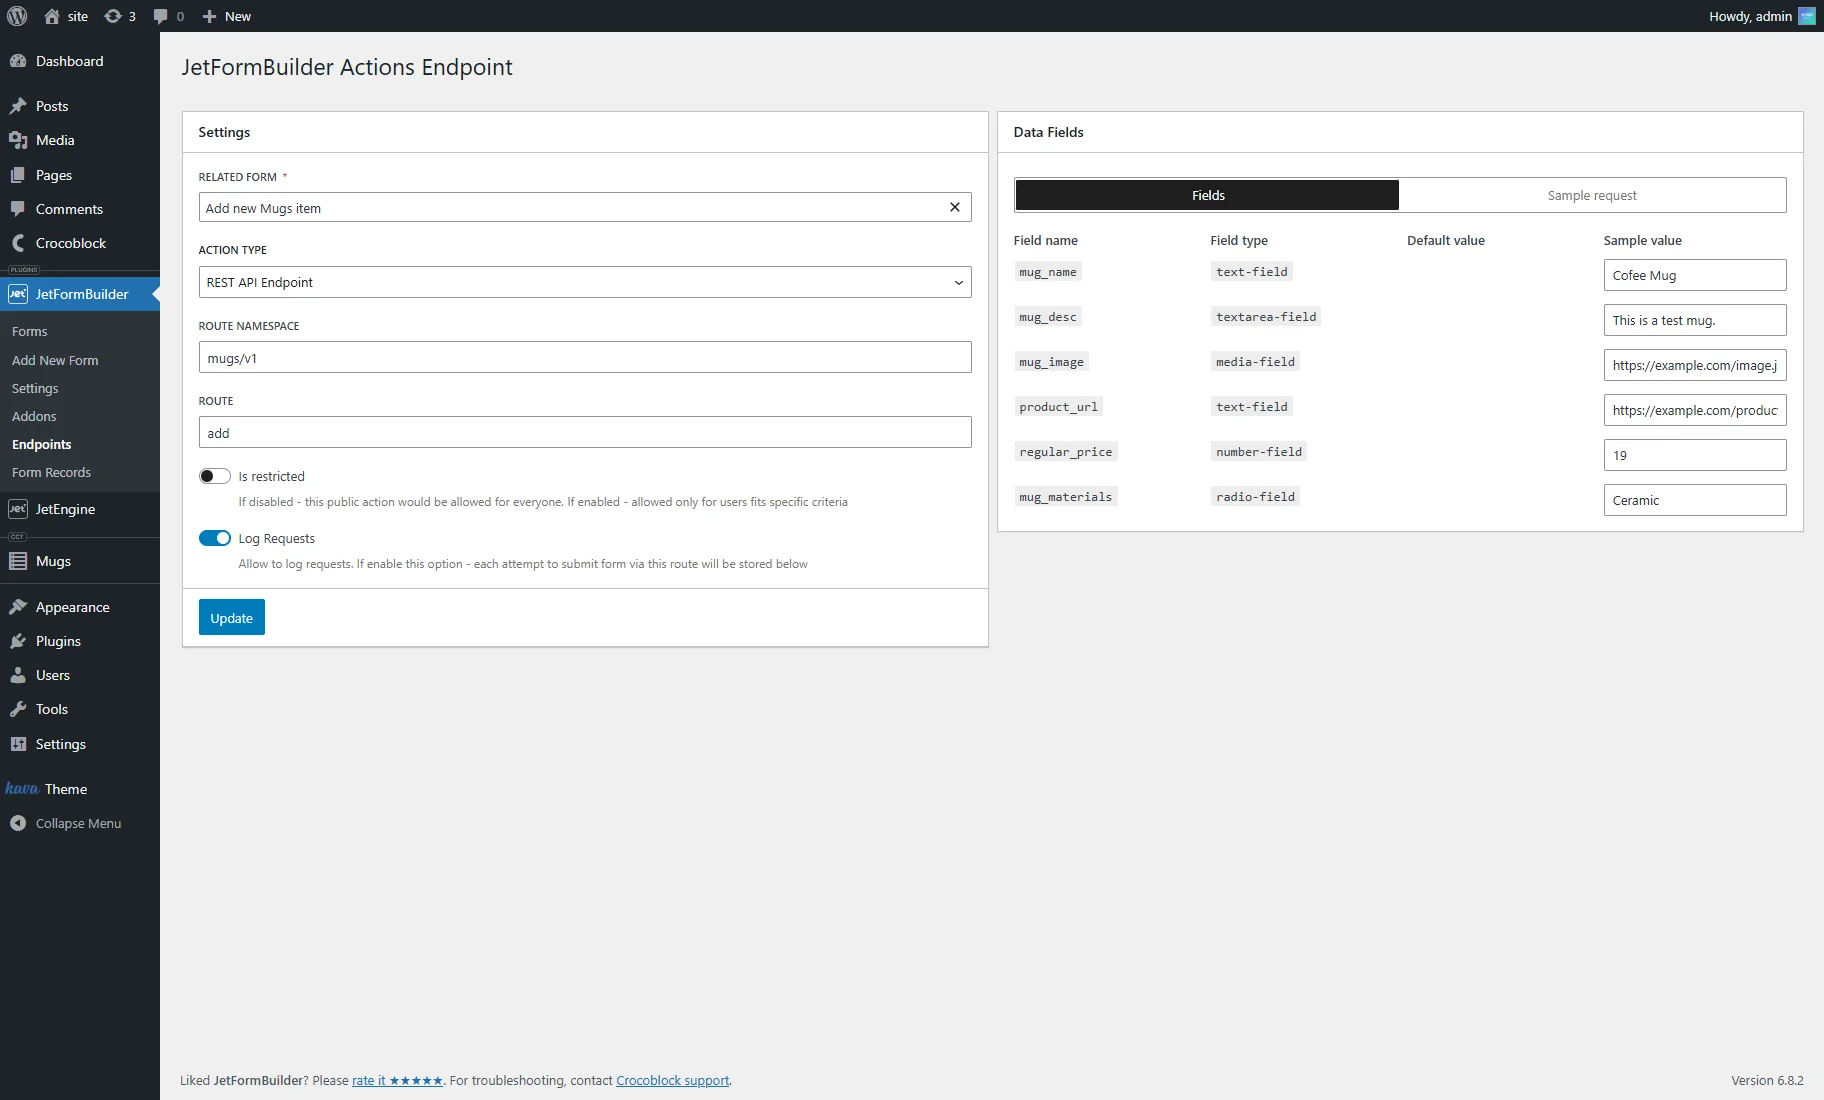
- RELATED FORM — select the required form;
- ACTION TYPE — pick the “REST API Endpoint” option;
- ROUTE NAMESPACE — enter the API group under which your route will be registered (e.g., “mugs/v1”);
- ROUTE — define the endpoint slug (e.g., “add”).
Also, if required, you can activate such toggles:
- Is Restricted — when disabled, the action is publicly accessible to anyone. When enabled, access is limited to users who meet specific criteria, ensuring controlled and secure access;
- Log Requests — when enabled, every form submission attempt through this route will be recorded, providing a detailed log of all form interactions for auditing and analysis.
In the Fields tab of the Data Fields section, you can set the Sample value for the required form fields.
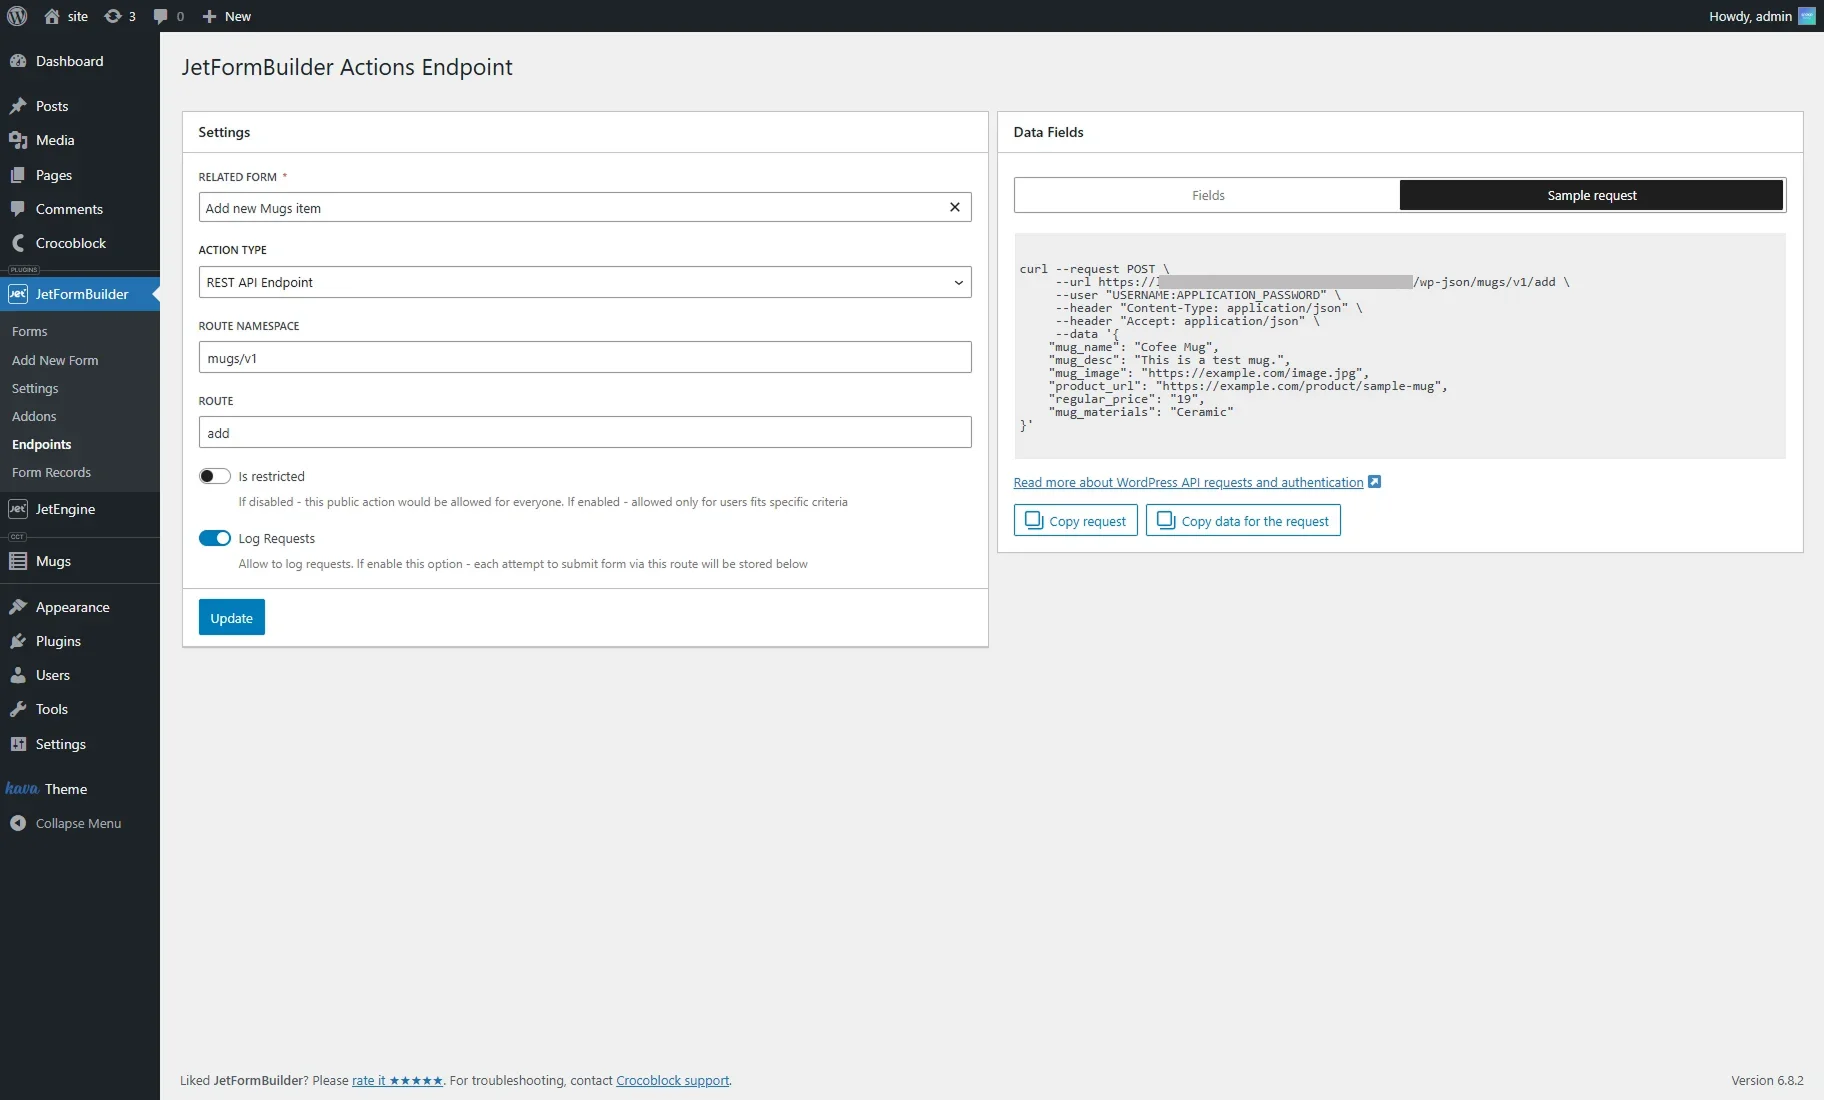
Next, open the Sample request tab and click the “Copy request” button to include it in the prompt.
Create a Prompt
Provide instructions to the AI builder:
- Describe the required form;
- Add the endpoint URL;
- Include the example request data, as noted above.
In our case, we enter such a prompt:
Build a front-end React form for adding new mugs to the website.

Form fields:

Mug Name → mug_name (text, required)

Description → mug_desc (textarea, optional)

Price → regular_price (number, required, min=0)

Materials → mug_materials (radio, optional)

Upload Image → mug_image (file input, accept only image/*, allow null if none)

Product URL → product_url (text, optional, default null)

Submit button: styled, disabled while submitting.

Use form validation with inline error messages.

On submit, send a POST request to this API endpoint:

curl --request POST \
     --url https://example.com/wp-json/mugs/v1/add \
     --user "USERNAME:APPLICATION_PASSWORD" \
     --header "Content-Type: application/json" \
     --header "Accept: application/json" \
     --data '{
    "mug_name": "Cofee Mug",
    "mug_desc": "This is a test mug.",
    "mug_image": "https://example.com/image.jpg",
    "product_url": "https://example.com/product/sample-mug",
    "regular_price": "19",
    "mug_materials": "Ceramic"
}'

Map the form fields to the JSON body keys shown above.

Show success message on completion, or error if request fails.

Add the form inside a pop-up that can be opened with the “+ Add New Mug” button.
Check the Result
After that, a form is added to the website with a listing, filters, and pagination. To open it, we press the “+ Add New Mug” button.

It opens a pop-up with the form that can be filled in and submitted. After that, a new item will be added to the website generated with Bolt and to WordPress as a CCT item.

That’s all. Now you know how to add a form to your WordPress website using Bolt AI Builder, JetEngine, and JetFormBuilder.