How to Add a Form to a WordPress Website via Lovable
Follow this step-by-step guide to learn how to add a form to your website via Lovable using JetEngine and JetFormBuilder WordPress plugins.
Before you start, check the tutorial requirements:
- Being signed in to the Lovable platform
- JetEngine plugin installed and activated, with a Custom Content Type created
- JetFormBuilder plugin installed and activated
Learn how to add a form to your website using the Lovable AI website builder. This tutorial shows you how to connect a form via JetFormBuilder and JetEngine’s REST API endpoints, embed it into your Lovable project, and customize its settings to start collecting submissions directly on your site.
From our WordPress and AI Builders Integration using Crocoblock: Bolt and Lovable Cases article, you can learn about the integration with Crocoblock. In this guide, we focus on adding the form to the website.
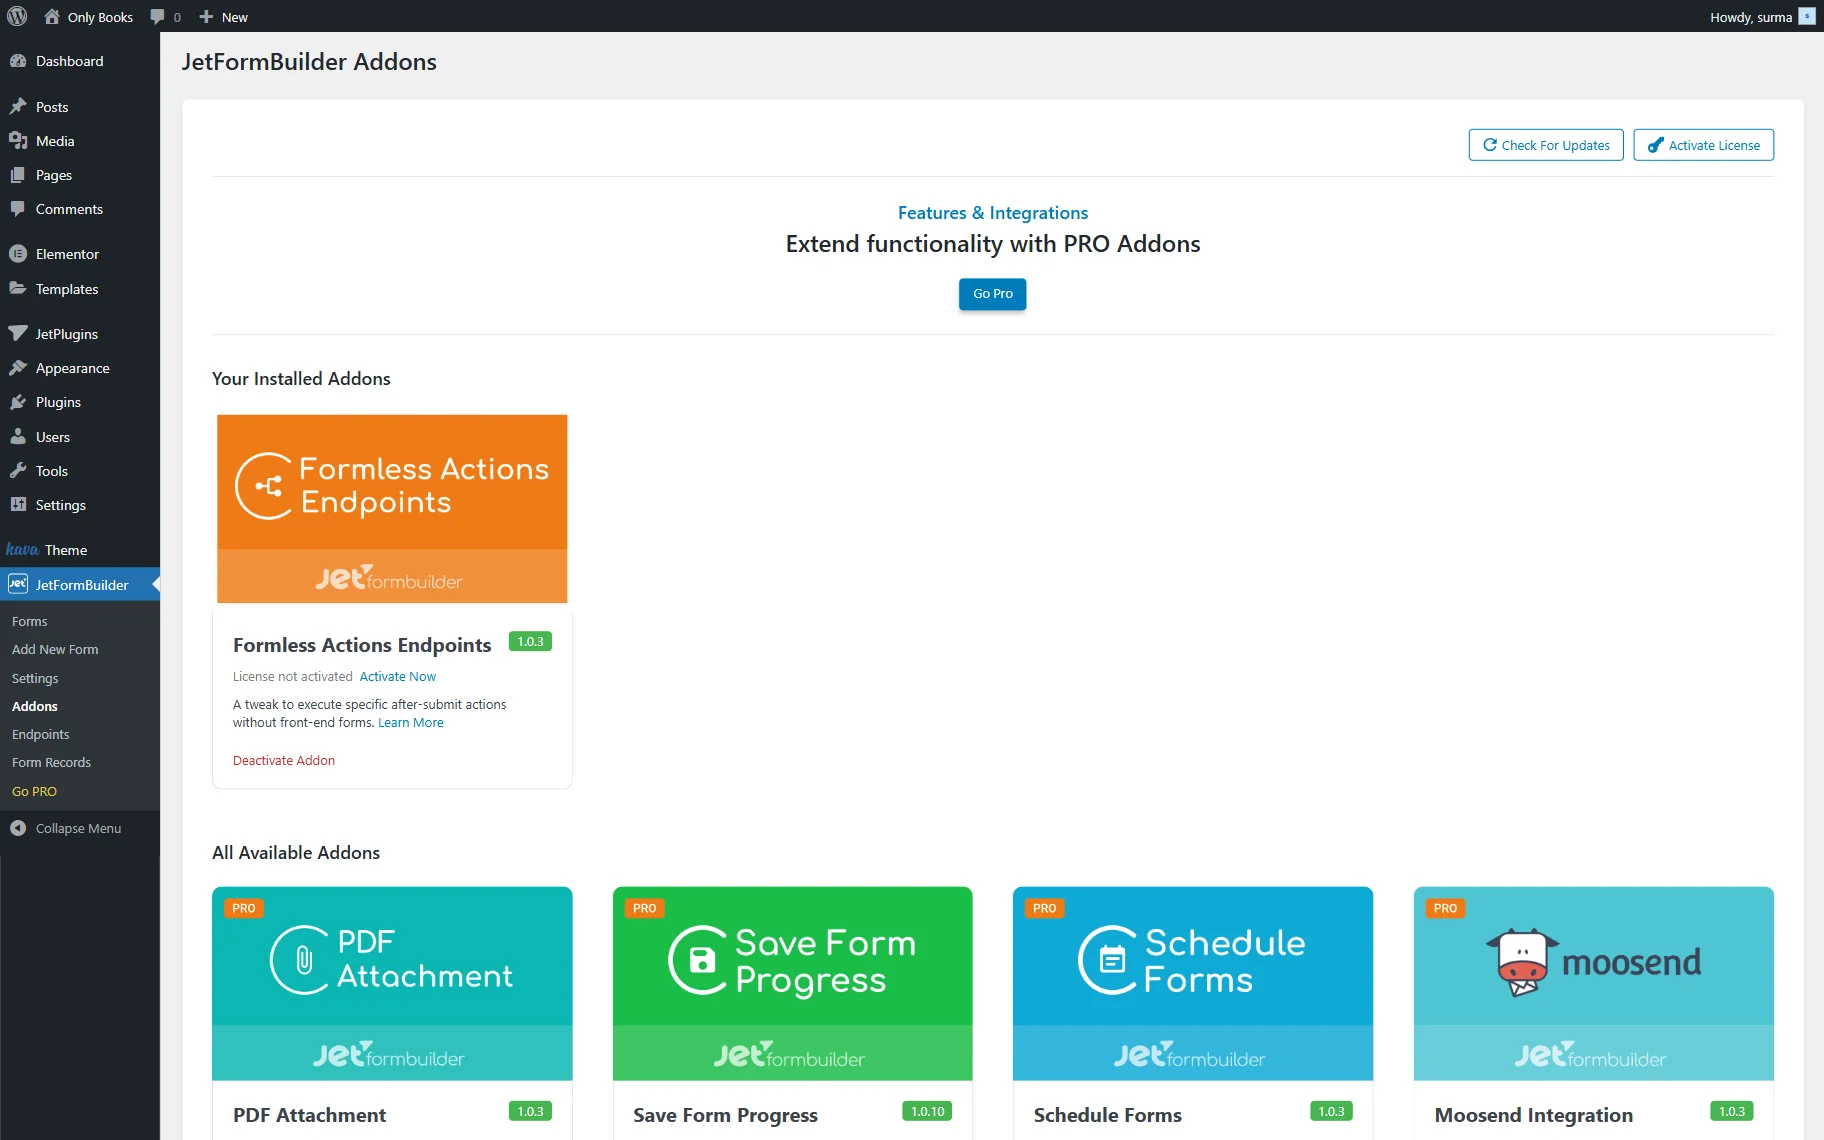
Install the Formless Actions Endpoints Addon
To install the add-on, go to WordPress Dashboard > JetFormBuilder > Addons tab and find the Formless Actions Endpoints addon in the All Available Addons section.
Press the “Install Addon” button, and once installed, it will appear in the Your Installed Addons section.
Click the “Activate Addon” button.
Create a Form
Navigate to the WordPress Dashboard > JetFormBuilder > Add New tab to create a new form.
The new form will be opened in the Gutenberg block editor.
Press the “Start from scratch” button in the Welcome block to create your custom form.
The Welcome block will be closed, and the Hidden Field, the Text Field, and the Action Button will be added by default.
Type the form’s name instead of the “Add title” placeholder. Also, check how to build forms from the Form Creation tutorial.
Add all the fields to the form, which are expected to be displayed on your site.
As an example, we add three Text Fields, a Media Field, several Checkbox Fields, and a Textarea Field.
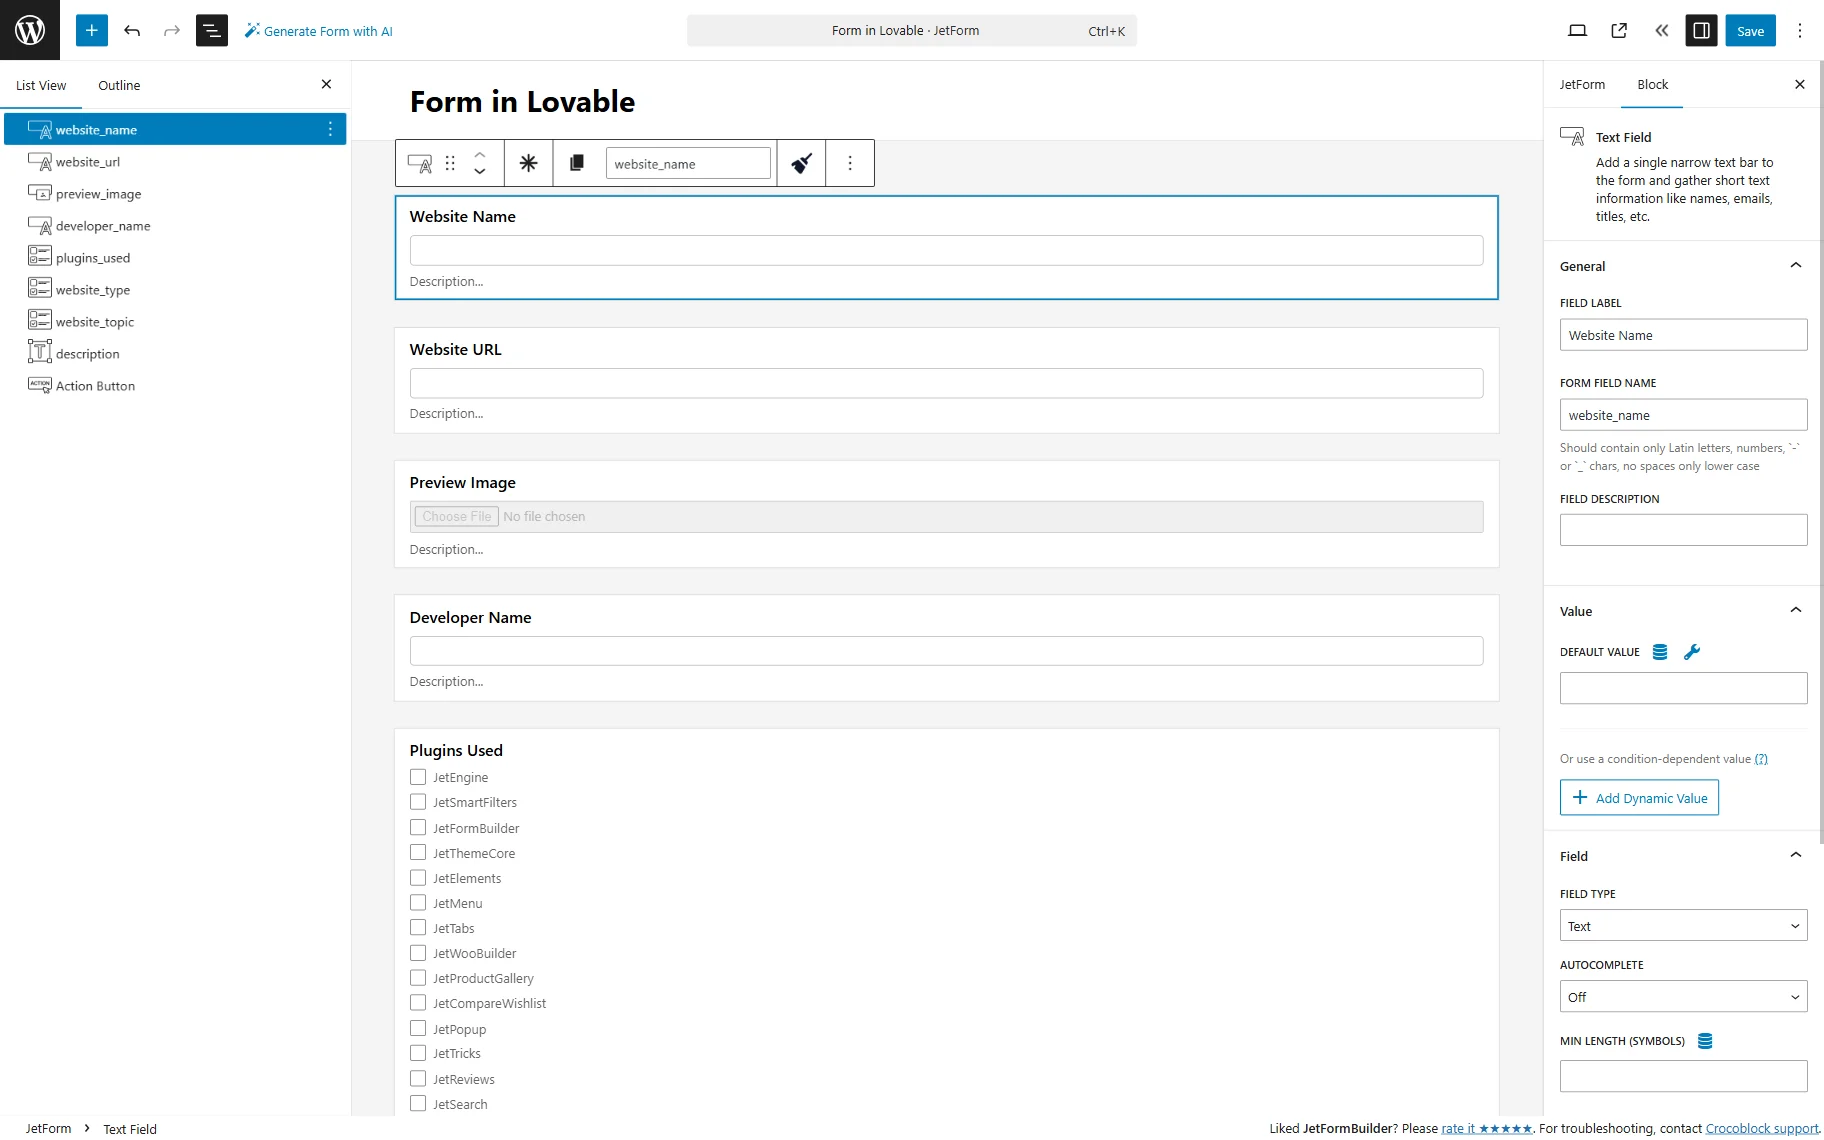
Do not add any styling settings in the form itself. Try to use the same field types as you need them to be displayed on the front end.
Click the “Save” button once you are ready with the settings.
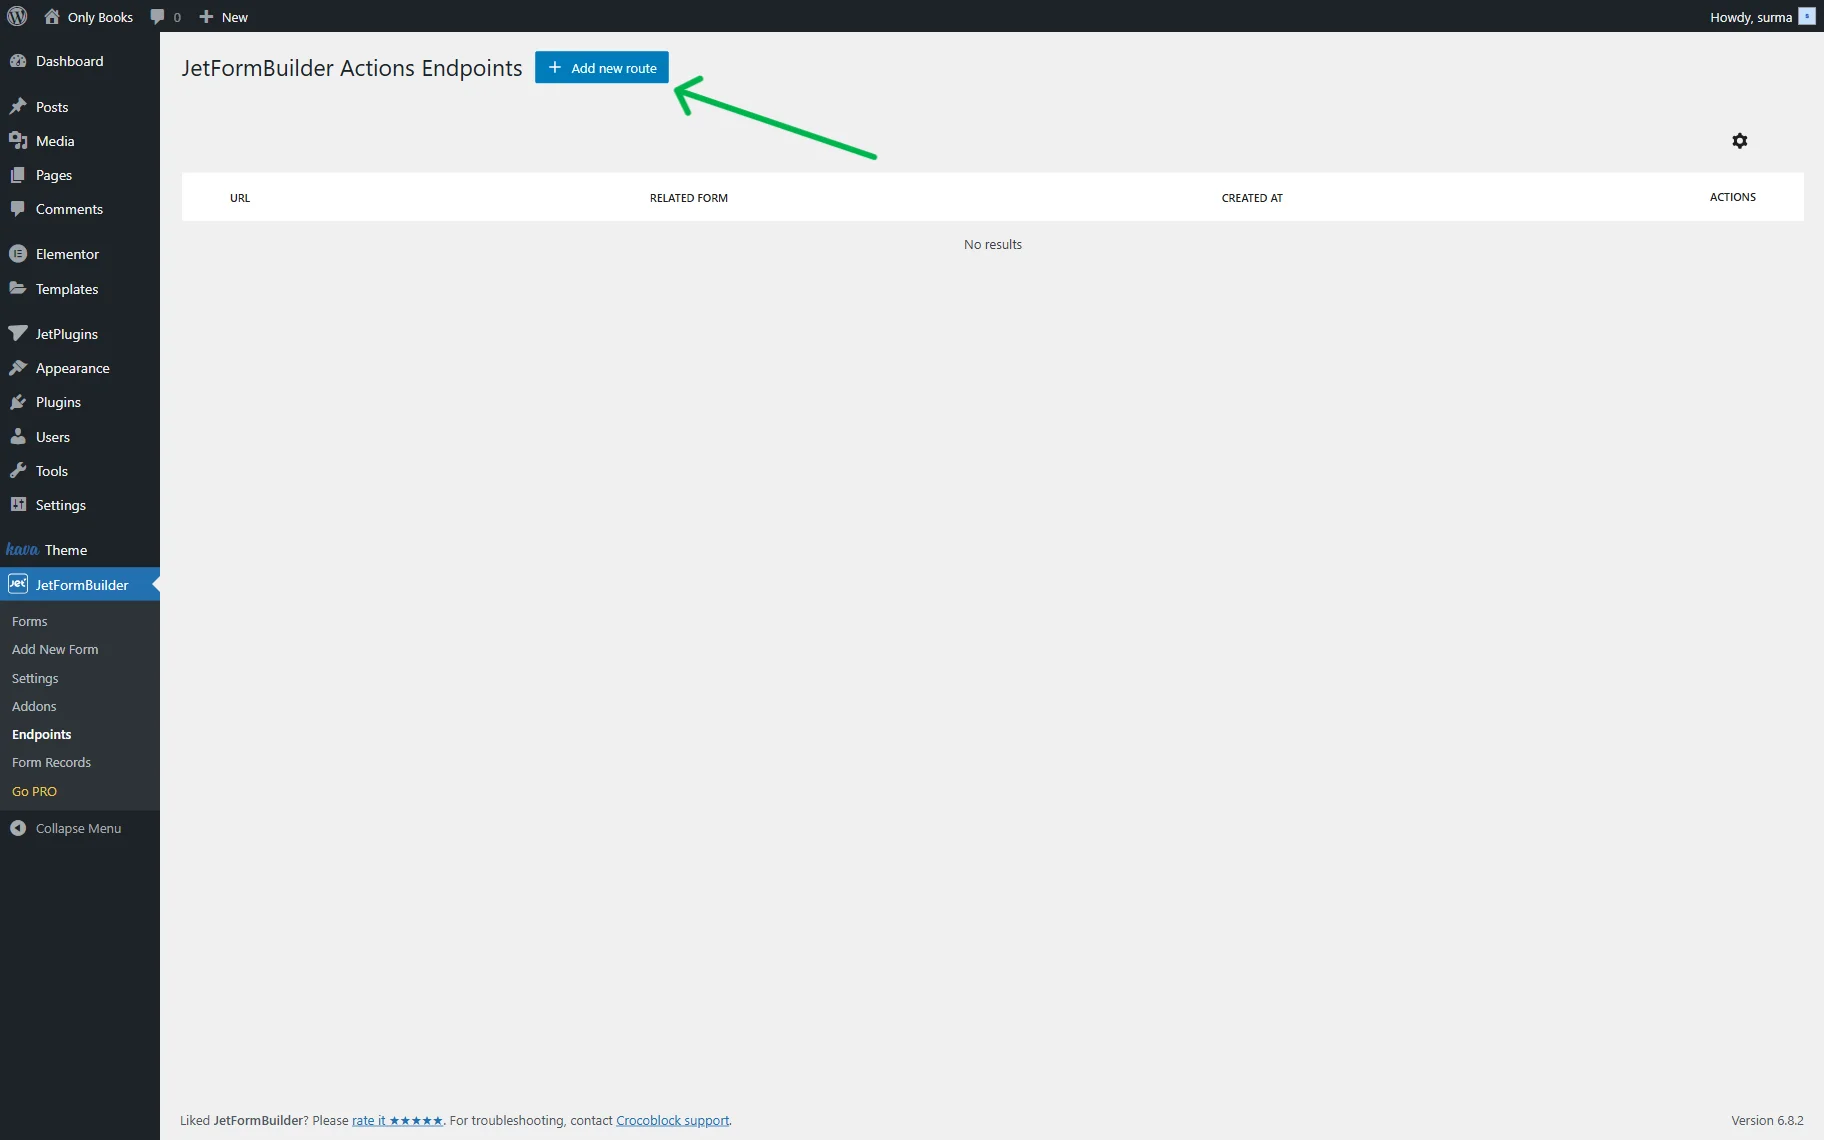
Add New Endpoint
Proceed to WordPress Dashboard > JetFormBuilder > Endpoints and click the “Add new route” button.
Once the new page opens, select the form you created earlier in the RELATED FORM field.
In the ACTION TYPE dropdown, choose the ”REST API Endpoint” option. Enter the ROUTE NAMESPACE (“croco” in this case) and ROUTE (“add-website” here) inputs.
We keep the Is restricted toggle disabled, and turn on the Log Requests toggle.
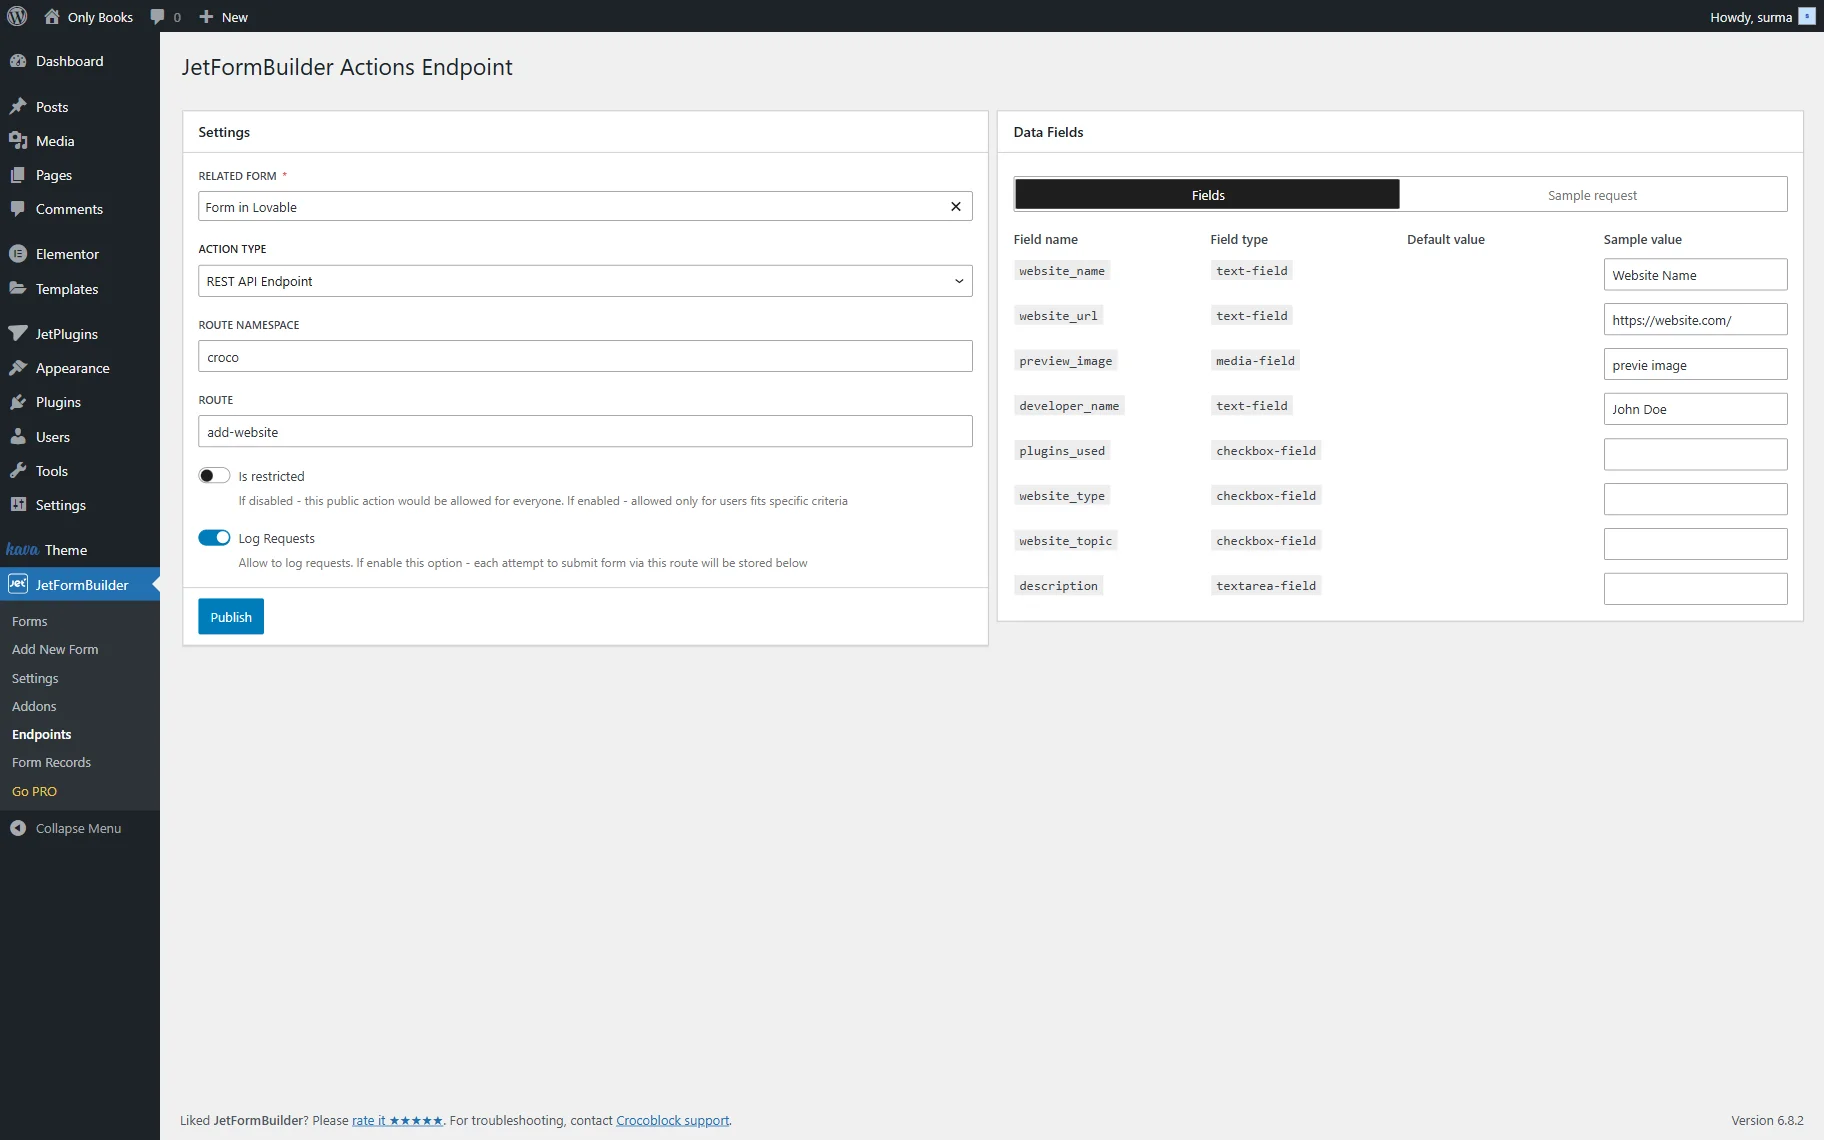
In the Fields section of the Data Fields tab, all the fields you added to the form are presented. Add values to the Sample Value – it will help the builder to understand your needs better.
When you switch to the Sample Request section, you see the request we get. The information from the “data” field needs to be saved to pass the info to the builder.
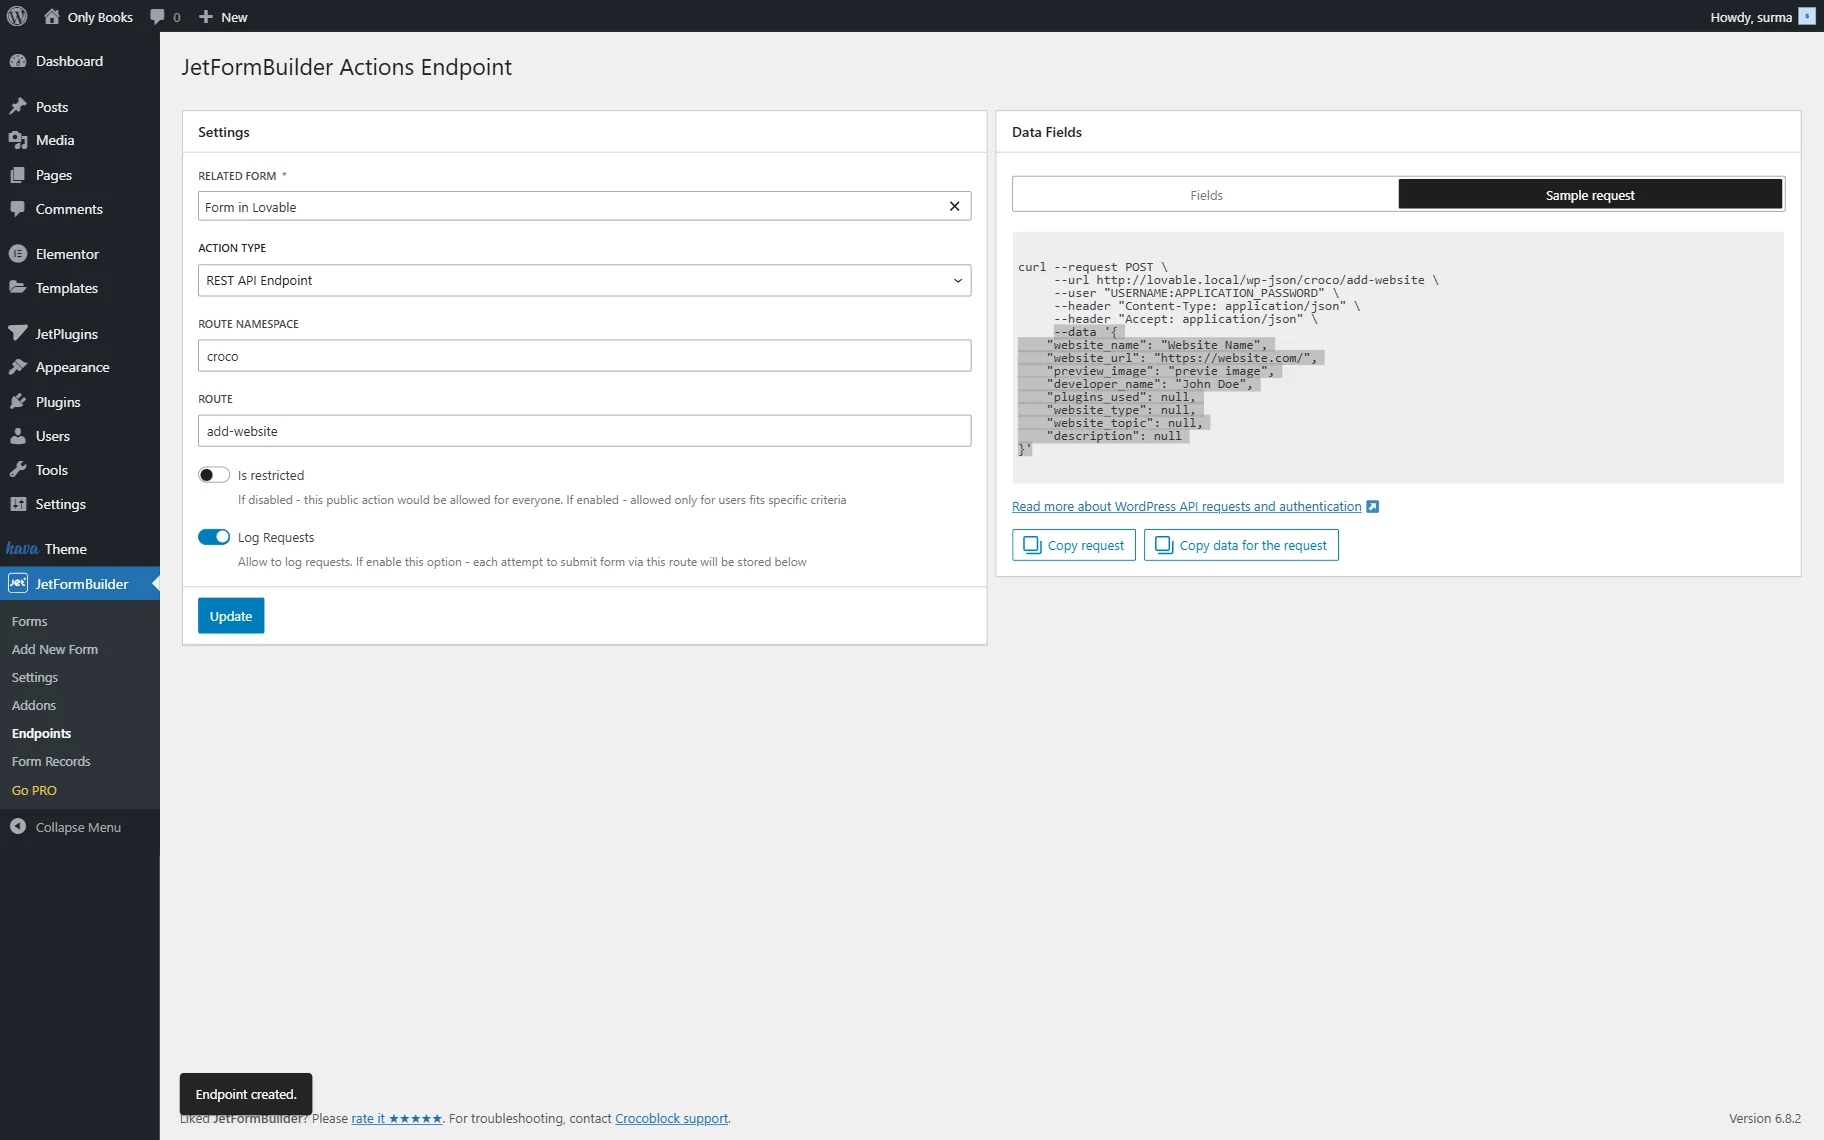
Click the “Publish” button once you are ready.
Create a Prompt
Now, proceed to the Lovable platform and sign in or log in.
The prompt should include information about the site you need to create, such as its type and purpose, as well as the main functions that are expected to be implemented. You can also share some existing sites as examples and any other context that may be helpful for the builder.
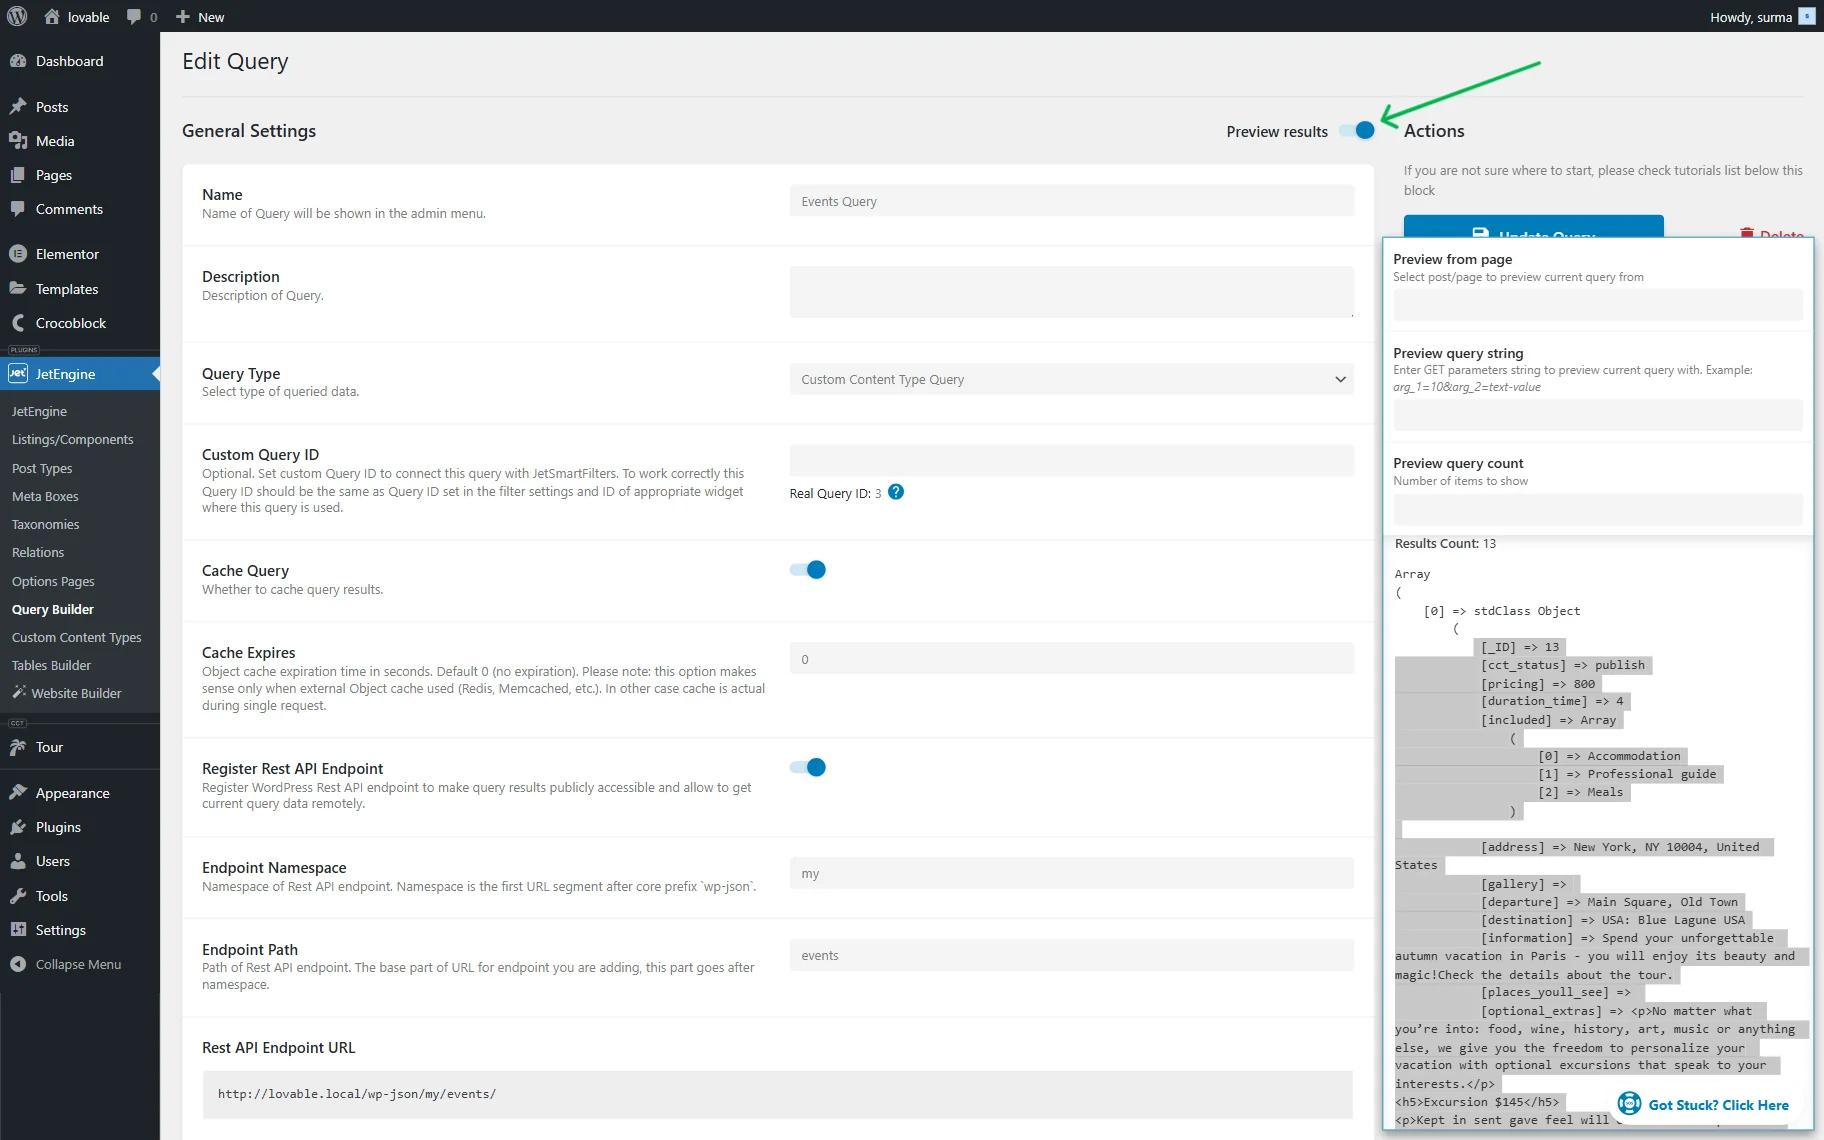
It should also be noted that the data should be retrieved from the REST API, and the URLs you saved earlier should be shared. It is recommended to describe the specific data that will be obtained from the URLs. If you use the CCT as a source, describe what meta fields from the CCT. When you use the query as a source, you can copy an item from the Preview results section for the AI builder.
If you need a single page to exist on the site, request its creation and share the Endpoint URL from which the single page will be obtained.
When setting up the form, include a description of the expected functionality, the endpoint URL, and the Sample Request data in the prompt.
Here is an example prompt for creating a form:
Additionally, create a form that allows users to insert posts to the “Website” Custom Post Type by submitting information about websites.

The form should send data to this endpoint: http://lovable.local/wp-json/croco/add-website

The form must include the following fields:
Text field: Website Name (website_name)
Text field: Website URL (website_url)
Text field: Developer Name (developer_name)
Media upload field: Preview Image (preview_image)
Checkbox field: Plugins Used (plugins_used)
Checkbox field: Website Type (website_type)
Checkbox field: Website Topic (website_topic)
Textarea field: Description (description)

The request should match the following JSON format:

{
    "website_name": "Website Name",
    "website_url": "https://website.com/",
    "preview_image": "preview image",
    "developer_name": "John Doe",
    "plugins_used": null,
    "website_type": null,
    "website_topic": null,
    "description": null
}

The inserted post should have the “published” status.
Paste the part of the prompt into the Lovable input and click the arrow-shaped icon or the “Enter” button.
Check the Result
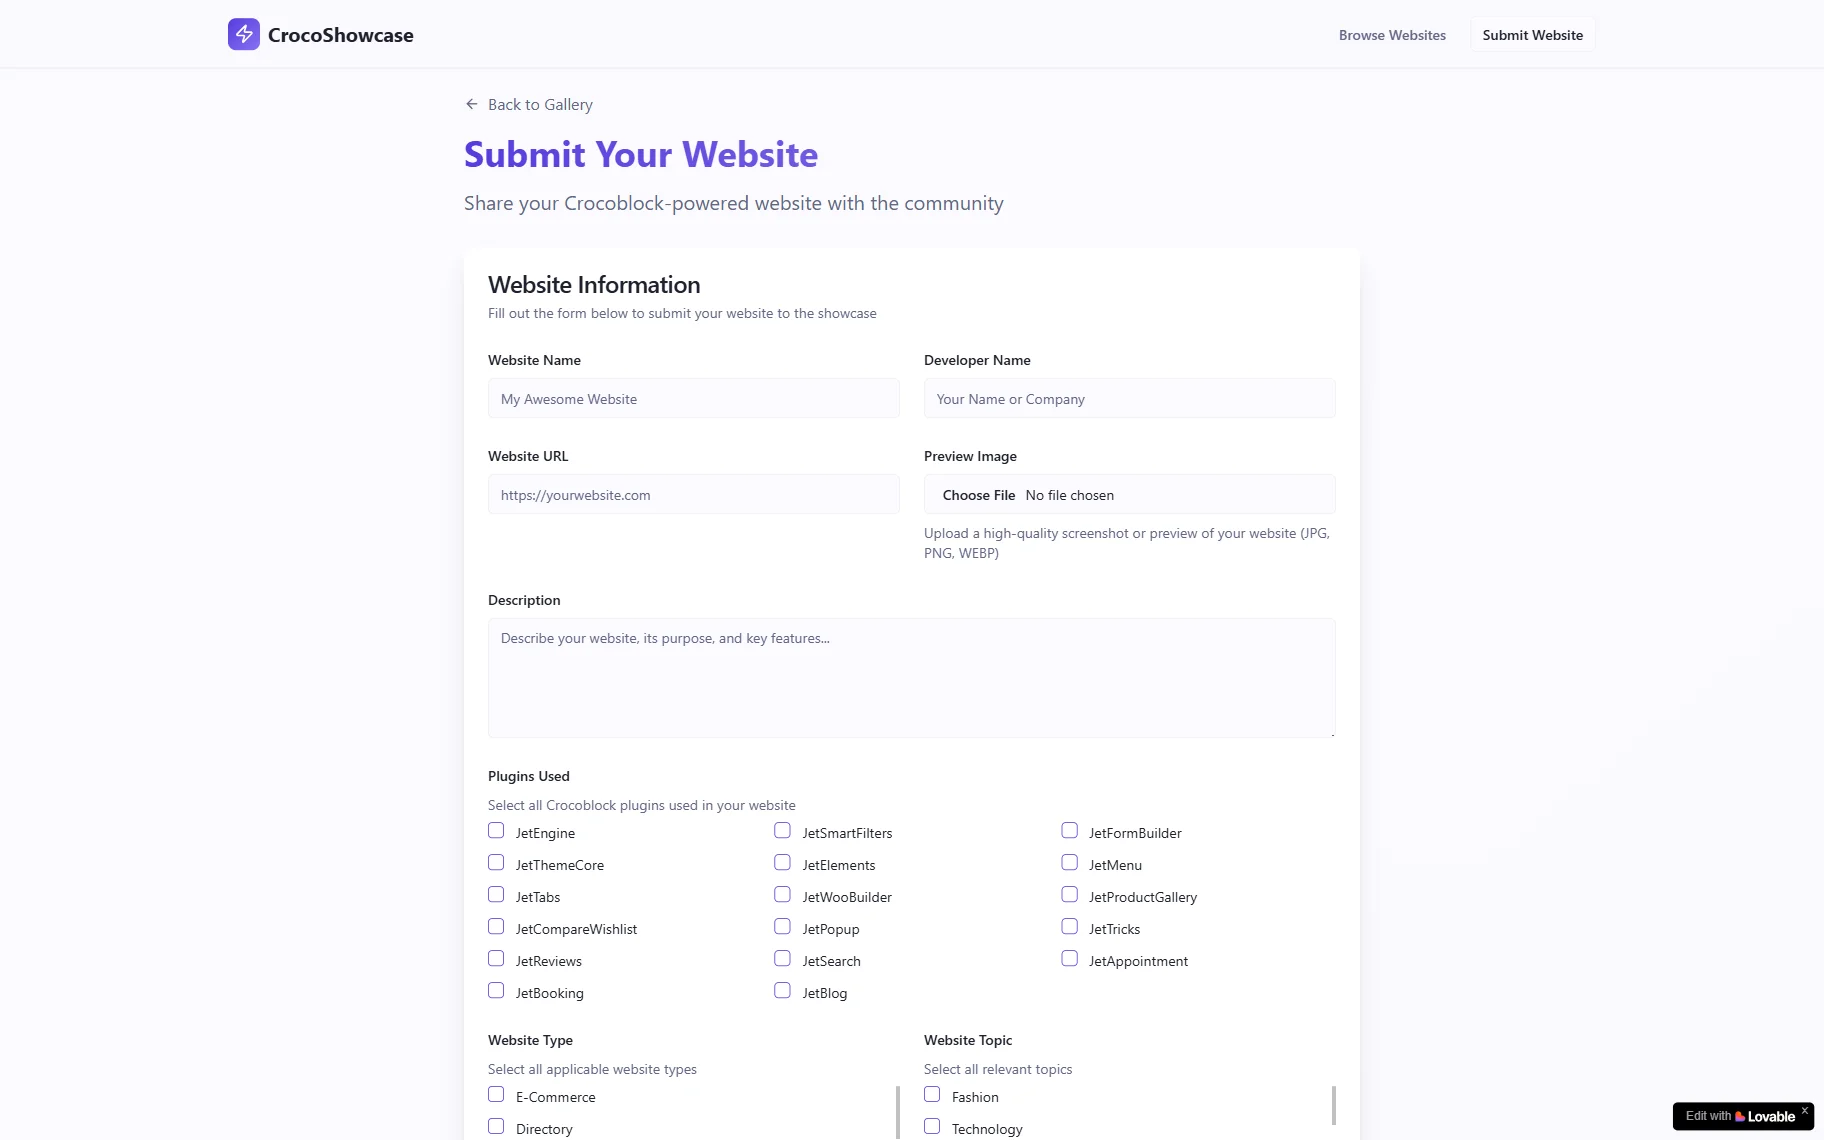
Here is the site we got: https://croc-showcase-hub.lovable.app/submit
The form is presented on the front end, and it can be successfully submitted
That’s it. Now, you know how to add a form to your website using the Lovable AI website builder, WordPress JetFormBuilder, and JetEngine’s plugins.