Disabling Sanitization for Specific JetEngine Dynamic Fields in Elementor
This tutorial explains how to use a custom WordPress PHP filter to allow raw HTML, SVGs, or scripts to render within a JetEngine Dynamic Field by using a specific CSS class.
Before you start, check the tutorial requirements:
- Elementor (Free version)
- JetEngine plugin installed and activated
By default, JetEngine uses wp_kses_post() to sanitize field output, which protects your site but often strips legitimate code such as SVG icons or REST API data. This custom PHP snippet allows you to bypass that filter for specific widgets, ensuring your raw HTML and complex scripts render exactly as intended without compromising site-wide security.
When to Use This Snippet
Use this code bypass when you need to render content that the standard sanitizer removes:
- Raw SVG Icons: Use it when storing <svg> code in meta fields to prevent paths or fill attributes from being stripped.
- REST API Integration: Essential when pulling raw HTML or JSON data from external REST APIs via JetEngine, where the incoming data must remain unformatted to function. The usage example is described in the How to Filter Listing Based on REST API Query Type tutorial.
- Complex Custom Scripts: If you are storing unique snippets or interactive elements that use non-standard HTML attributes, this filter bypasses the cleaning process entirely for that specific widget.
Disabling Sanitization vs. WP_KSES
Crocoblock provides two filters that bypass standard security restrictions.
In this tutorial, we describe the Disable Sanitization filter, which acts as a targeted bypass for specific widgets. By adding the ‘disable-sanitize’ CSS class to an Elementor widget, you completely disable sanitization for that field alone. This is the best solution for SVGs and REST API data because it prevents WordPress from stripping complex XML paths or unformatted data strings that are difficult to safelist individually.
The Cannot Display Iframe with Dynamic Widgets article provides an example of the WP_KSES filter, which is a global allowlist that adjusts WordPress core security for all post content. Rather than disabling security, it grants explicit permission for specific tags—like <input> or <iframe>—to render across the entire site. This is the recommended method for fixing missing iframes or maps, as it allows you to enable required attributes (like src or type) while keeping the rest of your site’s security filters active.
How to Set the Disable Sanitization Filter
Add the Filter Snippet
The filter can be added either via a custom code snippets plugin (like Code Snippets) or directly in your theme’s functions.php file (preferably in a child theme to prevent changes from being overwritten on updates).
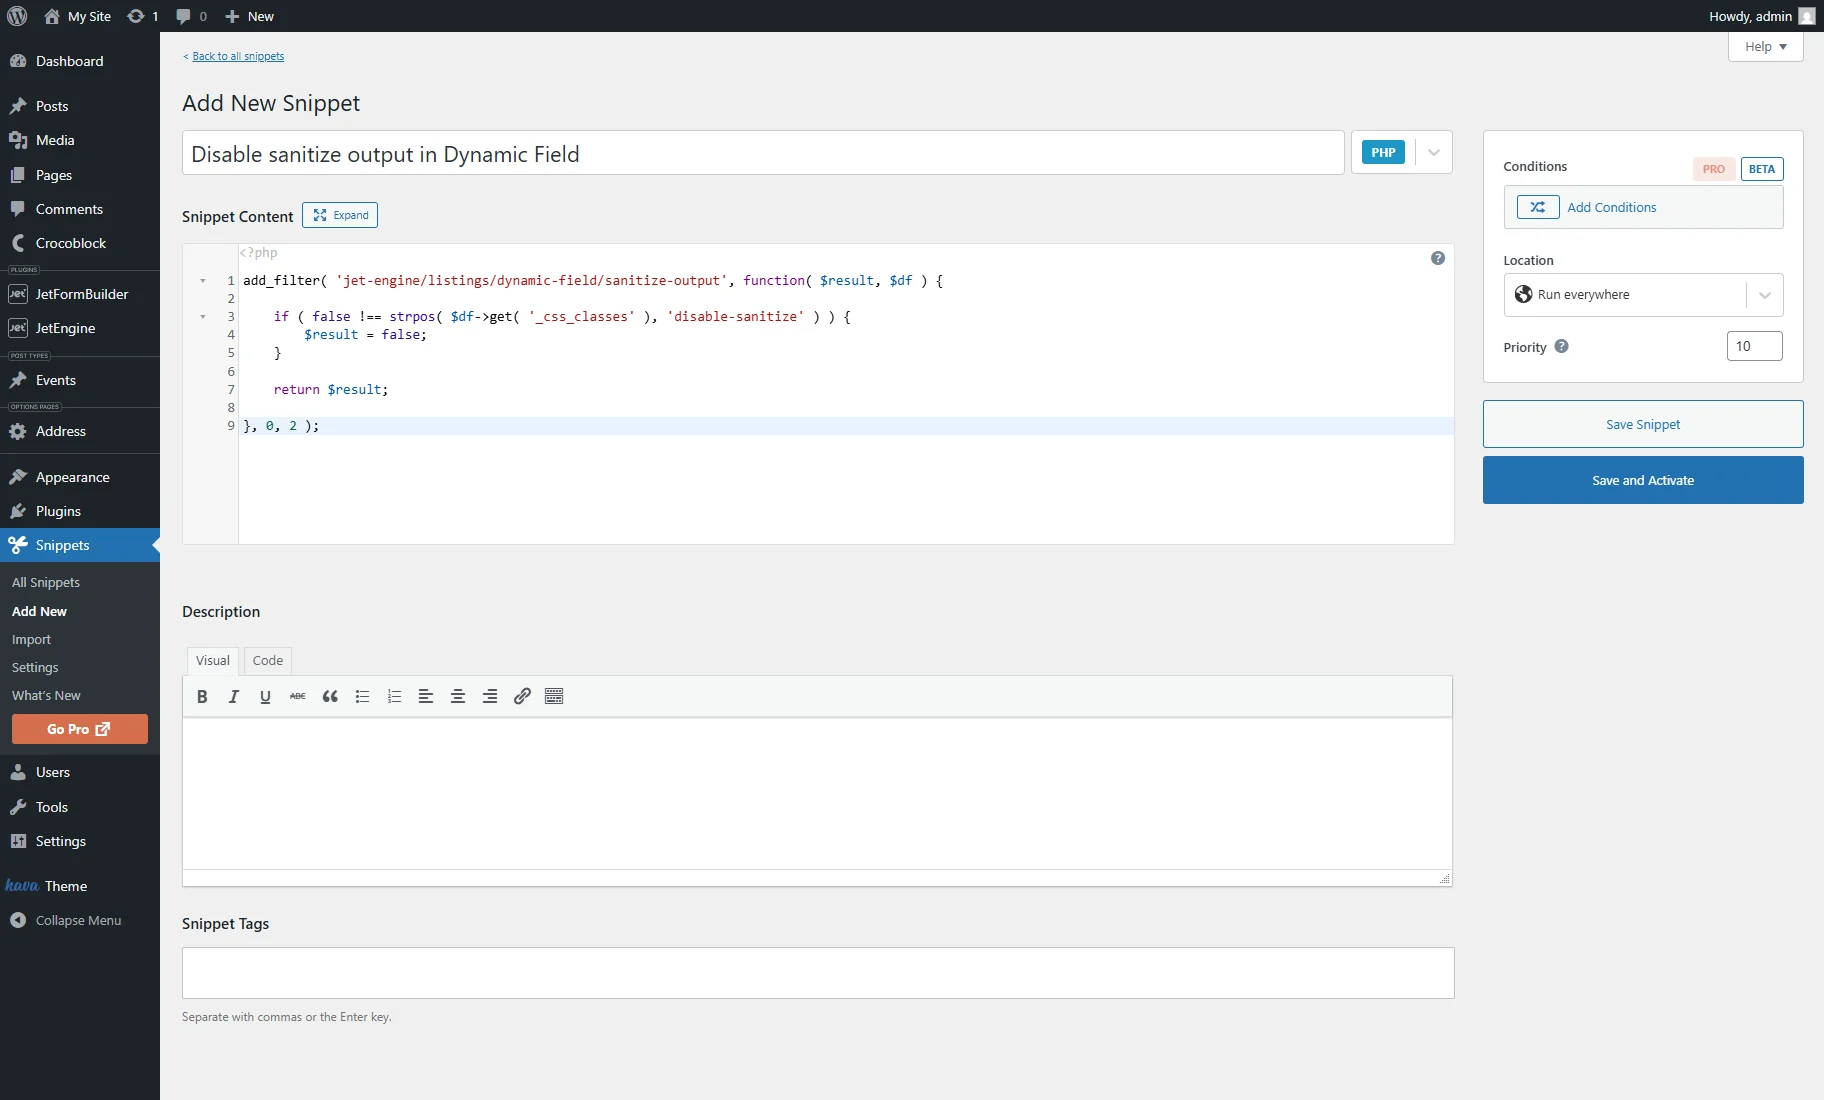
For example, we install and activate the Code Snippets plugin, then proceed to the WordPress Dashboard > All Snippets tab and click the “Add New” button.
We type the filter name into the title bar (e.g., “Disable sanitize output in Dynamic Field”), keep the “PHP” selected, and enter such code into the textarea:
add_filter( 'jet-engine/listings/dynamic-field/sanitize-output', function( $result, $df ) {

	if ( false !== strpos( $df->get( '_css_classes' ), 'disable-sanitize' ) ) {
		$result = false;
	}

	return $result;

}, 0, 2 );
This code checks whether a Dynamic Field has a specific CSS class and, if so, stops sanitization.
Finally, we click the “Save and Activate” button.
Prepare your Meta Field
Ensure your data is stored in a “Textarea” meta field.
For example, we add such an SVG icon to the CPT post:
<svg viewBox="0 0 24 24" width="20" height="20">
  <path d="M12 21s-8-4.6-8-11a5 5 0 0 1 10 0 5 5 0 0 1 10 0c0 6.4-8 11-8 11z"/>
</svg>
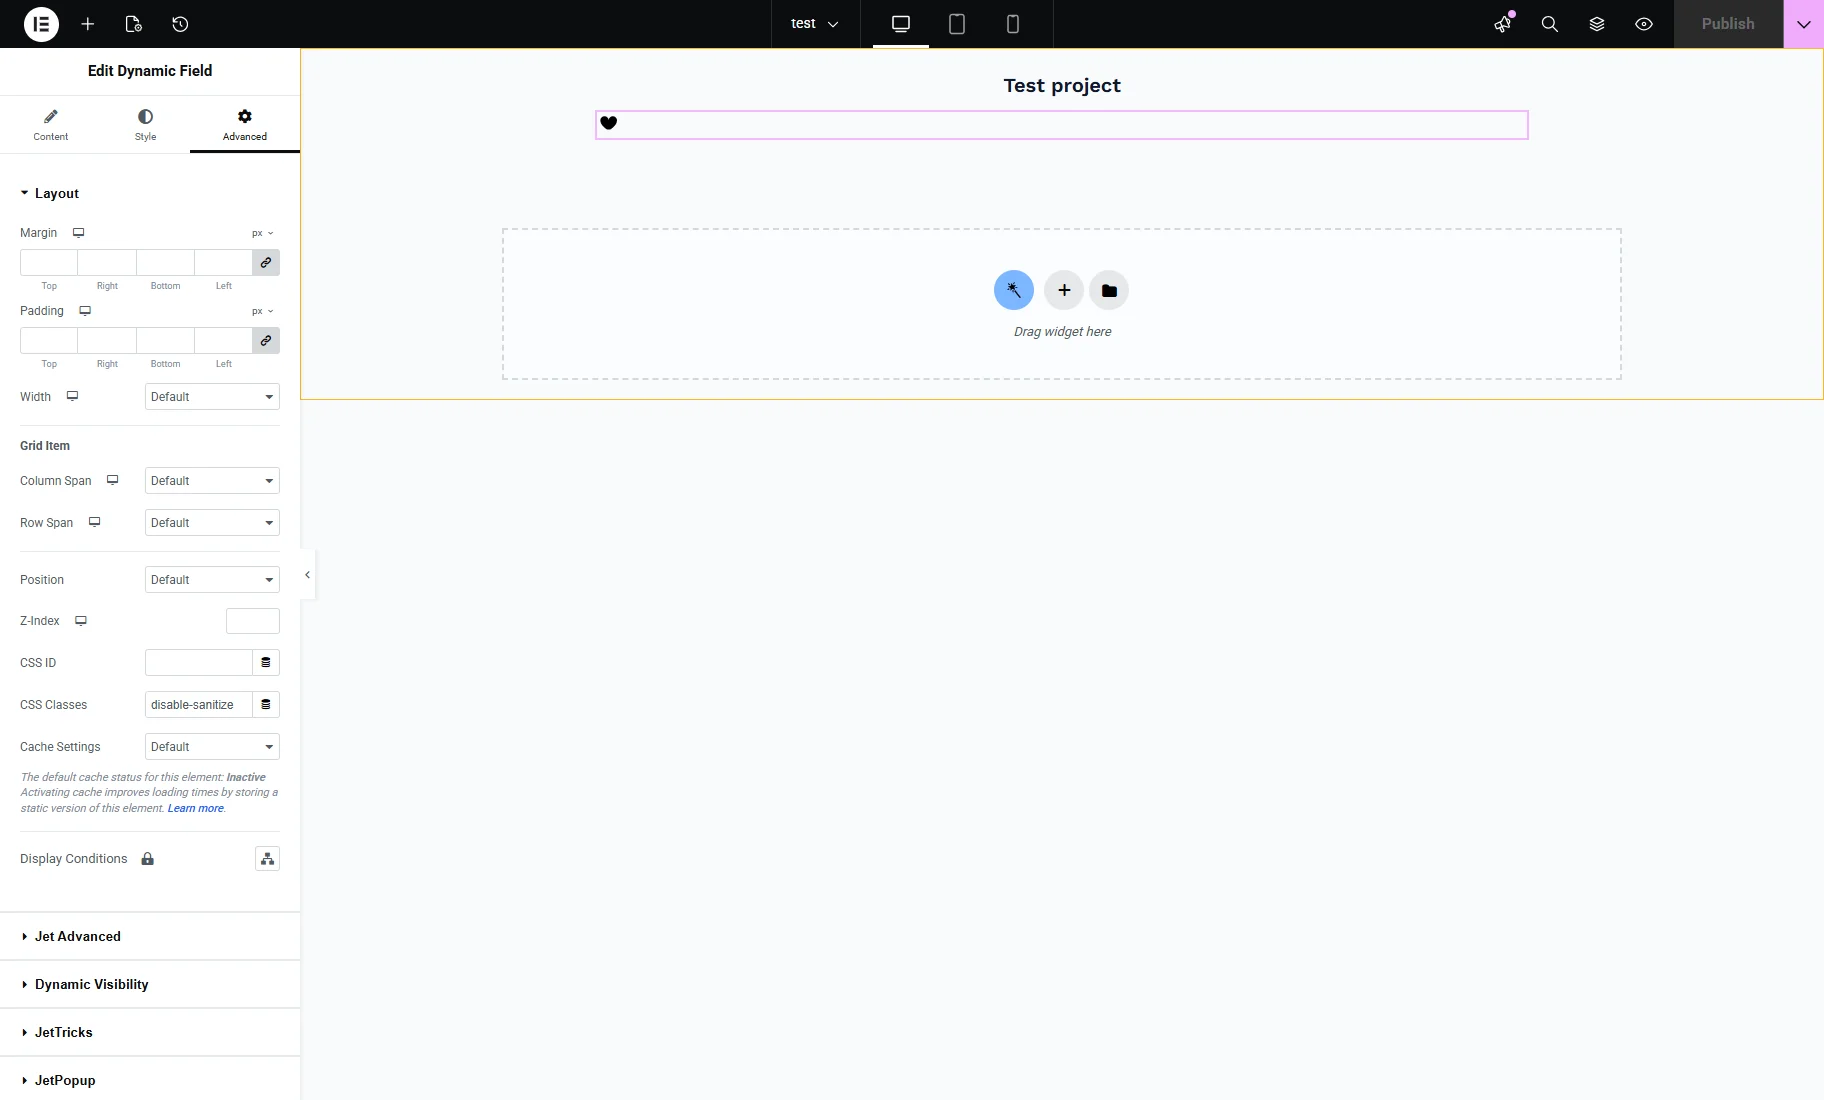
Configure the Widget
Drag a Dynamic Field widget into your Listing or Single Page template.
Select “Meta Data” as the Source and pick the Meta Field that stores the data (SVG icon in our case).

Then, go to the Advanced widget’s tab and add “disable-sanitize” in the CSS Classes field.
After that, the icon should be displayed.
Save the settings by pressing the “Publish” button.
That’s all. Now you know how to use a custom WordPress PHP filter to allow raw HTML, SVGs, or scripts to render within a JetEngine Dynamic Field by using a specific CSS class.