How to Create a Standalone Booking Form for Hotel Room Reservations
In this guide, you will find out how to create a standalone booking form on your WordPress website.
Before you start, check the tutorial requirements:
- Elementor (Free version), Block editor (Gutenberg), or Bricks
- JetBooking plugin installed and activated
with the configured booking instance
In this tutorial, we use the “Grand Hotel” dynamic template and create a hotel room reservation setup. However, you can use the same workflow for any other booking project configured with JetBooking.
We also add the Booking Form widget to the booking instance Single template, but you can also place it on other pages or templates by specifying the Booking Instance ID manually.
Add Booking Form to the Single Template
First, we open the Single template of the booking instance post type.
We use the JetThemeCore plugin’s functionality for this, so you can check the How to Create a Custom Single Page for CPT-Based Booking tutorial to build a similar layout. In this example, our Single template is built in Elementor.
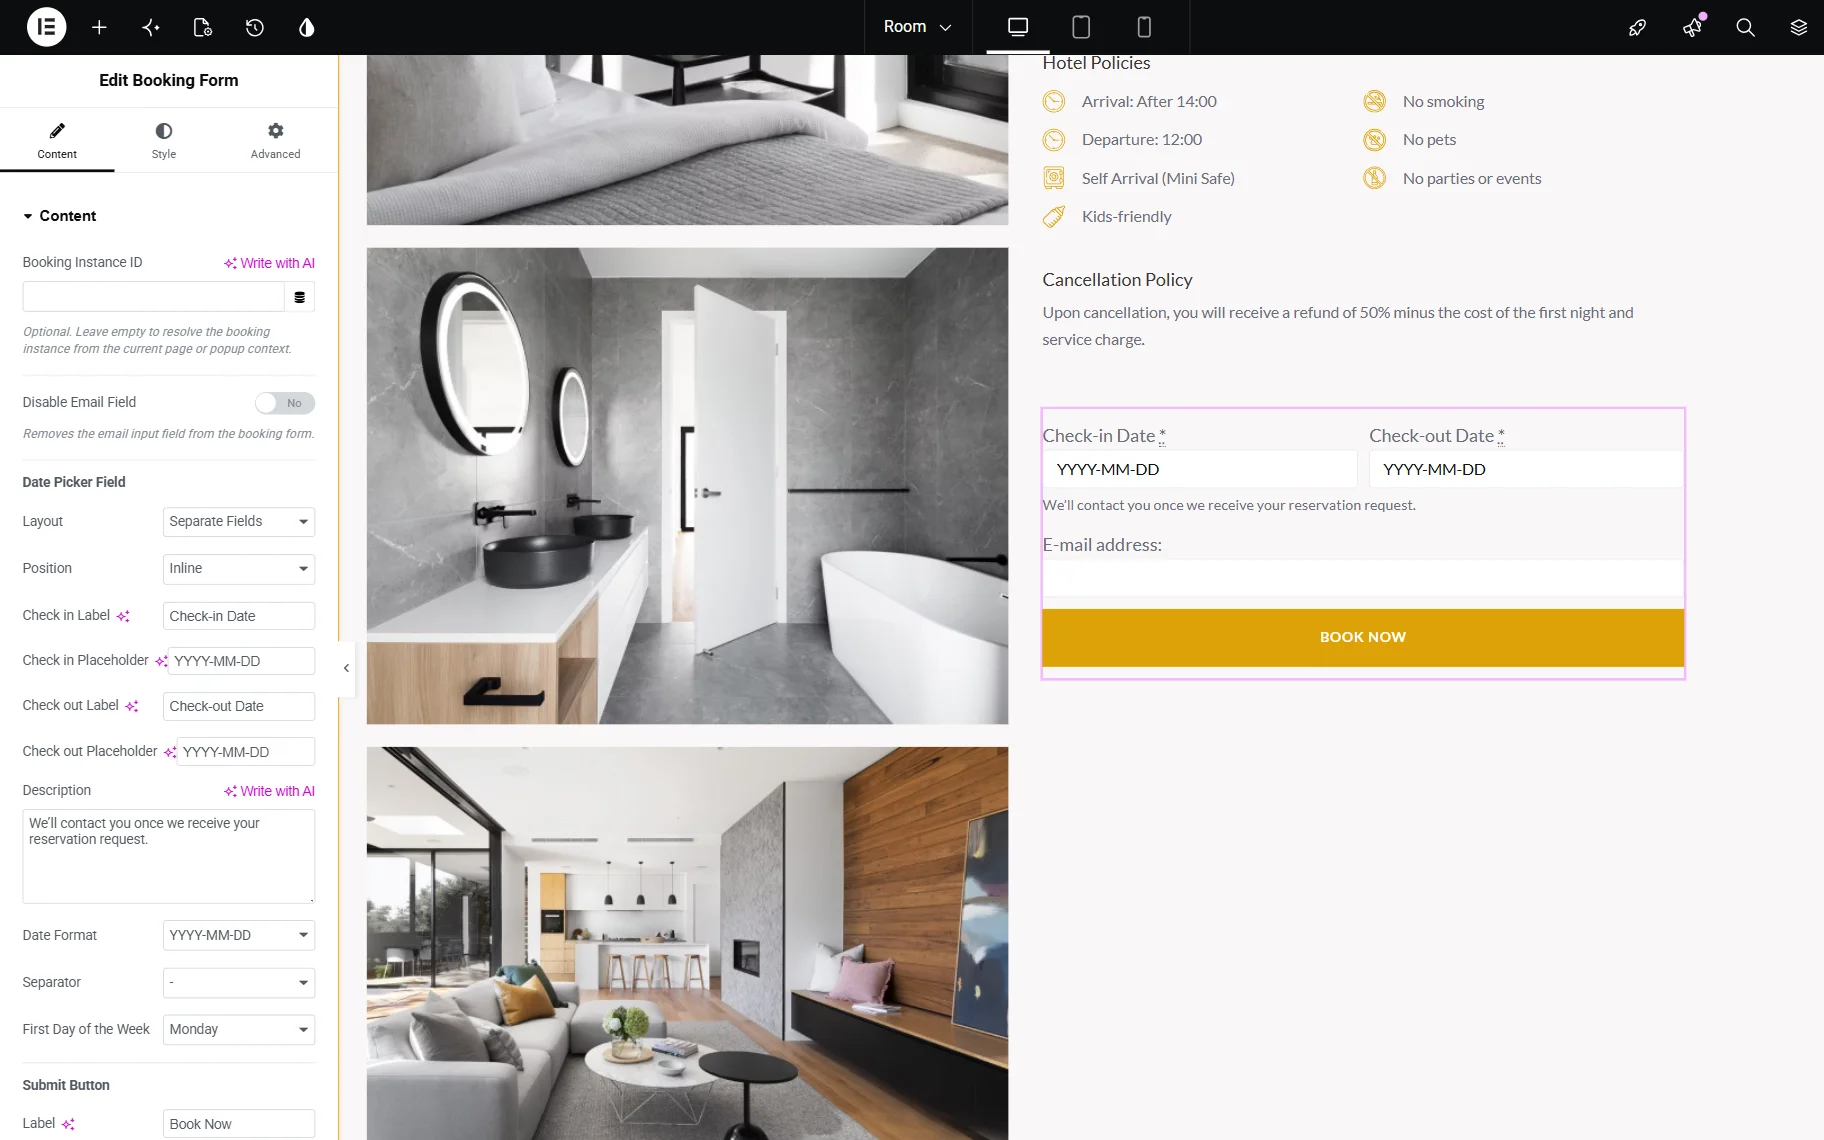
So, we add a Booking Form widget to the template. Check our Booking Form Overview to find out more information about this widget’s settings.

We leave the Booking instance ID field empty because we work with the booking instance Single template. However, if you add the form to the page that is not directly connected to the booking instance, you should specify the ID of the needed post in this field.
As for the Layout, we change it to “Separate Fields” and leave the “Inline” Position selected.
We also set the Check in Label and Check out Label to “Check-in Date” and “Check-out Date” values accordingly.
In the Description field, we paste the “We’ll contact you once we receive your reservation request.” text that will be displayed below the check-in/check-out fields.
In the Label field, we set the “Book Now” value.
You can make style changes to the widget and adjust the page if needed.
Once everything is ready, save the result.
Test the Booking Form
Now, open any of the posts related to your booking instance post type on the front end.
For example, we open the “Suite Room” post and scroll down to the form.
We complete this form by entering the check-in and check-out dates and a test email address. To submit the reservation request, we press the “BOOK NOW” button.
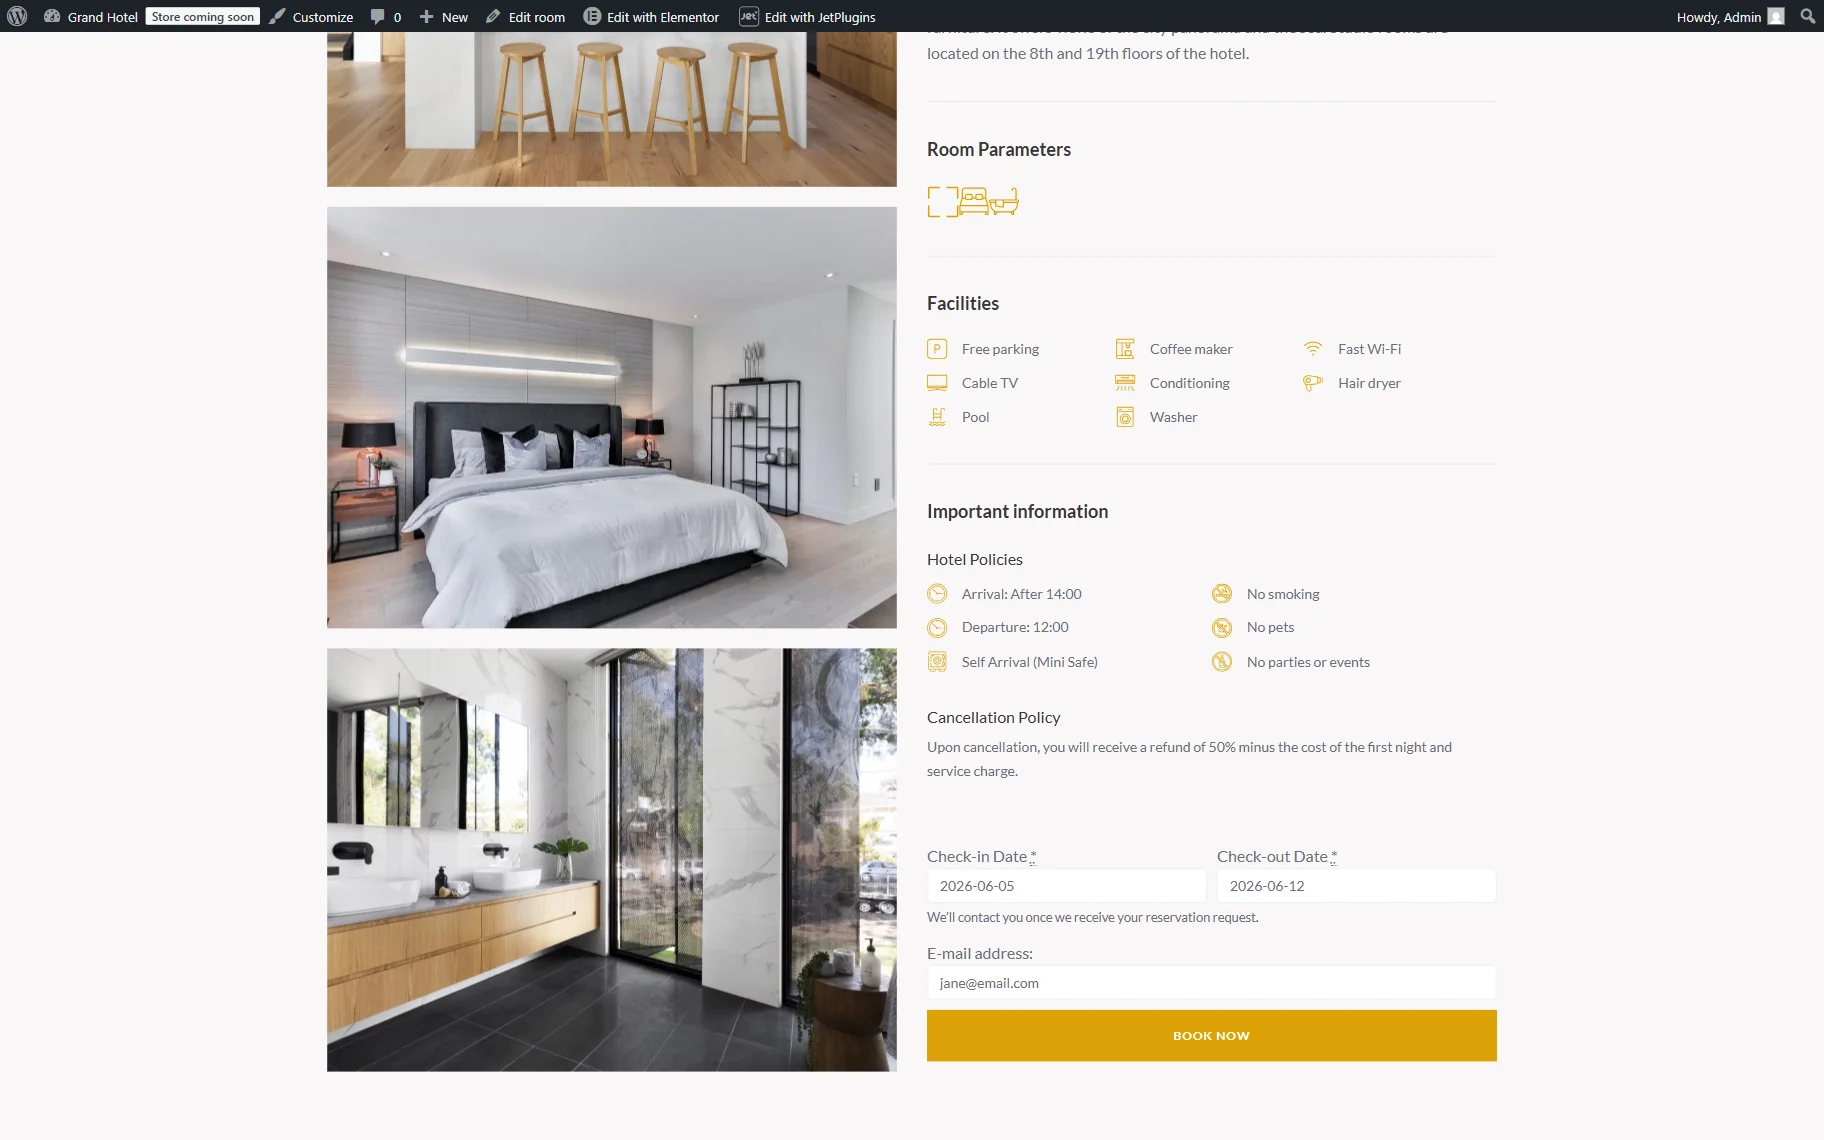
Once the button is pressed, the “Booking was created successfully.” message is displayed below the form.

Check the Created Booking
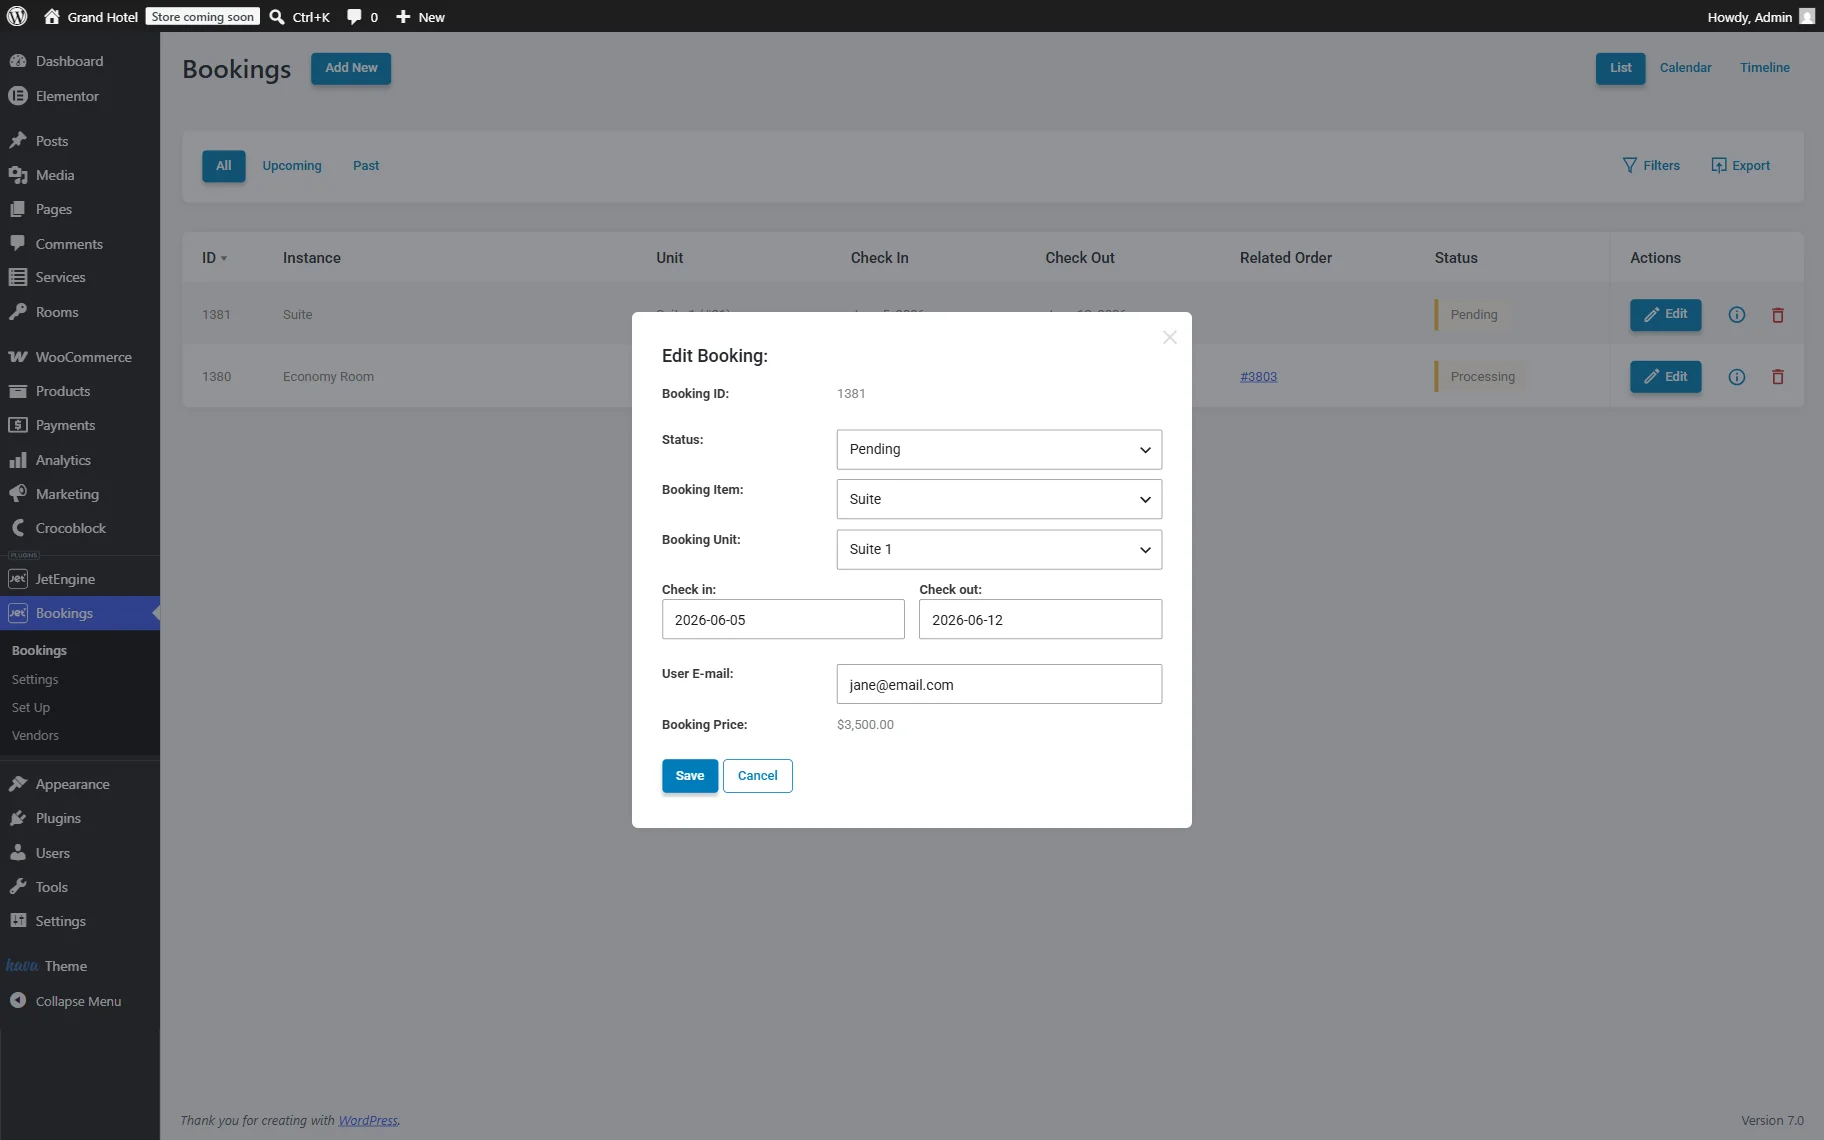
Now, we check whether the booking was added to the WordPress Dashboard > Bookings list.
If everything is set up correctly, the booking will appear here. We press the “Edit” button to review the reservation details.

Once the button is pressed, the Edit Booking pop-up opens. Here, we can see all details related to the created booking.
FAQ
Yes, you can place the Booking Form on any page or template. In this case, you can specify the Booking Instance ID manually in the widget settings.
No, the Booking Form creates bookings directly via AJAX submission and does not require the WooCommerce functionality.
Yes, the form works independently and can create bookings without JetFormBuilder forms.
Newly created bookings receive the “Pending” status by default.
That’s all about creating a standalone booking form for hotel room reservations by using the Booking Form widget/block/element from the JetBooking plugin for WordPress.