How to Display the Booking Form on the Single Post Page
The tutorial explains how to display booking forms with the JetFormBuilder and JetEngine plugins and apply the Booking Availability Calendar widget on the single post pages.
Before you start, check the tutorial requirements:
- Elementor (Free version) and Block editor (Gutenberg)
- JetThemeCore plugin installed and activated with a Single Post Page created.
If you have not done this yet, please follow this tutorial.
- JetFormBuilder plugin installed and activated with a Booking Form created.
If you have not done this yet, please follow this tutorial.
- JetBooking plugin installed and activated.
Users can add their JetFormBuilder or JetEngine forms to single pages built in Elementor and Block Editor (Gutenberg) using the Form and JetForm widgets/blocks, respectively.
Create the Single Page
Navigate to the Crocoblock > Theme Templates tab. Press the “+ Add New” button to create a single page.
Fill in the fields in the Create a template pop-up window: select the “Single” option from the Template Type drop-down menu, the builder from the Template Content Type drop-down menu, and fill in the Template Name field.
Click the “Create Template” button. Set the page template visibility conditions to make it appear on the specific CPT pages.
For a full setup, please refer to the How to Create a Custom Single Page for CPT-Based Booking tutorial.
Add the Booking Availability Calendar Widget/Block
This block/widget is only available for the custom single pages built in Elementor or Block Editor and works with the JetEngine or JetFormBuilder booking forms.
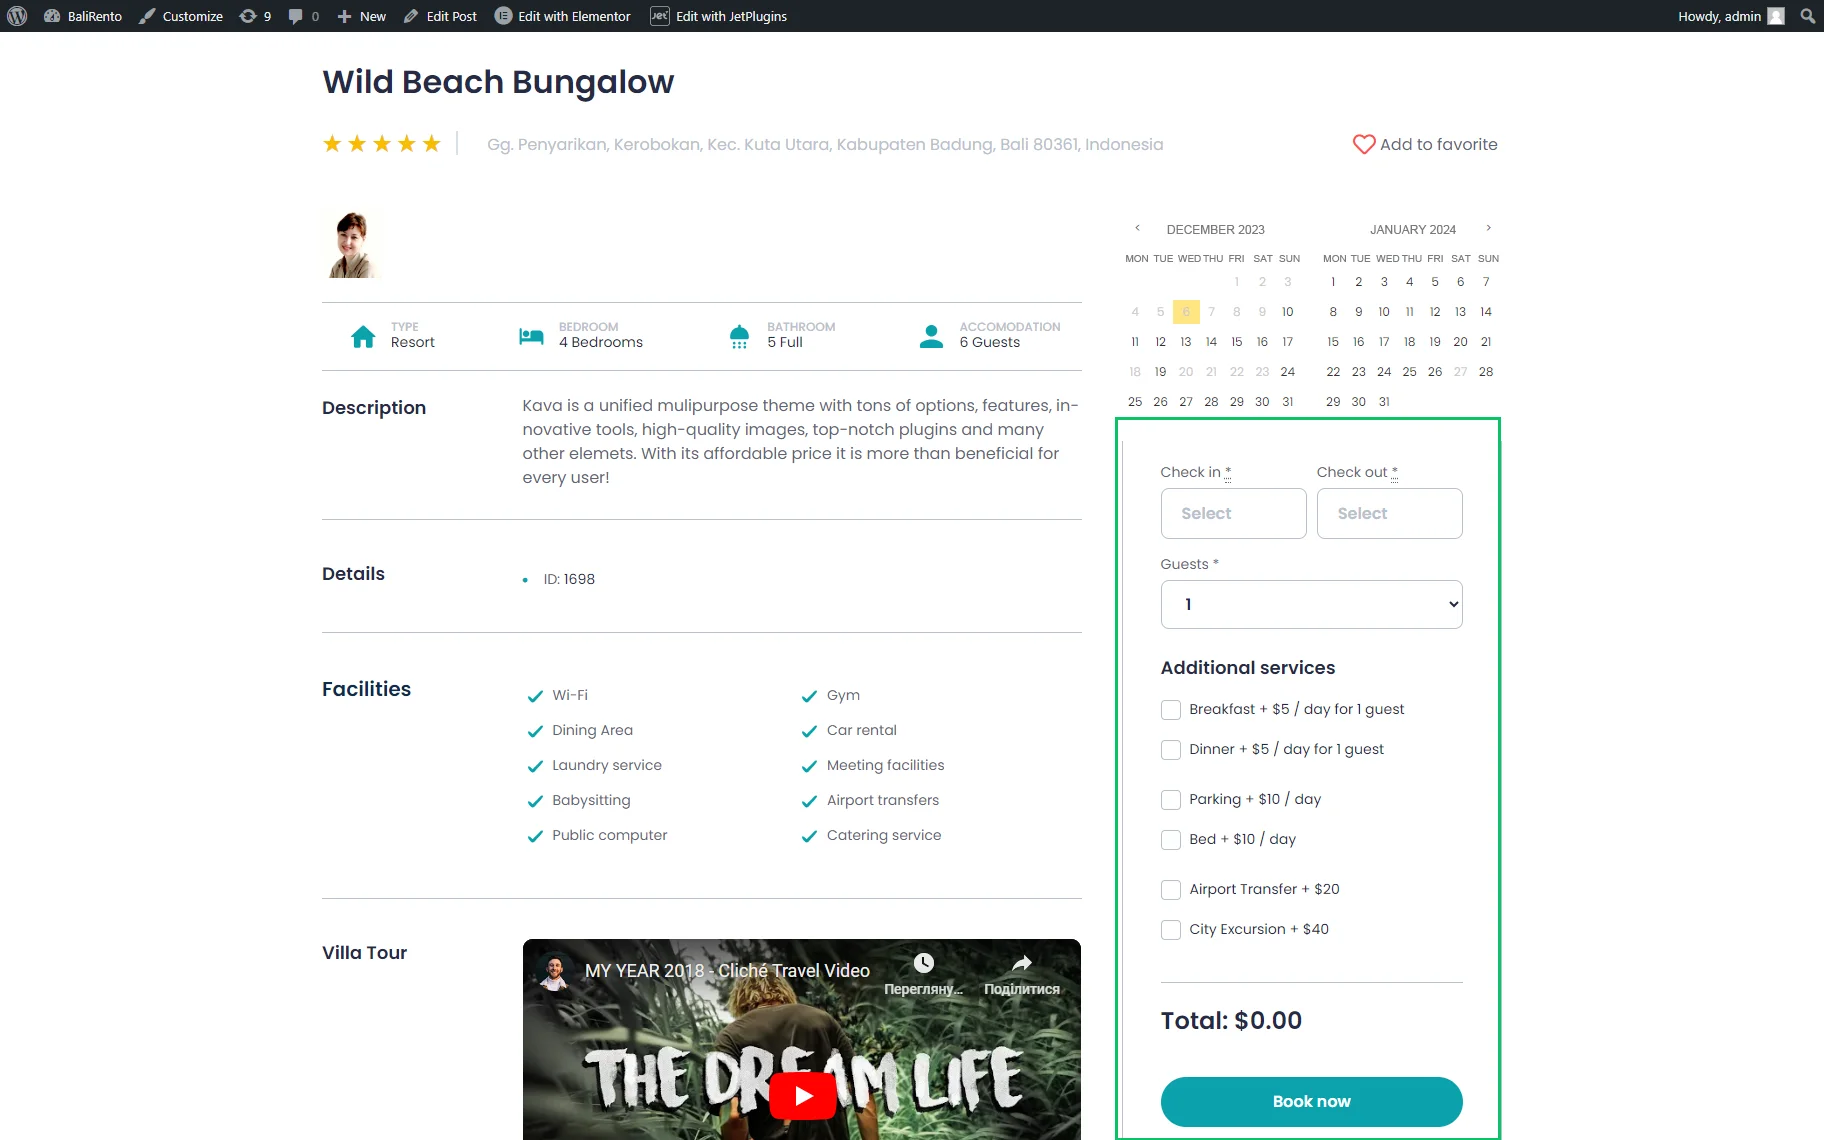
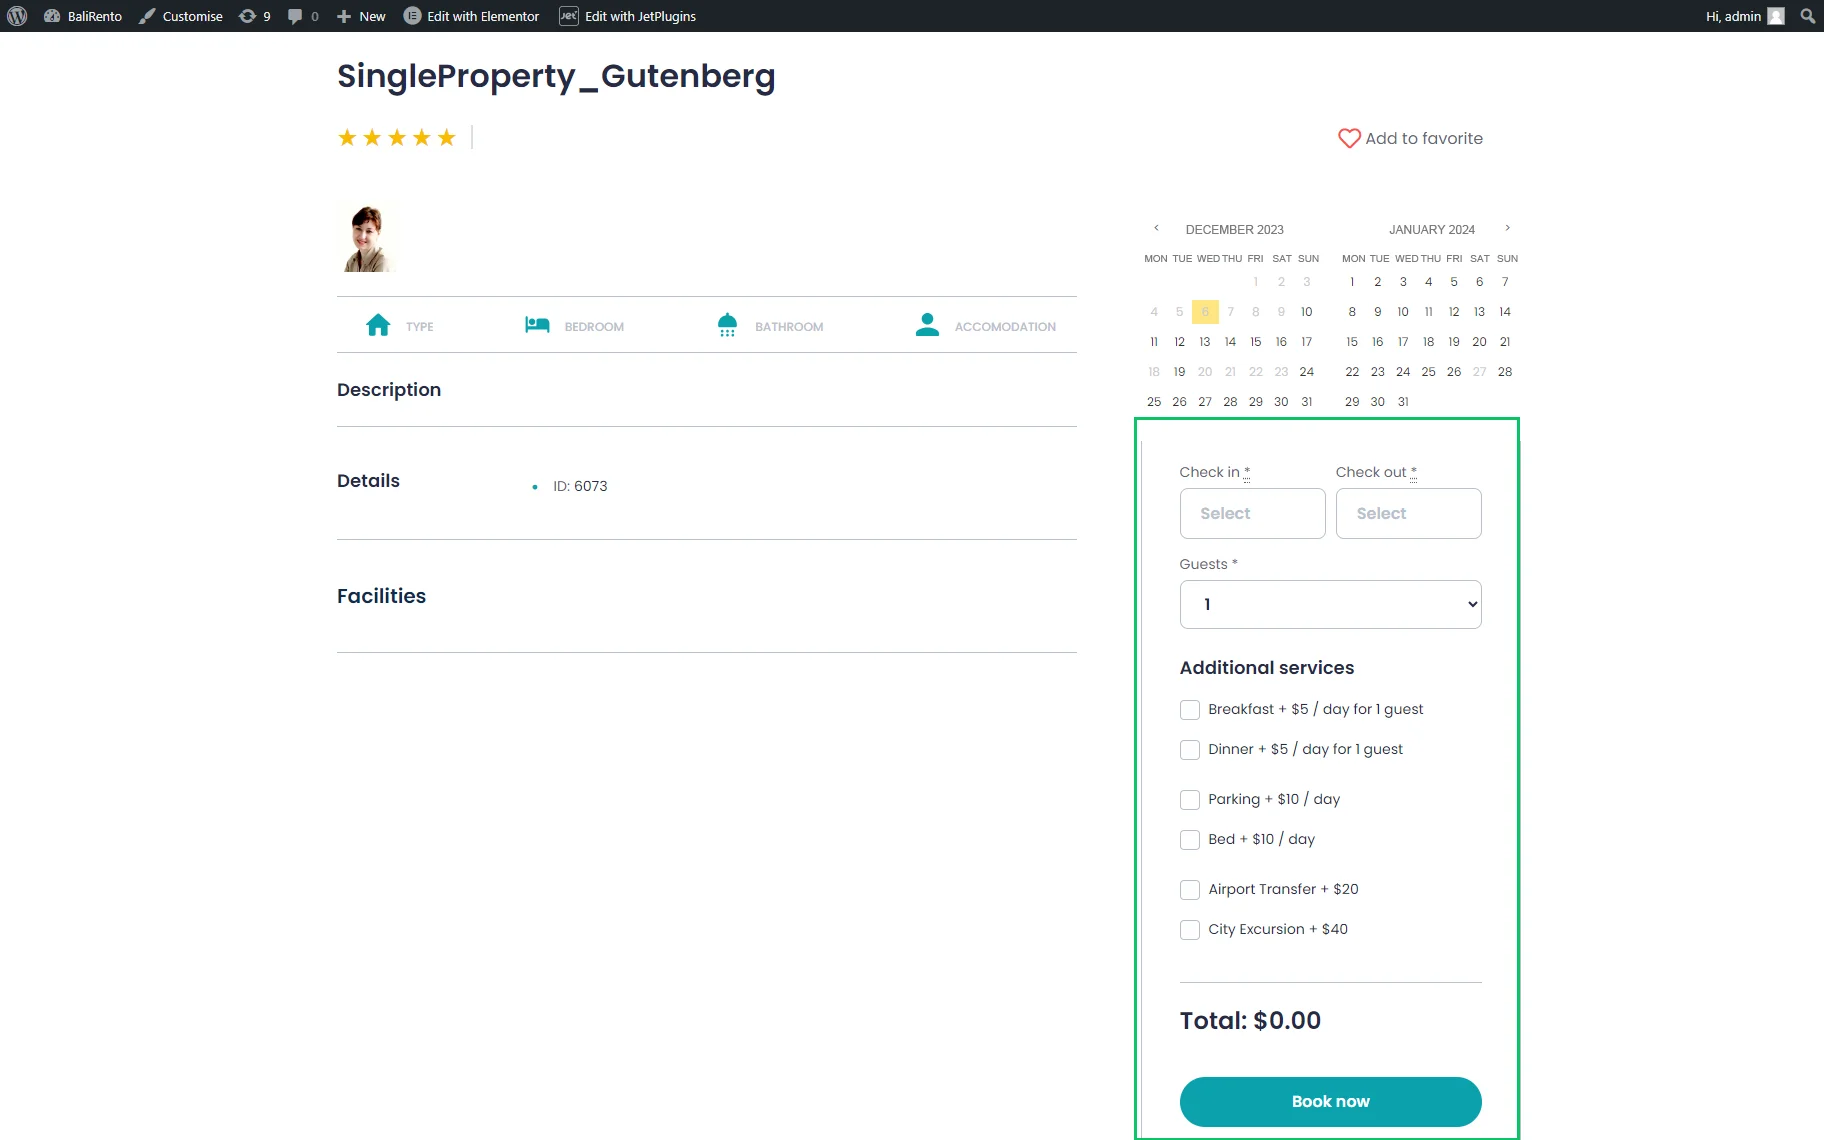
If added to the single page, this block/widget displays a calendar and allows users to choose the check-in/out dates. Additionally, it shows the dates that are already booked. When the user selects dates on the calendar, they will be automatically placed in the Check-In and Check-Out fields of the booking form.
Adding the Booking Availability Calendar block to the Single page in Block Editor
Open the created Single page in Block Editor. Find the Booking Availability Calendar block and drag and drop it to the page.
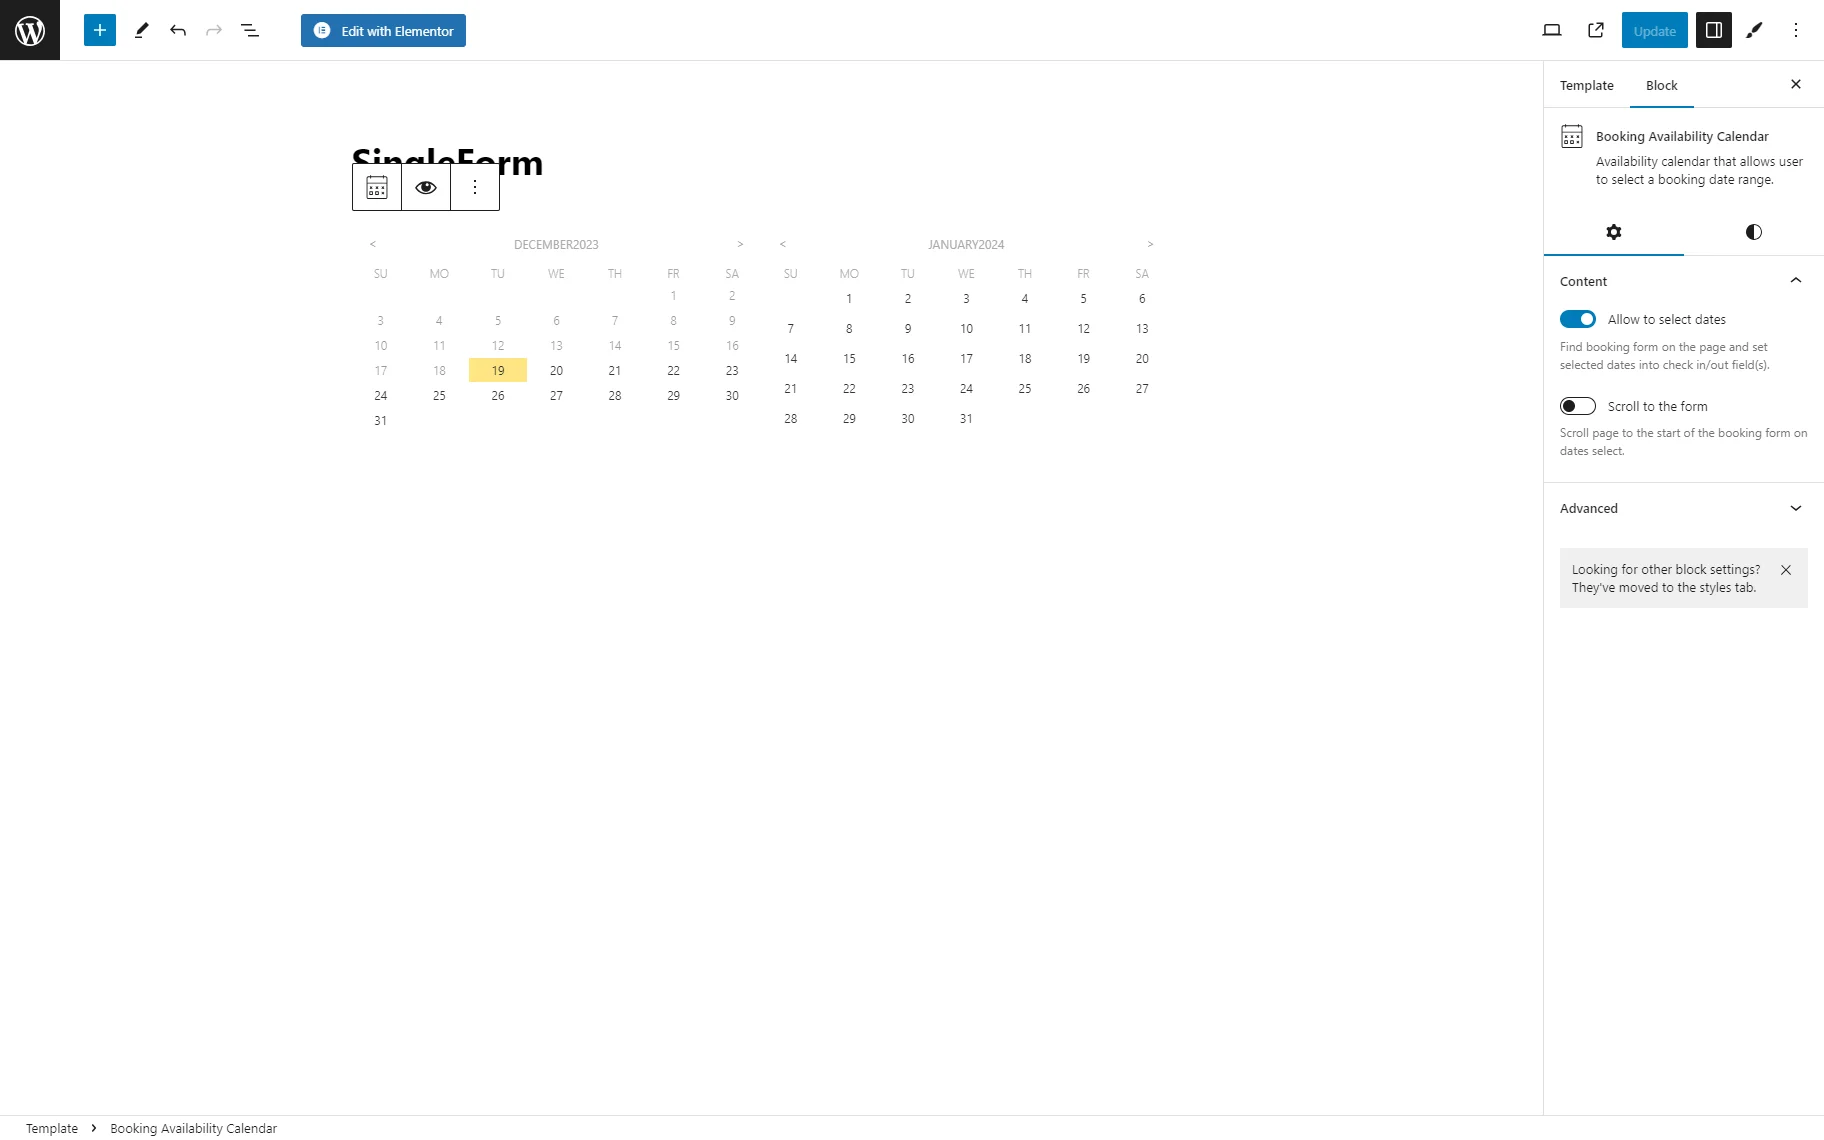
Enable the “Allow to select dates” toggle to set selected dates into check-in/out fields.
Adding the Booking Availability Calendar widget to the Single page in Elementor
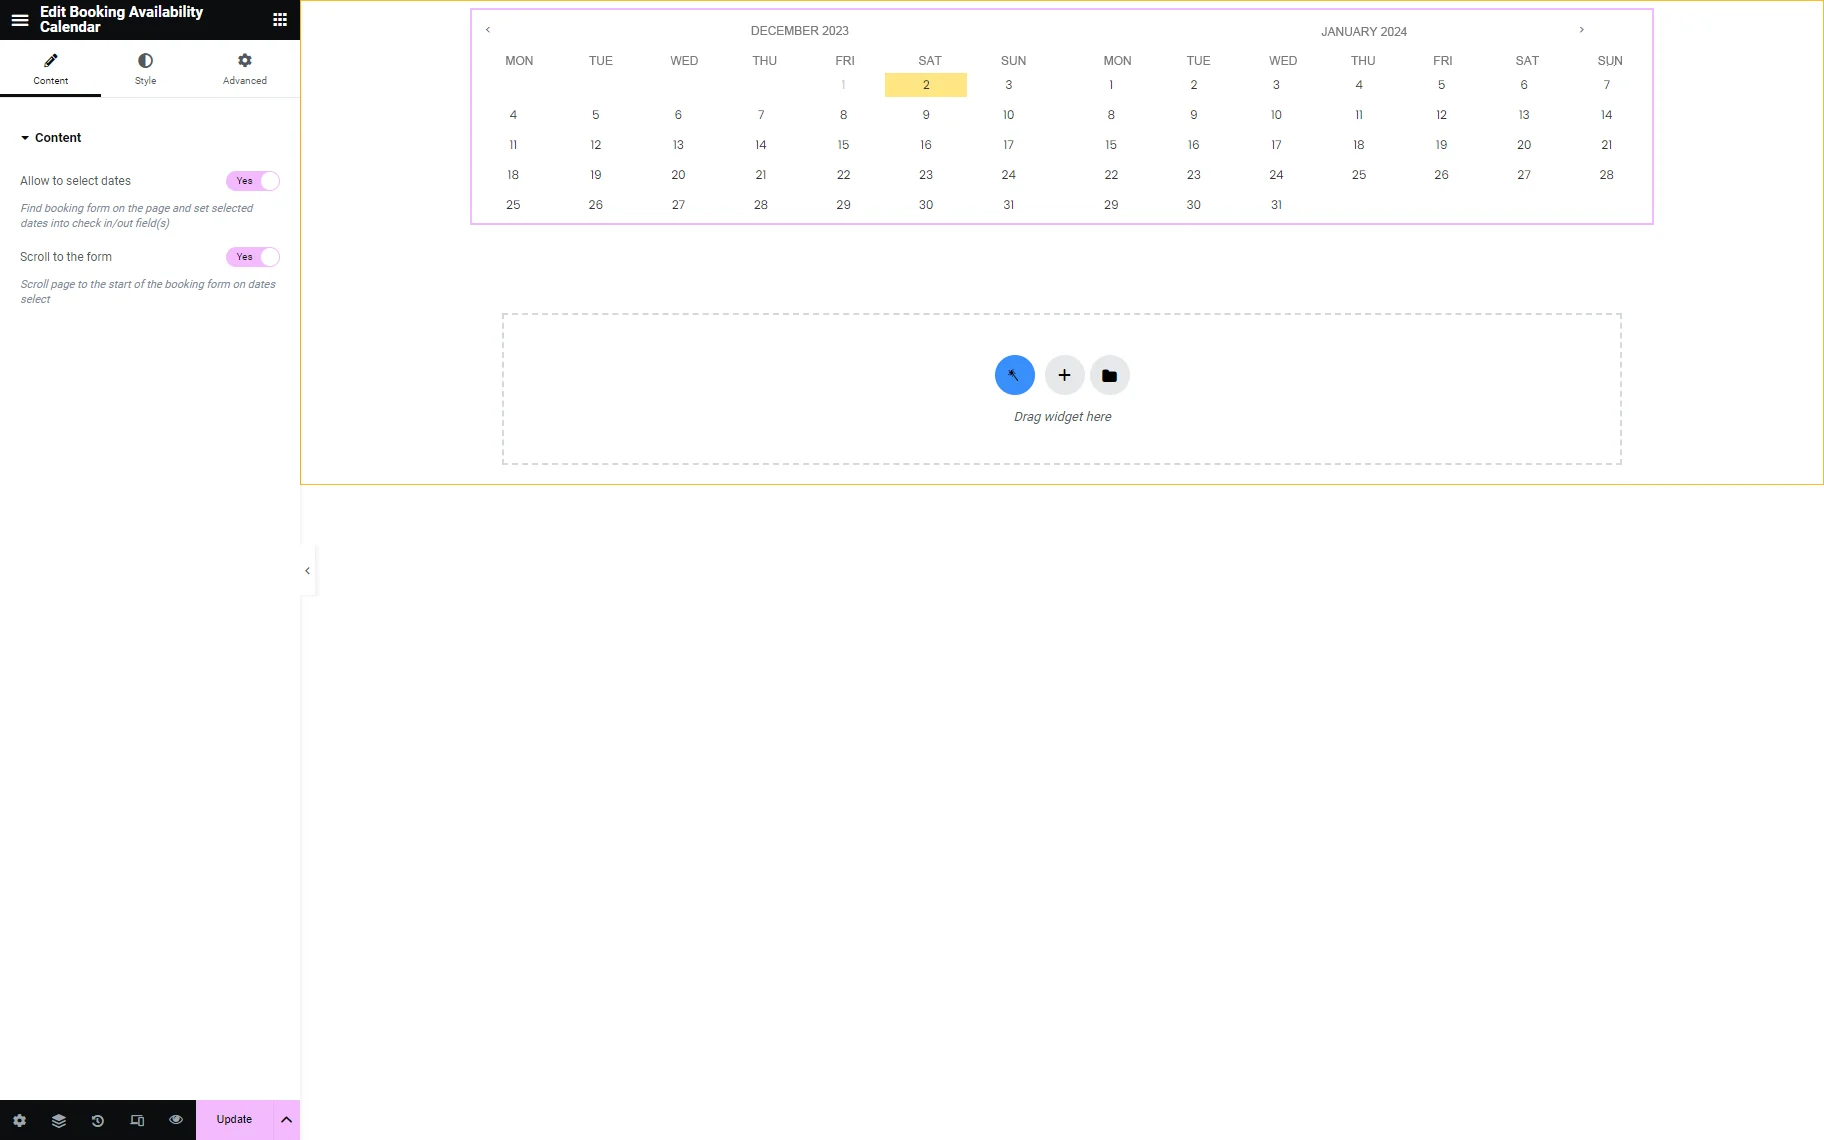
Find the Booking Availability Calendar widget, drag and drop it on the page.
Toggle the necessary settings:
- Allow to select dates to set the desired dates into the check-in and check-out field(s);
- Scroll to the form to scroll the page to the start of the booking form.
Add the JetFormBuilder Forms to Single Post Pages
Adding the forms in Elementor
Find the JetForm widget and drag and drop it where needed. Select the JetFormBuilder booking form from the Choose Form drop-down menu.

Navigate to the CPT list (here, Properties) to see the CPT post where the booking form was added.
Adding the forms in the Block Editor
To add a form in the Block Editor:
- Open the necessary Single page.
- Find the JetForm block and drag and drop it onto the page.
- Select the JetFormBuilder form in the CHOOSE FORM field.
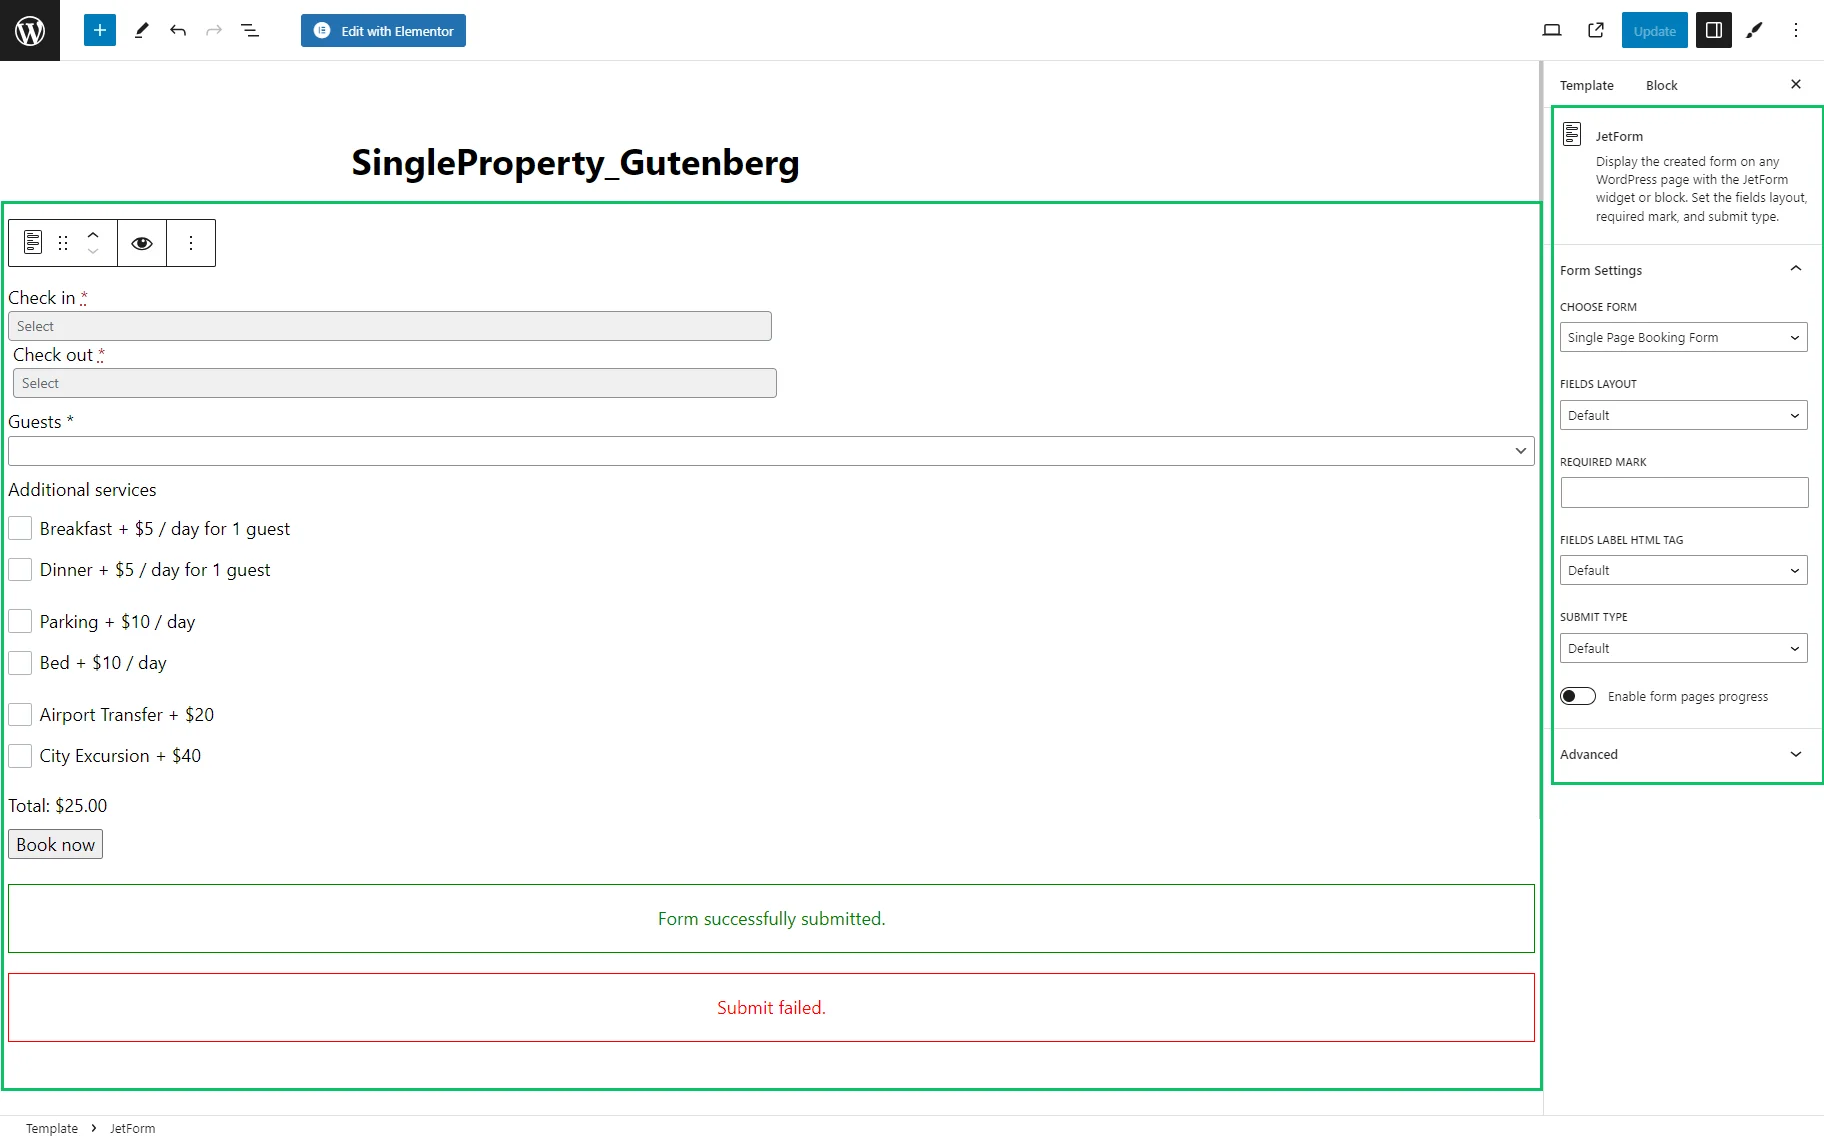
Check how the form looks on the front end.
Add the JetEngine Forms to Single Post Pages
Find the Form widget and drag and drop it to the Single page. Select the “JetEngine” option as a provider in the Choose Provider drop-down menu.
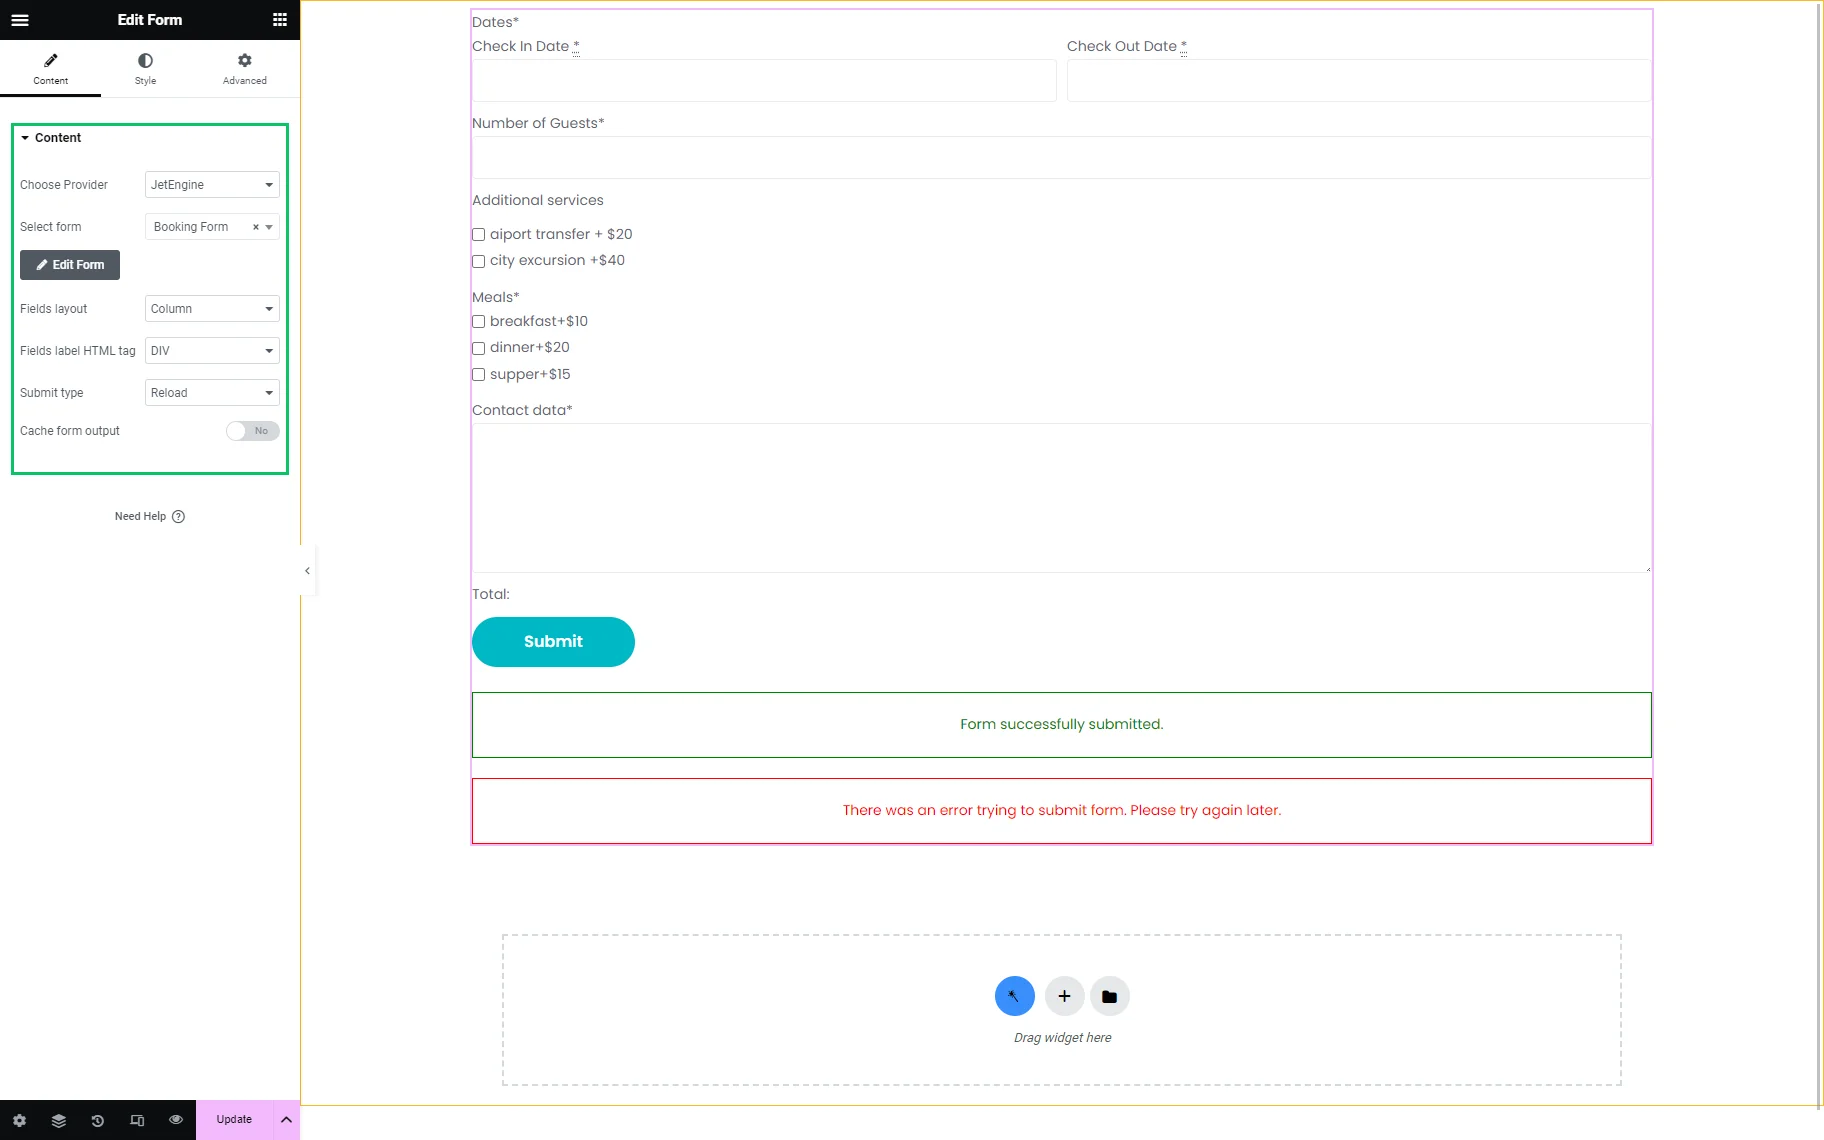
In the Select form settings, select the form. Style it up if you want, and update the form.
Navigate to the CPT list and view the CPT with the booking form added.
Managing Orders
The JetBooking plugin collects all booking orders via its dashboard. To manage them, navigate to the Bookings > Bookings tab.
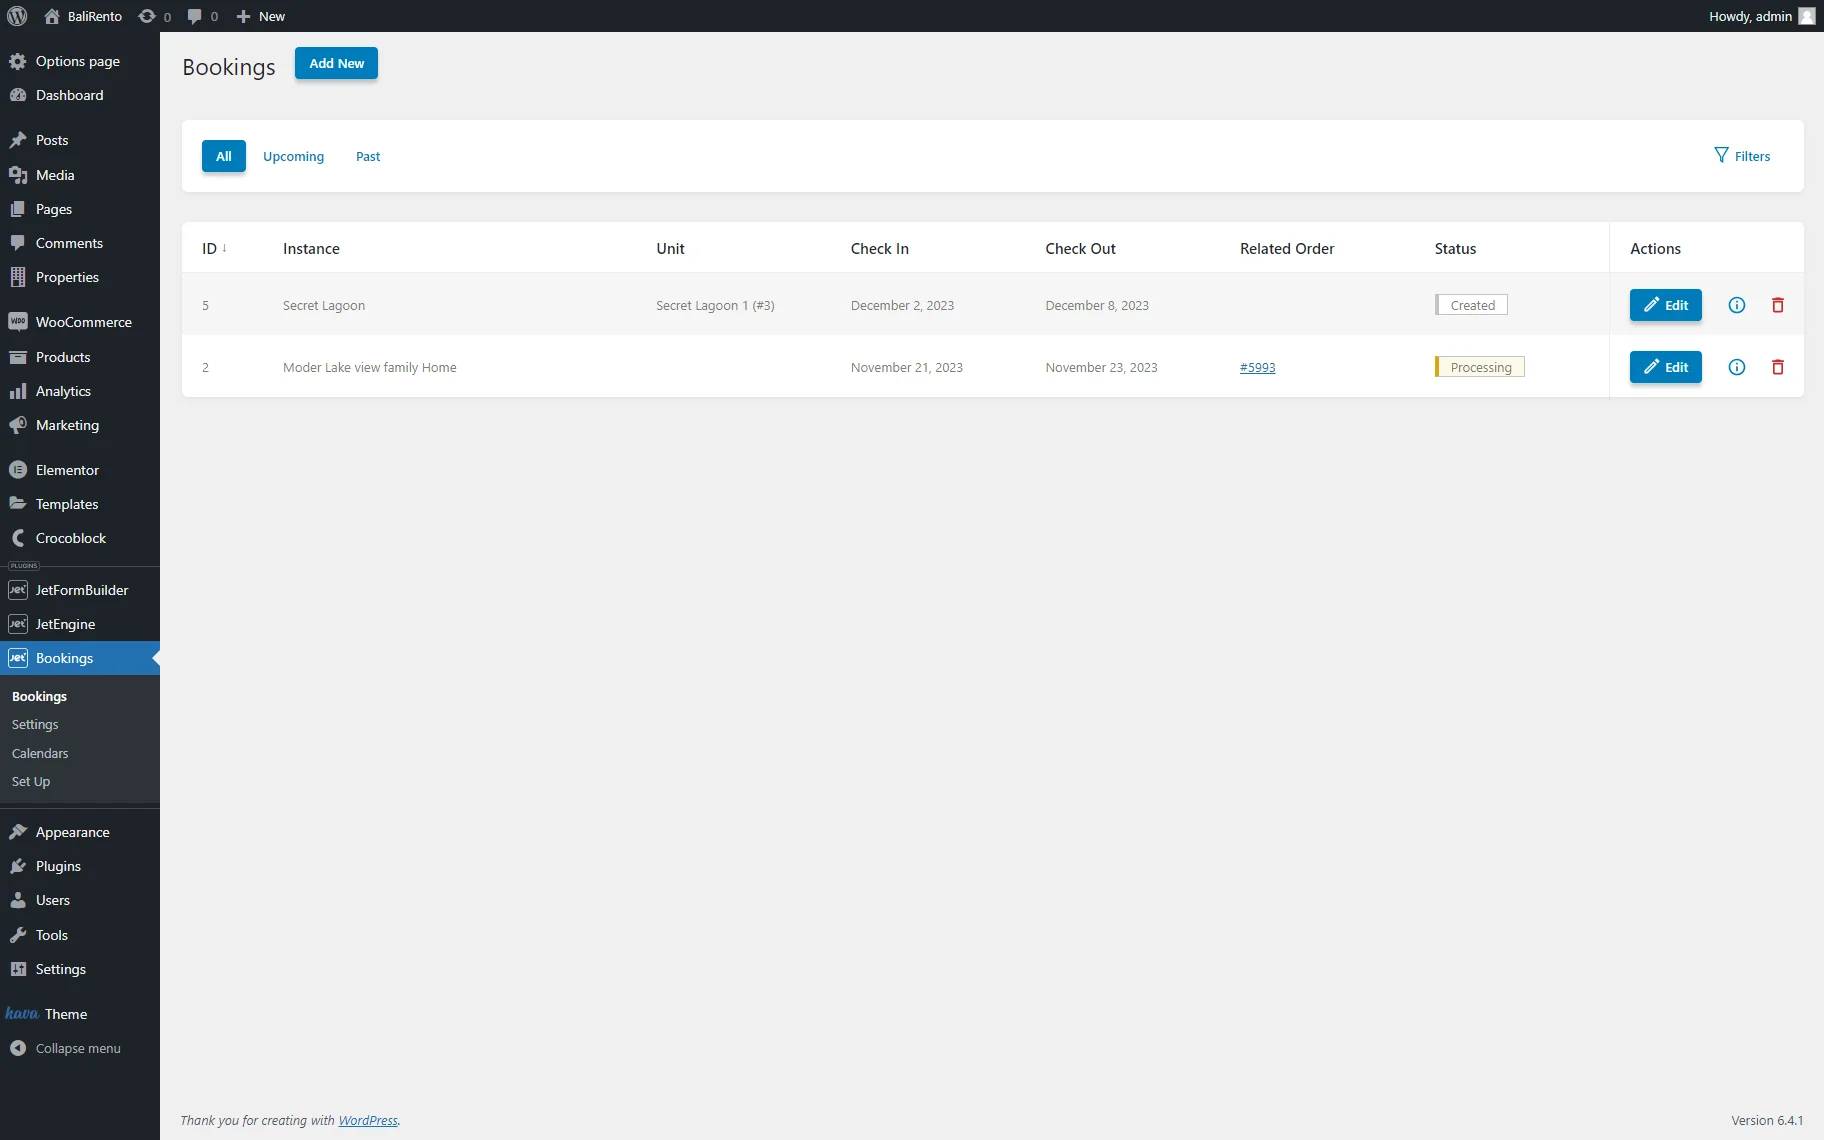
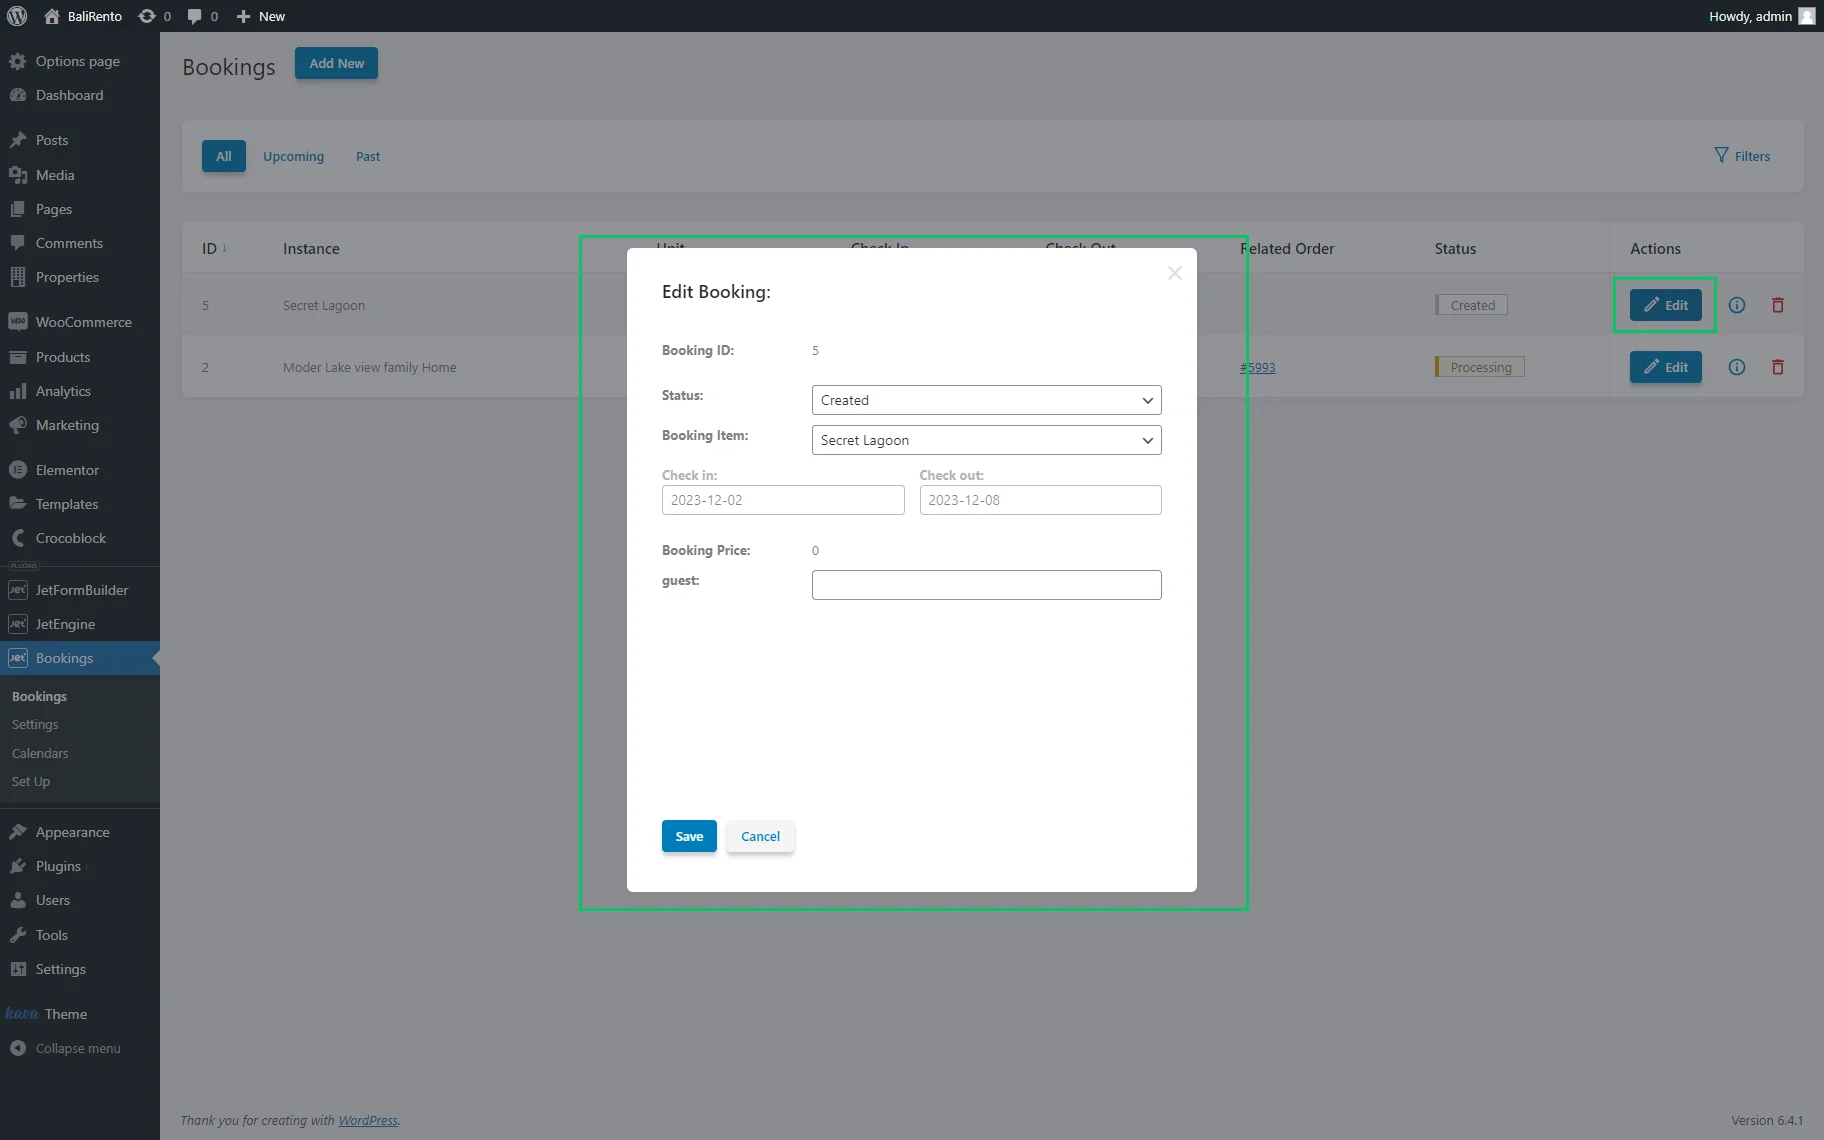
The dashboard displays the columns with data referring to the order’s details, i.e., check-in and check-out dates and the order’s status. To edit booking order details, press the “Edit” button and use the settings in the Edit Booking pop-up window.
That’s all. Now you know how to display the booking form with the JetFormBuilder and JetEngine plugins and apply the Booking Availability Calendar widget or block on the single post pages.