How to Create a Custom Blog Posts Archive Template
This tutorial will show you how to create an archive template in several clicks using the JetThemeCore WordPress plugin.
A custom blog post archive allows you to create a new creative blog page layout and then apply it instead of the default blog page.
With the JetThemeCore, you can create a blog archive template in the Elementor or Gutenberg editors or a blog page template (with a header, body, and footer).
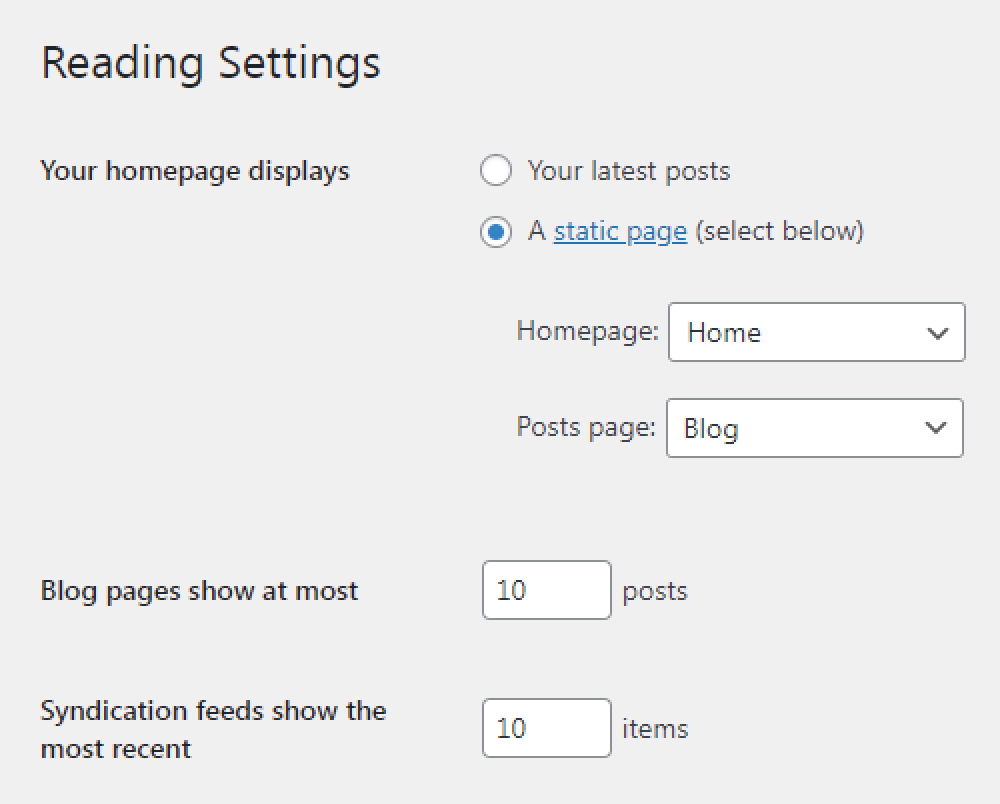
Before the template creation, navigate to the Settings > Reading WordPress Dashboard tab. Make sure that you selected the “A static page” option and chose the default Blog WordPress page (or another page) as the Posts page.
Also, be aware that the Blog pages show at most feature impacts on the widgets and blocks that display posts. For example, if you set that the Blog pages show at most 3 posts and set 6 posts in the Posts widget, the blog page will show only 3 posts.
Creating a Custom Archive Template in the Elementor Editor
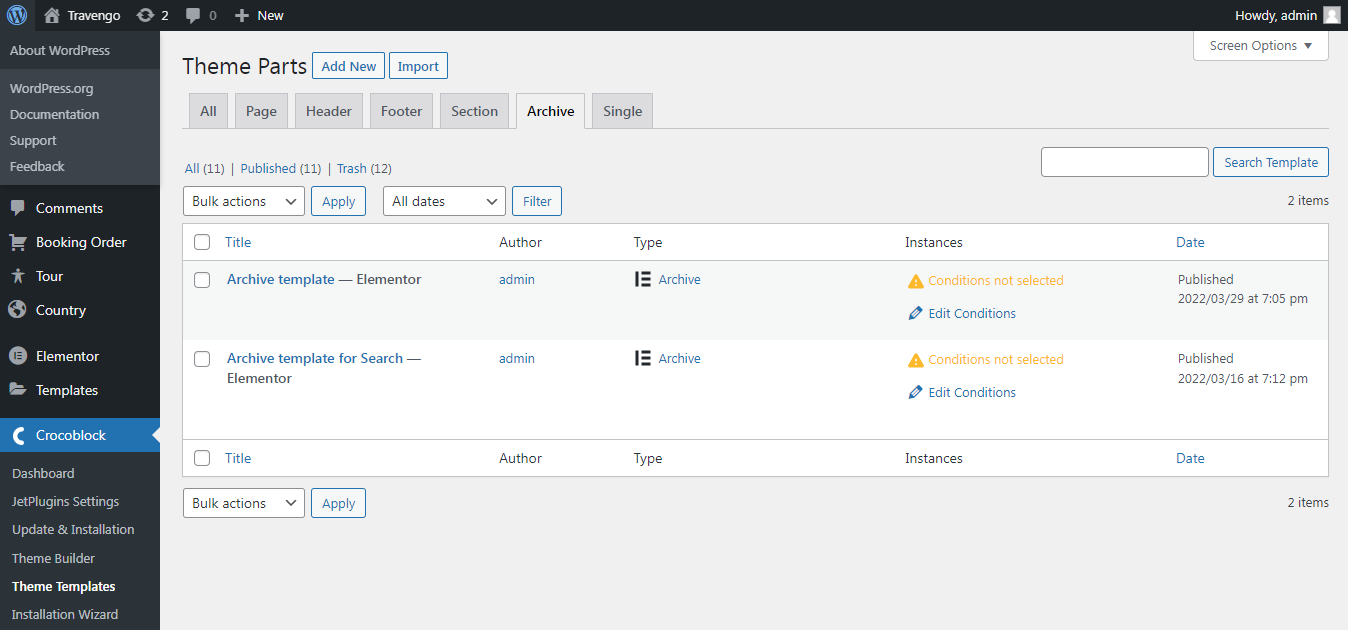
Open the WordPress Dashboard, proceed to the Crocoblock > Theme Templates directory to create a custom blog posts archive, and hit the “Add New” button.
Select the “Archive” Template Type, choose the “Elementor” Template Content Type, and set the Template Name.
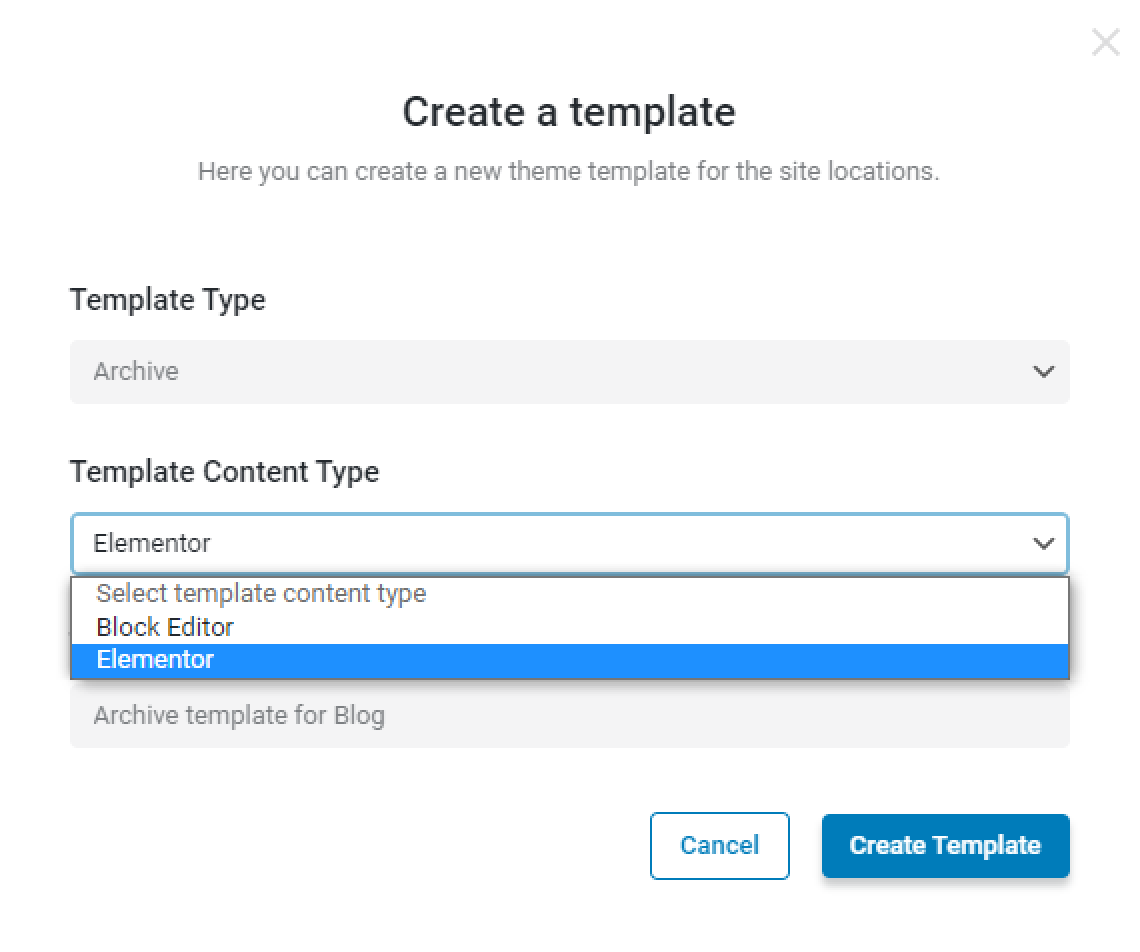
Tick the “Create Template” button, and you will be redirected to the Elementor editor.
In order to pull out the posts to the archive template, you can use the Listing Grid (for it, you need to create a Listing template), Posts, or Smart Posts List widget.
Drag and drop the needed widget to a new section.
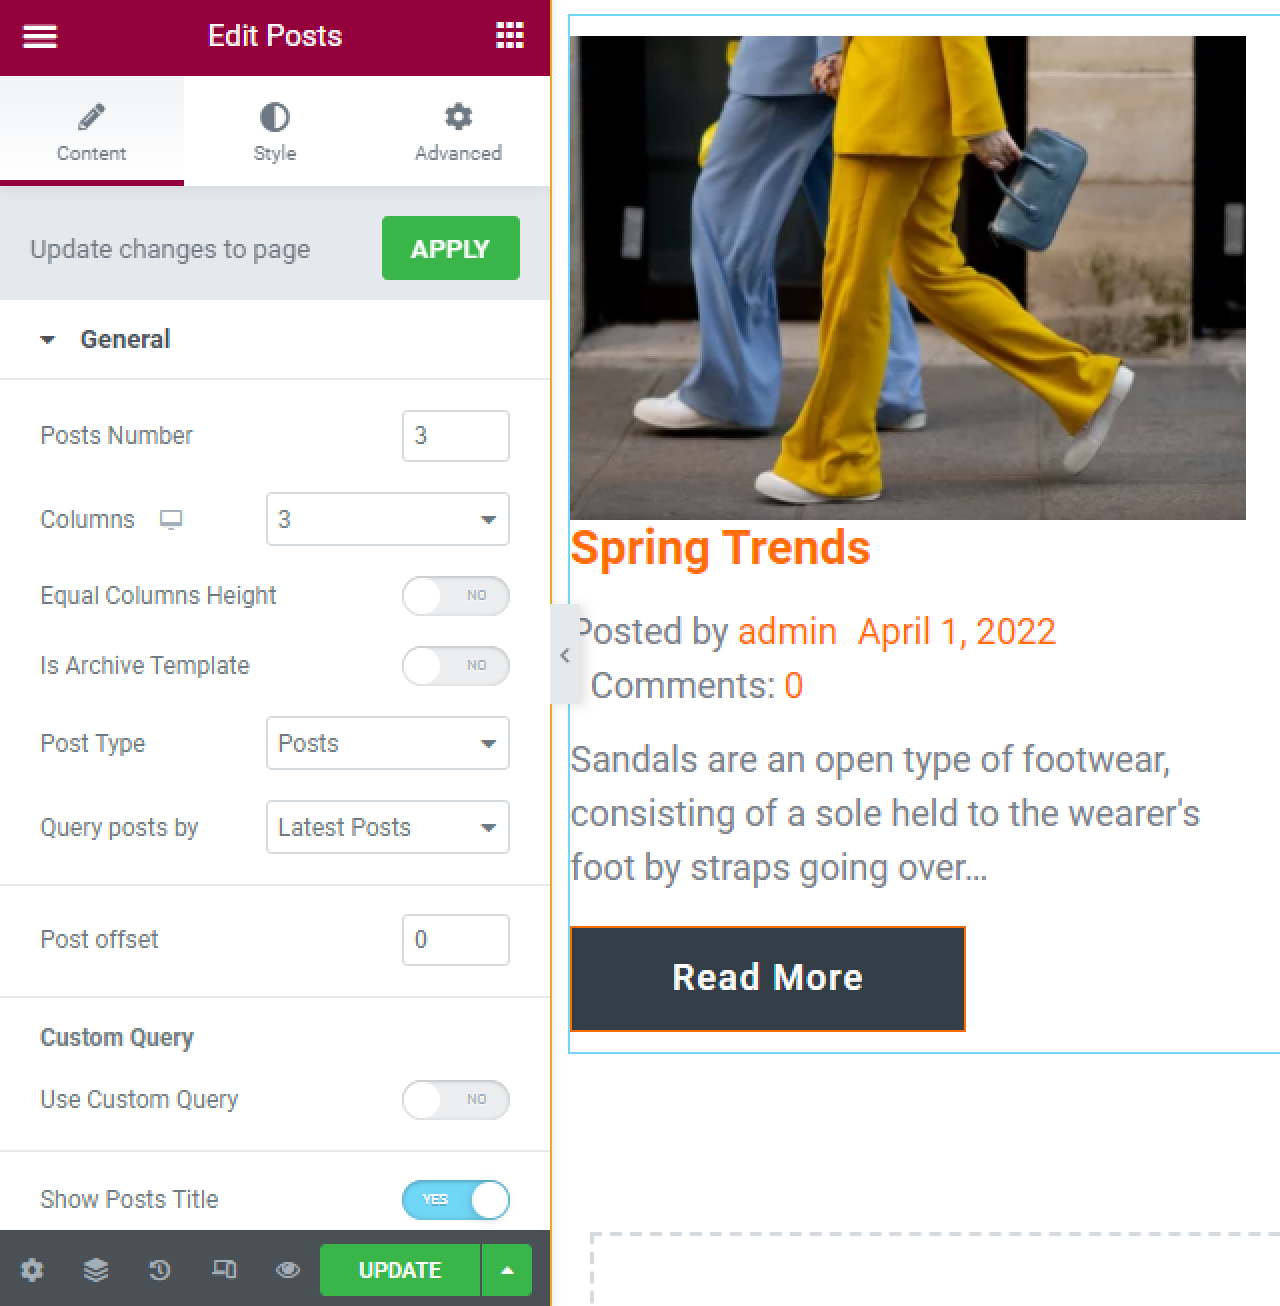
If you use the Listing Grid widget, keep in mind that the “Use as Archive Template” option allows you to pull the number of posts to be displayed on the Archive page from the default Reading settings.
After the archive customizing and stylization, push the “Publish” or “Update” button.
Return to the Crocoblock > Theme Templates tab and click on the “Edit Condition” button in the Instances tab.
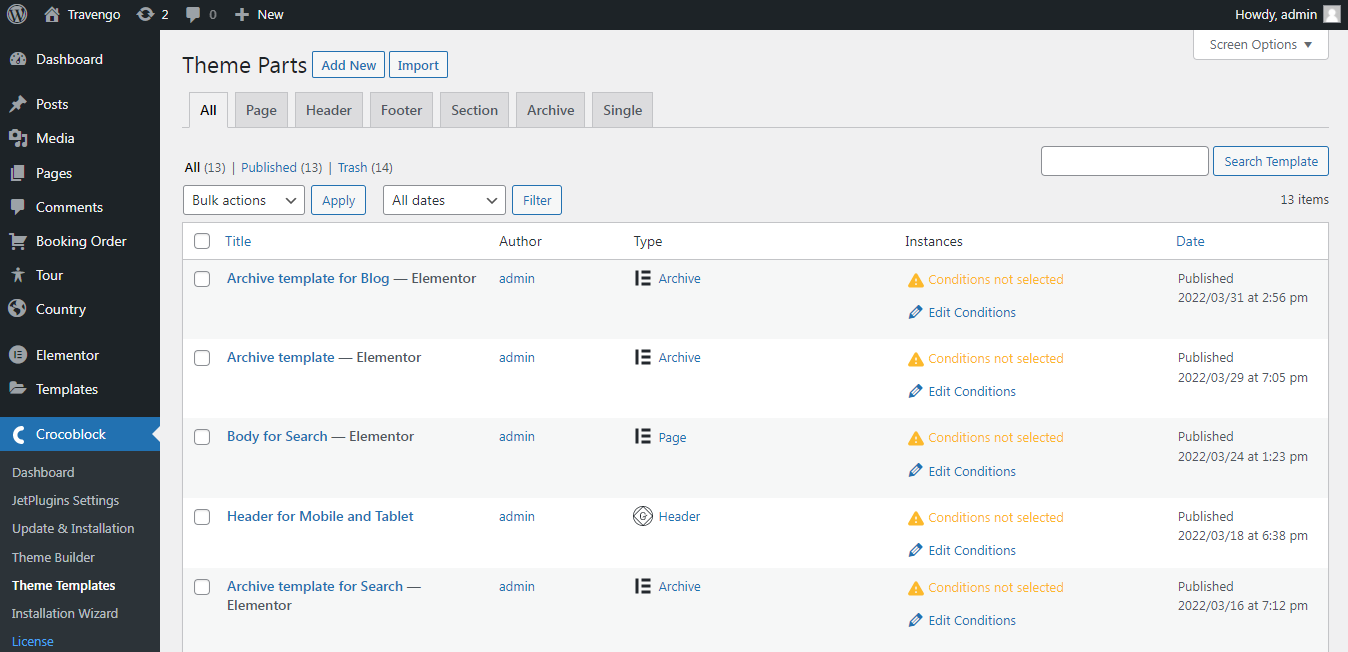
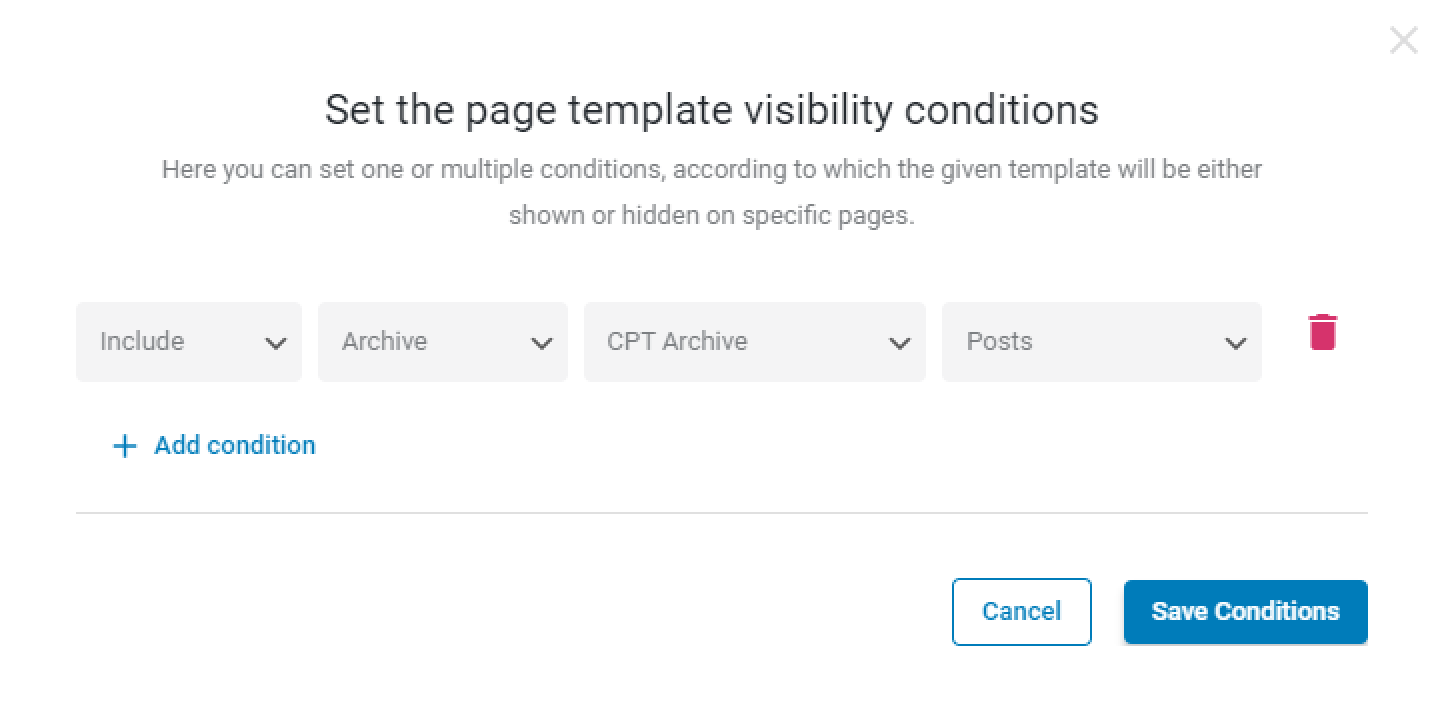
In order to apply an Archive template instead of the default blog page template, in the appeared condition pop-up, select the “Include,” “Archive,” “CPT Archive,” and “Posts” options. Finally, push the “Save” button and close the pop-up.
Creating a Custom Archive Template in the Block (Gutenberg) Editor
Open the WordPress Dashboard, proceed to the Crocoblock > Theme Templates directory to create a custom blog posts archive, and hit the “Add New” button.

Select the “Archive” Template Type, choose the “Block Editor” Template Content Type, and set the Template Name.
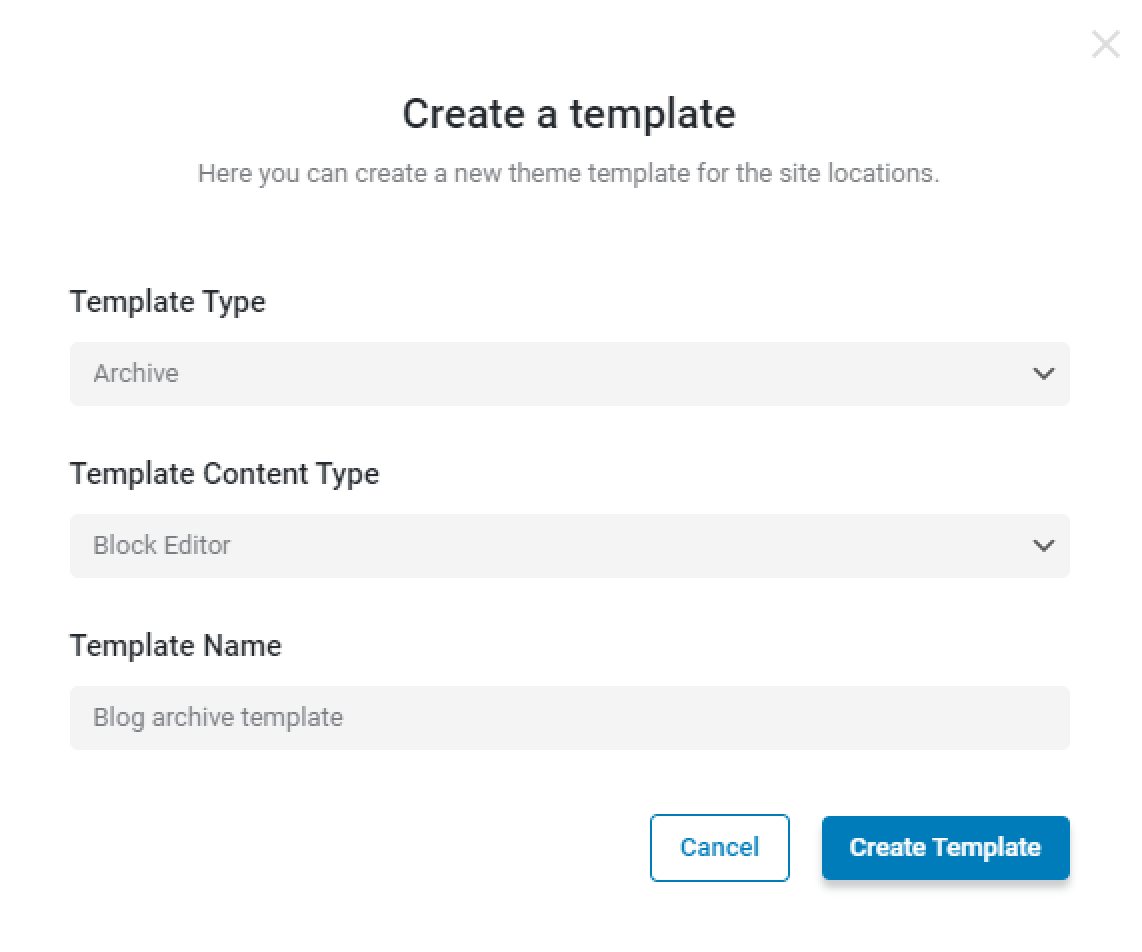
Tick the “Create Template” button, and you will be redirected to the Gutenberg editor.
In order to pull out the posts to the archive template, you can use the Listing Grid (for it, you need to create a Listing template) or the default Posts List WordPress block.
Type the “/” symbol, enter the name of the needed block, and add it to the editing page.
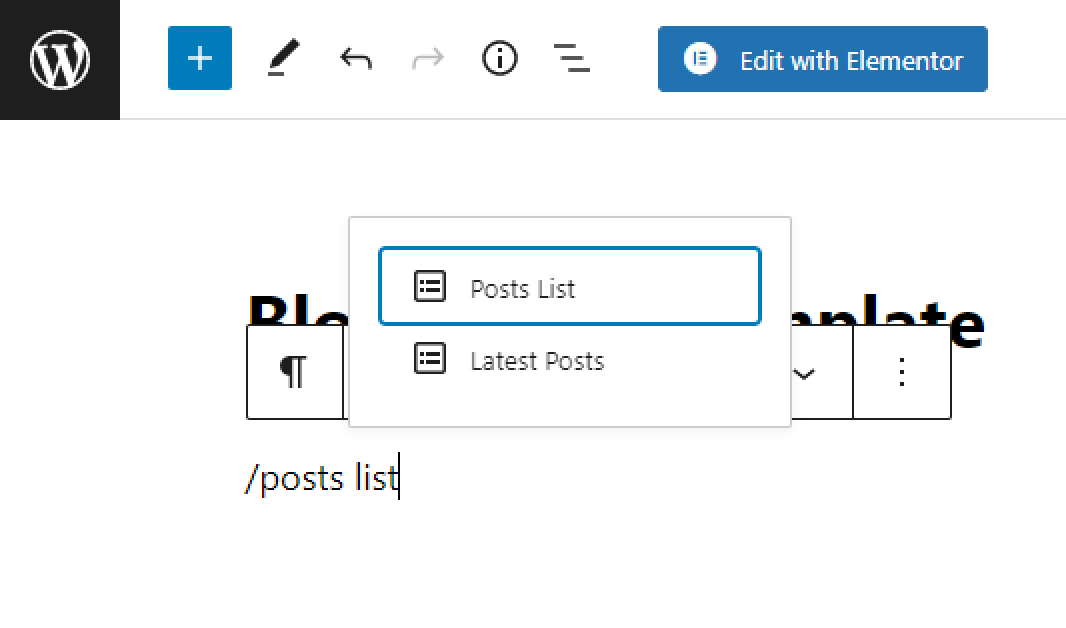
Customize and stylize the template to your needs.
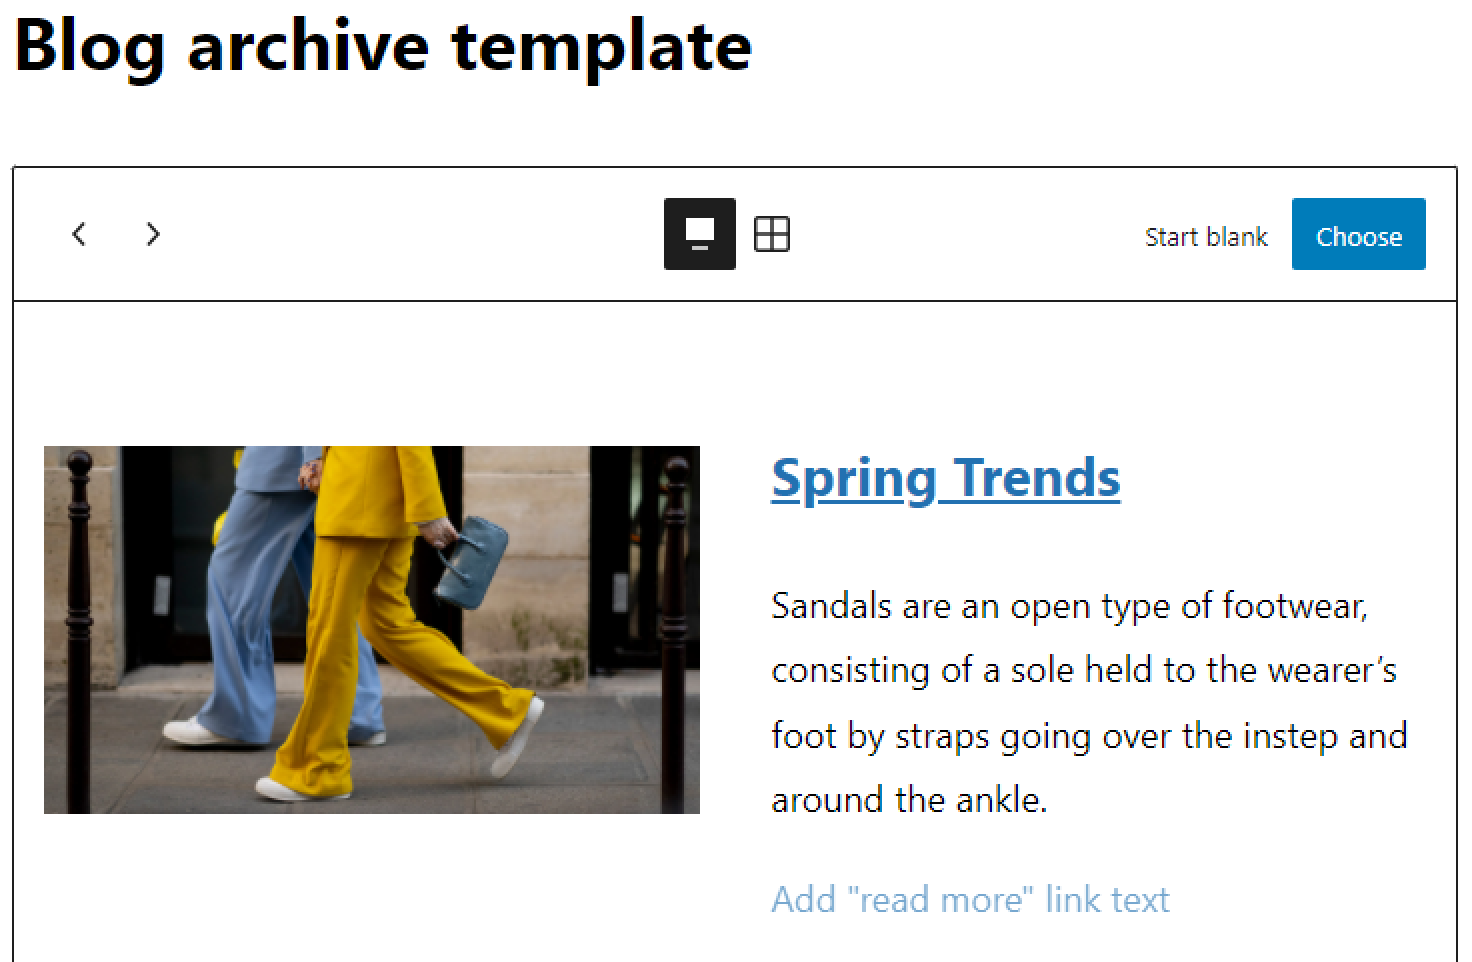
If you use the Listing Grid block, keep in mind that the “Use as Archive Template” option allows you to pull the number of posts to be displayed on the Archive page from the default Reading settings.
After you’re done, push the “Publish” or “Update” button.
Return to the Crocoblock > Theme Templates tab and click on the “Edit Condition” button in the Instances tab.
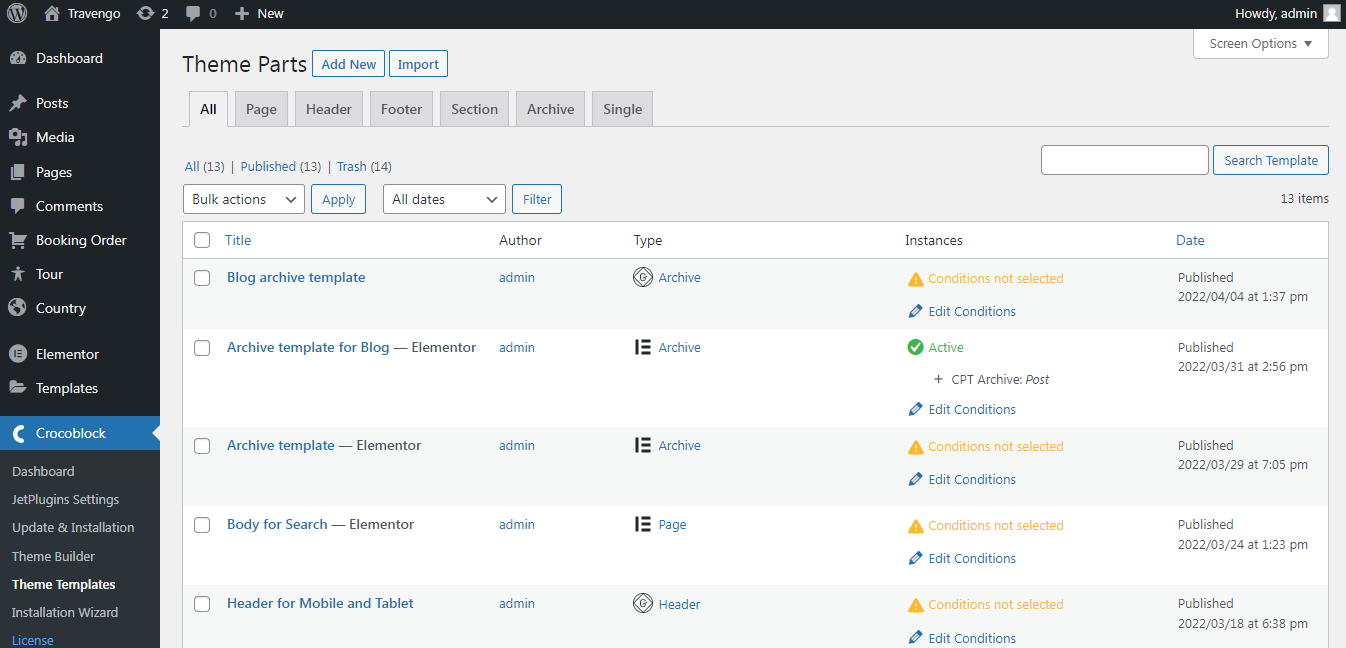
In order to apply an Archive template instead of the default blog page template, in the appeared condition pop-up, select the “Include,” “Archive,” “CPT Archive,” and “Posts” options. Finally, push the “Save” button and close the pop-up.

Creating a Custom Archive Page Template (with a Header, Body, and Footer)
Creating the Page Template allows you to make a header, body, and footer for the blog archive.
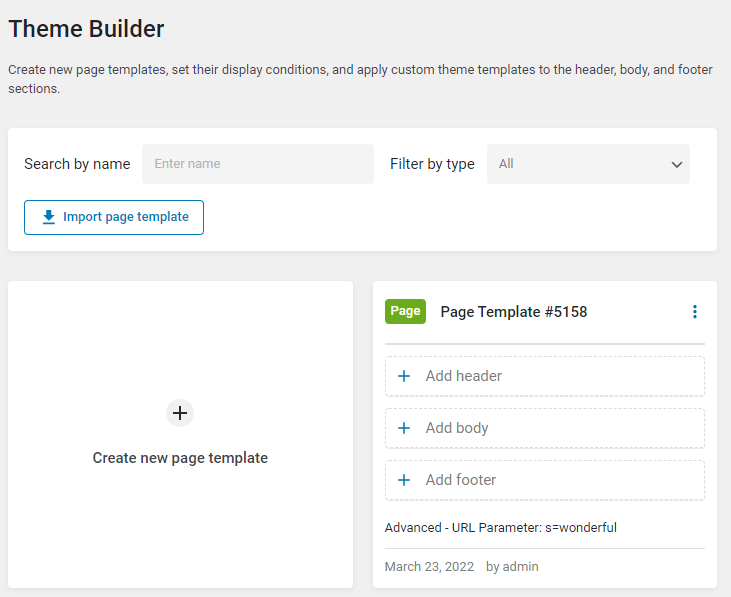
Go to the Crocoblock > Theme Builder WordPress Dashboard tab and tick the “Create new page template” button.
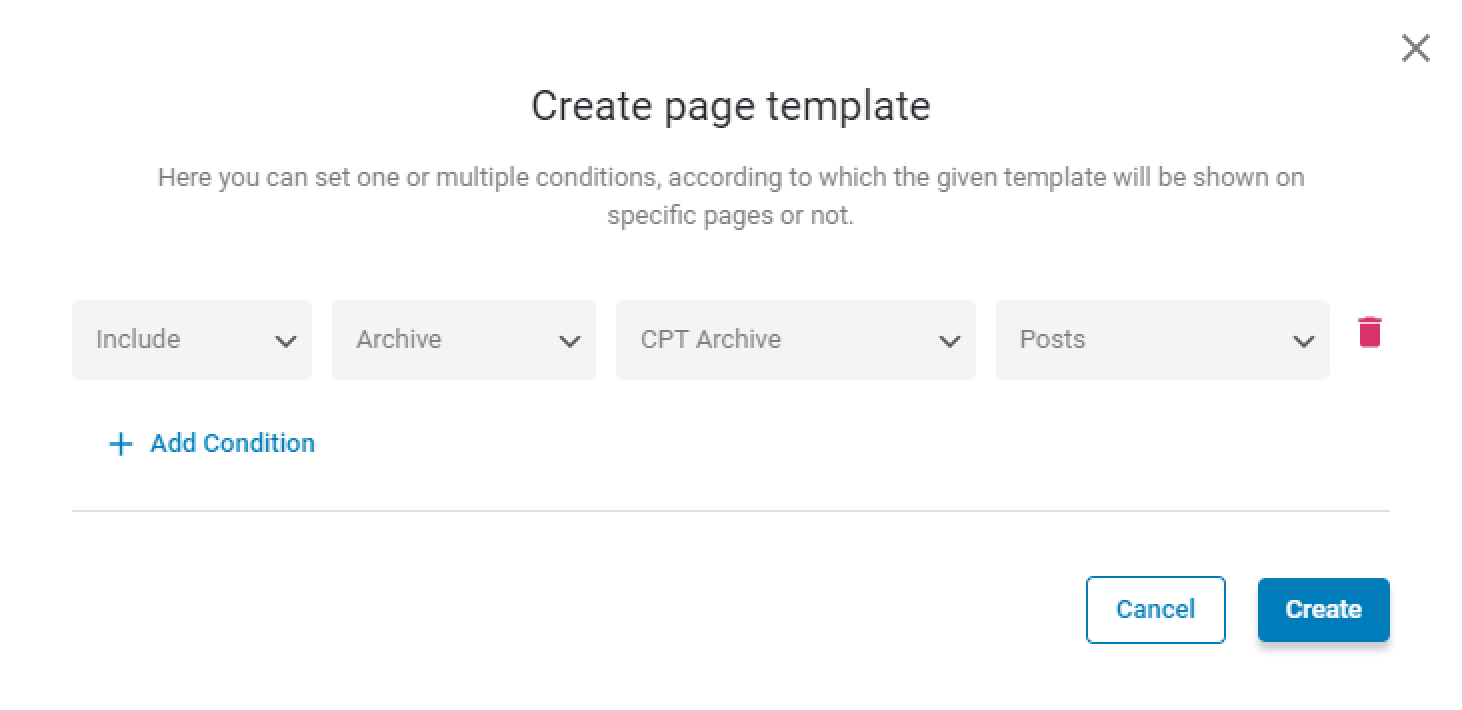
Press the “Add Condition” button and select the “Include,” “Archive,” “CPT Archive,” and “Posts” options. Finally, push the “Create” button.
You can add the templates to the page template from the library or create new ones. As the body template, you can use the archive template how to create, which was described in the previous two chapters. Also, you can mix templates created in the Gutenberg and Elementor editors.
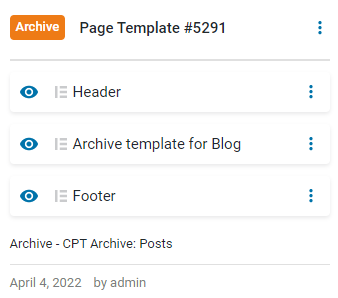
That’s all. Your custom blog post archive is ready to use. You can move to the front end to check the new blog page.