How to Create Product Attributes in WooCommerce
Learn how to create WooCommerce product attributes, configure their terms, and assign them to product variations, adding specific characteristics to a product, such as size and/or color.
Before you start, check the tutorial requirements:
- WooCommerce plugin installed and activated
The product attributes are a useful pre-made tool of the WooCommerce plugin that allows for creating product variations by adding product-specific characteristics (i.e., such as size and/or color). Each attribute can include some terms (i.e., the color attribute can include the “Green,” “Black,” “White,” etc., terms).
Read more about the product variation settings in the How to Create WooCommerce Product Variations tutorial.
Create Attributes
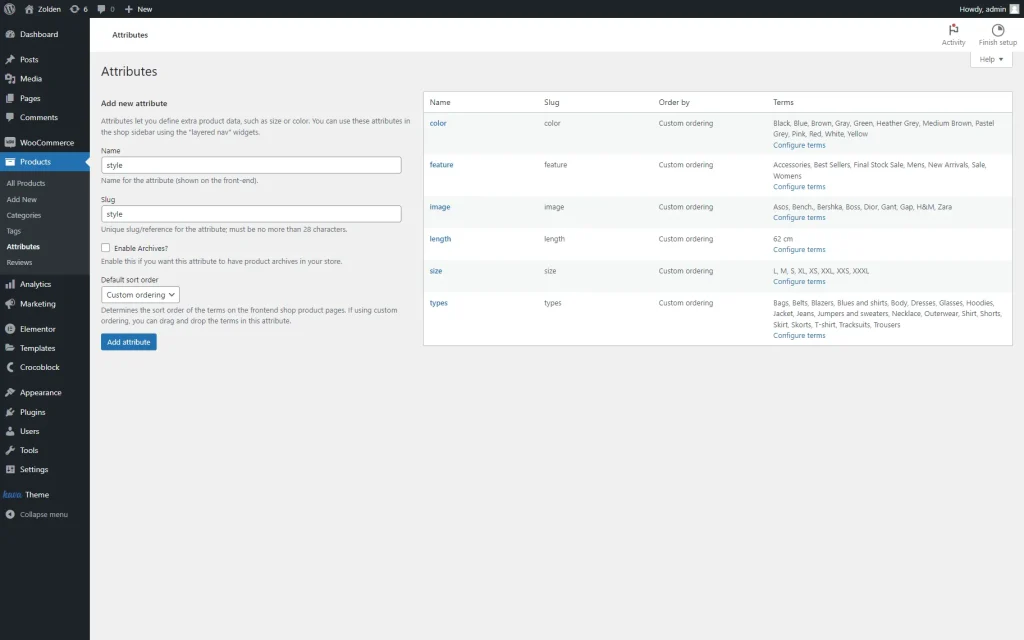
Navigate to the WordPress Dashboard > Products > Attributes tab and type the attribute’s Name; the Slug field will be inserted automatically. Then, in this case, we keep the Enable Archives? toggle disabled and leave the default “Custom ordering” Default sort order option.
Finally, press the “Add attribute” button.
In this tutorial, we created the “color,” “feature,” “image,” “size,” and more attributes with the corresponding names; the slugs were added automatically.
Configure the Attribute’s Terms
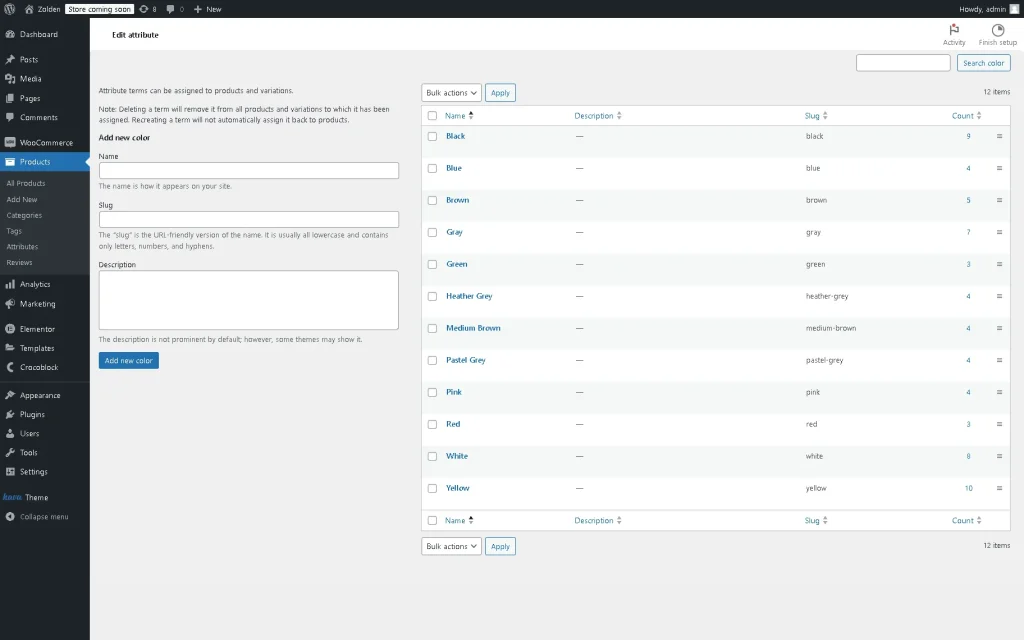
After pressing the “Add attribute” button, the new attribute will appear in the list. Click the “Configure terms” link on the right near the appropriate attribute to be redirected to the Edit attribute page.
Here, type the Name of a new term, Slug, and Description (optionally). Once completed, press the “Add new (attribute name)” button.
In this way, create as many terms as needed.
For instance, we created the following terms for the “color” attribute: “Black,” “Blue,” “Brown,” “Red,” and more.

Assign the Attributes and Terms to Products
Navigate to the WordPress Dashboard > Products > Add New path. On the Add new product page, type the product’s name instead of the “Product name” text in the corresponding field and scroll down the page.
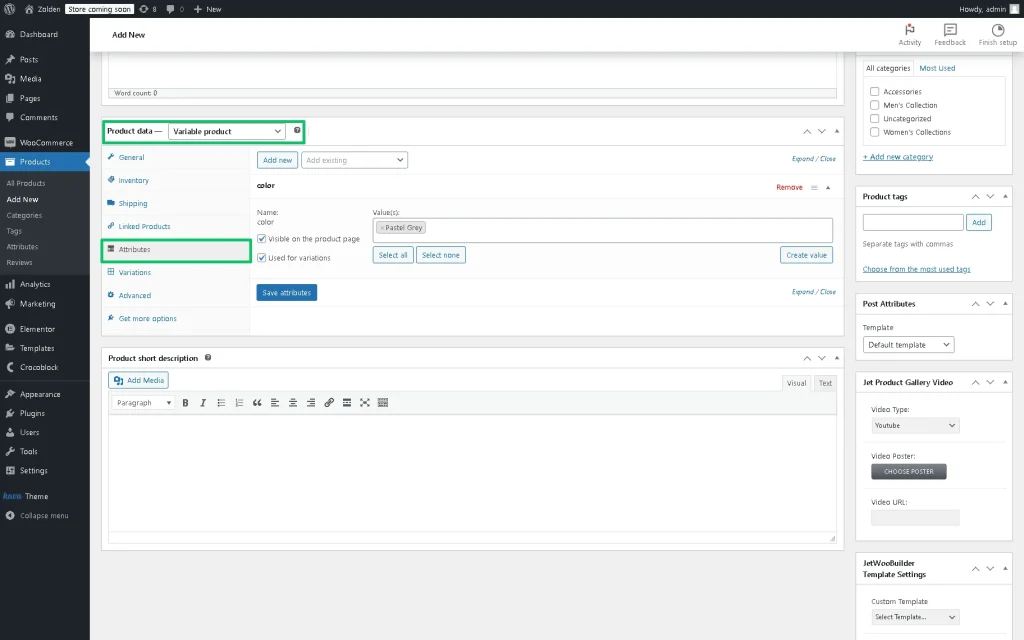
Select the “Variable product” in the Product data drop-down list. After that, move to the Attributes section under this drop-down. Here, type some characters in the “Add existing” search bar to find the needed attribute or create a new one by pressing the “Add New” button.
In this tutorial, we added the “color” attribute.
In the next step, fill out the attribute Value(s) field to add the required term(s). If you need to add all created terms, click the “Select all” button under this field.
In this case, we added the “Black” term to the attribute Value(s).
Also, leave the “Visible on the product page” option checked to make the attributes shown on the product page and the “Used for variations” option checked to use the attribute for product variations.
Finally, once completed, click the “Save attributes” button to save the changes.
That’s it. Now you know how to create WooCommerce product attributes, configure their terms, and assign them to the product variations.

