How to Enable Comparison Functionality for WooCommerce
This tutorial explains how to enable Comparison functionality and provides an overview of Comparison widgets of the JetCompareWishlist plugin.
Before you start, check the tutorial requirements:
- JetCompareWishlist plugin installed and activated
With the JetCompareWishlist plugin, you will have a unique opportunity to create wishlists and compare tables with desired products, add wishlists and compare buttons to the product templates.
From this tutorial, you will learn how to start using the Comparison functionality for WooCommerce products.
Open Settings
Open the website’s WordPress Dashboard and go to JetPlugins > JetCompareWishlist Settings. In the Compare tab, you will see the available customization options. Let us have a closer look at them.
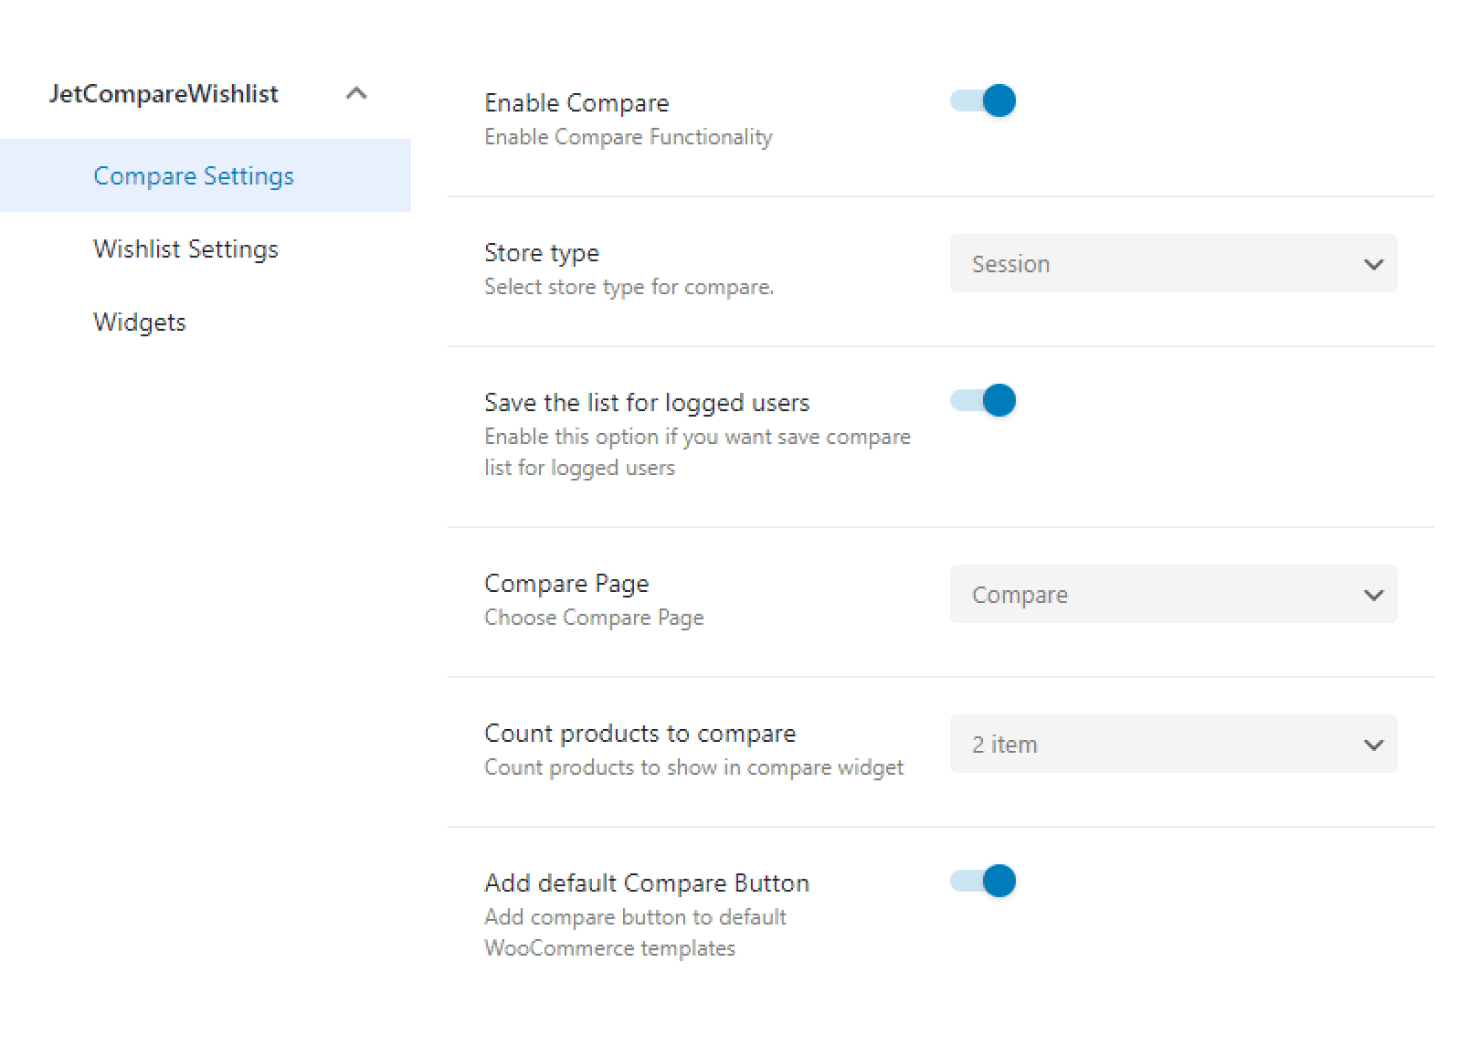
- Turn on the Enable Compare toggle to enable compare functionality on your page;
- Choose a Store Type where products will be saved, Session and Cookies are available;
- Save for logged users toggle enables saving the compare list of the logged-in users, so they will be able to take another look at it when they come back to the site;
- Select the page where the compare list will be displayed in the Compare Page dropdown menu. Note that you can create a specific page for this purpose or choose the existing one;
- You can set the preferable number of products that the user can add to the compare list in the Count products to compare dropdown menu. Remember that you are able to display from 1 to 4 items;
- If you turn the Add default Compare Button toggle on, the compare button will be automatically added to the default WooCommerce templates.
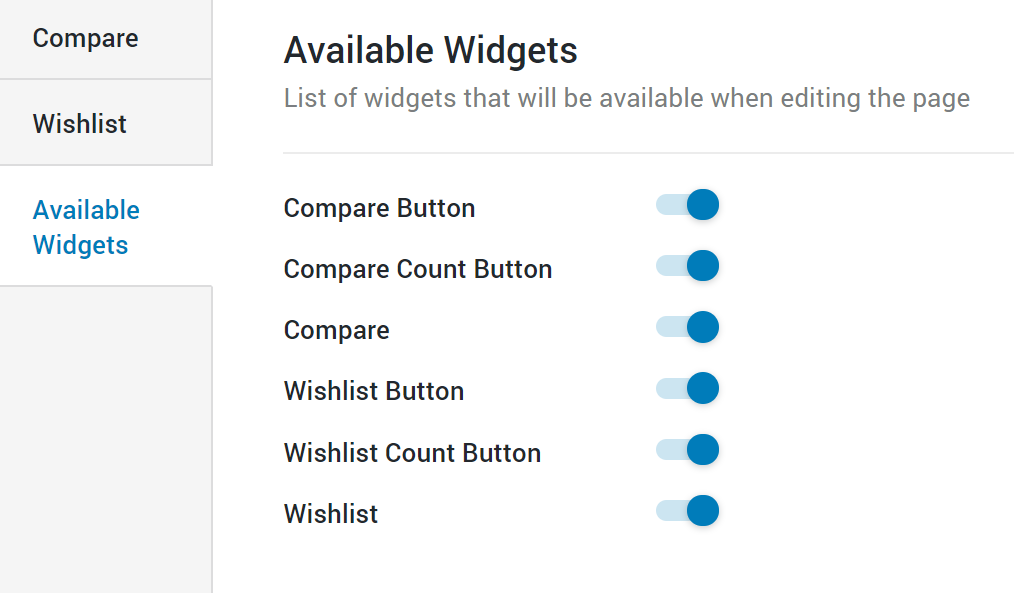
Enable Widgets
When you are done with settings, proceed to the Available Widgets tab, and tick Compare Button, Compare Count Button, and Compare checkboxes.
You don’t need to do anything to save the changes. They will be performed automatically, and you will see the “Settings have been saved” popup notification.
It is successfully enabled. Now you know how to make Comparison functionality work for WooCommerce. The creation of the comparison button and inserting it into the page process are described in the next tutorial.