How to Set the Footer Conditions
From this tutorial, you will learn to choose the right conditions for footer templates using the JetThemeCore plugin.
Before you start, check the tutorial requirements:
- Elementor (Free version) or Block editor (Gutenberg)
- JetThemeCore installed and activated with WordPress footer built.
With the conditions provided in the JetThemeCore plugin, you can apply the templates you’ve built to different WordPress website pages.
You can easily apply any footer to your entire site or any pages of your choice.
Setting the Footer Conditions
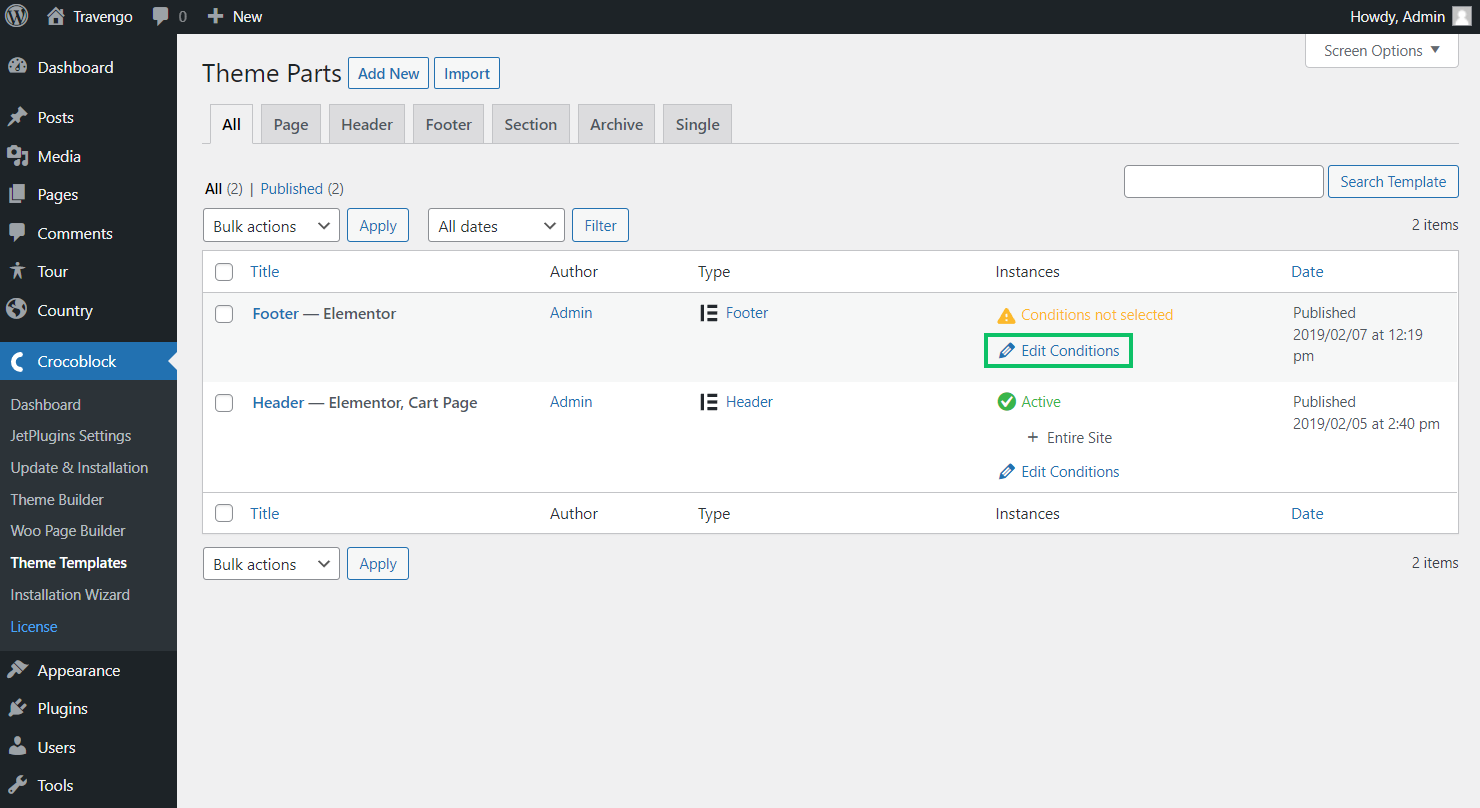
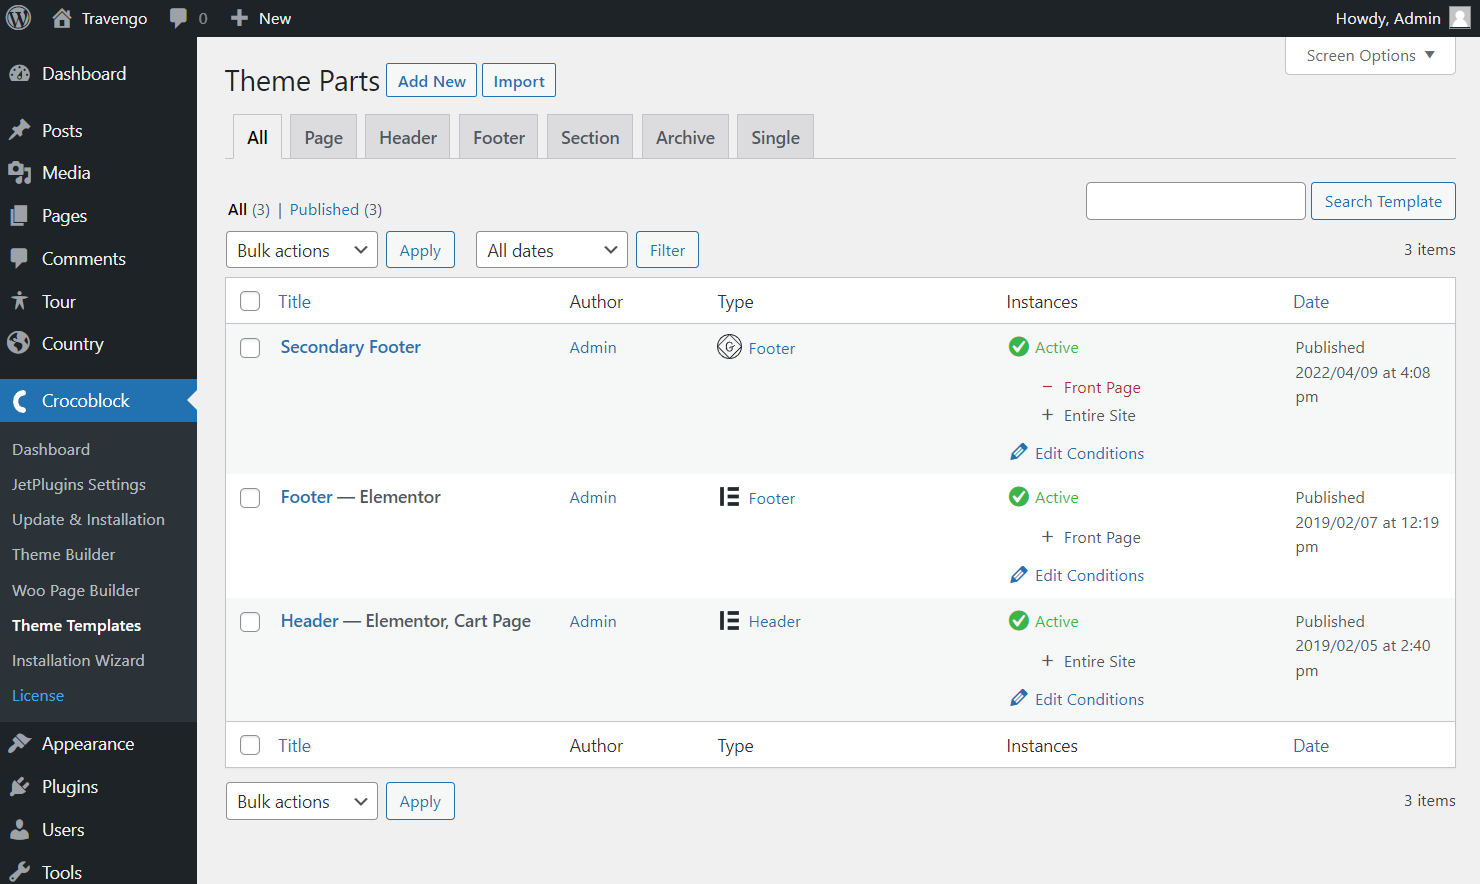
Firstly, open the WordPress Dashboard > Crocoblock > Theme Templates directory and find the needed footer.
Look at the Instances section where the “Edit Conditions” button can be found. Press it to access the conditions editing window.
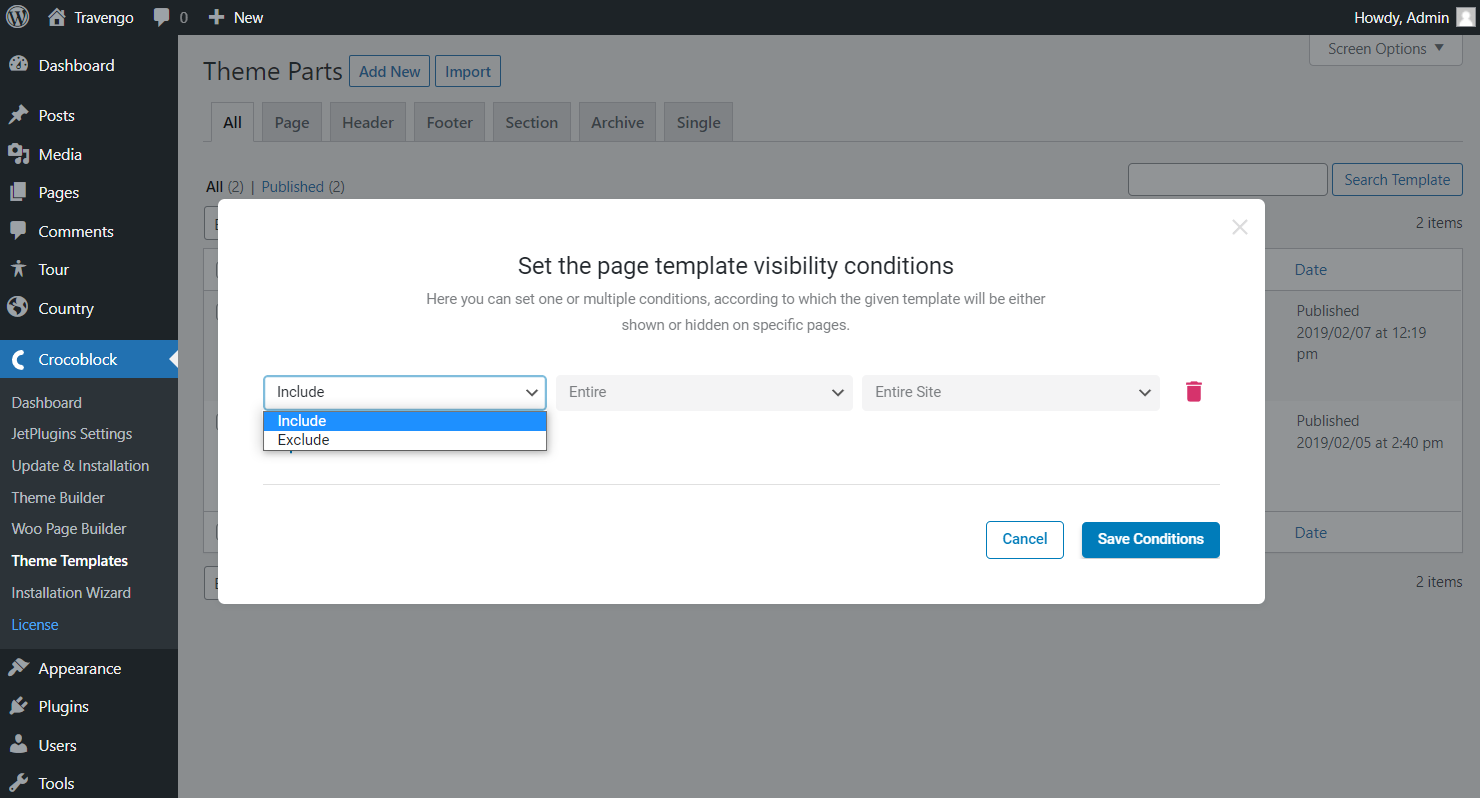
There you go; the first condition is already created. However, the options are set by default; let’s make a change.

Define whether you want to include or exclude the footer by picking the samely named options in the first menu.
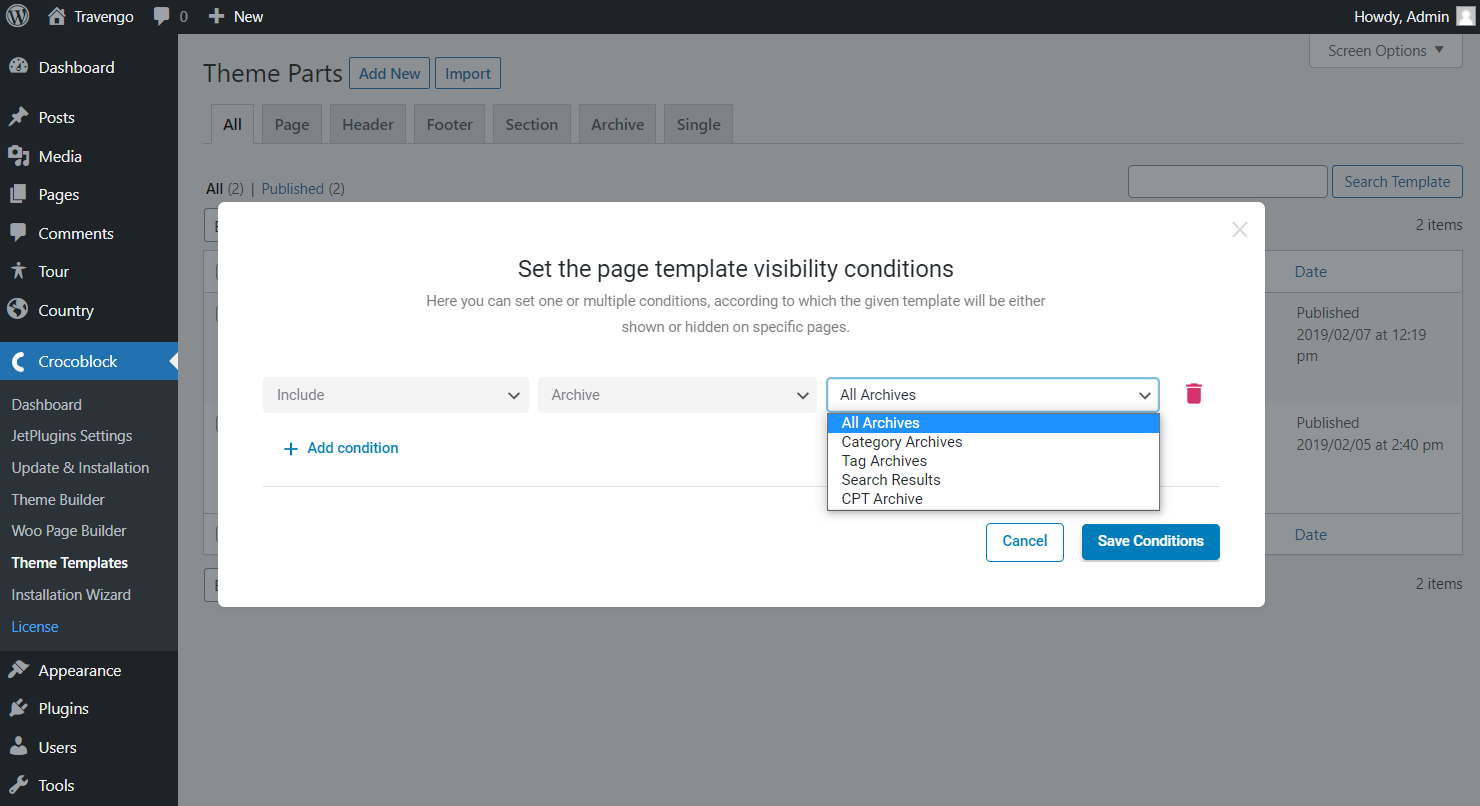
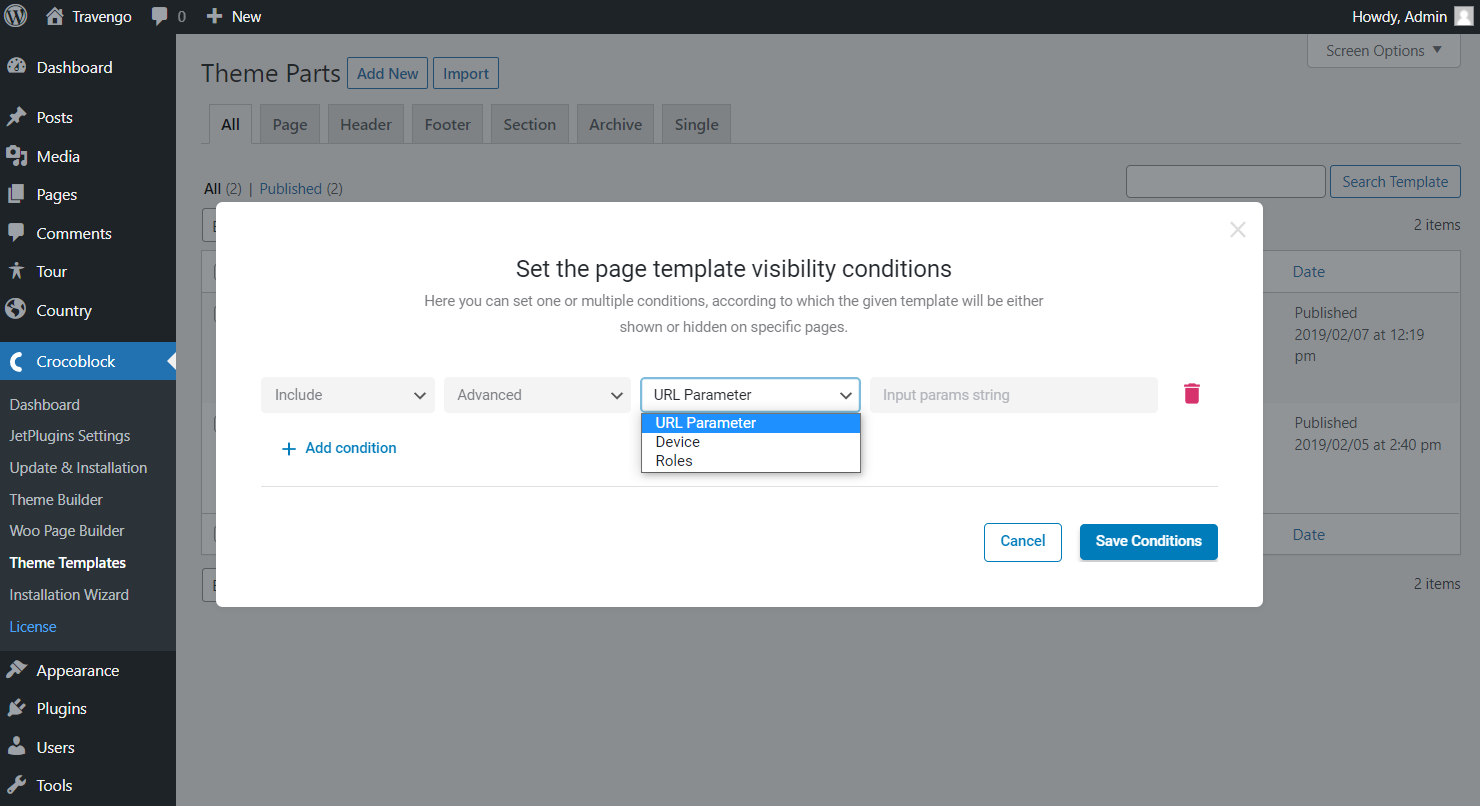
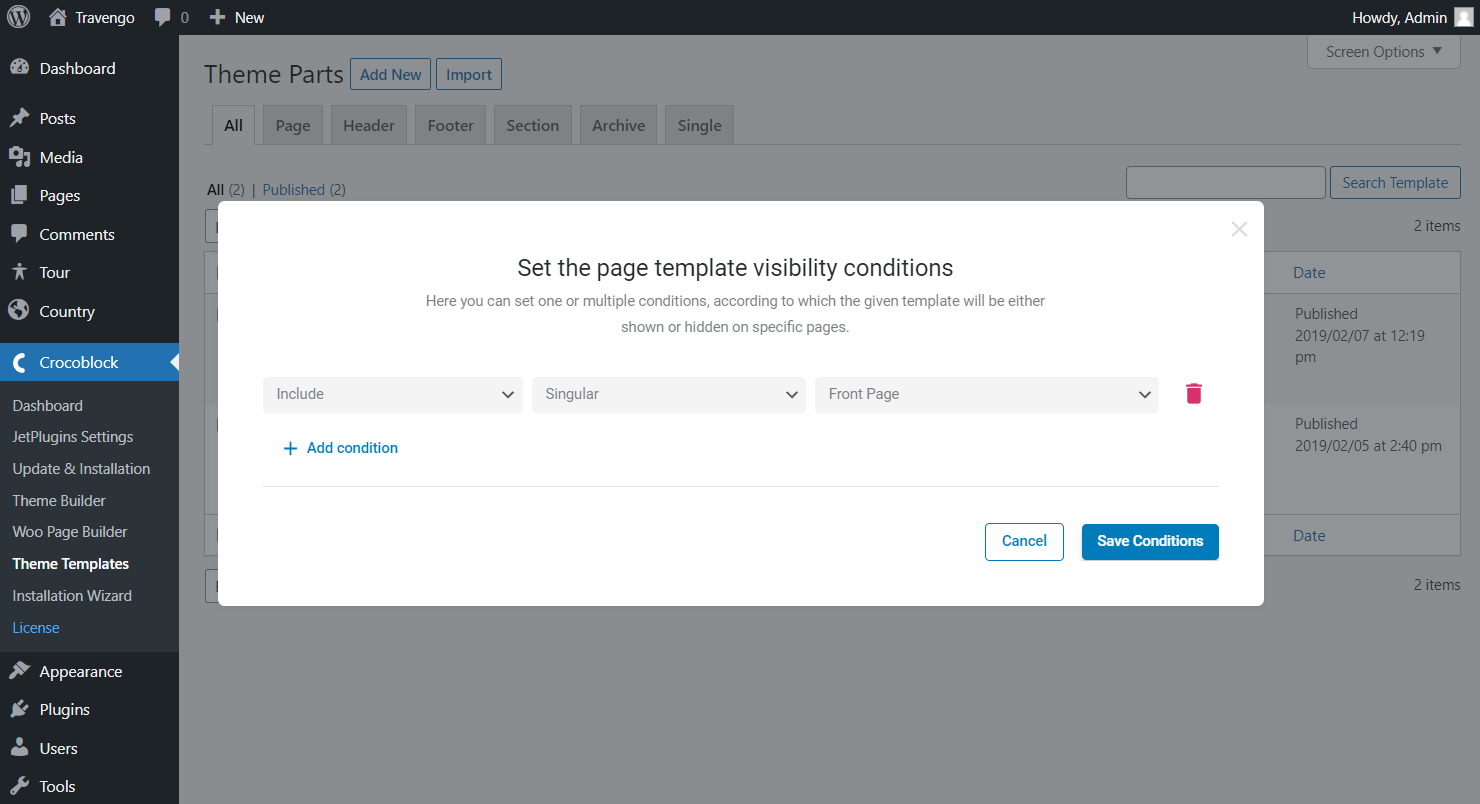
After that, move to the following selector and pick the needed condition here.
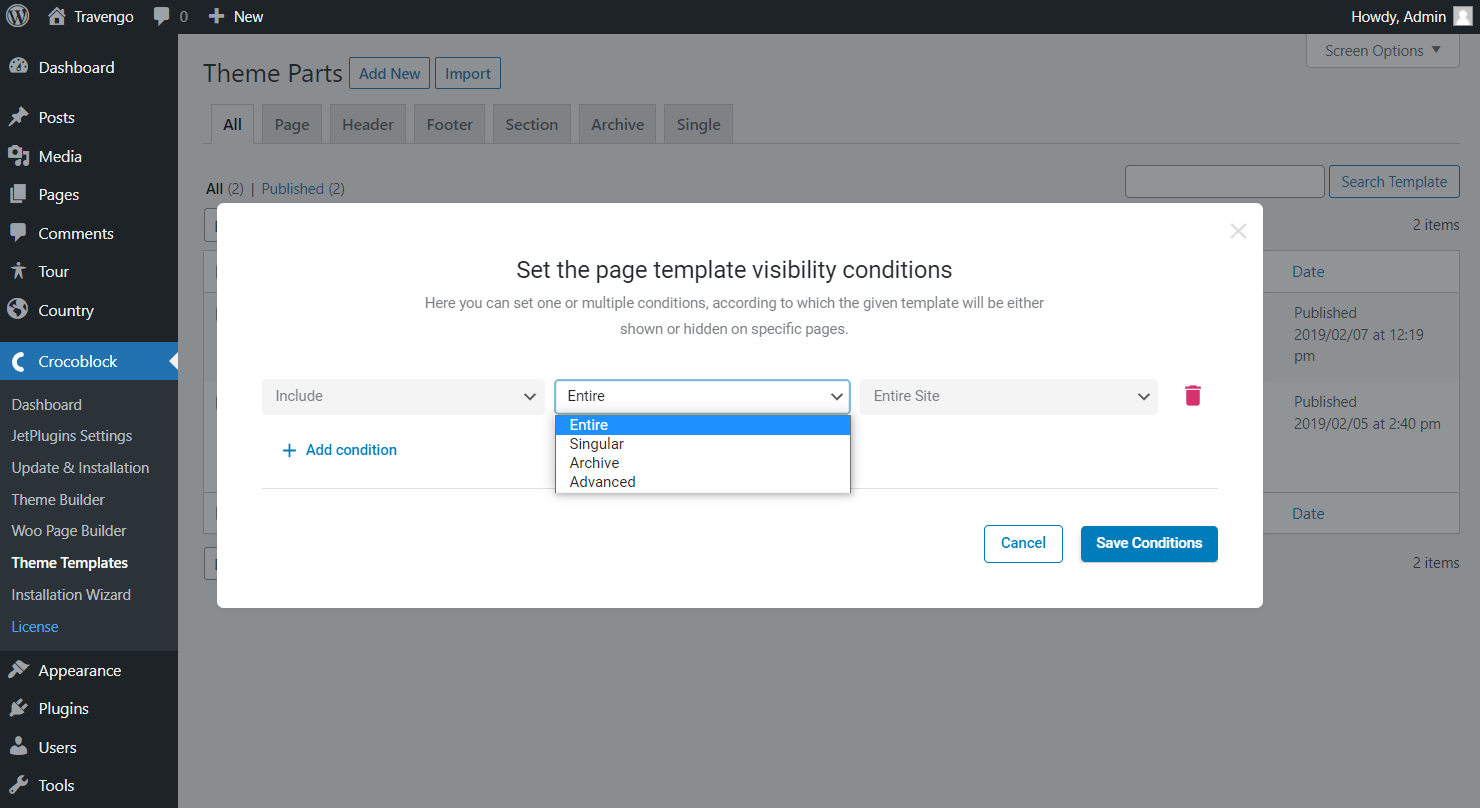
Entire — apply the footer template to the whole WordPress website.

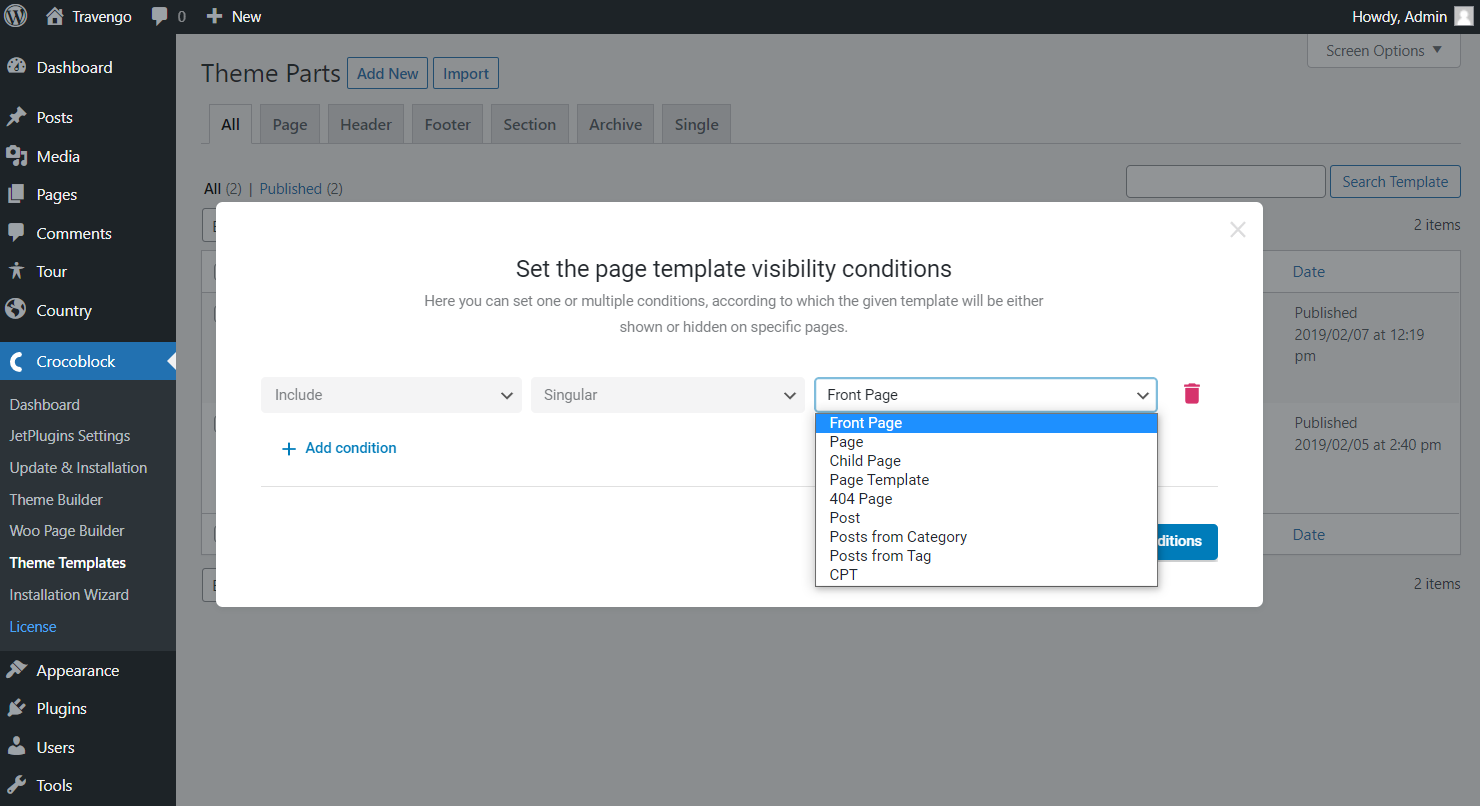
Singular — choose to set the footer template to specific posts, pages, categories, tags, etc.
Archive — set the footer to different archive pages or search results archives.
Advanced — select this option to specify the URL parameter, device, or WordPress user role to work with.
For instance, we will set the footer only to the front page, while the other footer will be displayed on the entire website.
Finally, click the “Save Conditions” button to save the progress once we’ve decided on the needed conditions.
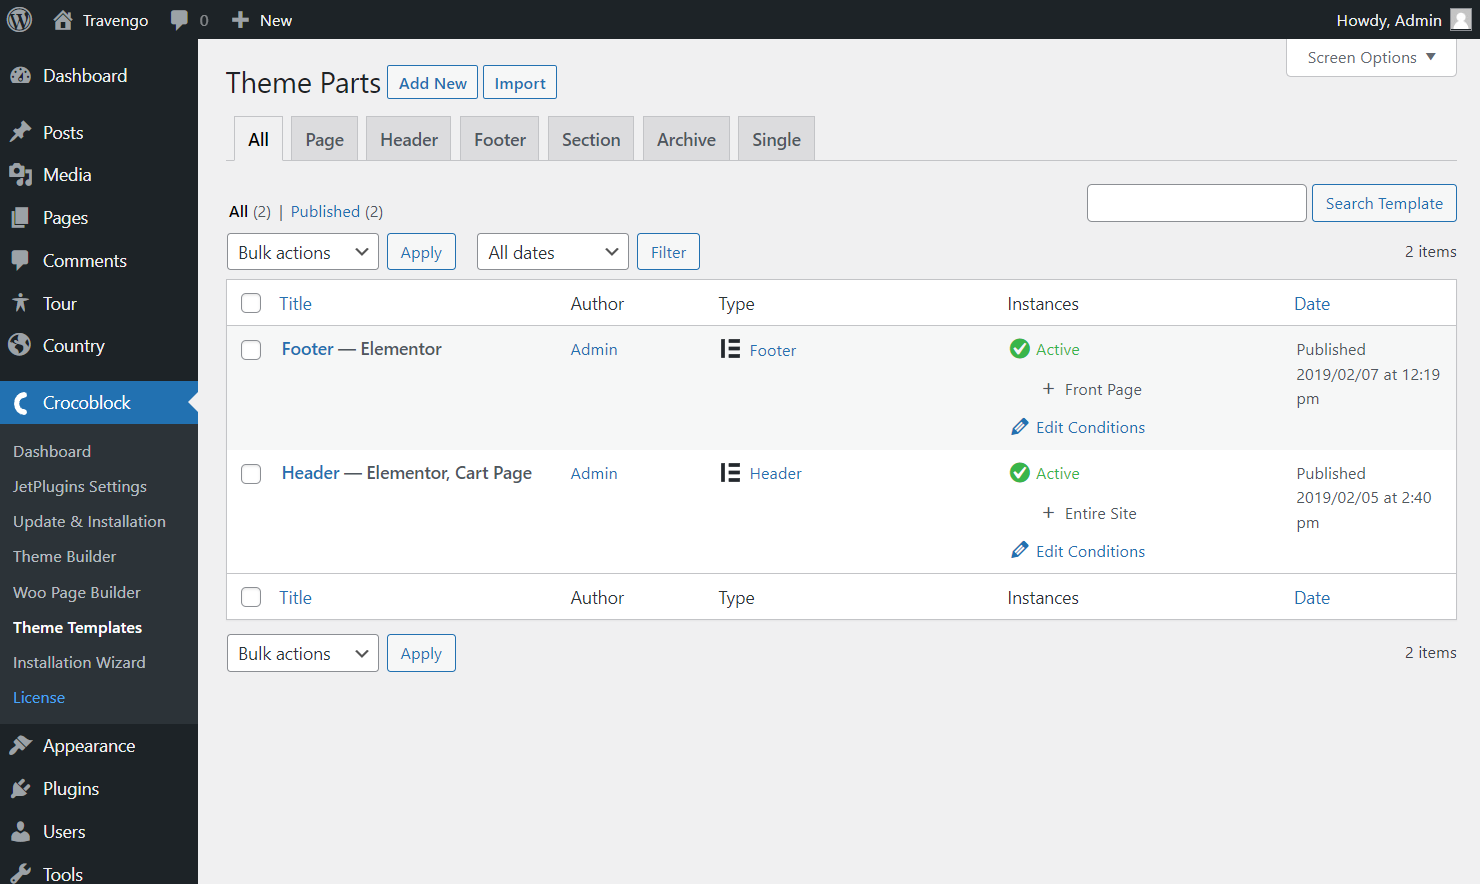
From now the footer template will be applied to the specific place of the website. You can check if it’s already active by closing the editing window.
Here you’ll see the activated conditions in the Instances tab to the right of the needed footer template.
Let’s check the custom post on the front end. Here the set footer is displayed at the bottom of the page.

While for other pages, we will build another footer and set its conditions to be included on the entire website and excluded on the front page.
Mind that this time the footer is created with the help of Block Editor. The editor doesn’t matter; JetThemeCore is compatible both with Elementor and Gutenberg.
Let’s check this footer on the front end. Just navigate to any page and scroll down to view the footer.

The footers are displayed right where they need to be. Now you know how to set the WordPress footer conditions with the JetThemeCore plugin.