How to Create a Dynamic Calendar
This tutorial explains how to create a calendar automatically filled with events from the specified listing template using the JetEngine plugin.
Before you start, check the tutorial requirements:
- Elementor (Free version)
- JetEngine plugin installed and activated
The Calendar widget is perfect for displaying scheduled events and timetables, including repeated ones. It allows the usage of listings with meta fields of different types (texts, media, and more) and styles them in the Elementor page builder.
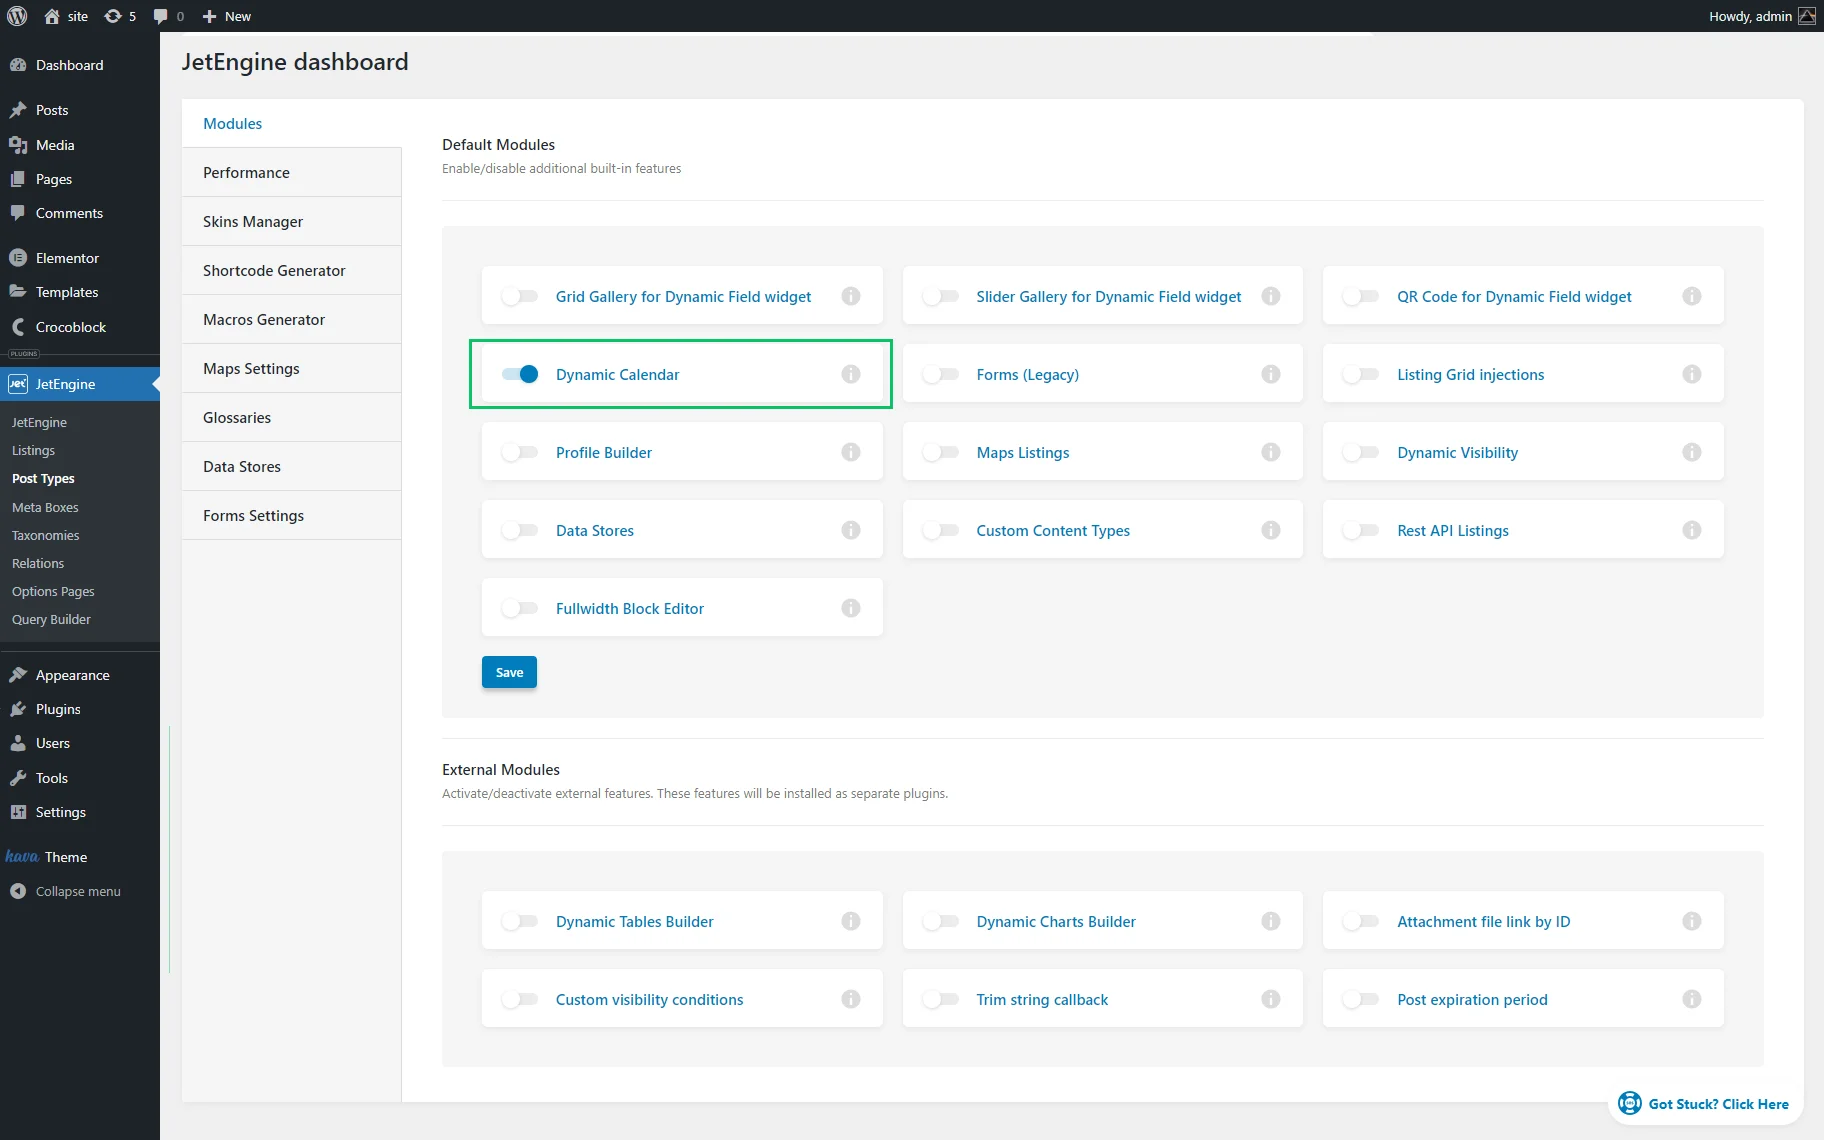
Enable the Calendar Module
Navigate to the WordPress Dashboard > JetEngine > Modules tab and enable the Dynamic Calendar toggle. Press the “Save” button.
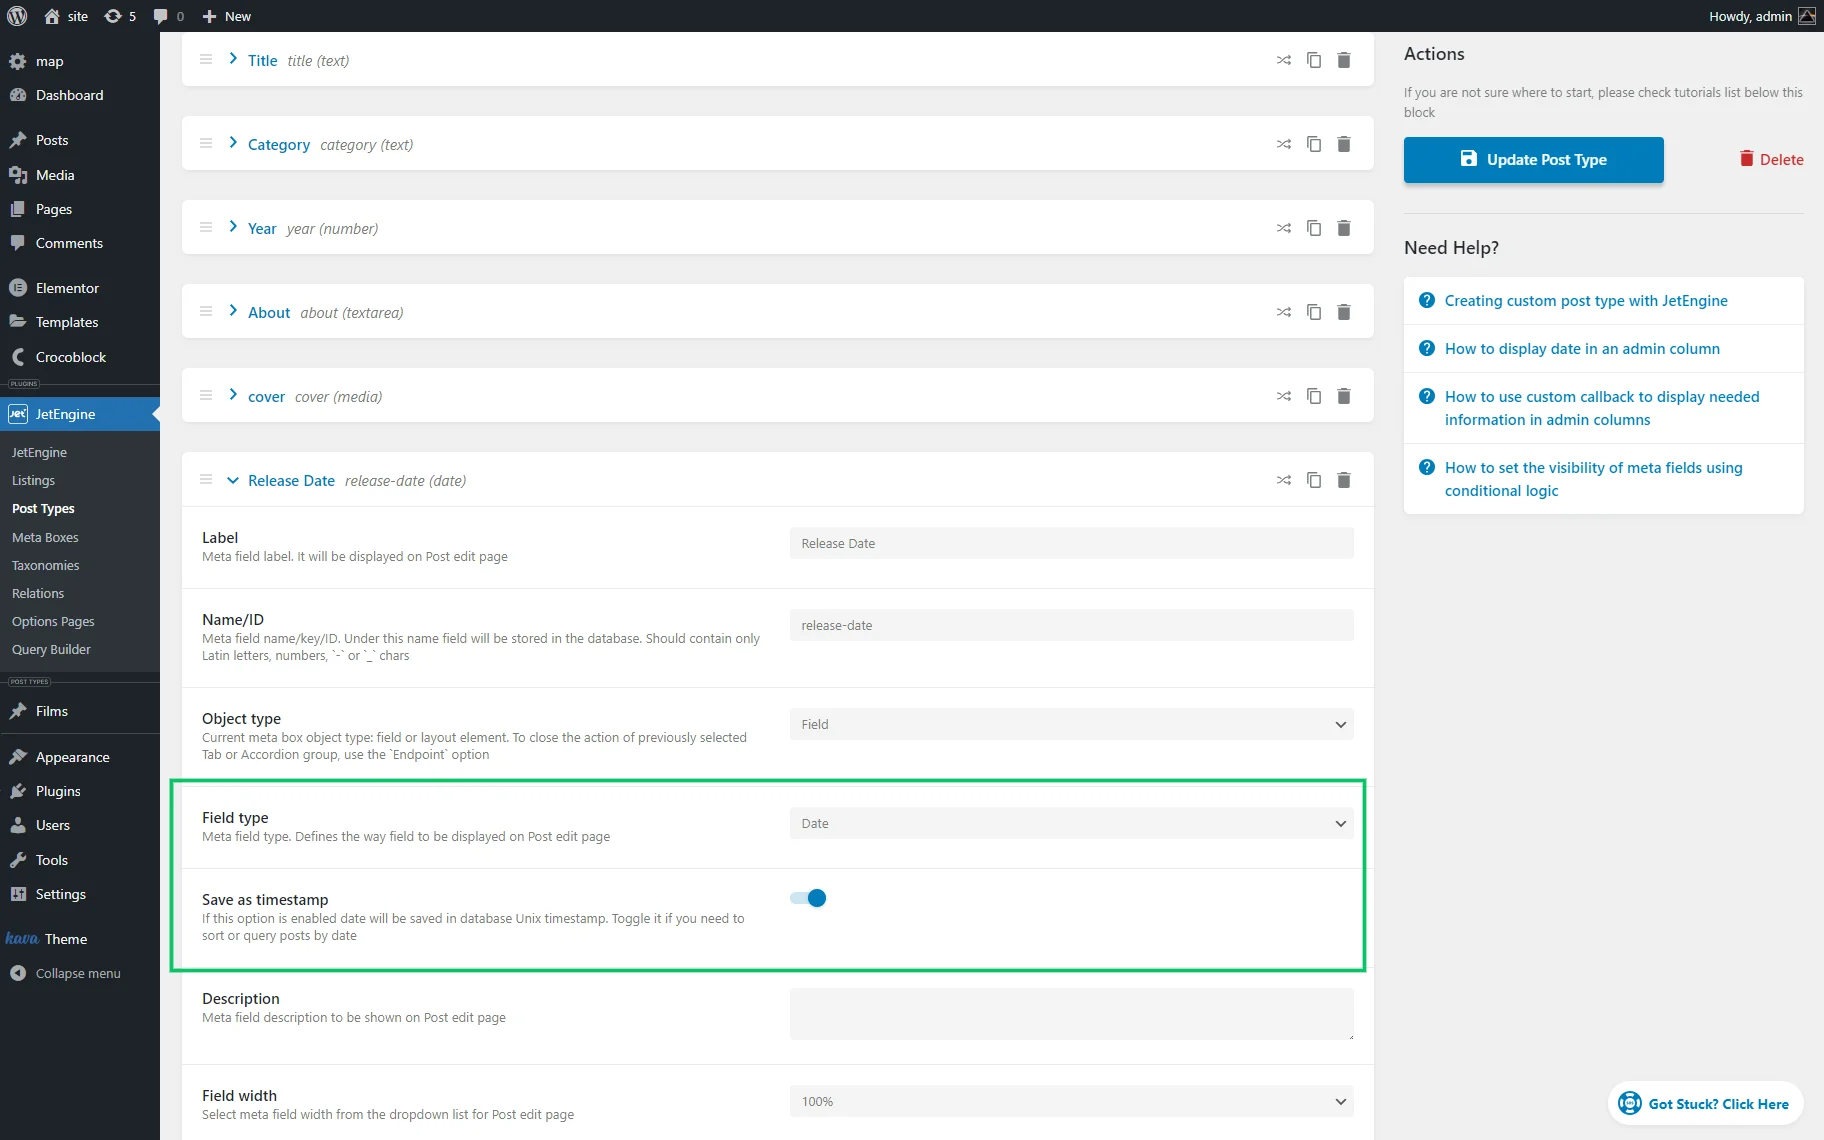
Create CPT with Date Meta Field
Proceed to JetEngine > Post Types, hit the “Add New” button, and create a new Custom Post Type for events. Add the necessary meta fields. Add the Date meta field to this CPT – the events will be presented in the calendar according to the data from that field. Enable the Save as timestamp toggle. Save the CPT.
Create CPT posts, fill them with data, and publish.
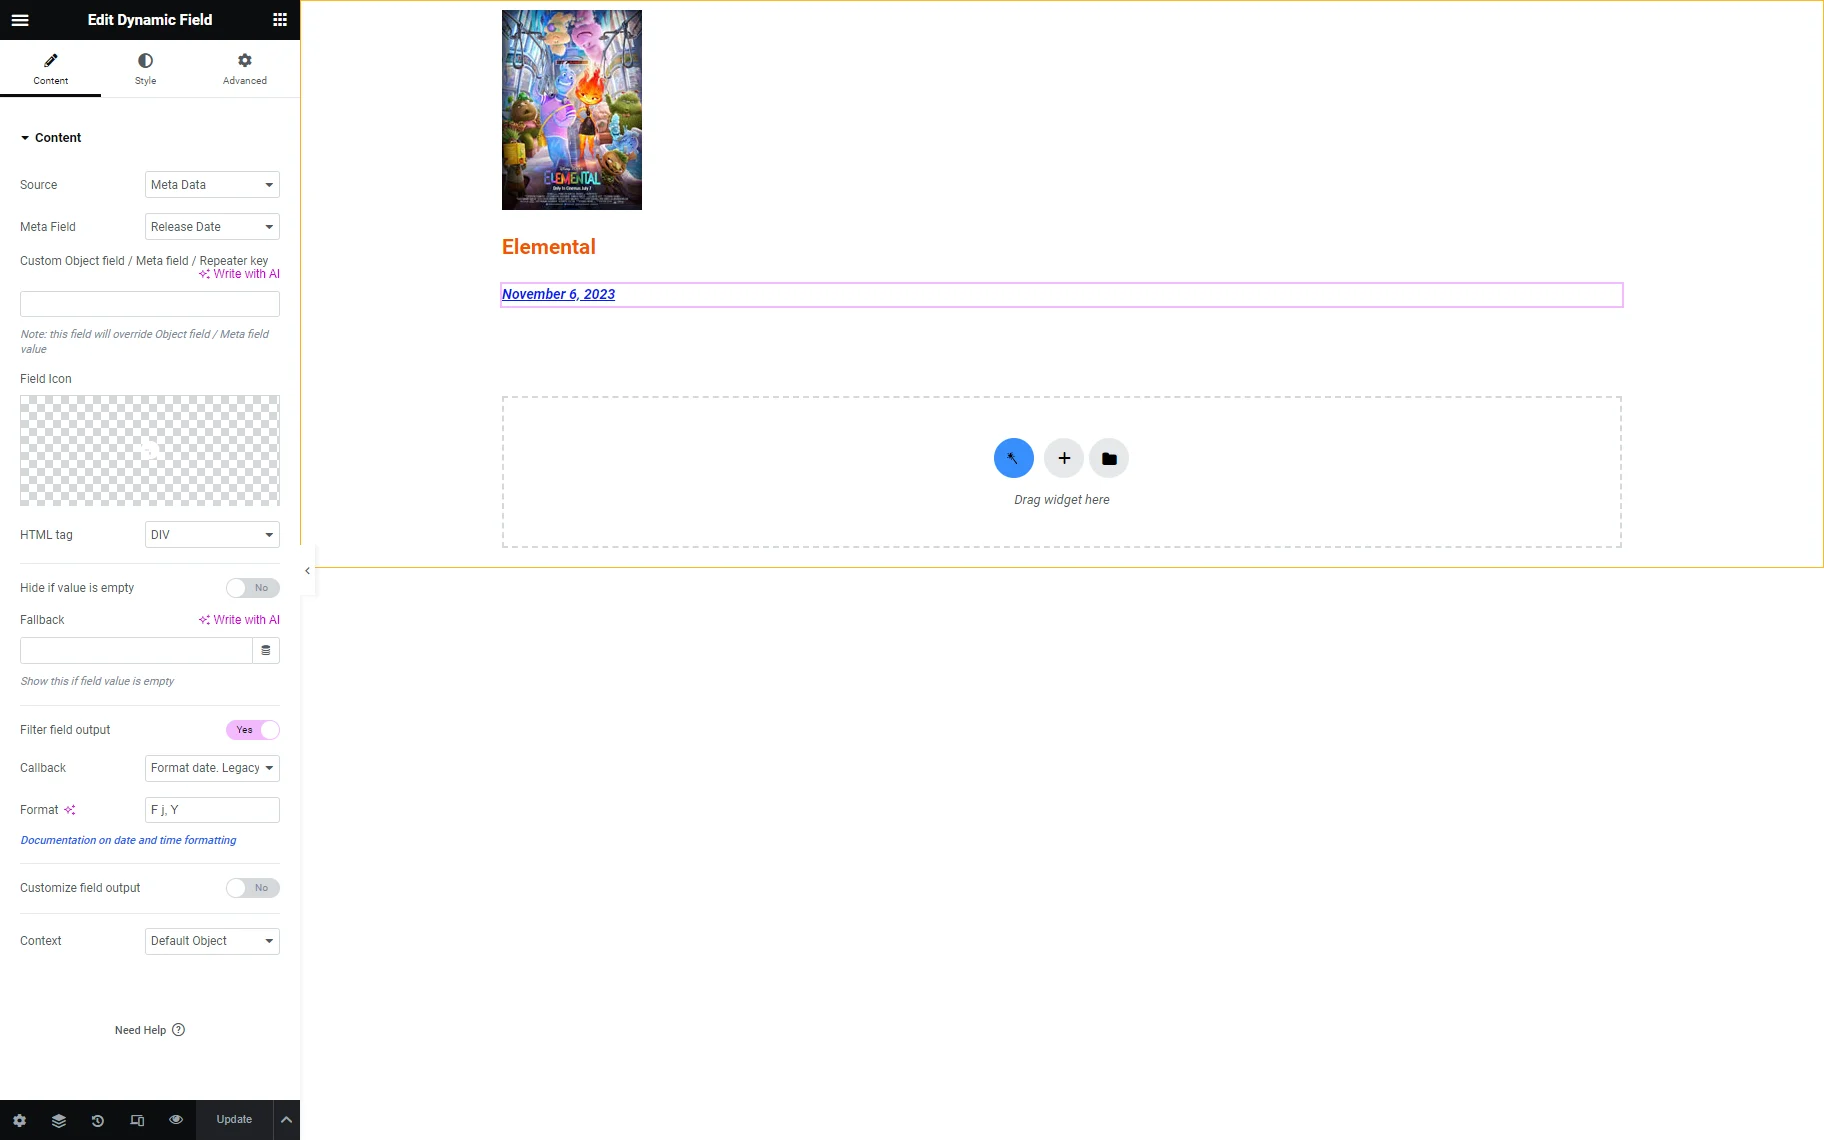
Create a Listing Item
Go to JetEngine > Listings. Click the “Add New” button and proceed to create a listing item for the built CPT. Add necessary meta fields to the item.
Source: Elemental Press Kit
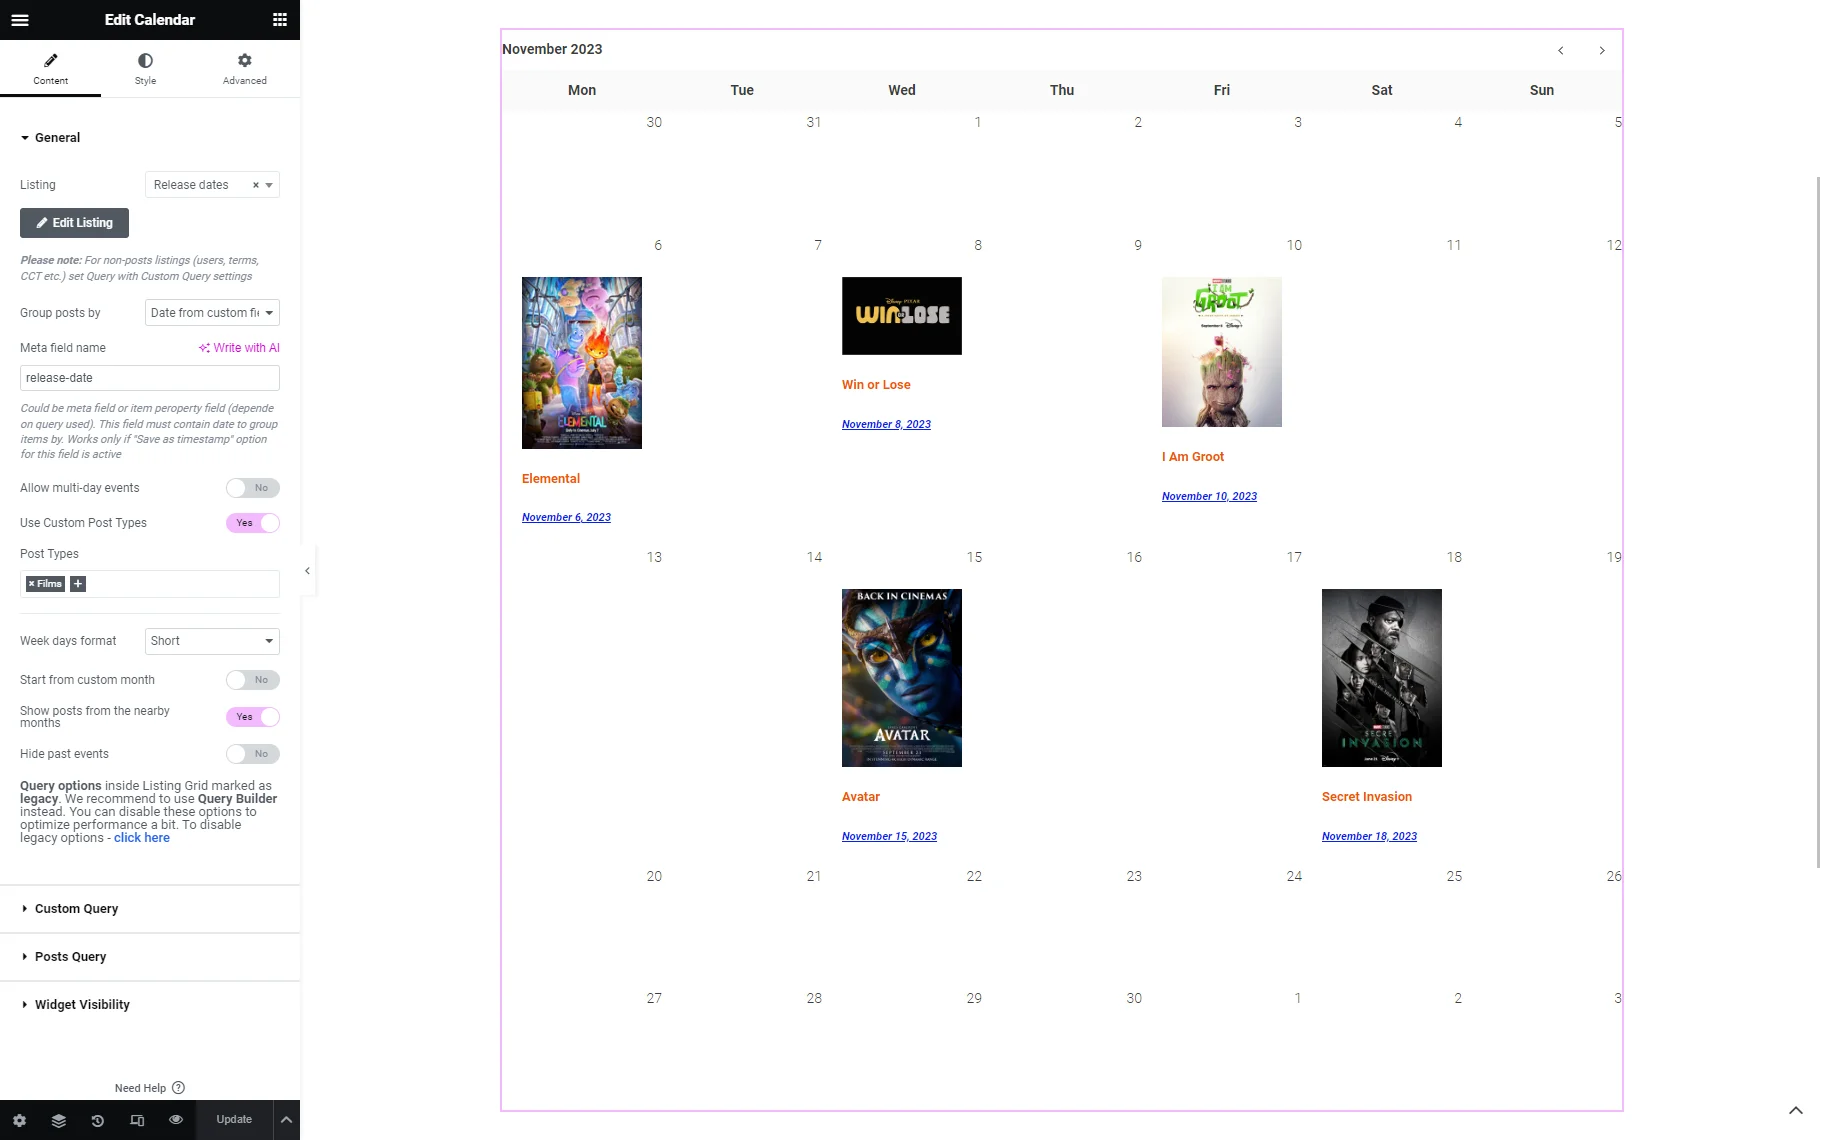
Add the Calendar Widget to a Page
Open the page or post where you would like to show the dynamic calendar with the events in the Elementor page builder. Find and drop the Calendar widget to the appropriate spot on the page.
This widget has the following settings:
- Listing drop-down menu allows users to select the necessary listing item;
- Group posts by field drop-down menu allows selecting how the events will be placed in the calendar. It has four options:
- “Post publication date” and “Post modification date” allow placing events in the calendar cells based on their date of creation or modification;
- “Date from custom field,” if selected, turns on the Date meta field name field to type the custom meta field to display the date;
- “Query item creation date” allows displaying such objects as users, comments, terms, and CCT items by the creation date. If such objects contain the Date meta field, use the “Date from custom field” option;
- Allow multiday events toggle, if enabled, makes it possible to display repeating events with needed frequency. To display such recurring events, use the Advanced Date field of a meta box;
- Use custom post types toggle shows posts from two or more different post types.
- Weekday format drop-down menu allows selecting the way the weekday names will be displayed;
- Start from custom month toggle, if enabled, shows the drop-down menu to select the initial month and year for the calendar. By default, the calendar opens with the current year and month, but with this toggle enabled, you can choose a different month and year as the starting point;
- Show posts from the nearby month toggle, if enabled, shows the events that happened or are going to happen in the nearby month;
- Hide past events toggle, if enabled, allows the display of all the events that have already ended.
Source: Disney Studios Press Kits
Go to Content > Widget Visibility block. Here, you can choose whether the calendar will be visible or hidden when the query is empty. Select the appropriate option from the drop-down menu in the Hide widget if field. If you want to show the widget permanently, choose the “Always show” option. In case it is necessary to hide it when the posts query is empty, you need to select the “Query is empty” option.
Customize the Calendar Appearance
To style the calendar’s appearance, apply the settings from Style and Advanced tabs.
The Style settings are focused on individual elements of the calendar, such as the Caption, Navigation Arrows, Week Days, Days, and Mobile settings. These settings include the Color, Typography, Padding, Margin, Gap, and more options.
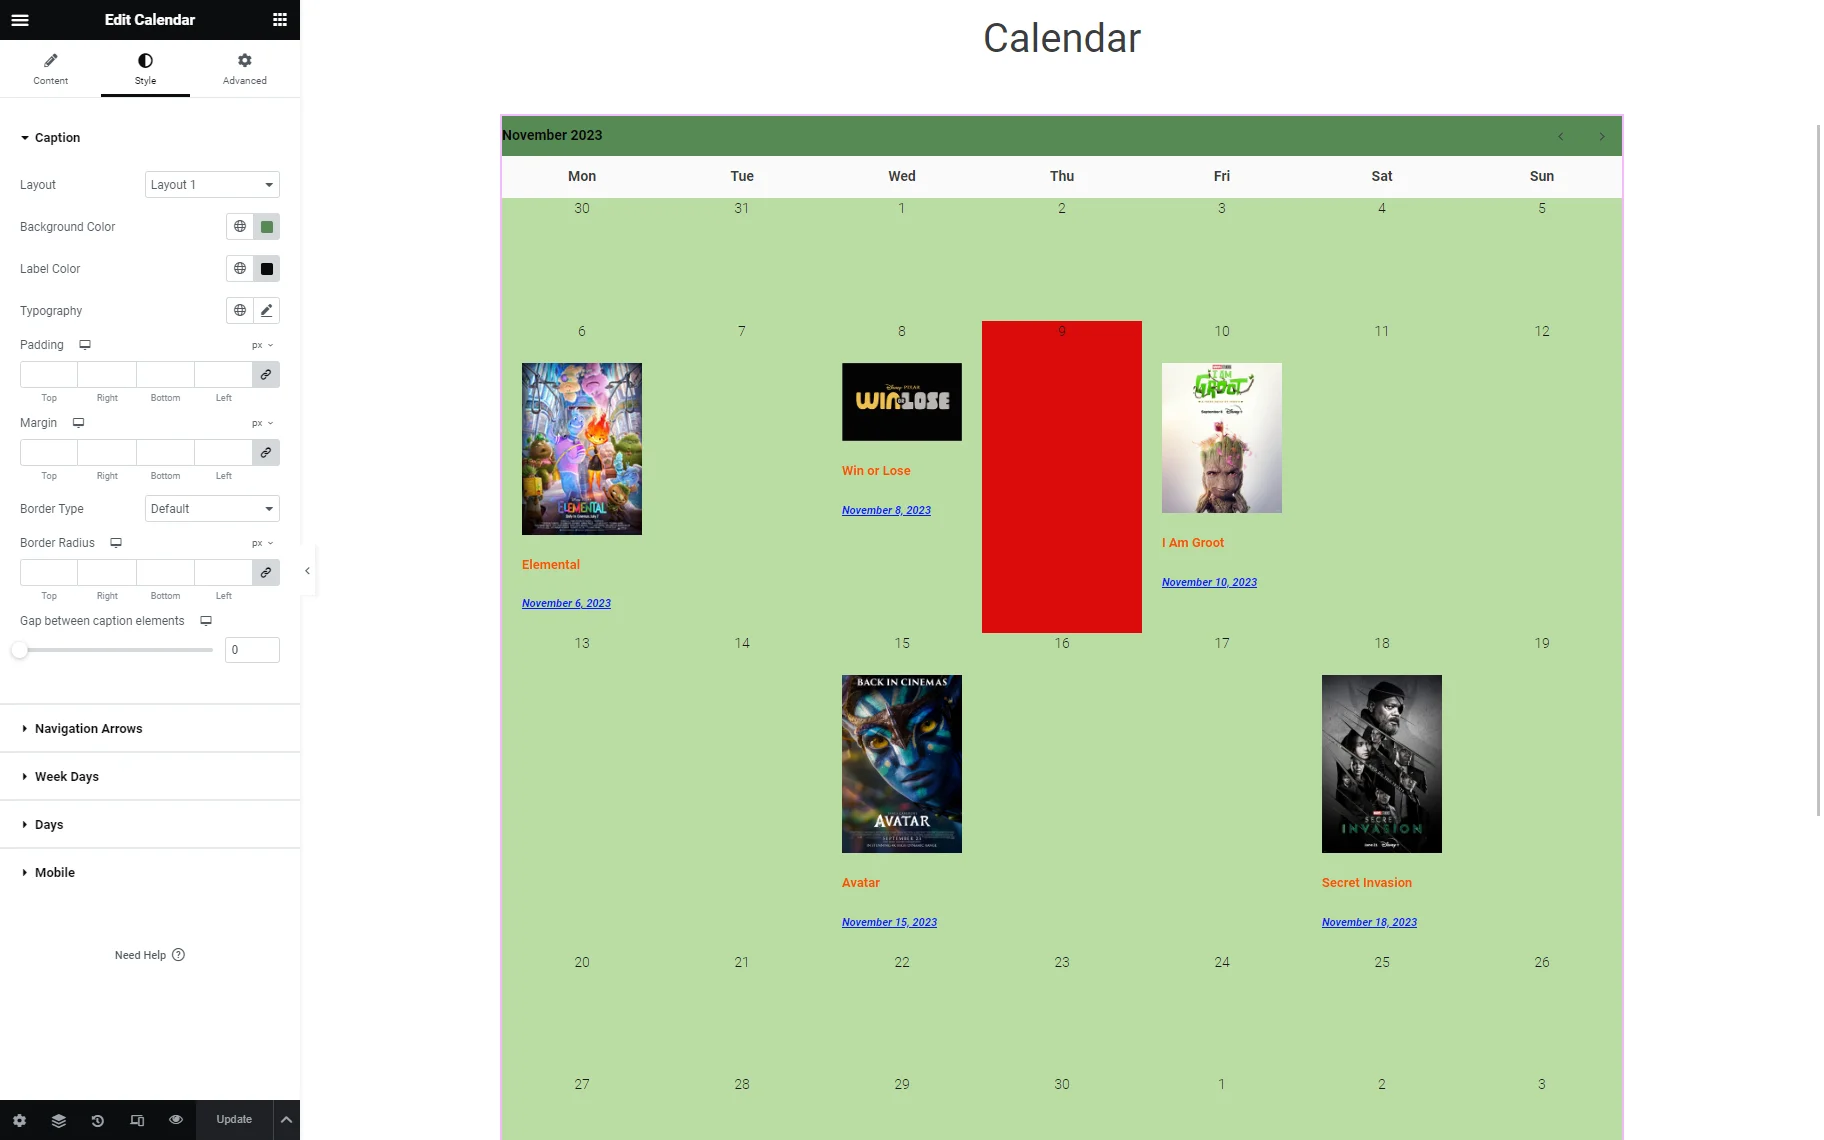
Source: Disney Studios Press Kits
The Advanced settings are focused on the widget’s overall appearance. They allow selecting the Layout, Motion effects, Transform, Background, Border, and Mask, making the calendar Responsive for different devices, adding Attributes (for Elementor PRO), and selecting Custom CSS (for Elementor PRO).
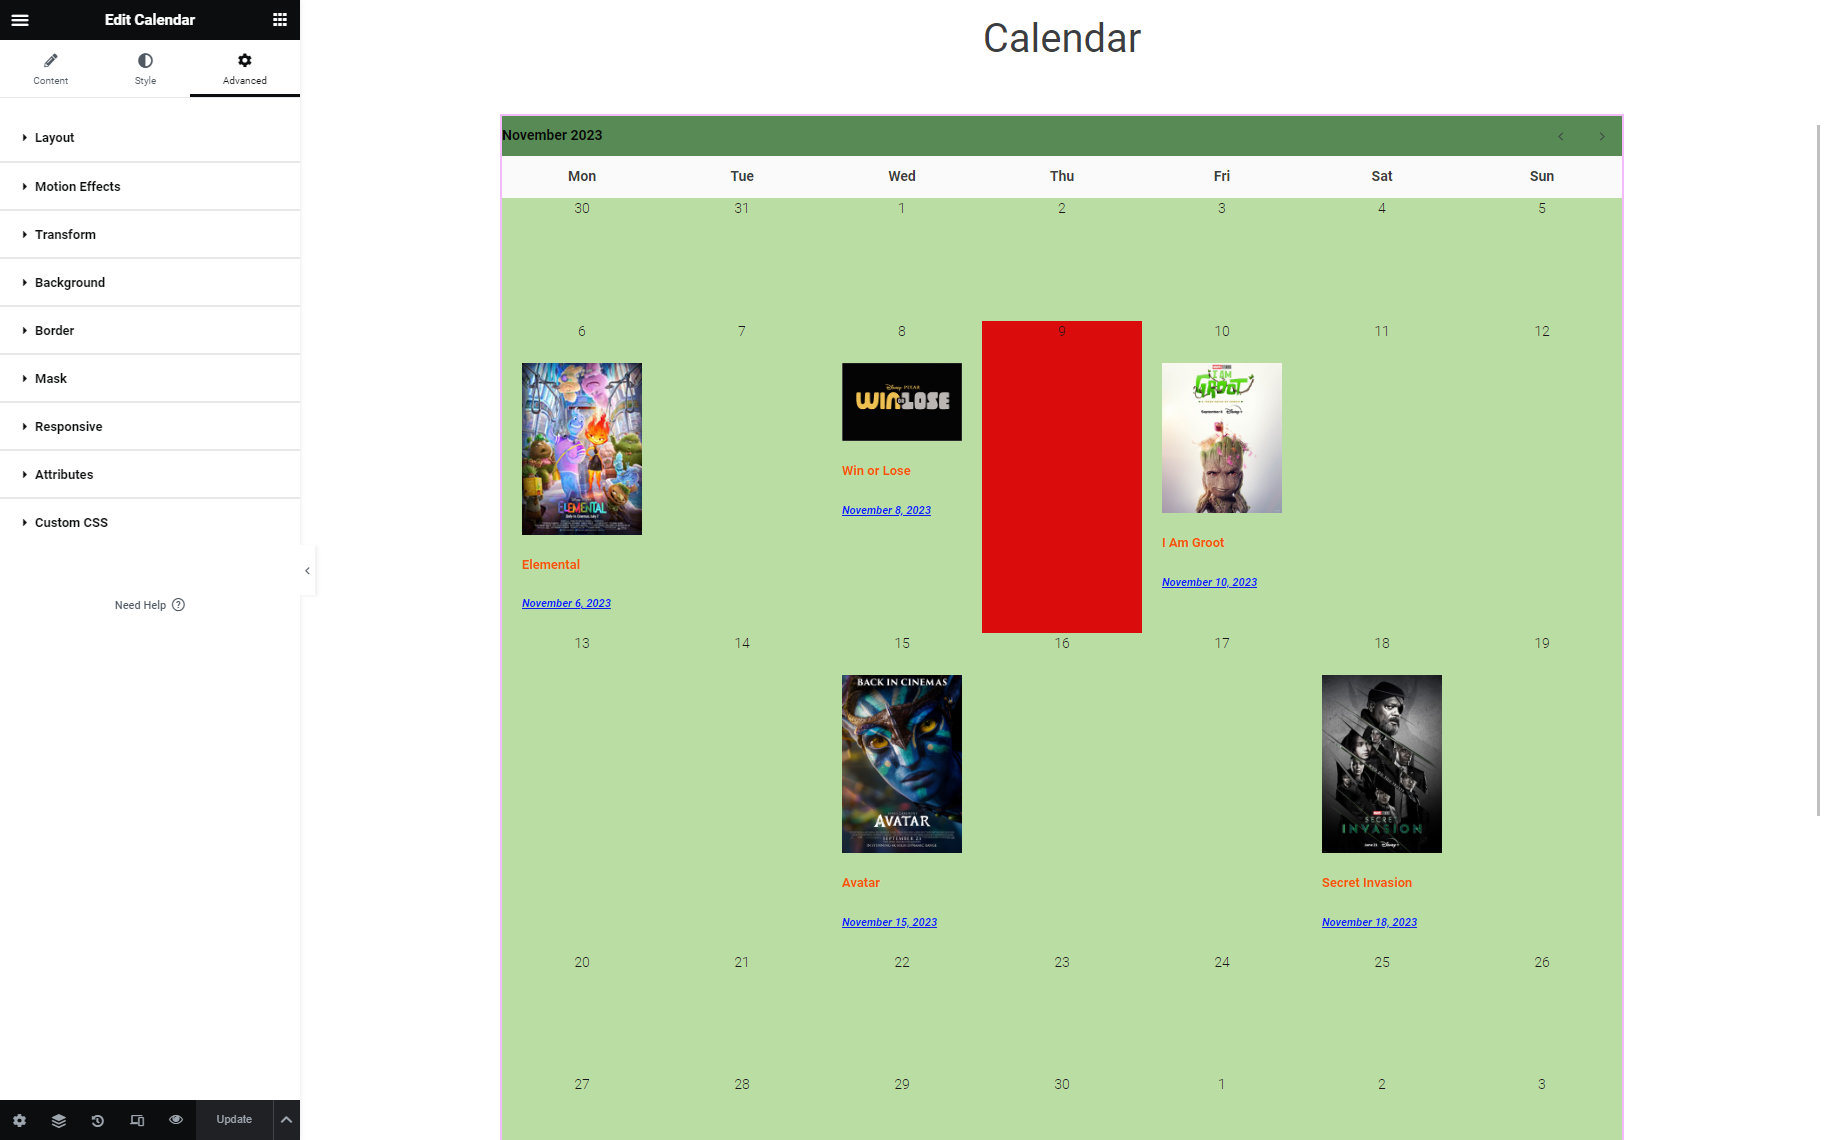
Source: Disney Studios Press Kits
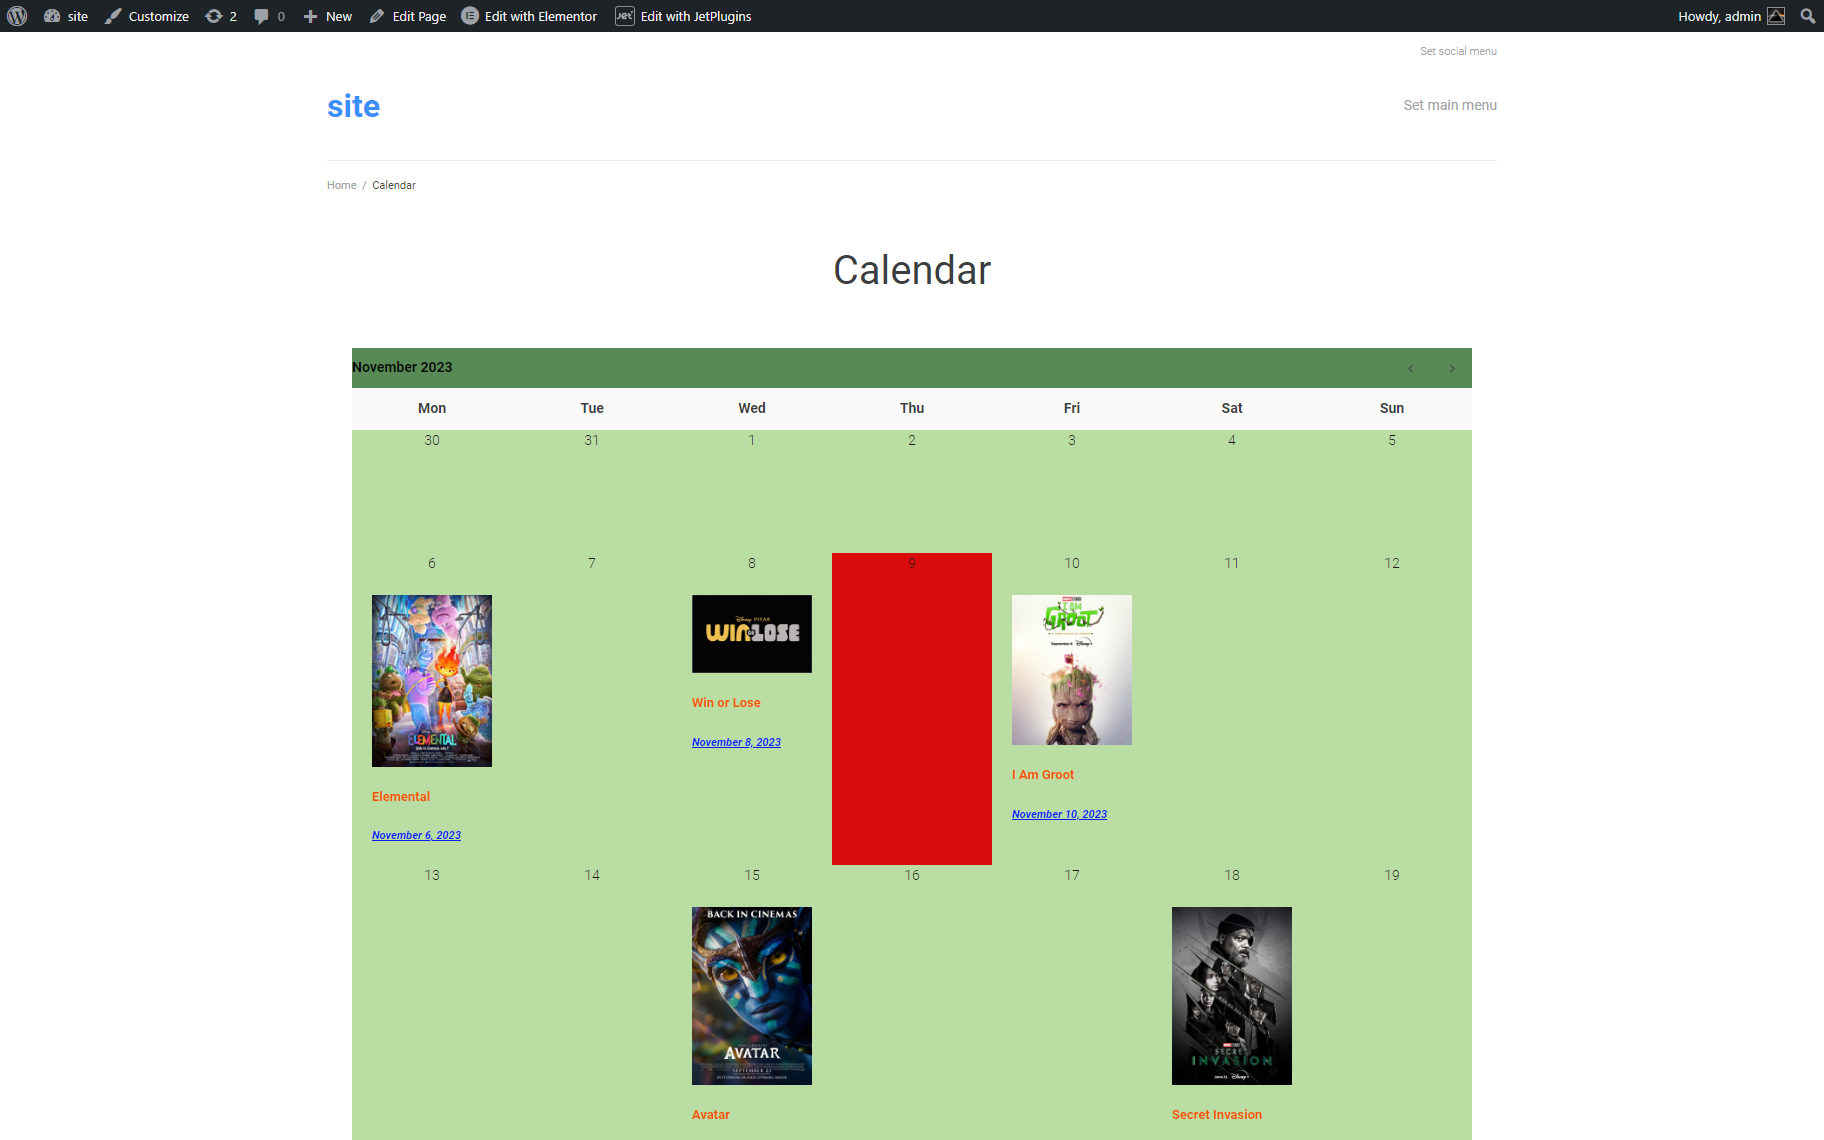
Finally, click the “Update” button and preview the calendar on the page.
Source: Disney Studios Press Kits
That’s all about adding the dynamic calendar to your WordPress website with the help of the JetEngine plugin.