How to Create a Listing Template for Users in Elementor
In this tutorial, we will dive into the topic of how to create the listing template and listing grid of the users using the functionalities of JetEngine.
Before you start, check the tutorial requirements:
- Elementor (Free version)
- JetEngine plugin installed and activated
Listing created with the JetEngine plugin is a very useful and practical tool in order to organize the content into sections. Listing can be created in a few clicks with the dynamic widgets which are able to display types of information: posts, pages, products, and users. Feel free to go through the information about listings with the Posts and Terms source types and their displaying.
And now let’s proceed to the step-by-step guidance on how to create a listing for the Users.
Backend Preparations
Adding new users
First of all, proceed to your WordPress Dashboard and open Users > Add New.
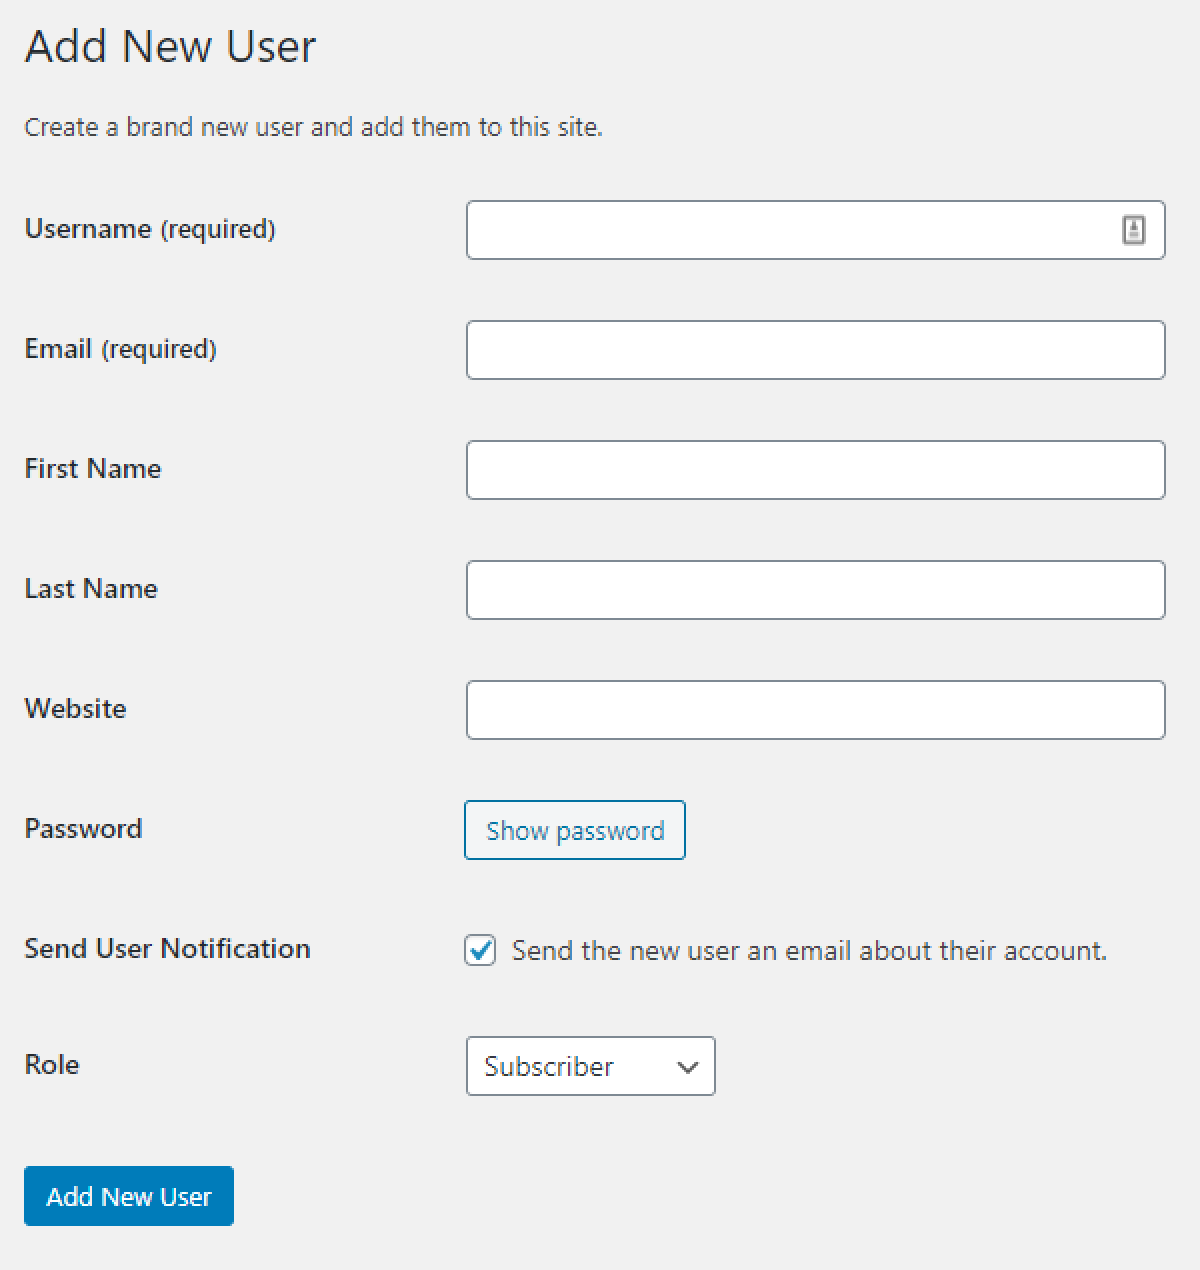
Set the needed default parameters: as the Username, Email, First and Last Name, website, and other information.
Note down, that the Username can’t be changed during the further transformations of the personal data and will be shown in the backend only.
Applying meta fields for users
Now, go to the JetEngine > Meta Boxes and hit the “Add New” button. Set the Meta Box Title and select the “User” value in Meta Box for field.
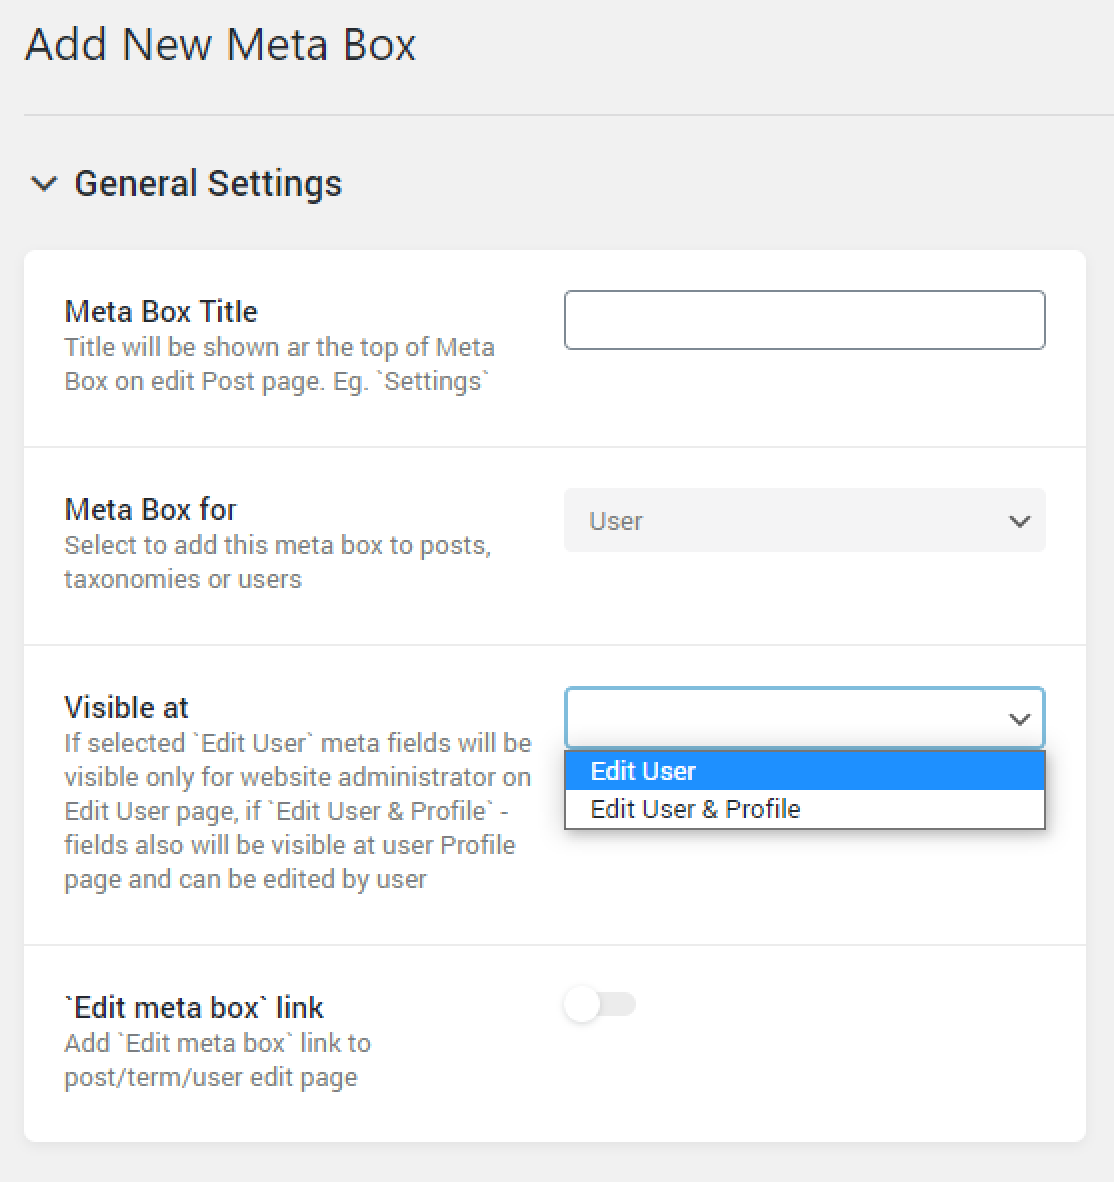
Next, you need to choose the value from the Visible at drop-down list. This option determines who will be able to see and edit the created meta fields.
- If the Edit User option is selected, then the meta box will be visible for the admin only;
- If the Edit User & Profile option is chosen, then the meta box will be visible for both admin and users and the last ones will be able to change the content by themselves.
After these basic settings for the Meta Box are done, let’s proceed to the meta fields adding. Read the tutorial if you don’t know how to add meta fields.
Filling meta fields for users with value
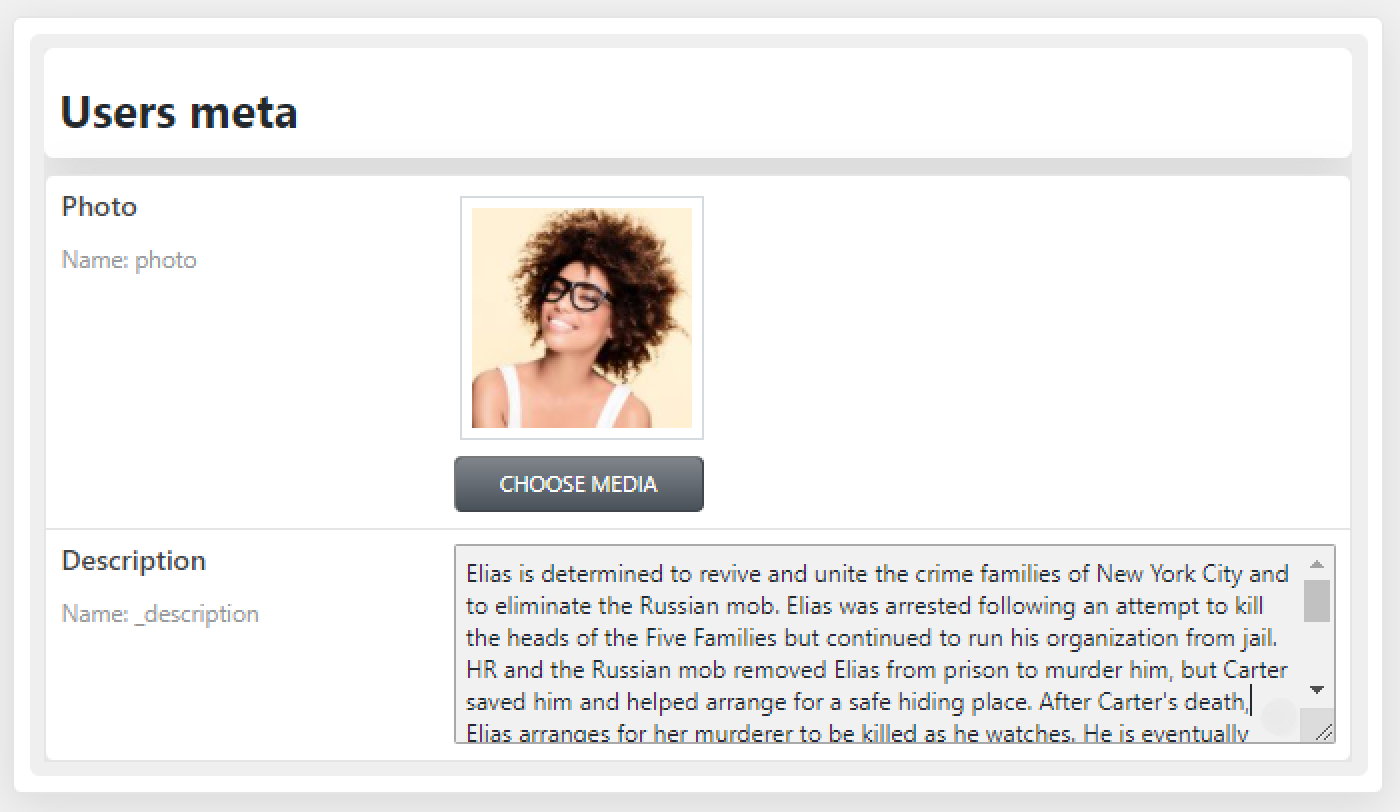
Go to the Users > All Users and click the “Edit” button under each title. Among the other default settings at the bottom of the page, you will see the meta fields you created previously. Fill in the fields with the appropriate information and click the “Update Profile” button.
Creating Listing for Users
Creating listing to showcase information of users
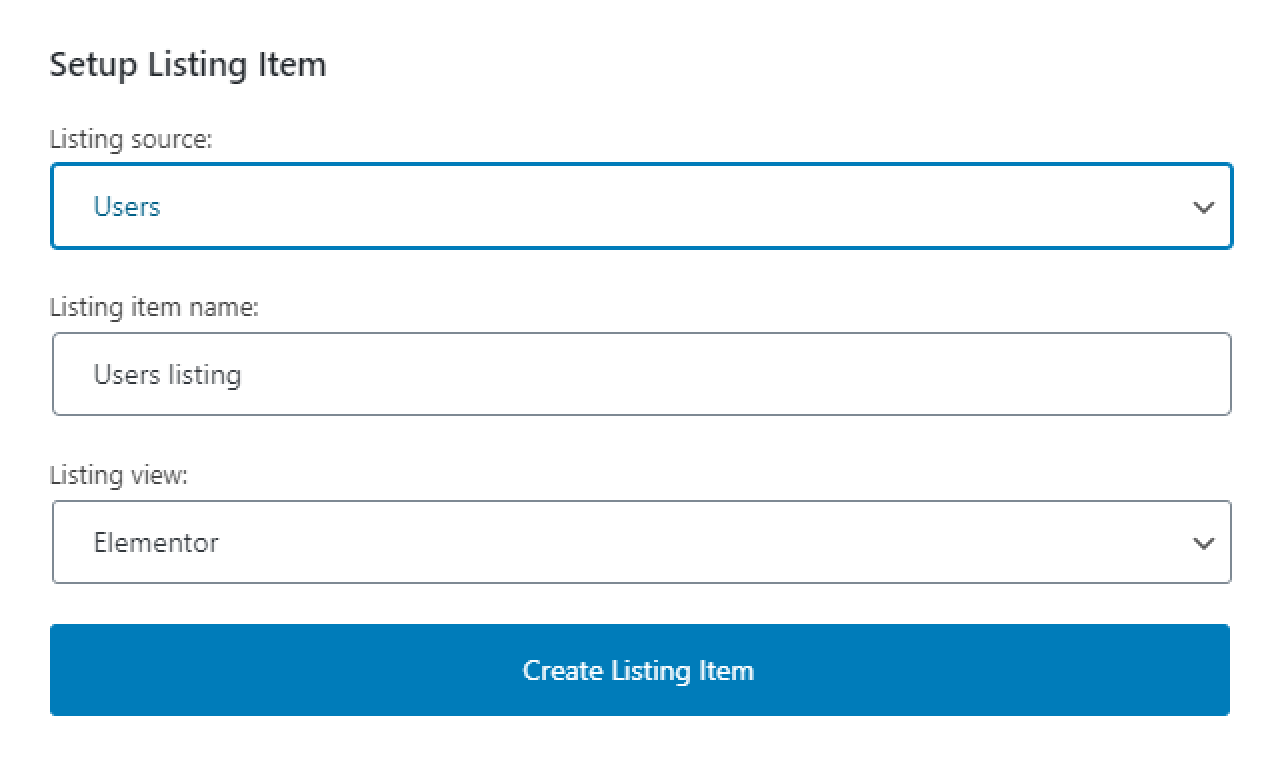
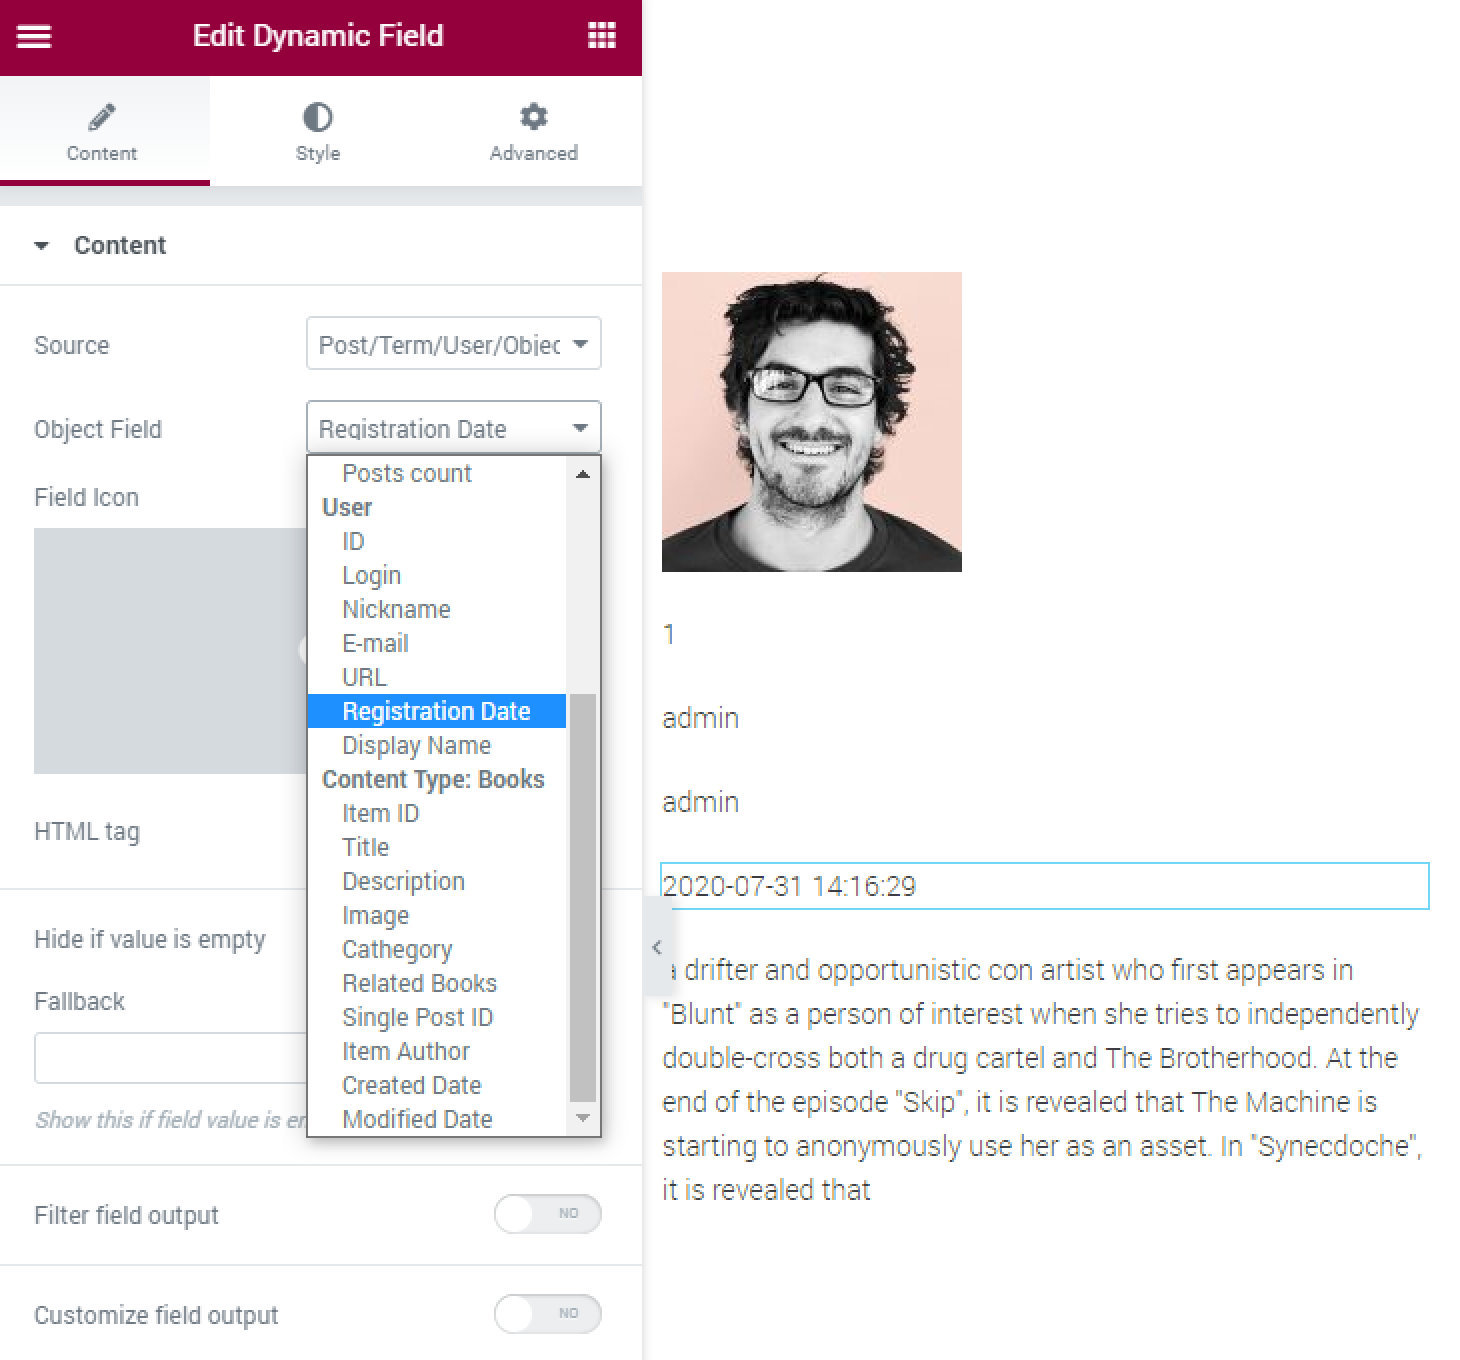
Proceed to WordPress Dashboard > JetEngine > Listings and click the “Add New” button. Select the “Users” option in the Listing source field. Enter the specific name and choose the “Elementor” option in the Listing View field.
To fill the Listing, you should use the Dynamic widgets. Choose the Dynamic Field widget and the “Post/Term/User Data” option in the Source field. In the Object Field, you will be able to choose among several items. With the Post/Term/User Data source type, you will be able to display all the default information which is added to each user.
- ID will display the numeric value of the user’s id, which you can get while hovering over the login value on the WordPress Dashboard.
- Login will show the name either which is set when WordPress has been installed creating. Login helps the user to go into the website Dashboard.
- Nickname will showcase that name which is set as a nickname in the users’ settings.
- Email field will output the value from the so-named field in the user’s settings.
- URL object field will display the website address you have entered in the corresponding field in the WP Dashboard.
- Registration Date option will display the date when the user has been added to the database. Enable the field filter output option as usually performed for the data values. Read here the detailed guide about the callbacks for the date meta field (link). This value you can’t change as it is recorded automatically.
- Display Name option must show the name you have applied from several ones for the choice. So the name will be a little customized and differ from the nickname. It is the default option in User settings, either.
What about the default avatar, you can display it with the Dynamic Image widget if you choose the User Avatar option in the Source field. Then, you will have the slider to specify the exact image size. Also, you can set the fallback image, which will be shown if the avatar is empty or even doesn’t exist at all. But if you enable the option which is called Hide if the value is empty, it will not be displayed, and the fallback option will be unavailable.
If you want to display the image from the Meta Field, choose its specific name of it in the Source field and customize up to your needs.
Also, you can make the picture clickable by enabling the corresponding option. For detailed information about the Dynamic Image widget possibilities, please proceed to the tutorial.
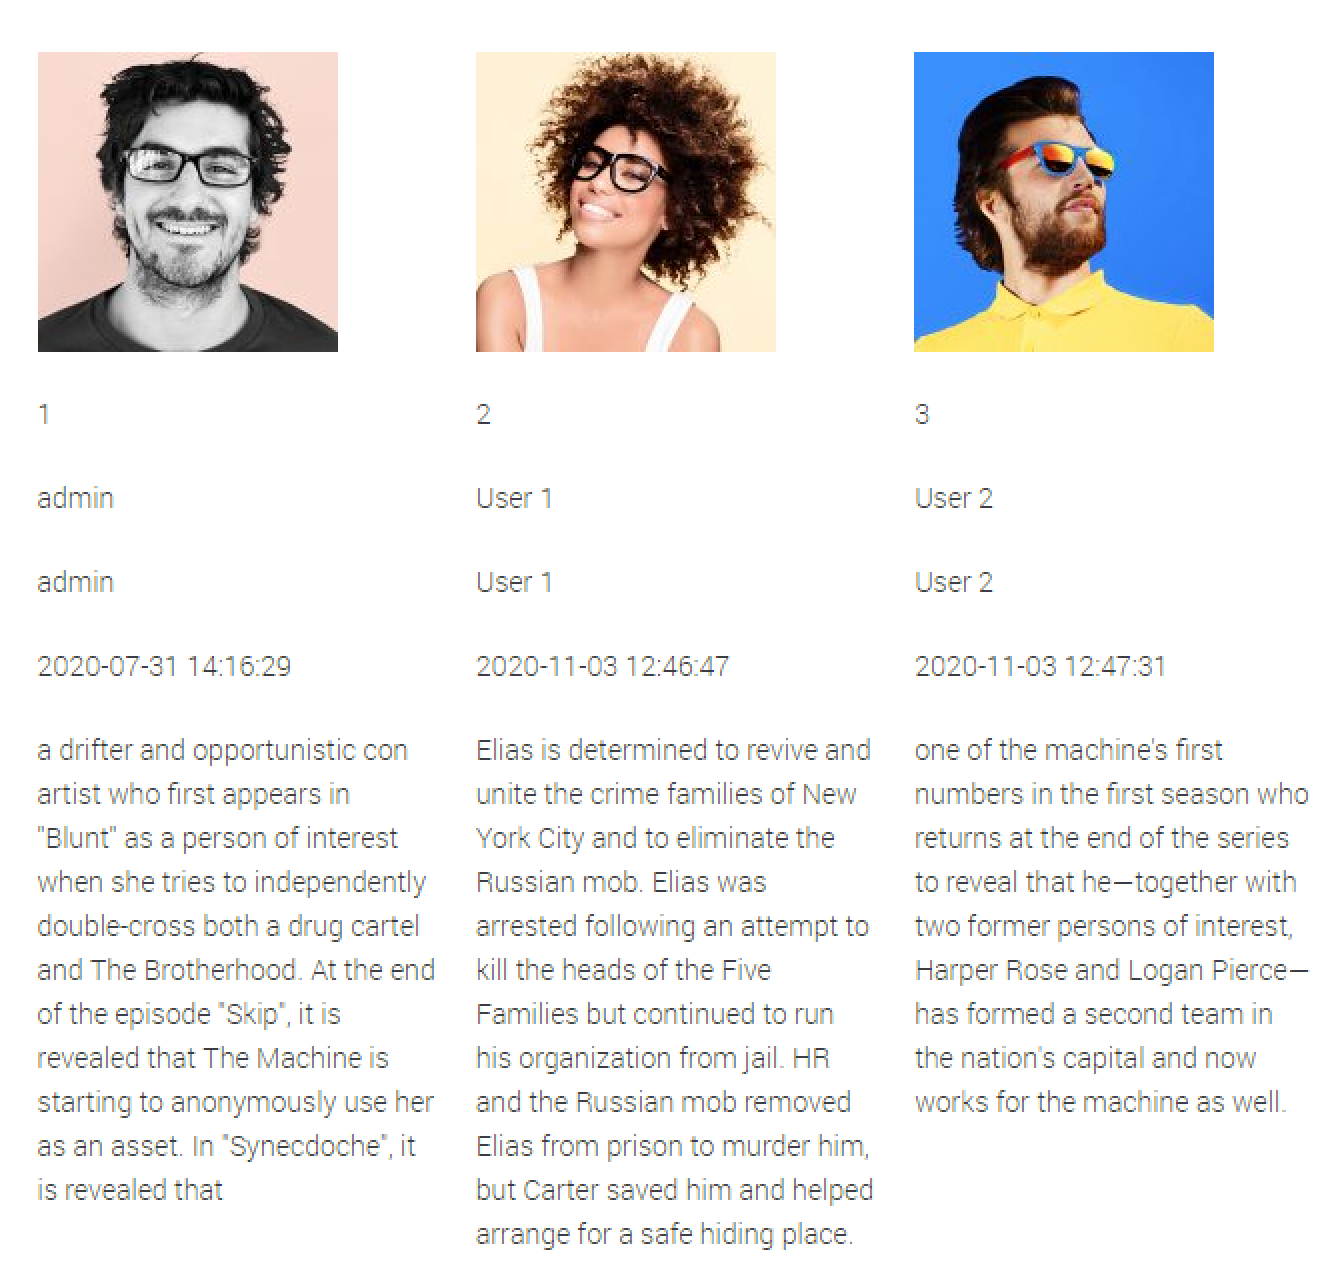
Displaying listing of users
Finally, you need to display all the users on the page with the help of the Listing Grid widget. To do it, drag-n-drop this widget to the page and choose the name of the listing you need to display. The result without styling can look like that:
Today, we reviewed the listing template creation for the users to show up important information about them.