How to Display Video via Dynamic Field and Dynamic Tag in the Listing Template
This tutorial will uncover how to add the video to the listing in a dynamic way, either from the WordPress media library or from the web portal using JetEngine functionality.
It’s a common situation when you want to display the video in your Listing Template and then Listing Grid. However, it can be complicated to decide how to perform it because the Media-type field is not suitable for that task. From this tutorial, you will learn several ways of adding the video to the Listing Template; either you have it stored in the media gallery or want to display it directly from a popular media portal like YouTube or Vimeo.
Uploading Video from WP Media Library
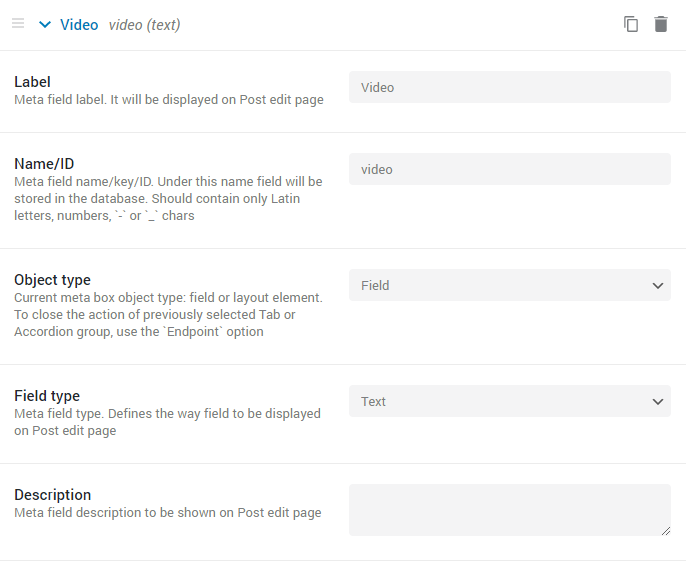
Adding the meta field
There are two sources you can use: Custom Post Type and default post type. Before we start adding meta fields please ensure that you have them. This tutorial uncovers the actions you should perform to add meta fields to the Custom Post Type, and it’s recommended to choose the Text type.
If you need to add a meta field to the default WordPress Posts, we recommend you to go to the JetEngine > Meta Box, create a new Meta Box and then attach it to the Posts. Check this tutorial for more details about adding custom meta fields to the default WP posts.
Adjusting the video to the post
The next what you need to perform is to adjust the link of the video to the post where you want it to appear.
Now, go to WP Dashboard > Media, hit the “Add new” button, and upload the video to your library. Click on the uploaded video and on the right sidebar you will see the link – copy it to the clipboard.
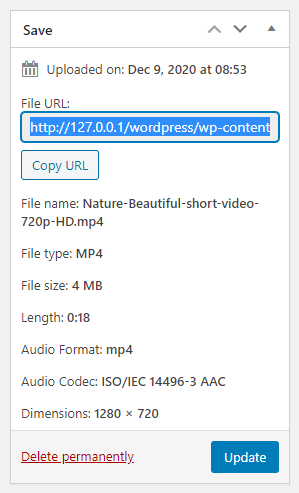
Proceed to the post editing window and enter the link to the corresponding meta field. Afterward, click the “Update” button to save the changes.

Displaying the video in a listing
There are two options you may choose to pull the video:
- with the help of HTML code;
- via the Video widget.
Showing the video using the HTML code
After the previous actions are done, it’s time to arrange the existing content of the posts. In this step, we will not dive into the details on how to create a Listing Template, because all of them are already available here.
We will use the Dynamic Field widget. Choose the “Meta Data” option in the Source drop-down menu, and in the Meta Field, select specify the one where you added the link of the video.
Then, you need to enable the Customize field output toggle. In the following Field format text area, you should enter this HTML code to display the video in .mp4 format.
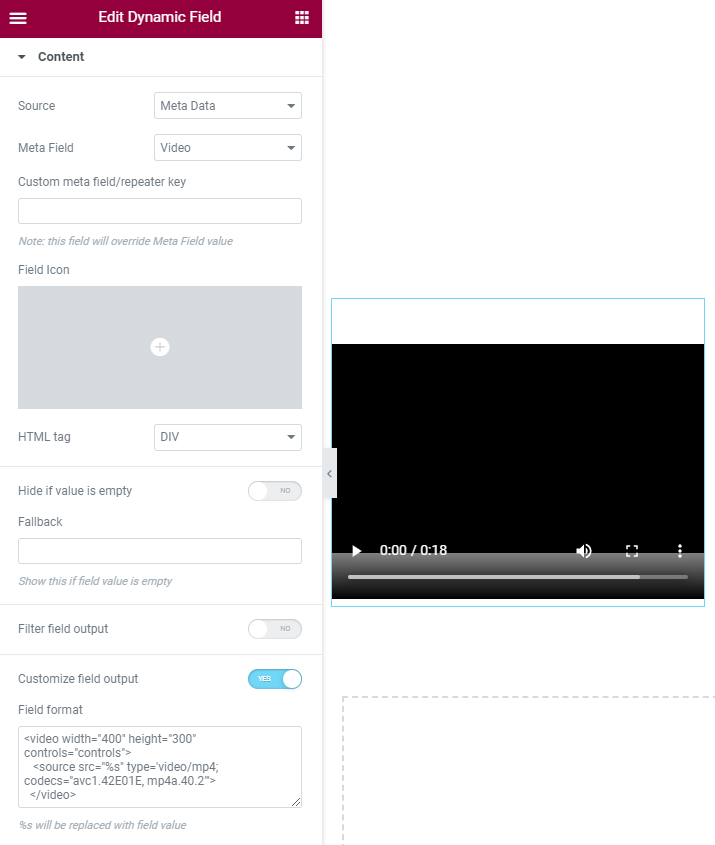
The line with the source varies depending on the video format that you want to use.
- For the .ogv video, it will be this one;
- For the .webm format of the video, the code will be of this kind.
In the code line with the source, we could have inserted the link as it was, but in this case, the same video would appear on every and each post. To keep the dynamic content representation, we inserted the %s macros and now it outputs the meta field values.
Showing the video with the Video widget
Drag-n-drop the Video widget to the page, and in the Source drop-down menu, choose the “Self Hosted” option. Enable the External URL toggle and click on the “Dynamic tags” button in the right corner of the next field. Choose the “Custom Field” JetEngine option. Click the field once again, and in the Field drop-down list, select the meta field with the video URL.
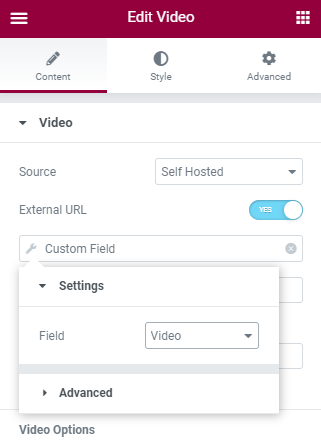
Adjust the other settings to customize the video playing.
Displaying Video from a Third-party Platform
Adding the meta fields
This step duplicates the steps from the first part of this tutorial. More information about creating meta fields you can find in this detailed overview. Also, make sure that you have created the Text-type meta field.
Now you need to insert the video link from the YouTube or Vimeo hosting source to the meta field of every post.

Displaying the video in the listing
To showcase the video in the listing, you need to go to JetEngine > Listings, create the new one, and open it in the Elementor editor. Once again, we will be working with the Dynamic Field widget, so find and drop it to the page.
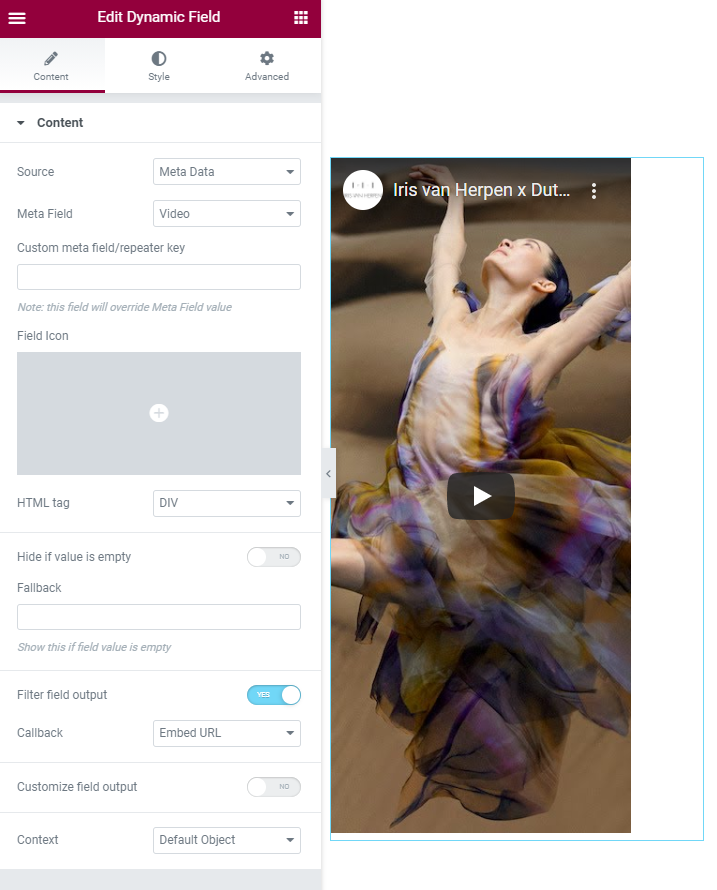
In the Source drop-down menu, choose the “Meta Data” option, and in the Meta Field list, choose the field where you placed the URL. Afterward, enable the Filter field output toggle and choose the “Embed URL” option.
After the video is chosen, it’s time to play around with the additional features in the Style tab.
That’s it. You now learned how to display videos in the Listing grid dynamically using JetEngine functionalities.