How to Make a JetEngine-Built Website Multilingual
In this tutorial, you will learn how to prepare your site for multilingual functionality and translate the core JetEngine features into any language using WPML.
JetEngine became WPML-compatible, which means it is now possible to translate the website into many different languages. Let’s start by prepping the website and then going through the translation process for every content type.
Preparing the Website to Run Multilingual
Start by purchasing the Multilingual CMS WPML package. It contains WPML String Translation, WPML Media Translation, and the core WPML Multilingual CMS plugin needed to translate the Crocoblock-built website. After you upload it to WordPress, complete the basic language setup.
WPML setup
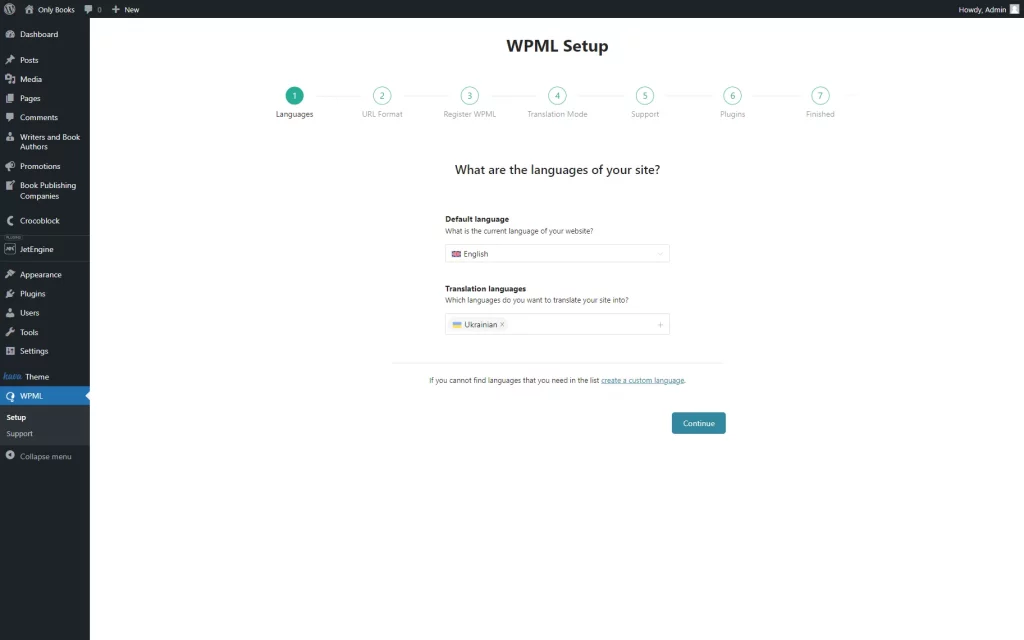
Run the WPML Setup wizard. In the first step, pick the default and translation languages of the website. Besides that, you can create a custom language if needed.
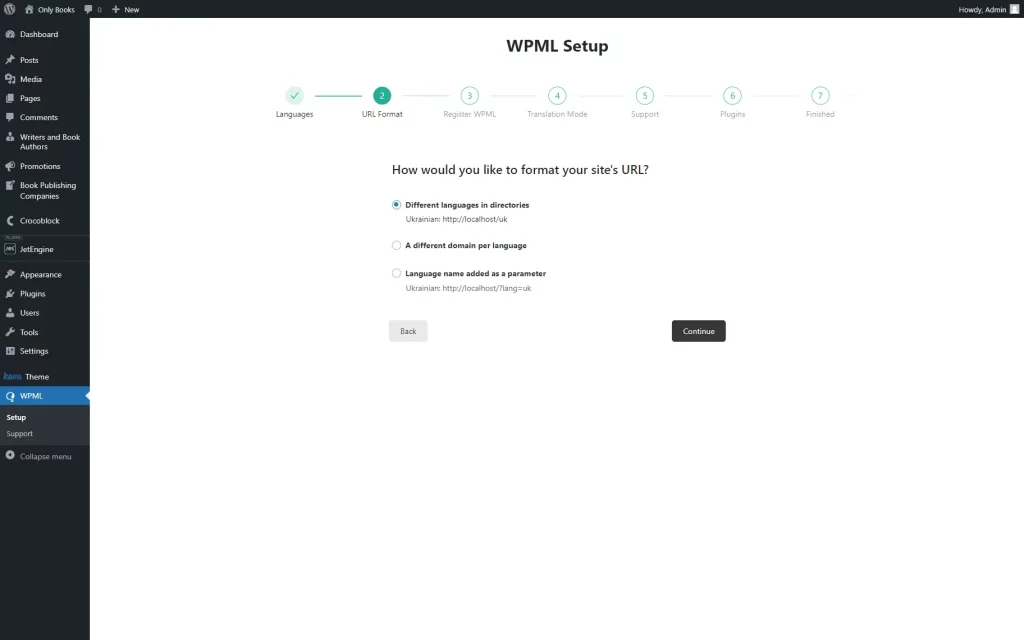
The second step allows you to format the URL of the translated website and offers three options to choose from:
- “Different languages in directories”;
- “A different domain per language”;
- “Language name added as a parameter.”
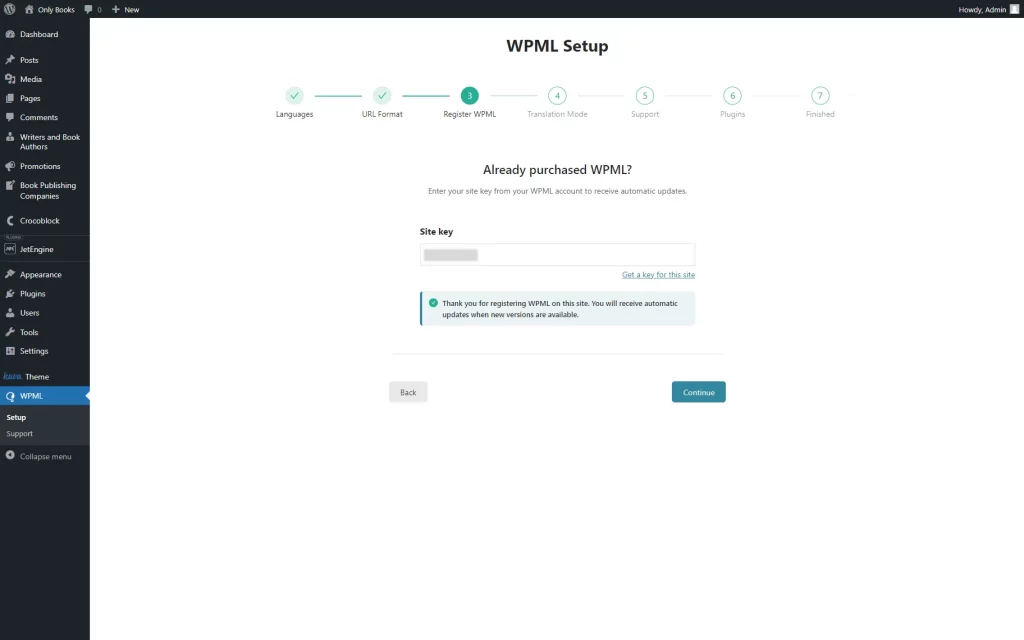
In the third step, you should register WPML. Сlick on the “Get a key for this site” link if you haven’t done it yet. It will lead you to the WPML account, where you can register WPML on the website you need and generate a site key.
After doing so, paste the received key into the Site key field in the WPML Setup window.
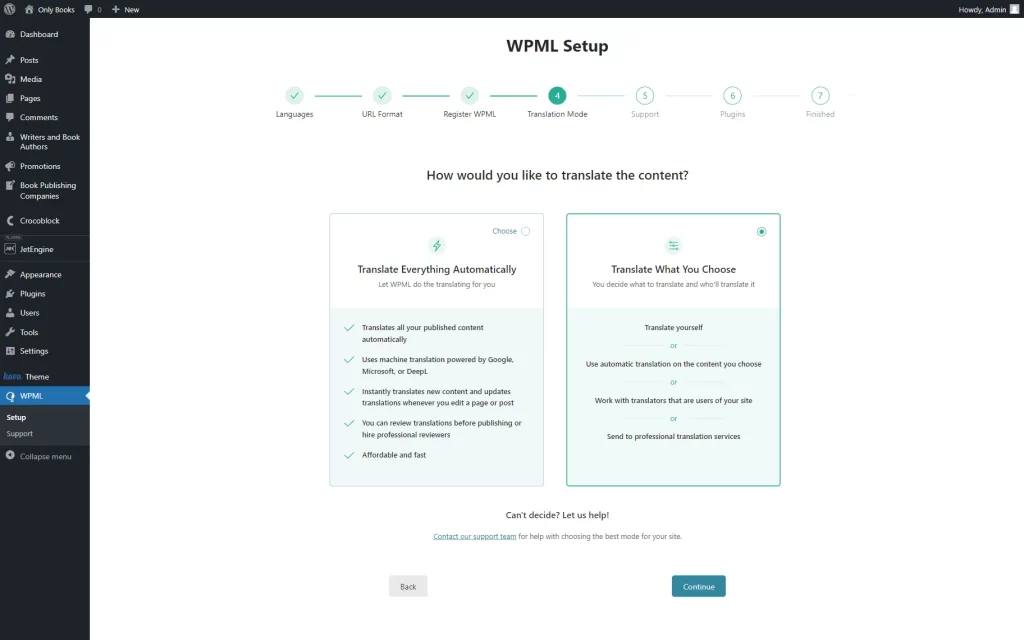
Proceeding to the next step, you need to decide how you would like to translate the website.
When choosing the “Translate Everything Automatically” mode, WPML will start translating content in the background. You can check the translation progress by heading to WordPress Dashboard > WPML > Translation Management or pushing the WPML logo in the toolbar.
As the new content will be published or edited, it will be translated automatically.
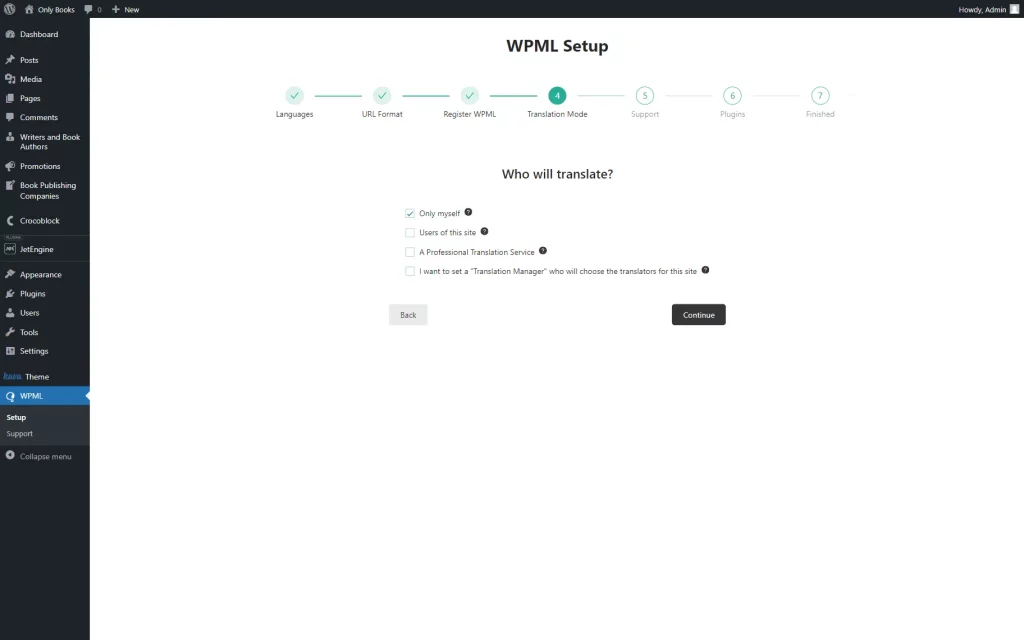
However, if “Translate What You Choose” is picked, you should define who will translate the content in the following step.
If you haven’t defined all the needed translation roles while setting up WPML, you can do it in the WordPress Dashboard > WPML > Translation Management > Translators tab. You can assign all roles right away or one at a time – just return to this page later.
Note that you can switch between modes later by going to WordPress Dashboard > WPML > Settings.
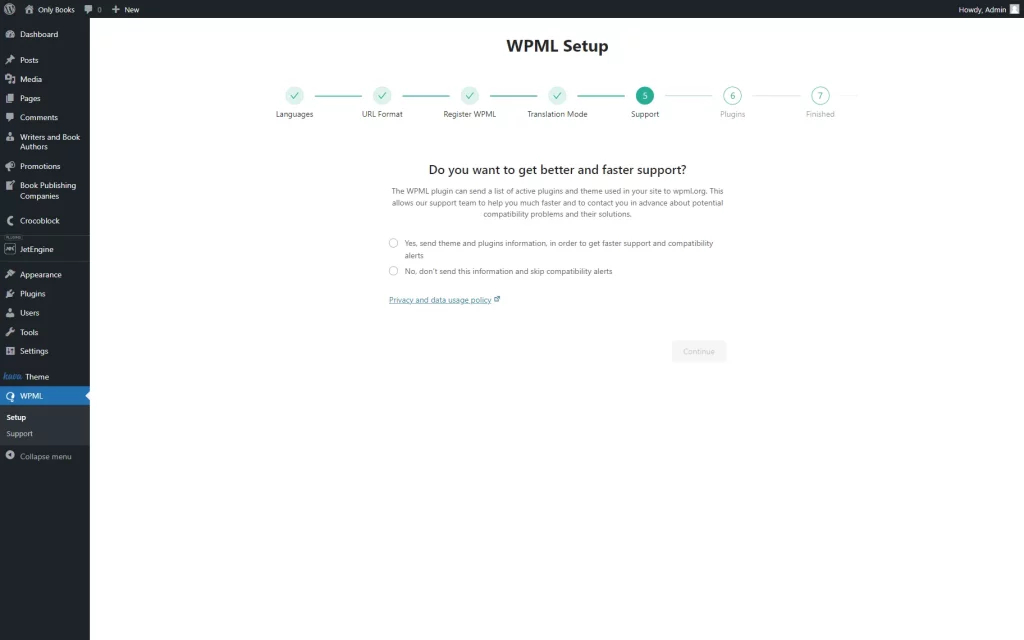
The fifth step, called Support, lets you send theme and plugin data to WPML support. This way, you will get compatibility alerts that will decrease the possible problems with website translation.
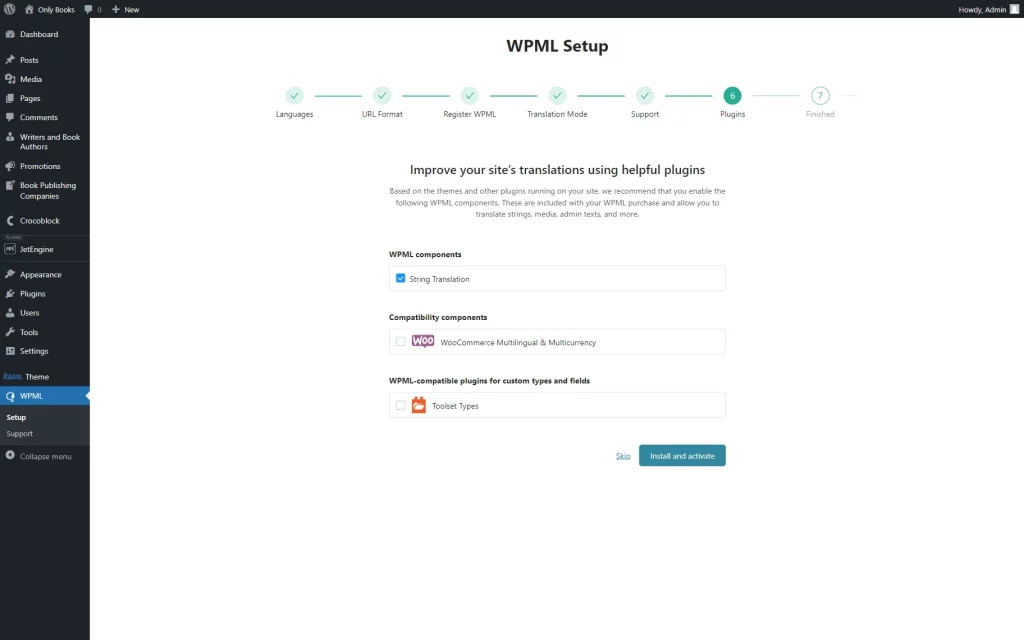
At the sixth Plugins step, install recommended plugins based on the website themes or skip if not interested.
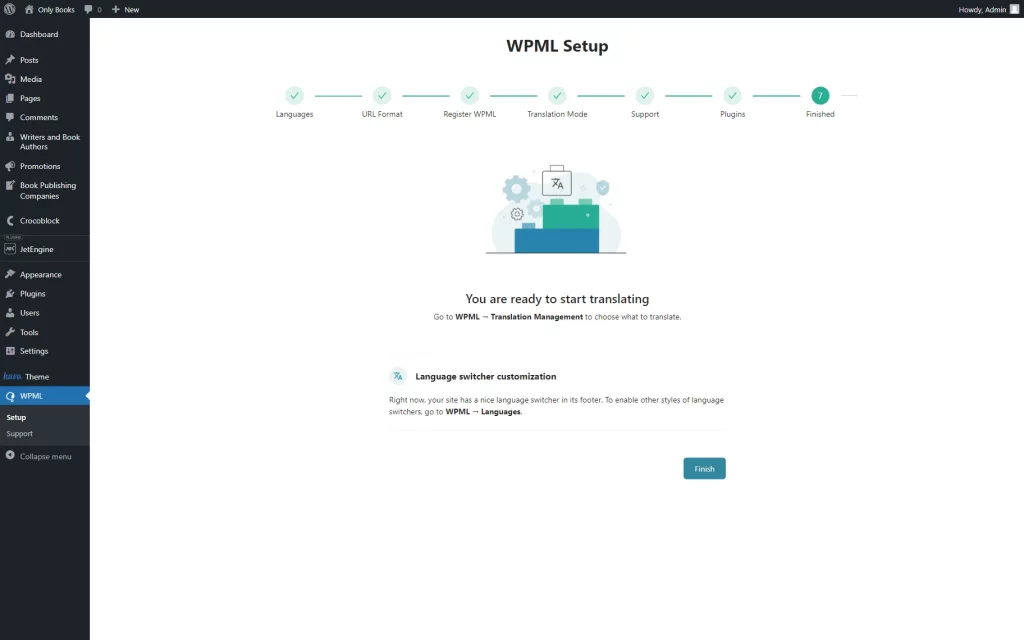
The final step displays additional information that can help you customize the translation process even more. Click on the “Finish” button to complete the setup.
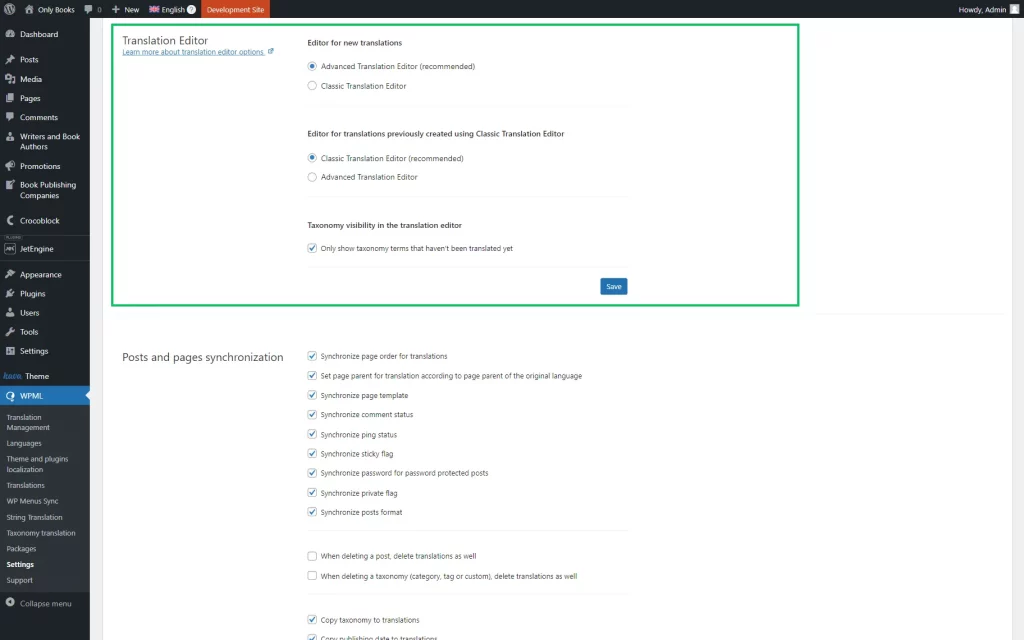
Afterward, go to the WordPress Dashboard > WPML > Settings tab and define the translation method for new content and the previously created translations in the Translation Editor section. Choose either “Classic” or “Advanced” for each feature.
Please note that we suggest using the “Advanced Translation Editor” for new content and the “Classic” one for old content. In this way, it won’t affect old translations.
After everything is done, let’s proceed to translate the JetEngine-generated content.
Translate Meta Boxes & Meta Fields
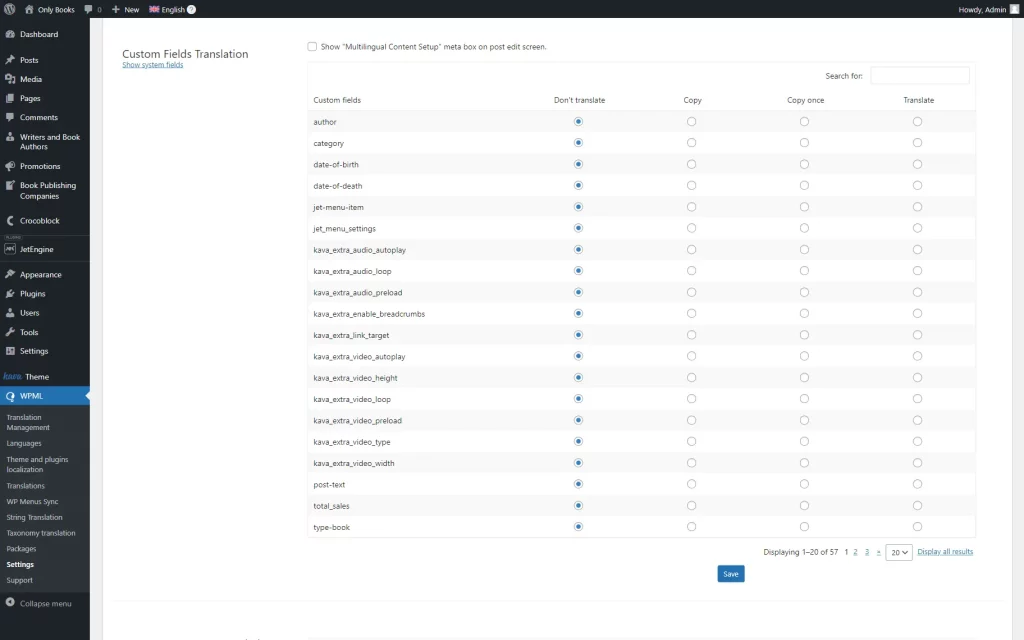
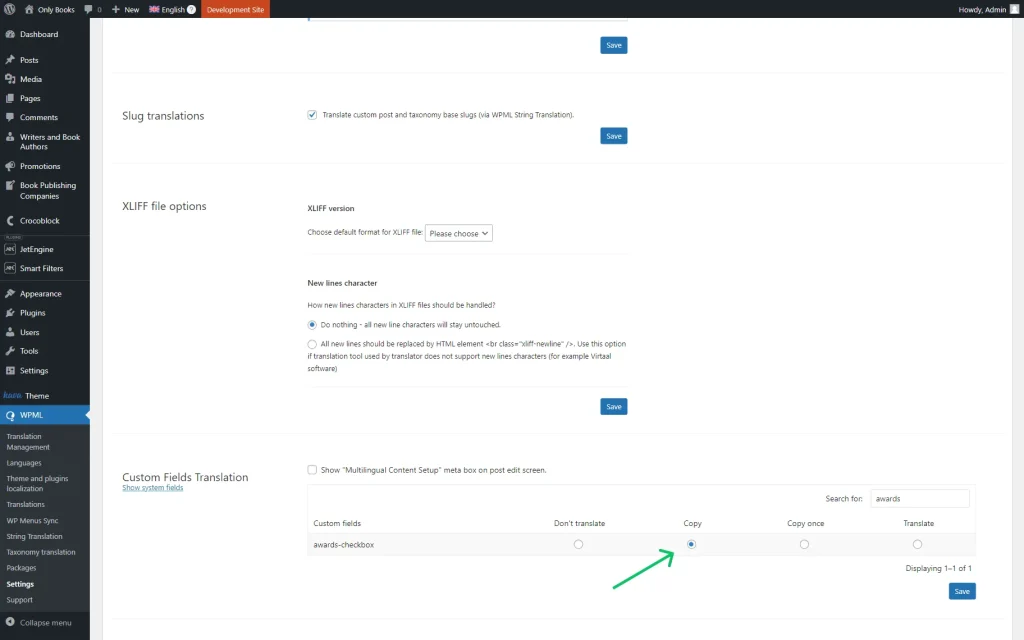
Initially, you’ll have to make the Meta Boxes and Meta Fields translatable. To do so, go to the WordPress Dashboard > WPML > Settings page and scroll down to Custom Fields Translation.
By default, the “Don’t translate” option is set to all the custom fields. You can select one of four translation options for the custom fields using radio buttons:
- Don’t translate – the system will output the given custom fields “as is”;
- Copy – the custom field value will always be copied to secondary languages whether you decide to modify the default-language custom field or not;
- Copy once – the custom field value will be copied to the secondary-language site version during the initial translation process. However, you can set a different value for it that won’t be overridden by the value of the default-language custom field;
- Translate – you will be able to translate these fields wherever they pop out.
When all radio buttons are checked, hit the “Save” button. To dig even deeper, press the “Show system fields” button (located under the Custom Fields Translation section name), and you’ll see the system components that can be made either translatable or not.
However, playing with system fields can be tricky. Be careful and always make a backup copy of your site content before changing anything on the backend.
- Go to WordPress Dashboard > Pages > All Pages and use the admin bar language switcher to view the pages that belong to a given language;
- Click to edit the needed page/post;
- You will see a warning. Press the “Edit anyway” button;
- Input the missing translations by hand and hit the “Update” button to save the changes.
Both Crocoblock and WPML development teams are aware of this issue and are working to fix it.
Concerning meta fields, remember that you do not want to change any Field attributes except the Label. If you alter anything else, there is a possibility that the website won’t be working correctly.
Translate Multi-Optional Fields
As for the meta fields that keep several options inside, such as Checkbox, Select, or Radio, they need to be translated differently.
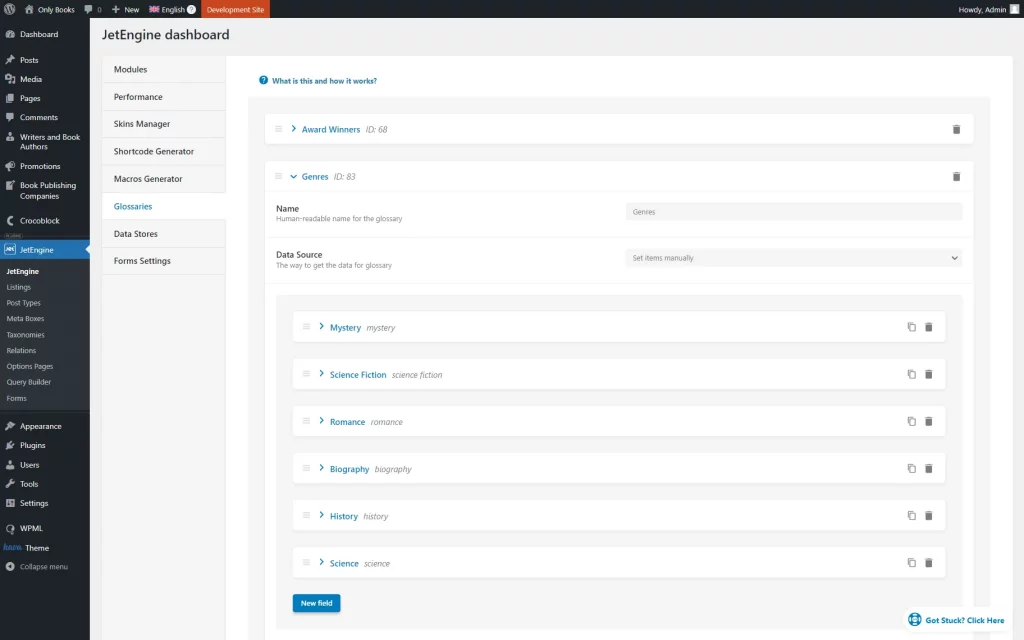
To translate them, we need to use the Glossaries functionality from JetEngine.
Create a Glossary that will be set as the source for the meta field.
Go to the page where your meta field editor is located. For instance, it can be a CPT editing page or a meta box.
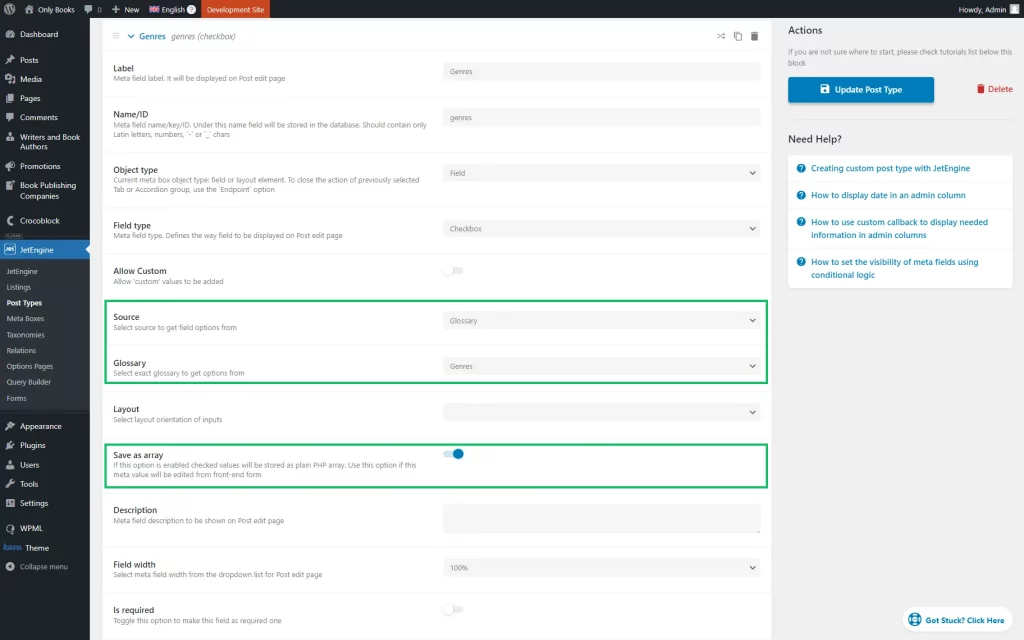
In the needed meta field settings, make sure that the Get options from the glossary toggle is enabled and the Glossary is selected.
Also, activate the Save as array option.
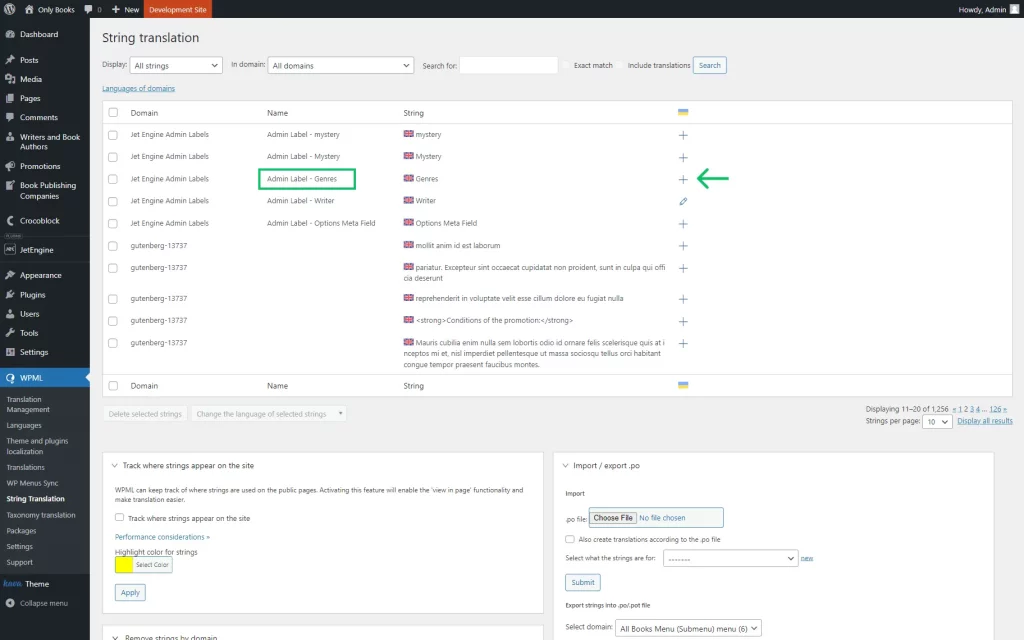
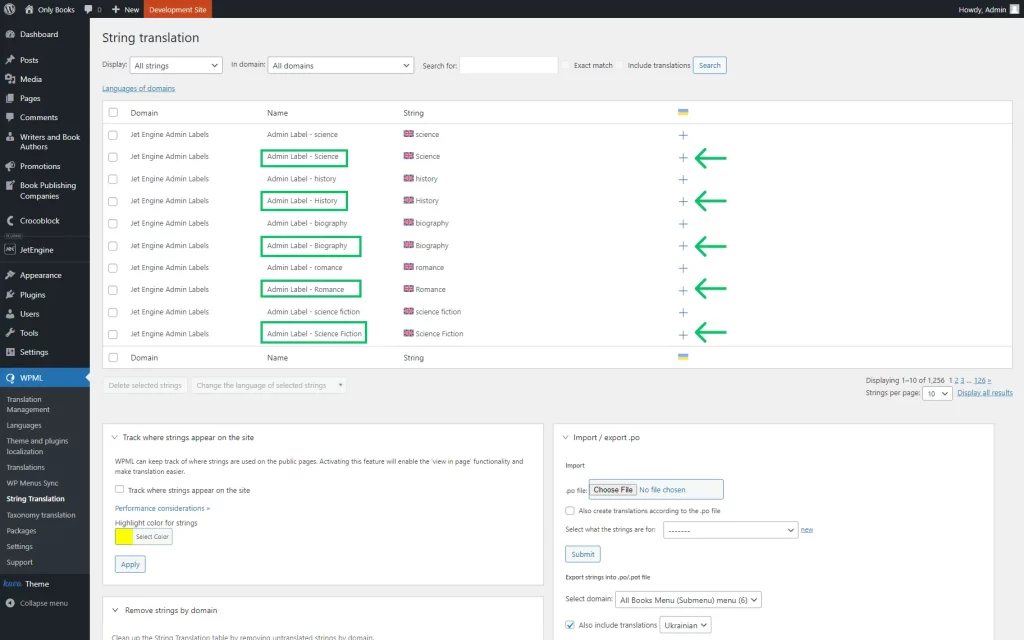
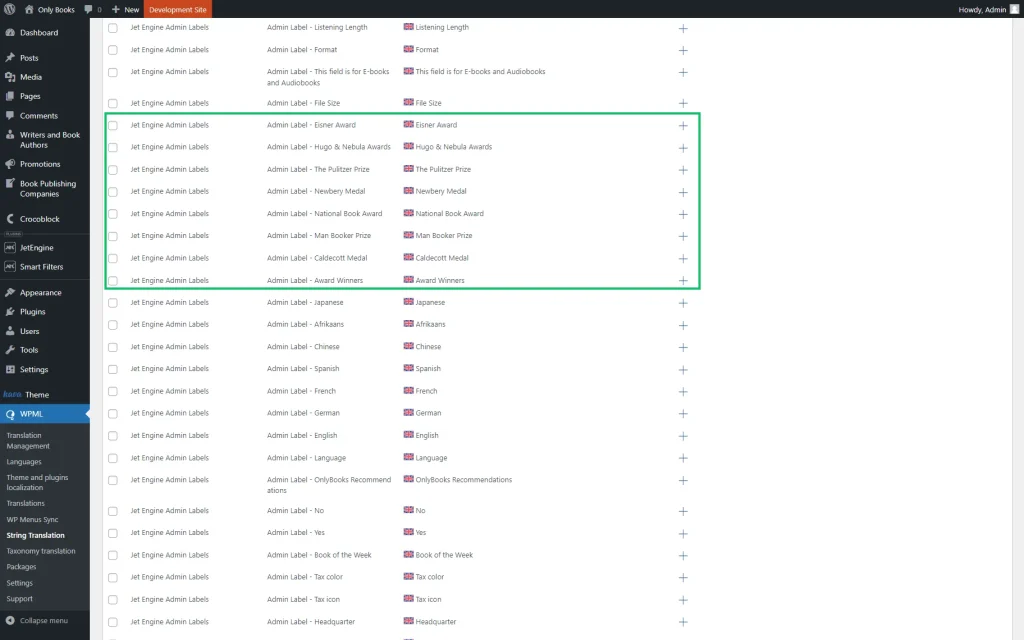
Proceed to the WordPress Dashboard > WPML > String Translation directory and locate the label of the meta you need. You can find it manually or by using the search bar located above the items.
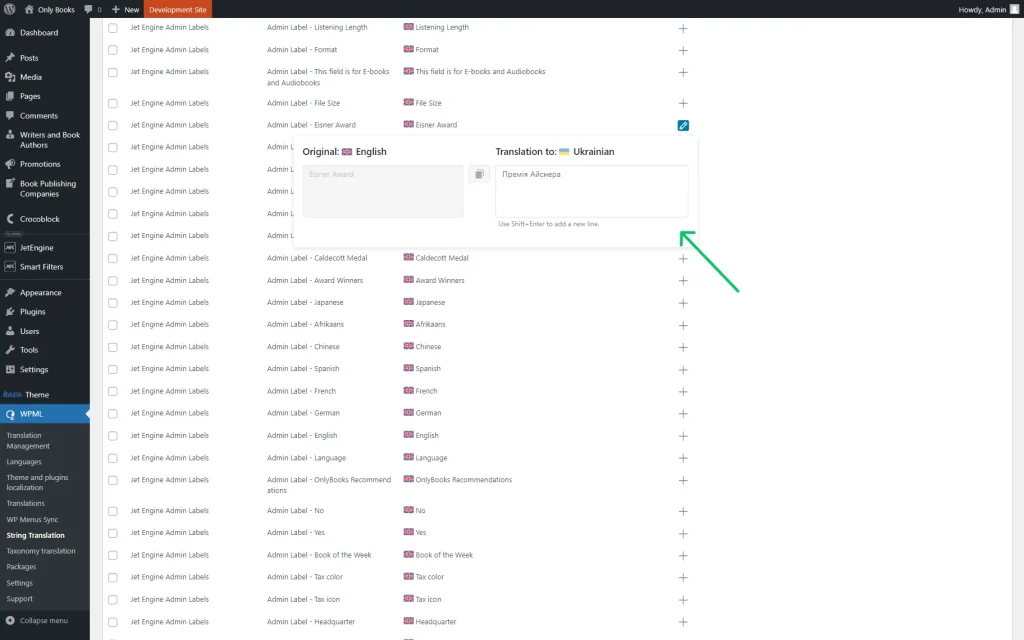
Press the plus-shaped button next to the needed meta field Label to add its translation.
Then, add the translation to the meta field options Labels.
Now, the meta field and its options can be checked for both original and translated versions.
Translate the JetSmartFilters Filter Based on the Glossary Built with JetEngine
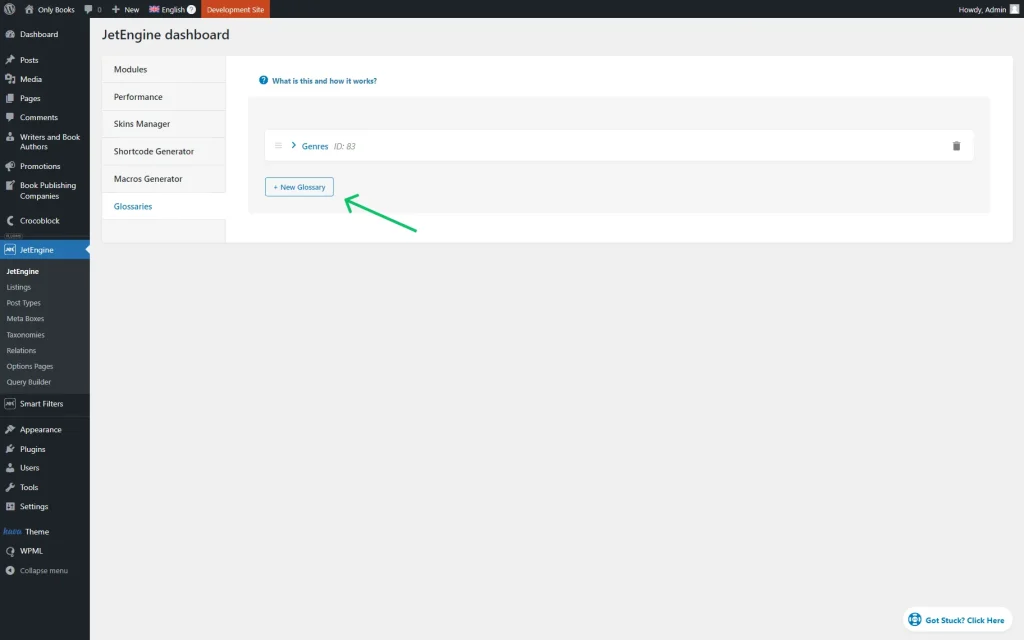
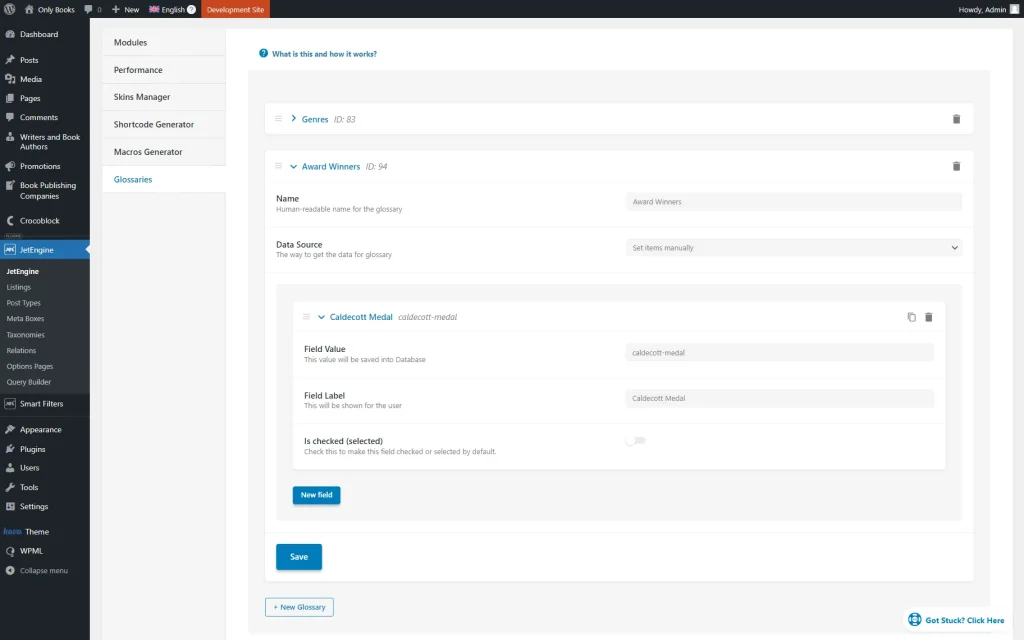
Proceed to WordPress Dashboard > JetEngine > JetEngine and open the Glossaries tab.
Press the “New Glossary” button.
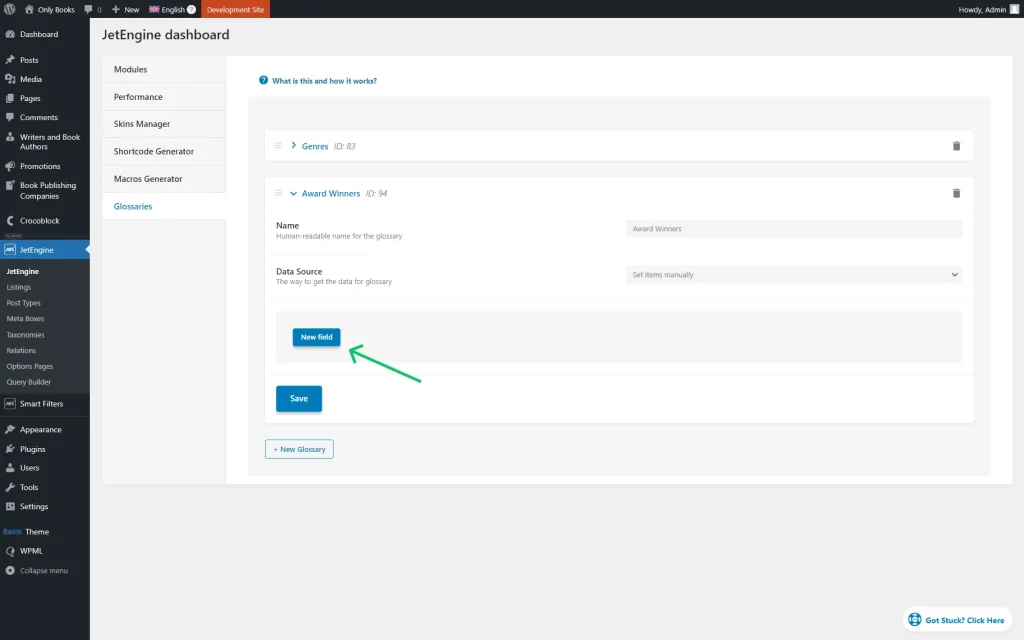
Define the glossary’s Name and set its Data Source. It can be either “Set items manually” or “Get items from uploaded file.”
If you want to add a new item, press the “New field” button.
Every item you add has the following customization settings:
- Field Value — a unique value of the item that should contain only Latin lowercase letters with no spaces and can contain numbers and “-” and “_” symbols;
- Field Label — a name of the item displayed as its label;
- Is checked (selected) — a toggle that should be activated if you want the item to be selected by default.
Once the glossary customization is over, press the “Save” button.
Then, we need to add the meta data to the source we want to connect with the filter.
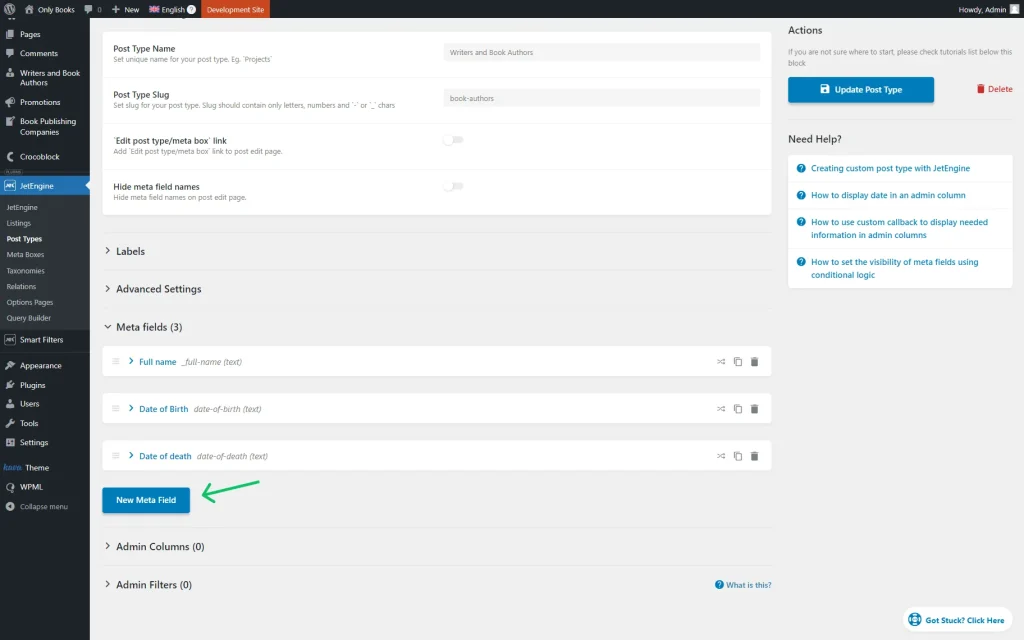
It can be done in the WordPress Dashboard > JetEngine > Post Types directory if you want to attach the filter to Custom Post Types or WordPress Dashboard > JetEngine > Meta Boxes to adjust a meta box for other sources.
For instance, we go to WordPress Dashboard > JetEngine > Post Types and open the existing post type editing page.
In the Meta fields section, click the “New Meta Field” button to create a new meta field.
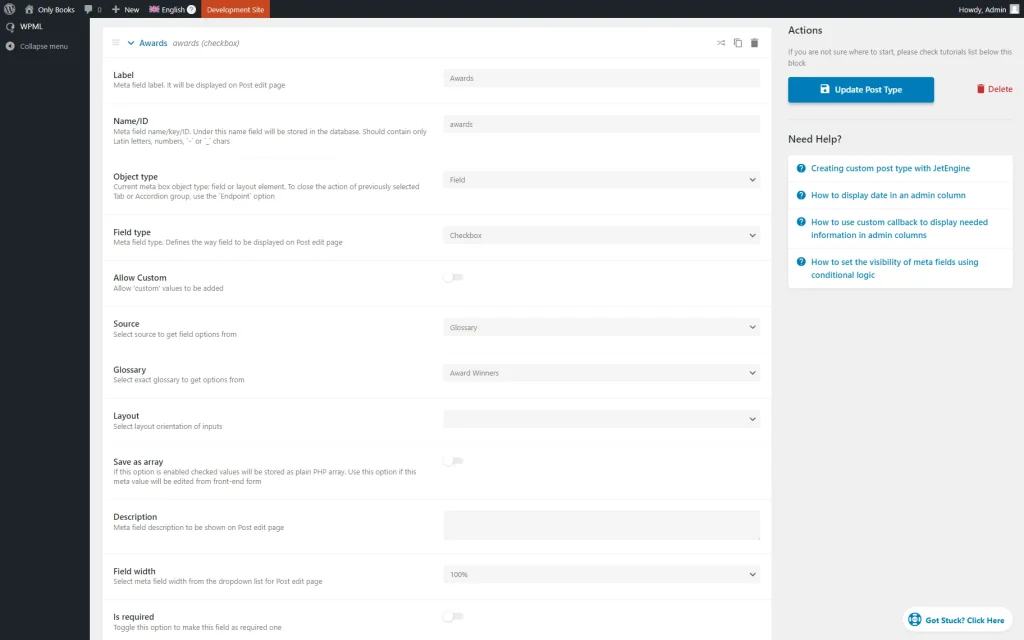
Complete the Label and change the Name/ID of the field if needed.
Then, set its Field type to “Checkbox” and select “Glossary” as its Source. Also, pick a Glossary you have just created.
That’s all with the meta data editing, so we hit the “Update Post Type” button.
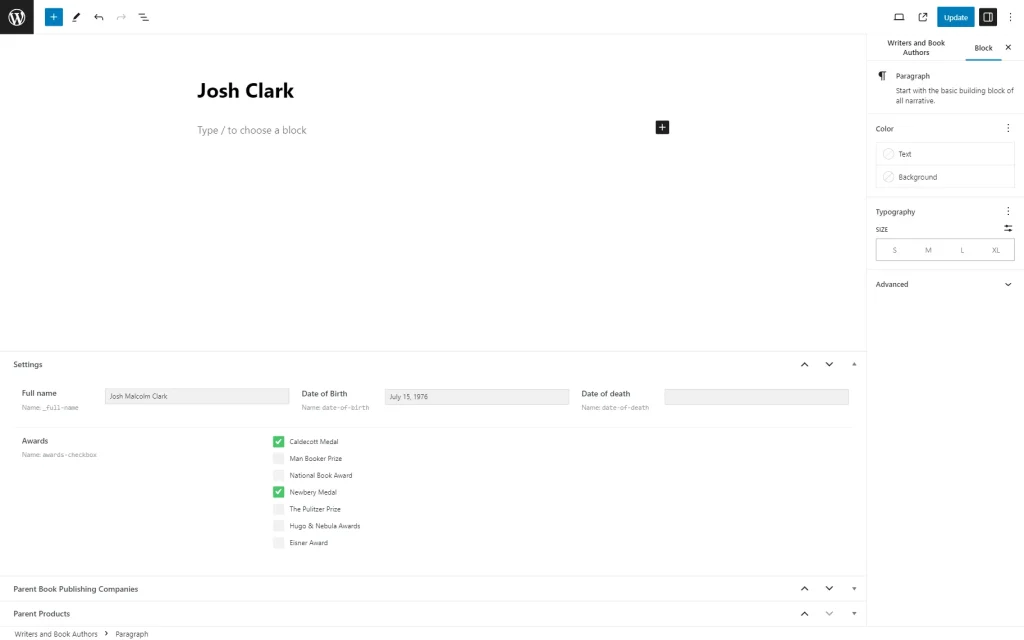
Head to the posts of the edited CPT and complete the just added “Checkbox” meta field.
The next step is to ensure you have activated the translation for the current source and custom field. To do so, navigate to WordPress Dashboard > WPML > Settings.
First, we scroll down to the Post Types Translation section, as we work with CPT and need to ensure it can be translated. We find the needed post type, set it to “Translatable,” and press the “Save” button.
Repeat the same step with the source you have the “Checkbox” meta field applied to.
Then, move to the Custom Fields section. Find the “Checkbox” field you have created (you can do this with the Search for: search bar), set its status to “Copy,” and click the “Save” button.
Once you have applied the changes, go to WordPress Dashboard > WPML > String Translation.
Here, find the Labels of the glossary fields and click the “plus” button next to them to add the translation.
Complete the translation of all the needed items.
Head to WordPress Dashboard > Smart Filters > Add New to build a new filter.
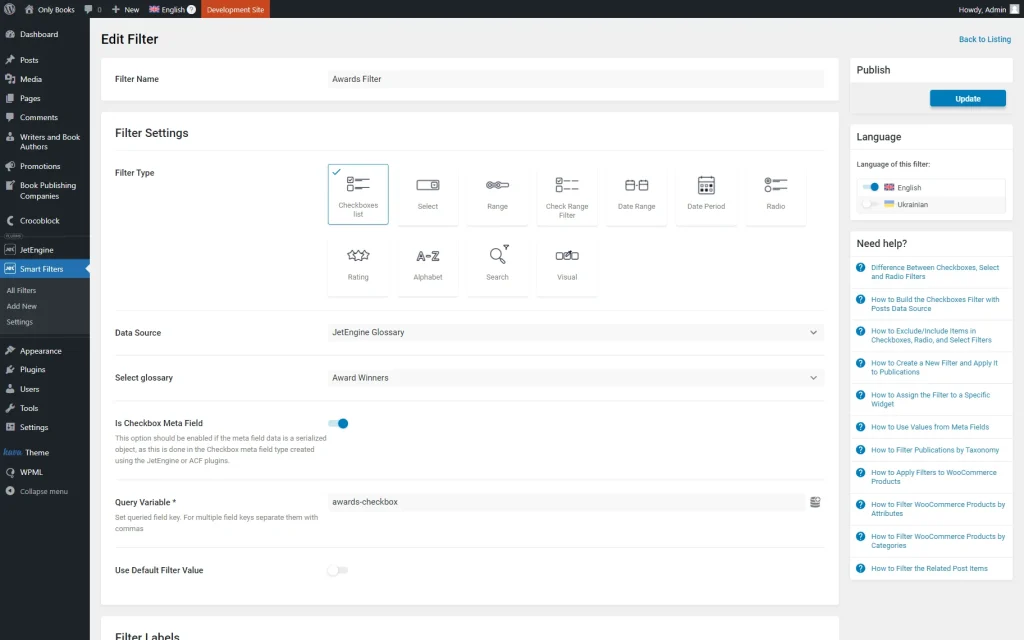
Set the Filter Name and select the “Checkboxes list” option as the Filter Type.
Then, select its Data Source to be “JetEngine Glossary” and pick the needed glossary in the corresponding Select glossary field.
Activate the Is Checkbox Meta Field (Jet Engine) toggle as we work with the JetEngine “Checkbox” field.
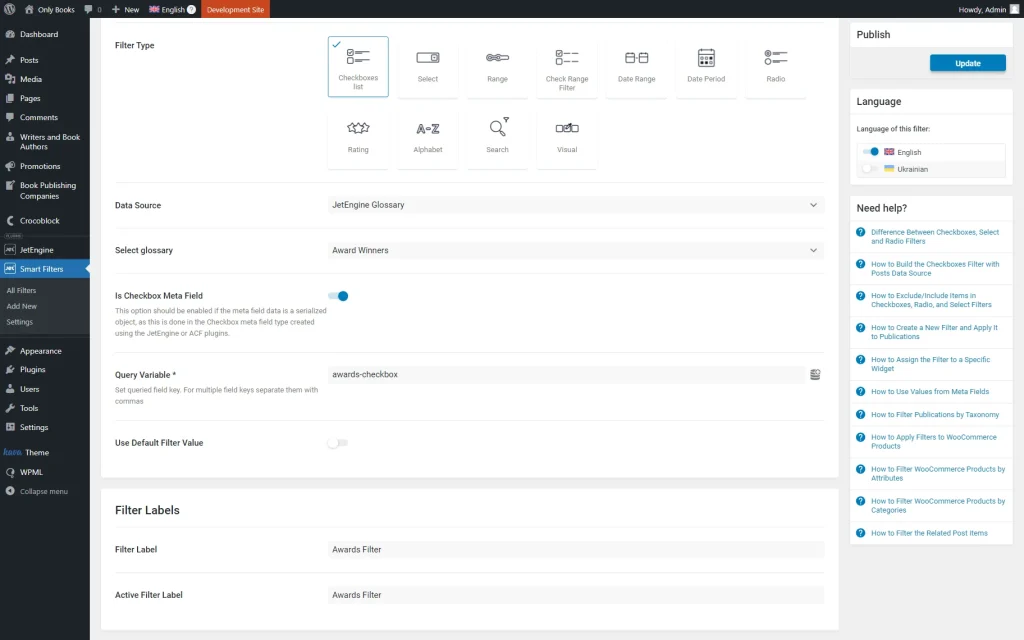
In the Query Variable field, put the Name/ID of the built “Checkbox” meta field.
Complete the Filter Labels section and press the “Update” button to save the filter.
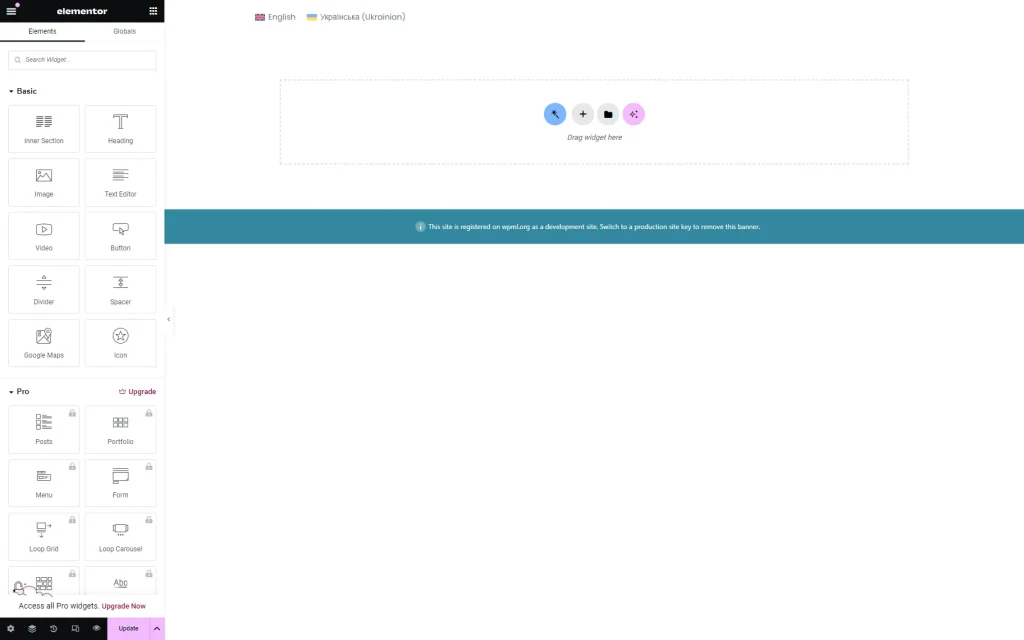
Head to the preferred editor to add the content; it can be Block Editor, Elementor, or Bricks. For instance, we work in Elementor.
On the page, put the Language Switcher widget to be able to switch between languages later.
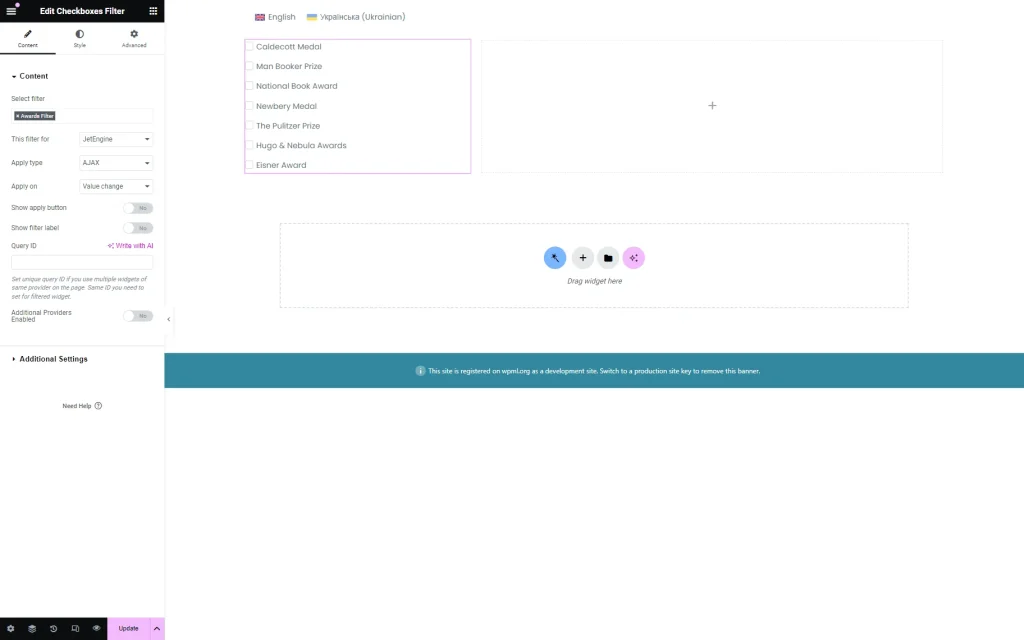
Add the Checkboxes Filter widget to the editing page. Select the needed filter and define its provider in the This filter for field.
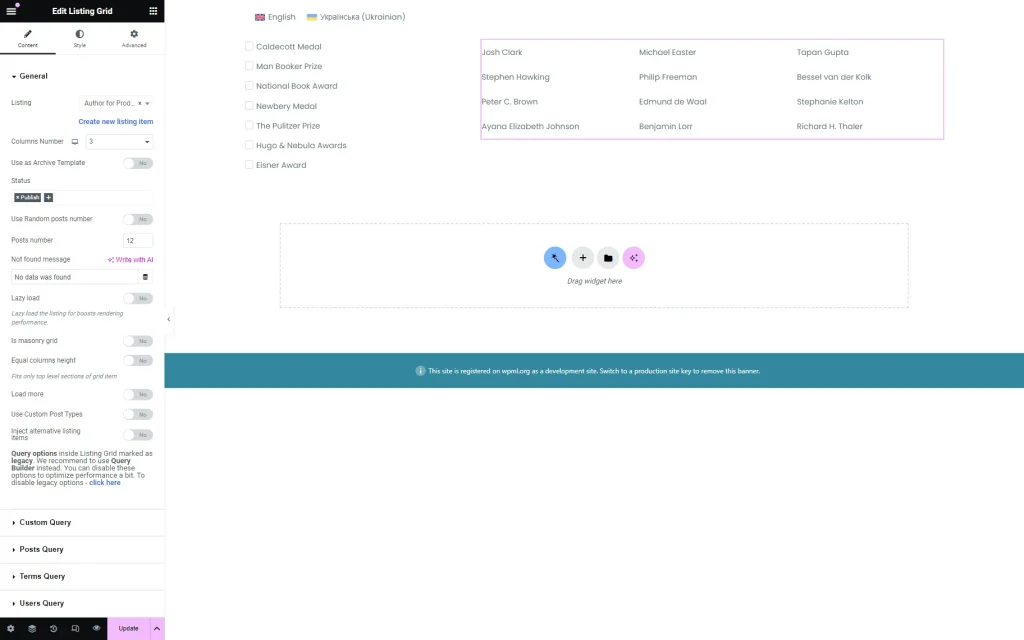
Add the provider to the page. For instance, we add the Listing Grid widget.
Adjust the page further if needed, and once ready, press the “Publish/Update” button.
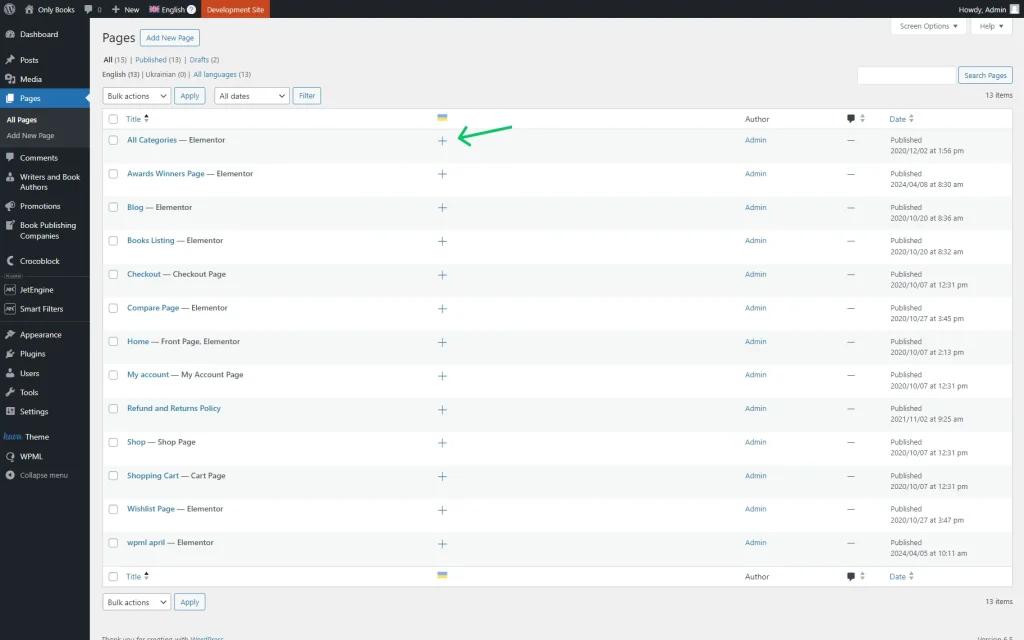
Return to the list of the CPT posts and translate the item by clicking the “plus” button.
Complete the translation for all of the CPT items.
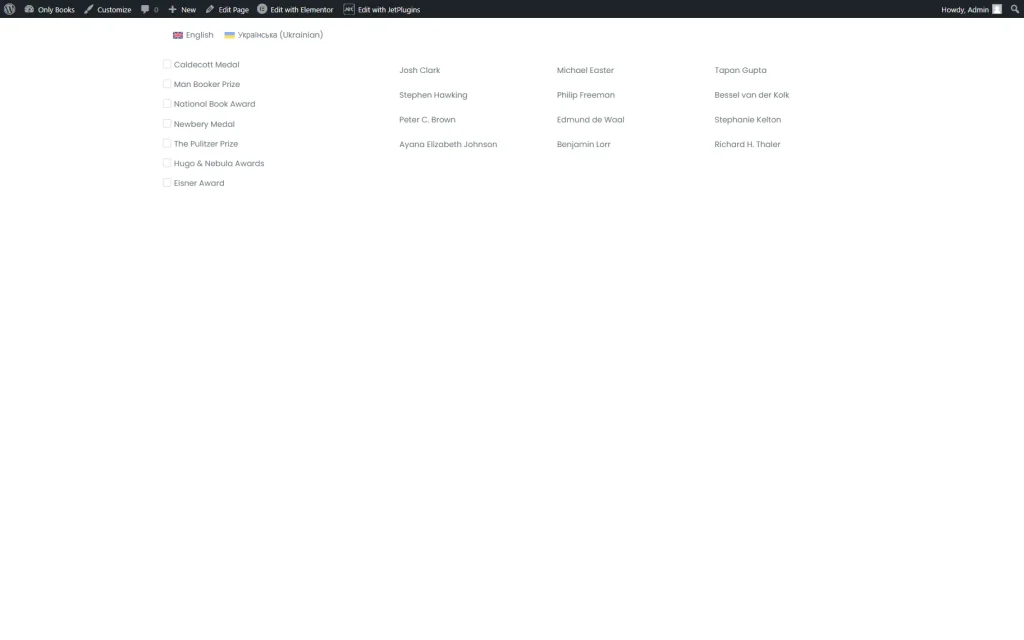
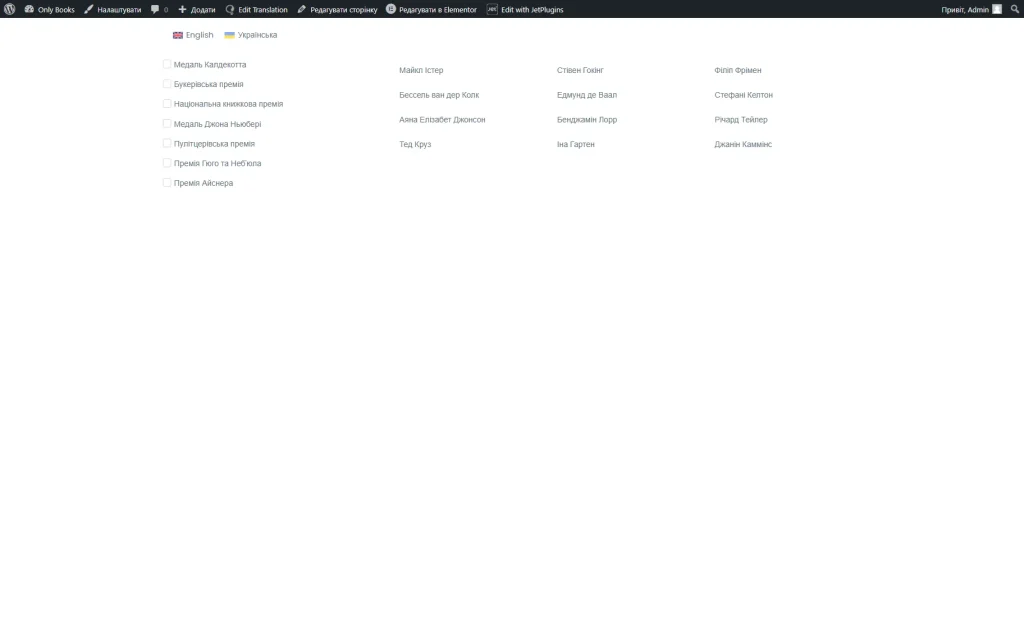
Proceed to the front end to check the result. At first, we see the original version of the page.
Once we click on the Ukrainian flag, we switch to the Ukrainian version of the page.
As you can observe, the content has now been translated.
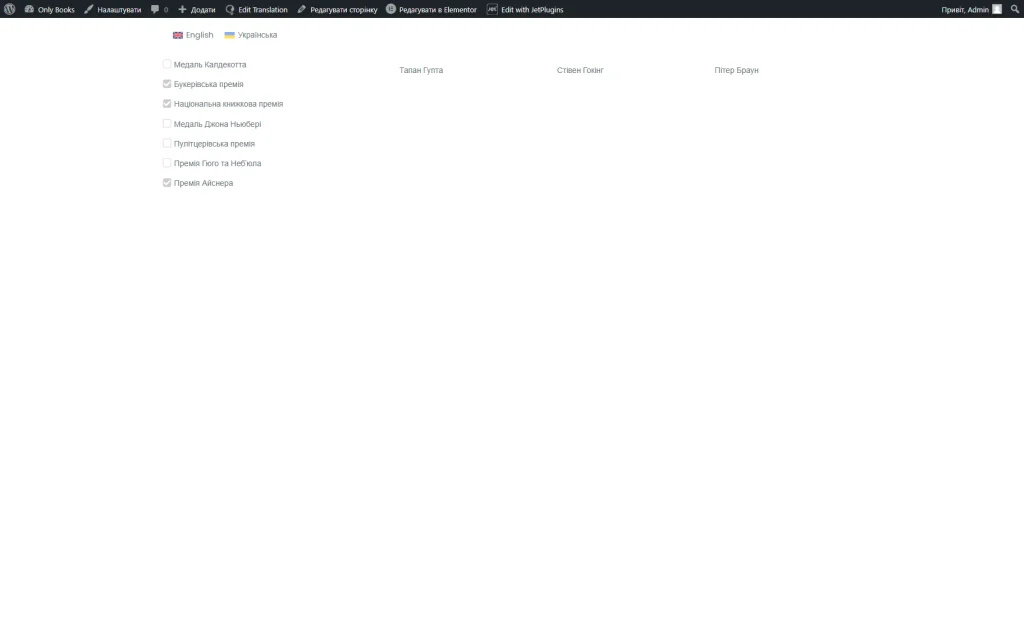
Let’s check how the filter works by selecting the options in the Checkbox Filter.
The Listing Grid is now filtered by the Checkbox Filter options.
Translate Taxonomies
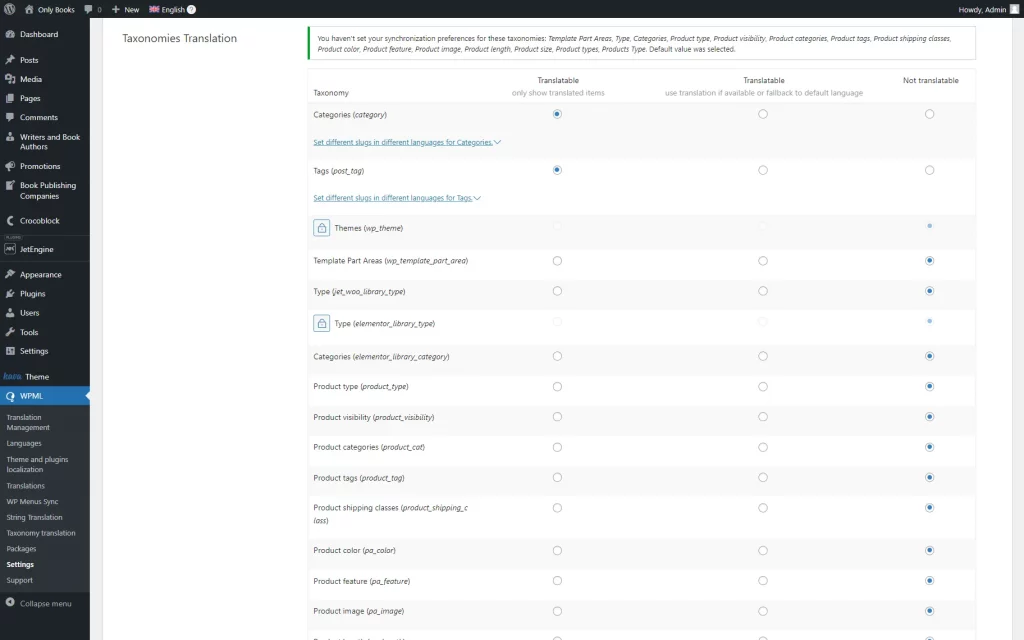
Go to WordPress Dashboard > WPML > Settings. Scroll down to Taxonomies Translation and click “Translate” radio buttons next to the taxonomies you need to be translatable. Press the “Save” button.
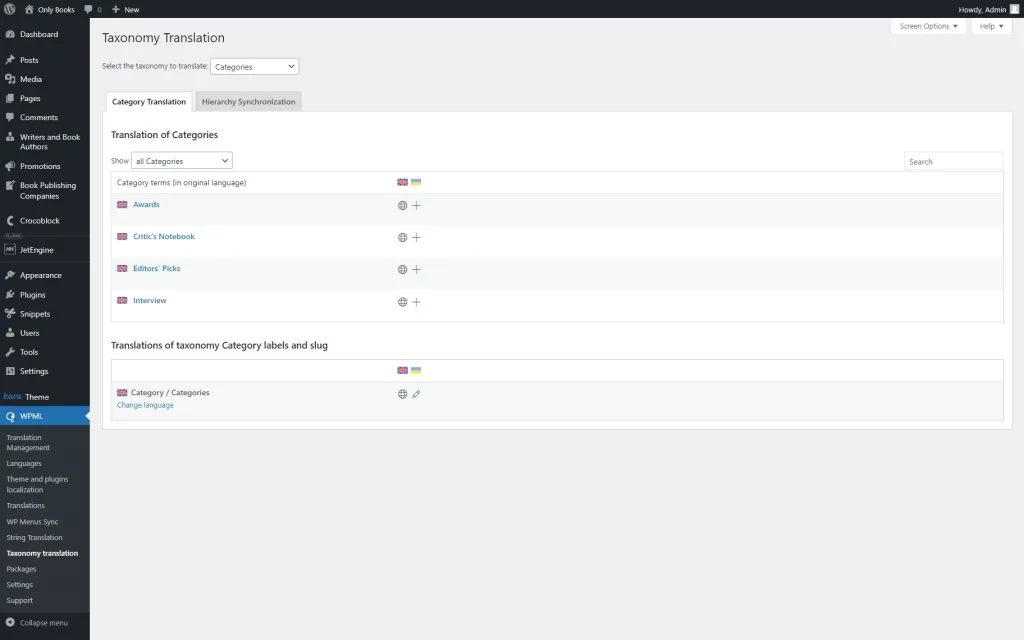
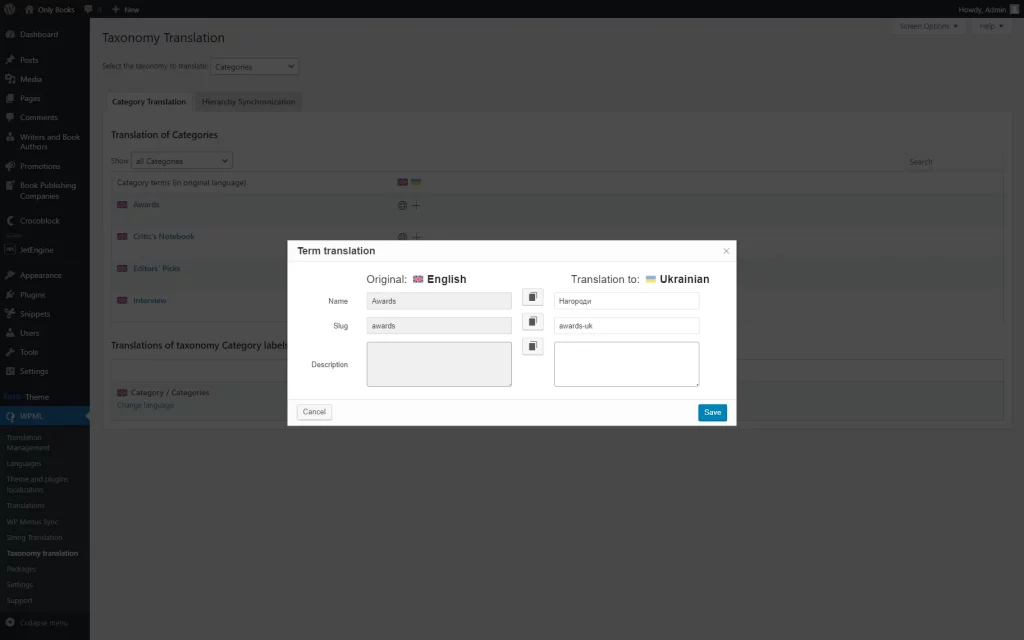
Now, follow the WordPress Dashboard > WPML > Taxonomy translation directory and choose the one to edit from the drop-down list. Here, you can see the content this taxonomy includes. To add a translation, press the “+” icon.
In the newly-appeared window, submit the necessary translations. The slug will be generated automatically. Please keep in mind that if there are identical slugs on the website, the system will add a suffix like “-uk,” where “uk” is short for the second (third, fourth, etc.) language. Don’t forget to press the “Save” button every time you edit the taxonomy content.
Repeat the same process for every taxonomy you’ve set to be translated.
Translate Custom Post Types & Listing Items
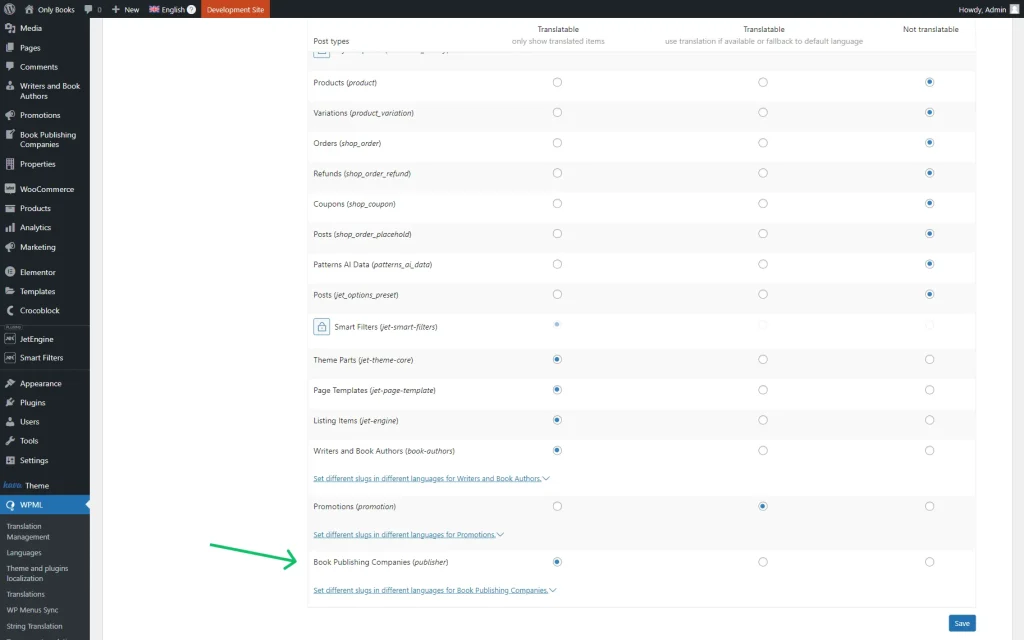
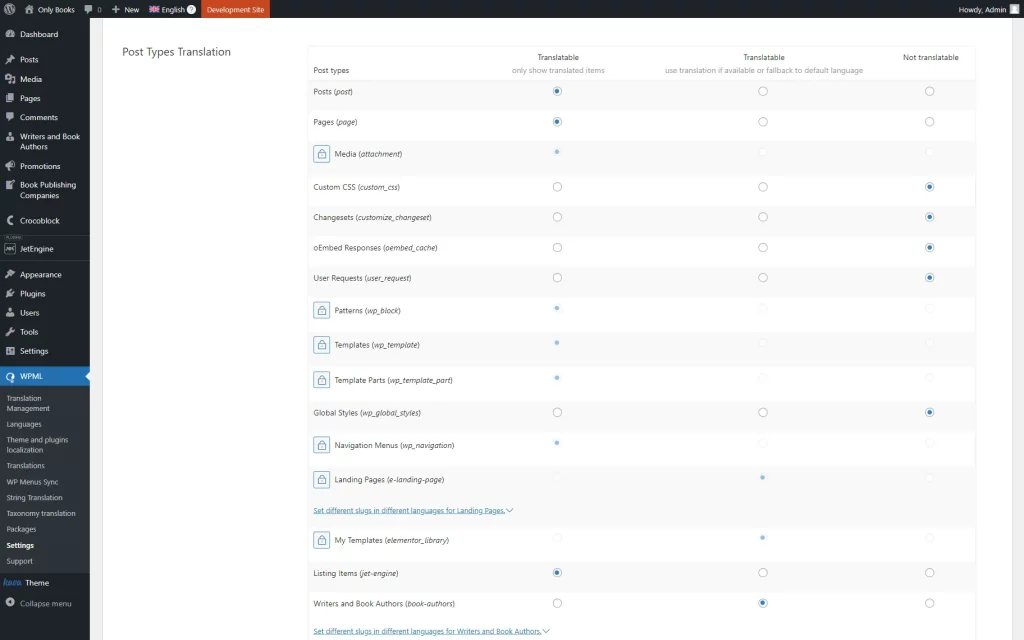
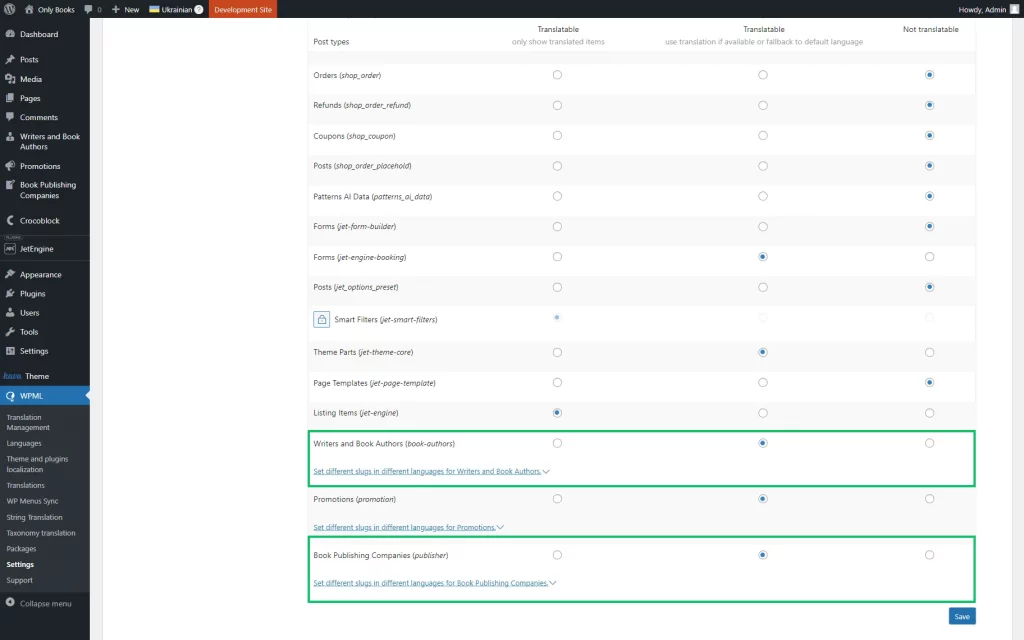
Proceed to the WordPress Dashboard > WPML > Settings page and find the Post Types Translation section. Make the custom post types translatable. Then, click the “Save” button.
Here, Listing Items can be set to translatable as well.
There are three options available for you here:
- Translatable – only show translated items — tick this radio button to display on the front end only those items you translated;
- Translatable – use translation if available or fallback to default language — this option will output the content translation if you’ve provided it, and the items with no active translations will be shown “as is”;
- Not translatable — a self-explanatory option.
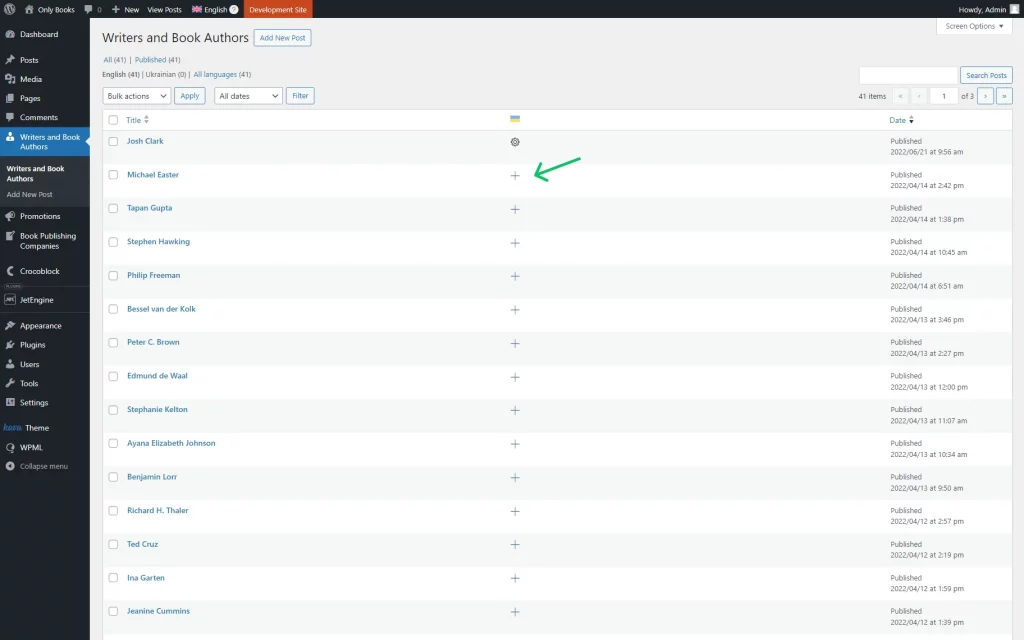
Afterward, open the Post Types tab in the admin panel, and you’ll see that small “+” icons appear next to post type titles.
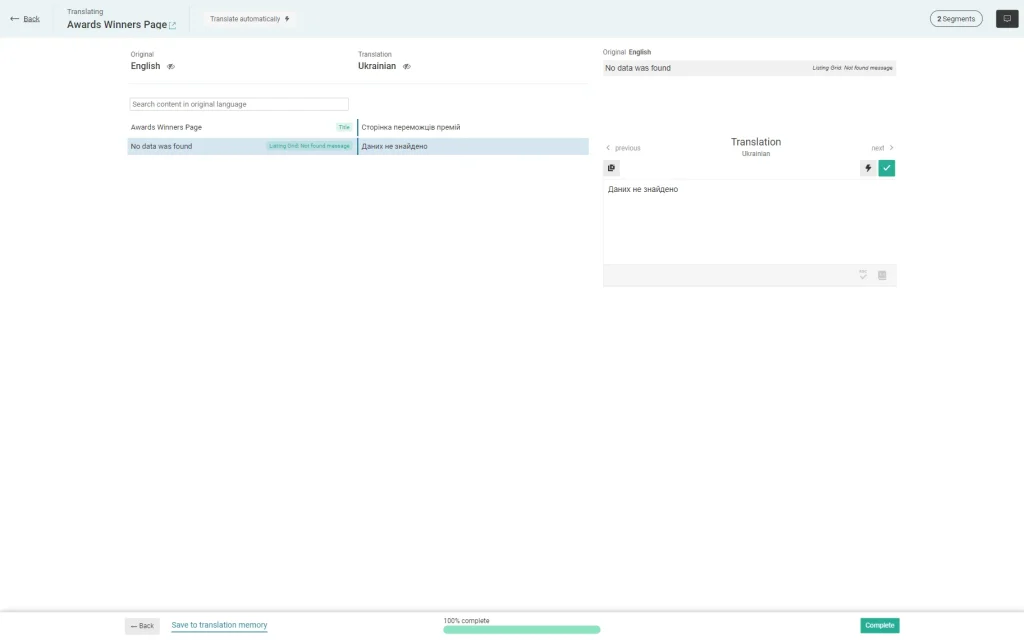
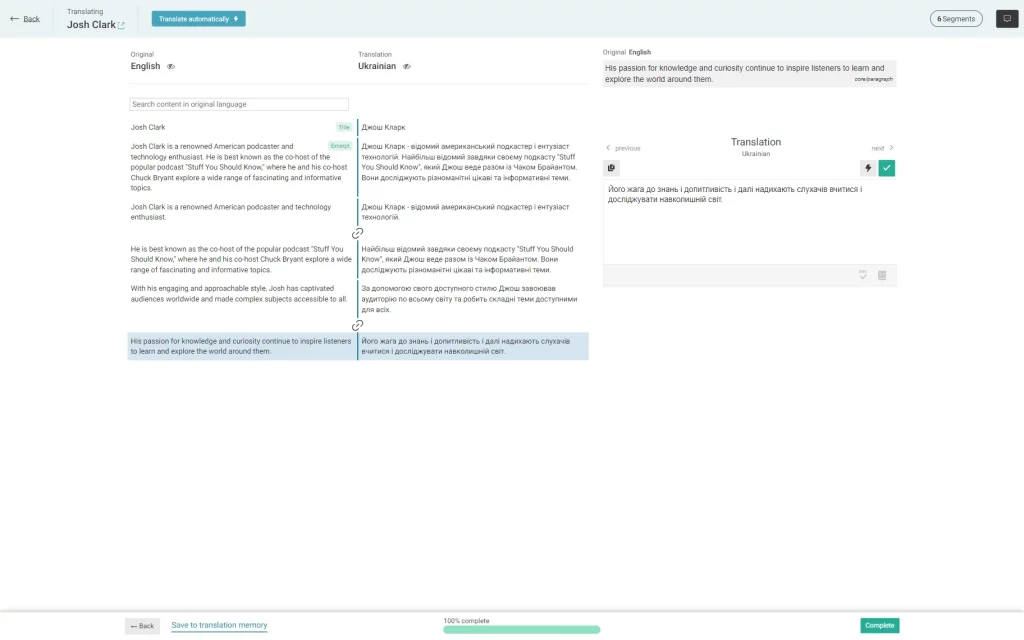
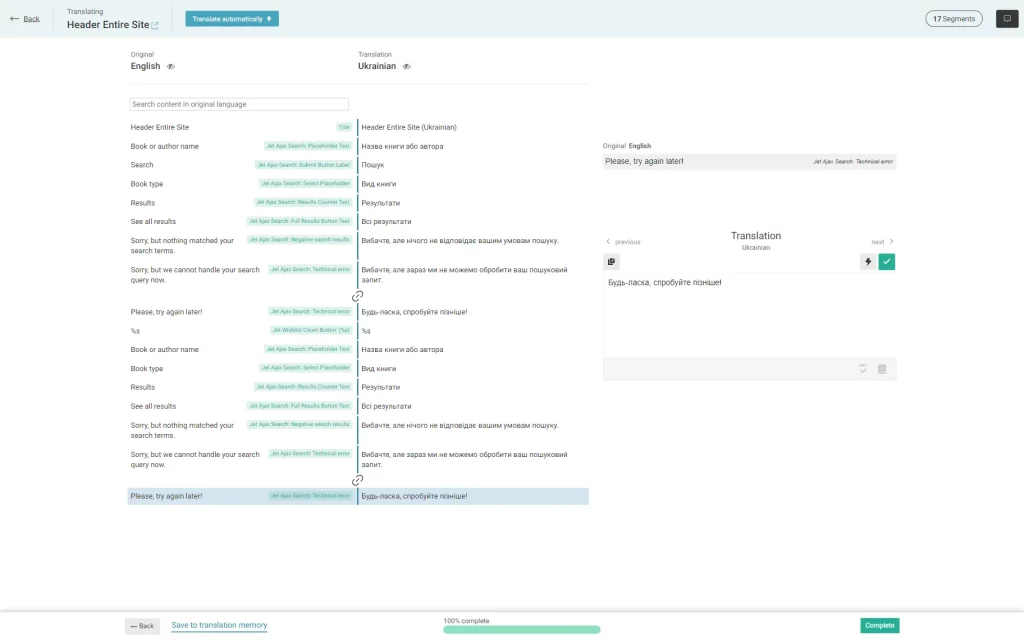
Press one of these buttons to be redirected to the WPML Advanced Translation Editor window. Translate the whole section by yourself or use automatic translation. Don’t forget to confirm each row separately; the bottom scale won’t let you quit until it is 100% full.
You can translate the Listing Items in the exact same way:
- Make them translatable in the Post Types Translation section;
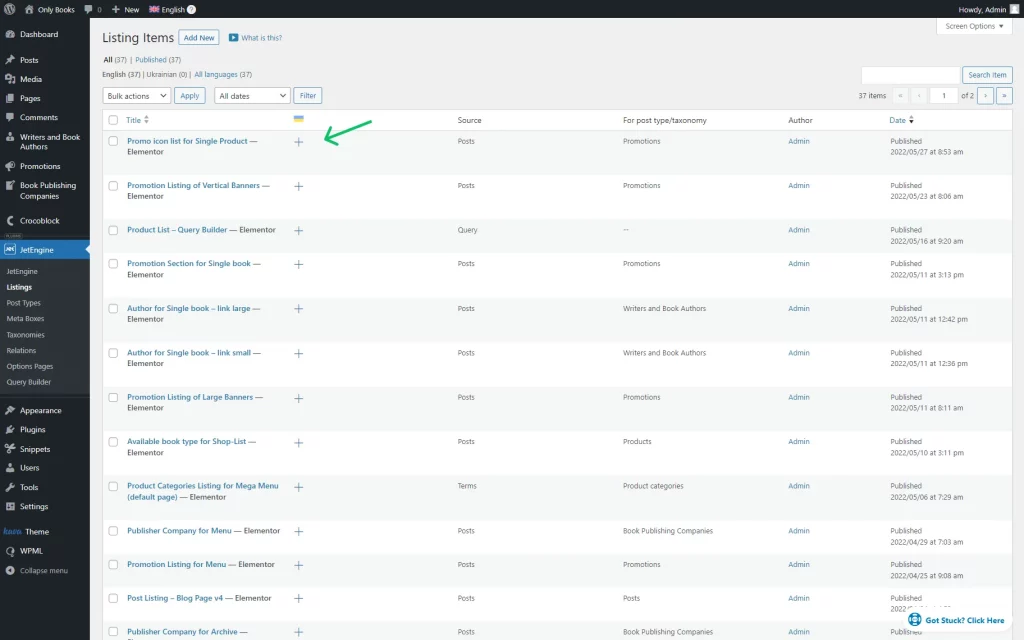
- Go to WordPress Dashboard > JetEngine > Listings;
- Open the desired Listing Item by clicking the “+” icon;
- Enter the translation manually or automatically;
- Press “Complete.”
Translate CPT Slugs
Follow the WordPress Dashboard > WPML > Settings path.
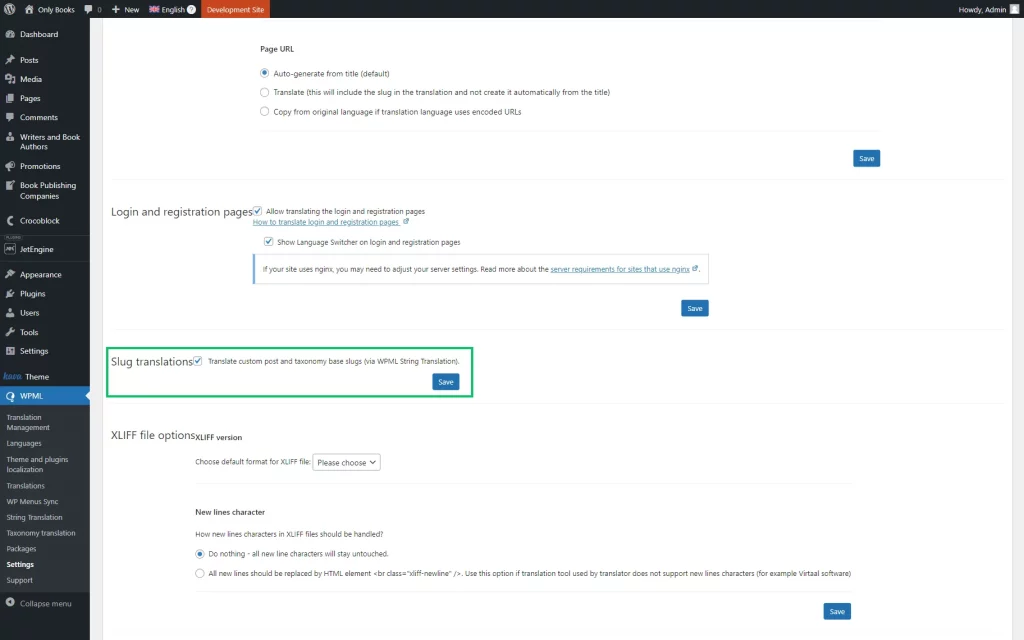
Head to the Slug translations section to make sure you have checked the Translate custom post and taxonomy base slugs (via WPML String Translation) option to allow the slug translation.
Don’t forget to push the “Save” button.
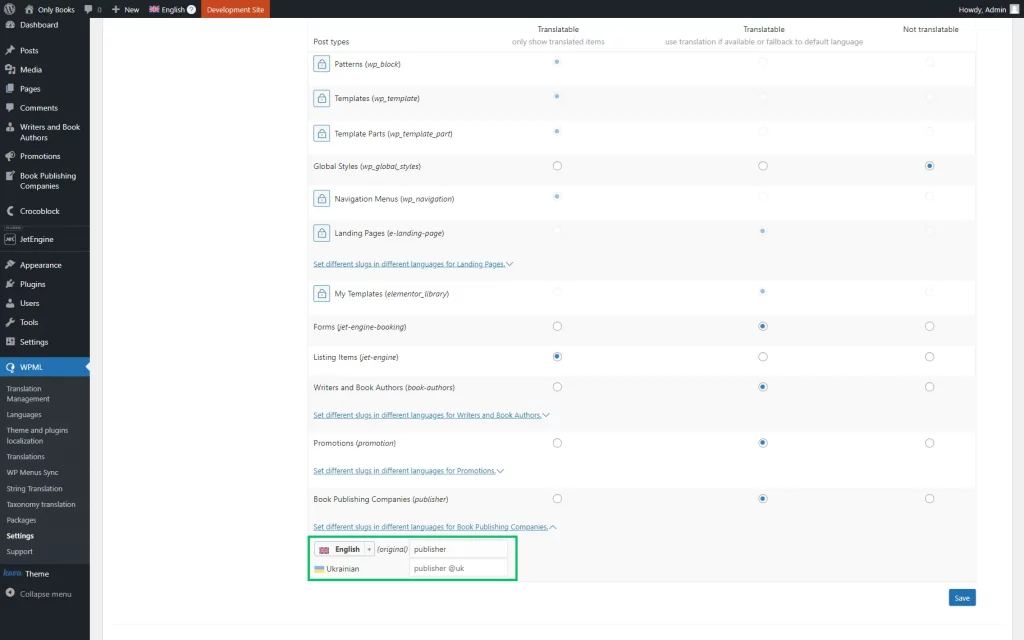
Scroll down to the Post Types Translation section and make sure that the needed CPT is set to the “Translatable” option (works for both “Translatable” available options.)
Translate the slugs there by pressing the “Set different slugs in different languages for {Your CPT Name}.”
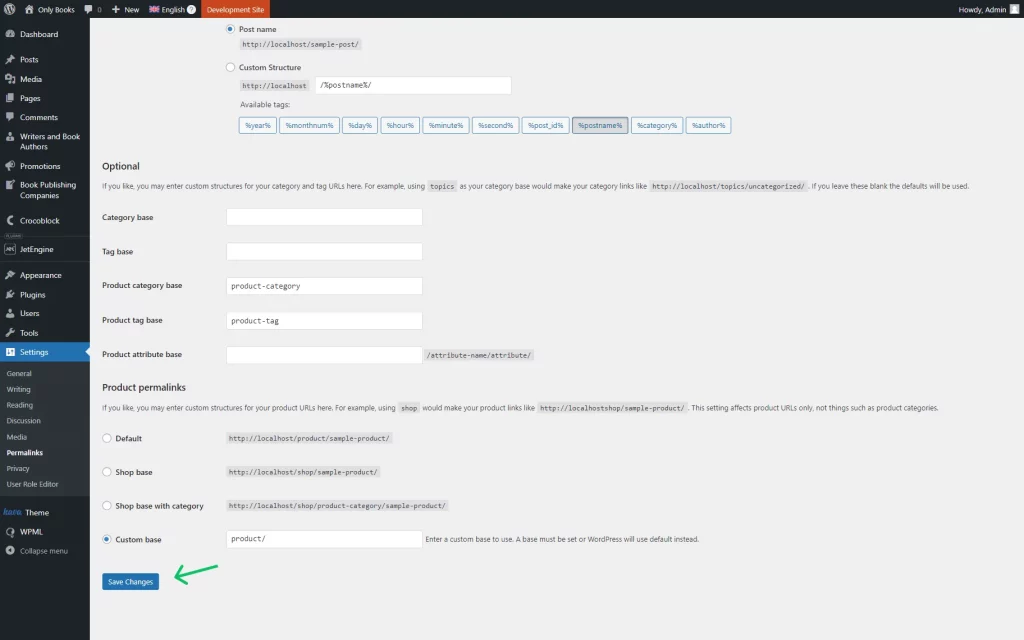
After these steps, the permalinks should be refreshed. Go to WordPress Dashboard > Settings > Permalinks and press the “Save Changes” button there.
Permalinks and rewrite rules are now flushed.
Translate JetEngine Forms (Legacy)
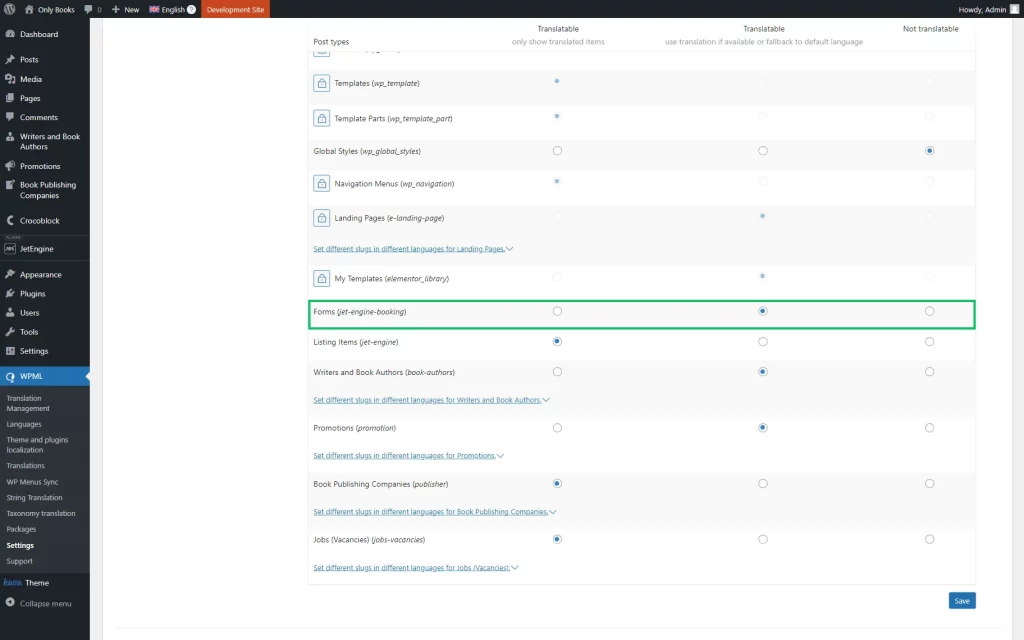
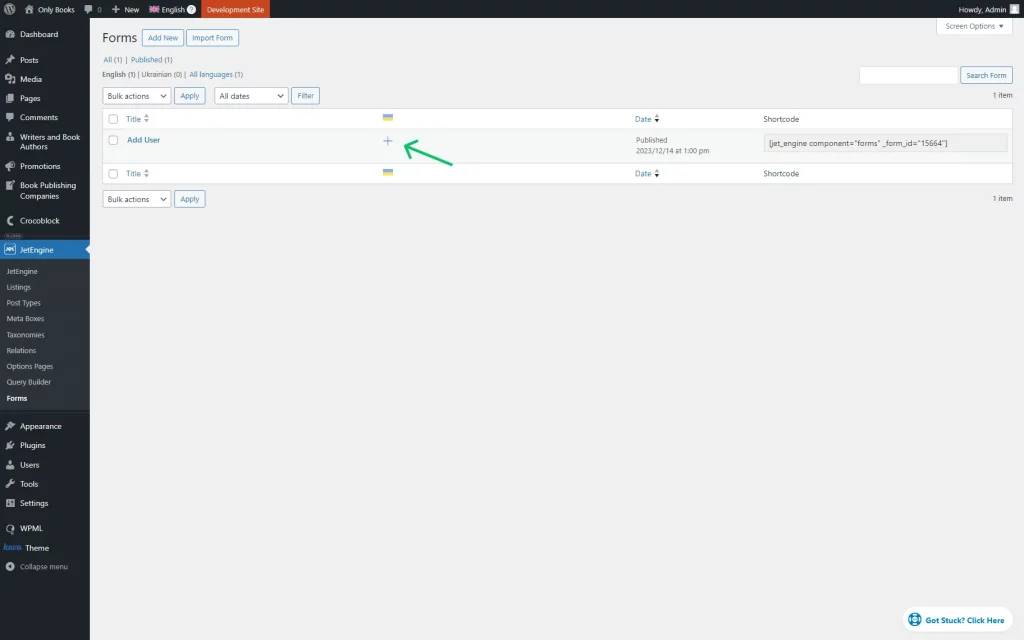
The JetEngine Forms can be made translatable. To do so, go to WordPress Dashboard > WPML > Settings, scroll down to Post Types Translation, and activate the “Translatable” radio button in the Forms row.
To translate any Form into the language of your choice, follow the WordPress Dashboard > JetEngine > Forms directory and press the plus button next to the desired form to add a translation to it.
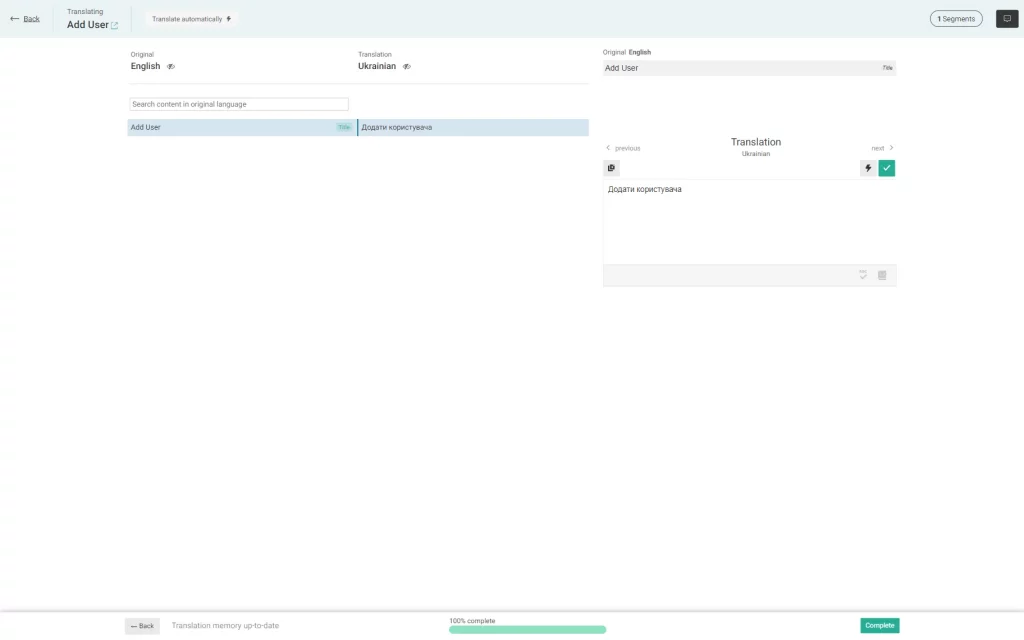
Fill in the translation of the form name and press the “Complete” button to save the result.
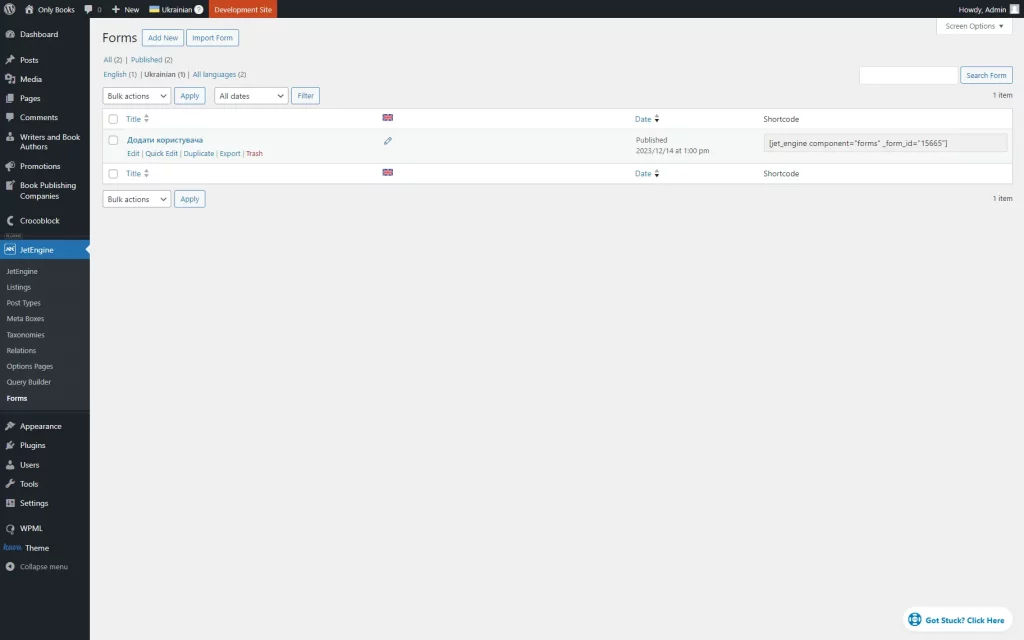
Now, go back to the Forms and click the “Edit” button to open the editor of the translated version of the form.
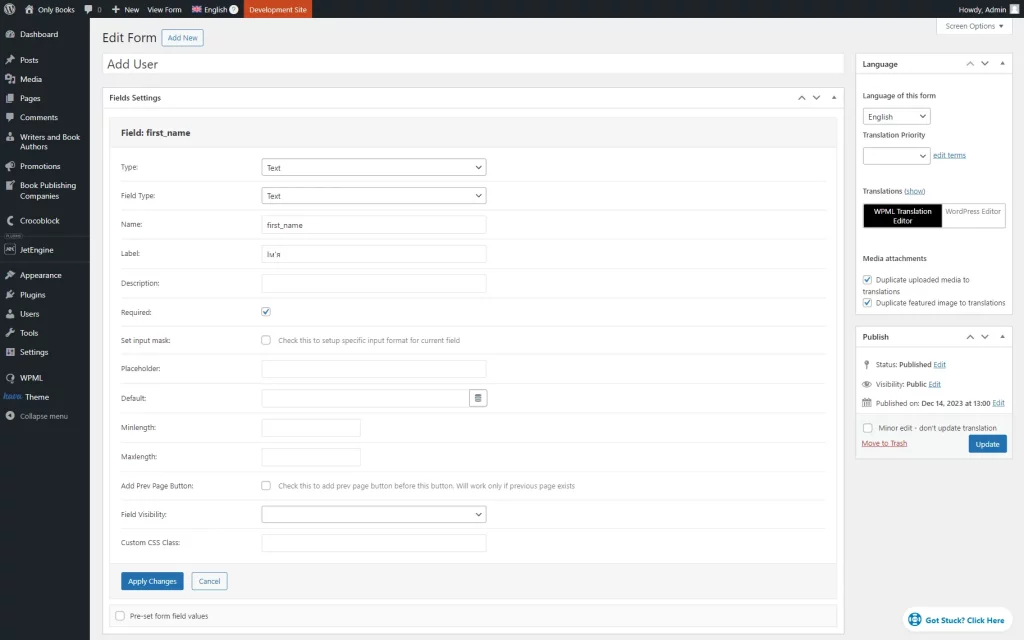
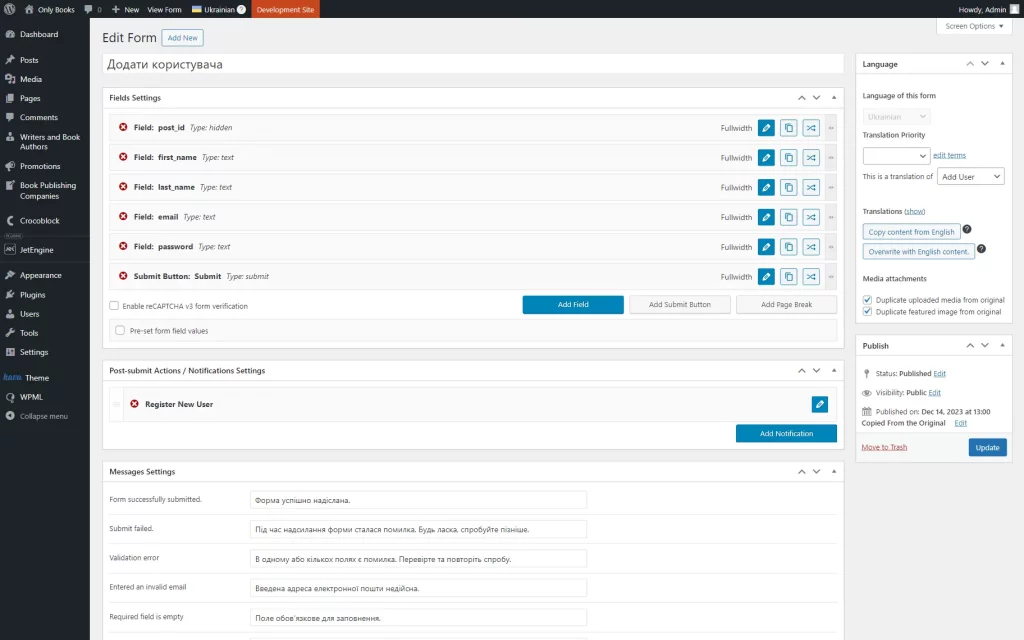
As the translated form lacks original fields, create them once again. This time, complete their Labels with translated versions and save them by clicking the “Apply Changes” button.
Once fields are done, navigate to the Messages Settings sections and translate notifications.
Then, push the “Update” button to save the form.
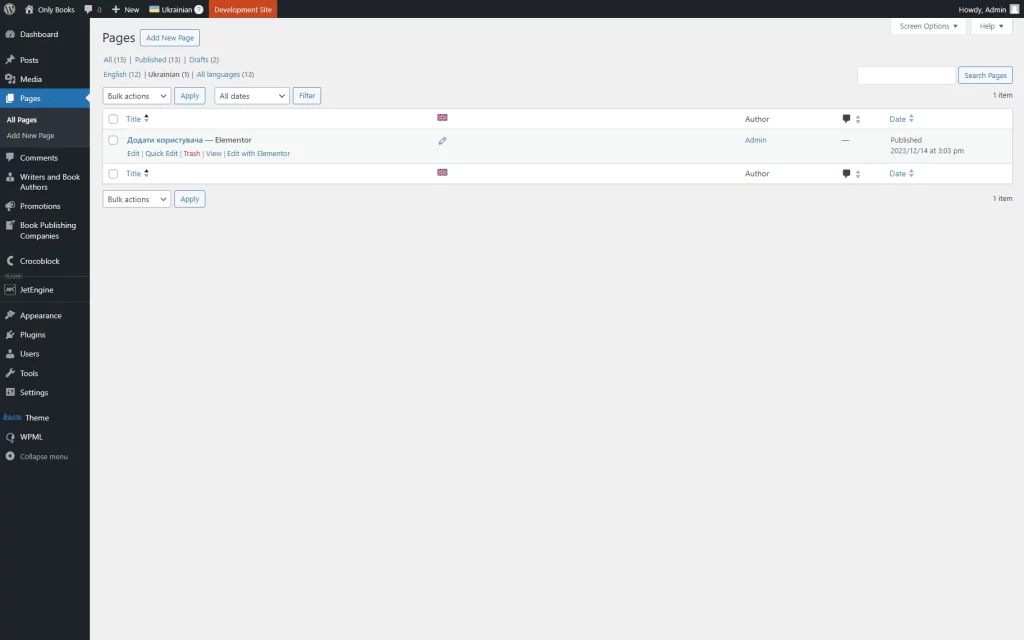
Head to WordPress Dashboard > Pages and open the translated version editor of the page where the form was originally added.
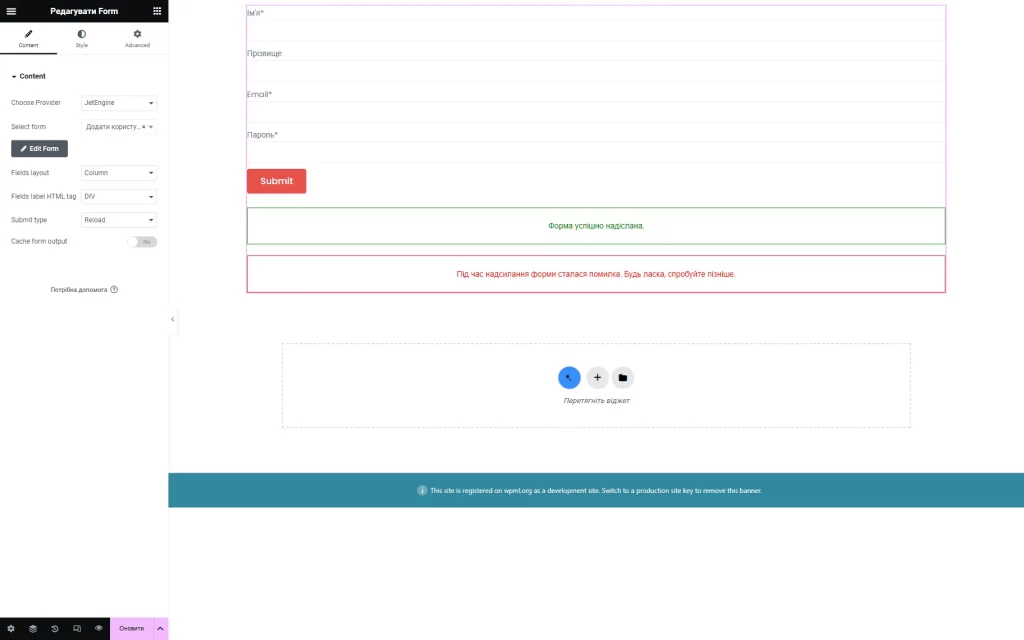
Add a Form to the page, and in the Select form field, pick the translated version of the form.
Once the page is ready, you can update it.
Set Up Language-Based Header & Footer for Dynamically Generated Pages
Last but not least, you need to translate the header and footer templates, as they will always be present on the secondary-language website pages.
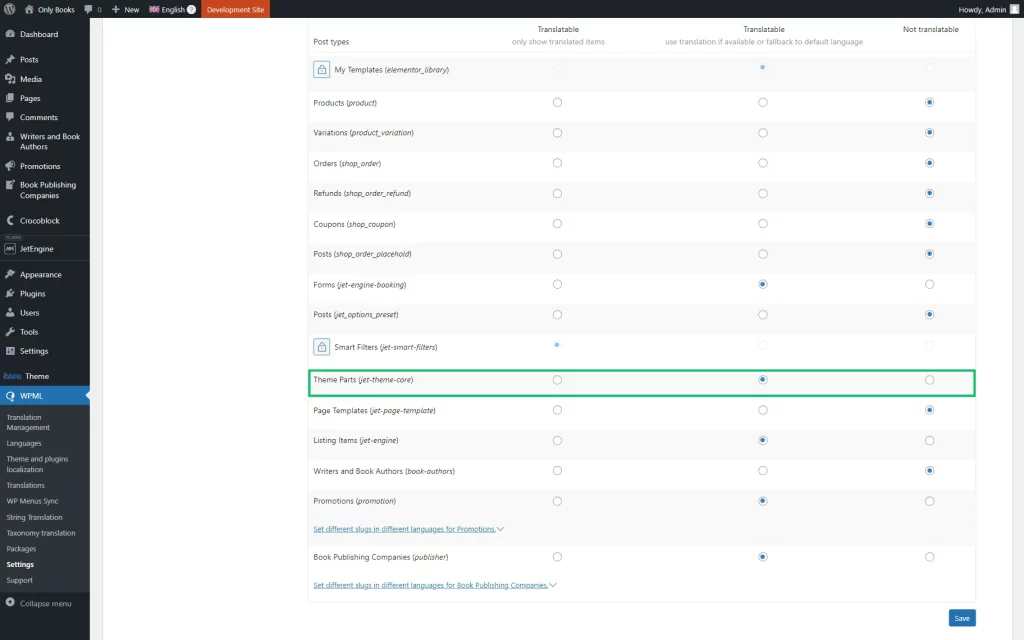
Firstly, go to WordPress Dashboard > WPML > Settings and scroll down to the Post Types Translation section. Find the Theme Parts row and set it to “Translatable.” Save the changes.
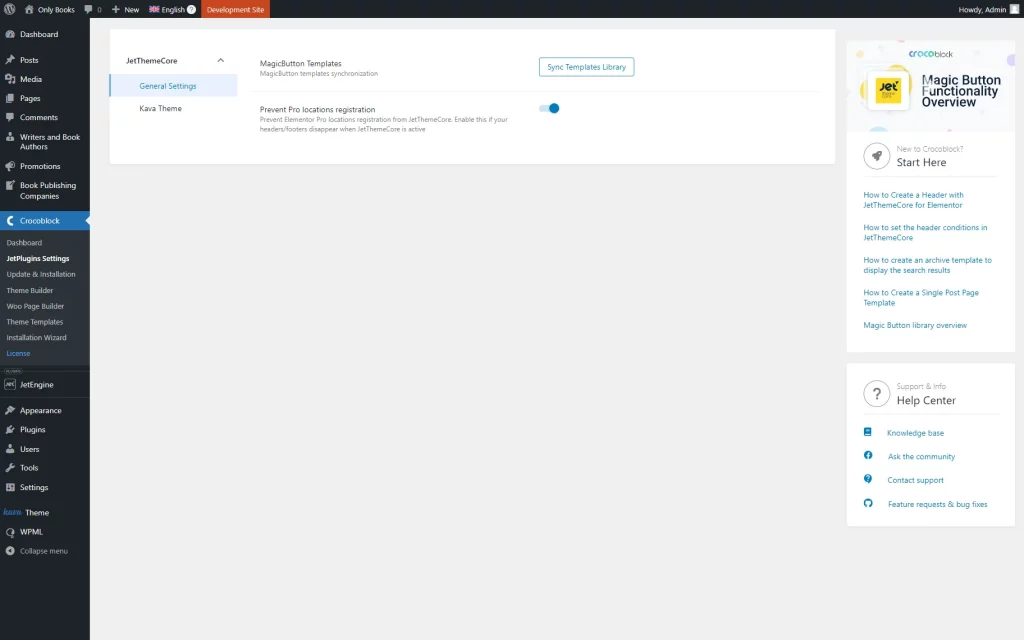
Secondly, proceed to the WordPress Dashboard > Crocoblock > JetPlugins Settings tab on the WordPress admin panel and open the JetThemeCore plugin settings.
Enable the Prevent Pro locations registration toggle in the General Settings tab. It will prevent the header and footer templates from disappearing on the second-language site pages.
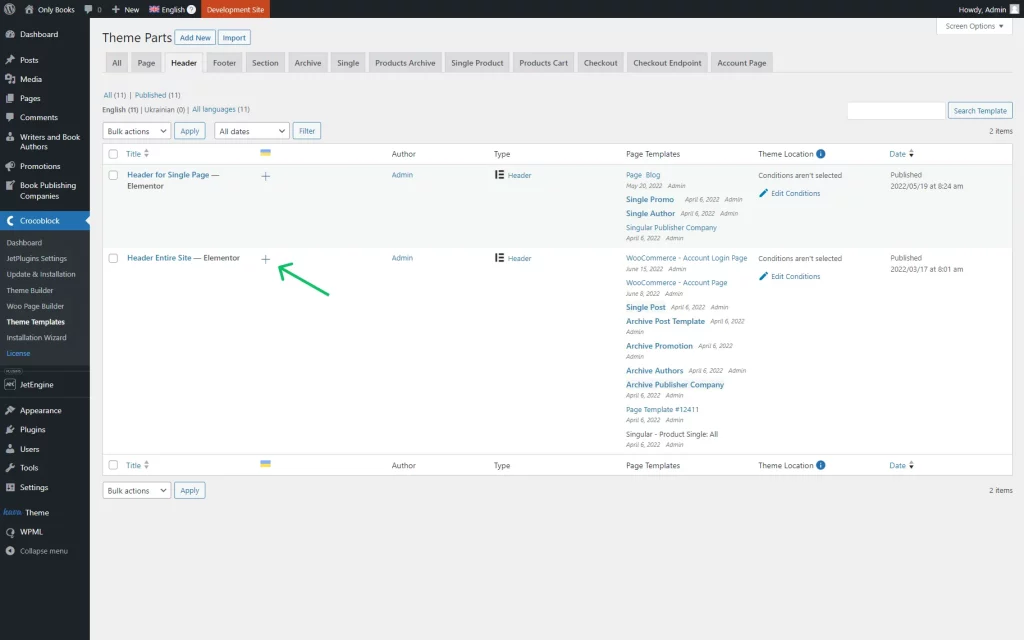
Thirdly, translate the corresponding header and footer templates into other site languages. To do so, follow the WordPress Dashboard > Crocoblock > Theme Builder pathway. Locate the needed template and press the “+” icon next.
Add the translations as you normally do for a regular page template in the Advanced Translation Editor. Once done, click the “Complete” button. Repeat the procedure for both header and footer templates.
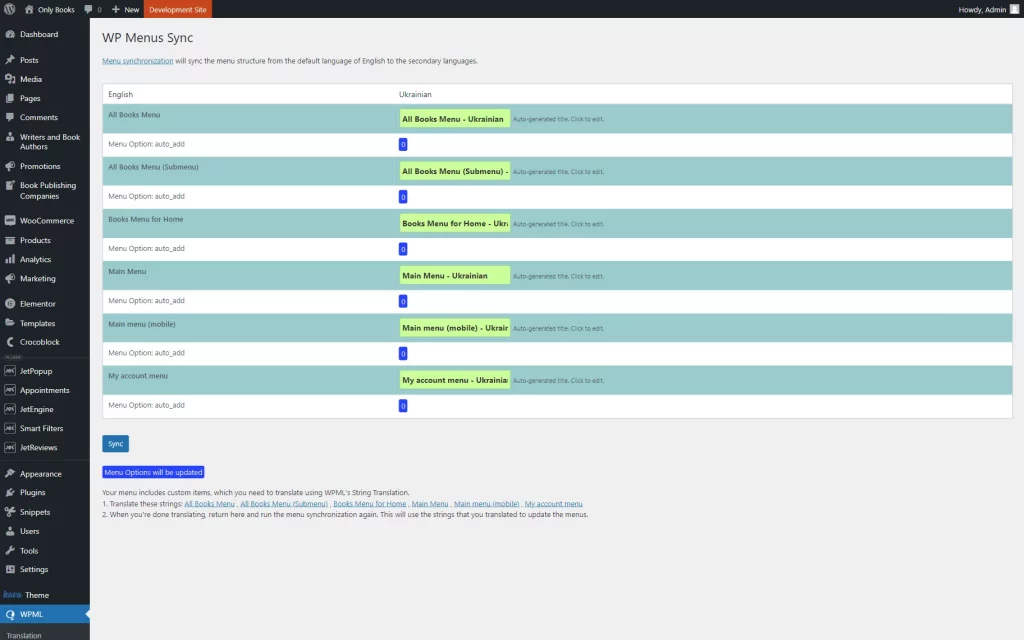
Follow the WordPress Dashboard > WPML > WP Menus Sync pathway. Press the “Sync” button to create a secondary-language menu first. Confirm the action by clicking the “Apply changes” button once you see it.
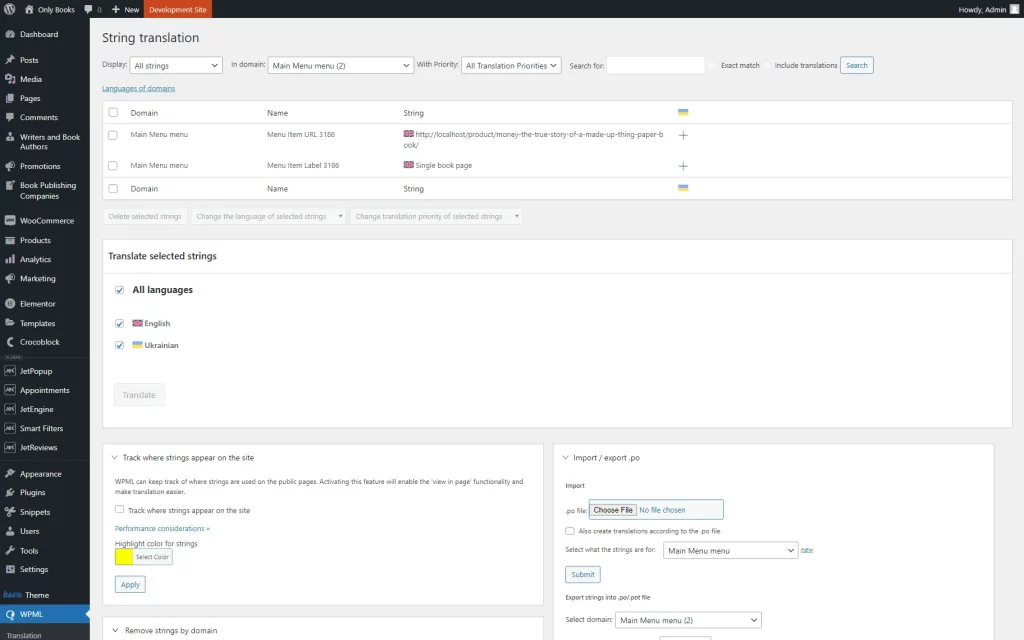
Once done, proceed to translate the menu strings. Below the “Sync” button, there is some additional information. The first point contains a link to the needed menu strings. Clicking it will take you to the String Translations WPML module. Add the missing translations one by one, including links.
For example, the English URL slug looks like this: /properties/ocean-star-luxury-cottage/. And this is its Ukrainian countertype: /properties-uk/ocean-star-luxury-cottage/?lang=uk.
When you finish translating the menu strings, return to the WP Menus Sync tab. You will see that there are now secondary-language translations available. Press the “Sync” and “Apply changes” buttons again to finalize the menu translation process.
Check out the result on the front end. The header template is displayed correctly; plus, all the menu items appear in the needed secondary language.
Translate Options Page Meta Fields
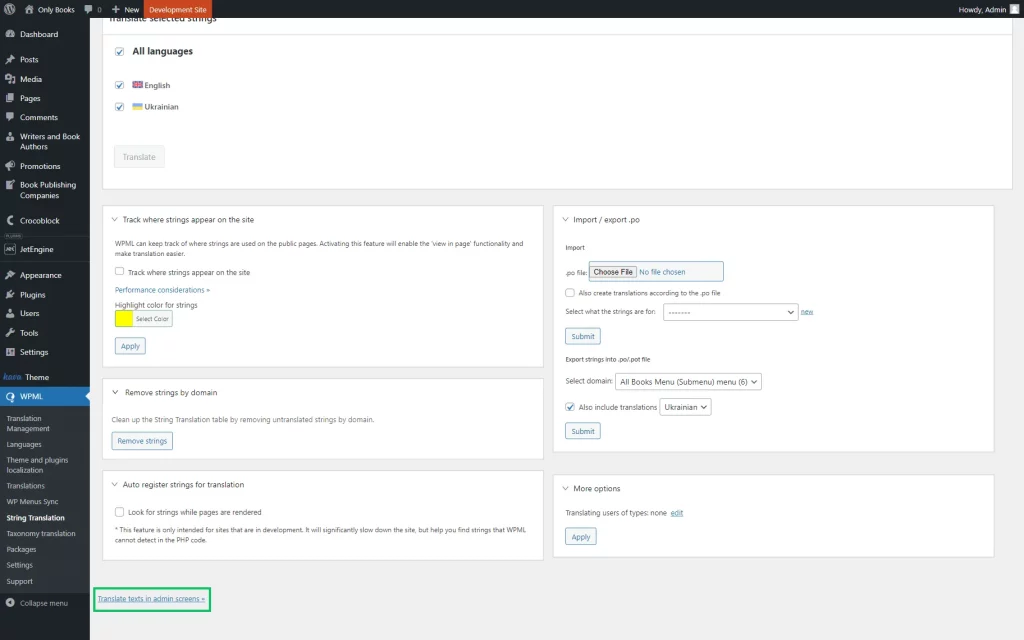
Proceed to WordPress Dashboard > WPML > String Translation. Press the “Translate texts in admin screens” button.
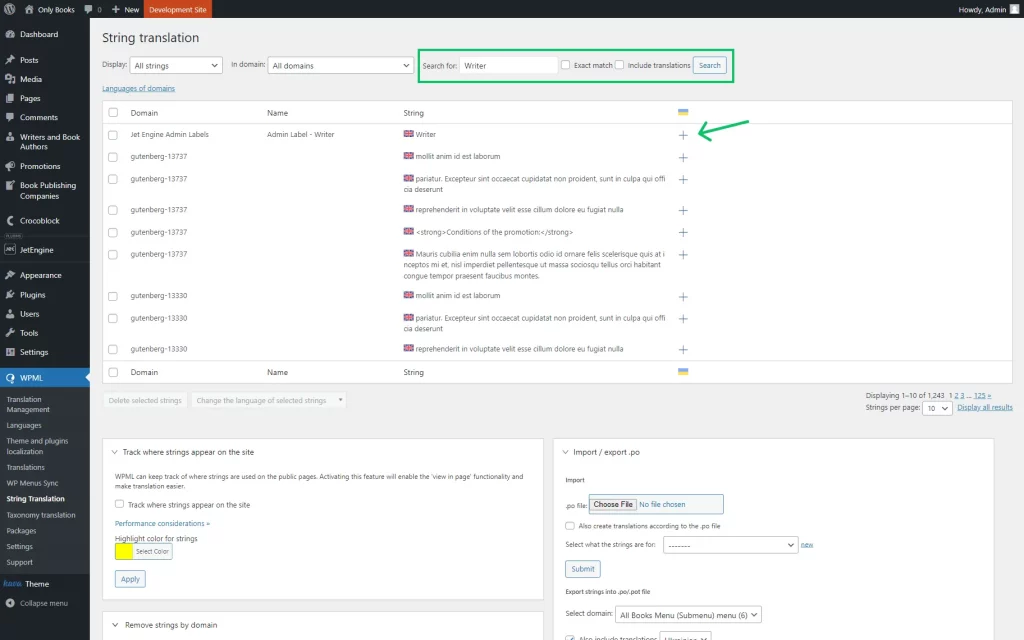
Find the needed meta field in the list. In the search bar, write the name of the field (not slug) and press the search button.
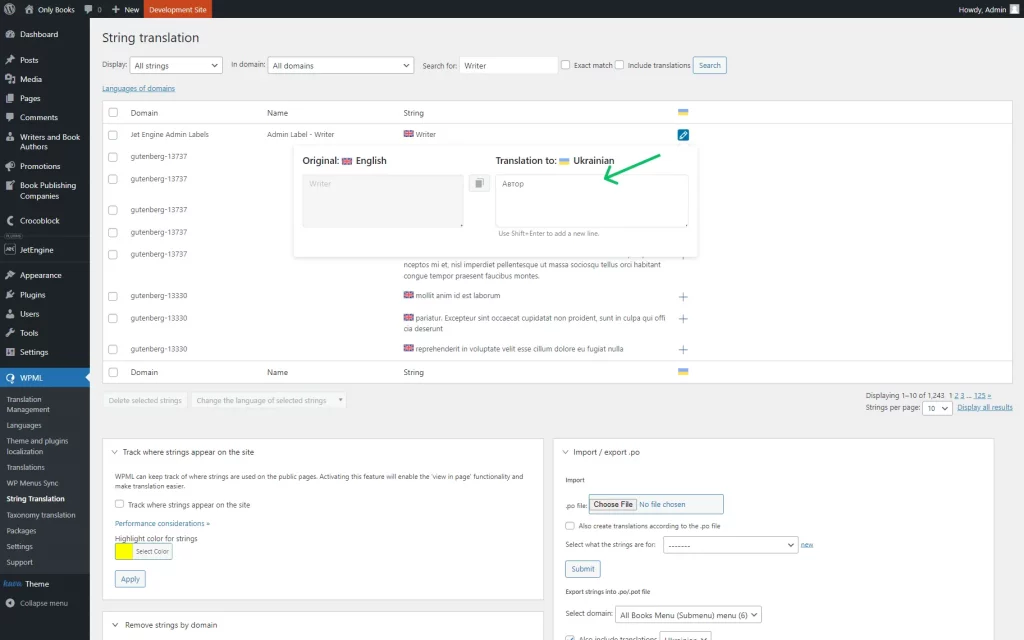
Сlick the plus-shaped button to add a translation.
Add the corresponding translation and press “Enter” on your keyboard.
The result can be checked on the front end. The meta field name is now translated into the other language by clicking the corresponding button.
Translate Relations
To translate JetEngine relation connections with WPML, you should recreate the following steps.
Initially, you should translate the items that will be set as child and parent items.
Go to WordPress Dashboard > WPML > Settings and set two needed elements to “Translatable.”
For instance, it can be two Post Types like in the described case. So, we scroll down to the Post Types Translation section and set two Post Types to “Translatable.”
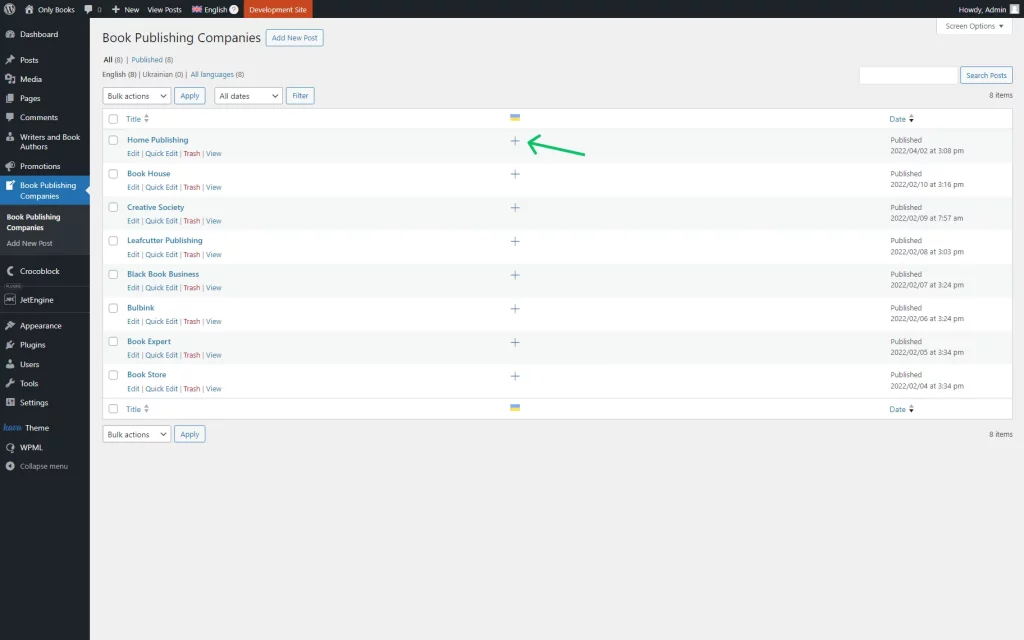
Then, we navigate to one of the Post Types and translate all its items by clicking the plus-shaped button next to them.
Then, we repeat the same step for the second post type: translate its items.
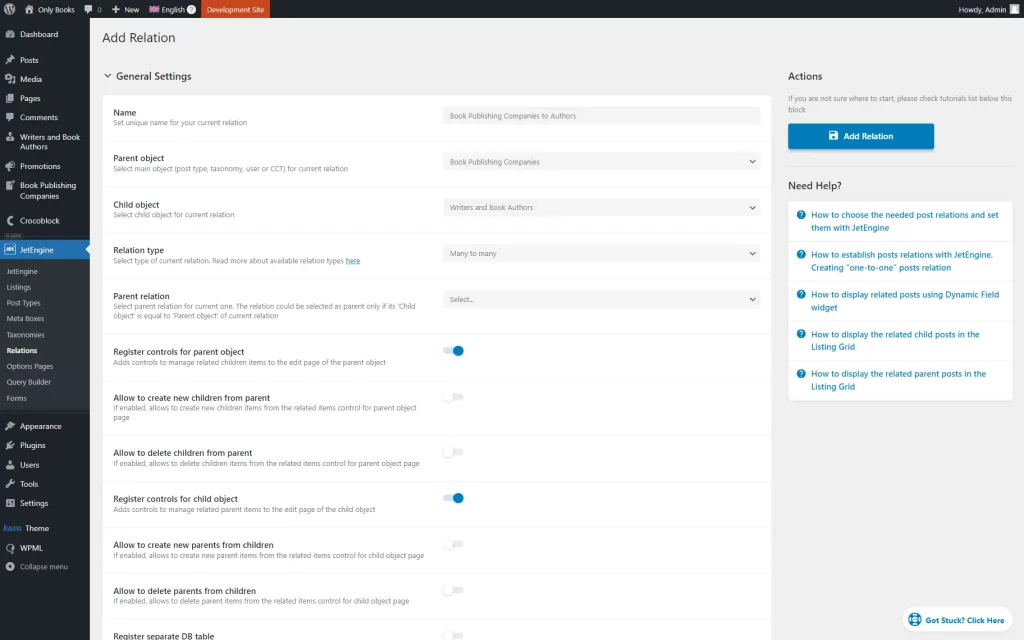
Now, we can create a relation.
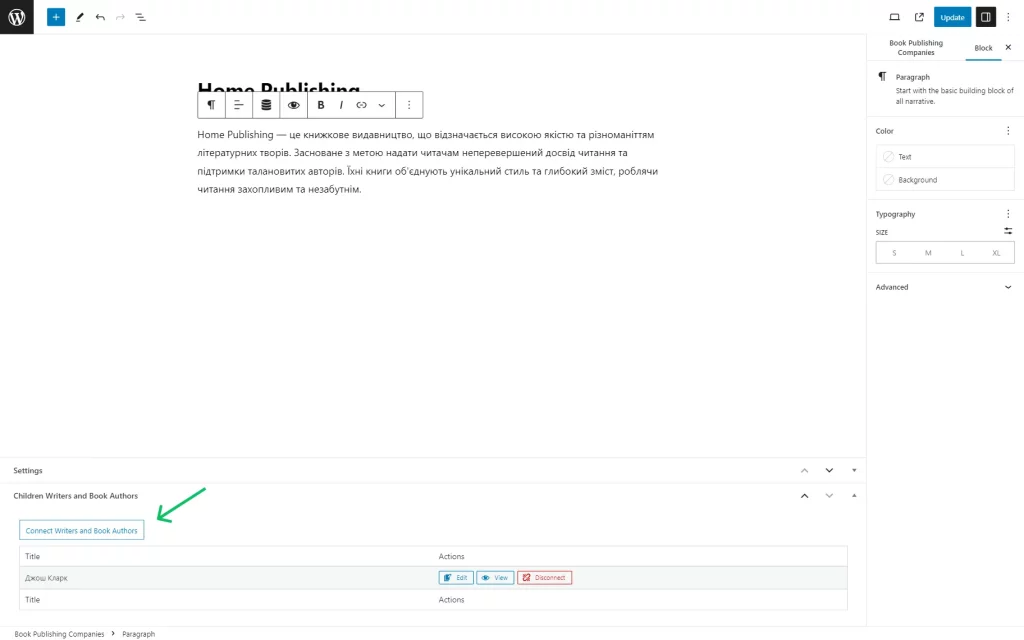
Once the relation is built, the items can be connected.
Now you know how to use WPML to translate JetEngine meta boxes and fields, forms, taxonomies, CPTs, and listing items and synchronize the website menus in different languages.
