How to Make Filters Multilingual Using WPML
From this tutorial, you will learn how to get your WordPress website translation-ready and find out which WPML modules are needed to translate the site content added with JetSmartFilters widgets.
Before you start, check the tutorial requirements:
- Multilingual CMS (or Multilingual Agency) plan by WPML installed and activated
- JetSmartFilters plugin installed and activated
JetSmartFilters is a plugin embracing various filter types for Elementor, Bricks, and Gutenberg. Using its functionalities, you can create hierarchical filtering tools powered by AJAX and apply them to any WordPress theme, page, and post type.
JetSmartFilters is compatible with WPML, which means you can translate filter labels, options, and related content into any required language. Let’s start by making the website WPML-ready, then translate the smart filters.
Follow these basic steps to get started:
- Install and activate the core components WPML Multilingual CMS and WPML String Translation.
- Go to WordPress Dashboard > WPML > Setup to start a quick setup wizard, where you also register WPML.
- Navigate to WordPress Dashboard > WPML > Translation Dashboard and select the content you want to translate.
- Choose your preferred translation method: manual or automatic.
JetSmartFilters is a Crocoblock plugin that functions equally on the backend and frontend. To create fully translated filters, you should dedicate some time to translating taxonomies, category slugs, custom fields, and strings. Otherwise, the translated smart filters won’t work on the second-language page. Let’s dive into the foremost preparations.
Basic Preparations
As mentioned previously, you’ll have to purchase the Multilingual CMS plan. During the setup wizard, WPML will ensure you have all the necessary components installed.
Make the posts translatable
Proceed to WordPress Dashboard > WPML > Settings.
In the Multilingual Content Setup tab, go down to the Post Types Translation section. Next, look through it and locate the Smart Filters post type.
There are three options available for selection:
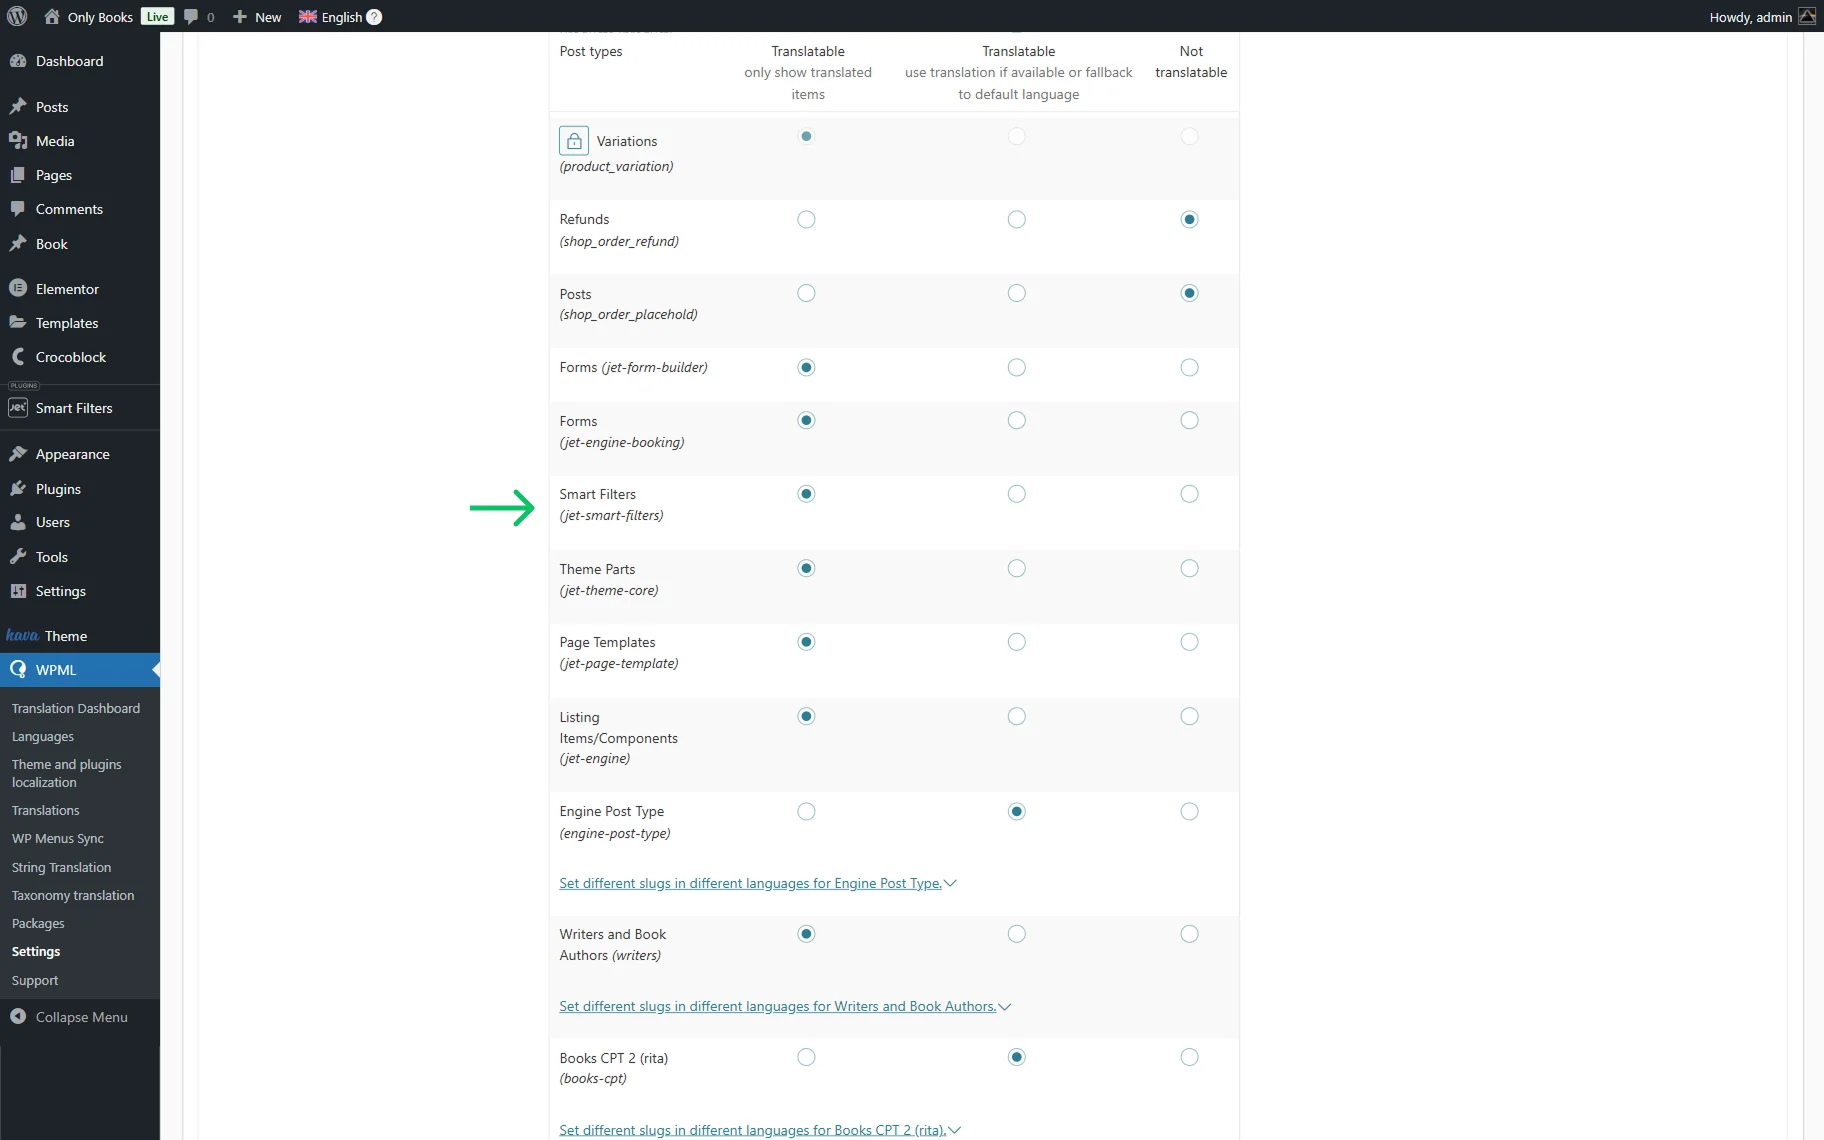
- Translatable – only show translated items — select this radio button if you are willing to display only those items you translated in the front;
- Translatable – use translation if available or fallback to default language — when this option is selected, the items’ translations will be shown where provided. The items with no translation will be output in the default language;
- Not translatable — select this option to leave the post types “as is.”
Make the Smart Filters post type translatable and then hit “Save.”
Make the custom fields translatable
In the WordPress Dashboard > WPML > Settings, find the Custom Fields Translation section.
Afterward, click on the “Show system fields” link next to the Custom Fields Translation section name.
Now, we need to review all the fields to identify those related to JetSmartFilters: “_filter_label” and “_filter_type.”
Here, you can pick from four available options:

- Don’t translate — the values of custom fields will be shown in the default language on secondary-language pages;
- Copy — select this option to always copy the default-language custom field values to the secondary-language site version, even in cases when the initial custom field has been altered in the default language;
- Copy once — selecting this copies the custom field value to the secondary language at the initial translation stage. Furthermore, if you wish to set a different value here, such a new value won’t be overwritten by the previous one;
- Translate — select this option to make the custom field values translatable.
As to the “_filter_type” field, you can choose to copy it or translate. Please ensure you set the “_filter_label” field to “Translate”; this will help WPML modules identify the filter labels that need translation.
We also search for the “genres” custom field and set it to “Translate,” as we will use it as the filter source.

Don’t forget to hit the “Save” button below the section.
Make the taxonomies translatable
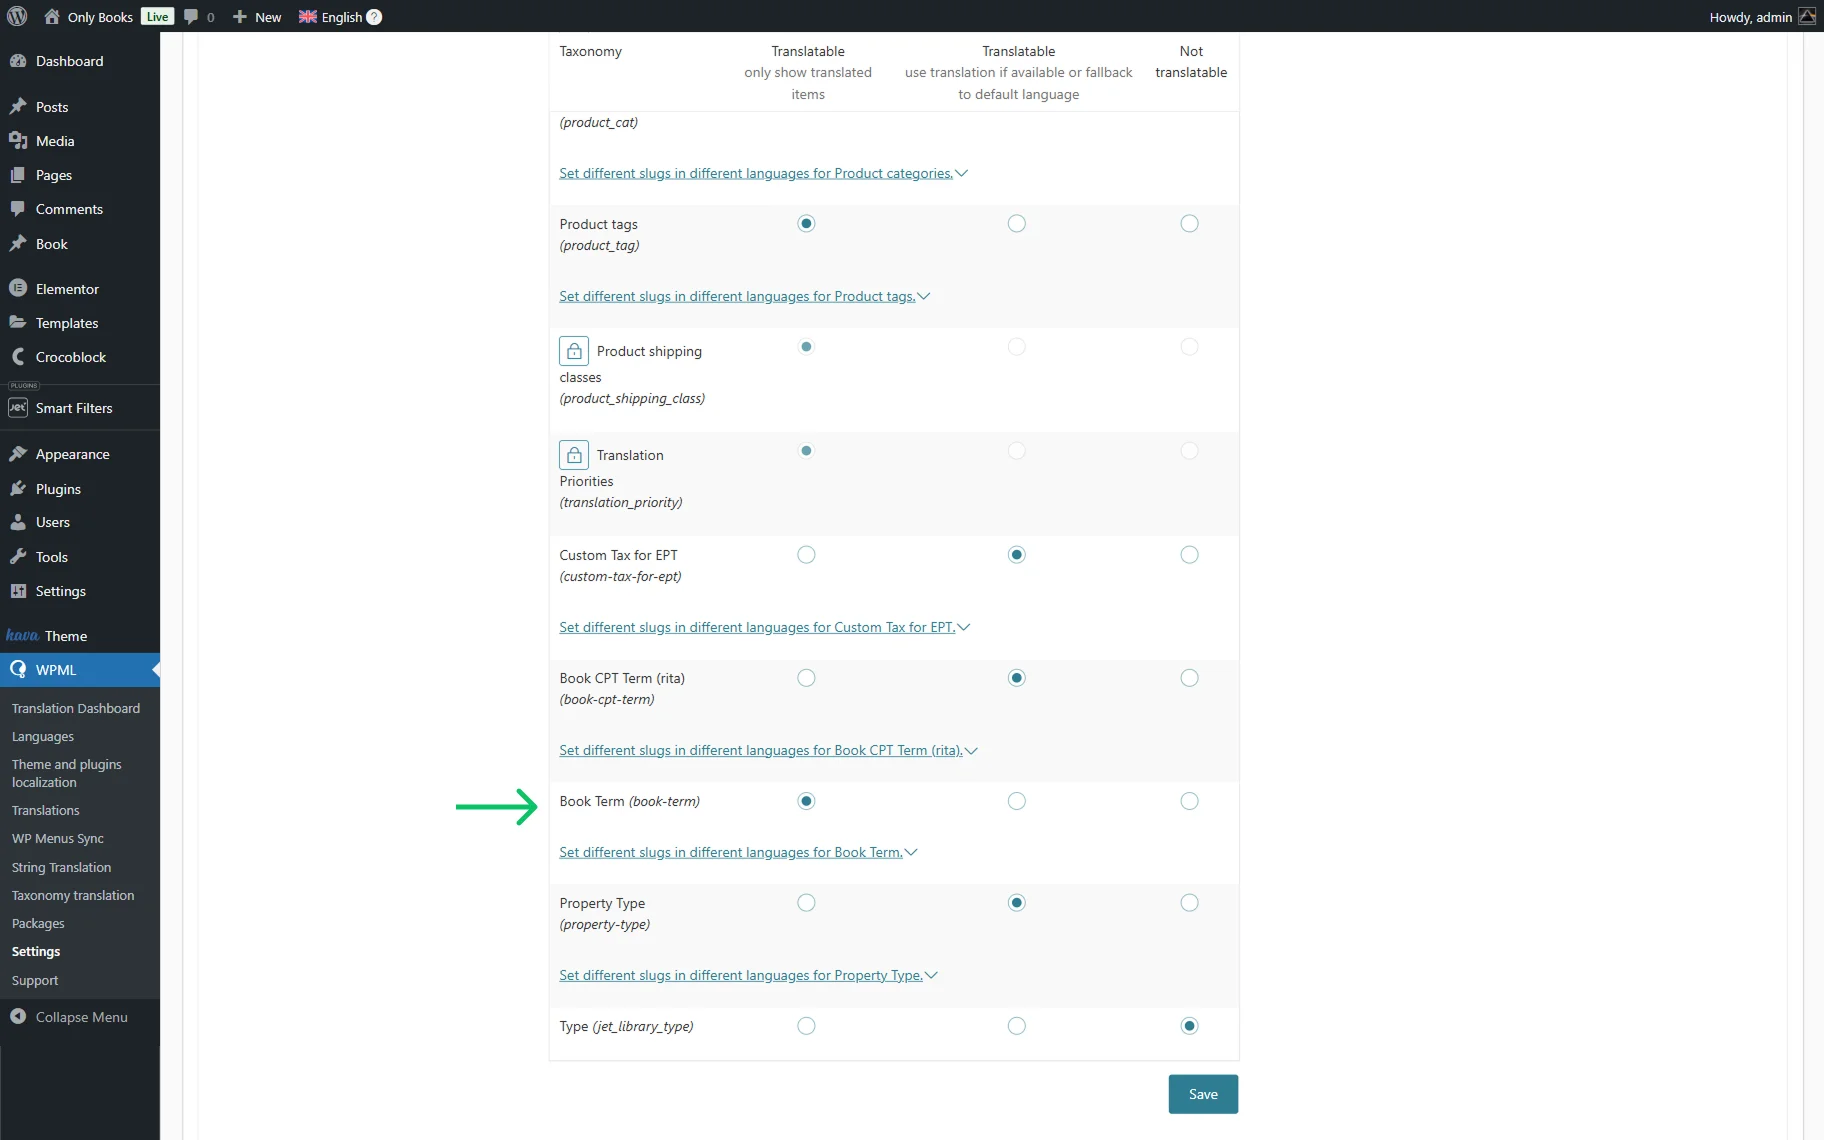
When it comes to filtering methods and archive search, WordPress will always use taxonomies. For this purpose, you need to translate all taxonomy-related items, including tags and terms.
Scroll down the page to the Taxonomies Translation section. Find the taxonomies involved in the JetSmartFilters’ operation and make them translatable. In our case, we set the “Book Term” category to “Translatable (only show translated items)”.
As usual, hit the “Save” button before leaving the page.
Now that you have completed the basic preparations, proceed to translate the JetSmartFilters’ taxonomies and category tags (if applicable).
Translate taxonomy terms and slugs
WPML automatically translates taxonomies (categories and tags) when you translate content they’re attached to. To translate a taxonomy separately, or before you add it to other content, go to WordPress Dashboard > WPML > Taxonomy Translation. In the Select the taxonomy to translate dropdown, pick the taxonomy to translate. In our case, the needed taxonomy is called “Book Term.”
Once the dedicated page opens, you can start adding the translations to each taxonomy term. Keep in mind that there’s a possibility of copying the taxonomy term values of the initial site language to secondary languages. If you hover over the taxonomy term, you will see the “Copy to all languages” link.
Press the pencil-shaped or the plus-shaped icon next to the term name if you wish to edit the existing taxonomy translations.
Submit new translations and hit “Save.”
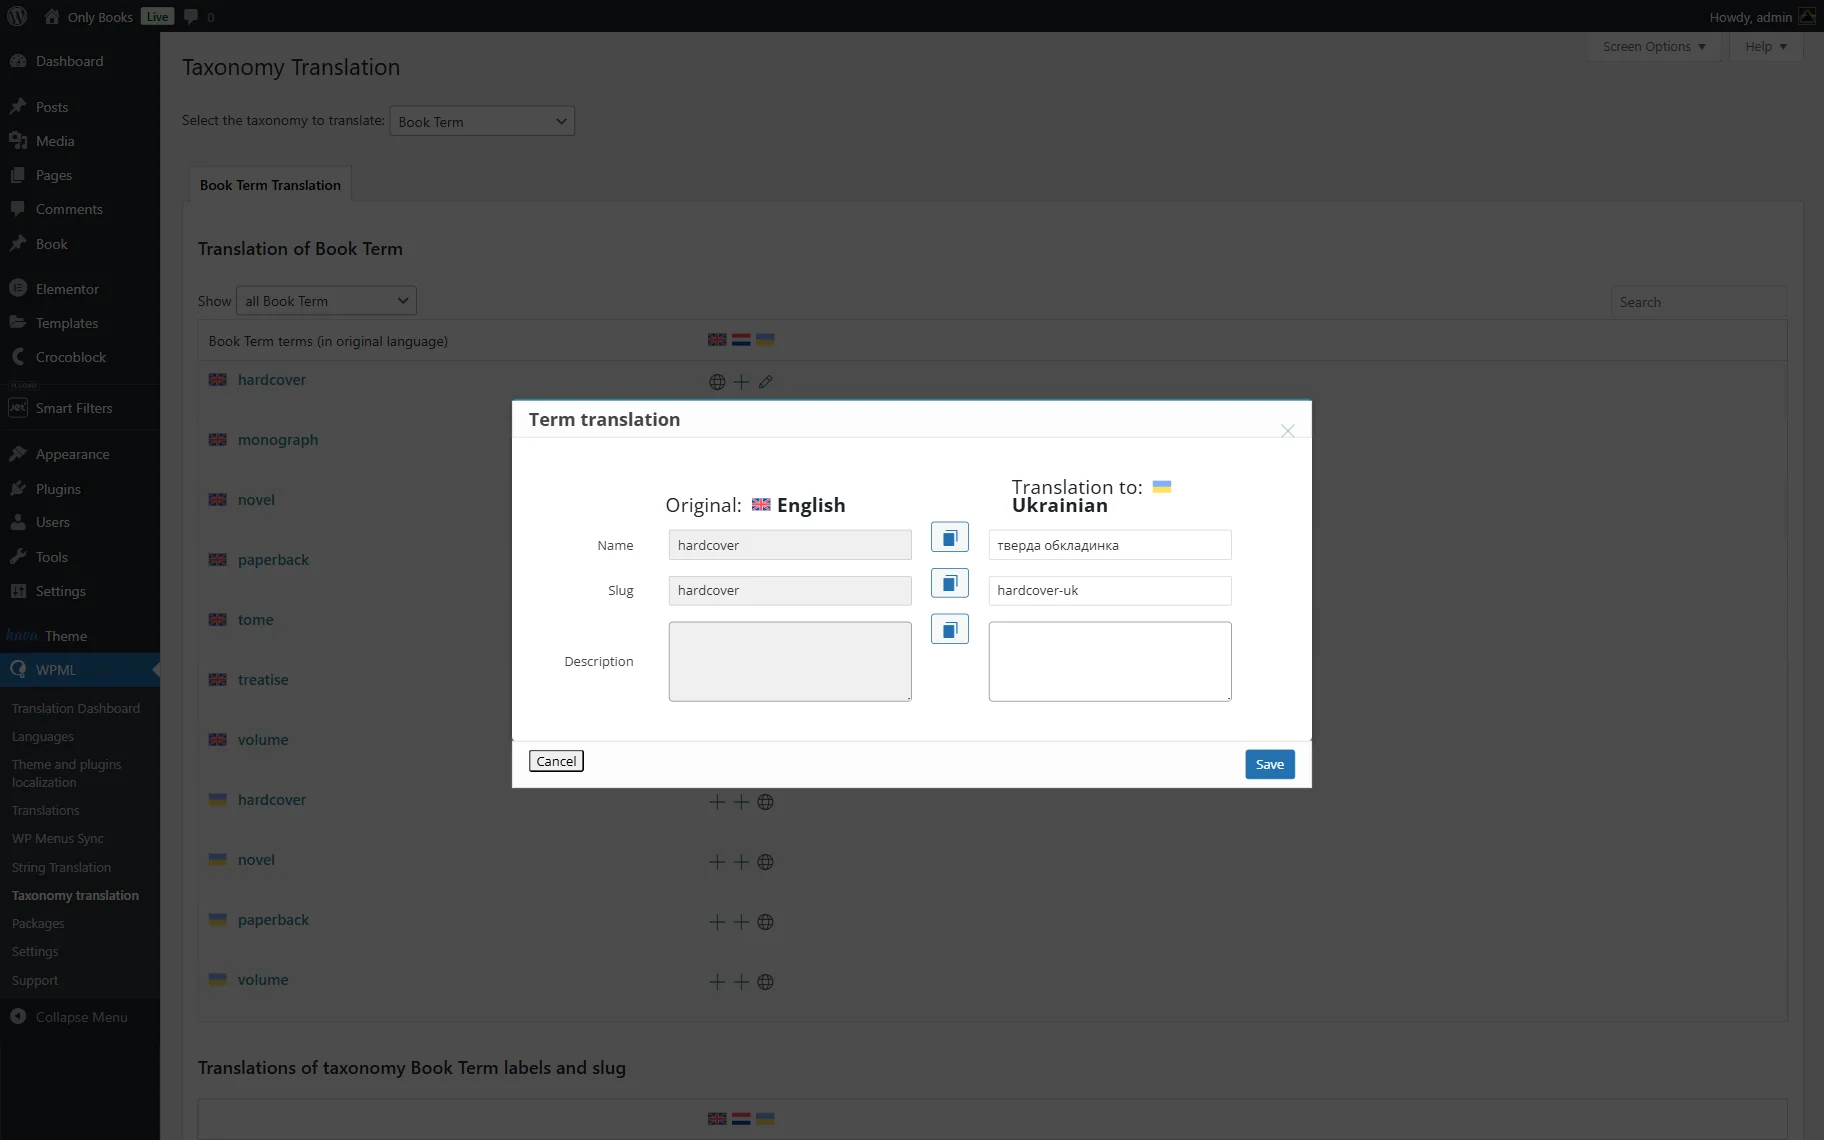
Repeat the same process for every term in every language, and don’t forget to translate taxonomy labels and slugs.
Translating the Smart Filters Content
JetSmartFilters offers various filter types, which can be translated using the WPML translation editor. Backed by the translated taxonomy, the smart filters should now be correctly picked up by the WPML modules and remain operational on the secondary-language page. Follow the steps below to complete the first filter translation.
Find the necessary filters
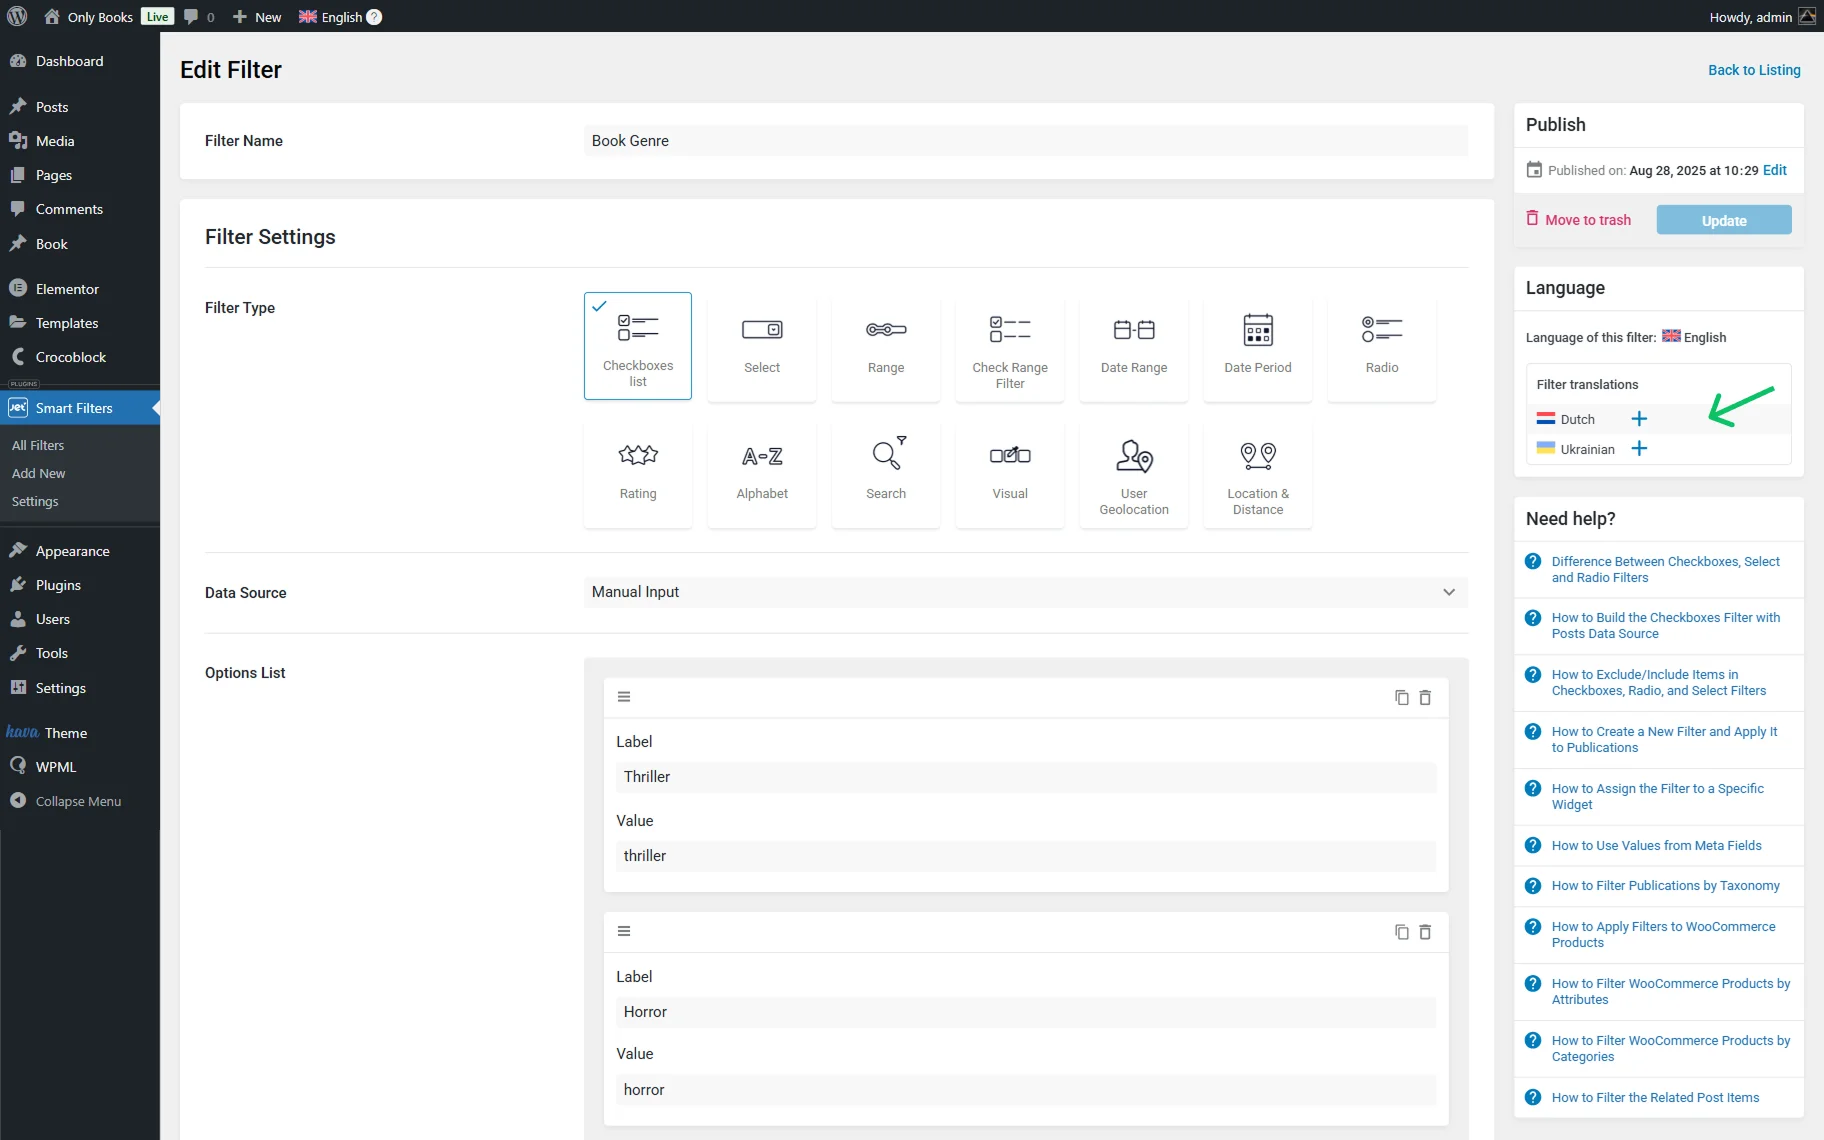
Go to WordPress Dashboard > Smart Filters > All Filters and press the “Edit” button next to the needed filter.
In the Language window, click the plus-shaped button next to the needed language.
Add the translation
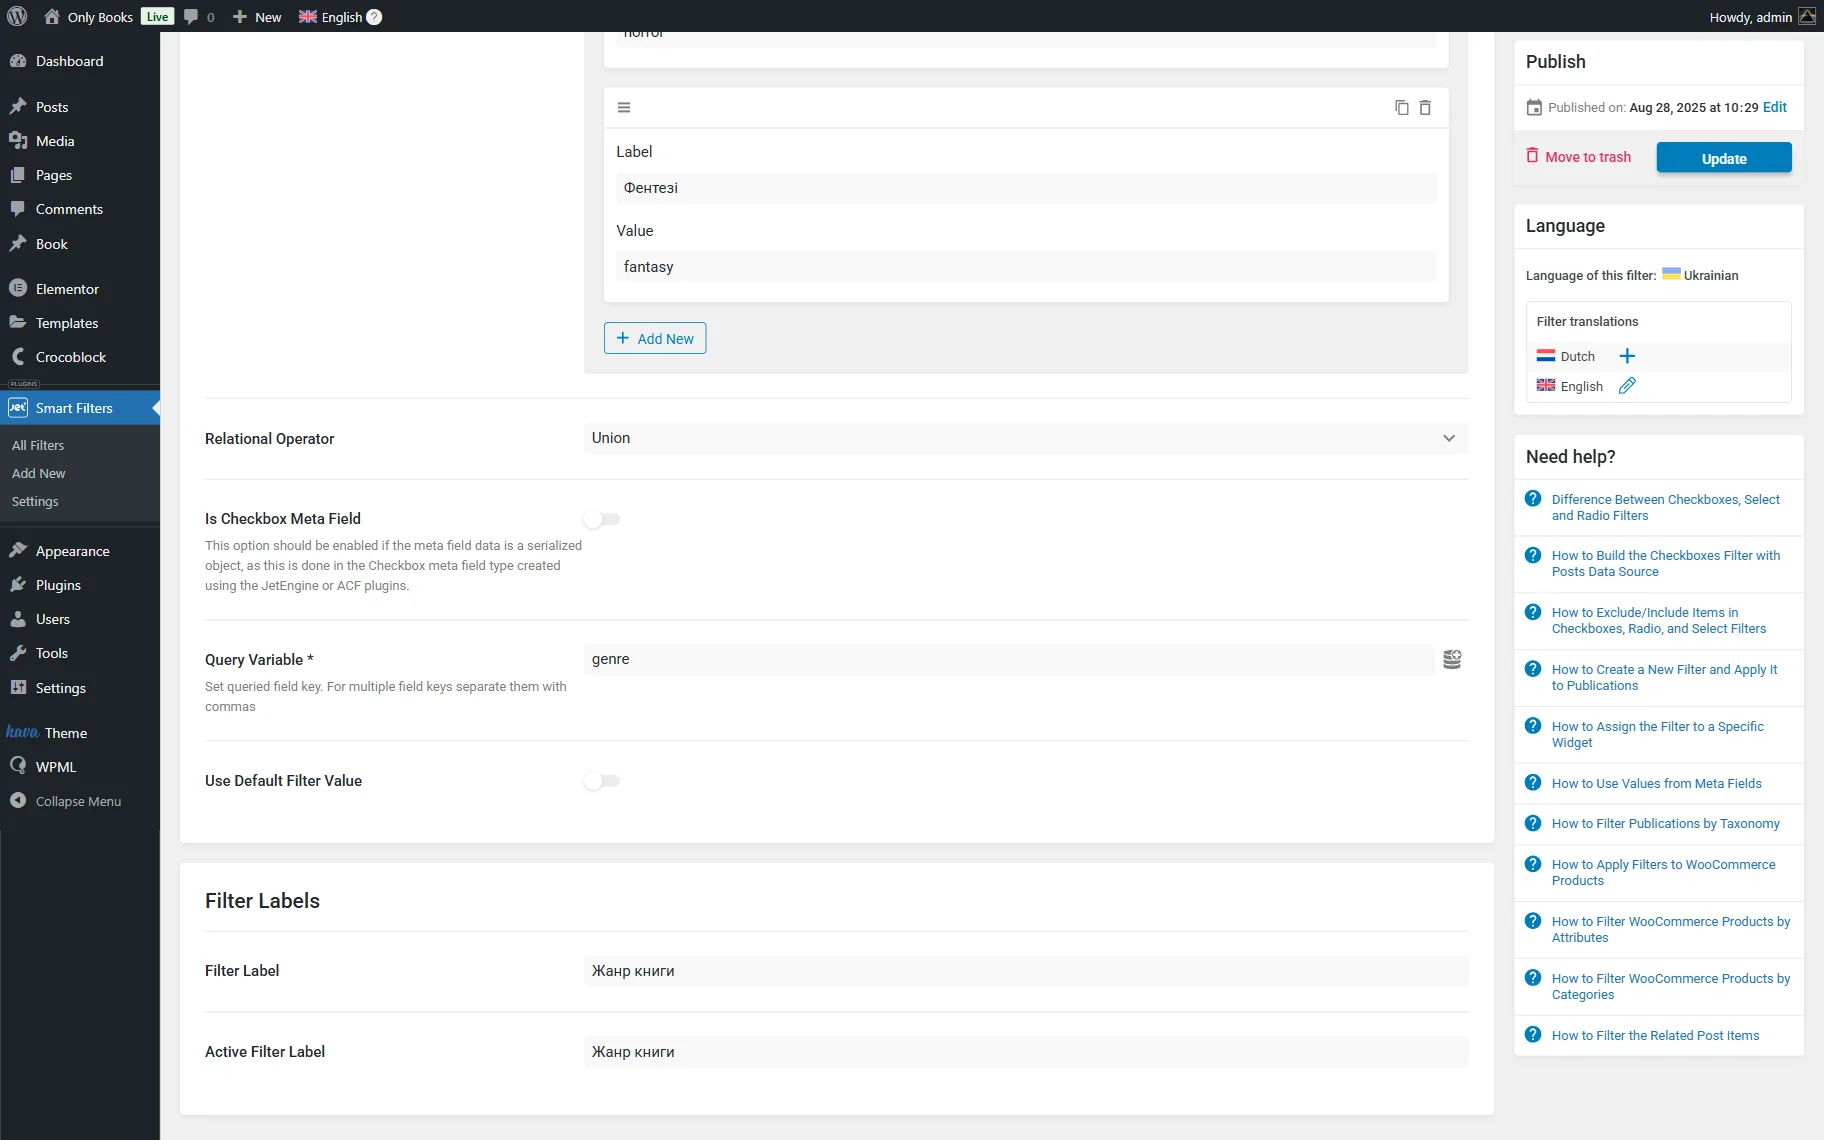
The same filter builder will open, but this time you should translate the filter content into the target language.
Enter the translations into the Filter Name field.
If you have the “Manual Input” Data Source, translate the Labels of the filter options in the Options List section.
Leave the other fields unchanged.

Complete the Filter Labels and click the “Update” button.
Add the translation to all filters in the same way and save the progress.
Add the filter to a page
Now, it’s time to add the filter to a page, if you haven’t done so before. So, we go to WordPress Dashboard > Pages > Add New and open the Elementor page builder (or, if preferred, the Block Editor or Bricks).
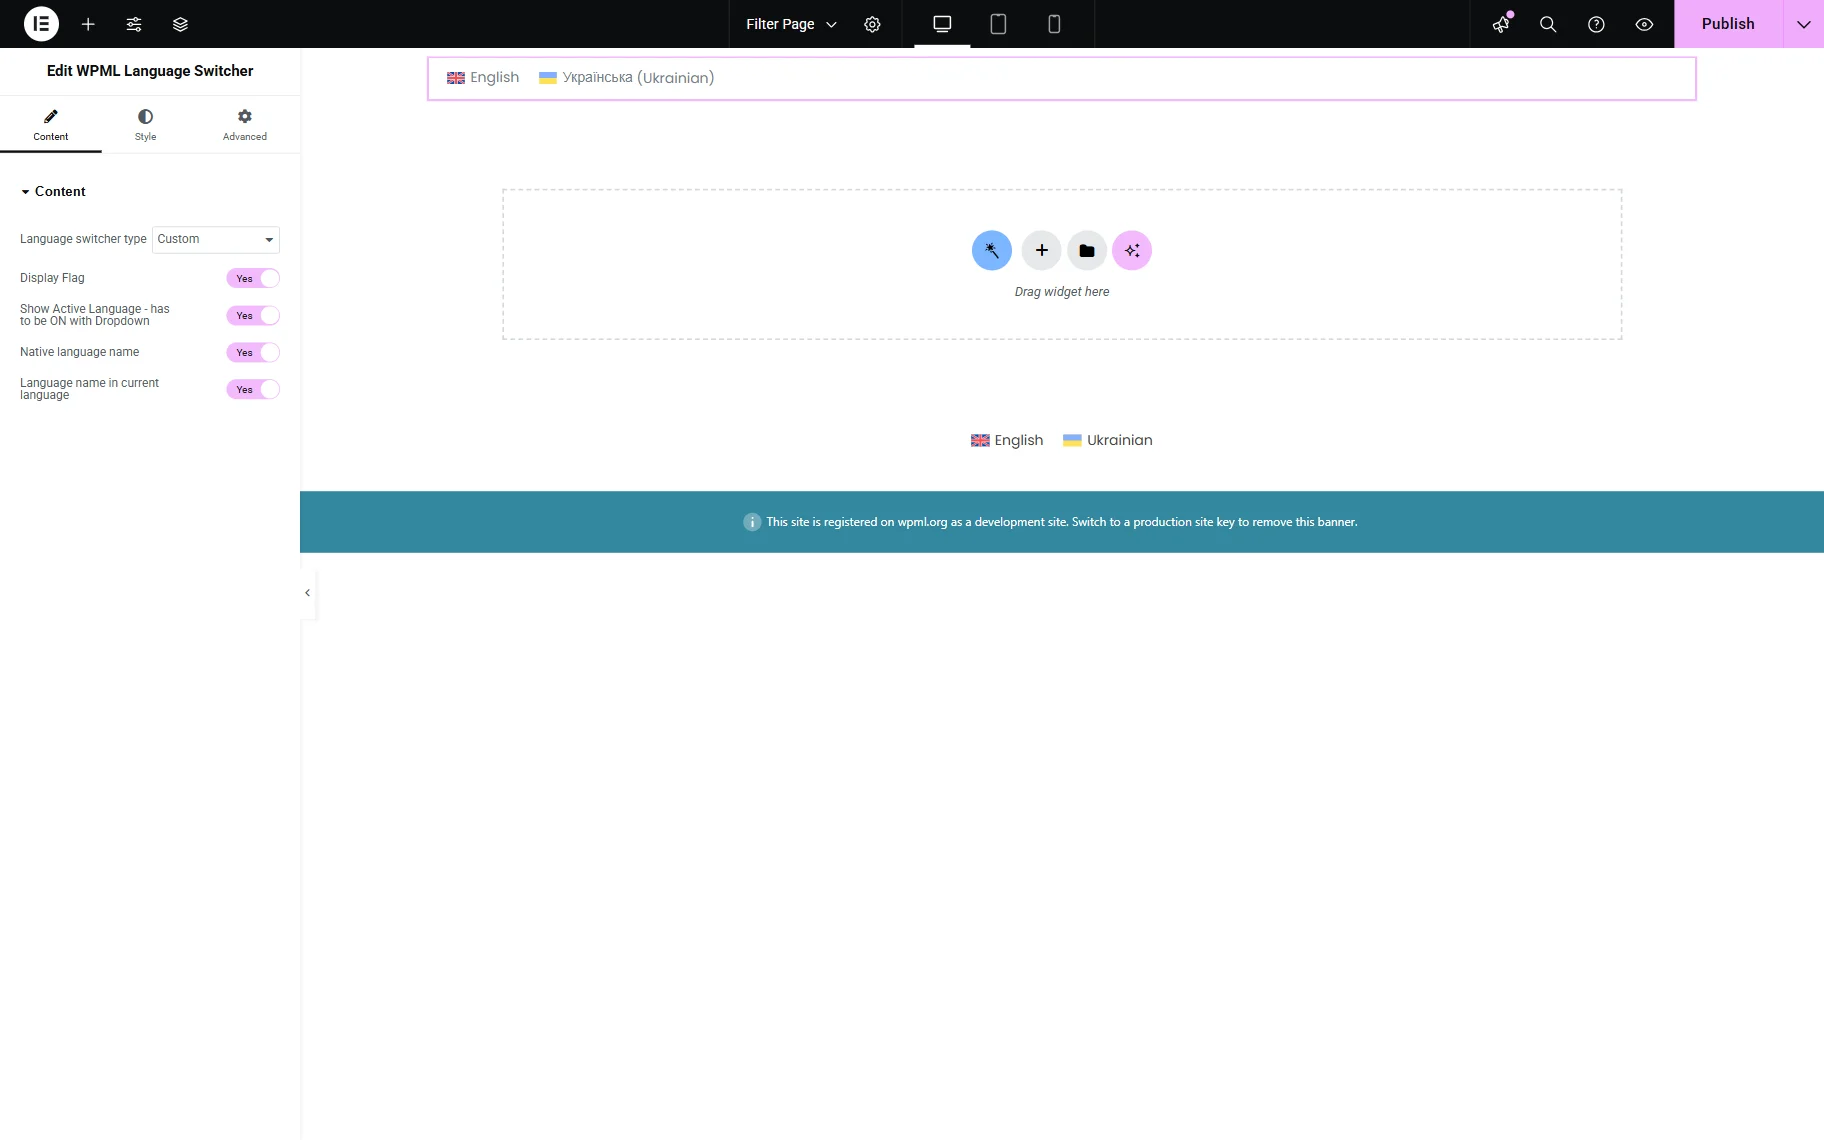
First, we will add the WPML Language Switcher to the page. Adjust settings as preferred.
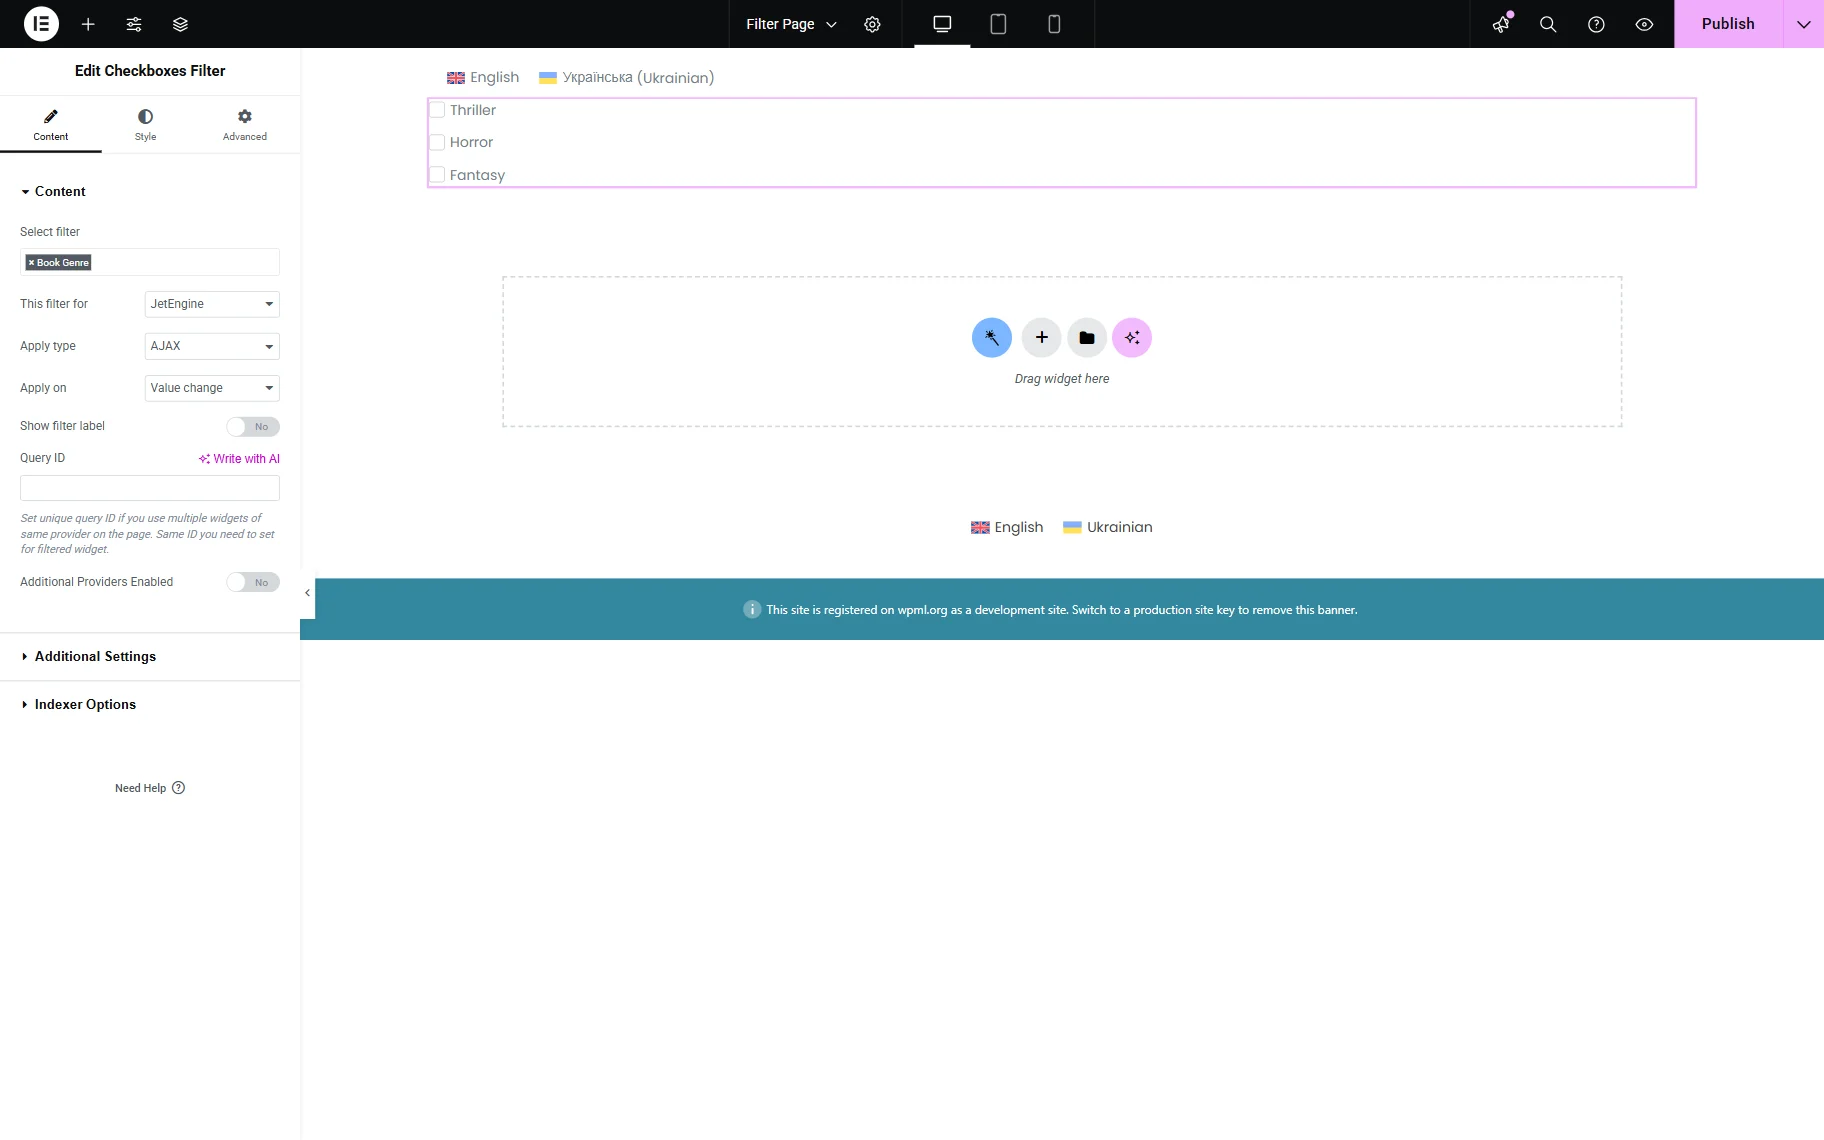
Next, add the corresponding filter to the page. As we built the “Checkboxes list” filter, we added the Checkboxes Filter to the page.
Pick the filter in the Select filter dropdown and set the needed filter source in the This filter for dropdown. In our case, we select the “JetEngine” option.
Next, we will add the provider itself, the Listing Grid widget by JetEngine. We built it beforehand to display the list of books and translated their content. Find out more about the translation of the JetEngine’s Listings and Components.
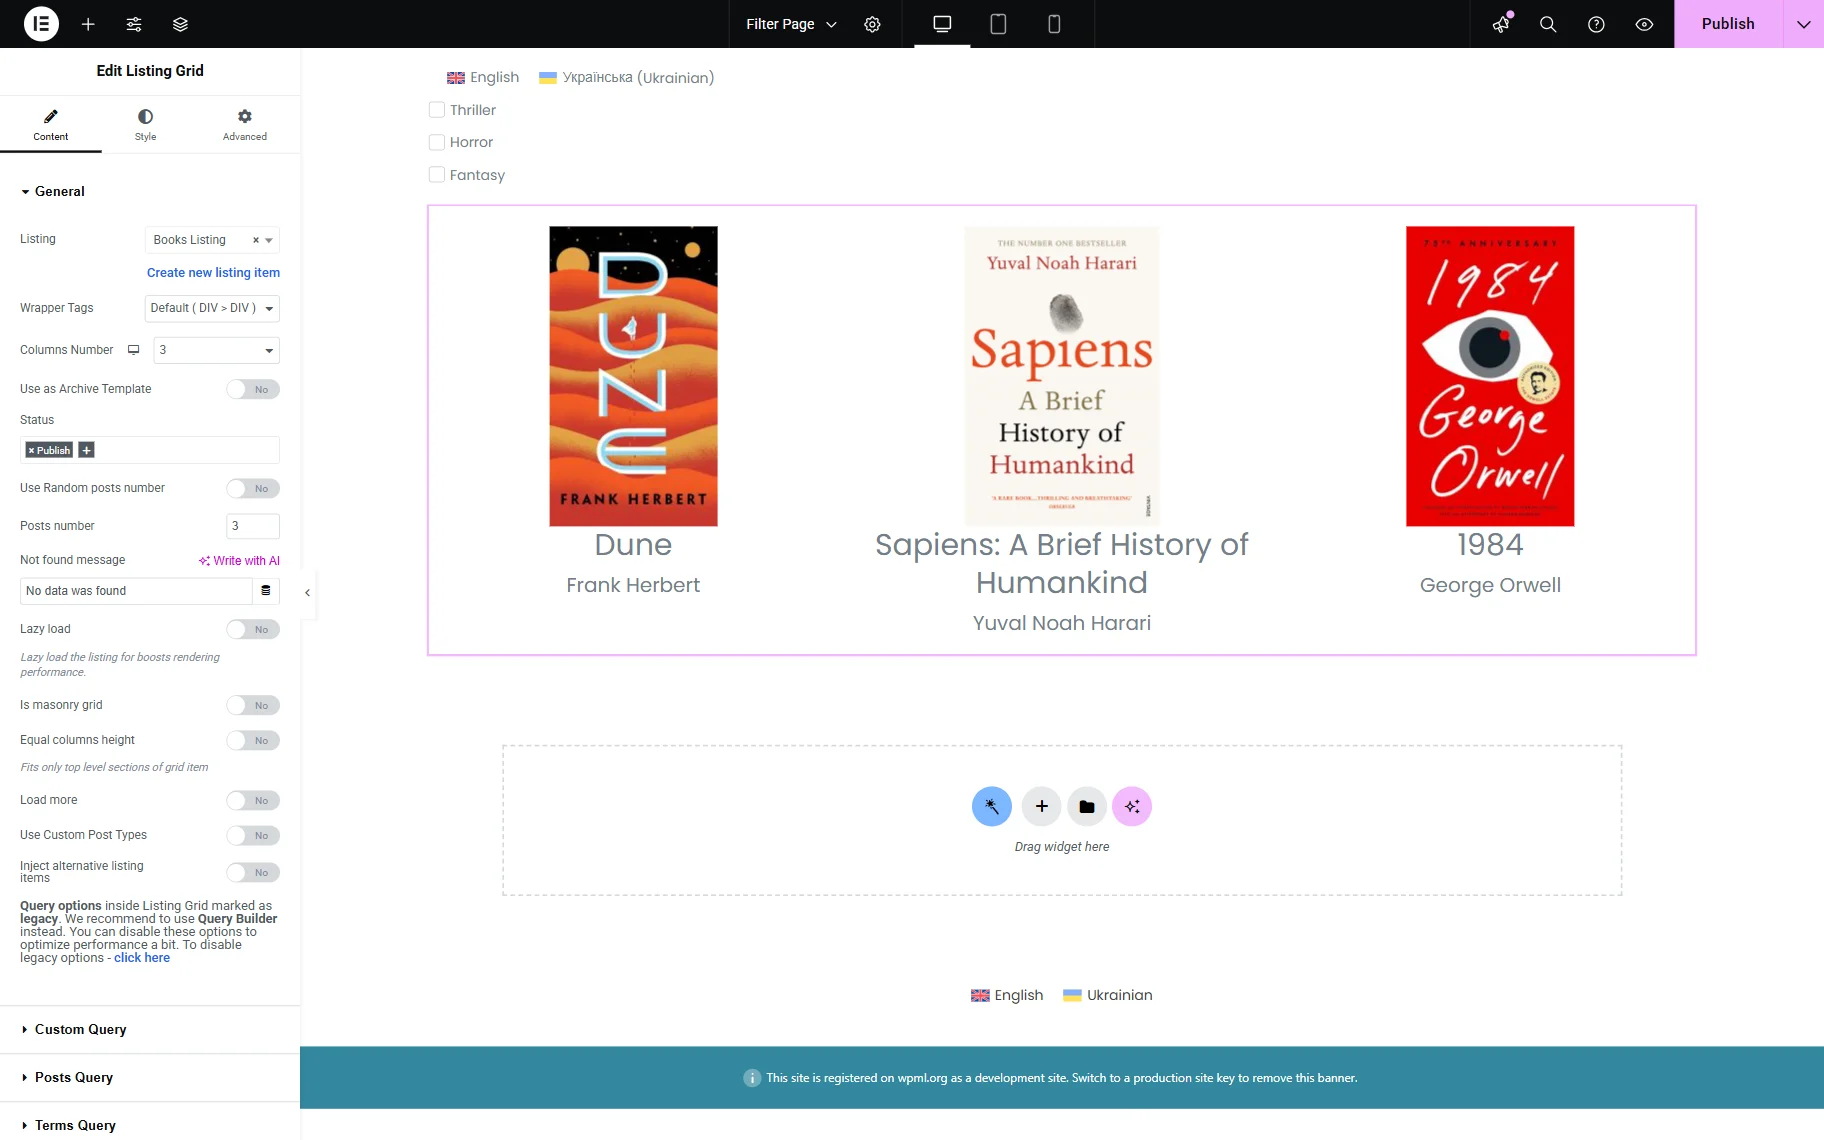
Press the “Publish” button to save the page when ready.
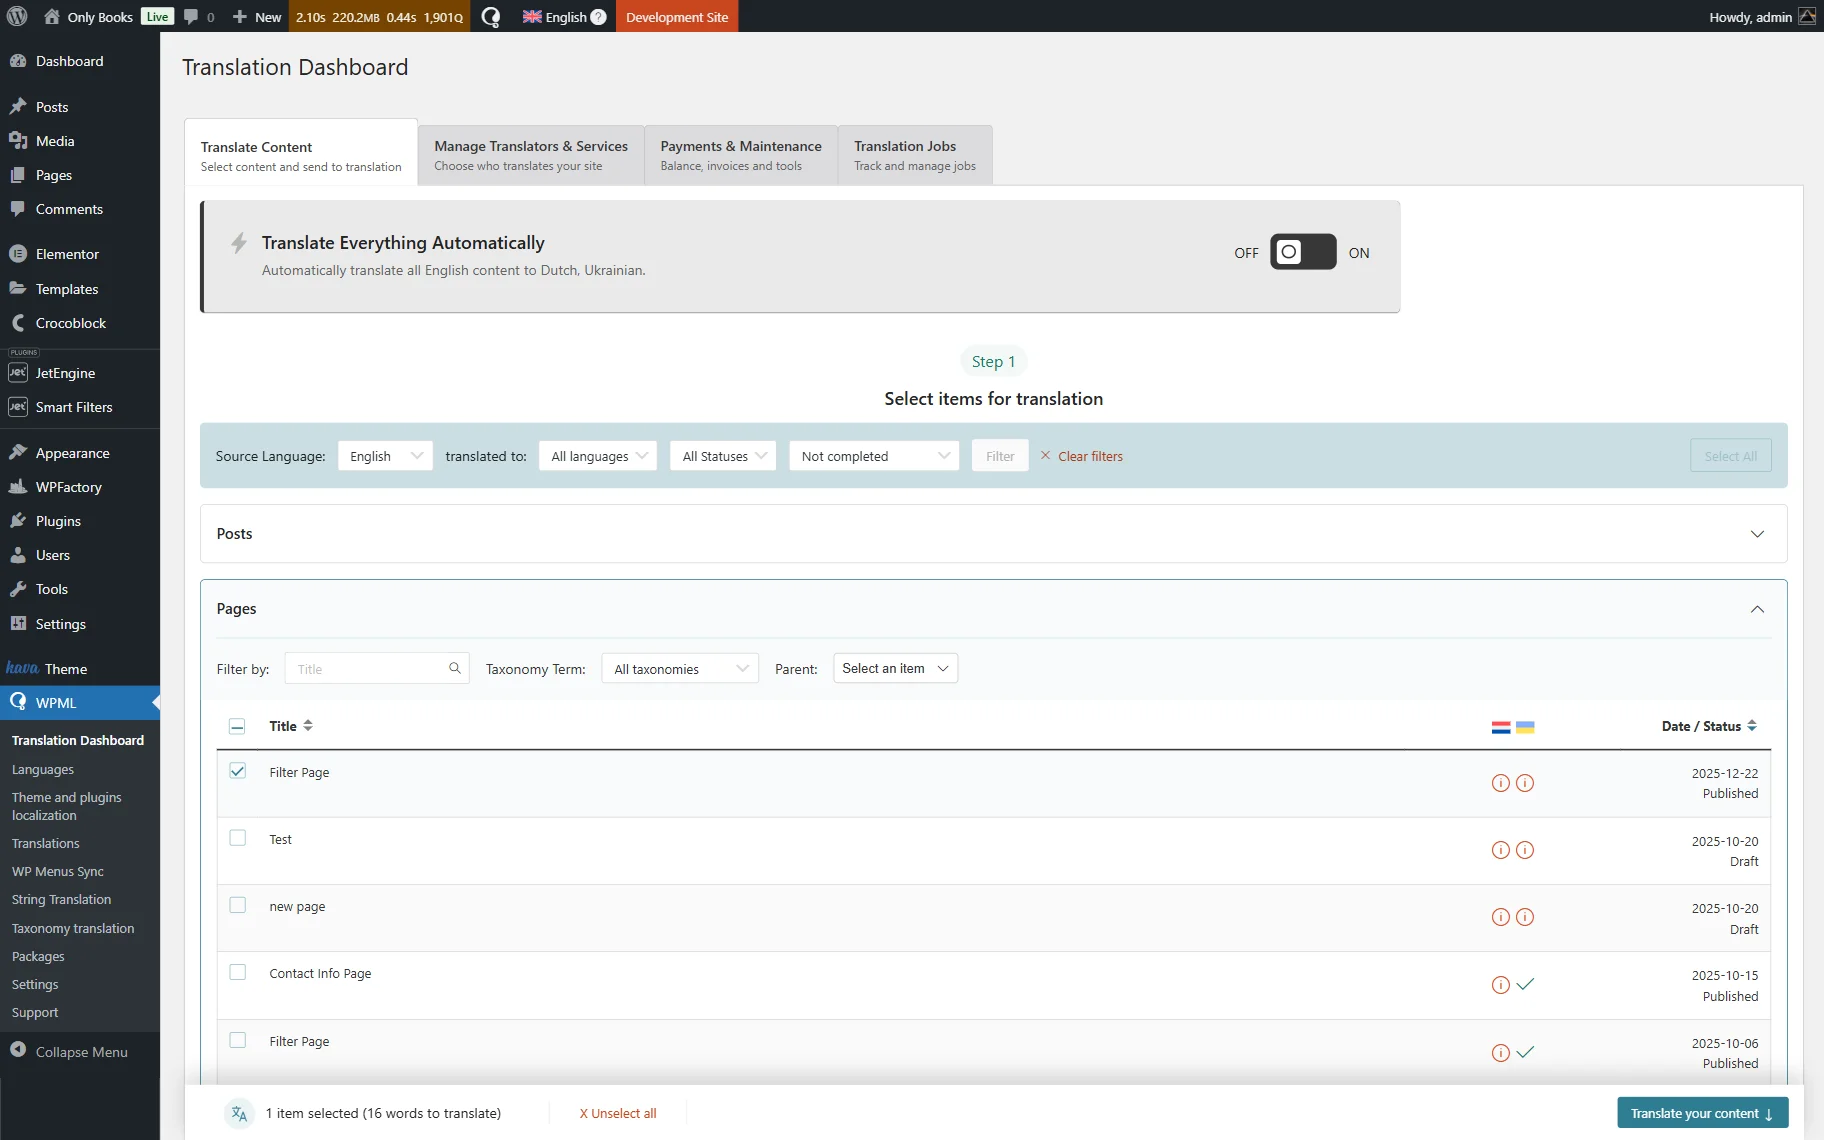
To translate any page, go to WordPress Dashboard > WPML > Translation Dashboard:
- Expand the Pages section and find the page you’ve added the filter to.
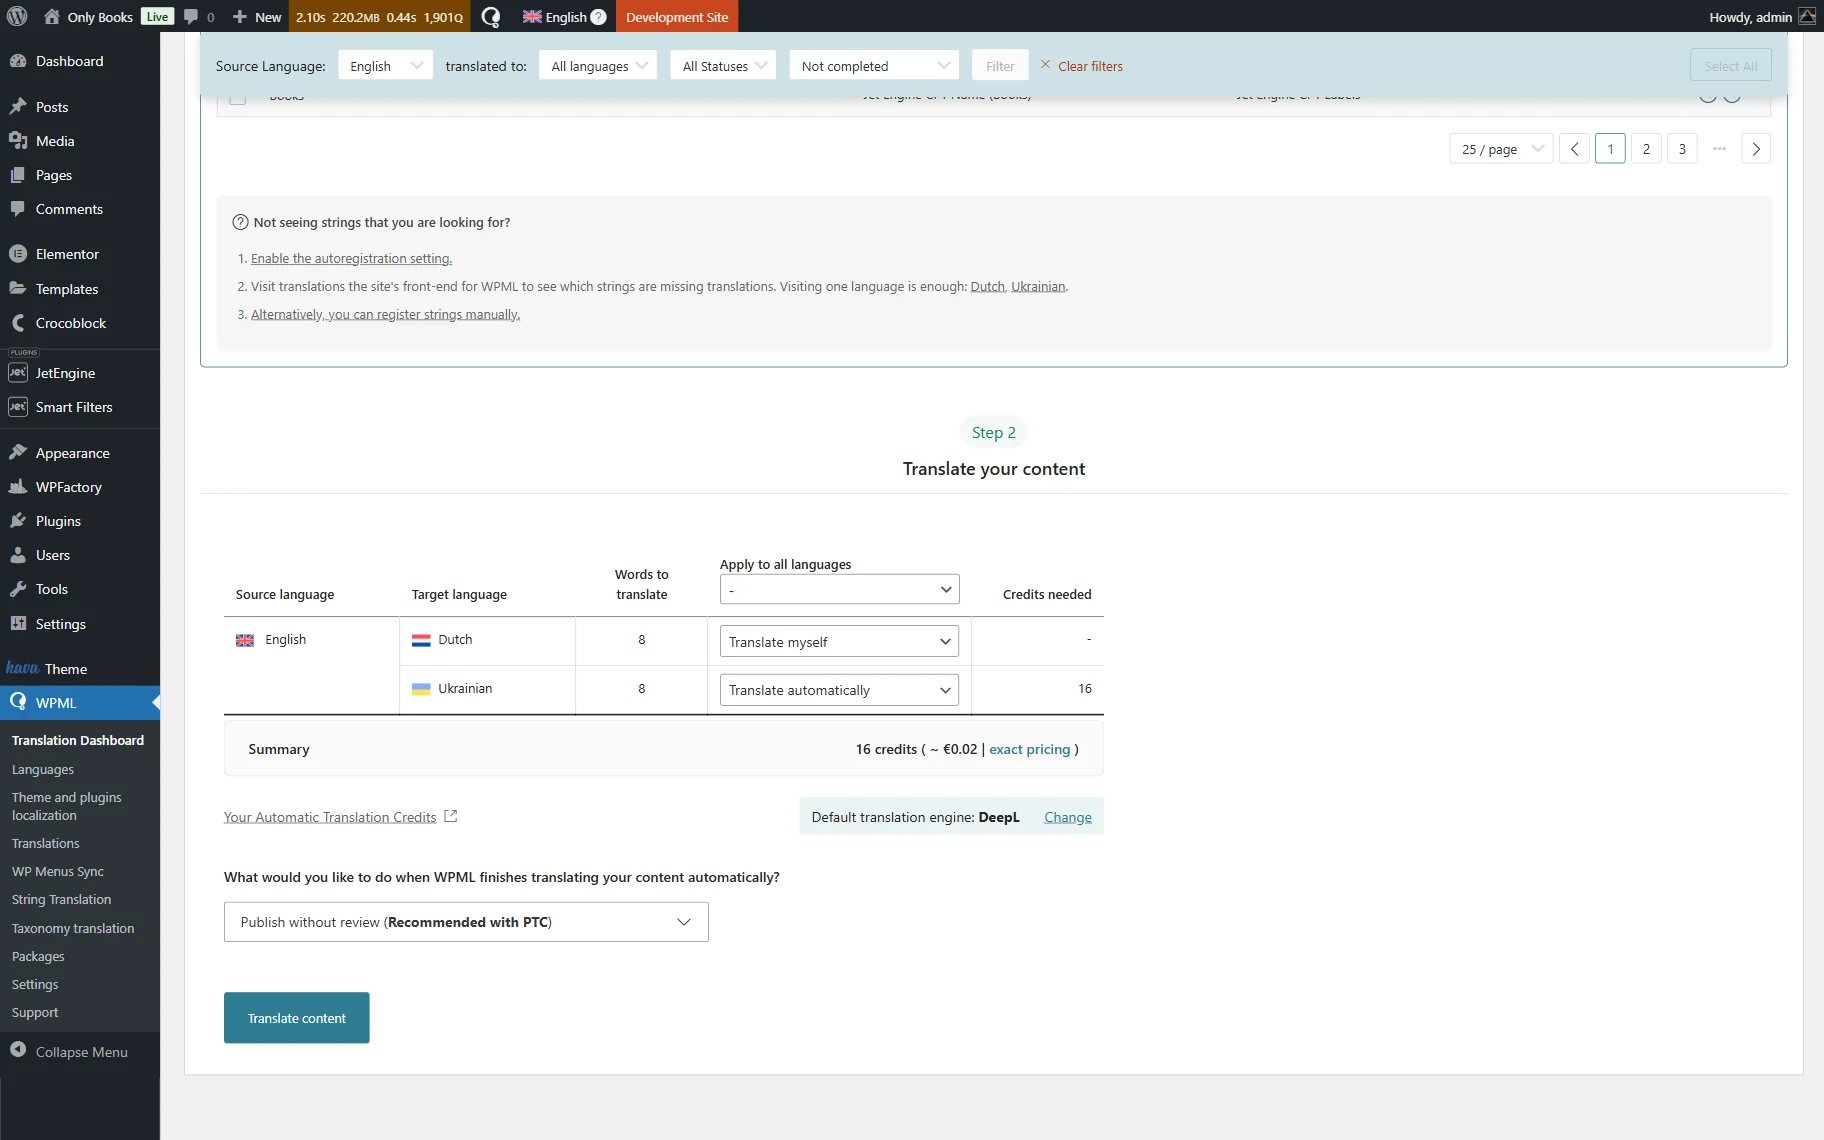
- Select the Page and click “Translate your content.”
At Step 2, choose your preferred translation method. WPML recommends their AI translation engine, Private Translation Cloud (PTC), for the most accurate results.
Translate strings
On the Translation Dashboard, expand the section Other texts (Strings). WPML automatically picks up strings when you view content on the front end of your site and displays them in this table.
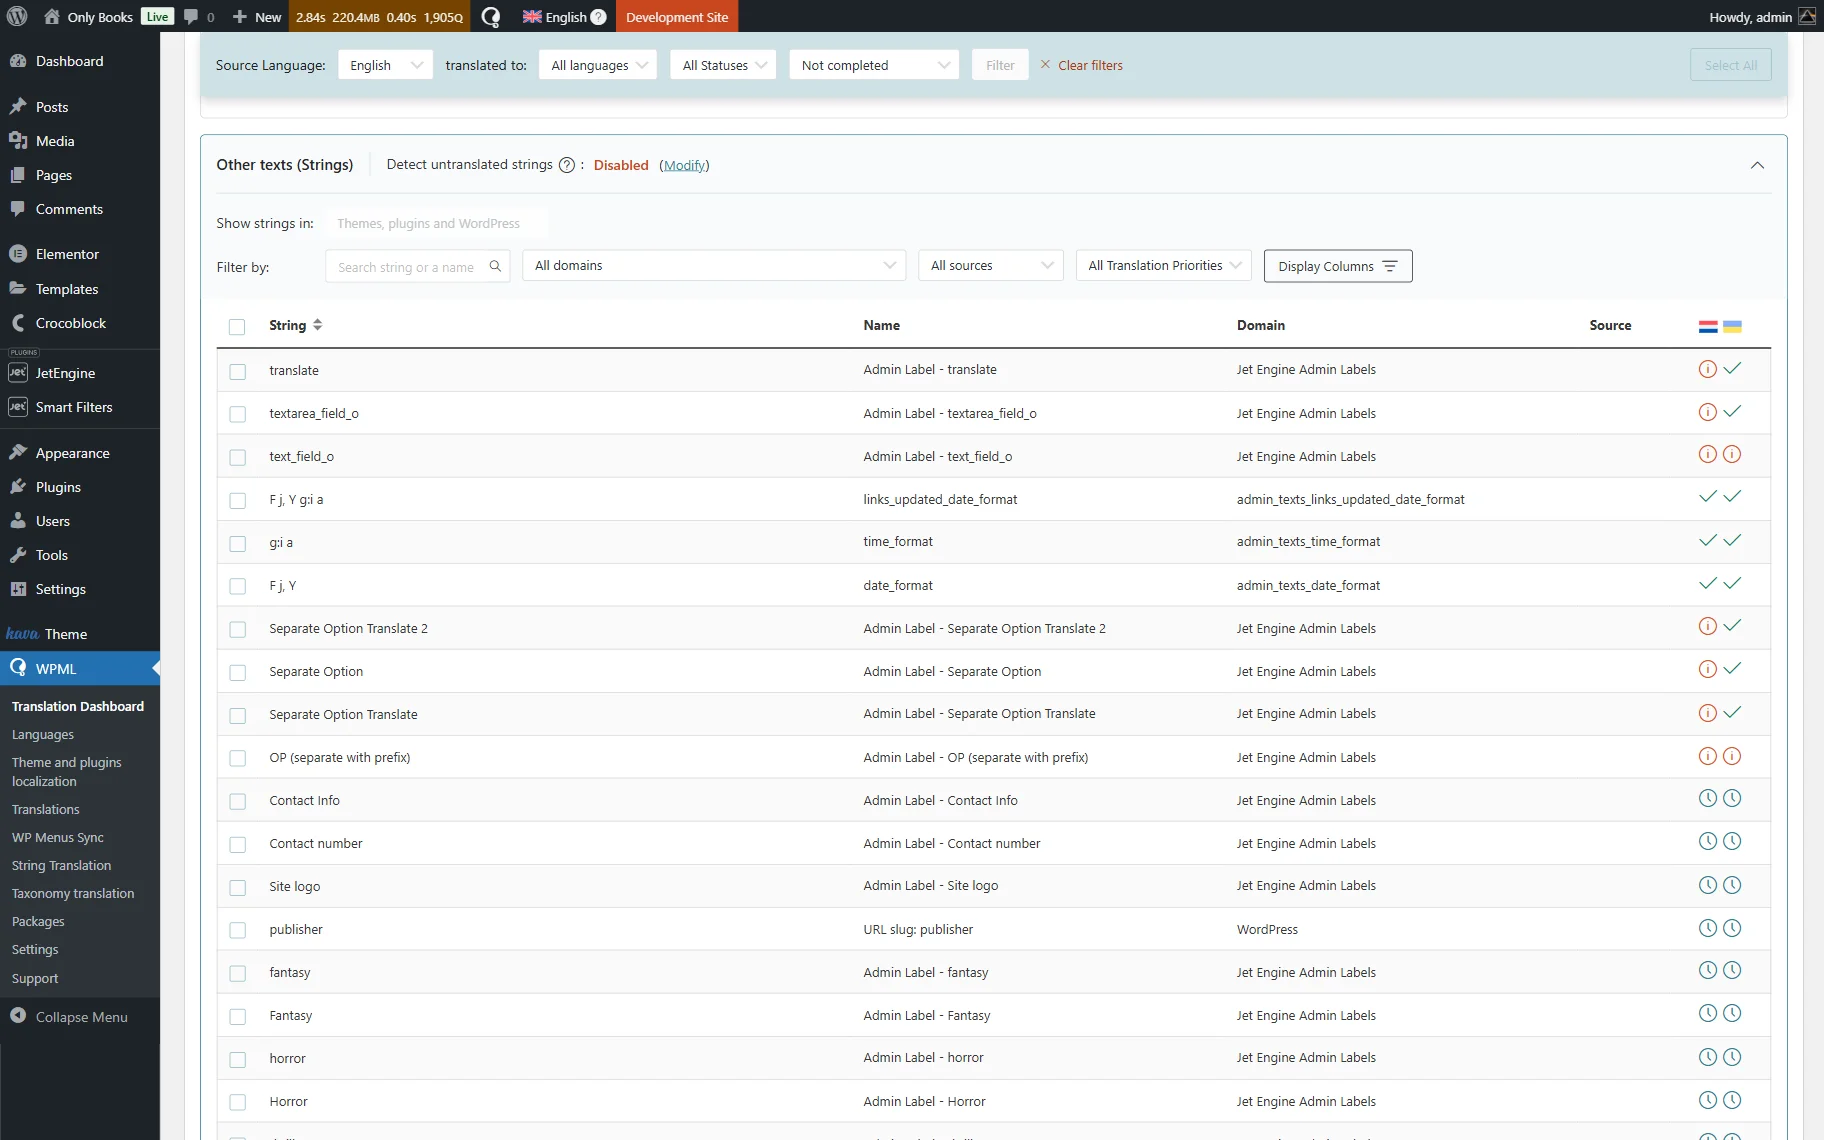
You can apply a variety of domain filters (e.g., “jet-smart-filters”) or type a string directly in the search field. Select as many strings as you want and send them to manual or automatic translation at Step 2, just like any other content.
Repeat the same procedure for as many strings as necessary. Also, pay attention to the “Jet Engine Admin Labels” domain if you have used JetEngine filtering source. Translate its labels.
Check the front-end result
Now, let’s proceed to the page on the front end.
When opened, press the target language in the language switcher. The translated content will now be displayed.
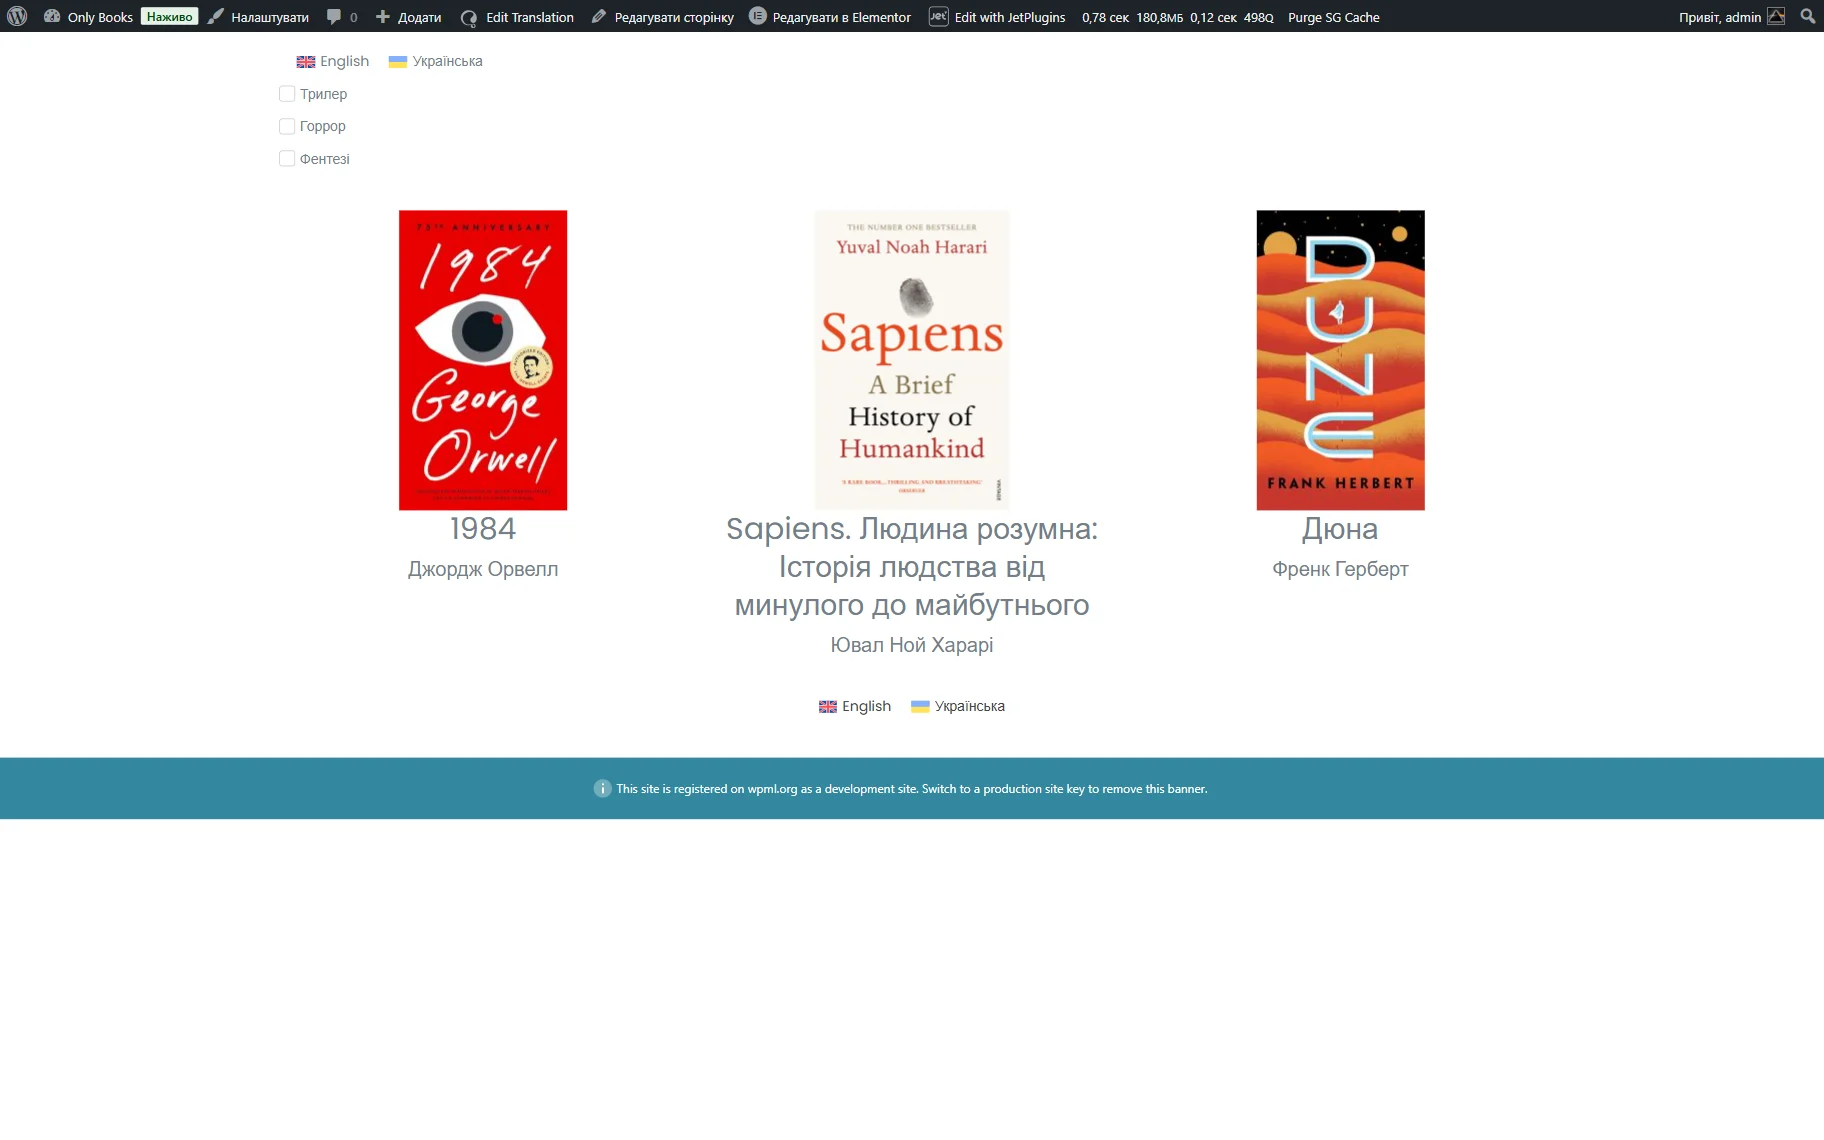
Select the required option(s) in the filter to verify that the filtering works properly.
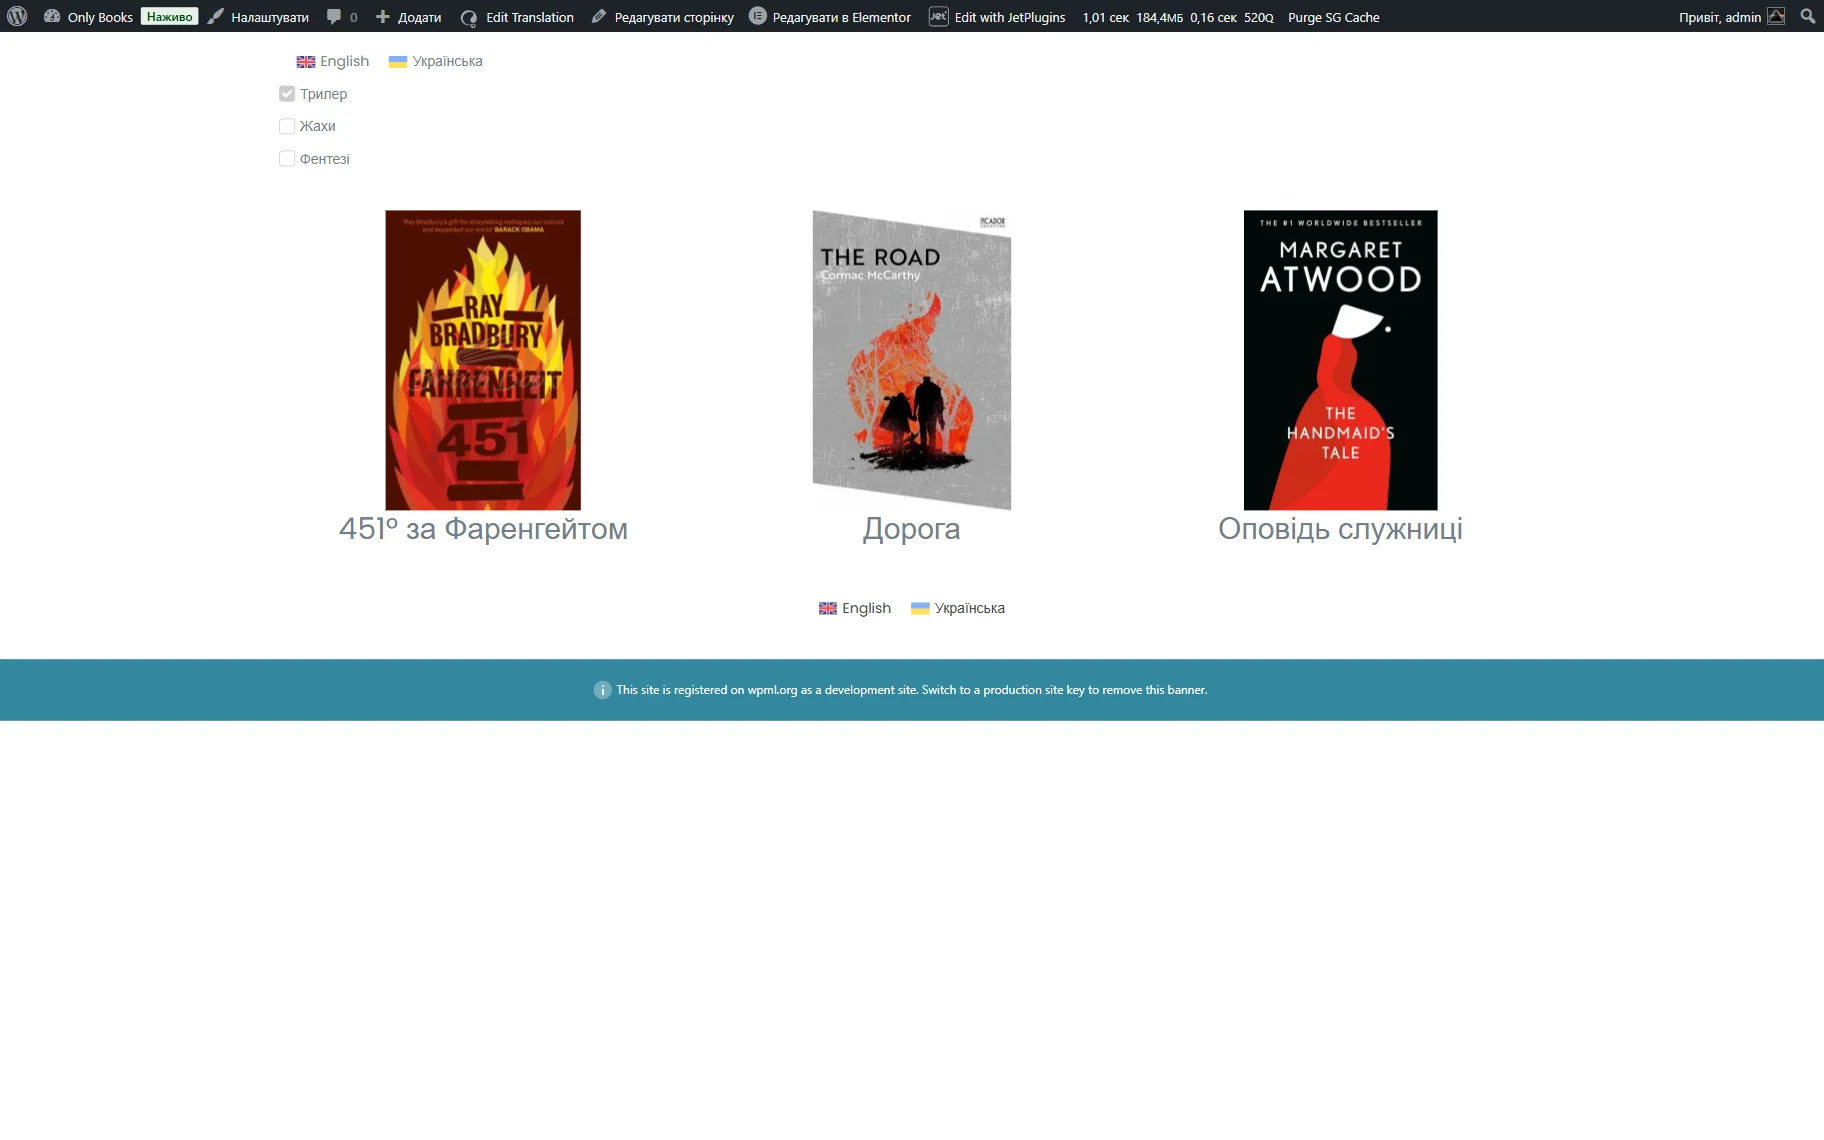
Known Issues
If translated filters, filter options, or filtered content appear in the default language on secondary-language pages, even though all translations and WPML are configured correctly, the issue can be related to WPML language cookies or caching.
JetSmartFilters relies on WPML language detection during AJAX requests. If the current language context is not passed correctly, filter results, taxonomy terms, or filter options may be displayed in the default language instead of the selected one.
To fix this, first go to the affected page and open its DevTools. There, navigate to Application > Cookies and check whether the “wp-wpml_current_language” cookie exists and contains the currently selected language code.
If filtering works correctly in an “Incognito” mode but not in a regular browser session, the issue is likely related to the cache. In this case, review your caching setup and ensure that WPML language cookies are preserved and available during AJAX requests.
That’s all. Now you know how to translate JetSmartFilters content on your WordPress website into any language you prefer with the help of WPML.