How to Make a Fullwidth Mega Menu in Elementor
From this tutorial, you will learn how to configure the mega menu to take up the width of the page with the JetMenu plugin.
It is always a good thing to know some features to boost the website. By making your mega menu fullwidth, you show it off to its full extent. Follow the steps below to learn how to create a fullwidth mega menu of the JetMenu plugin for showcasing more content inside the items.
We will explain how to enable the fullwidth mode both for the Revamp Menu and the classic Mega Menu.
Making a Fullwidth Mega Menu with Revamped Menu
Build a Revamp Menu if you haven’t done it yet. Once ready, open the page with a mega menu in the header and go to More Tools > Developers Tools in the browser panel.
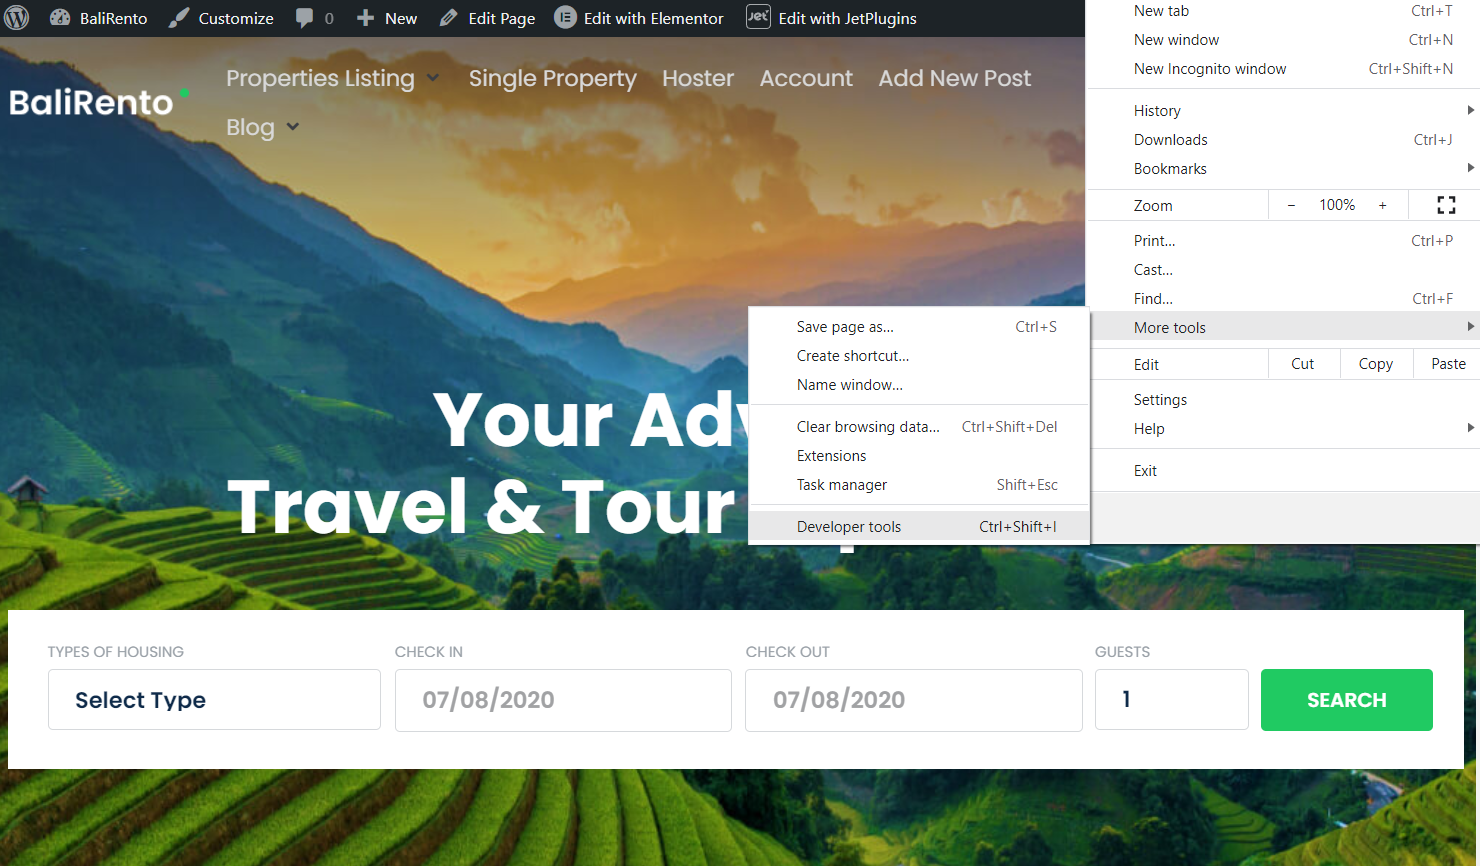
Click the “Select an element in the page to inspect it” icon in the appeared bar and inspect the section that takes up the entire page’s width.
Now, all you need to do is find this section’s CSS class and copy it.

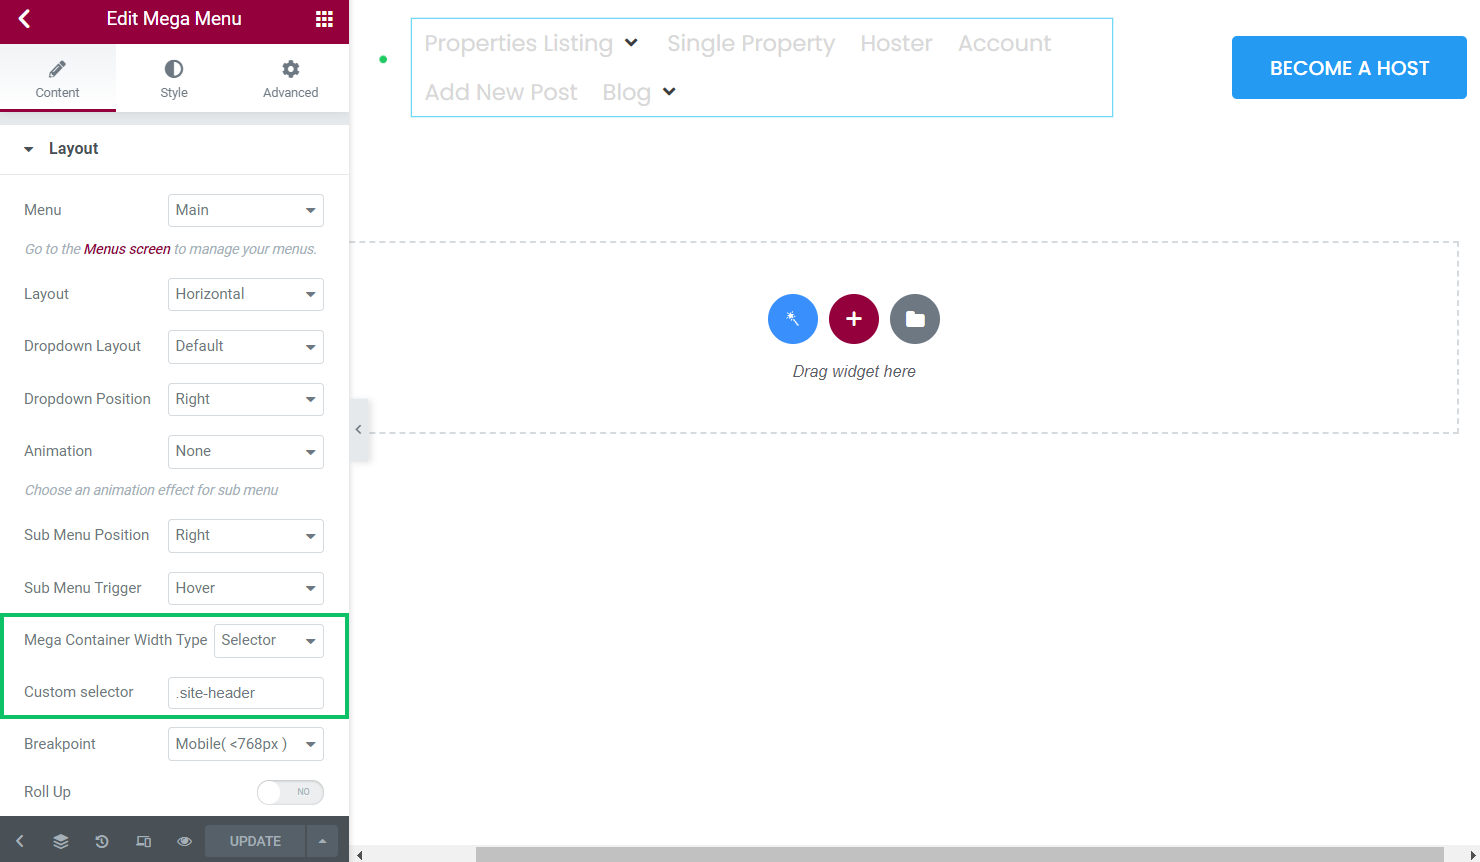
Go over to the heading template. Proceed to the Mega Container Width Type option and choose “Selector” from the drop-down menu.
Paste the copied CSS class into the field. Since it is a CSS class, a dot is required before the name of this class (e.g., “.custom-section”). Click on the “Update” button to save the changes.
Go back to the page where you’ve got a mega menu, and refresh it. Now you can see that the mega menu takes all the width of the page.

Making a Fullwidth Mega Menu
The process will be similar to the fullwidth Revamp Menu building. So, repeat steps with Developer Tools mentioned above and move on to the next one.
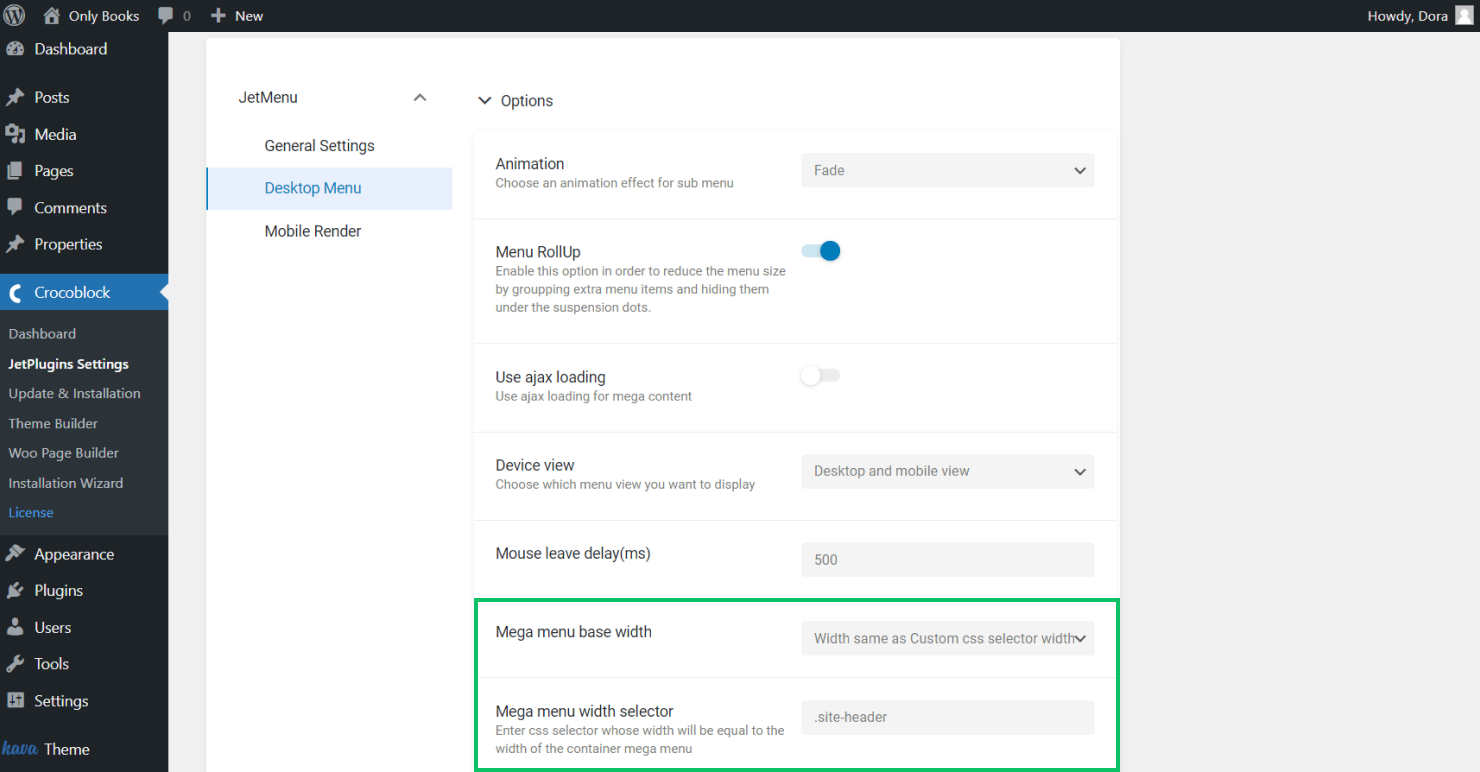
Navigate to the Crocoblock > JetPlugins Settings section and open the JetMenu settings. In the Desktop Menu tab, you need to find the Mega menu base width option. There are three options from which you can choose.
Select the “Width same as Custom CSS selector width” option. Insert a copied CSS class in the Mega menu width selector field.
Remember to type the dot before the name of this class (e.g., “.custom-section”). Then save the settings.
Go back to the page where you’ve got a mega menu, and refresh it. Now you can see that the mega menu takes all the width of the page.
All in all, the fullwidth mega menu is ready. Besides, check the article about making the fullwidth submenu.
Now you know how to customize the mega menu width and in which way you can make it fullwidth with the JetMenu plugin.