How to Make Filters Multilingual Using WPML
From this tutorial, you will learn how to get your WP website translation-ready and find out which WPML modules are needed to translate the site content added with JetSmartFilters widgets.
JetSmartFilters is a Crocoblock plugin embracing 12 filter types for Elementor & Gutenberg. Using its functionalities, you can create hierarchical filtering tools powered by AJAX and apply them to any WordPress theme, page, and post type.
JetSmartFilters is compatible with WPML, enabling you to translate the content added through its widgets into any necessary language.
Let’s start by getting the website WPML-ready and then proceed to translate the smart filters.
How to Make the Website Translation-Ready
Here are the basic steps to get going:
- Get the Multilingual CMS WPML plugin.
- Upload and activate it through Plugins > Add New. Register at WPML.
- Complete the language setup.
- Add translators and translation managers.
- Choose the preferred translation method.
Once you complete the basic setup, feel free to translate the website pages. You can do it by hand or send a translation task to any translator. Just drop the texts into the translation basket.
How to Translate the JetSmartFilters Content
JetSmartFilters is a Crocoblock plugin that functions as much on the backend as it does in the front. To put it simply, you must dedicate some time to translating taxonomies, category slugs, custom fields, and strings. Otherwise, the translated smart filters won’t be working on the second-language page. Let’s dive into the foremost preparations.
Basic preparations
As mentioned previously, you’ll have to purchase the Multilingual CMS plan, which contains WPML String Translation, WPML Multilingual CMS, and WPML Translation Management modules.
Make the posts translatable
Proceed to WPML > Settings. Open the Multilingual Content Setup tab and head to the Post Types Translation section. Next, look through it and locate the Smart Filters post type.
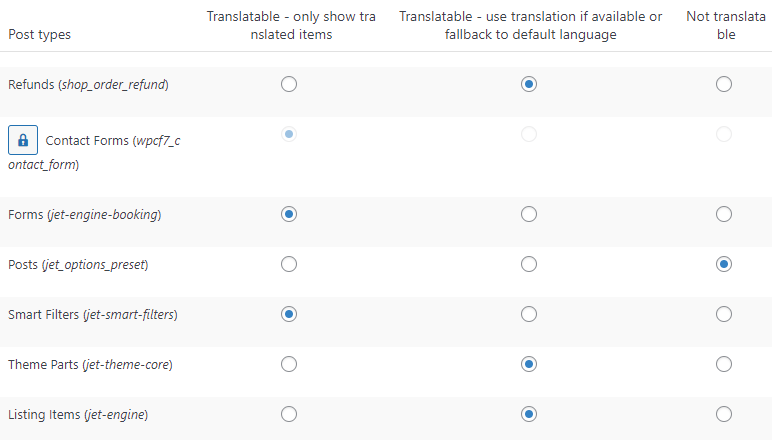
There are three options available here:
- Translatable – only show translated items. Select this radio button if you are willing to display only those items you translated in the front;
- Translatable – use translation if available or fallback to default language. When this option is selected, the items’ translations will be shown where provided. The items with no translation will be outputted in the default language;
- Not translatable. Select this option to leave the post types “as is.”
Make the Smart Filters post type translatable and then hit “Save.”
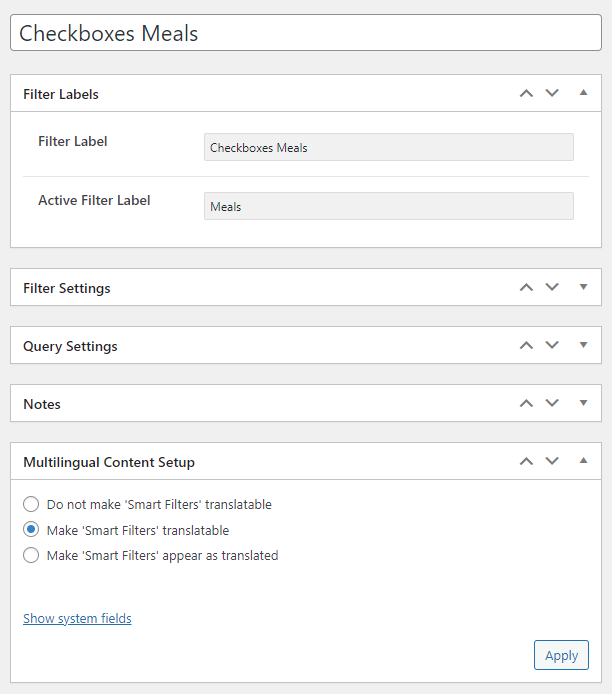
Make the custom fields translatable
Follow the WPML > Settings > Multilingual Content Setup directory, find the Custom Fields Translation section. Afterward, click on the “Show system fields” link. Now, we need to look through all the fields to detect those relating to JetSmartFilters. But why bother? We can still use the internal search functionality. Type “filter” into the search bar, and the system will show you only relevant results.
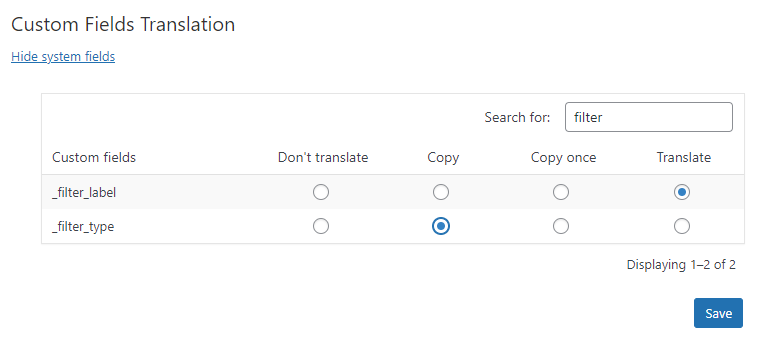
Here, you pick from four available options:
- Don’t translate – the values of custom fields will be shown in the default language on secondary-language pages;
- Copy – select this option to always copy the default-language custom field values to the secondary-language site version, even in cases when the initial custom field has been altered in the default language;
- Copy once – by selecting this, the system will copy the custom field value to the secondary language at the initial translation stage. Furthermore, if you wish to set here a different value, such a new value won’t be overwritten by the previous one;
- Translate – select this option to make the custom field values translatable.
As to the _filter_type field, you can choose to copy it or translate. Please make sure that you set the _filter_label field to “Translate”; this will help the WPML modules pick the filter labels, which need to be translated. Don’t forget to hit the “Save” button.
Make the taxonomies translatable
When it comes to filtering methods and archive search, WordPress will always use taxonomies. For this purpose, you need to translate all taxonomy-related items, including tags and terms.
In the same Multilingual Content Setup tab, scroll down the page until you reach the Taxonomies Translation section. Find the taxonomies involved in the JetSmartFilters’ operation and make them translatable. As usual, hit the “Save” button before leaving the page.
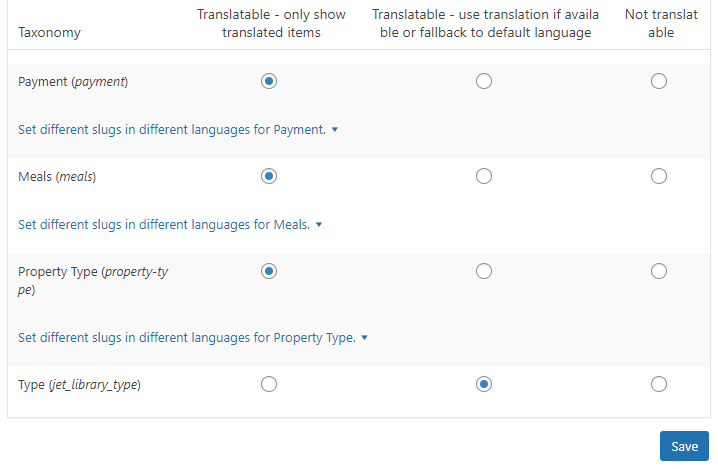

Now that you are done with the basic preparations, proceed to translate the JetSmartFilters’ taxonomies and category tags (if any).
Translating taxonomy terms and slugs
To translate a taxonomy with WPML, you need to proceed to WPML > Taxonomy translation. In the Select the taxonomy to translate drop-down select, pick those to be translated. In our case, the needed taxonomies are Payment, Meals, and Property Type.
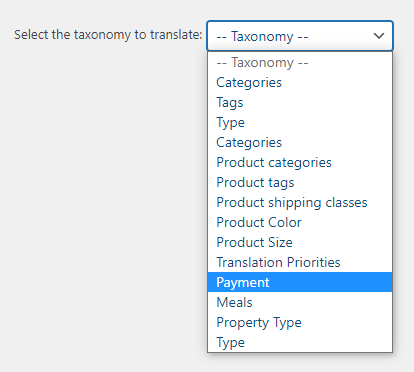
Once the dedicated page opens, you can start adding the translations to each taxonomy term. Keep in mind that there’s a possibility to copy the taxonomy term values of the initial site language to secondary languages. If you mouse over the taxonomy term, you will see the Copy to all languages link.
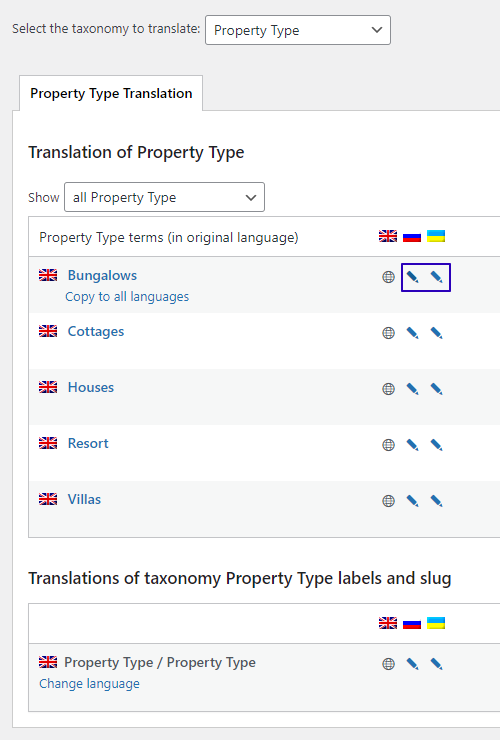
Press the pencil-shaped icon next to the term name if you wish to edit the existing taxonomy translations. Submit new translations and hit “Save.”
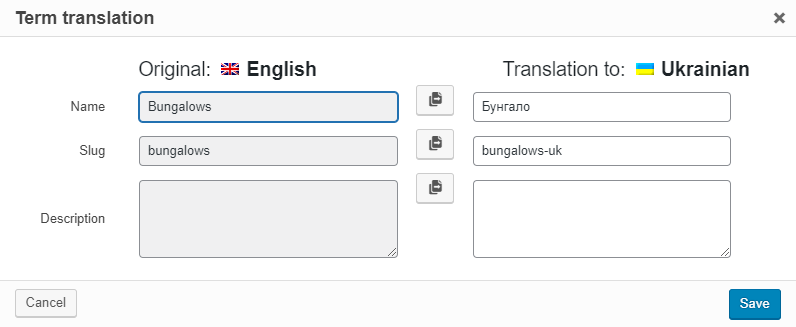
Repeat the same process for every term in every language, and don’t forget to translate taxonomy labels and slugs.
Now, if you see the following service message after submitting all translations:
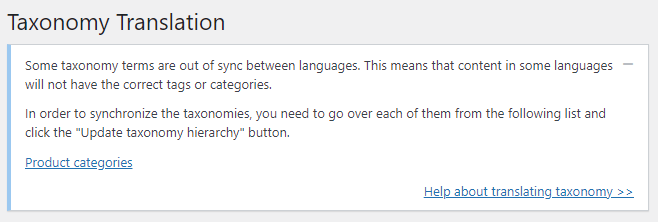
It means that the changes you’ve made to the taxonomy tree in one language need to be synchronized with the rest of the site languages. On the Taxonomy Translation page, click the Hierarchy Synchronization tab.
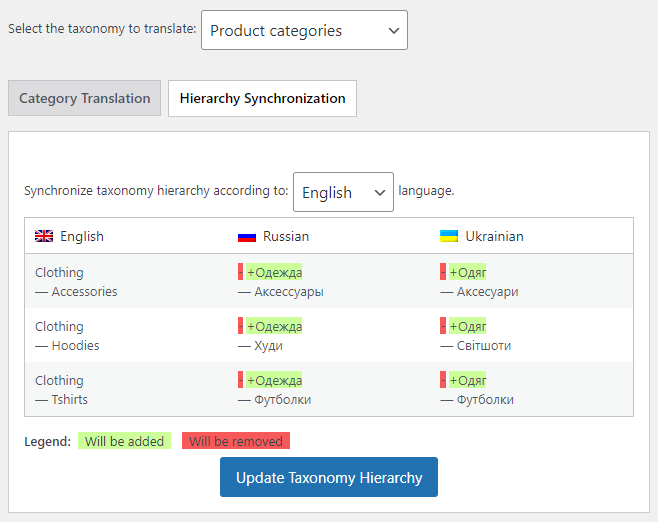
When there’s something to sync, you will be shown the associated taxonomy terms. Otherwise, the tab will output a message stating that the taxonomy hierarchy is already synced. Press the “Update Taxonomy Hierarchy” to finish off the process.
Translating the Smart Filters content
JetSmartFilters boasts 12 filter types, which can be translated in the Advanced Translation Editor by WPML. Backed by the translated taxonomy, the smart filters should now be picked properly by the WPML modules and remain operative on the secondary-language page. Stick to the steps below to carry out the first filter translation.
Find the necessary filters
Go to Smart Filters > Smart Filters and seek those located on the archive page. Then, press the “+” icon next to the correct filter title.
Add the translation
Once you are taken to the WPML Advanced Translation Editor window, translate the filter content. Input the translations by hand or get everything translated at once using the “Translate automatically” button. Each row should be confirmed by pressing the “✔” icon. As soon as the bottom scale is 100% complete, you will be allowed to submit translations. Press the “Complete” button to do so.
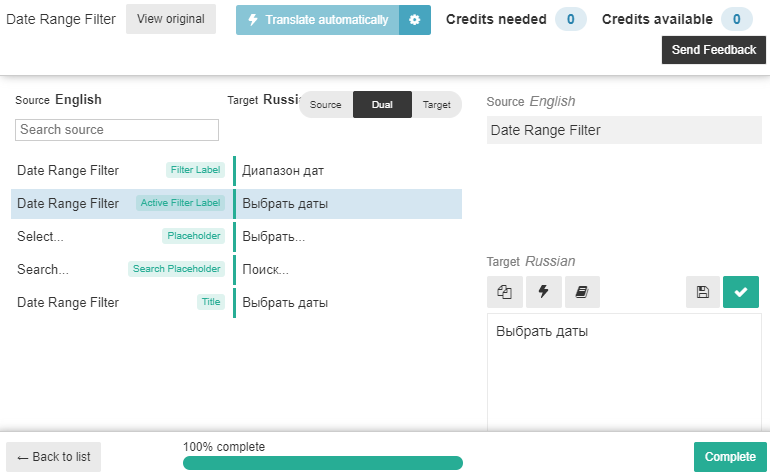
Add the translation to all filters in the same way and save the progress.
Check the frontend result
Now, let’s go to the frontend page that contains these filters and see how it works.
You can see that the greater part of the smart filters’ content has been added to the secondary-language page and the filters still work. Though, several translations are missing. Let’s fix that.
Proceed to WPML > String Translation menu item to find the non-translated JetSmartFilters strings. In the In domain drop-down select, find the “jet-smart-filters (402)” option (the number in brackets may vary). Type the missing string name into the Search for bar and press the “Search” button. Once you get the search results, add the missing translations using the “+” icon.
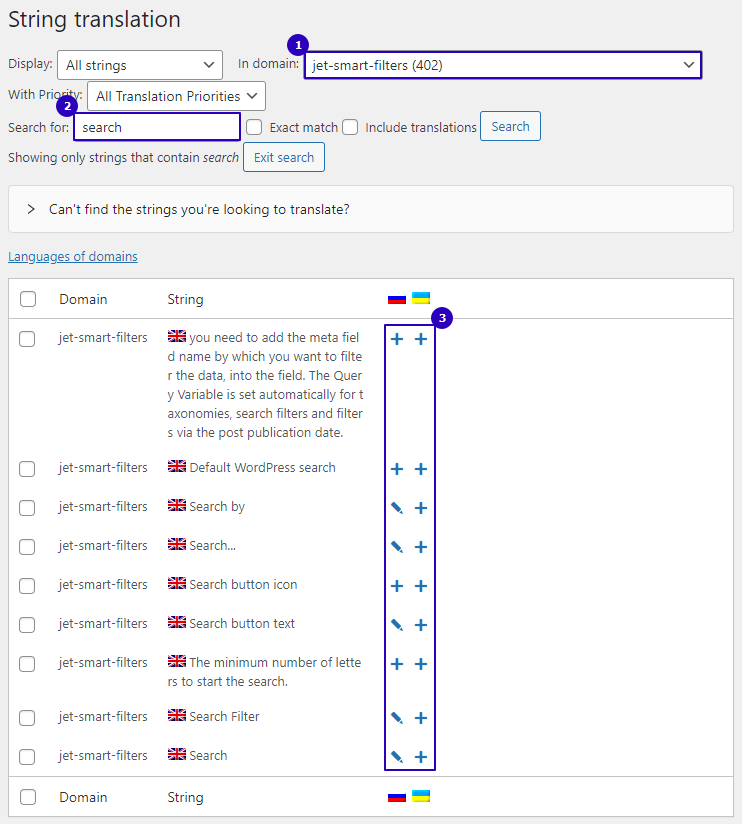
Repeat the same procedure for as many strings as necessary.
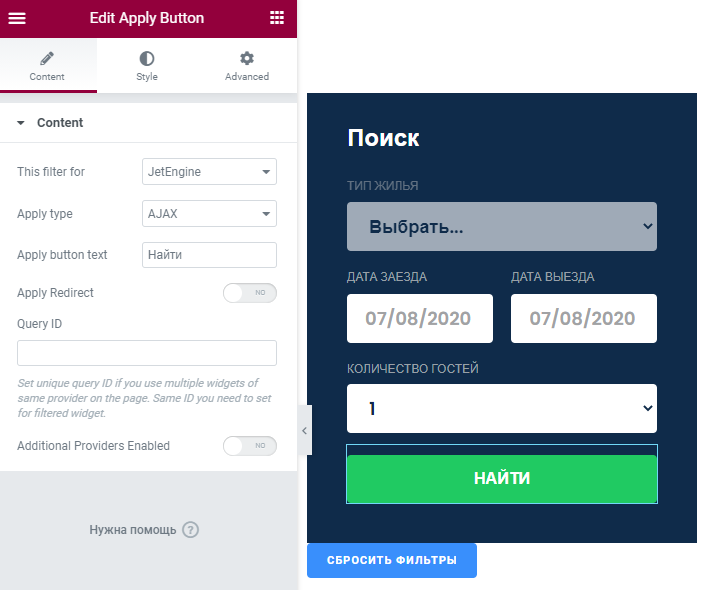
First, switch the default site language to the needed secondary one (it’s Russian, in our case). You will notice that the URL has changed a bit; it took the language attribute like “?lang=ru”. Now, use the top admin bar to edit the secondary-language archive in Elementor.
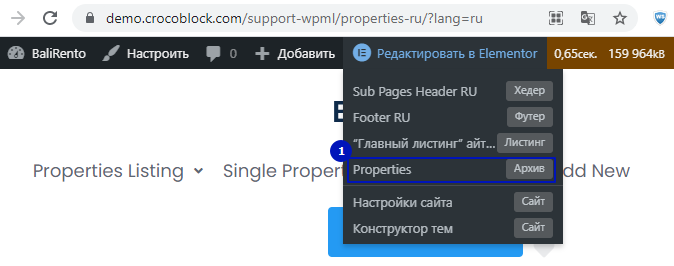
Input the missing translations by hand. We are adding texts for the Apply Button and Remove Filters widgets. Then click the “Update” button and check out the result on the front-end.
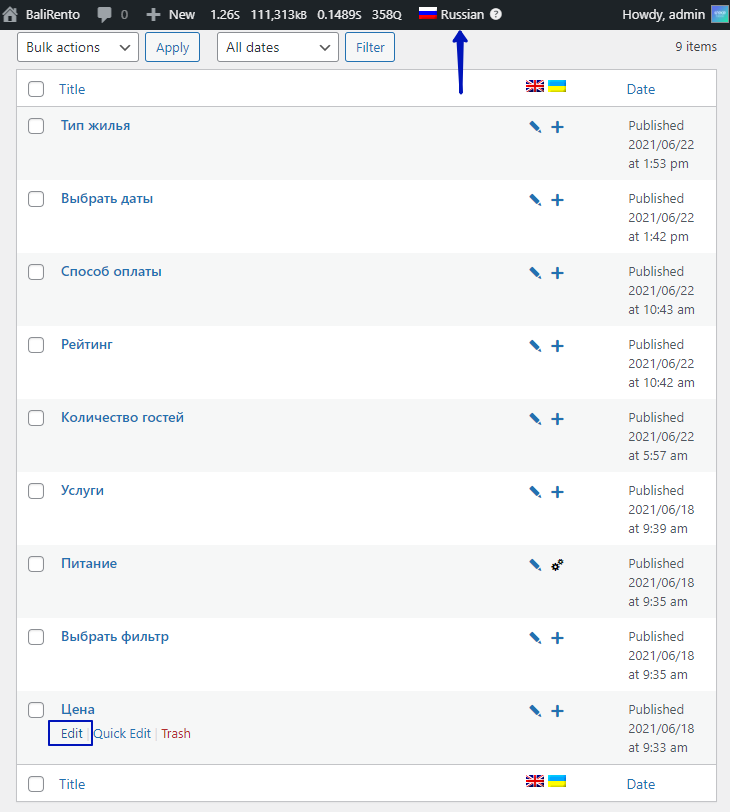
Sometimes, the filter values in the default language are not translated automatically. So you need to submit them manually on the backend. Open the Smart Filters > Smart Filters pathway, then switch the language in the top toolbar. You will see all JetSmartFilters translated into the secondary language. Click to edit the one you need.
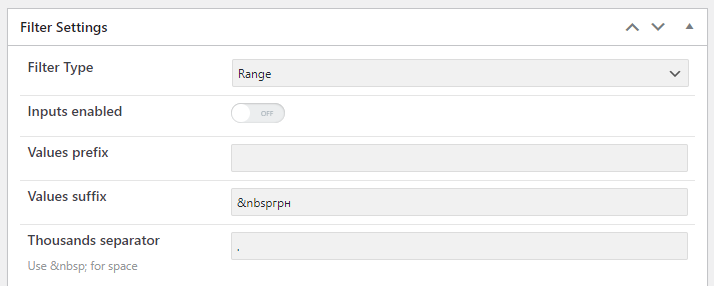
At this point, you need to enter the correct values and press the “Update” button. Also, keep in mind that the currency sign needs to be placed in the Value prefix field in some languages, whereas in others, it should go in the Value suffix field.
That’s all. Now you know how to translate Crocoblock’s smart filters into any language you prefer with the help of WPML.