How to Create a Thank You Page Template
From this tutorial, you will learn how to create a page that users see after finishing the billing form and performing a payment. That page is called Thank You page and could be easily created using the JetWooBuilder plugin.
Before you start, check the tutorial requirements:
- Elementor (Free version)
- WooCommerce plugin (Free version) installed and activated
- JetWooBuilder plugin installed and activated
- JetThemeCore plugin installed and activated
How to Create a Thank You Page Template with the JetWooBuilder Plugin
Enable the Thank You Page Widgets
Navigate to the WordPress dashboard > Crocoblock > JetPlugins Settings directory and unfold the JetWooBuilder tab.
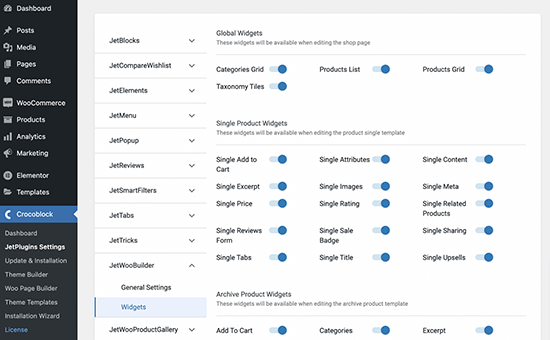
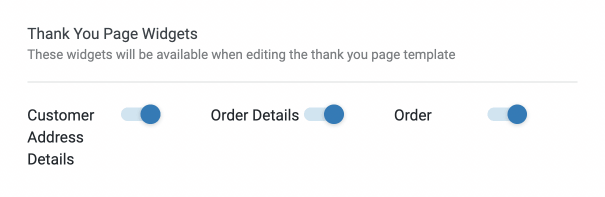
Scroll down to the Thank You Page Widgets section and check if all the widget toggles are enabled.
Create a Thank You Page Template
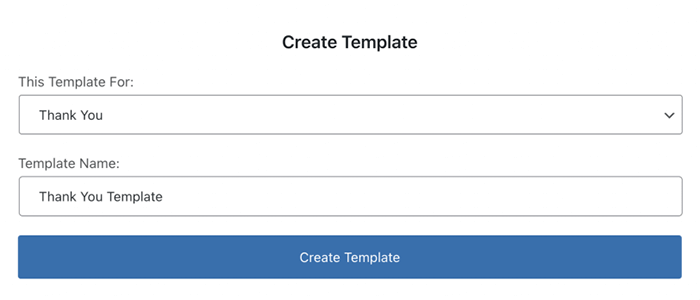
Proceed to Crocoblock > JetPlugins > Woo Page Builder submenu and click the “Create New Template” button.
Choose the “Thank You” option in the drop-down “This template for” list of the pop-up window and give it a title. Afterward, click the “Create Template” button.
The JetWooBuilder plugin offers you a few widgets created especially for the Thank You page. Let’s take a closer look at them.
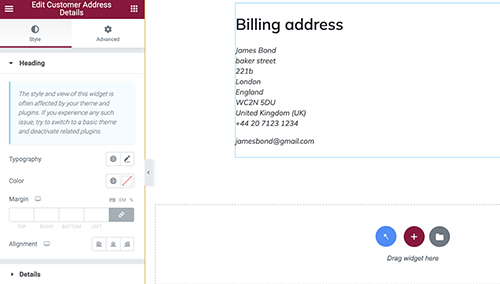
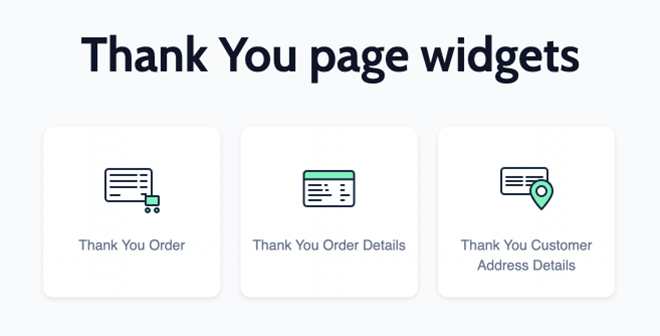 Thank You Customer Address Details
This widget adds a table to the Thank You page containing the client’s address details. The data will be taken from the checkout of the shipping form the user has filled in previously.
The appearance of this block is completely customizable in the Style menu tab.
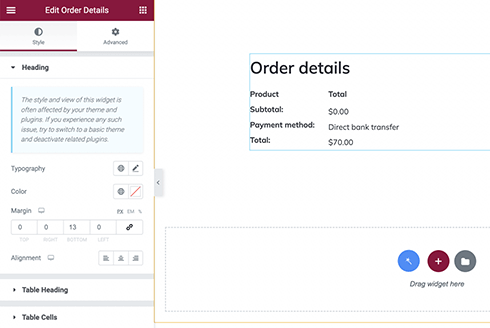
Thank You Order Details
With the help of this widget, you can add a detailed table of order details to your Thank You page.
The table will show the information about the purchased items, total price, shipping details, and others. Use this widget if you want the clients to see all the details of the order they’ve made.
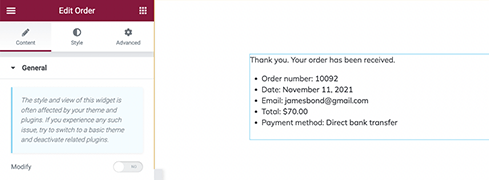
Thank You Order
This is a terser version of the Thank You Order Details widget. It also shows the customer order details but in a slightly reduced way.
Use it if you want to make the Thank You page simpler and more minimalistic.
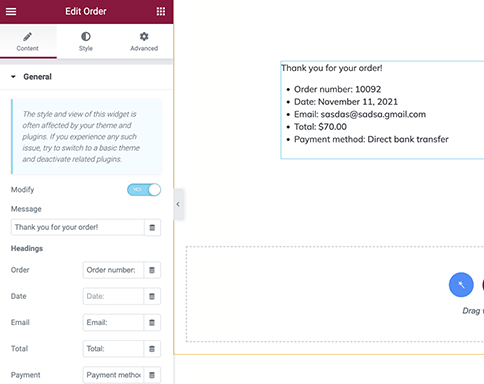
By the way, you can turn on the Modify option and customize the widget’s elements.
Assign the Template to the Page
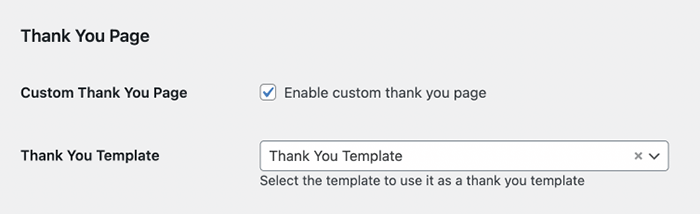
The created template is still not attached to the website’s page. To assign it, go to the WooCommerce > Settings > JetWooBuilder and scroll the page down to the Thank You section.
Tick the Custom Thank You Page checkbox and choose the template you’ve just created in the Thank You Template drop-down menu. After that, click the “Save Changes” button.
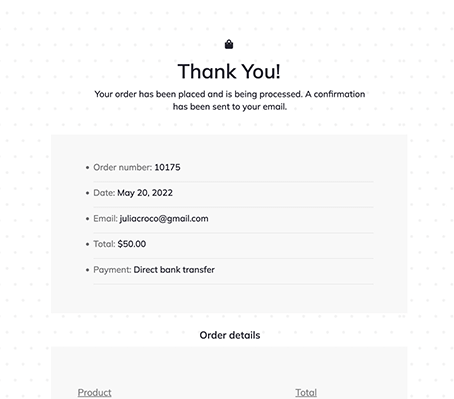
Proceed to the front end, place an order, and you will be redirected to the Thank You page with the template you created before.
How to Create a Thank You Page Template with the JetThemeCore Plugin
Create a Thank You Page Template
With the recent update of the JetThemeCore plugin, you can create page templates and assign the needed elements like body, header, and footer in a couple of clicks.
Before you move on to creating a template, navigate to the Crocoblock > JetPlugins Settings > JetWooBuilder directory and make sure that you have all Thank You Widgets enabled.
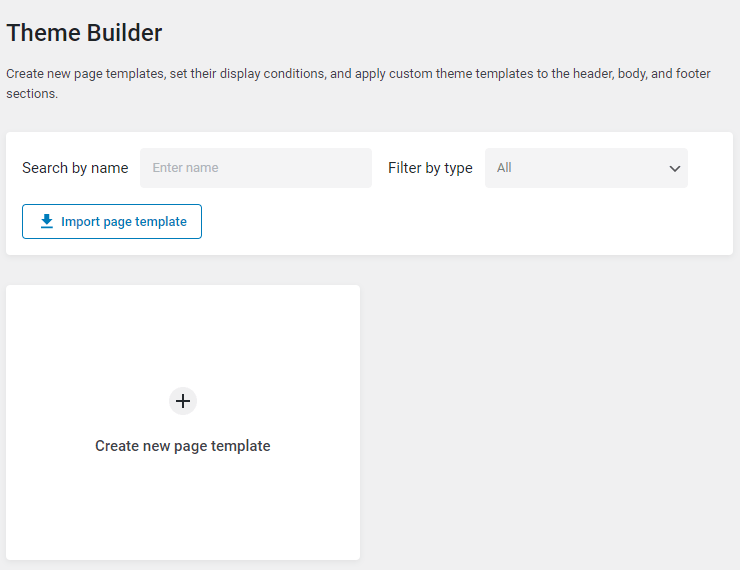
Proceed to WordPress Dashboard > Crocoblock > Theme Builder and click on “Create new page template.”
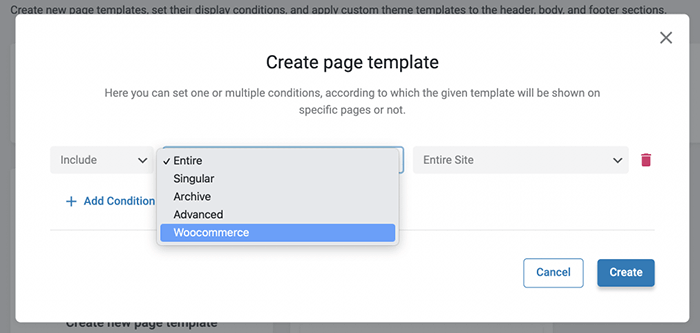
There will be a new pop-up window where you can set one or multiple conditions, according to which the given template will be either shown on specific pages or not.
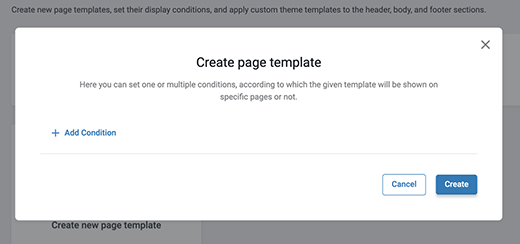
Hit the “Add Condition” button. Firstly, make sure that it’s set to “Include.”
In the following drop-down list, select “WooCommerce.”
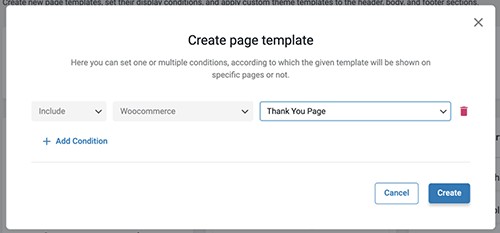
Proceed to the last drop-down menu and choose the “Thank You Page” option.
Once you hit the “Create” button, you will see a new template in the JetThemeCore dashboard. Give it a name.
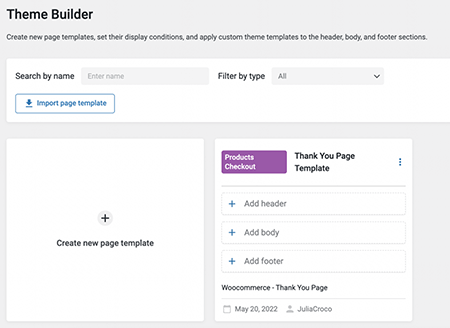
Firstly, click on the “Add body” button. Here you can create a template from scratch with the JetThemeCore plugin adding the widgets described in the first part of this tutorial.
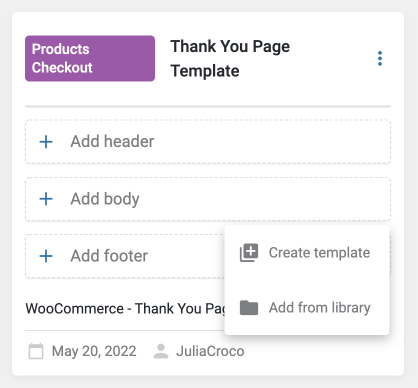
Or, you can simply click on “Add from library” and choose a template you already have, e.g., built with the JetWooBuilder plugin.
The color of the first icon under the Properties will indicate which plugin was used to create the chosen template.
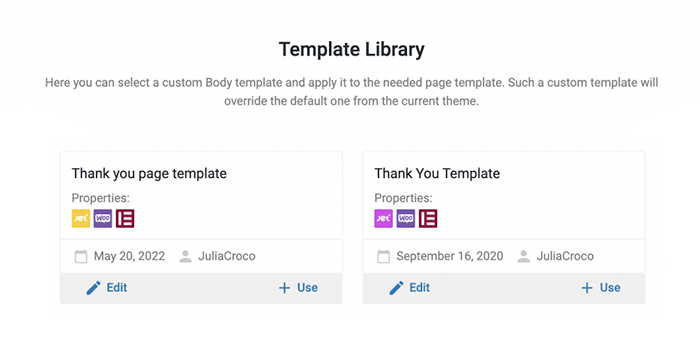
Hit the “Use” button. The template is attached to the body now.
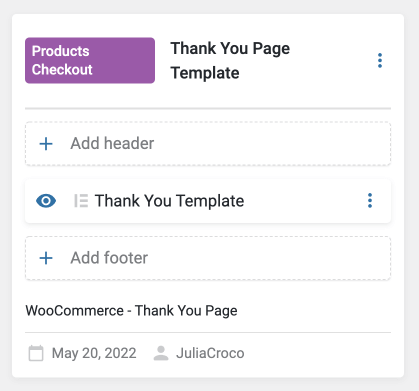
Add More Elements to the Thank You Page Template
The JetThemeCore plugin allows adding custom headers and footers to the templates right from the JetThemeCore dashboard.
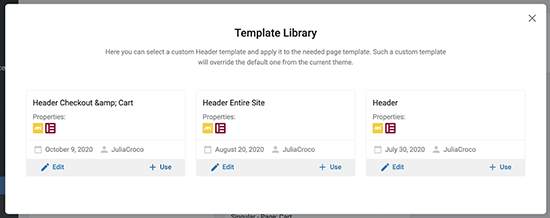
To add an element to the Thank You page template, click on the “Add header” button and create a new header or choose one from the library.
Repeat the same steps and add a custom footer if needed.
Check the JetWooBuilder Settings
Go to WooCommerce > Settings and open the JetWooBuilder tab. Scroll down to the Thank You Page section and ensure that the Custom Thank You Page checkbox is unchecked.

There is no need to choose the template in the Thank You Template drop-down menu as we have already assigned the template to the Thank You page in the Theme Builder dashboard.
Scroll the page down and click the “Save Changes” button.
Proceed to the front end and place an order. You will be redirected to the Thank You page with the template you created before.
Now you know how to create and customize a Thank You page using the JetWooBuilder and JetThemeCore plugins.