
How to Set Multiple Booking for Appointments
From this tutorial, you’ll learn how to use Multi-Booking for your appointments.
Book several appointments on different days and times with the Multi-booking option from the JetAppointment plugin. You can even book various services and providers in one form. Sounds good, doesn’t it?
Use Multi-booking on the Front-end Form
Enable the Multi-Booking option
The first thing you need to do is create an appointment. The easiest way is to do it with Wizard Setup.
Then, go to the Appointments > Settings > Working Hours and enable the Multi-Booking option. After that, you’ll see the Slot Count field.
Here you can set Min and Max slots. For example, if we select the “1” option as Min and “5” as Max, then we’ll be able to book up to 5 slots at different times and days in one form.
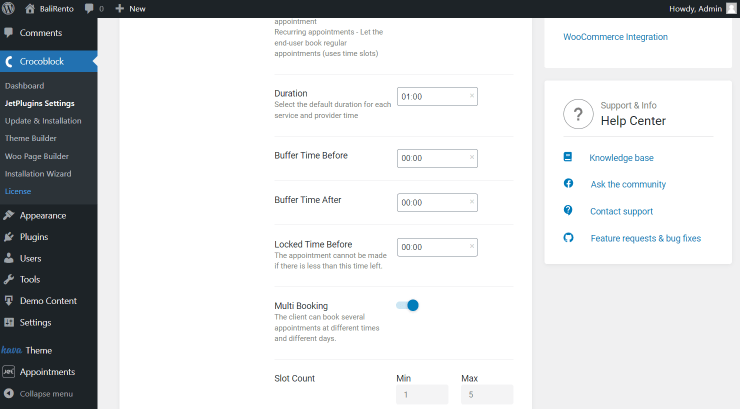
Also, pay attention to the Locked Time Before option. The appointment cannot be made if less than this time is left. For example, if we set the time to 15 minutes, and we have a slot that will start at 4:00 p.m., and the current time would be 3:45 p.m., then this slot won’t be available.
Check the form in action on the frontend
Now you need to create a form with the help of the JetEngine plugin.
After that, add the form to the needed page, and let’s check how the multi-booking option works on the front end.
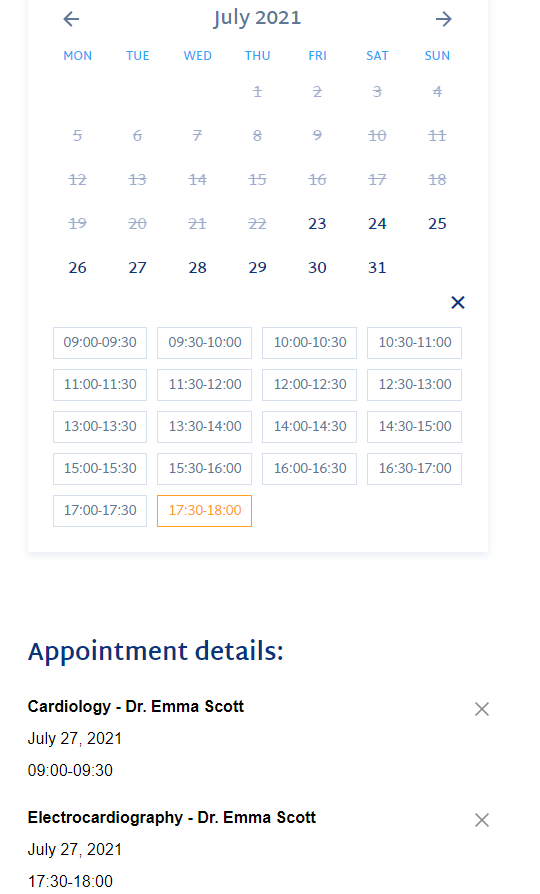
We’ve chosen the five max slots to book five different services on various days and times. For example, we can book two slots on July 27 at different times for different services.
After that, we’ll see the details of our appointment under the calendar.
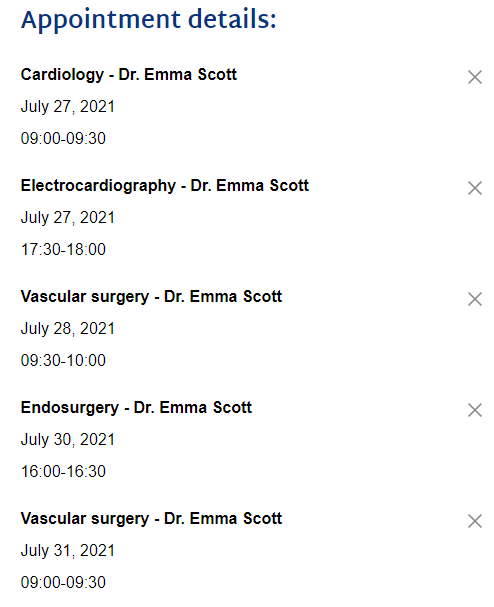
Then, we can choose other dates and book three appointments for different services.
Below we can see that all five booked appointments appeared.
Booked appointments on the backend
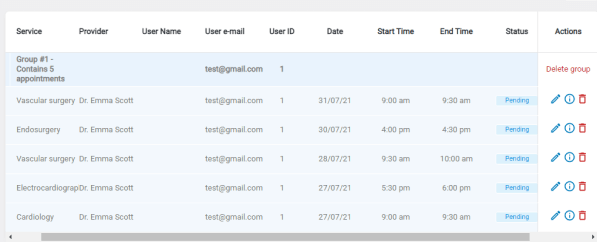
After you’ve booked an appointment, you can check it in the Appointments section in your dashboard. You’ll see that all appointments are gathered in Group#1, so it contains five appointments. There’s an opportunity to edit the appointment from the backend, delete separate appointments or the whole group.
Book Appointments from the Admin Panel
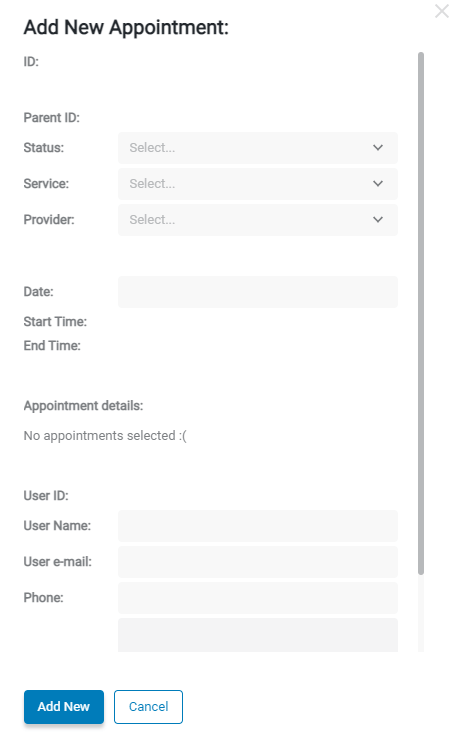
To add the appointment from the backend, you need to go to the Appointments > Add New. Here you’ll see the form where you can choose Status, Service, Provider, Date, and add other User ID details.
Now you know how to use the multi-booking option from the JetAppointment plugin.