
JetAppointment Wizard Setup
This detailed tutorial shows the step-by-step JetAppointment installation with the help of the specialized wizard.
The JetAppointment plugin is a tool that will help you build a website for the services providers. It presents to you all the functionalities letting users book the services and select a date and a time slot available in the provider’s schedule.
Find out more about its convenient wizard to make the setup process more manageable.
However, before you can start to set up the JetAppointment plugin, you have to create a Custom Post Type. In our case, we create a spa salon website; that is why the post type will be “Services.”
Create a CPT and add a few posts to it (like “Make-up,” “SPA,” “Nail design,” etc.). If you need some help, go through our CPT creation tutorial.
Besides that, if you want to add service providers, you will need a separate CPT for them. In our case, that is a “Team” post type.
Now, let’s look at setting up JetAppointment with its special wizard.
JetAppointment Installation Wizard Steps
After the plugin installation in your WordPress Dashboard, proceed to a new Appointments menu tab that appears in the navbar. Click “Go to setup” to start the basic plugin customization.
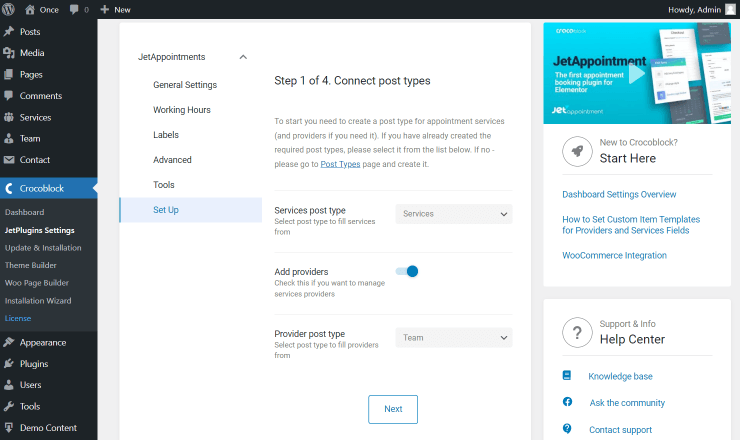
Connect Post Types
In the first step, you should select the post type with which the JetAppointment plugins will work. Choose the one you created in the Service post type drop-down menu.
If you have some service providers, turn on the Add providers toggle and select the corresponding post type in the Provider post type drop-down list.
Push the “Next” button once the fields are completed.
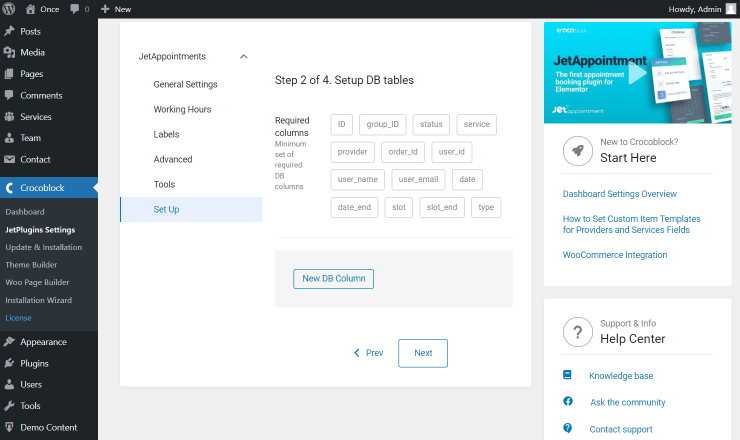
Set up Database Tables
After the appointment submission, the required columns would be created in the database to save the bookings by default. It allows you to manage your appointment forms from the back-end, check the status, and change any information about the booking.
If you need to add more fields to the booking form ‒ for example, the first and last name of the customer, phone number, comments, etc. ‒ click the “New DB Column” button and create as many new columns as you need.
Don’t forget to hit the “Next” button to proceed to the following step.
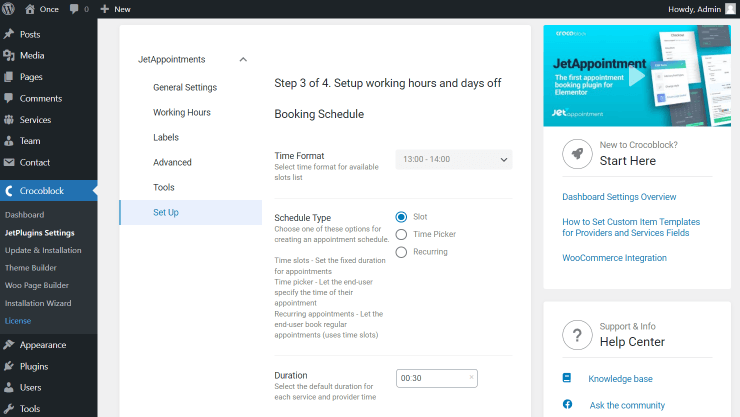
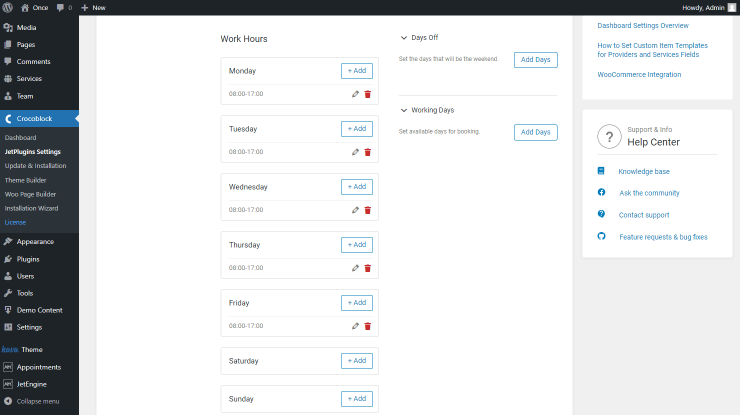
Set up Working Hours
Now you can set your availability during the week and specify the days off.
Firstly, set the Time Format. Select the preferable format and move to the Schedule Type. Here you can specify the type of the time schedule.
Define the Duration of the service. Later, you can change this time slot to more flexible or prolong it.
Other settings appear once the “Time Picker” or “Recurring” options are selected.
Complete the Buffer Time Before and Buffer Time After fields. That means you set a break time before and after the services.
You can also select the Locked Time Before time to make it impossible to book some time before the end of the working day.
Moreover, switch on the Multibooking option to allow one user to book several appointments at different times.
Then you can set working hours for each day.
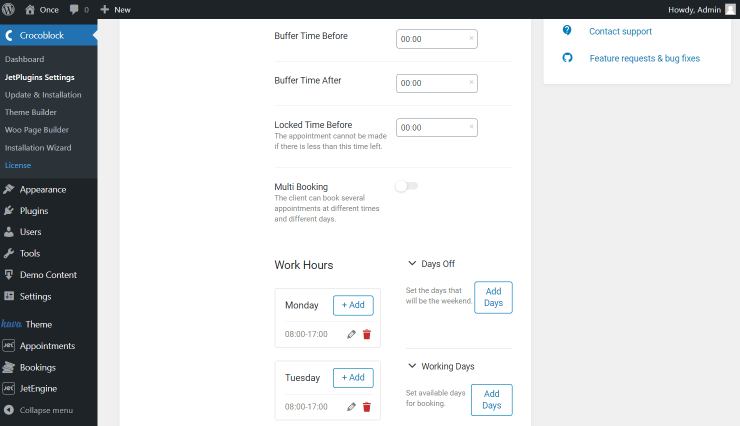
The great thing is that you can add multiple working hours for the same day. So if you have a lunch break, you can specify it here, so the customers can’t book the service on this time slot. Click the “Add” button and choose the time in the drop-down list.
If you need to add some days off, simply don’t add any working hours, and it won’t be available in your calendar.
You can also set specific dates for the day off here. Click the “Add Days” button in the Days Off block, specify the Days Label (for instance, it can be a holiday name), and pick the date or period in the drop-down calendar. You can add as many days off as you need.
To set some additional Working Days, push the “Add Days” button and repeat the same procedure as the one for the Days Off.
Additional Settings
If you want to allow the customer to pay for the service right after the appointment submission, activate WooCommerce integration. However, this time we won’t enable this option. The customization of WooCommerce integration is covered in this tutorial.
Below you can see two options for creating booking forms; just leave them toggled on. In this case, two types of forms will be created – one that could be added to any static page and another for a single service page.
The difference between these two forms is that there is no Select Service field on the single service page.
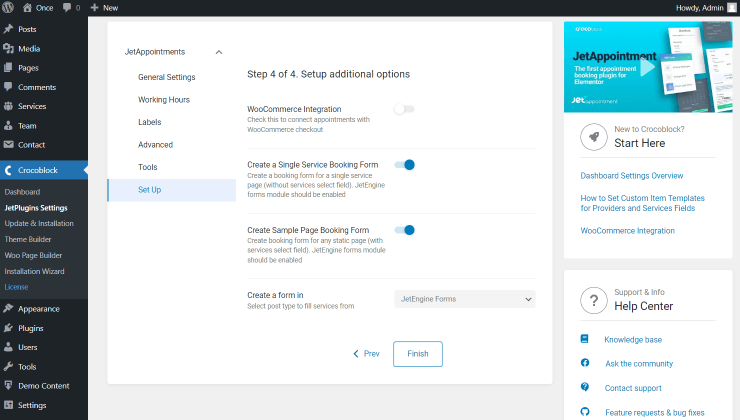
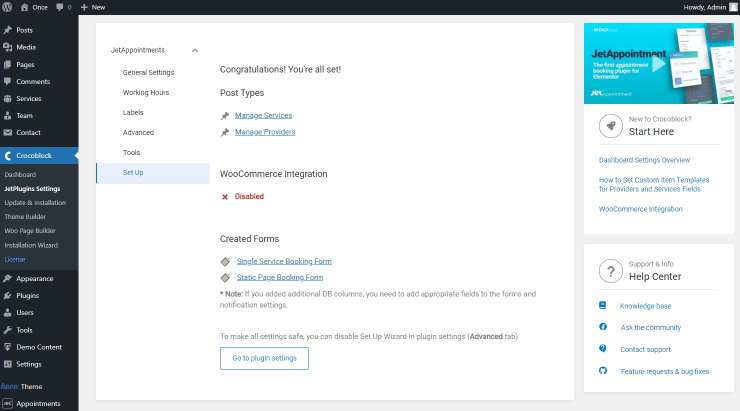
Finally, push the ”Finish” button, and you will see the success screen.
Post Relations
You don’t need to create a separate Relation in JetEngine > Relations. When you finish setting up JetAppointment, the necessary options will appear in the posts. You can simply select the needed provider for each service.
Open the post and take a look at the right-side menu. As you can see, you can select a team for every service.
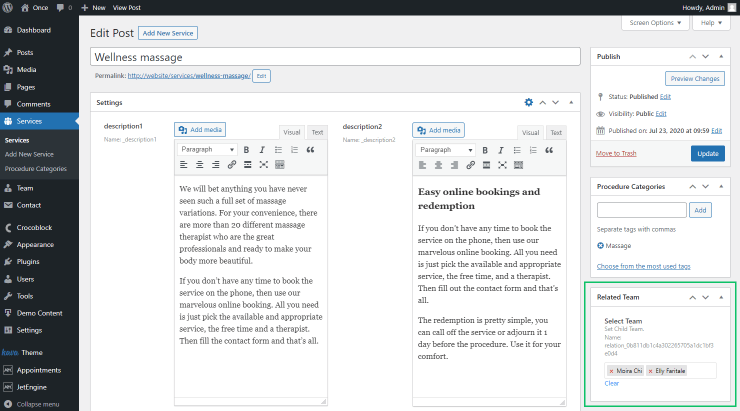
Read more about posts relations in the corresponding article.
Now you have discovered how to get started with the JetAppointment plugin and create a booking website.