How to Use Booking with WooCommerce Based Mode
Learn how to expand the WooCommerce functionality using the JetBooking plugin, i.e. to apply seasonal/weekly prices, rates, sailing dates, additional products, and range prices; to allow selecting predefined additional booking services; to calculate total price considering the input number of guests and ordered services, as well as to manage orders via the JetBooking and WooCommerce dashboards.
Before you start, check the tutorial requirements:
- Elementor (Free version) or Block Editor (Gutenberg)
- WooCommerce plugin installed and activated
- JetBooking plugin installed and activated
Set the JetBooking Settings
Select the Booking mode
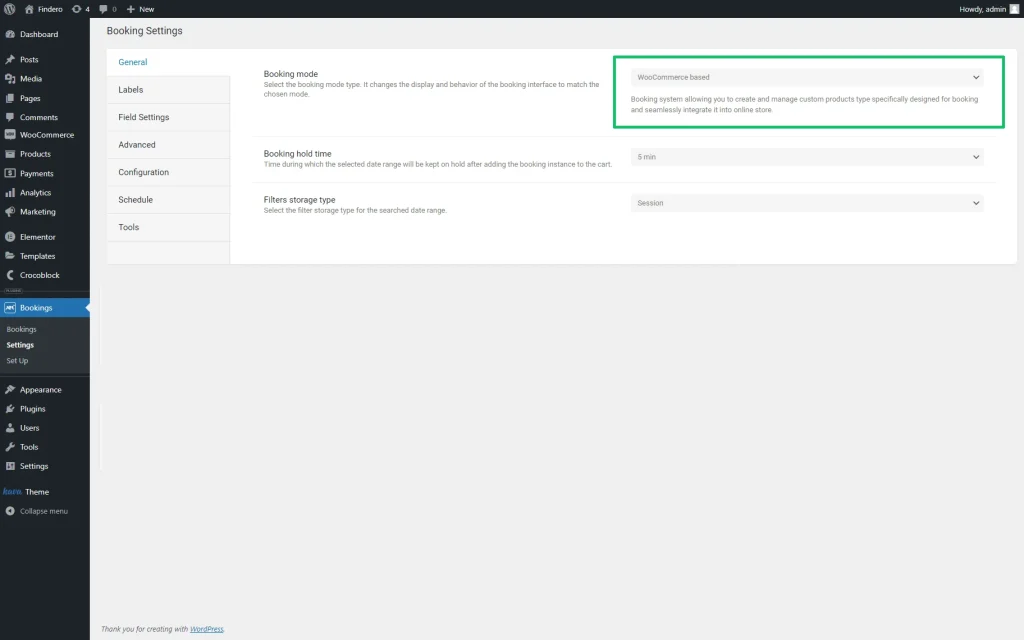
Navigate to WordPress Dashboard > Bookings > Settings. Unroll the Booking mode drop-down menu of the General tab and select the “WooCommerce based” option.
Additionally, the mode allows you to avoid building a booking form in the JetBooking backend dashboard. It disables the Check-in/check-out dates field block in the forms. Instead, it uses WooCommerce “Products” as a default CPT for booking instances and embeds a calendar for picking dates directly into the add-to-cart form on the Product’s single page. Then, after placing an order on the checkout page and making a payment, a new booking will be added to the booking list in the WordPress Dashboard > Bookings tab after completing the checkout.
Adjust the Settings Common for All Products
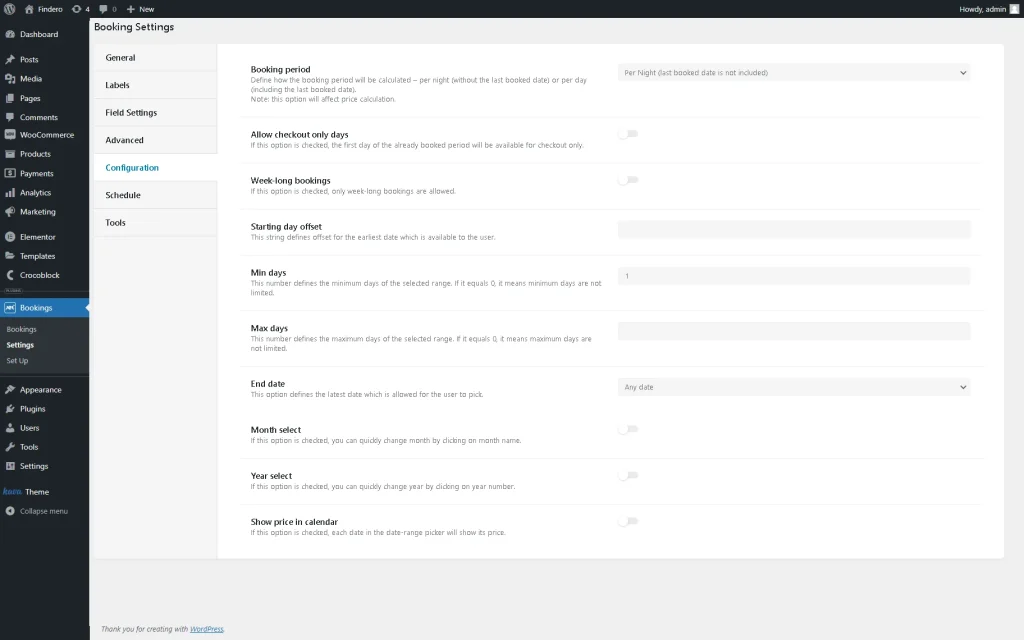
To specify the settings common for all Products, unroll the needed Booking Settings (i.e., the Configuration or Schedule tab). In the given case, we unrolled the Configuration tab, picked the “Per Night (last booking day is not included)” Booking Period, and set the Min days and “Any day” End date.
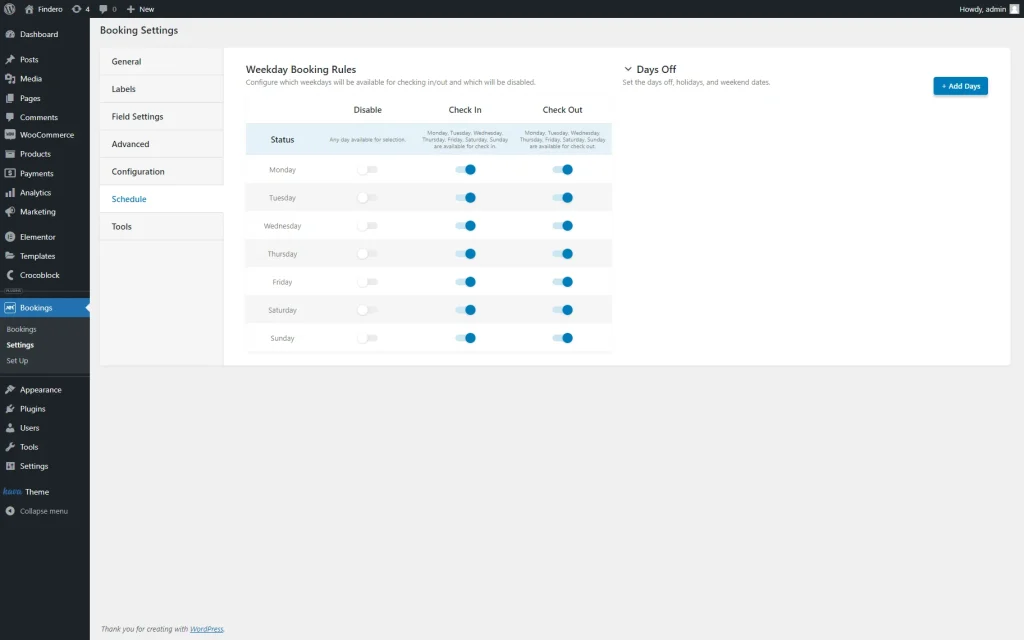
Then, we configured available check-in and check-out weekdays in the Schedule tab.
Set the Additional Services Attributes
Create attributes and terms
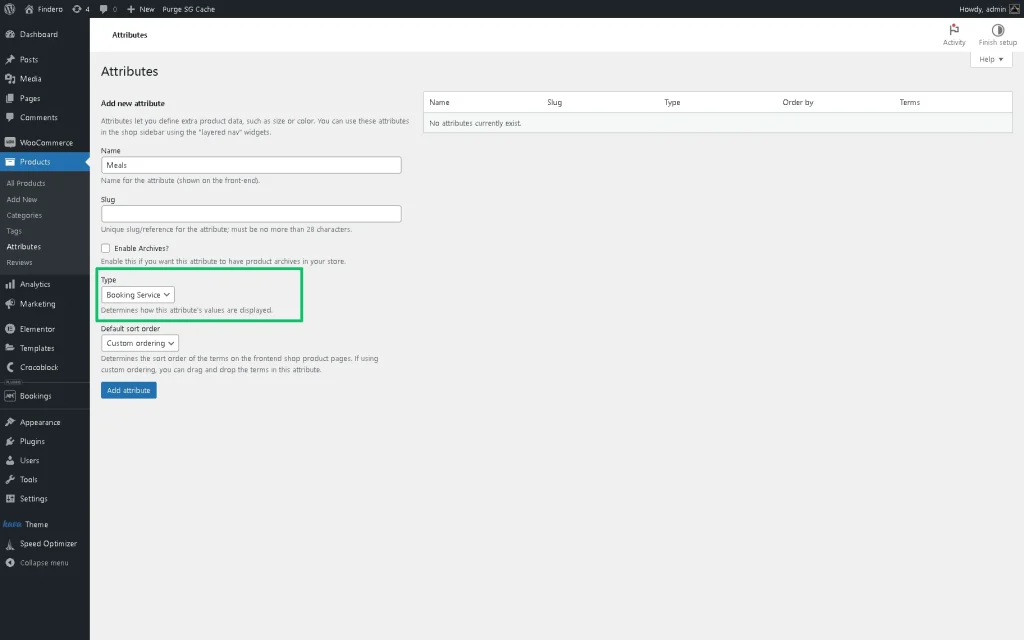
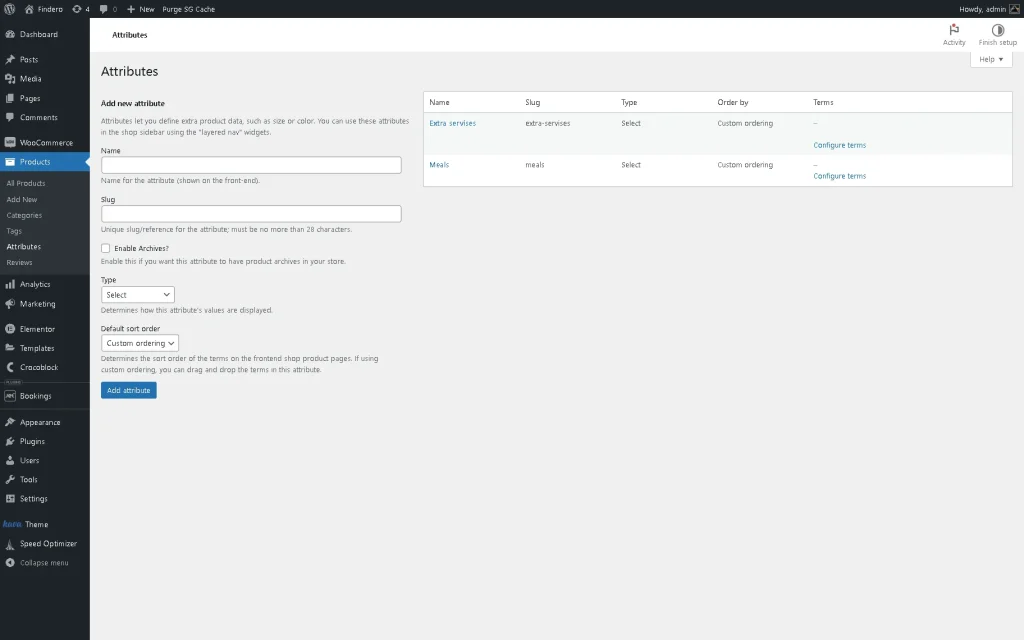
Navigate to the WordPress Dashboard > Products > Attributes page. On this page, fill in the Name field and/or the Slug field (if you omit the Slug field, it will be filled in automatically) and select the “Booking Service” option in the Type drop-down. After that, press the “Add attribute” button.
In this case, we created the “Meals” and “Extra services” attributes.
After pressing the “Add attribute” button, the new attribute will appear in the list.
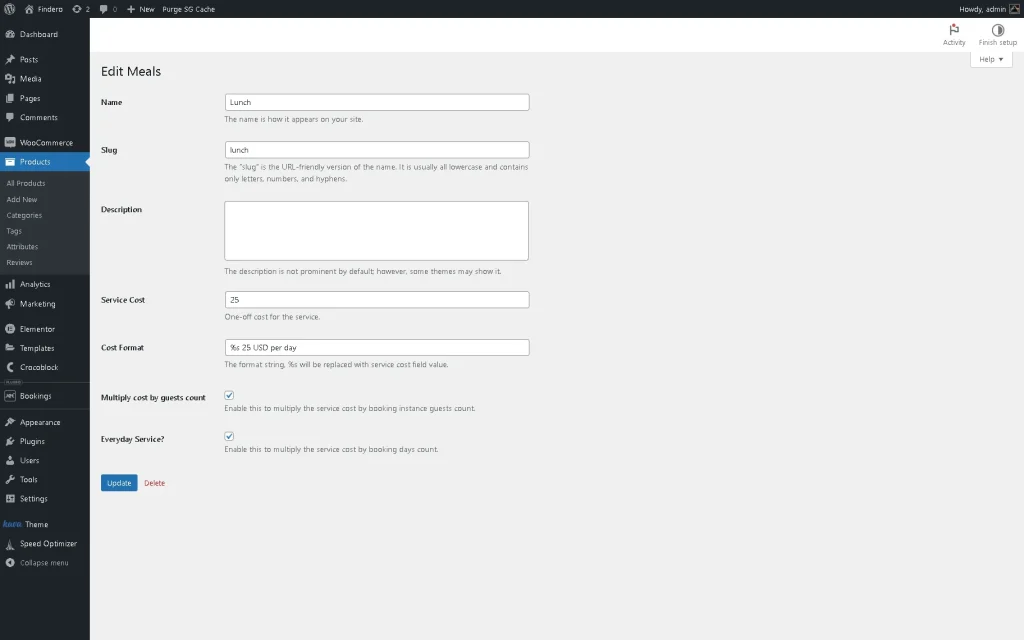
Click the “Configure terms” link on the right near the corresponding attribute, and then you will be redirected to the Edit attribute page. Here, type the Name of a new term, and the Slug field will be filled out automatically. Also, if needed, add the Description.
Next, move to the Service Cost field and insert the value that will be used in further calculations. If required, type the text in the Cost Format field that will be displayed on the front end near the corresponding item. Then, tick the Multiply cost by guests count toggle to multiply the attribute price by the number of guests and tick the Everyday service? toggle for the daily scheduled services. In the last step, press the “Update” button.
In this case, we created the “Breakfast,” “Lunch,” and “Dinner” terms for the “Meals” attribute and the following terms for the “Extra services” attribute: “SPA/Hammam/Massage,” “Transfer in/from station,” “Children’s play kit,” and “Pet-friendly services.” Also, we added the corresponding values in the Service Cost and Cost Format text fields for all terms and ticked the Multiply cost by guests count toggle for terms. The only exception was the activation of the Everyday service? toggle for the terms of the “Meals” attribute.
In particular, for the “Lunch” term of the “Meals” attribute, we typed its Name (Lunch), and the Slug field was filled automatically; then, we filled out the Service Cost field (the “25” text), inserted the text in Cost Format field (%s per day). In this case, the “%s” text will be replaced with the value from the Service Cost field, and the “per day” text will be added after this value. Then, we ticked the Multiply cost by guests count and Everyday service? toggles.
After completing these fields, we saved the changes.
Read the How to create Additional Services Attributes tutorial to learn more about customization of the attributes and terms.
Configure the Attribute settings of the product
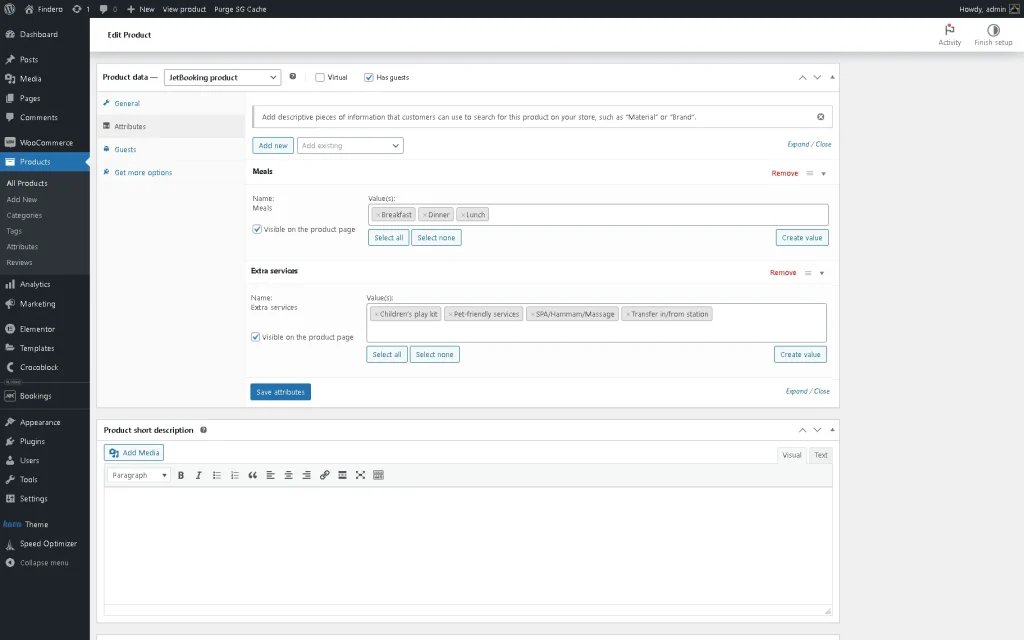
Once completed editing terms, navigate to the WordPress Dashboard > Products > All Products tab, unroll the needed product from the list, and continue editing the product. Scroll down the Edit Product page to the Attributes section. Here, choose the needed Attribute from the Add existing drop-down list, and then you can press the “Select all” button under the Value(s) field.
In this case, we first chose the “Meals” attribute and added the “Breakfast,” “Lunch,” and “Dinner” terms. In this way, we added all pre-created attributes and the corresponding terms.
After that, press the “Save attributes” button.
Finally, after inserting all needed attributes and the corresponding terms, scroll the page up and click the “Update” button.
Create a Product
To create a new product, move the WordPress Dashboard > Products > Add New path or click the “Create the first product” link below the Booking mode drop-down menu if you are in the WordPress Dashboard > Bookings > Settings > General tab.
Then, you will be directed to the Products > Add New page.
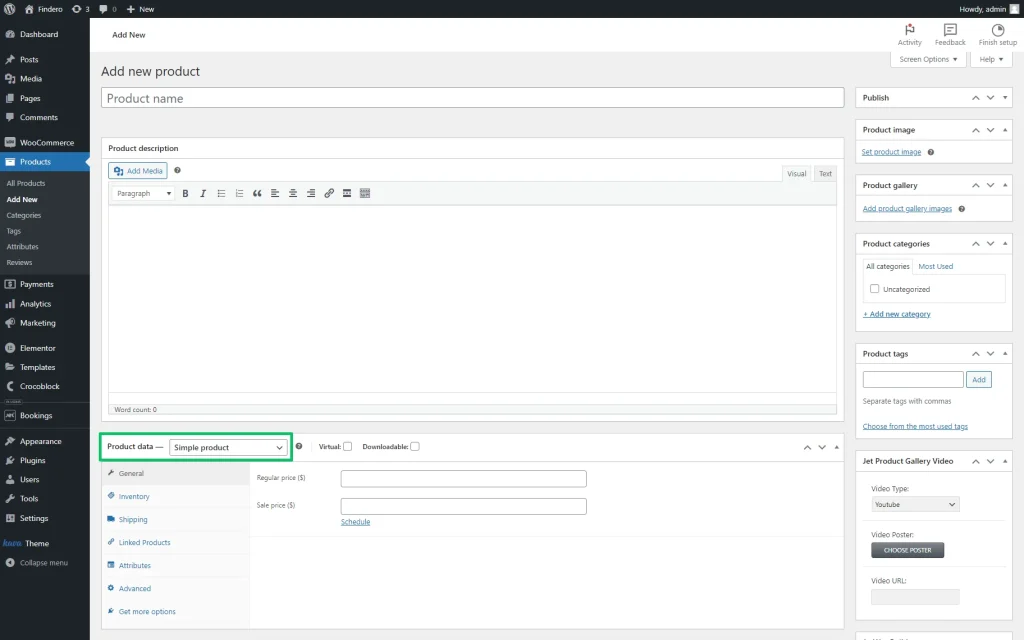
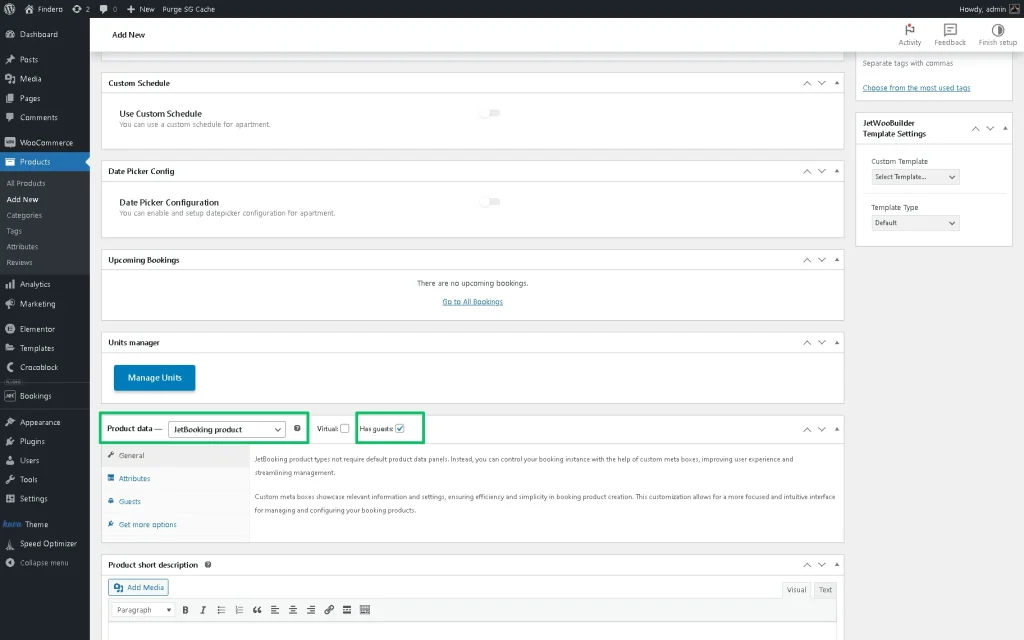
The Add new product page has the “Simple product” type by default, which is set in the Product data drop-down list.
To benefit from the “WooCommerce based” mode functionality, select the “JetBooking” Product data. Once chosen, this option activates the booking meta fields, such as Pricing Settings (i.e., rates, seasonal/weekly prices), Custom Schedule, etc. These settings are globally configured on the booking settings page (WordPress Dashboard > Booking > Settings tab), but the settings configured here are a priority.
Also, after choosing the “JetBooking” Product data option, you can tick the newly-appeared Has guests checkbox field.
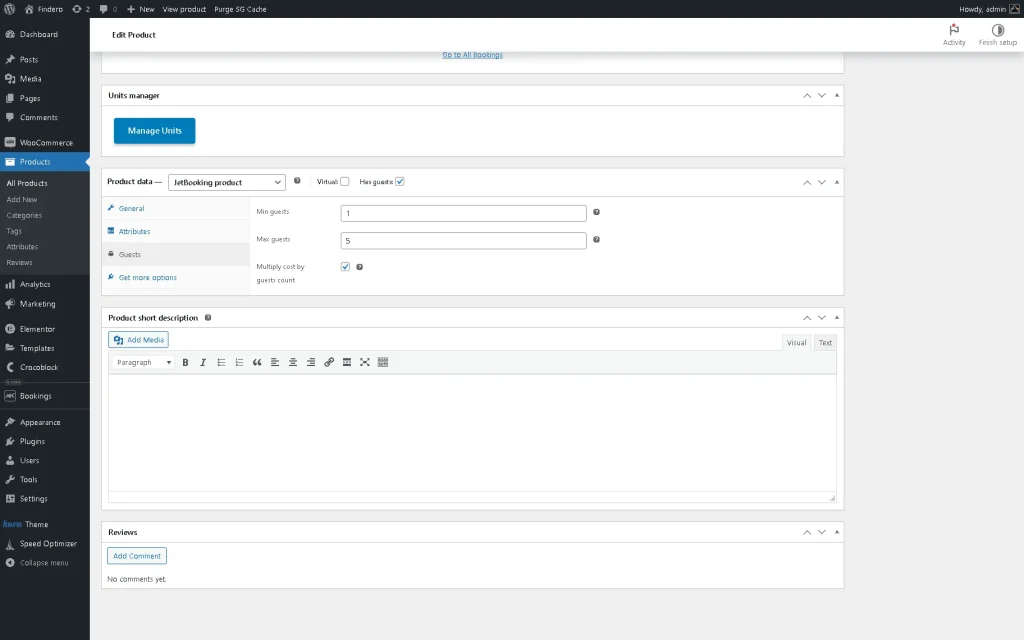
Then, the Guests tab will appear under the Attributes tab. Unroll this tab and type the minimum number and maximum number of guests allowed in the Min guests and Max guests fields. In the last step, you can tick the Multiply cost by guest count checkbox to calculate the total cost for all guests.
In this tutorial, we ranged the minimum and maximum guest numbers from “1” to “5” and ticked the Multiply cost by guest count checkbox.
Fill in the Product Meta Fields
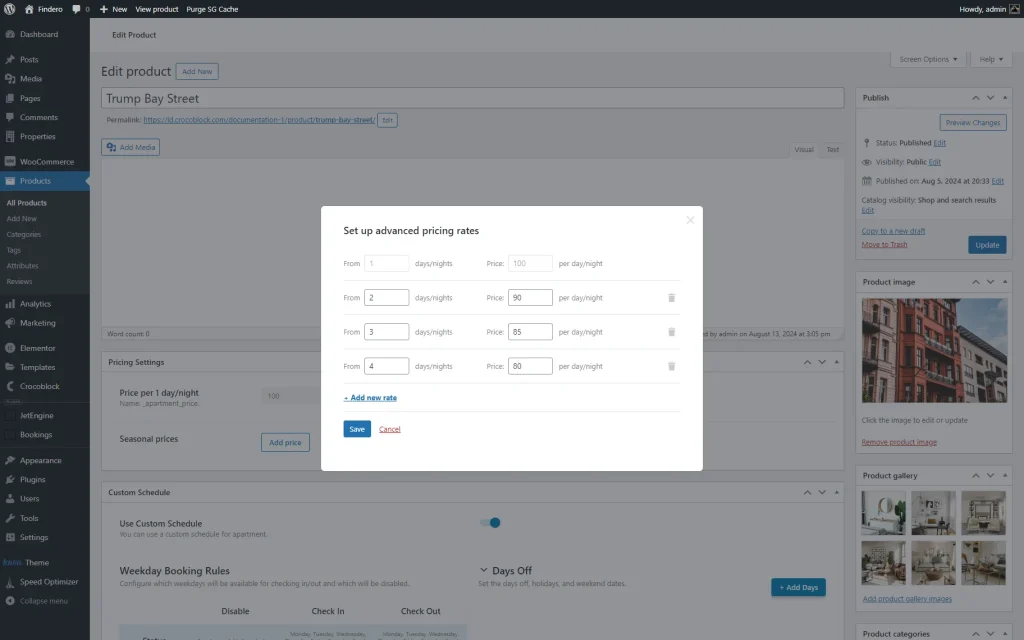
Fill in the needed meta fields. First, we added the product’s name and filled in the Product description, Product Image, etc. Then, we moved to the Pricing Settings block and pressed the “Add rates” button. In the newly-appeared Set up advanced pricing rates pop-up, we specified the needed values in the From and Price fields. When completed, we clicked the “Save” button.
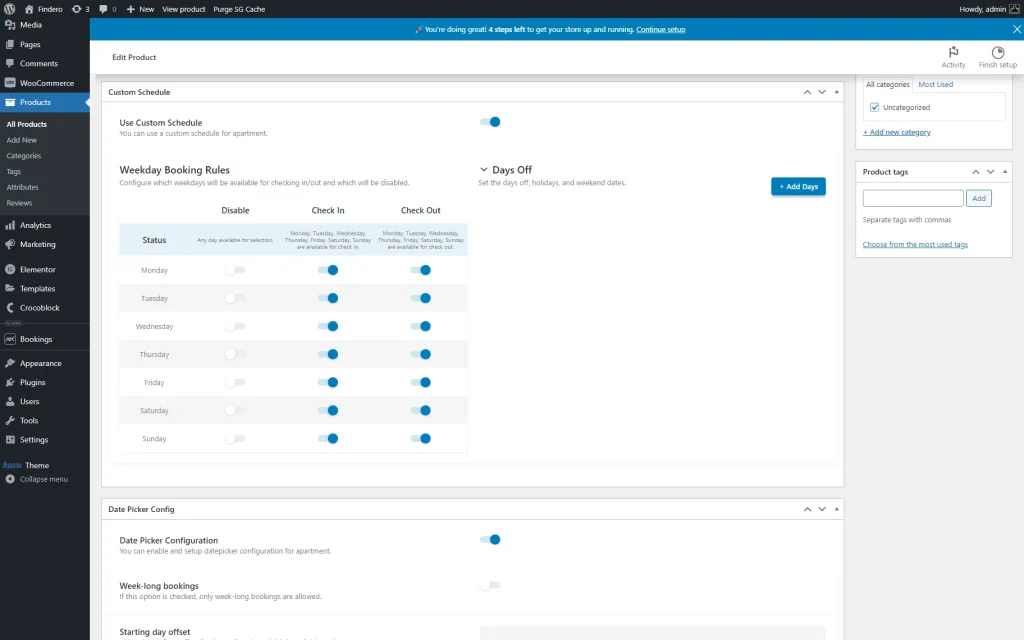
Next, to set specific options for this product that differ from common settings for all products, move to the Custom Schedule block (activate the Use Custom Schedule toggle to select required options) and the Date Picker Config block (enable the Date Picker Configuration toggle).
Once completed, press the “Publish/Update” button.
Add a JetWooBuilder Template
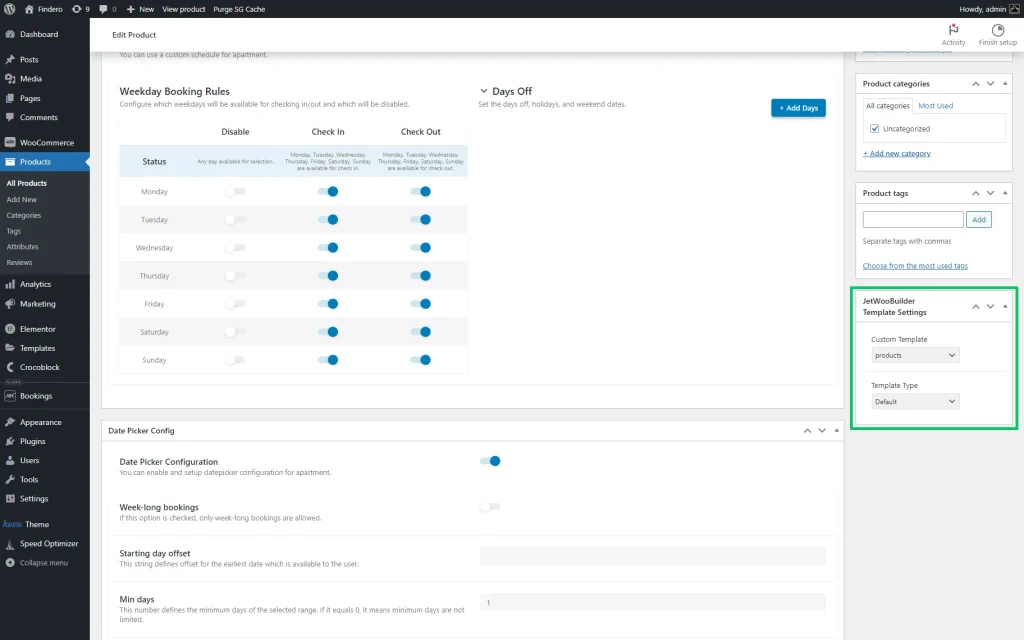
To provide better usability, we recommend setting the JetWooBuilder Single template to display products. To do this, we moved to the JetWooBuilder Template Settings block and selected a Custom Template.
For an in-depth understanding of how to create a template using the JetWooBuilder and JetThemeCore plugins, activate the needed widgets, and manage their settings, read the How to Create a Single Product Page Template tutorial.
Once completed, navigate to the top of the page and press the “Publish/Update” button.
Check the Result
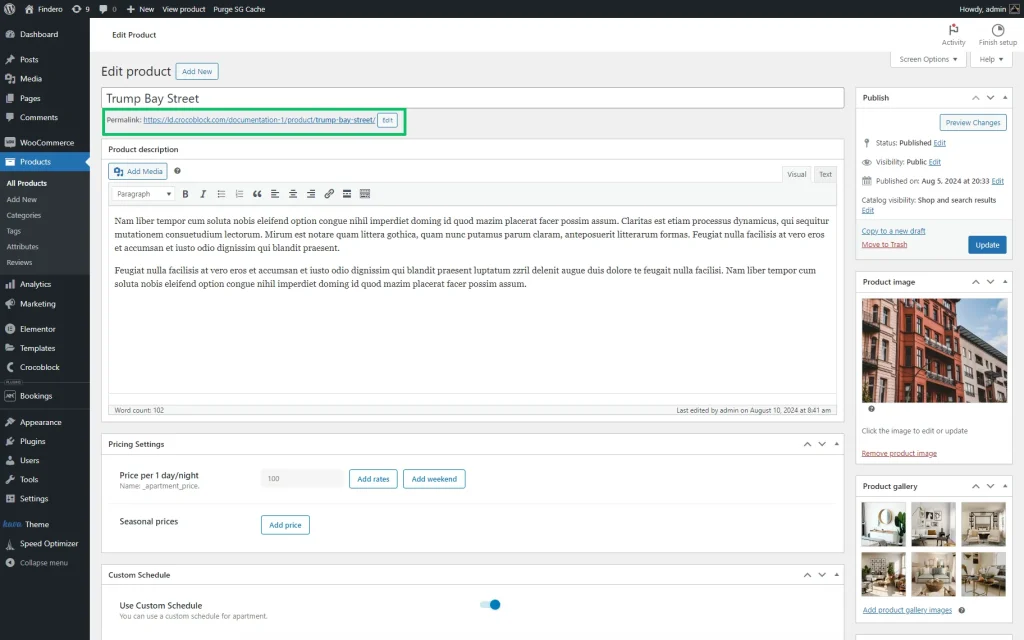
Press the permalink of the product to redirect it to the product page.
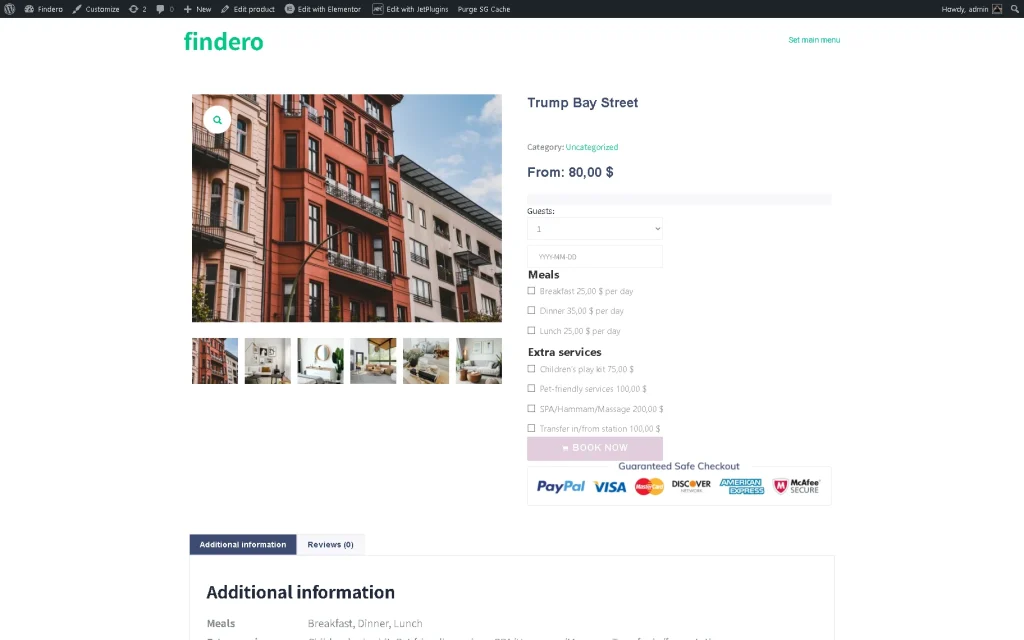
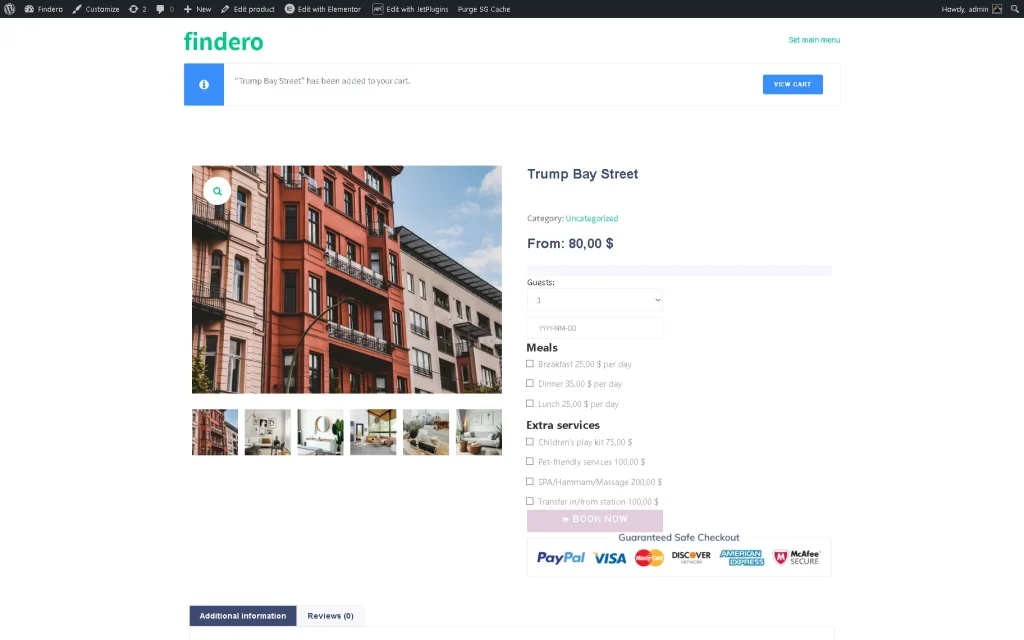
The front-end view of the product page displays the native fields of the WooCommerce Product page. The Price range specified in the product settings will be shown as the minimal pricing rate (with the “From” text). Thus, the price is displayed dynamically. Also, this page shows the added attributes and the corresponding terms as checkboxes.
If you use the JetWooBuilder plugin, the price range will be displayed via the Single Price widget, as well as the Single Add to Cart widget will show the selected Attributes and Terms as checkboxes.
After selecting the booking dates and pressing the “Book Now” button, the product will be added to the cart and will be available for the time set in the Booking hold time drop-down menu of JetBooking’s General settings.
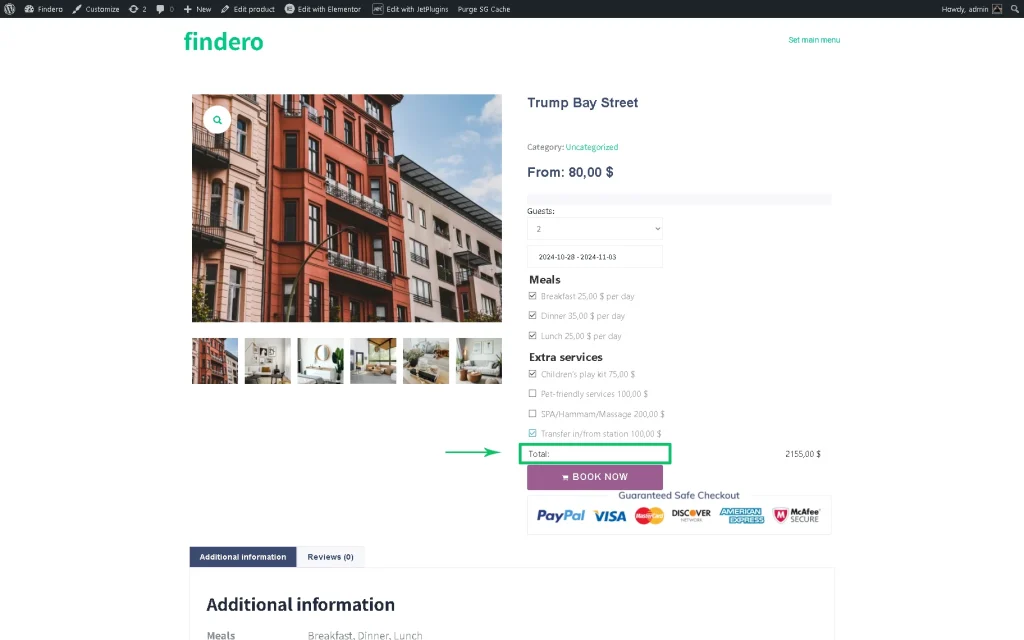
After selecting the needed number of guests, booking dates, and additional services, the total price will be calculated and returned.
Then, press the “BOOK NOW” button to add the product to the cart for further proceeding with the order.
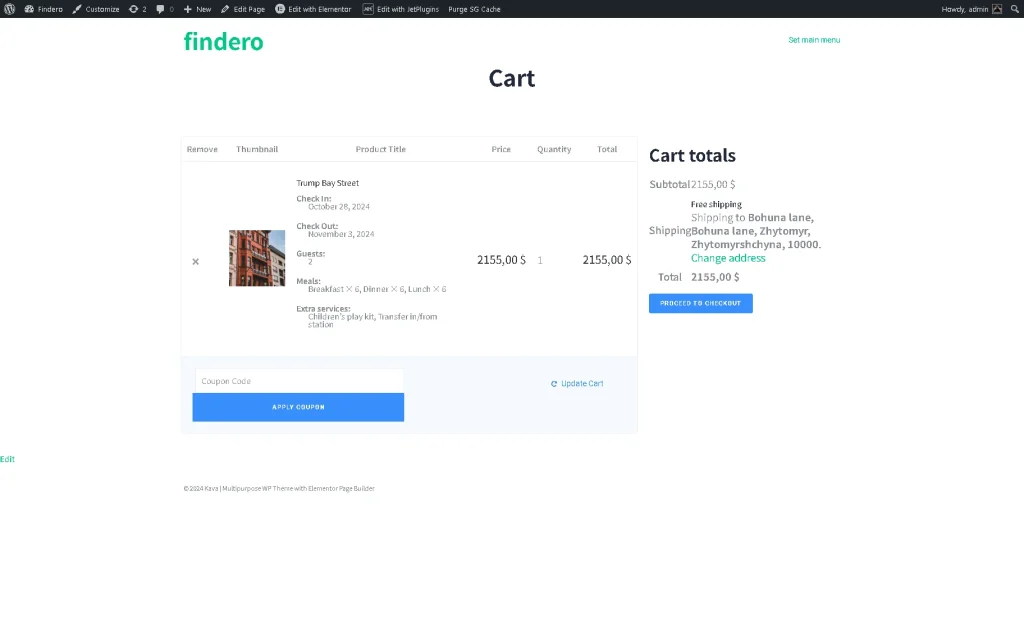
In this case, we used the pre-built Crocoblock’s dynamic template, which allows users to be redirected to the cart. Therefore, we clicked the newly-appeared “VIEW CART” button.
In this case, the Cart page displays the product title, check in and check out dates, selected number of guests, everyday services with the multiplication sign on the number of days, selected other services, and the calculated total price.
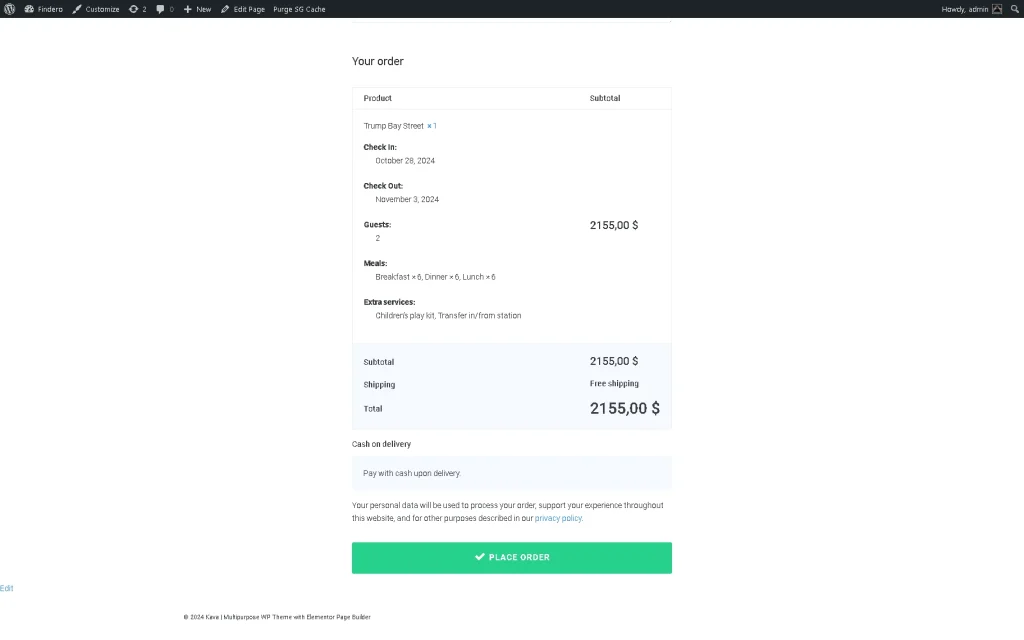
To place the order, press the “PROCEED TO CHECKOUT” button. Scroll down the page and, finally, press the “PLACE ORDER” button.
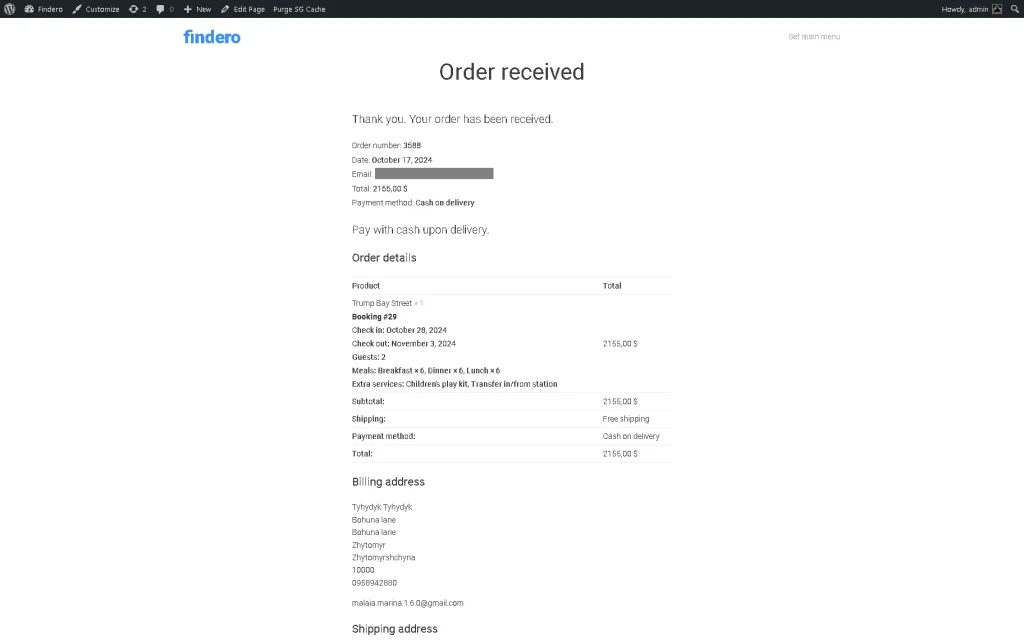
Since the order was received correctly, a Thank You page appeared.
Manage Bookings and Orders via Dashboard
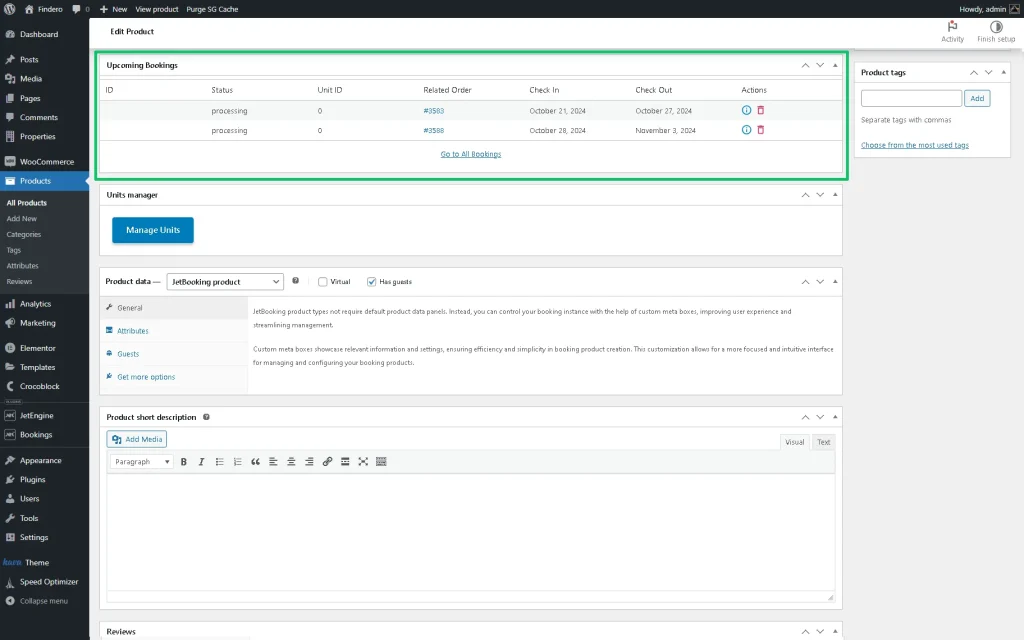
The “WooCommerce based” Booking mode allows booking orders to be collected in JetBooking’s Bookings and WooCommerce Orders tabs and filled in the Upcoming Bookings section of the specific product.
Manage bookings via the JetBooking dashboard
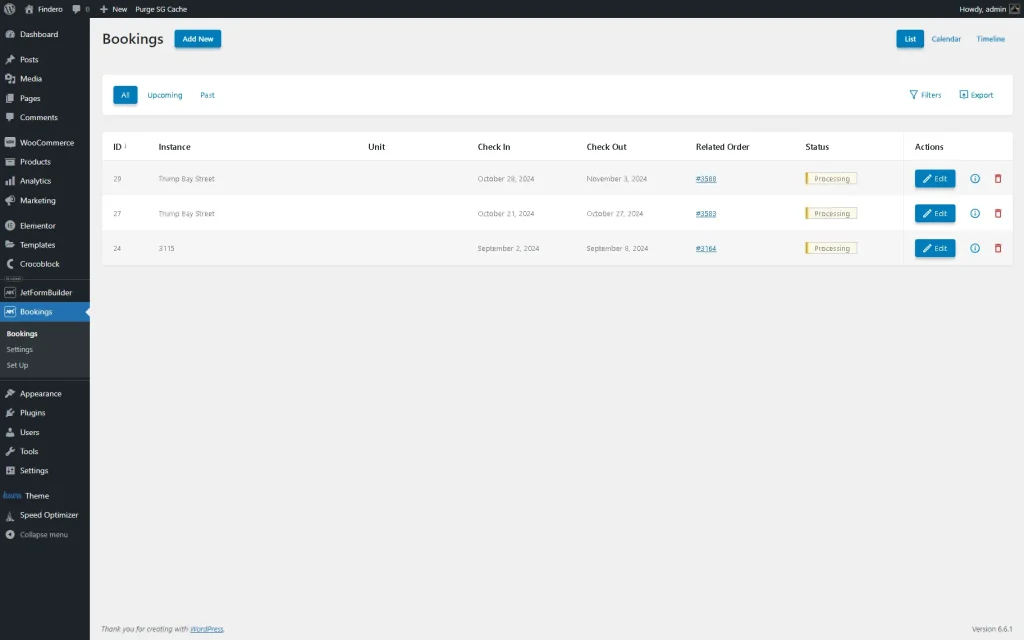
Navigate to the WordPress Dashboard > Bookings > Bookings path. The Bookings tab displays all orders.
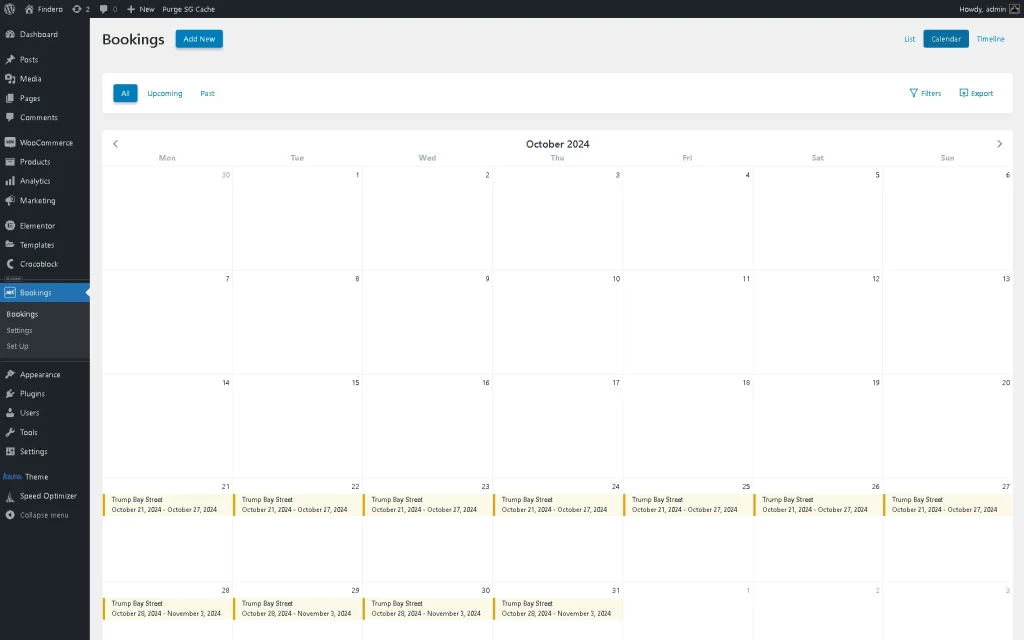
Also, you can observe the ordered booking instance in the calendar or timeline form by pressing the “Calendar” or “Timeline” button in the top right corner of the page.
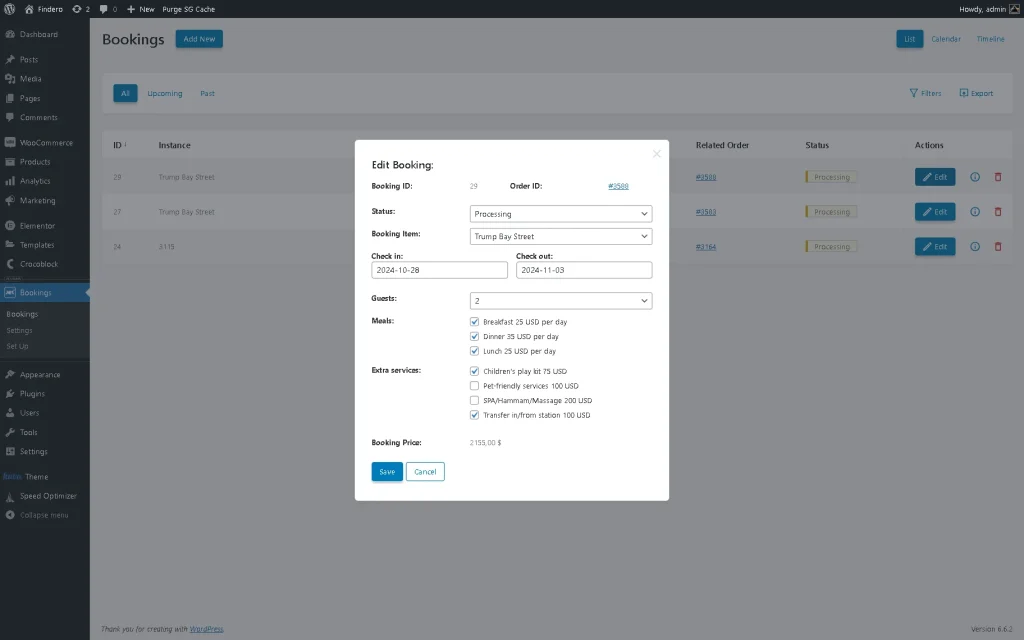
If you need to edit the booking record via the Booking dashboard (i.e., to change its status), press the “Edit” button. The pop-up allows changing the Status, Booking Item, Check In, and Check Out dates, choosing the Guests, or selecting the Booking Services.
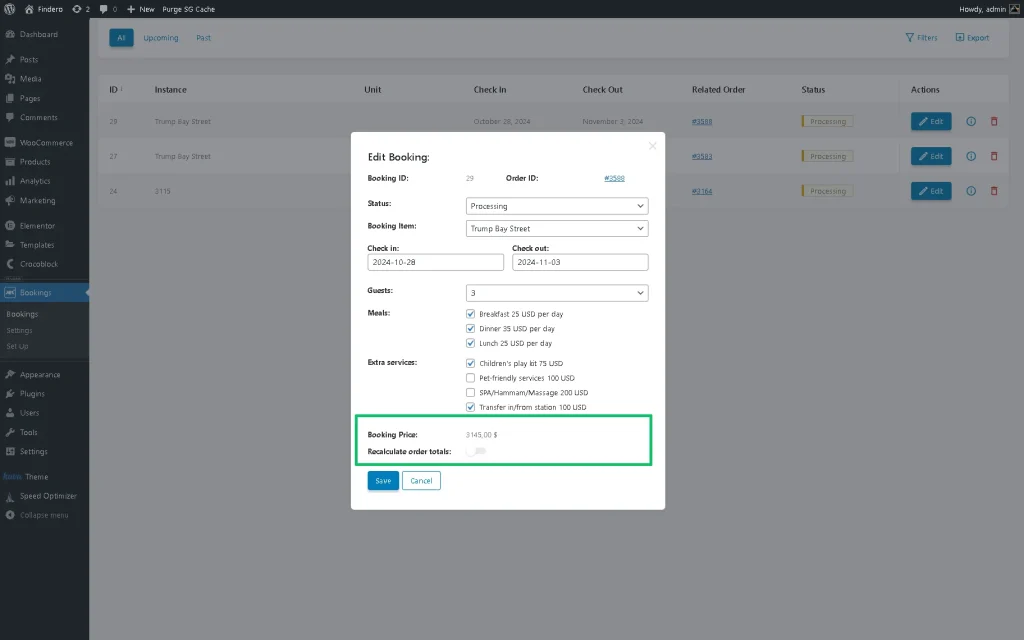
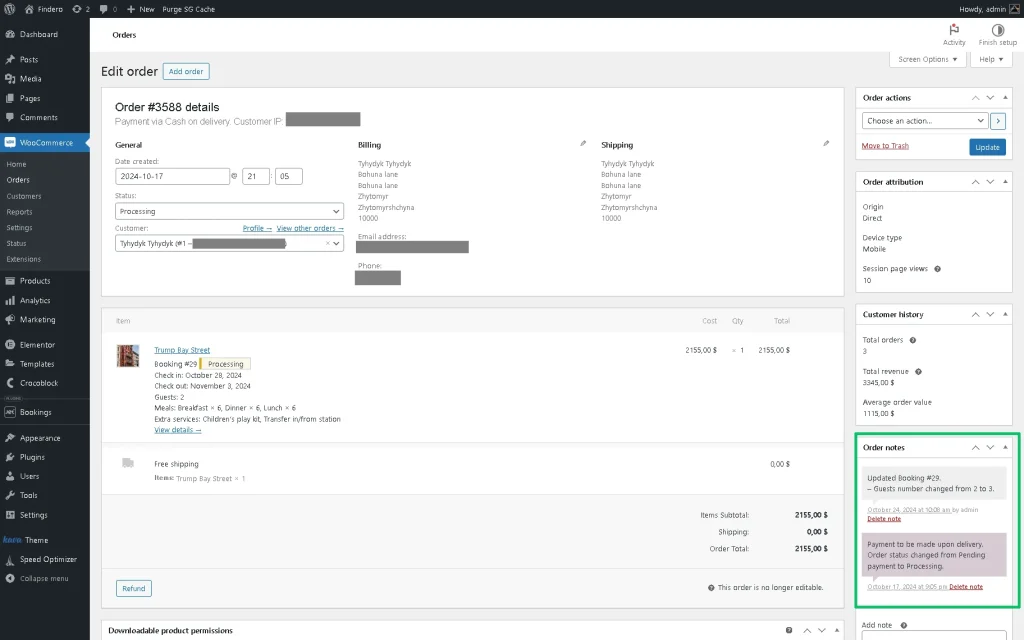
In this pop-up, you can correct the needed data. In this tutorial, we changed the number of guests from two to three. Also, the total price will be recalculated. To save the changes, press the “Save” button.
Additionally, you can press the number of the order in the Edit Booking pop-up or in the Related Order column of the booking list to be redirected to the appropriate WooCommerce order.
Manage booking orders via the WooCommerce dashboard
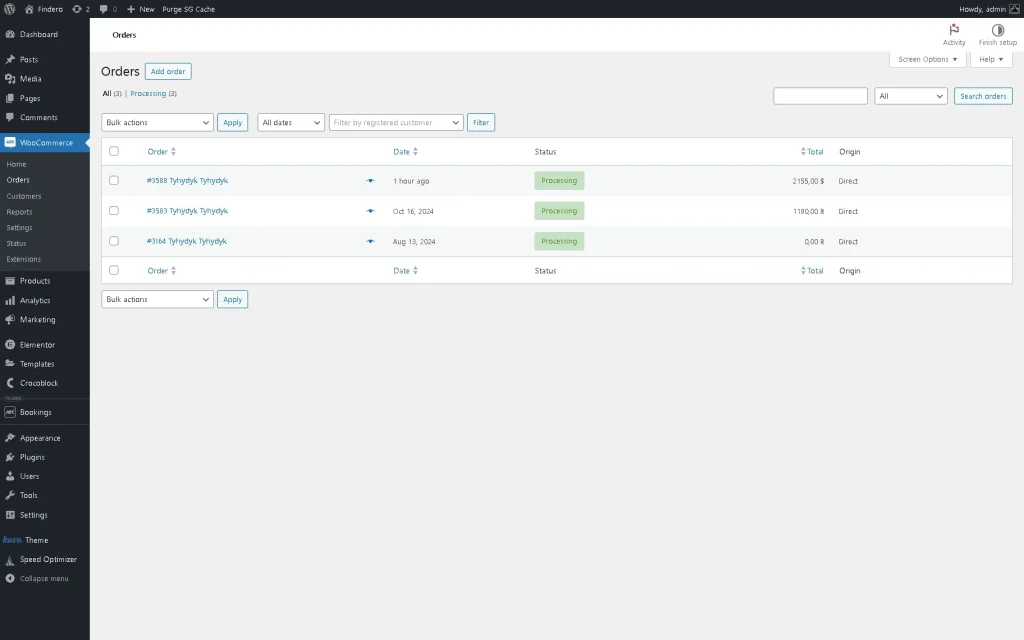
Unroll to the WordPress Dashboard > WooCommerce > Orders tab. This tab also displays the orders.
Select an order to see its details or take order actions.
Manage the product’s Upcoming Bookings section
After setting the booking order, the order will be added to the Upcoming Bookings section of the booked product.
That’s all about implementing the WooCommerce functionality with the JetBooking plugin for your WordPress website.
