How to Import and Export Data with WP Ultimate CSV Importer Pro
Follow this guide to learn how to use the WP Ultimate CSV Importer plugin to export and import JetEngine data from a CSV file to WordPress.
Before you start, check the tutorial requirements:
- WP Ultimate CSV Importer Pro plugin installed and activated
- JetEngine plugin installed and activated
Although the JetEngine plugin provides an inbuilt tool for imports and exports (Skins Manager), this guide explores an alternative — the WP Ultimate CSV Importer Pro plugin. It is a premium third-party plugin from Smackcoders that can read various file formats, including CSV, XML, TXT, and ZIP. By supporting JetEngine, this plugin lets you import, update, and export data from Custom Post Types, custom fields, Custom Content Types, custom taxonomies, and relations. Let’s find out how it works.
WP Ultimate CSV Importer Pro Overview
Once the WP Ultimate CSV Importer Pro plugin is installed and activated, its name will appear in the WordPress admin panel. Click its tab to open the plugin’s dashboard.

The Ultimate CSV Importer PRO plugin has seven sections. They are as follows:
- Dashboard — this module allows viewing Importers Activity details and Import Statistics.
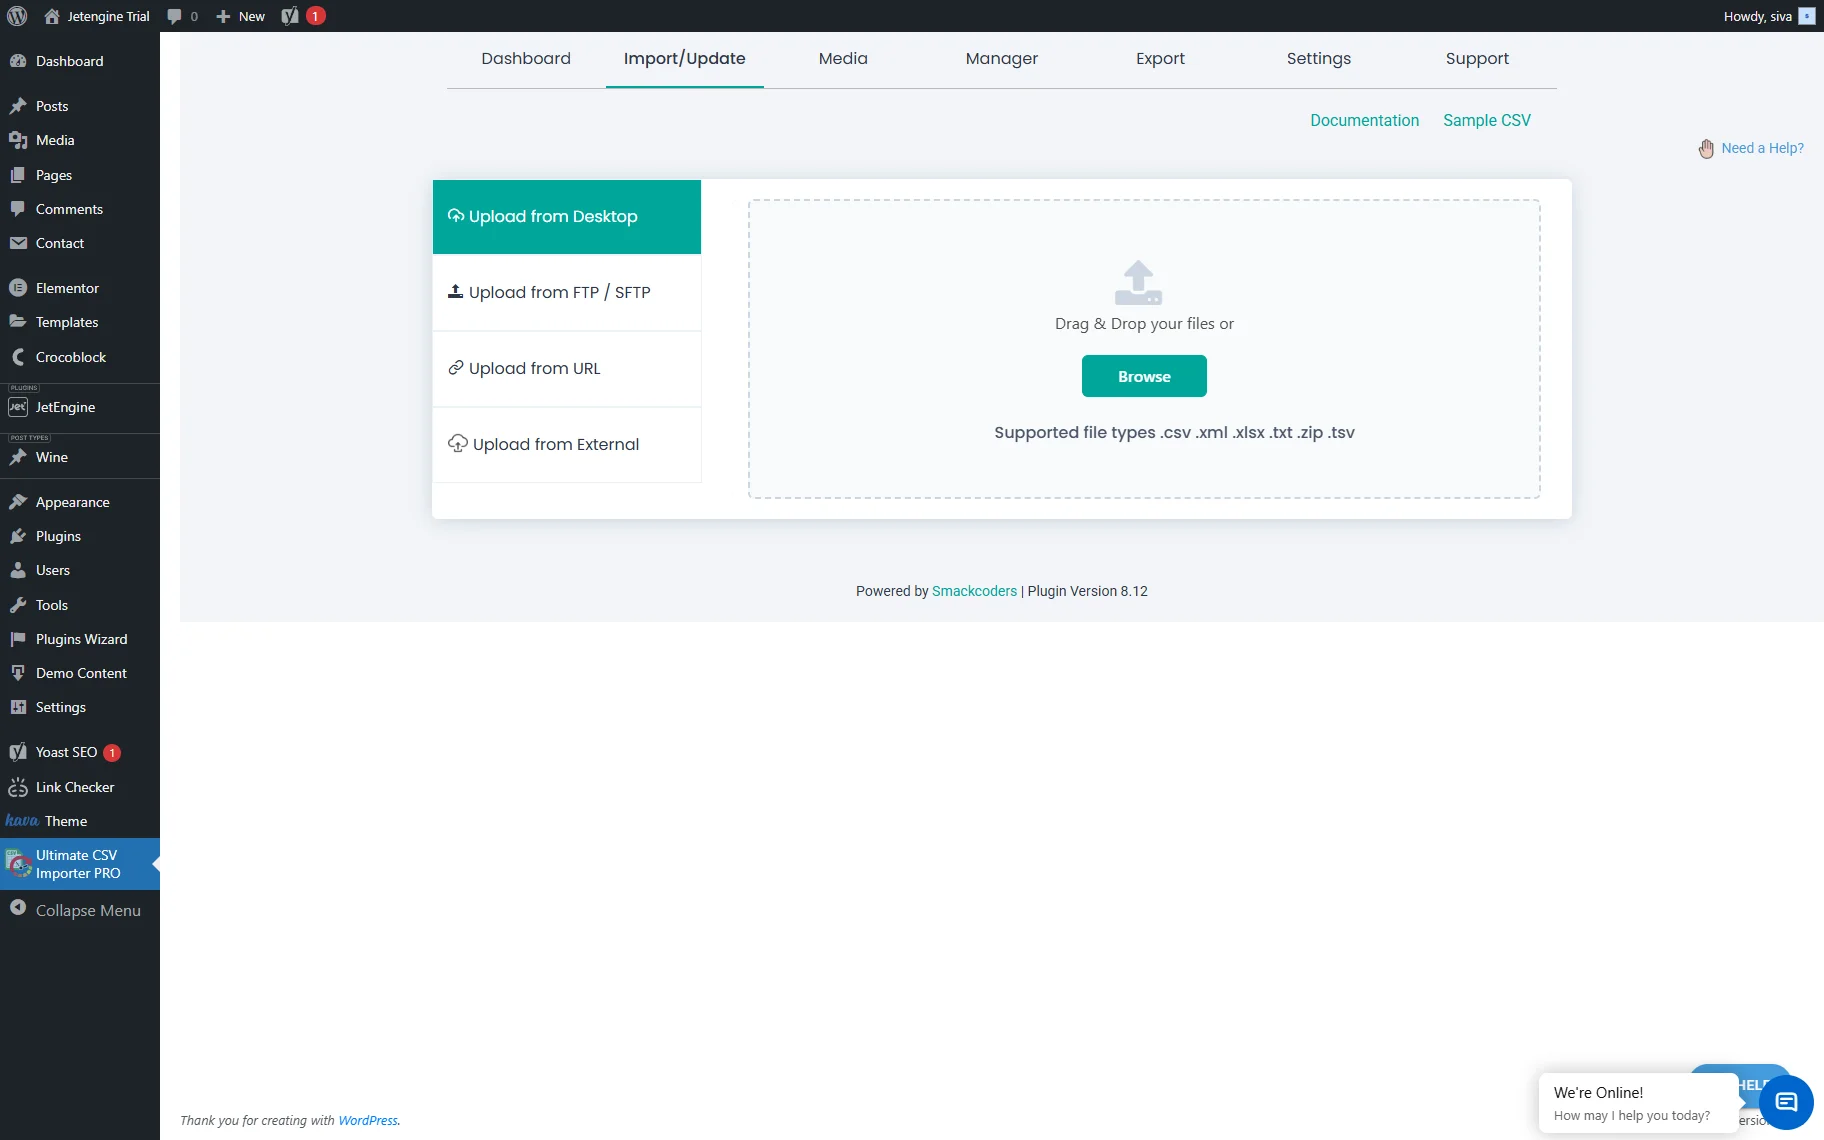
- Import/Update — here, one can upload data files in one of the supported formats: CSV, TXT, XML, XLSX, TSV, or ZIP. The data import functionality can be carried out through the following methods:
- Upload from Desktop — one can browse the needed file or drag-and-drop it to the content area;
- Upload from FTP / SFTP — one can obtain the data file from the hosting provider;
- Upload from URL — one can upload files straight from external URLs;
- Upload from External — one can upload data from Dropbox or Google Sheets.
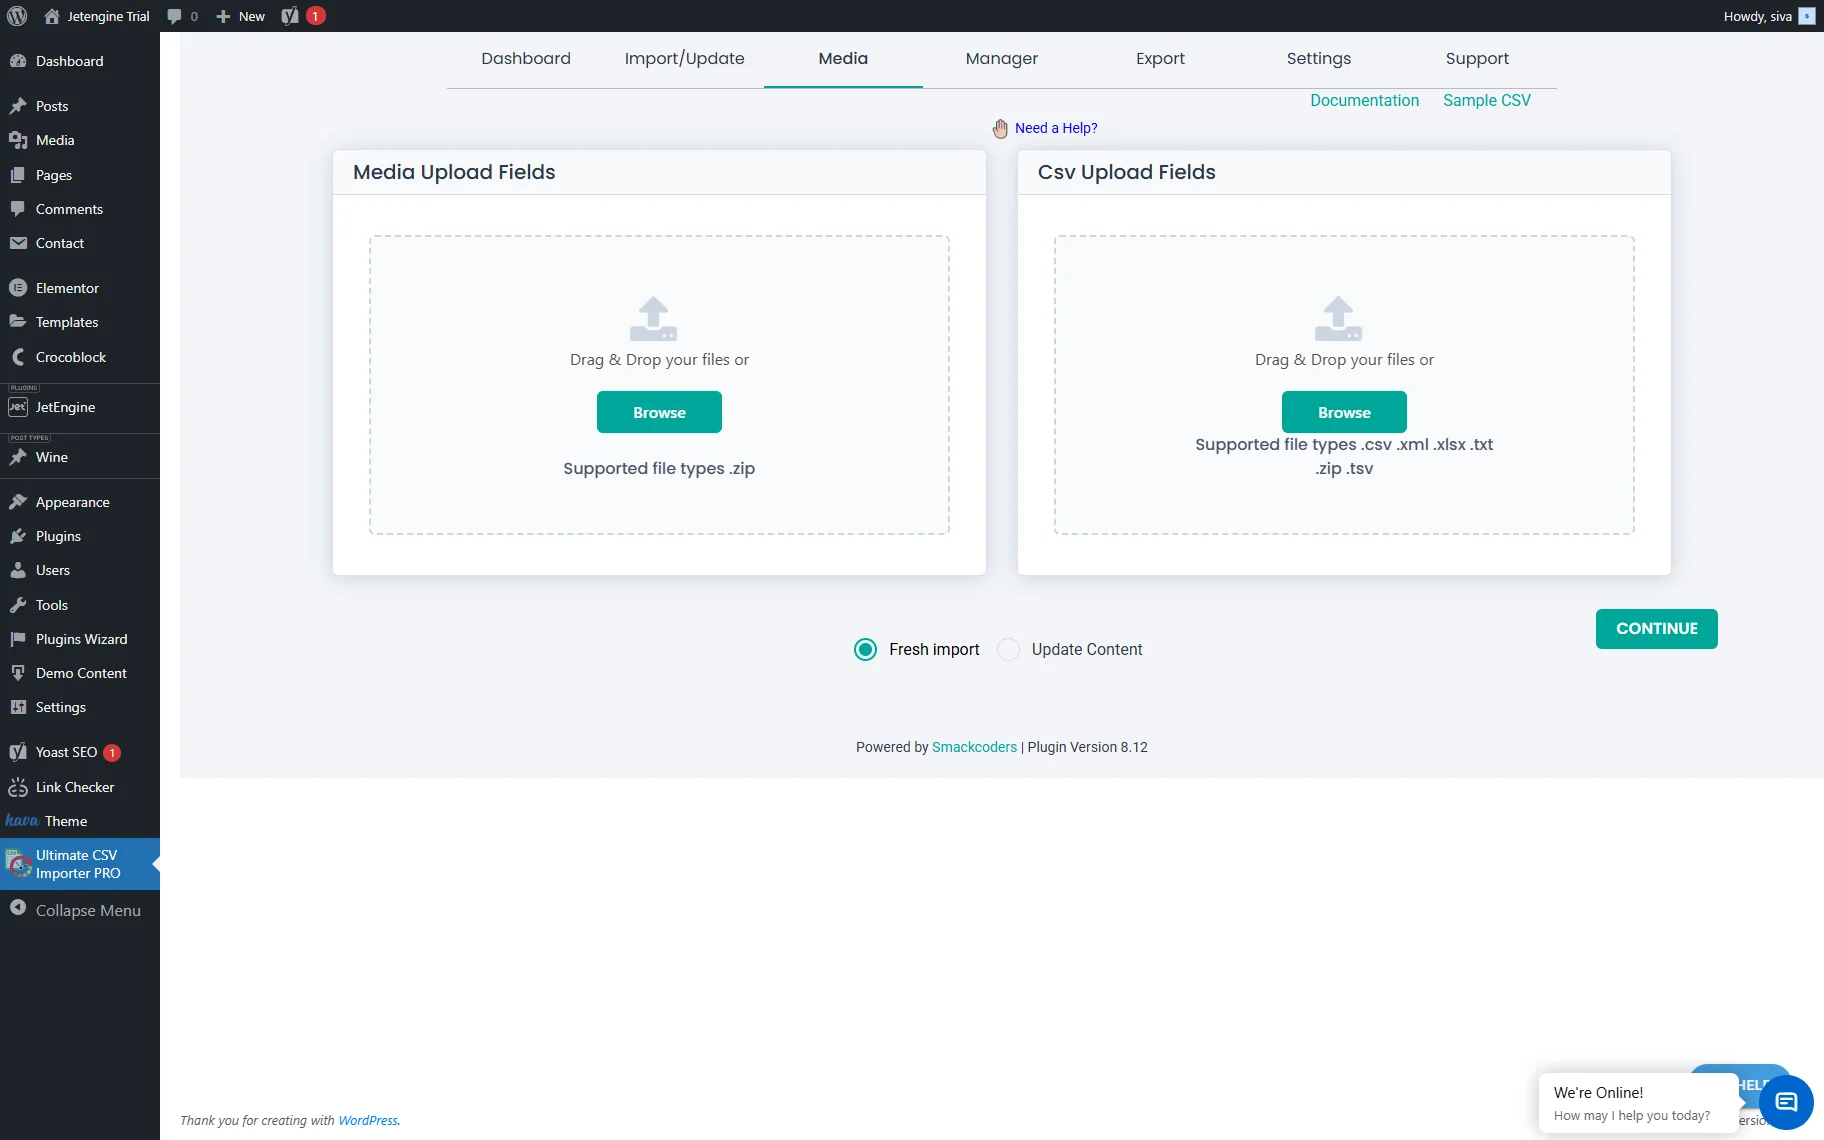
- Media — in this tab, one can browse or drag&drop files in the Media Upload Files or CSV Upload Files tab. The Media Upload Files tab supports uploading ZIP files, and the CSV Upload Files tab supports uploading CSV, TXT, XML, XLSX, TSV, and ZIP files. It can also be selected whether the Fresh import or Update Content is needed.
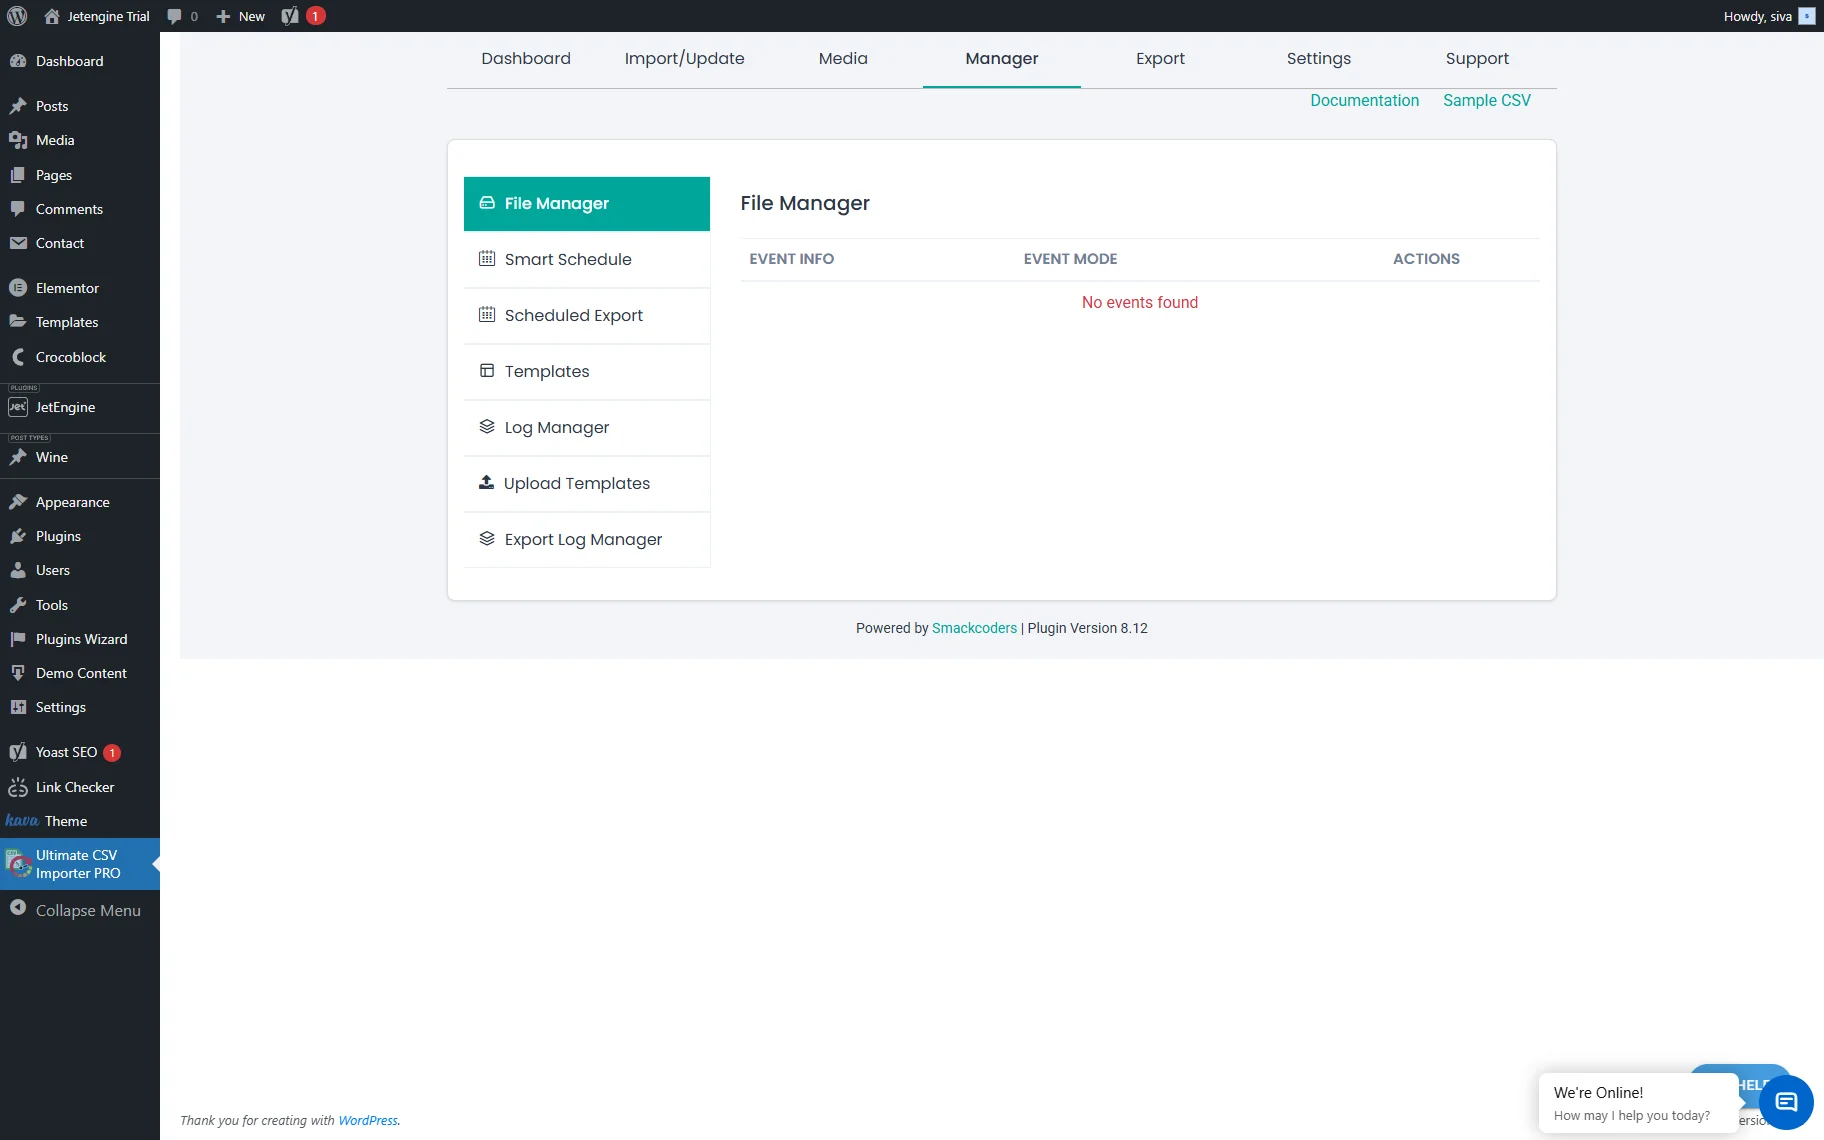
- Manager — this section allows you to view and manage all files. One can view the schedule data export here, as well as template and log info, browse media log records, and even view scheduled events.
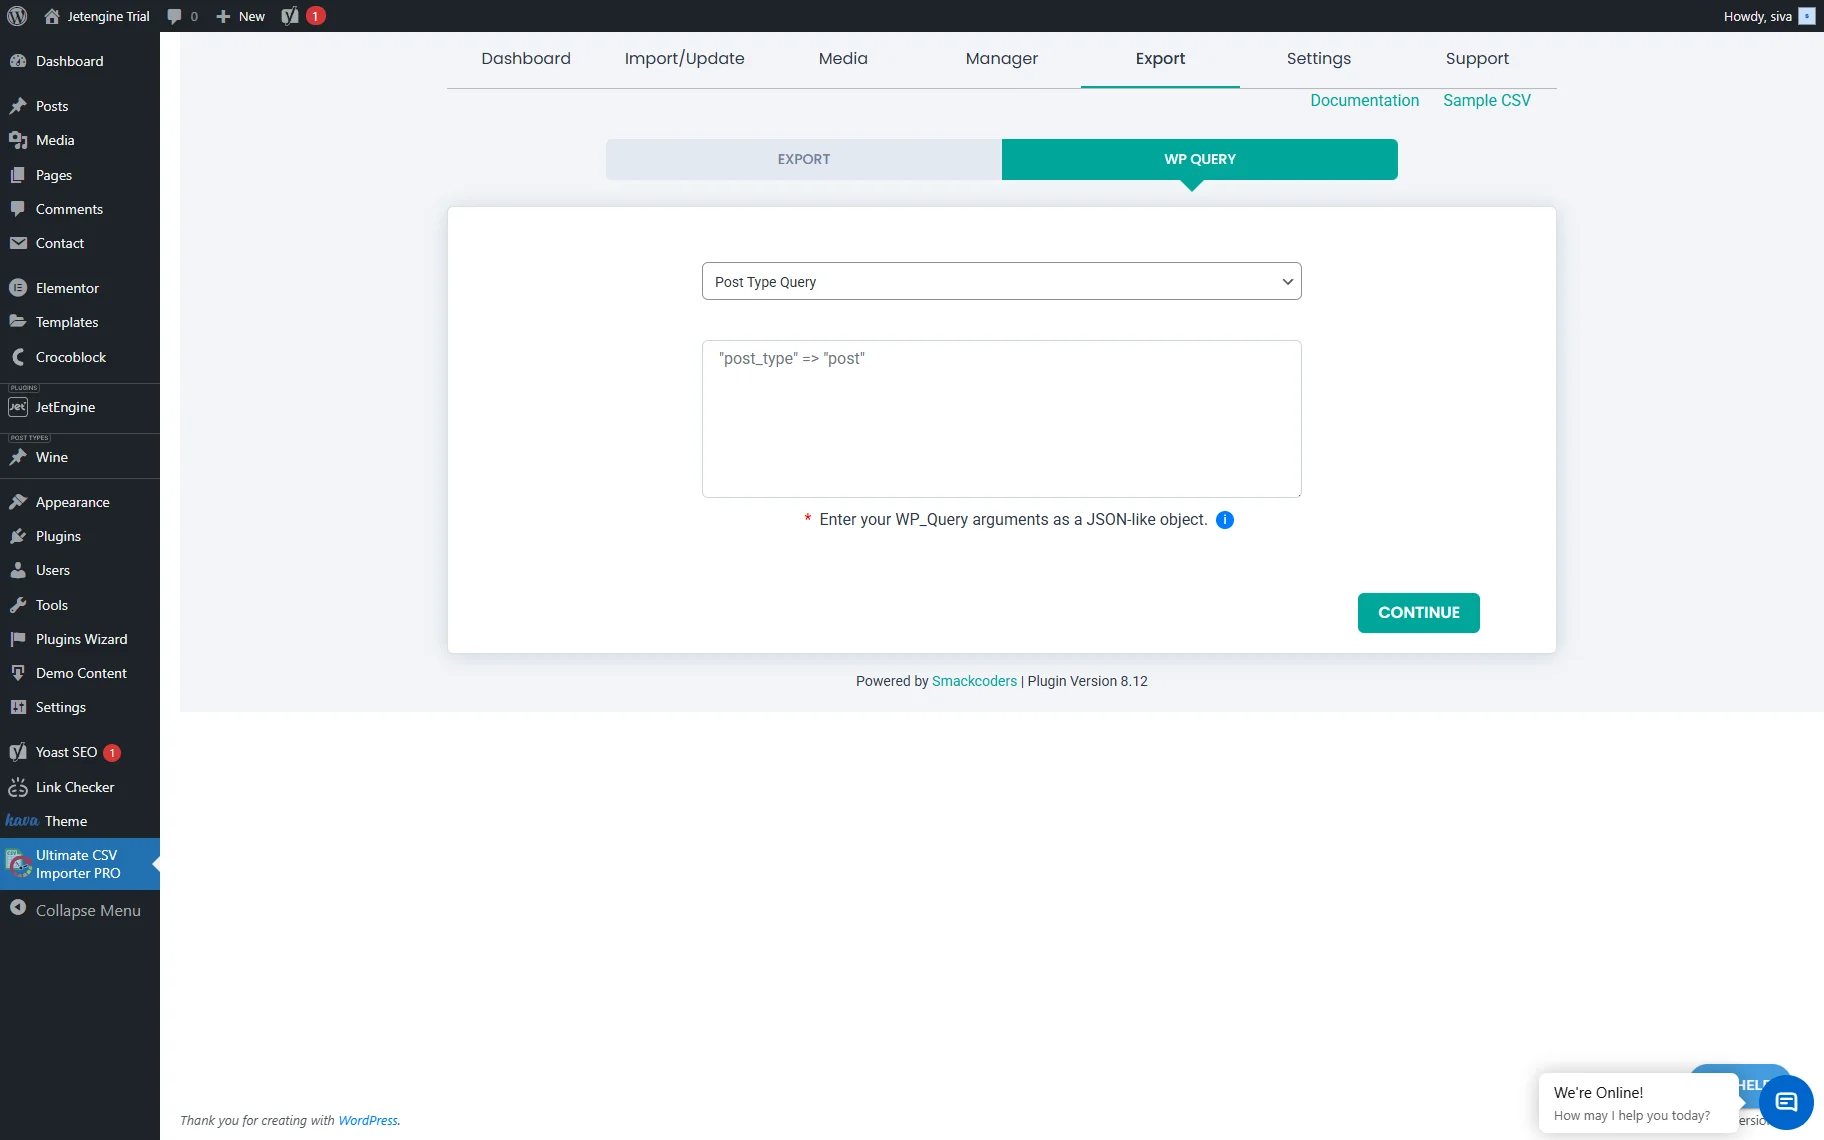
- Export — in this module, two tabs are available:
- Export — here, one can select and export any desired module from the current WordPress site and save it to a separate file;

- WP Query — here, one can select the needed query and specify the required arguments to export.
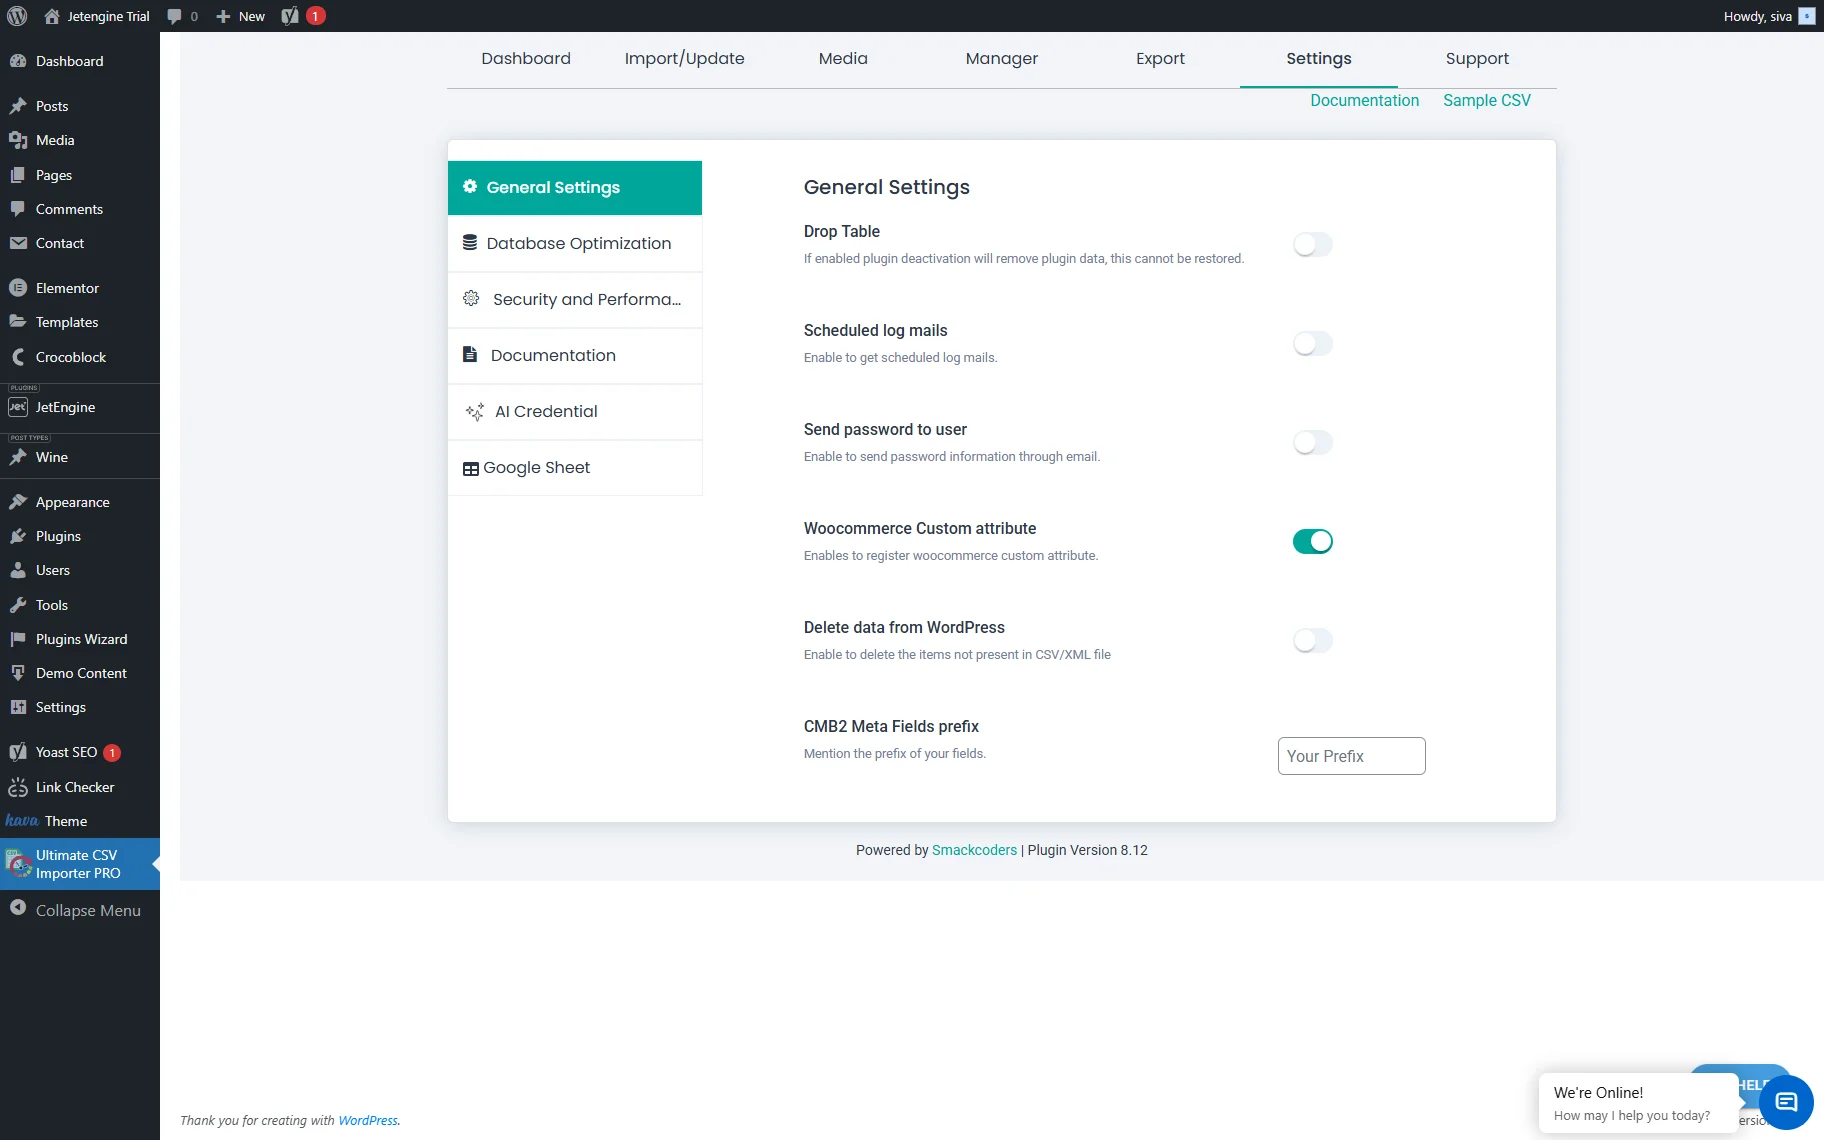
- Settings — in this section, six tabs are presented: General Settings, Database Optimization, Security and Performance, Documentation, AI Credential, and Google Sheet. Each tab contains settings that let you optimize database performance, adjust import/export settings, and more.
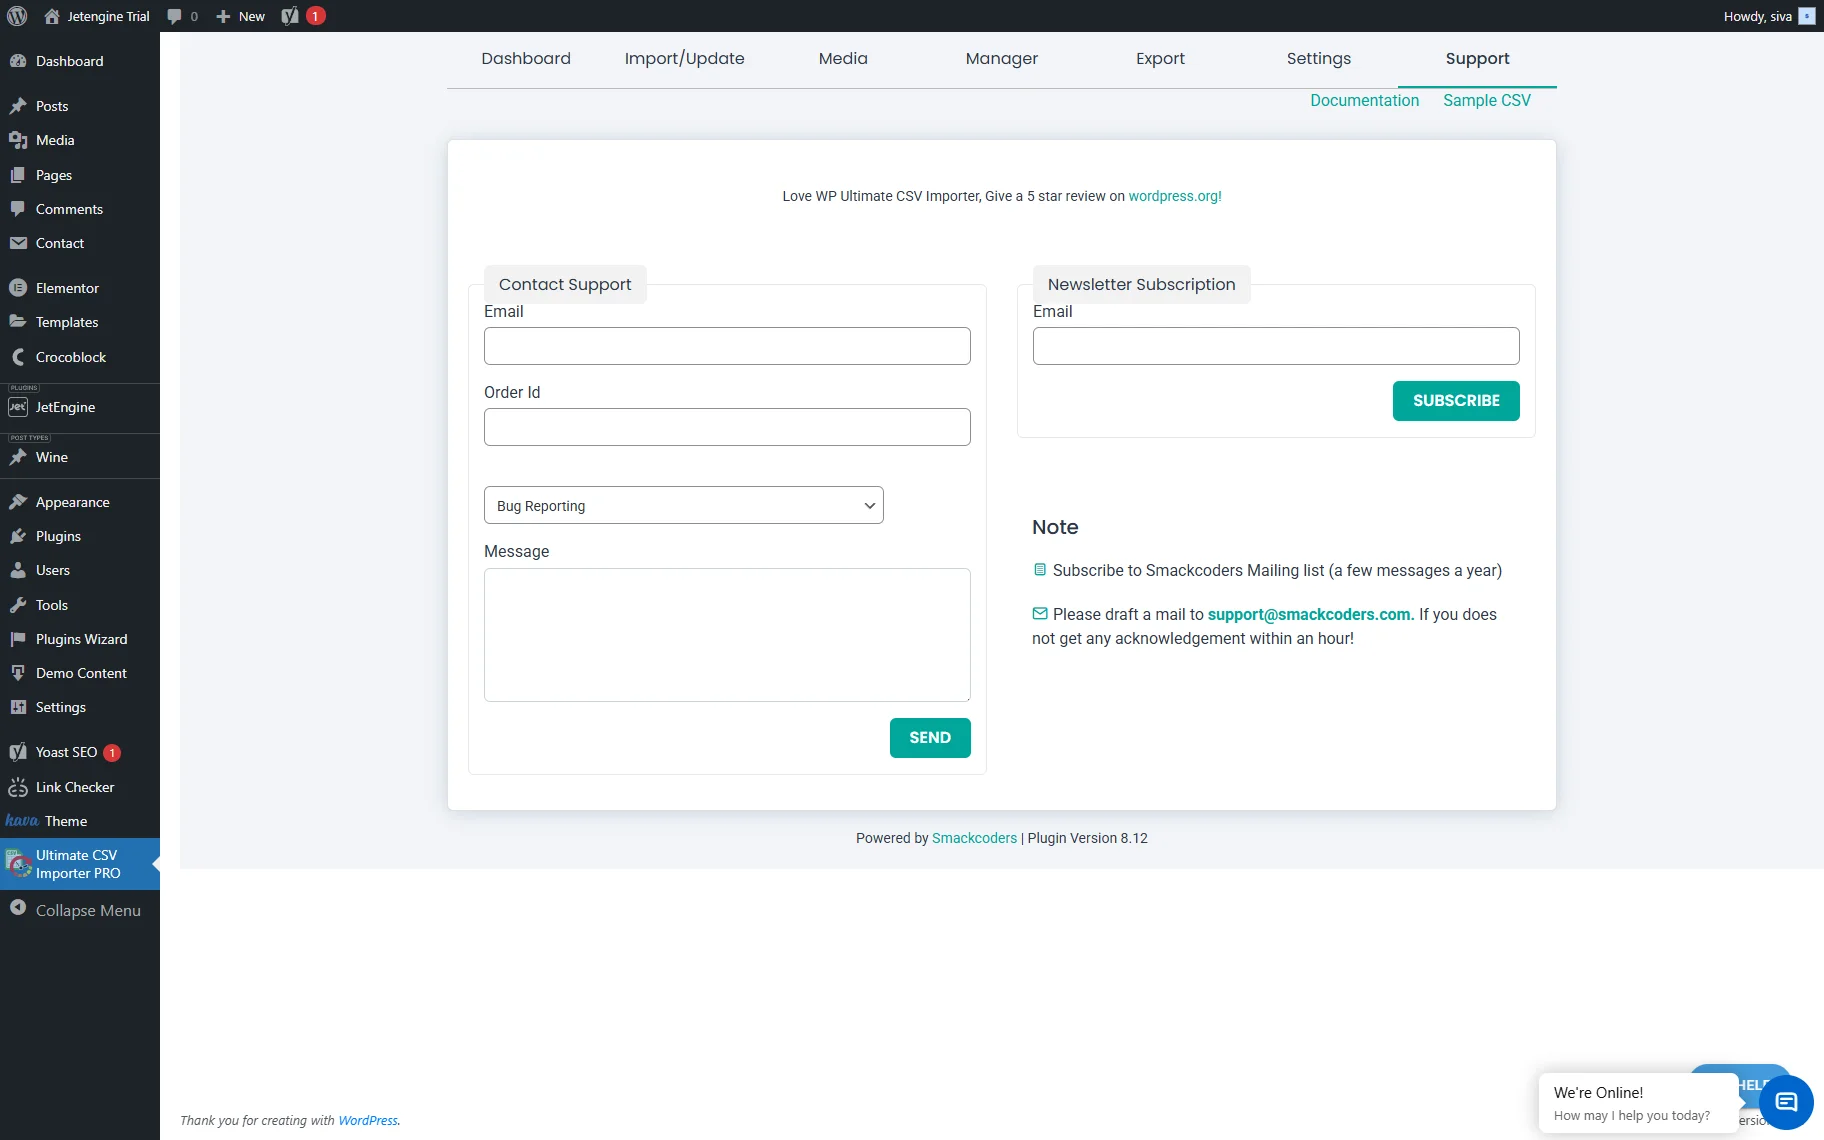
- Support — a section where you can contact the Smackcoders support team and subscribe to a mailing list.
For more detailed information on the WP Ultimate CSV Importer modules, please check this documentation.
Generate a CSV File
To start with, create a CSV file. You can do it by saving data to a Google Sheet in the PC folder or creating a file in a desktop program like Microsoft Excel, Neat Office, etc.
Consider the following file requirements:
- The CSV file needs to be in UTF-8 format.
- Any delimiters can be used, but each cell needs to be properly escaped.
- The Importer can handle large CSV files, depending on your server configuration.
- The headers are up to you. To automate mapping (relating the CSV headers with their corresponding WordPress fields), keep the CSV file headers the same as WordPress field names.
Browse the WordPress and CPT Data
Now, it’s time to decide which data you should add to the CSV file. The plugin supports fifteen JetEngine custom field types: Colorpicker, Checkbox, Date, Datetime, Gallery, Iconpicker, Media, Number, Radio, Select, Switcher, Text, Textarea, Time, and WYSIWYG. You can assign these fields to WordPress and custom posts, users, WooCommerce products, and pages. The WP eCommerce CSV import and data import will still be possible. You can import data from a Repeater field and post relations, as well. Mind that they will require additional fields in the CSV file: a post ID and a slug.
Follow the link to find a detailed field description and a CSV sample.
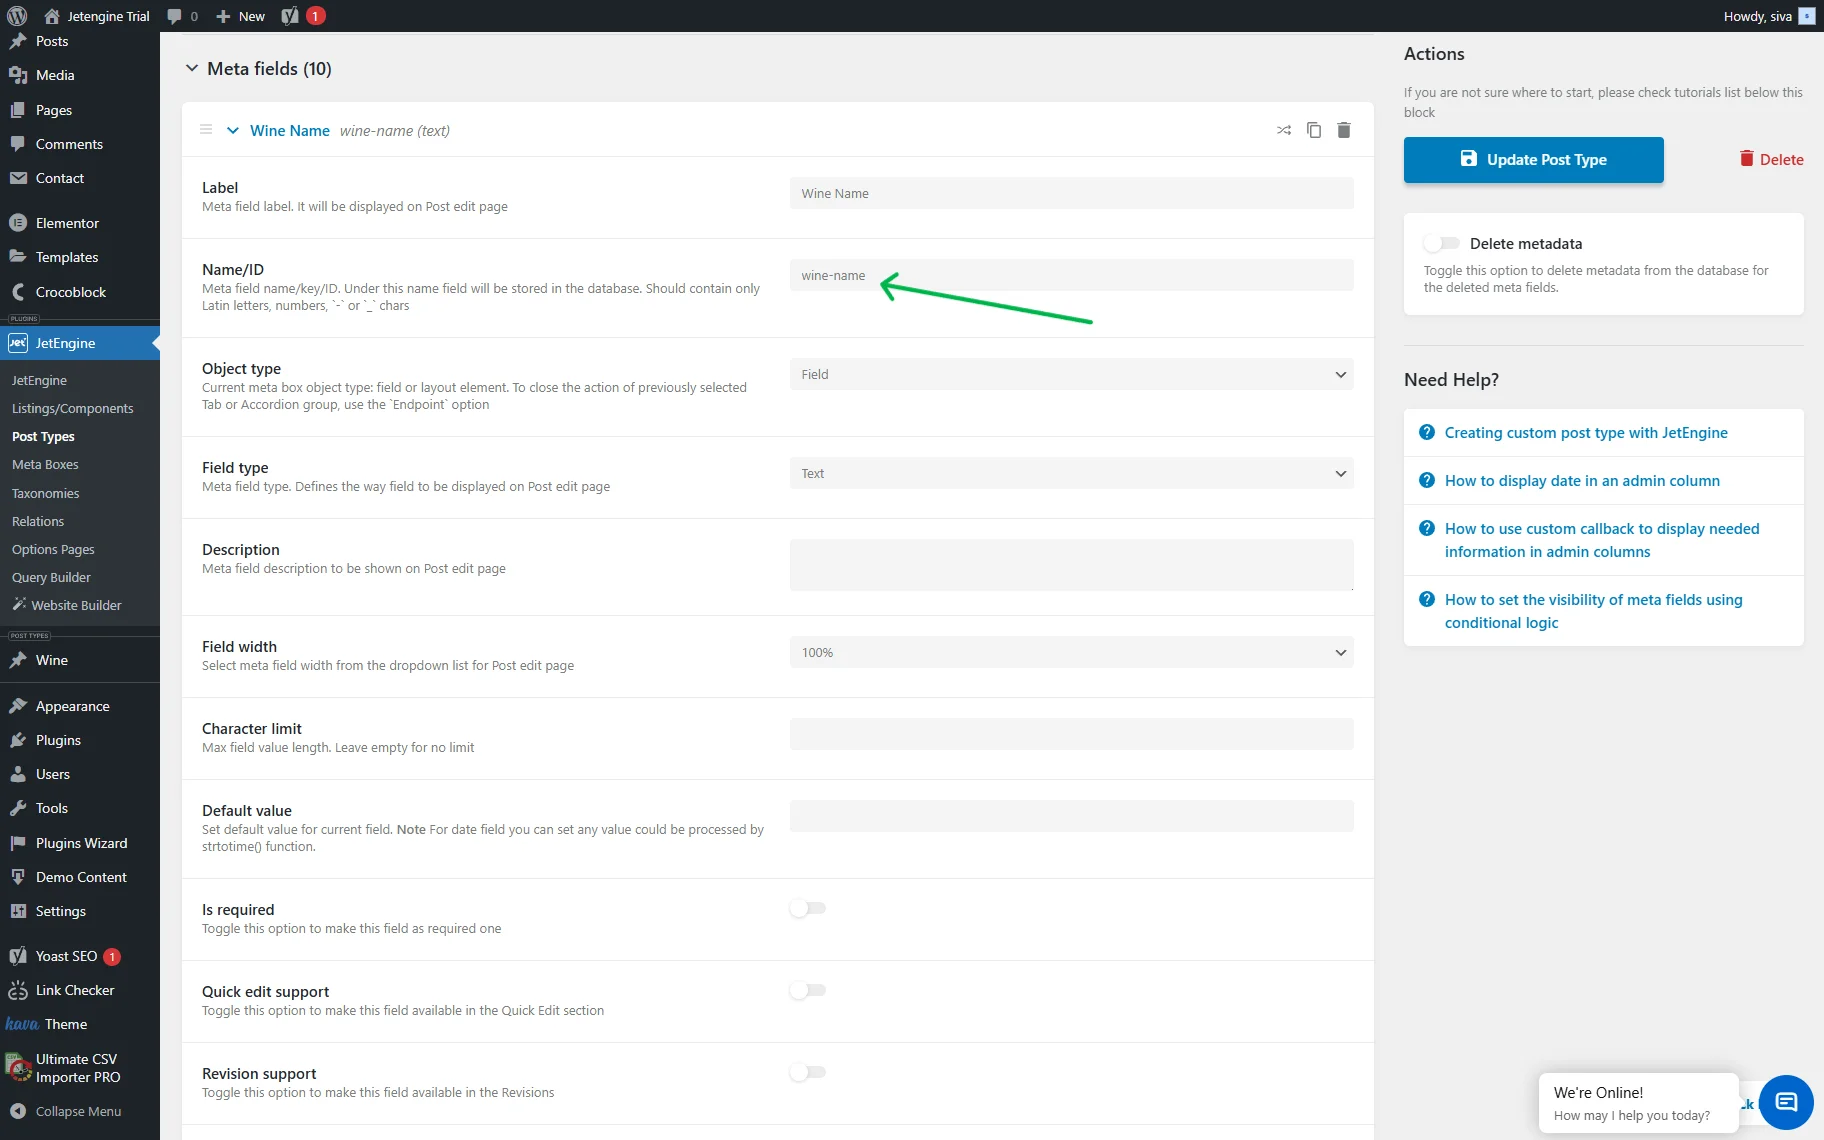
Go to WordPress Dashboard > JetEngine > Post Types and open the desired Custom Post Type. You need to copy and paste the actual field names into the CSV file.
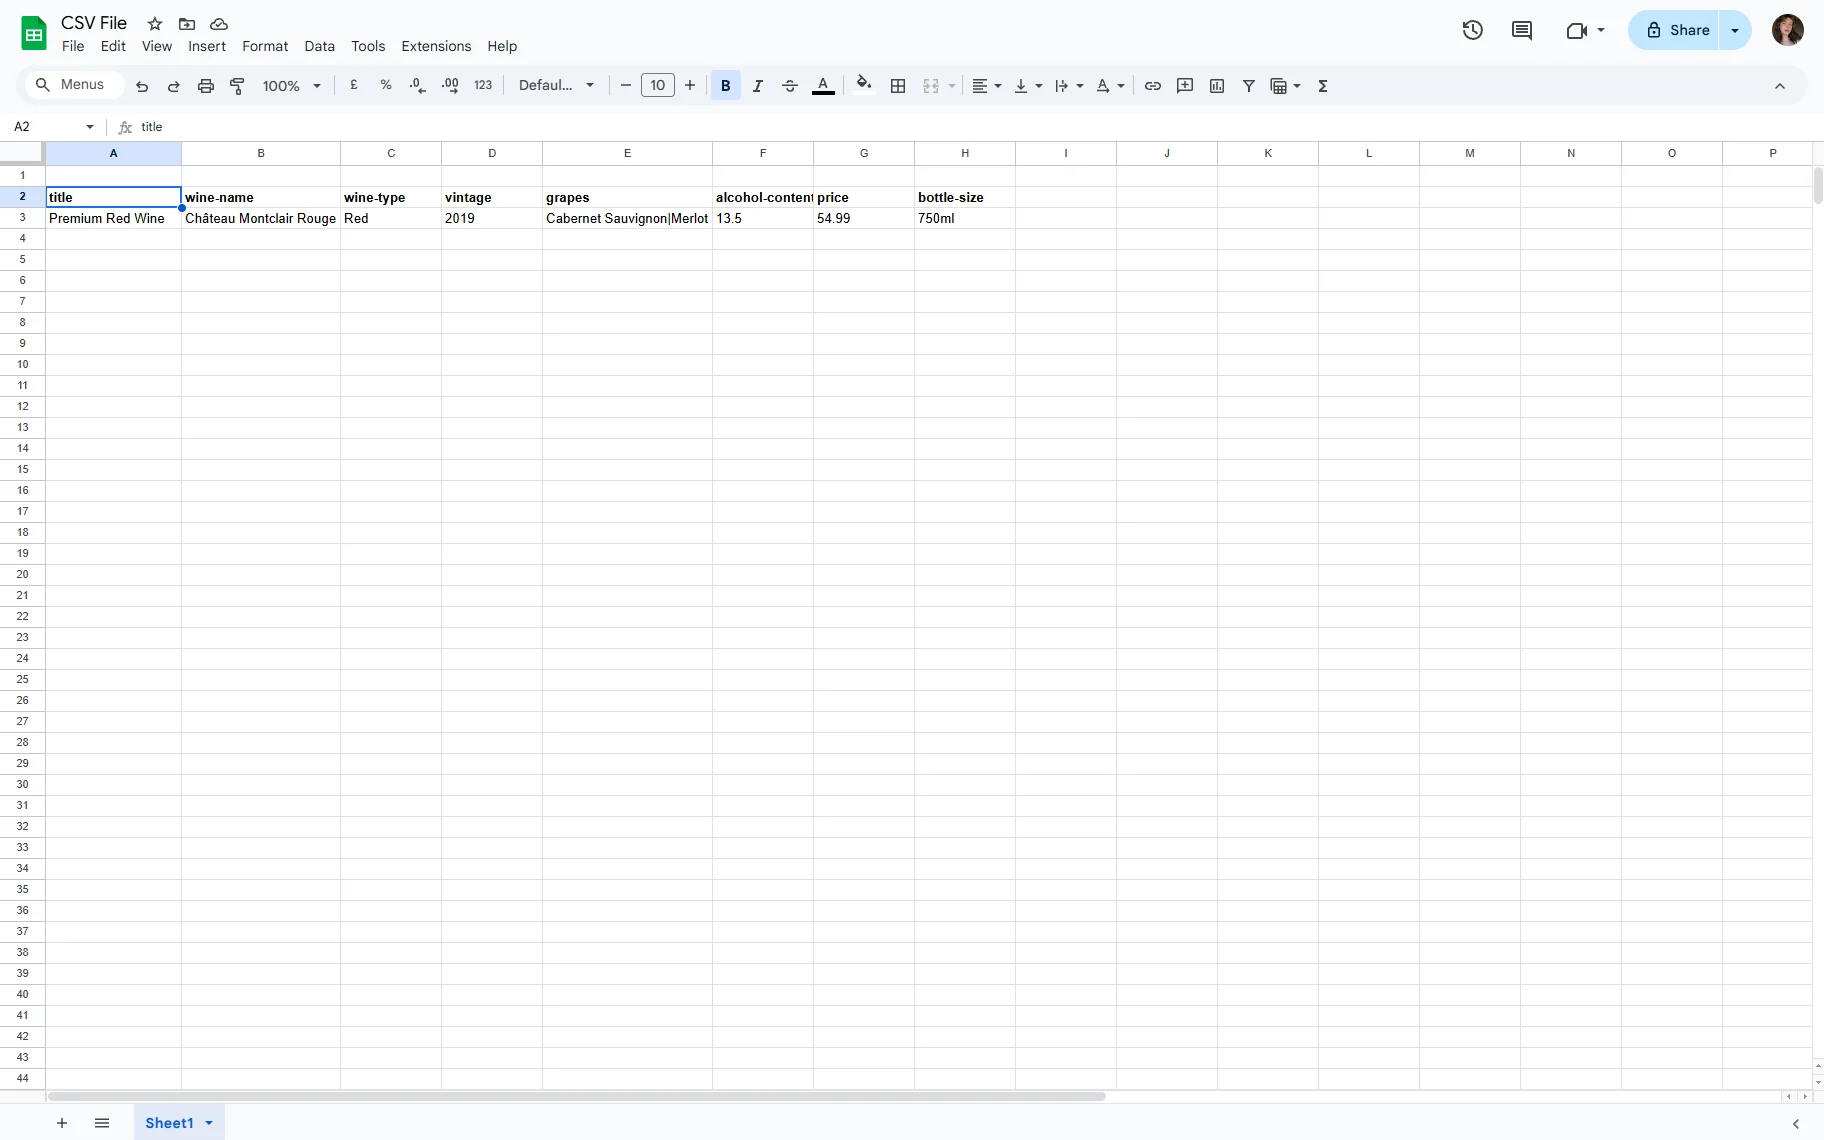
We need to provide the values for these meta fields below their names. The final CSV file contains the data needed to add two new posts to the existing CPT after import.
Be aware that the Media and Gallery field types can contain WordPress media image URLs and publicly accessible external URLs. That’s why you will need to upload the media files to the Media Library before adding their links to the CSV file.
In this case, we add the custom field names to the Google Sheet page. Once you add all the necessary fields, open the File tab, click the “Download” button, and save the Google Sheet as a CSV file.

Importing/Updating JetEngine Data from a CSV File
WP eCommerce CSV import and other data import are smart ways to add many posts to the WordPress website in one go. Now that we’ve prepared a CSV file with post data, we just need to upload it to the Ultimate CSV Importer PRO.
Navigate to the Ultimate CSV Importer PRO in the WordPress admin Dashboard. Switch over to the Import/Update tab and upload the necessary CSV file by clicking the “Browse” button.
After uploading the CSV file, you will see a new window with two options.
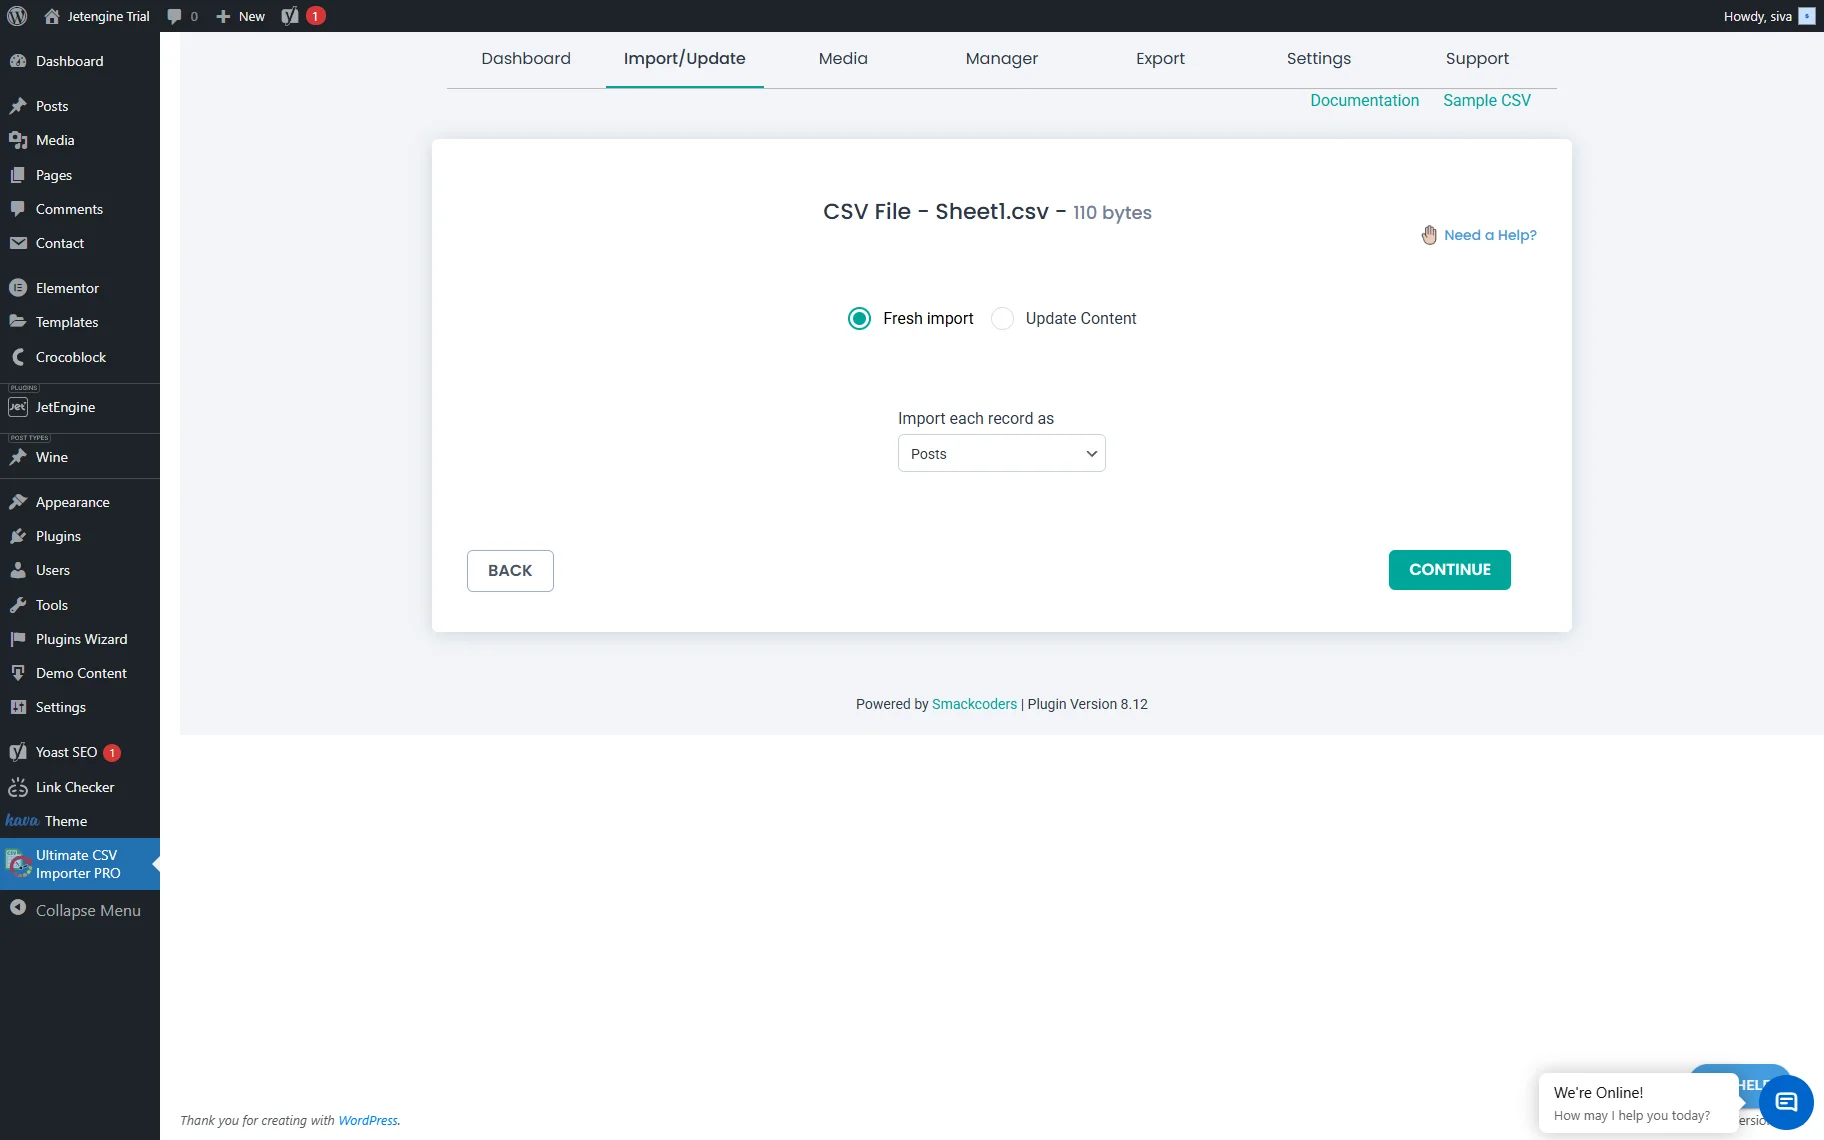
- Fresh Import — choose this option to let the plugin know that you want data from the CSV file to be organized in a new post type;
- Update Content — selecting this option imports data into WordPress posts that already exist, updating their content.
In the Import each record as drop-down, select the CPT name to which this data is related. Since we add data to the existing CPT, each new post will be recorded as a single post. Click the “Continue” button.
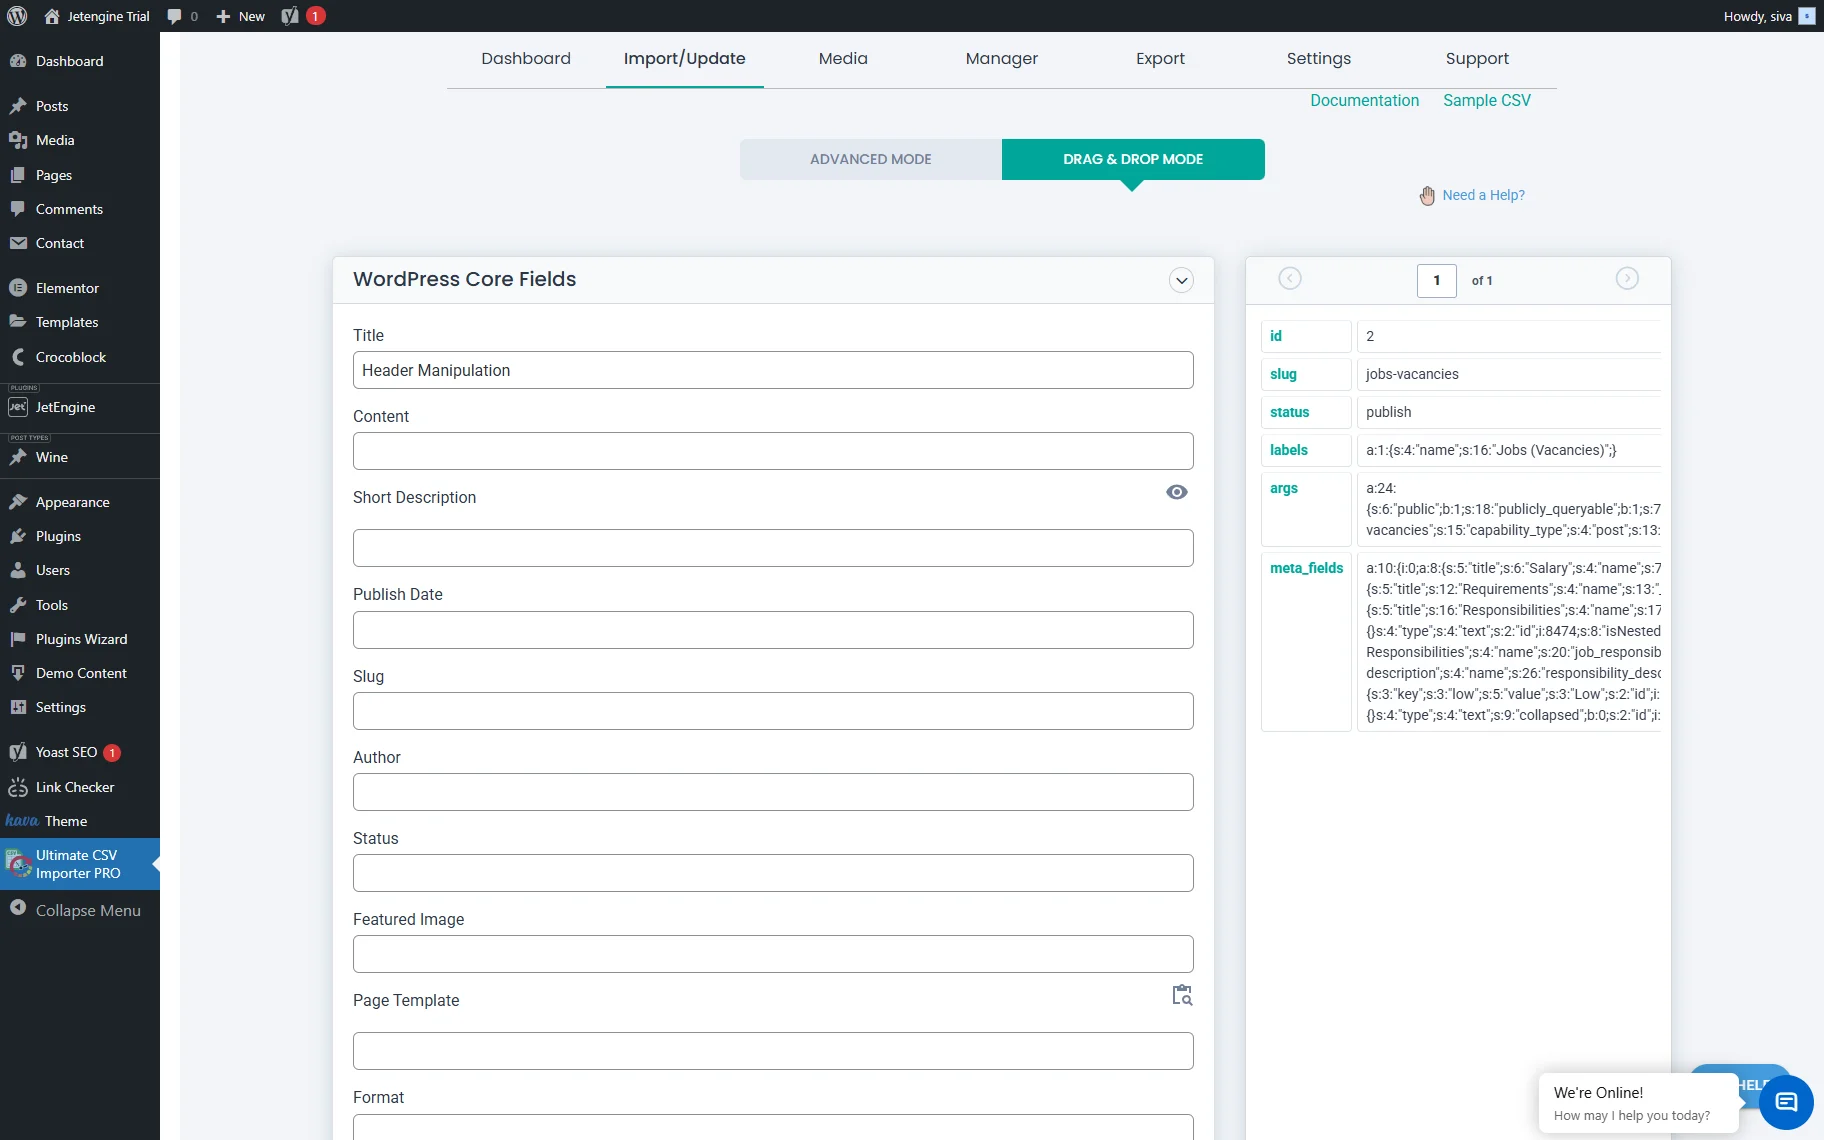
Now, the mapping process starts. There are several sections on this page where you should check how the meta fields from the CSV file are mapped inside the CSV Importer.
You can choose between the Advanced Mode and the Drag & DropMode. Since we have copied and pasted the meta fields correctly, the plugin automatically detects them. You just need to ensure that the data is placed into the intended WordPress field. Don’t forget to unfold the Create WP Custom Fields, Terms and Taxonomies, as well as other sections where custom fields may be found. Then click “Continue.”
Next, there is a Manage Media Uploads section. Choose options such as “Use available media images”, “Overwrite the Available Image”, or “Always Create as a New Image”.
Below is the Download the post content external images to media toggle. Enable it to download all media in your post content to the media library.
Enable the Retaining the original file path instead of the current month folder toggle in the media import path to use your media file’s original path instead of creating a new one when importing.
In the Import Configuration Section, configure the essential import settings before running the import.
Choose the “Enable safe prestate Rollback (Backup before import)” and “Do you want to SWITCH ON Maintenance mode while import?” options for safer imports. The rollback is useful for reverting to the previous state before import if you encounter any problems after import. The maintenance mode is useful to notify your visitors when you run a bulk import.
Select the “Do you want to handle the duplicate on existing records?” option to handle duplicate record import. Choose a field like id, title, or slug to check for duplicates (based on the field type selection). This will completely avoid duplicate record imports.
Enable the “Do you want to import data filtered by category?” and choose categories from the list to import records of those categories only.
Configure the “Do you want adaptive file processing of record?” option if you have bulk records to import.
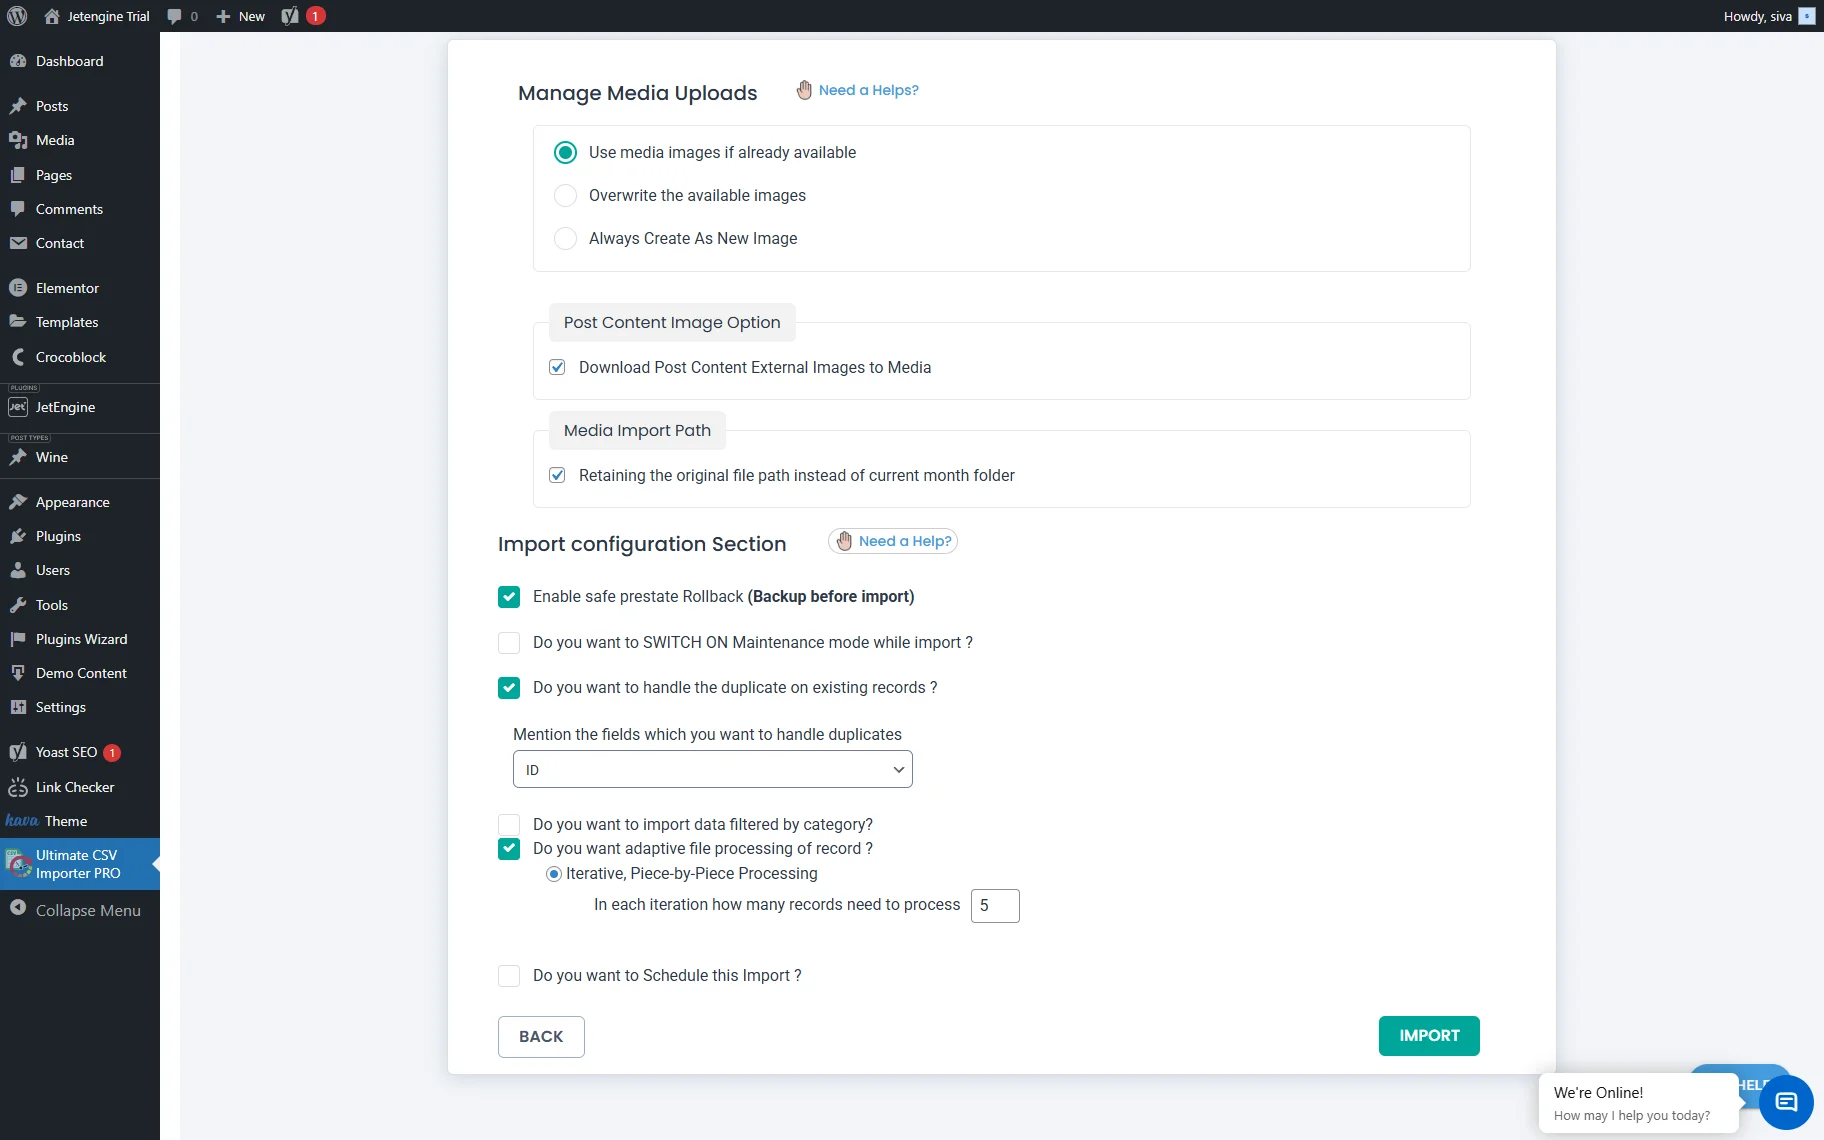
Set the “Do you want to Schedule this Import?” option to run your import at your preferred time if needed.
Click the “Import” button once you are ready.
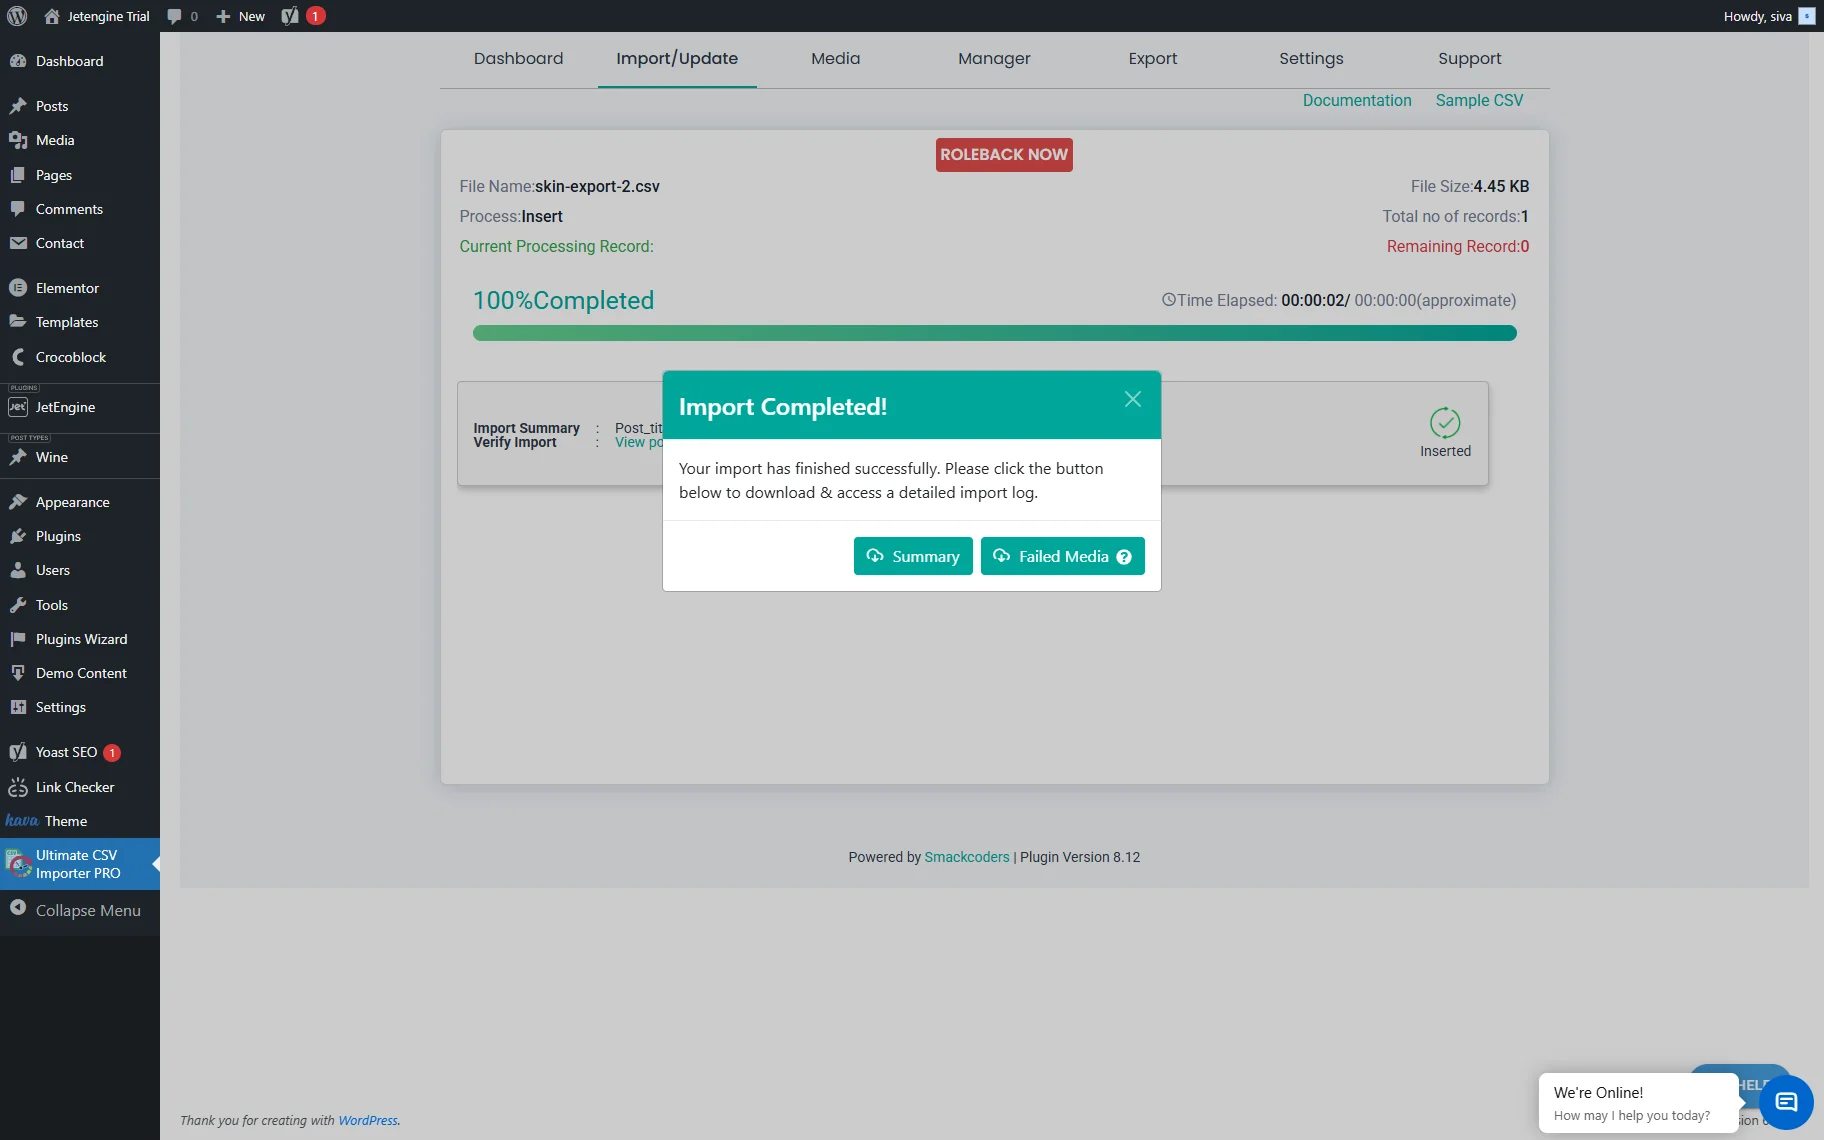
Your WordPress site will begin creating or updating your records. A pop-up displaying ‘Import Completed‘ will notify you upon completion, offering options to download logs for any failed media and an overall import summary.
Exporting JetEngine Data to a Separate File
Open the Ultimate CSV Importer PRO > Export tab. Select the module you want to export.
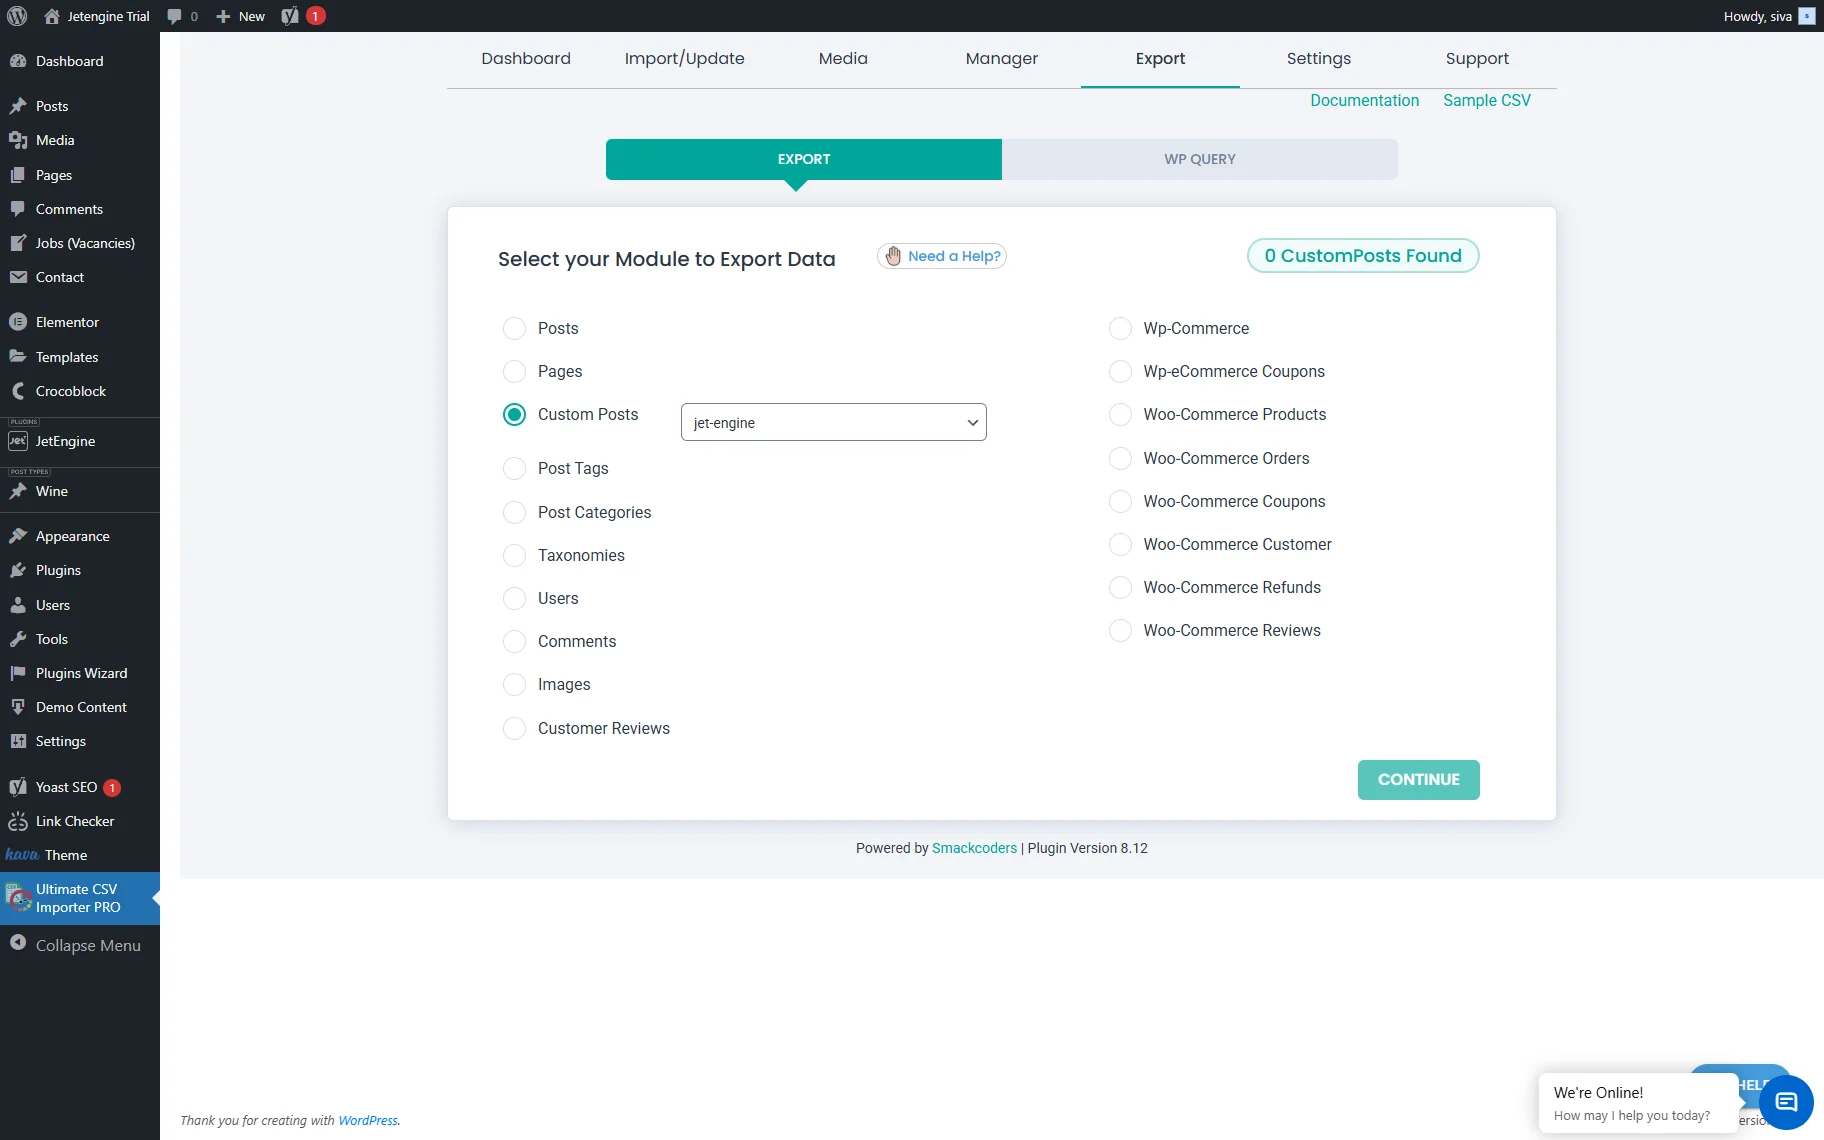
You can export all kinds of content: posts, pages, tags and categories, users, images, WooCommerce products, and JetEngine data. For instance, select the “Custom Posts” option to export JetEngine Custom Post Type data. In the drop-down list, pick the needed CPT name.
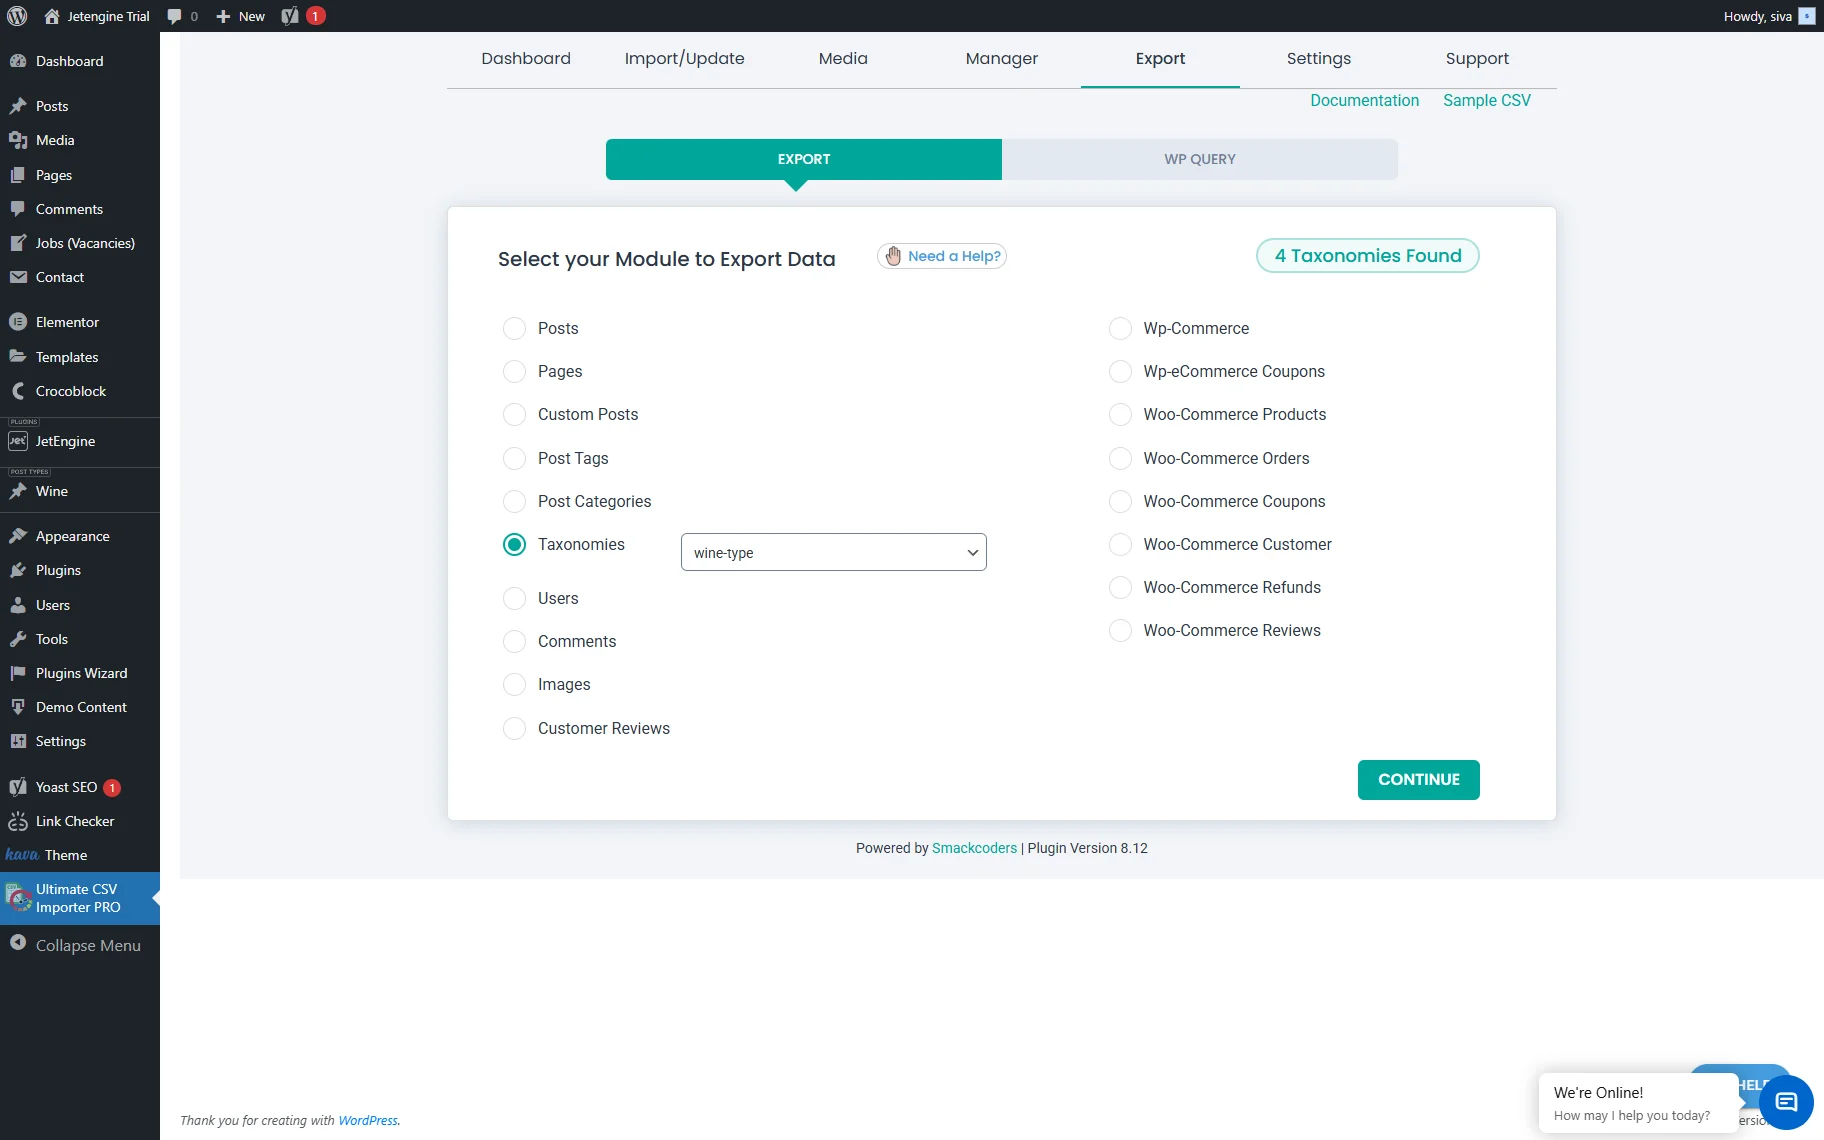
In this case, we will export the JetEngine taxonomy data. Select the “Taxonomies” option and then pick a taxonomy name from the drop-down list.
Click the “Continue” button. You will proceed to the export settings window. Let’s go through the available controls and their options:
- Export File Name — a text area where you enter the exported file name;
- Export Type — this section has six options: CSV, XLS, XLSX, XML, TSV, and JSON. Depending on which you choose, the corresponding file format will appear in the Export File Name text area after the delimiter;
- Split the Record — is a checkbox field that supports numeric values only. If you tick this option and enter the desired number in the field below, the plugin will export the data as a .zip file containing multiple CSV files.
Among the Advanced Filters, the following options are available:
- Export data with auto delimiters — here, you can choose the preferred delimiter. The available options include a comma (,), colon (:), semicolon (;), tab, space, and custom;
- Export CSV data to the Google Sheet — once checked, allows exporting data to the prepared Google Sheet;
- Export data for the specific period — allows you to set up the date frames from and to which you need to get the data from;
- Export Processing in Iterations — by default, it processes fifty records per iteration. You can also provide an Iteration Limit once the option is checked;
- Allow non-admins to run this export in Client Mode — once checked, you can choose the user roles you want to grant access (e.g., “Shop Manager”). You can select multiple roles if needed;
- Export data based on specific Inclusions — once you check this option, the WordPress Core Fields accordion will appear. There are five checkboxes inside it: select those you want to export to the general file;
- Do you want to Schedule this Export — you can schedule the export whenever it’s convenient for you.
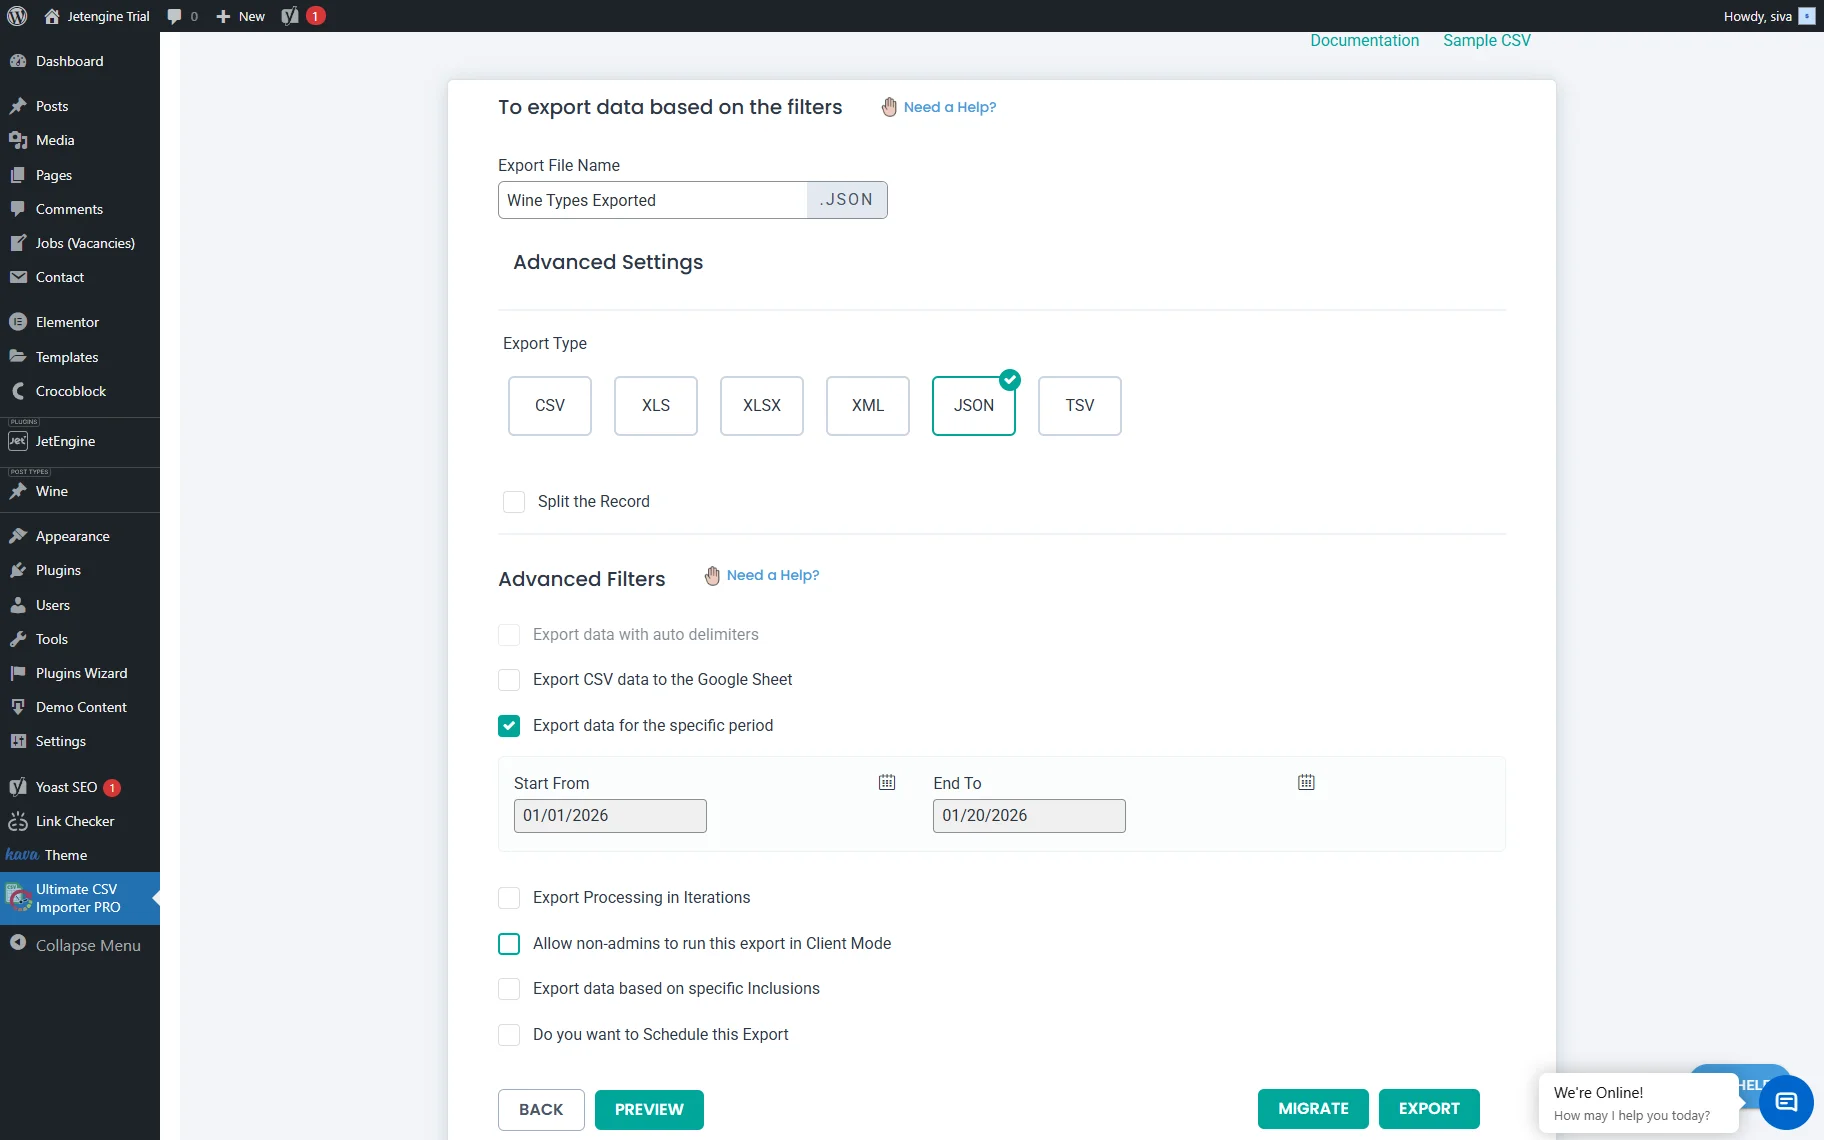
Click the “Export” button once you are ready.

Once the scale shows “100% Completed”, click the “Download” button to download the file to your device.
This is it. Now you know how to use the WP Ultimate CSV Importer plugin to import, update, and export JetEngine data to a WordPress website.