Dynamic Field Block Overview
This overview will give you a detailed description of the Dynamic Field block that appears in the Gutenberg Editor menu after the installation of the JetEngine plugin.
All dynamic blocks were created to help you display dynamic data. They show the values that you place in the meta fields of the items. You can customize the look by defining the general content and style settings. Different dynamic blocks can display the data from certain meta fields. Here are the meta fields that can be shown via the Dynamic Field block:
- Text;
- Date;
- Time;
- Datetime;
- Textarea;
- WYSIWYG;
- Switcher;
- Checkboxes;
- Iconpicker;
- Media;
- Gallery;
- Radio;
- Select;
- Number;
- Colorpicker;
- Posts.
General Settings Section
To add the block to the page, click the “Add Block” button and find the Dynamic Field block.
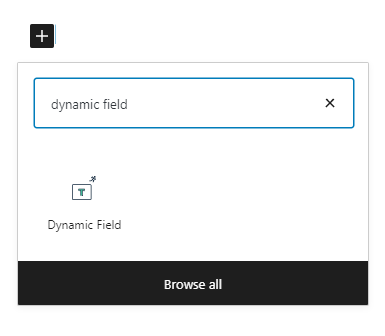
Click on it and take a look at the General settings menu located to the right.
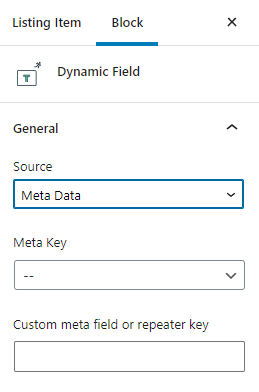
- Source. This is where the data will be taken from.
- Post/Term/User/Object Data – pulls the content from the default meta fields of the post, term, user, or object. Those are fields like “post ID”, “creation date”, or “author”. You can choose the specific field in Object Field select;
- Meta Data – takes the content from the meta field you created using the JetEngine plugin’s tools. Choose a certain field in the Meta Field drop-down menu. You can also define it by typing its name into the Custom meta field/repeater key bar;
- Options – pulls the data from the Options Page meta field. Select the specific one in the Option drop-down menu;
- Relation Hierarchy – takes the data from the meta fields of the posts that are related to the one you are working with. Choose the type of relation in the Get select and define the type in the drop-down list called From Post Type;
- Relation Meta Data – takes the data from the meta fields created for relations. We also have a dedicated tutorial about the relations dynamic output.
Layout Settings Section
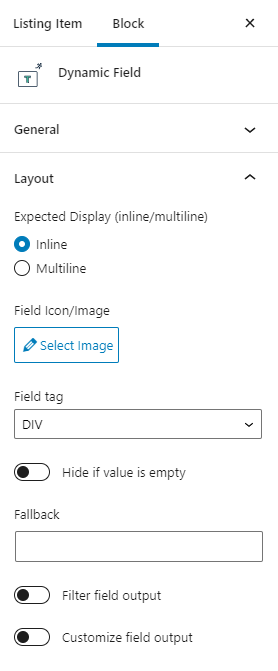
- Expected Display. This feature defines the look of the text in the field. If you choose the Inline option, the whole text will be displayed as a single line. If you select the Multiline variant, the text will be shown in several lines;
- Field Icon/Image. Here you can add an image or SVG icon to the field. The “Select Image” button opens the Media library, so you can upload the files to it and pull them to the field afterward;
- Field tag. You can wrap the field into an HTML tag. In this drop-down menu, you can choose that tag. You can read more about all the tags in this HTML guide;
- Hide if value is empty. Sometimes, the meta fields of an item are left empty. If you want to hide the field in case there is no data in it, turn this toggle on;
- Fallback. If something goes wrong with the field, the user will see a notification message. This is a bar where you define that message;
- Filter field output. Here you can define the output of the field. You will find a more detailed description of this field below;
- Customize field output. Enabling this toggle opens the text area where you can add a macro code that will customize the look of the field. Read more in this macro code guide.
Filter field output options
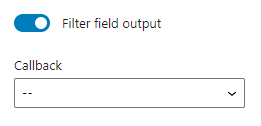
When you turn on the Filter field output toggle, it will open the Callback drop-down menu. Let’s take a closer look at the options.
- Format date. Shows the date pulled from the database using Date or Time meta fields. Set the date’s format in the Date Format bar;
- Format date (localized). This option is the same as the previous one but shows the date that is already localized to the website’s language;
- Format number. Displays data from the Number-type meta field. You can define the look of the Decimal point and Thousands separator and set how many numbers will be shown after the decimal point;
- Get post/page title. Shows the title of the post or page provided that you have chosen the Post ID option in the Object Field select;
- Get post/page link (only URL). Displays the post’s URL if you have chosen one of the ID options in the Object Field drop-down menu;
- Get post/page link (linked title). Shows the post’s URL but in the form of a title with a link;
- Get term link. Displays the term’s URL if you selected the term or taxonomy ID in the Meta Field select;
- Embed URL. Embeds the URL from the meta field that contains a URL. For example, it can embed a video from YouTube using its URL;
- Make clickable. By default, a field with a URL in it is shown as plain text. This callback transforms it into a clickable link;
- Embed icon from Iconpicker. Works with the Iconpicker-type field. Allows you to show the icon, not its ID;
- Multiple select field values. Works with the Select-type fields. Allows you to showcase several selected options. Don’t forget to specify the Delimiter;
- Checkbox field values. Works with the Checkbox-type field. Helps you display the chosen options in a line separated by Delimiter;
- Checked values list. Also works with the Checkbox-type meta field. Shows the chosen options as a list. Allows you to choose the number of columns and a separator between them;
- Switcher field values. Displays the values of the Switcher-type meta field;
- ACF Checkbox field values. Allows you to display the chosen values of the Checkbox-type meta fields created with the ACF plugin;
- Get post titles from IDs. Works with the Posts-type meta field. Displays the titles of the posts you have chosen in the field;
- Related posts list. Also works with the Posts-type meta field and displays the titles of the posts in a list instead of a row;
- Field values count. Another one for the Posts-type meta field. Shows the number of posts you have chosen in the field;
- Get Image by ID. Works with the Media meta field. Displays the image from the Media Library instead of its ID (only if it is uploaded to the library);
- Do shortcodes. By default, a shortcode is displayed as plain text. If you use this callback, the shortcode in the field will be processed and shown correctly;
- Human readable time difference. Works with the Date-type meta fields. Shows the difference between the date you put into the meta field and the current date in the number of days;
- Add paragraph tabs (wpautop). Works with the Textarea-type meta field. Adds paragraphs to the text;
- Zeroise (add leading zeroes). Adds zeroes before the value of the Number-type meta field;
- Get child element from object/array. Works with the Checkbox and Select-type meta fields. It shows if the value of the option, chosen in the checkbox or select is the same as the one you will place to the Child item name bar. For example, if you tick the “2” option of the checkbox and have chosen the “2” option for the callback, it will display the “true” value;
- Images Gallery Grid. Works with the Gallery-type meta field. This option appears in the list after you enable the Grid Gallery for Dynamic Field widget toggle in the JetEngine > JetEngine Dashboard > Modules tab;
- Images Gallery Slider. Also works with the Gallery meta field. Shows the pictures added to the slider. This option appears in the list after you enable the Slider Gallery for Dynamic Field widget toggle in the JetEngine > JetEngine Dashboard > Modules tab;
- QR Code. Converts the value of the field to a QR code.
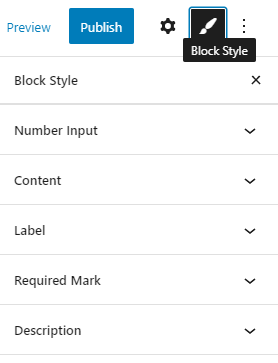
Style Settings Tab
You can customize the appearance of the Dynamic Field block content in a separate menu tab. To enter it, click the “Block Style” button. All the details about the settings of this tab are described in this Block Style settings overview.
That is all about the Dynamic Field block. You now know all of its settings and can use them to make the block work as you need.