Relations Overview
This tutorial describes the relations feature settings of the JetEngine plugin for WordPress.
General Settings
After you convert relations or create a new one, they will have such General Settings:
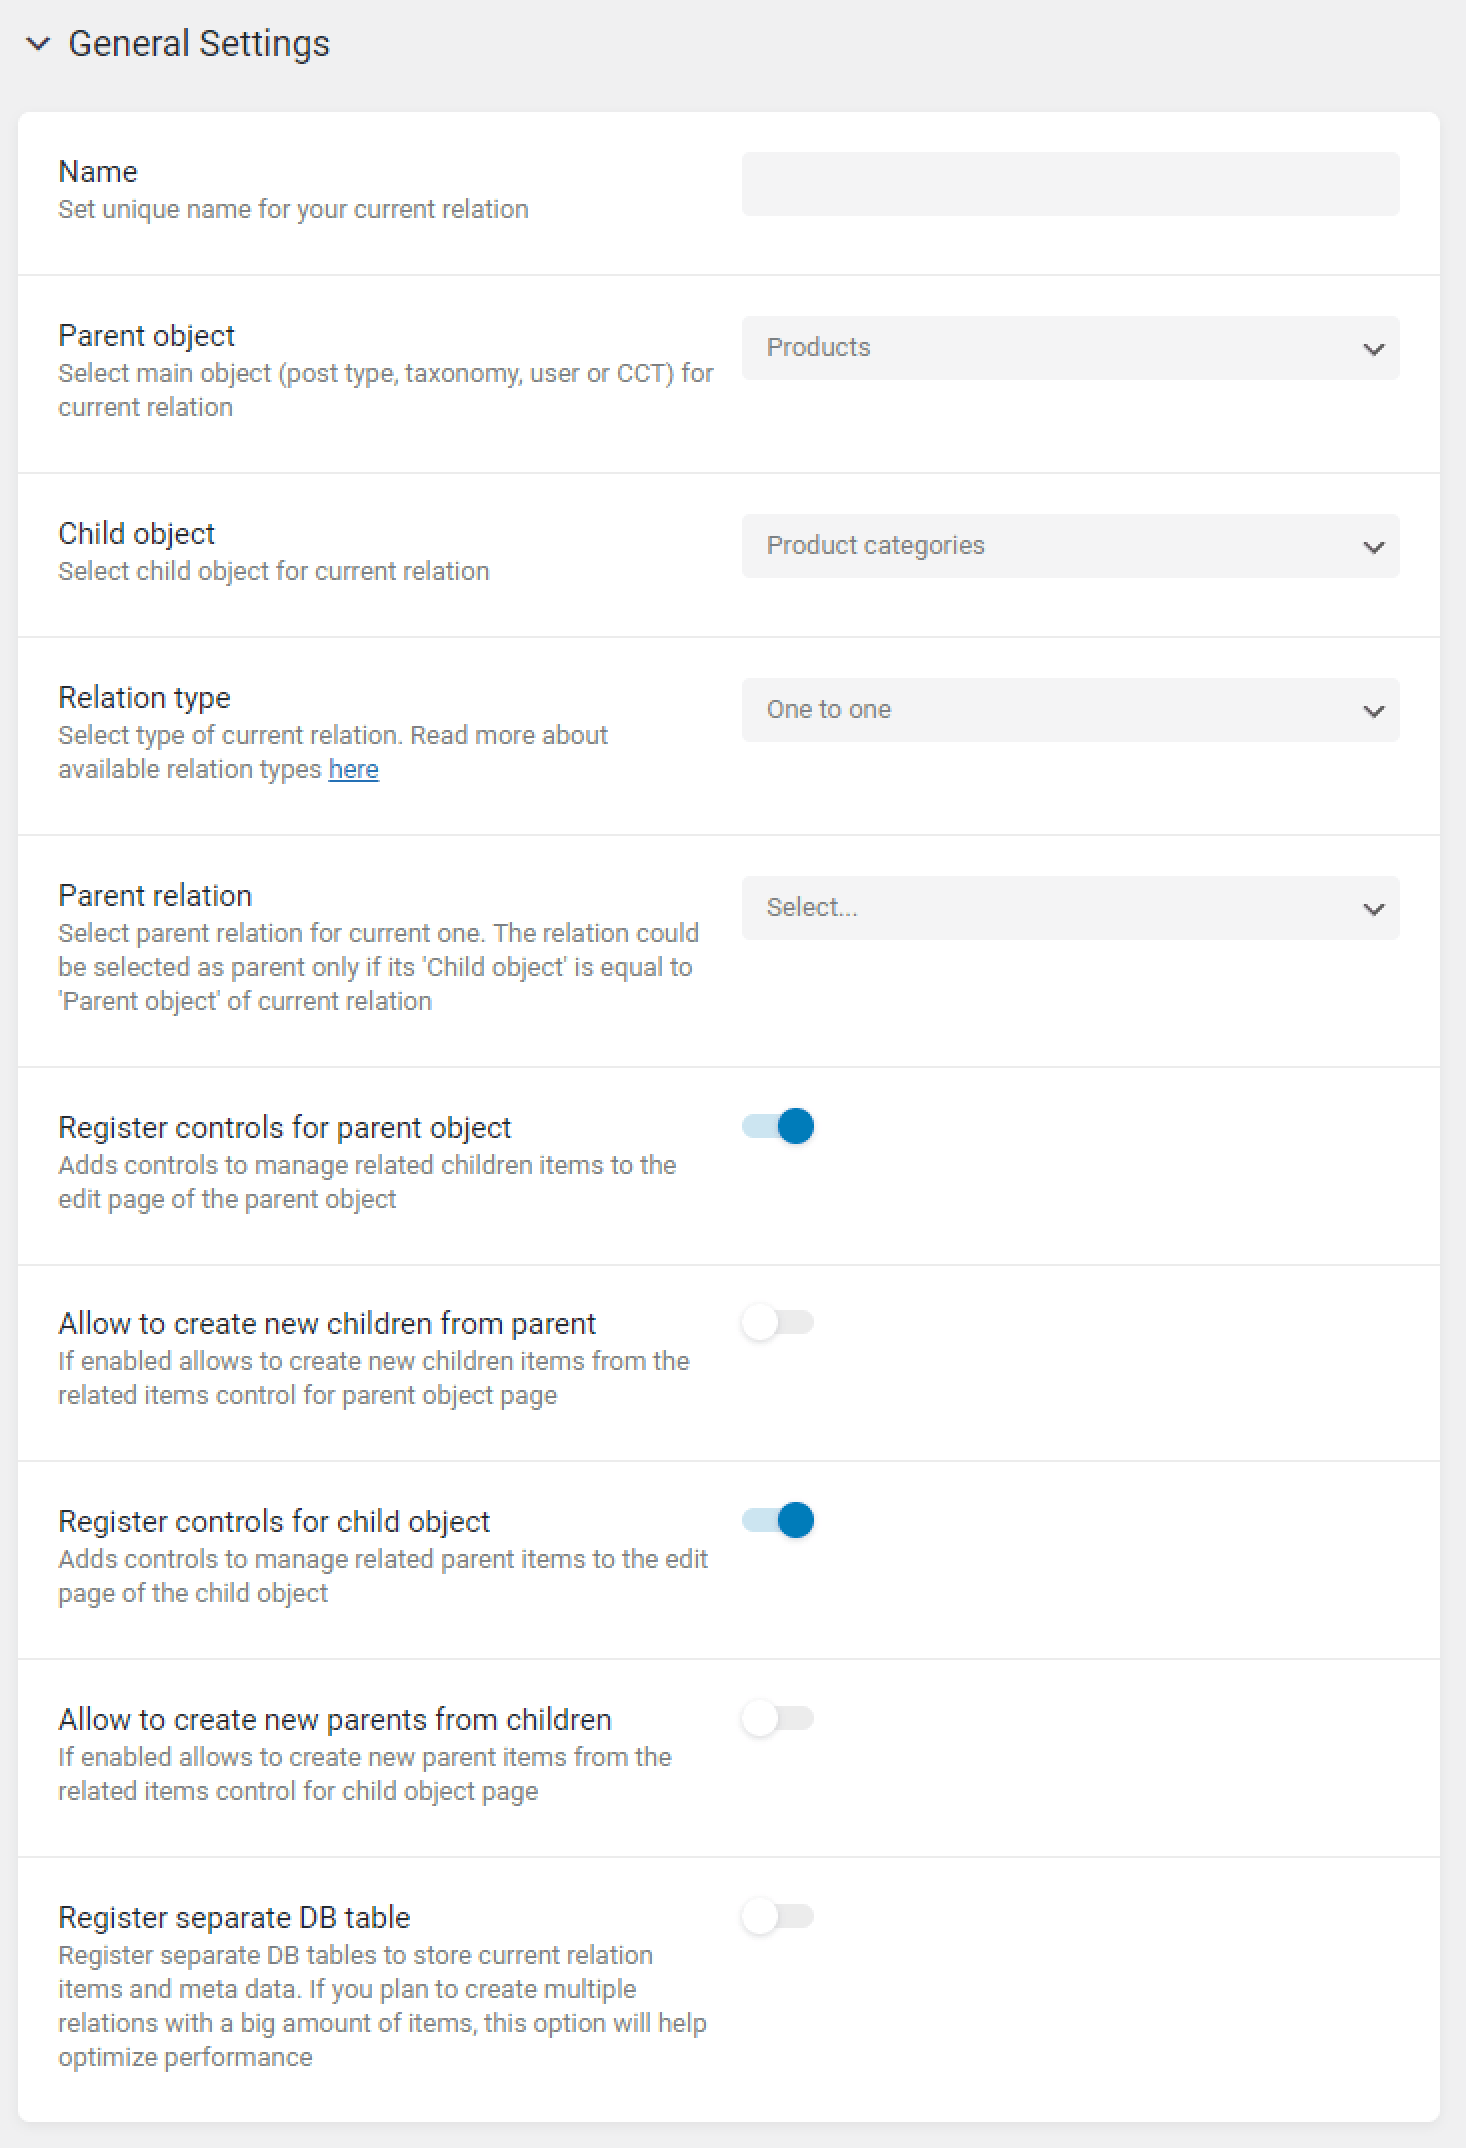
- Name. Name of the relation, which will later be shown in macros and dynamic tags settings;
- Parent object. Pick the main object for the current relation (e.g., post type, taxonomy, users, or CPT);
- Child object. Pick the child object for the present relation (e.g., post type, taxonomy, users, or CPT);
- Relation type. Check the detailed information about relation types here. You can pick such available types:
- One to one;
- One to many;
- Many to many.
- Parent relation. Allows you to create the grandparent relation (e.g., Continent > Country > City);
- Register controls for parent object. It adds a user interface (UI) to manage related items on the parent object editing area (e.g., on the editing areas of the post, user, term);
- Allow to create new children from parent. If you enable this option, it allows you to create new child-related items from the parent object editing page;
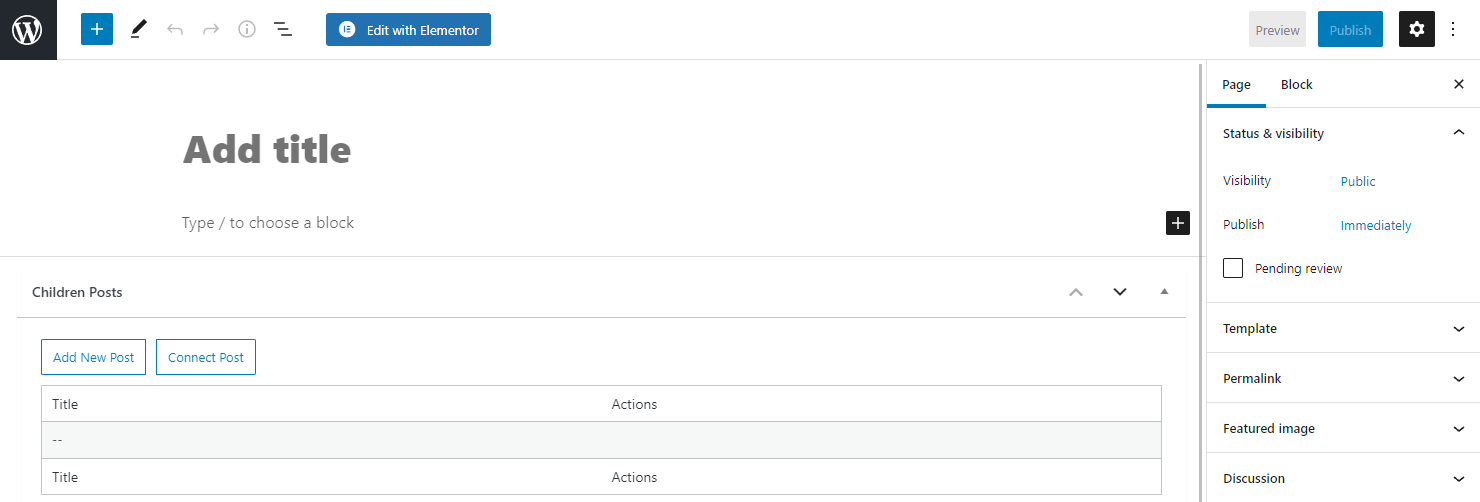
- Register controls for child object. It adds a user interface (UI) to manage related items on the child object editing area (e.g., on the editing areas of the post, user, term);
- Allow to create new parents from children. If you enable this option, it allows you to create new parents-related items from the child object editing page;
- Register separate DB table. This option registers the relation to a different Dashboard table (otherwise, all related items are stored in the same table for relations).
Content Type Related Settings
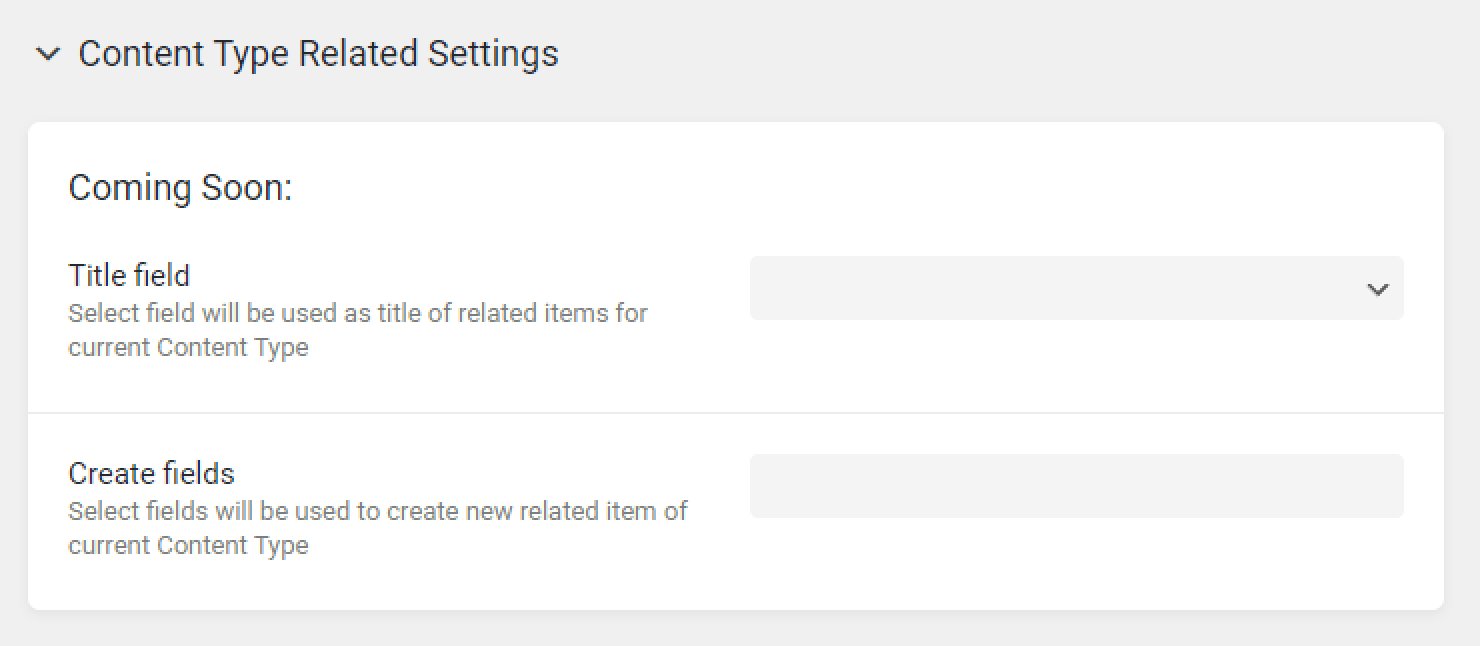
If you select a CCT as a parent or child object, a block with the following settings appears below the General Settings:
- Title field. Pick a CCT field from where the titles will be taken for the related items when you connect a new related item;
- Create fields. Here, you can choose the CCT fields you can fill when creating a new child CCT item on the parent editing page or a new parent CCT item on the child editing page.
To learn more about related Custom Content Type items, check this tutorial.
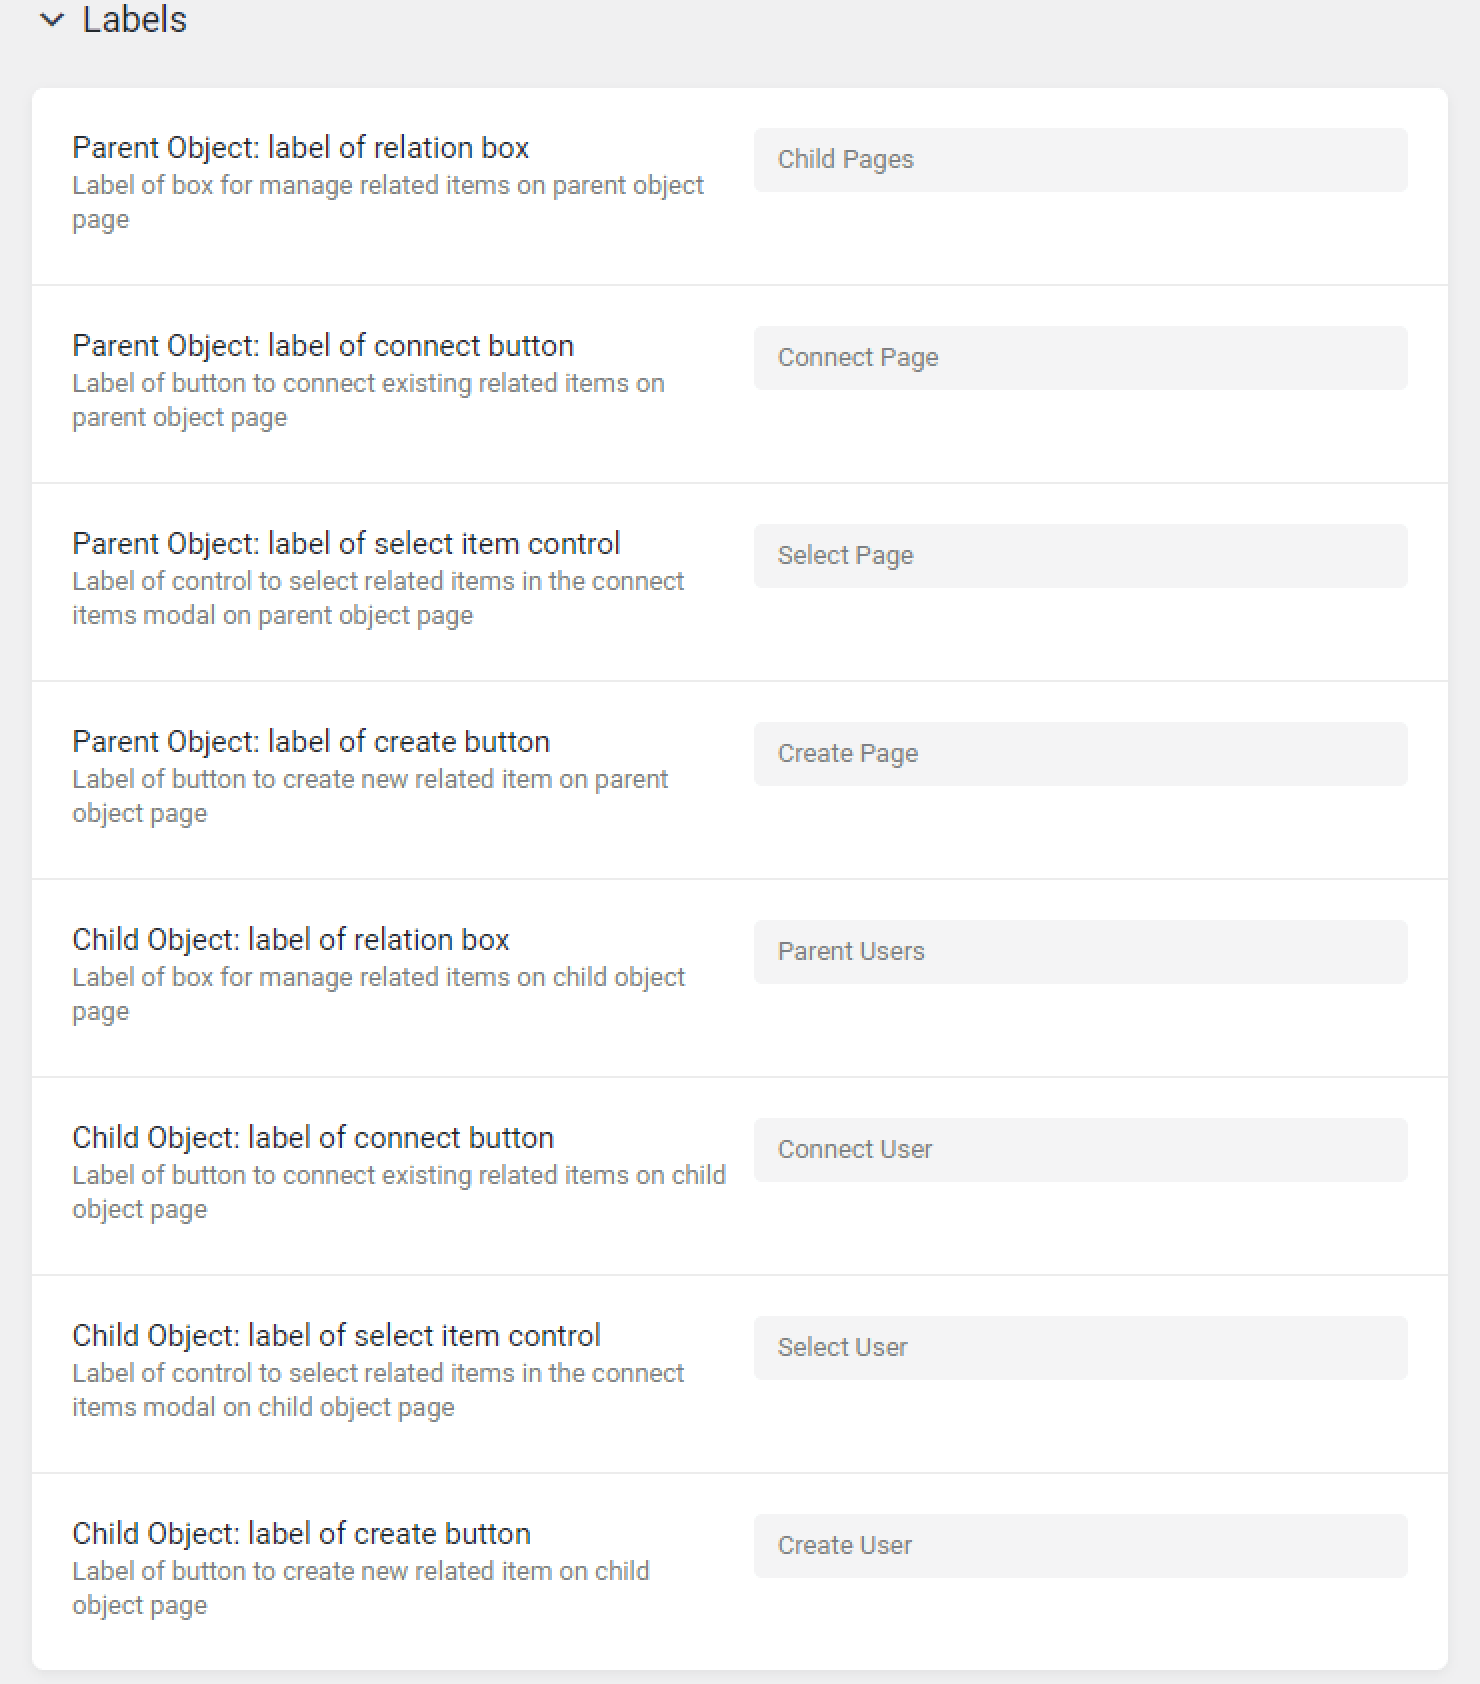
Labels
In the Labels block, you can set how relation settings will look in the dashboard. The Labels for the parent or child objects will appear if you enable the Register controls for parent/child object toggle. Also, some labels are dependent on the Allow to create new parents/children from children/parent toggles.
- Parent Object: label of relation box. It’s a custom label for the relation box on the parent object editing page;
- Parent Object: label of connect button. It’s a custom label for the button for connecting related items on the parent object editing page;
- Parent Object: label of select item control. It’s a custom label for the control for items selection on the parent object editing page;
- Parent Object: label of create button. It’s a custom label for the button for creating related items on the parent object editing page;
- Child Object: label of relation box. It’s a custom label for the relation box on the child object editing page;
- Child Object: label of connect button. It’s a custom label for the button for connecting related items on the child object editing page;
- Child Object: label of select item control. It’s a custom label for the control for items selection on the child object editing page;
- Child Object: label of create button. It’s a custom label for the button for creating related items on the child object editing page.
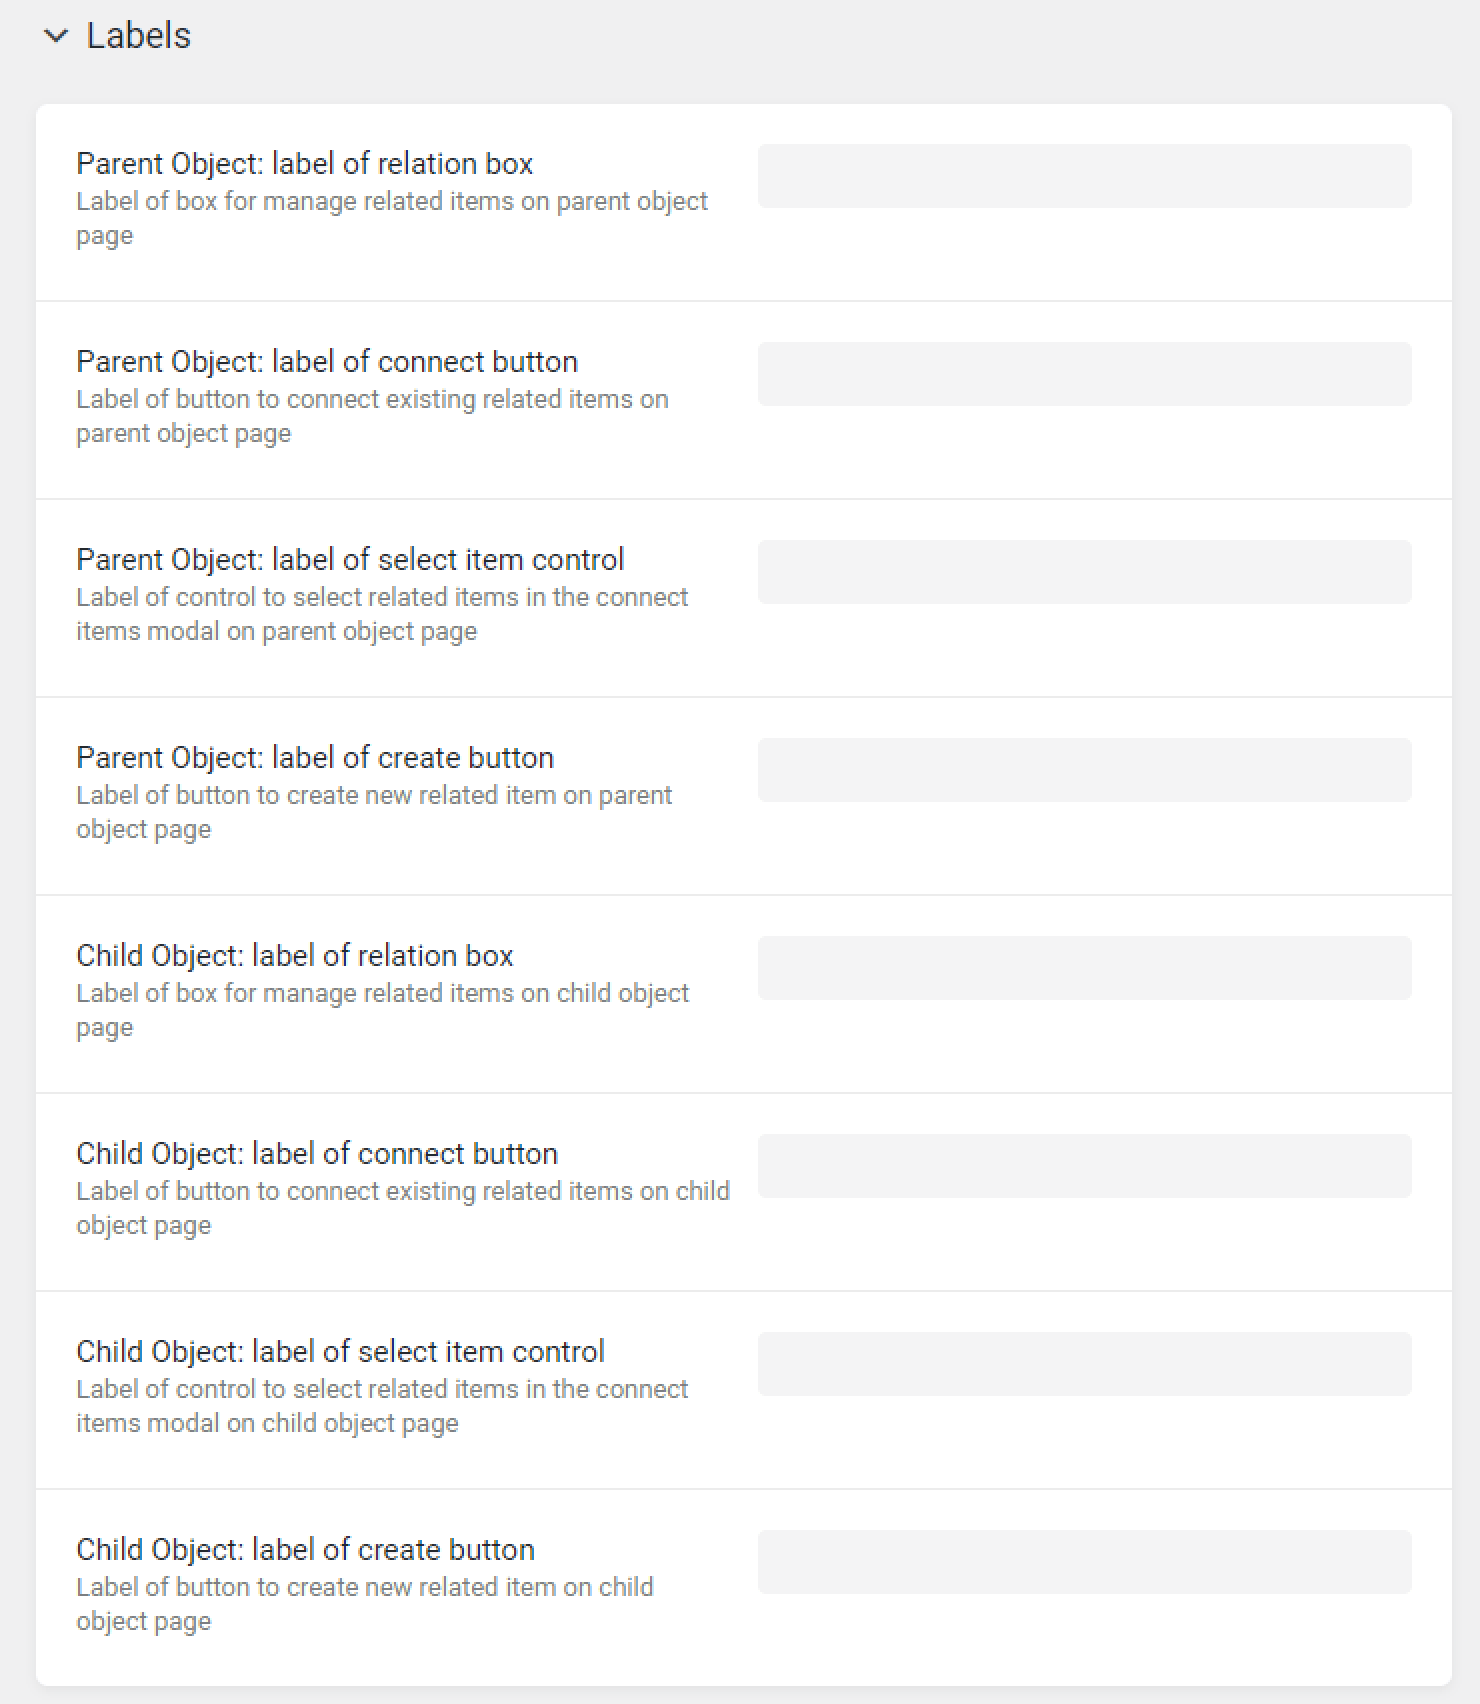
For example, we have created the relation, where users are the parent object and pages are the child object, and added such Labels.
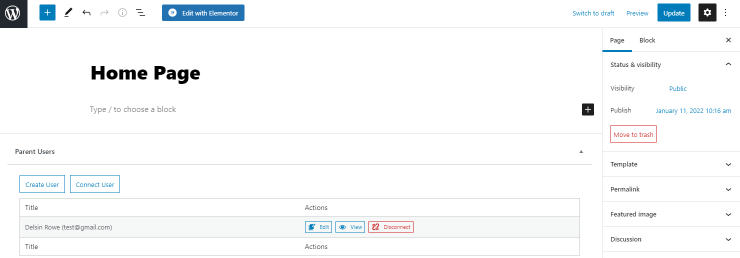
Let’s proceed to the child page. Here we can see the list of the parent items and create and connect them if needed.
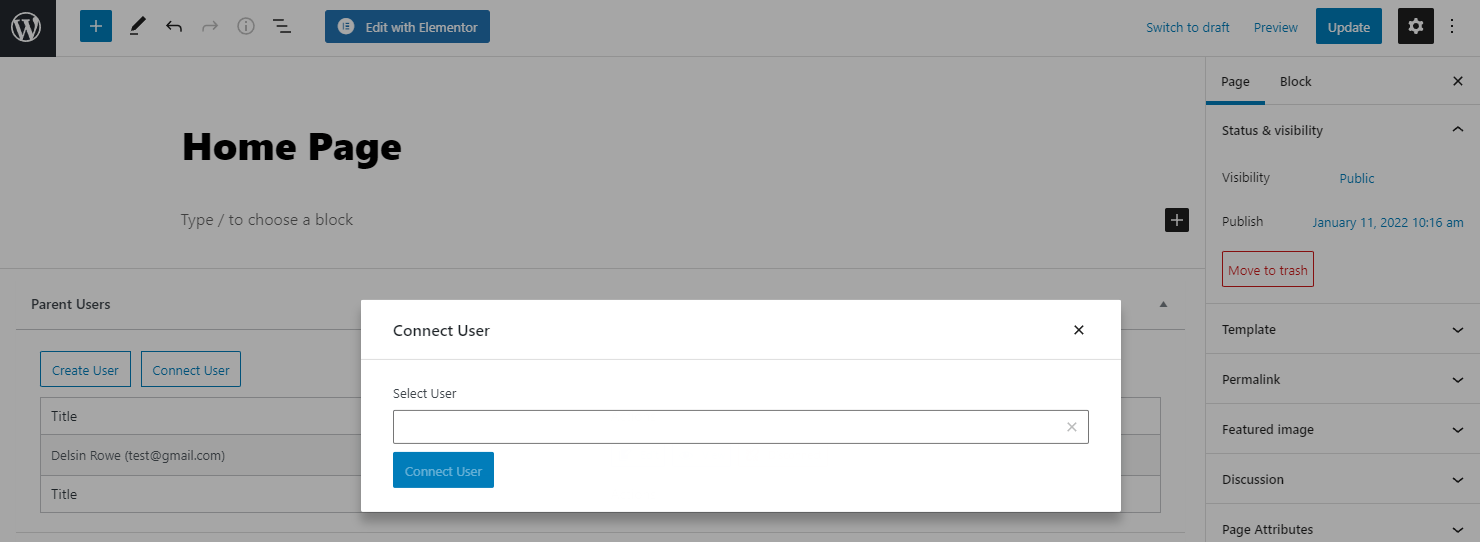
Once we hit the “Connect” button, the pop-up with the select item control will appear.
Such settings are analogous to those on the parent object page, where you can see, create and connect the child items.
Meta Fields
The meta field functionality is the same as in the post types, taxonomies, and meta boxes, but not all the field types are available because they are not compatible with the UI due to restrictions.
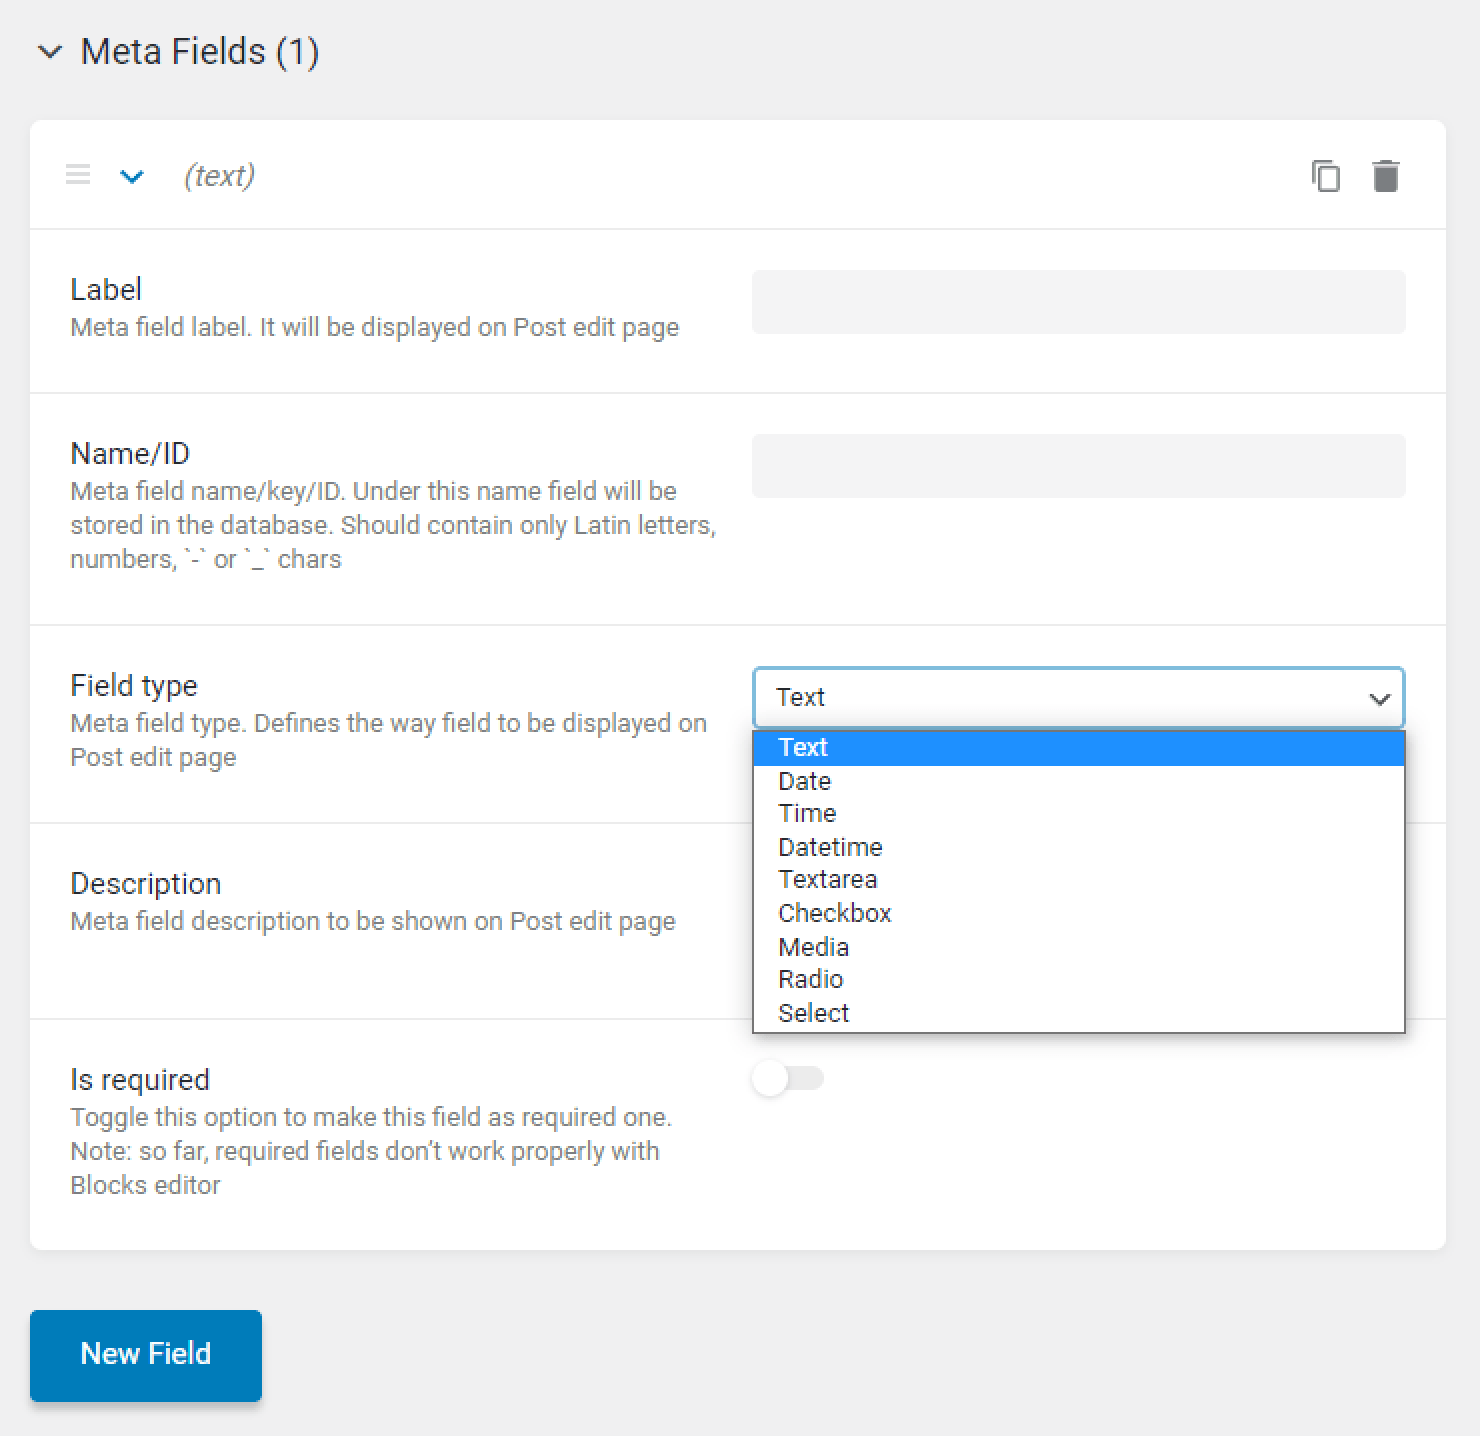
After creating meta fields and ending with other relation settings, click on the “Publish Relation” or “Update Relation” button. Then, proceed to the child or parent editing page (for instance, we have navigated to the provider post type and hit the “Edit” button of one of the posts).
Push the button for related item creation or connection. In the first pop-up, you will need to enter the name of the created item or select the title of the connected one. In the second pop-up, you can fill the meta field data.
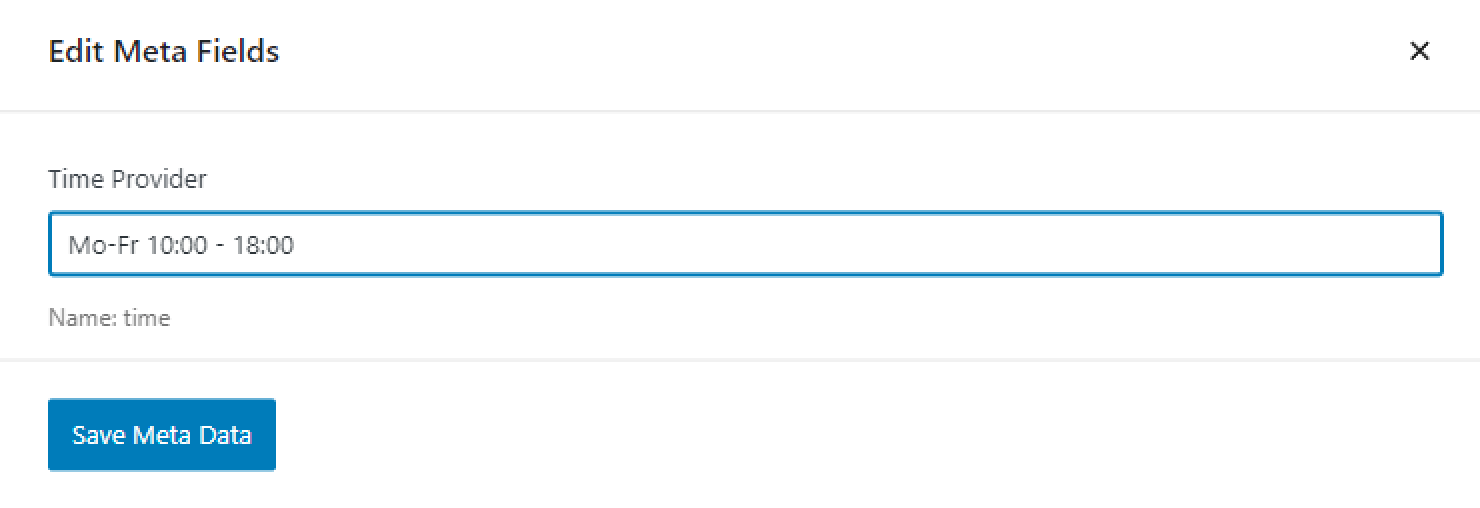
Also, to fill the meta field, you can press the “Edit Meta” button. Here you get the same pop-up, as in the previous screenshot, where you can edit or enter new meta data. After you finish, click on the “Save Meta Data” button and close the pop-up.
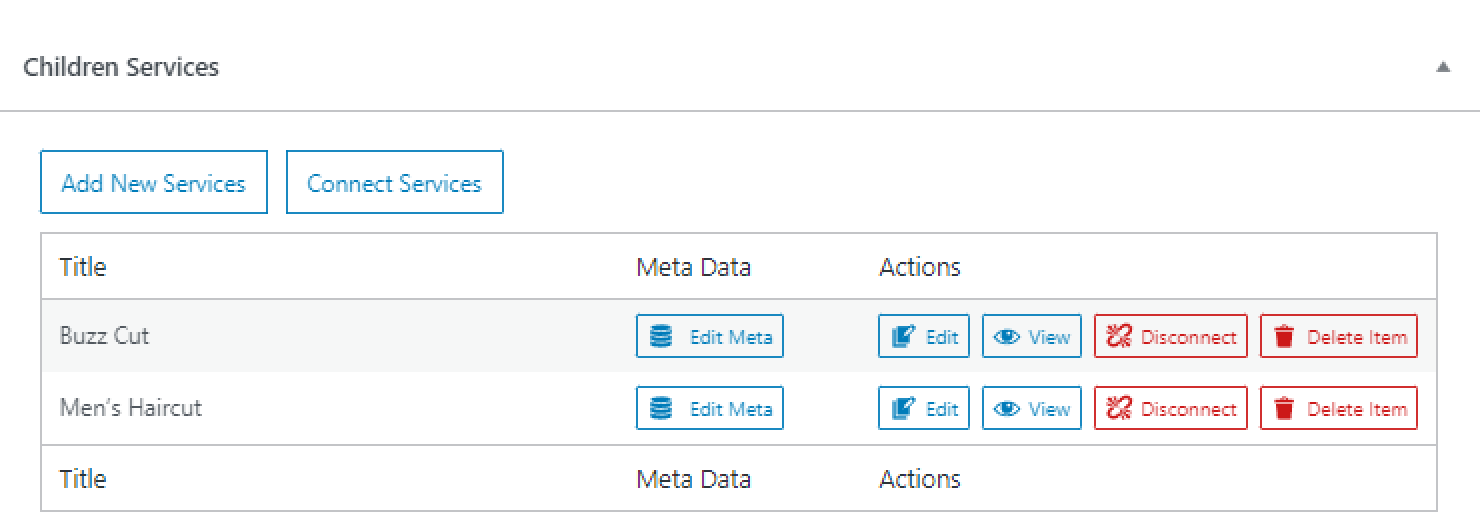
If you end, update, or publish the object (post, CCT item, term, etc.), which you edited.
Press to edit a Single Page or Listing Item via the Elementor or Gutenberg editors and drag-n-drop the Dynamic Field widget or block to display the meta fields of related items. Select the “Relation Meta Data” Source and the name of the needed Meta Field. Lastly, select the “Related Items From…” Context.
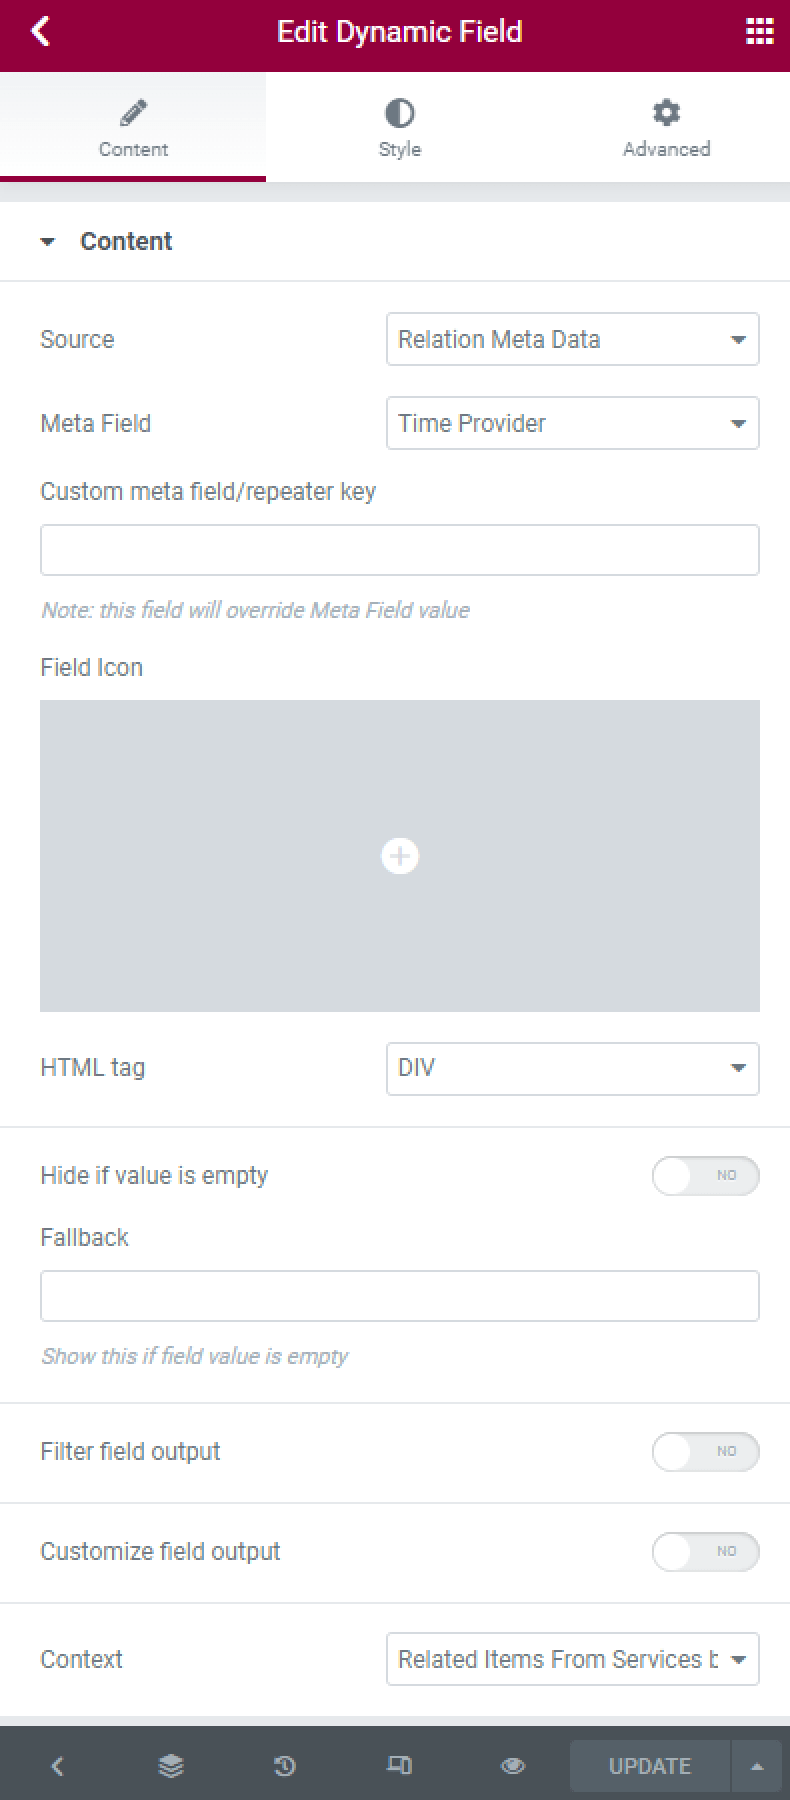
There are the same settings in the Dynamic Field block in the Gutenberg editor.

We have placed the meta field on the Parent Single Page and in the Listing with the related children items.

To display only the related children service posts below the parent provider post we have used the Post Type Query with the Related Items macro in the Listing Grid.
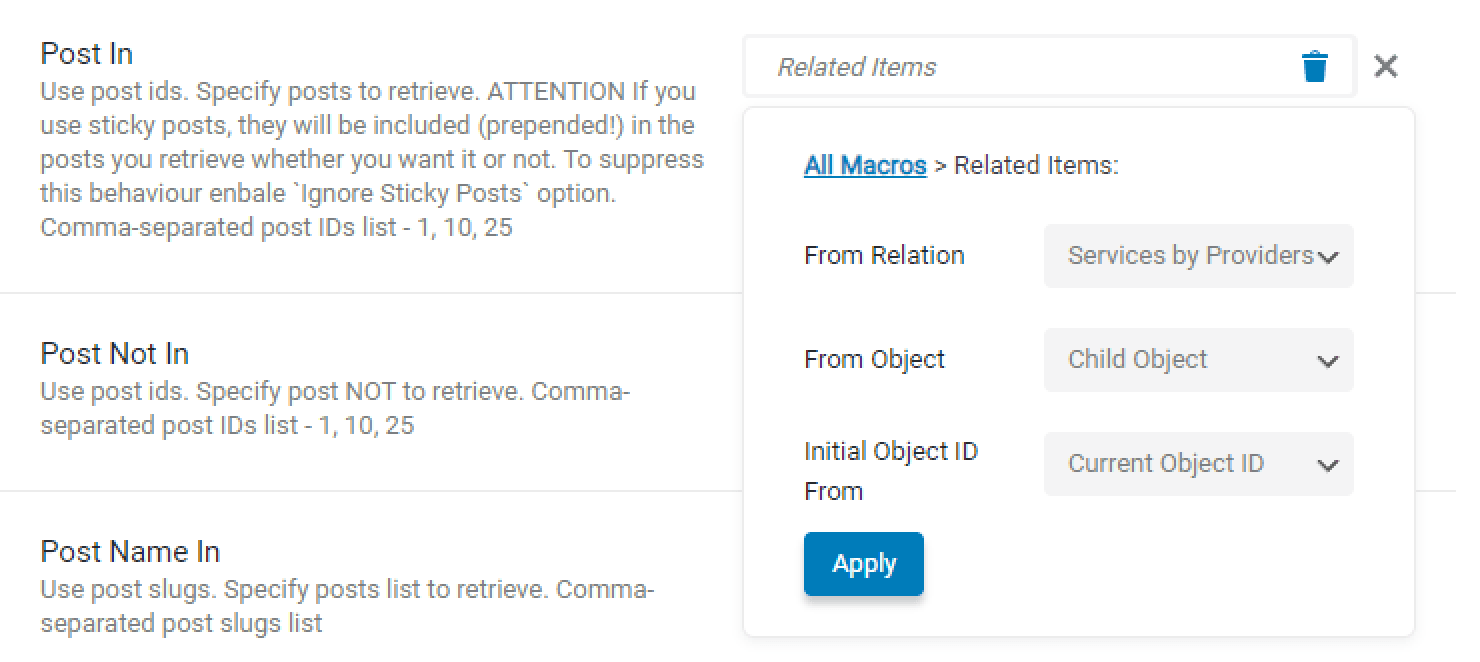
To apply the query to the Listing Grid proceed to the Custom Query section in the widget Content settings, enable the toggle and select the query for relations.
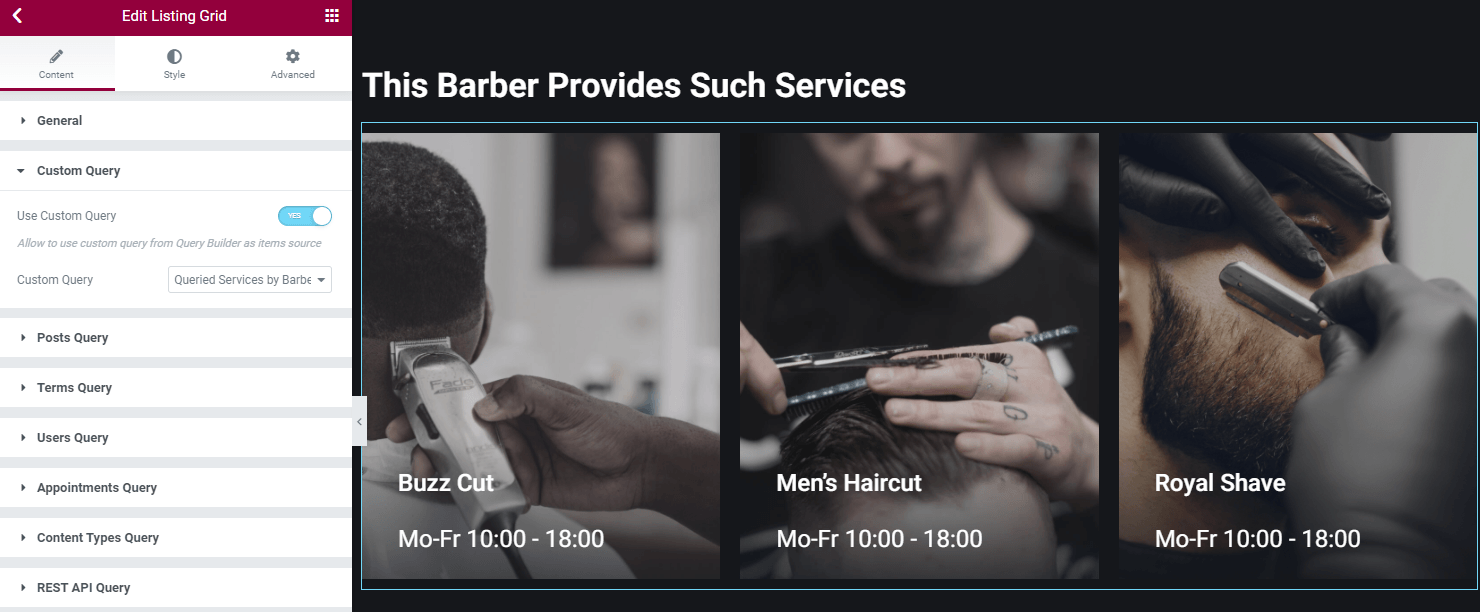
To learn more about the query and macros for relations, proceed to this tutorial.
Admin Column
To organize your posts more appropriately, you can display the related items in the Admin Column in the CPT.
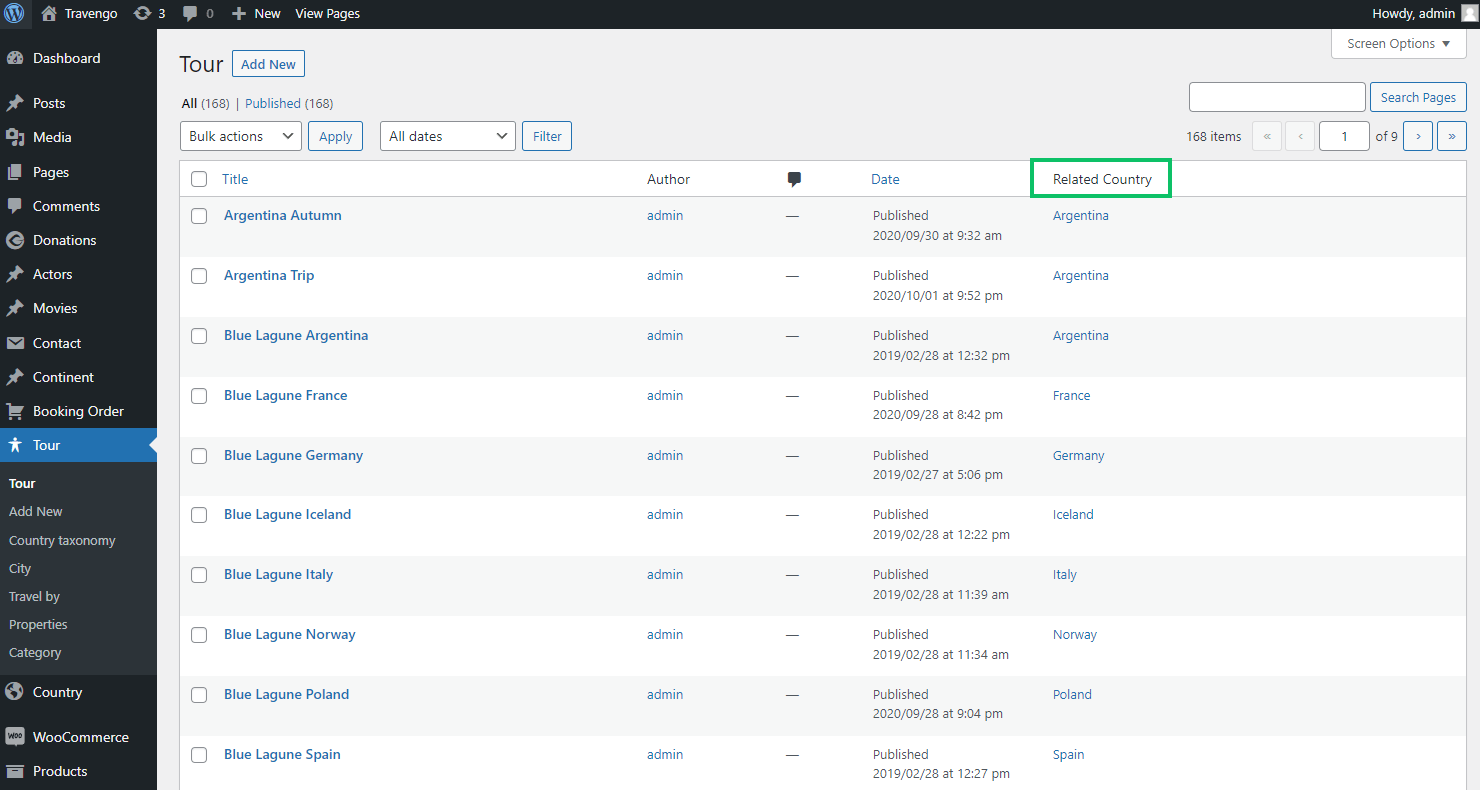
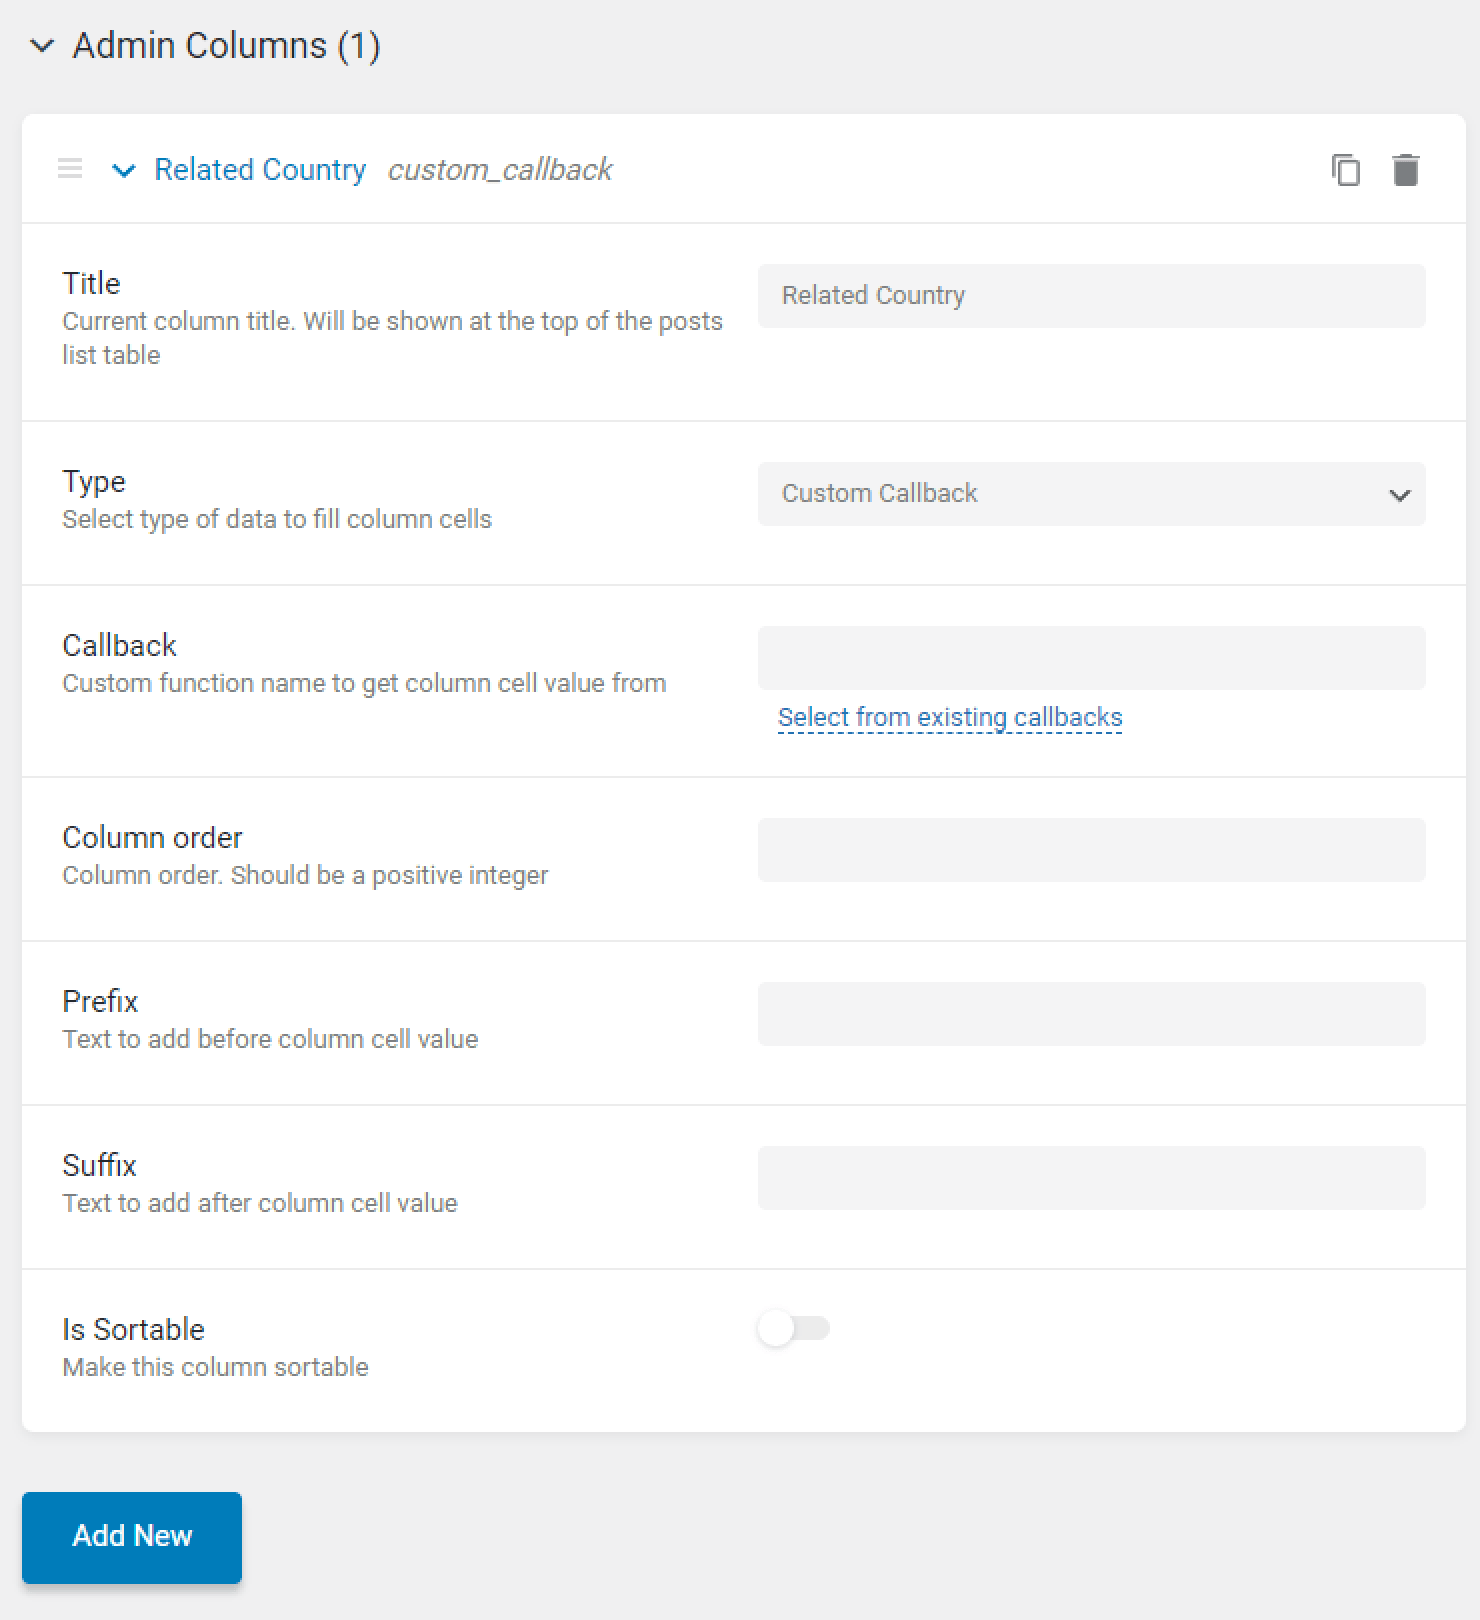
Go to JetEngine > Post Types and click the “Edit” button near the needed CPT. “Add new” admin column, give it a title, and select the “Custom Callback” Type. Click the “Select from existing callbacks” line in the Callback field.
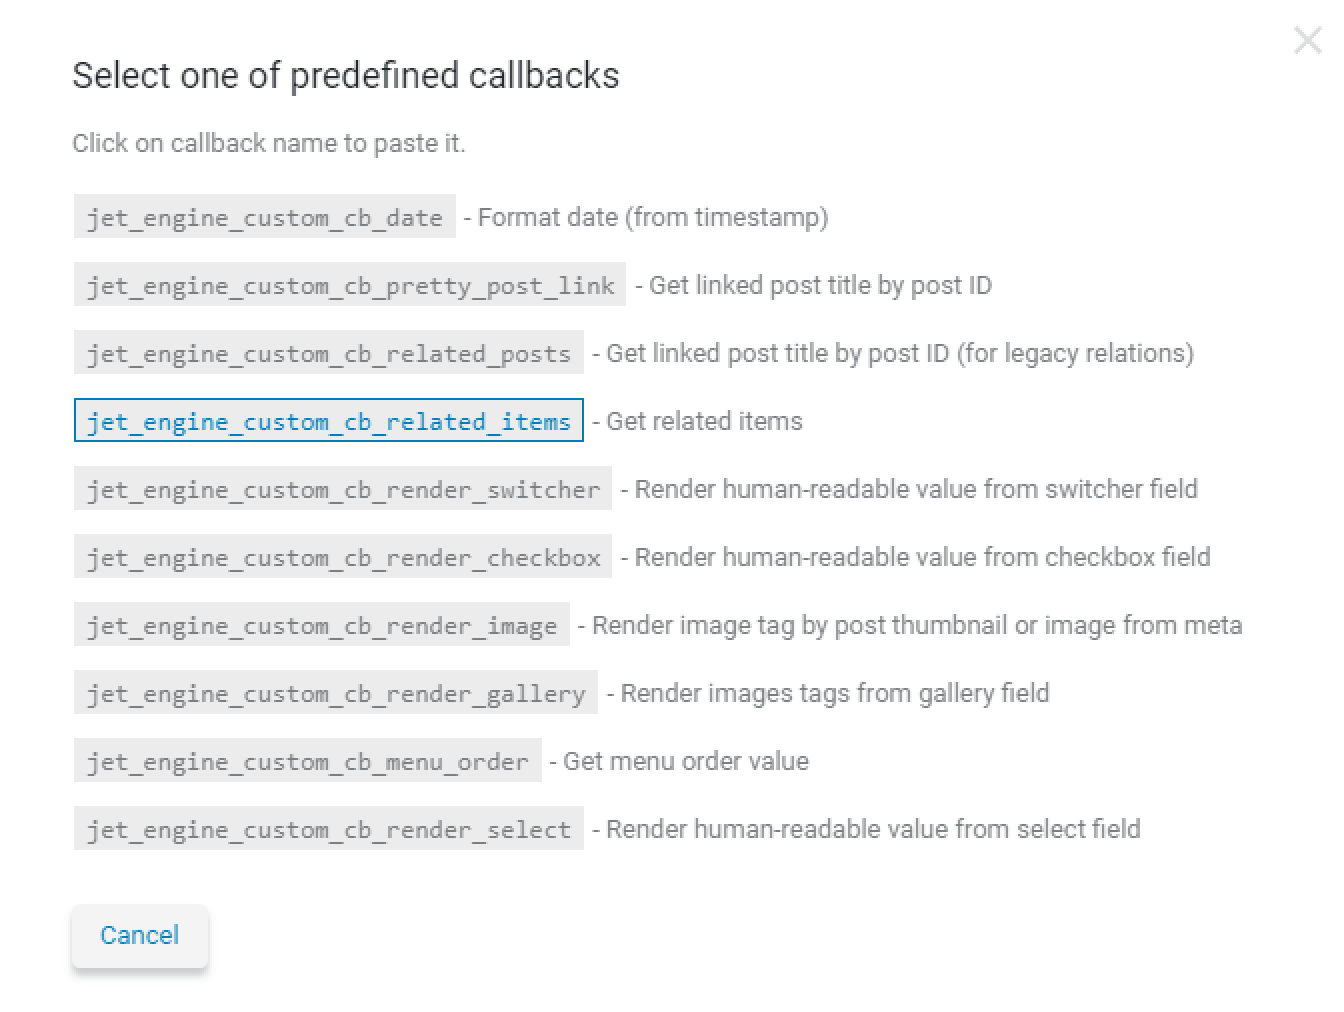
In the appeared window, select the jet_engine_custom_cb_related_items callback.
Choose the relation for this admin column in the next window and tick the “Apply” button.

“Update” the CPT, proceed to the post type tab on the WordPress Dashboard and check the admin column with the related items.
Admin Filter
With the Admin Filters feature, you can filter the posts list by the related items.
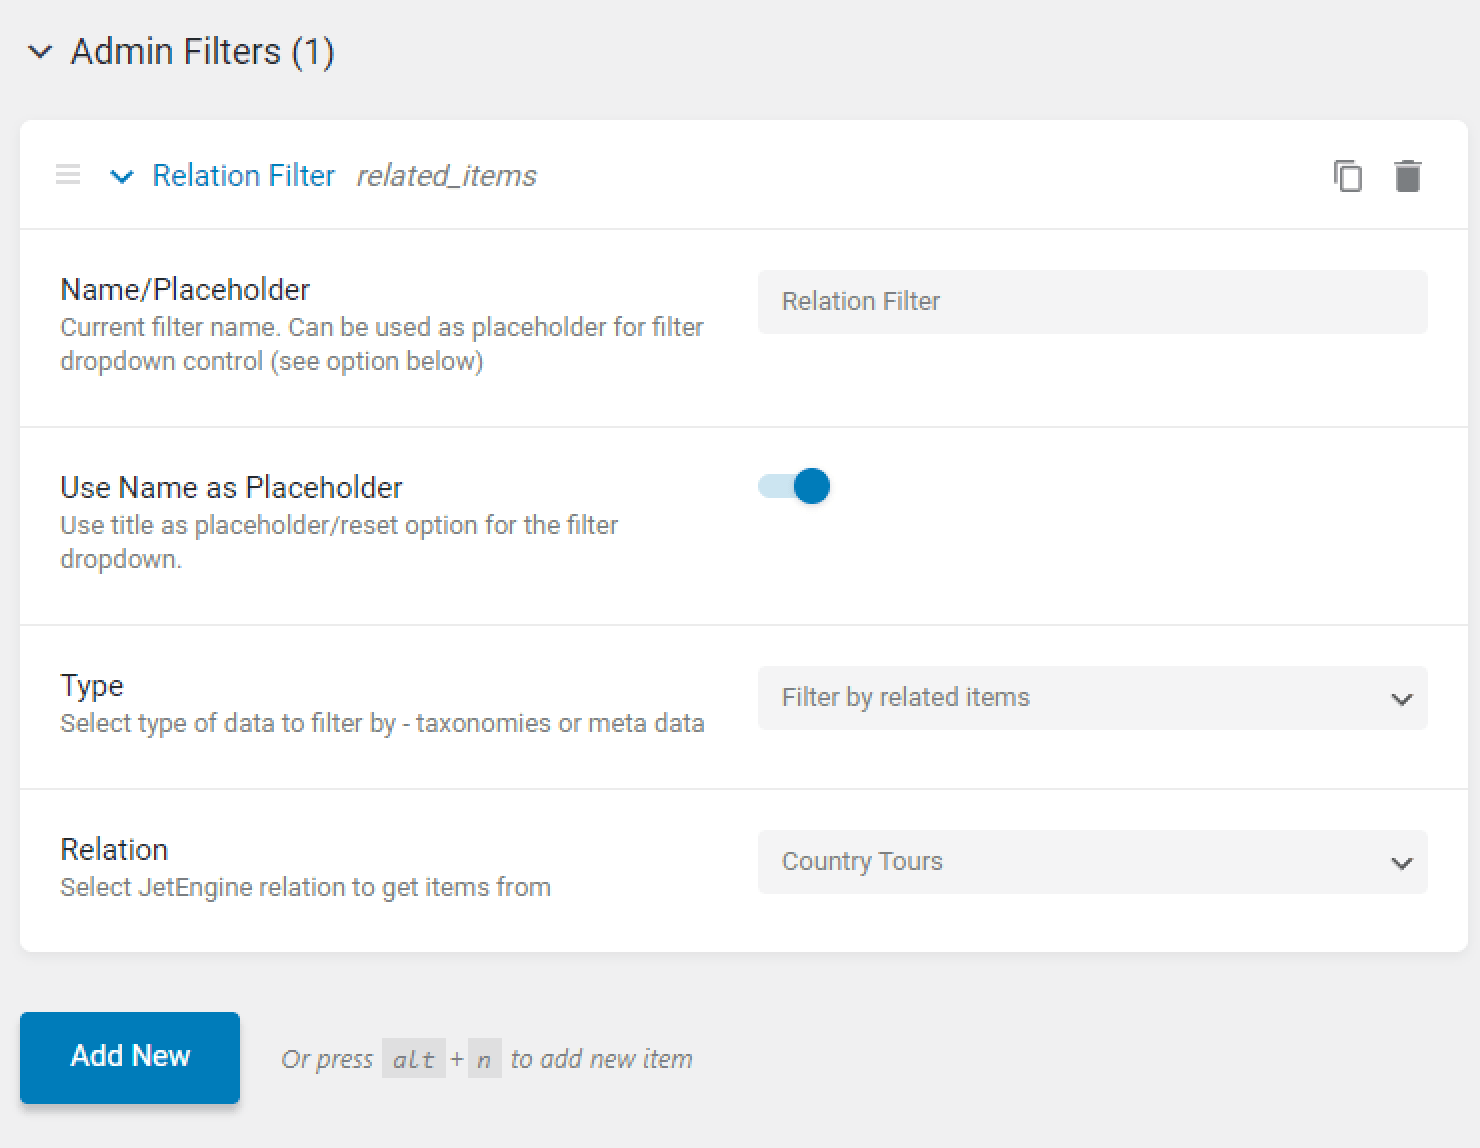
Go to JetEngine > Post Types and click the “Edit” button near the needed CPT. “Add new” admin filter, give it a name, and select the “Filter by related items” Type. In the new Relation field, select the needed relation.
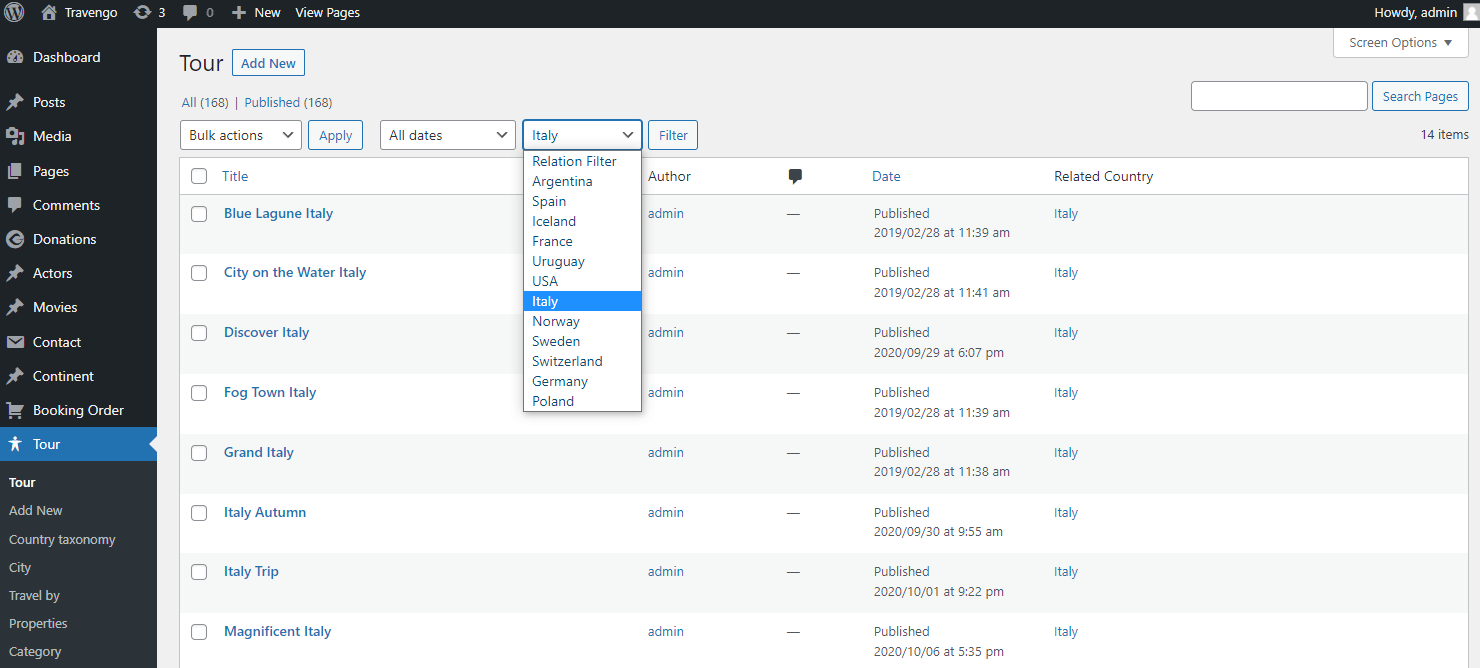
“Update” the CPT, proceed to the post type tab on the WordPress Dashboard, and filter posts by the related items.
That’s it. You know now all about the JetEngine relations feature settings and how they can help you create or connect the related items on the parent or child editing page.