How to Create Admin FIlters for the Custom Post Type
With JetEngine Admin Filters, you can create back-end filters for the Custom Post Type. To do it, please, follow the next instruction.
Before you start, check the tutorial requirements:
- Elementor (Free version) or Block editor (Gutenberg)
- JetEngine plugin installed and activated with the Custom Post Type created and Taxonomy assigned to it
Head to WordPress Dashboard > JetEngine > Post Types. Find the needed Post Type and edit it.
After that, scroll down to the Admin Filter tool and click “Add new” in the Admin Filters section.
The basic setup is over; now, let’s create a specific filter type.
Create Admin Filters for Posts by Taxonomies
This filter type helps the admin to sort posts by taxonomy assigned to the needed Custom Post Type. Follow this tutorial to learn more about How to Create a Custom Taxonomy.
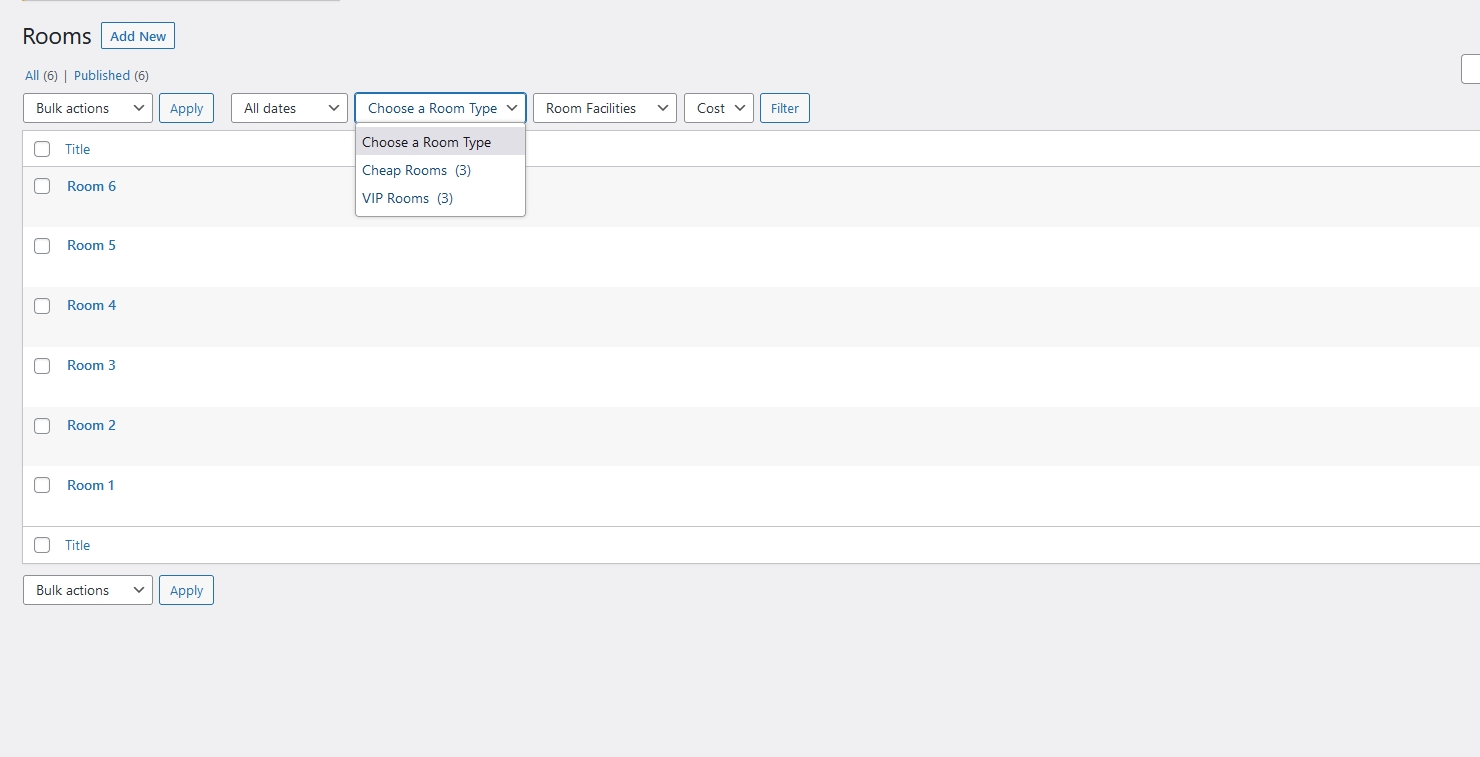
For example, there is a “Room” post type, and we need to filter rooms by the “Room Types” taxonomy.
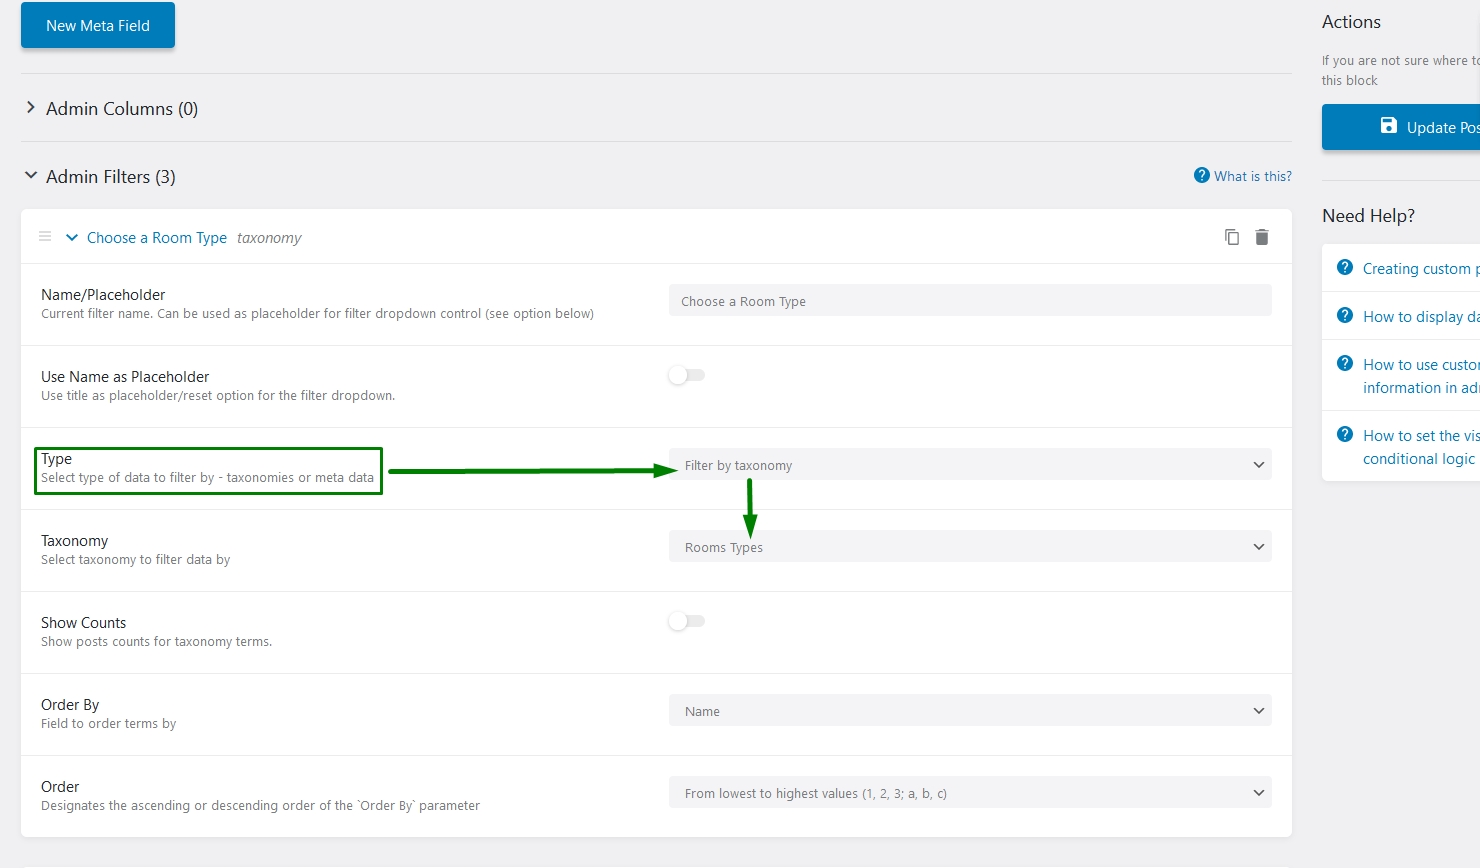
Once the Admin tab in the Custom Post Type is opened, set the Name/Placeholder for a filter and select the “Filter by Taxonomy” option in the Type dropdown. Then, don’t forget to pick the needed Taxonomy by which posts will be filtered.
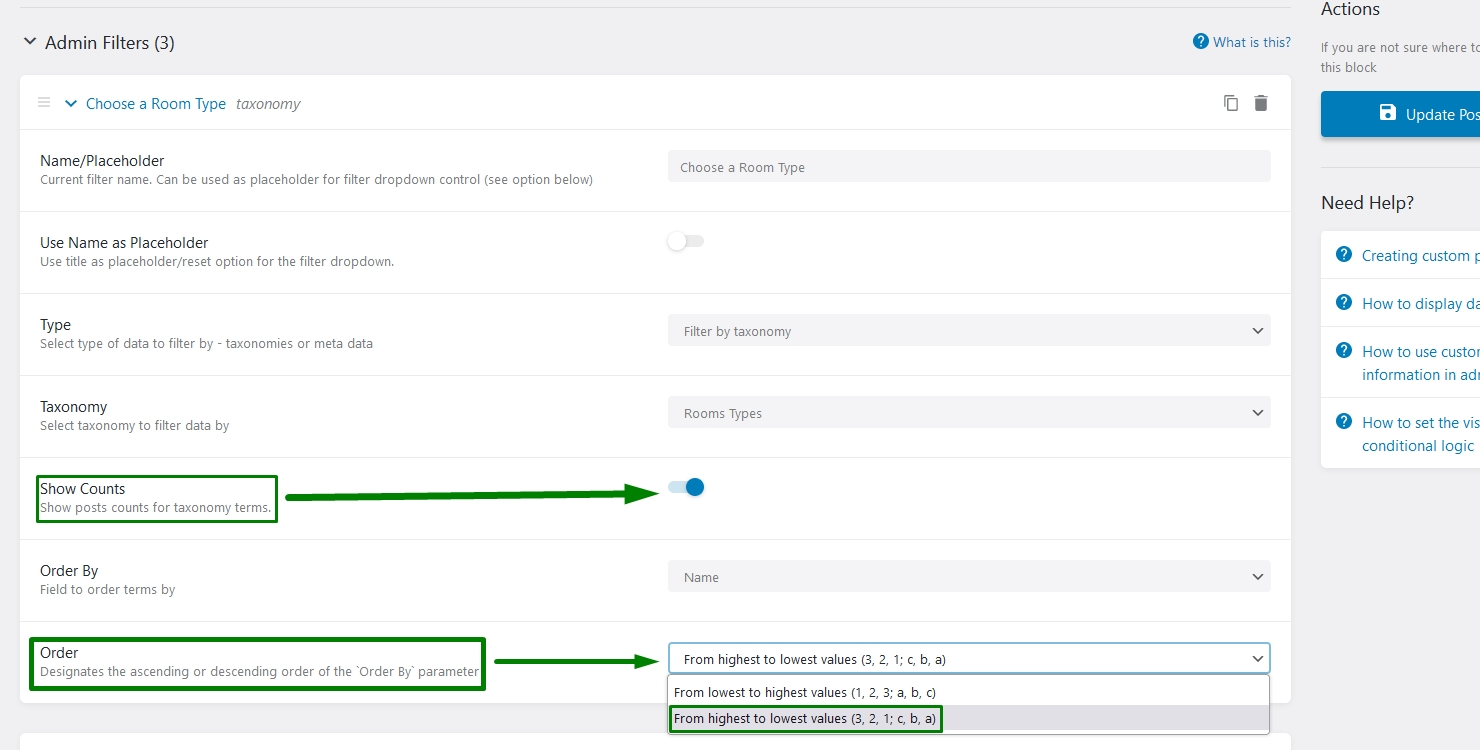
To change the categories display order in the filters, enable the Show Counts feature and set the “From highest to lowest values” Order.
Build Admin Filters by Meta Data
Glossary option source
Firstly, create a filter with the “Filter by meta data” Type.
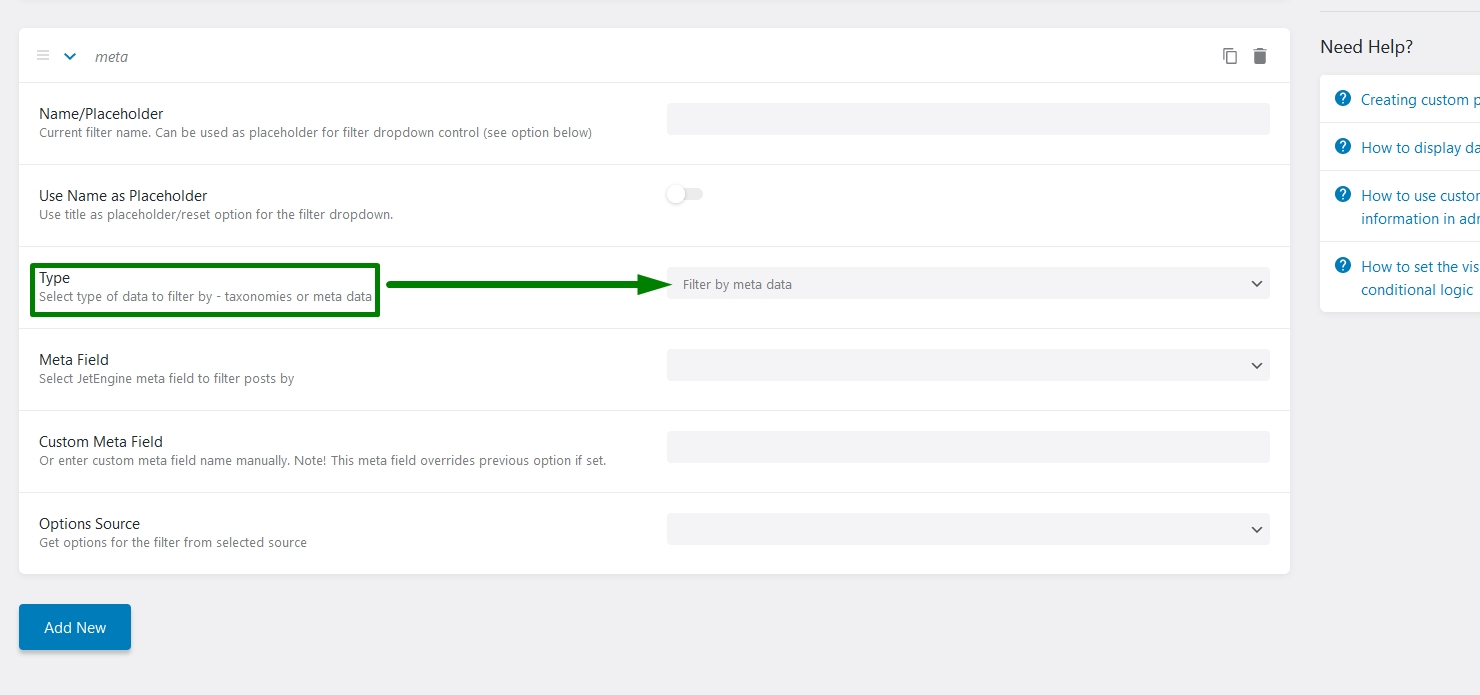
Now to filter by specific meta field, select it from the list.
To pull the labels from the glossary, choose the samely named item in the Options Source drop-down and pick the needed glossary from the Glossary list.
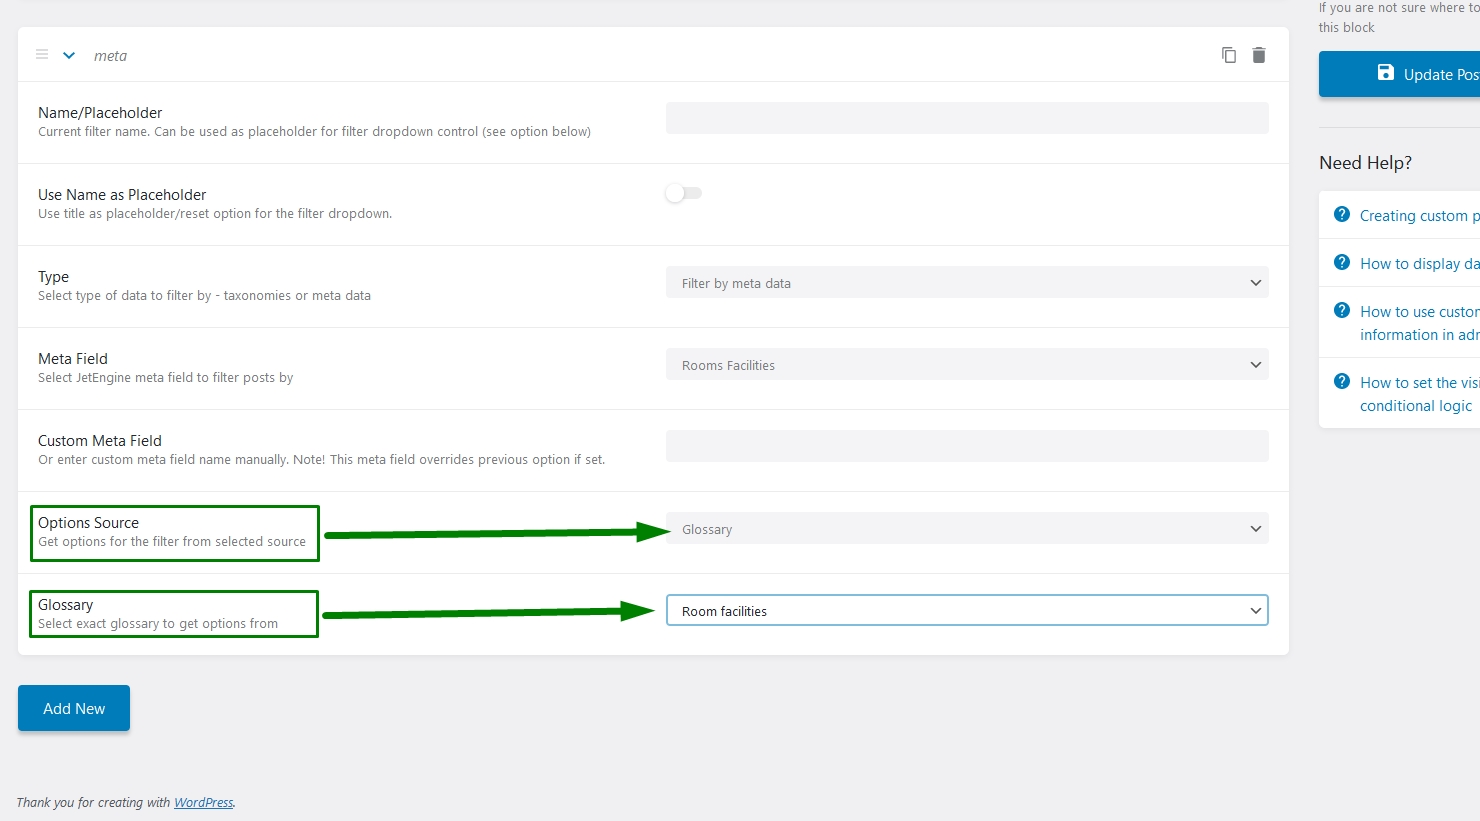
In the following picture, you may see configured admin filter:

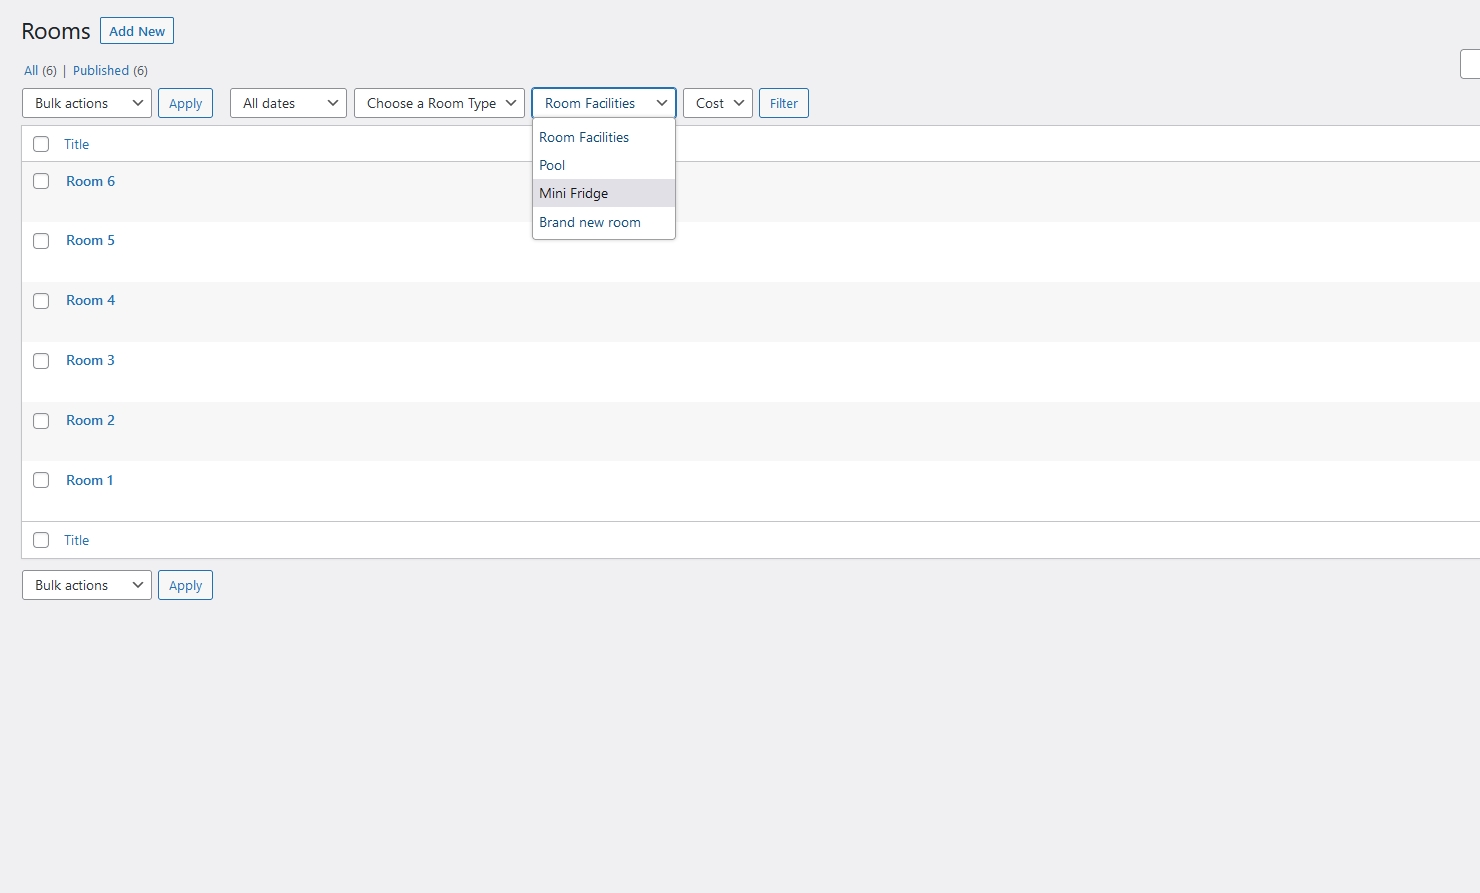
Save the changes and check the results.
Field options source
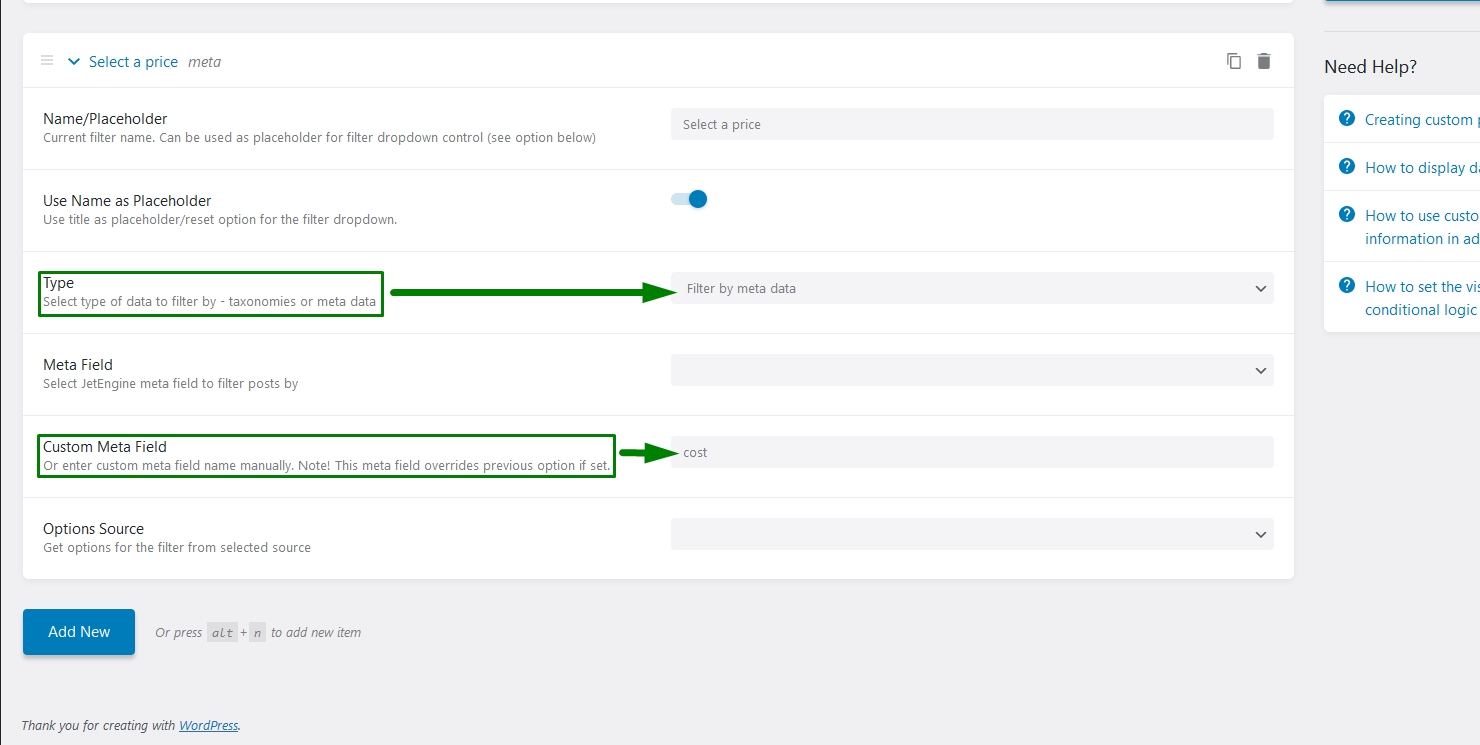
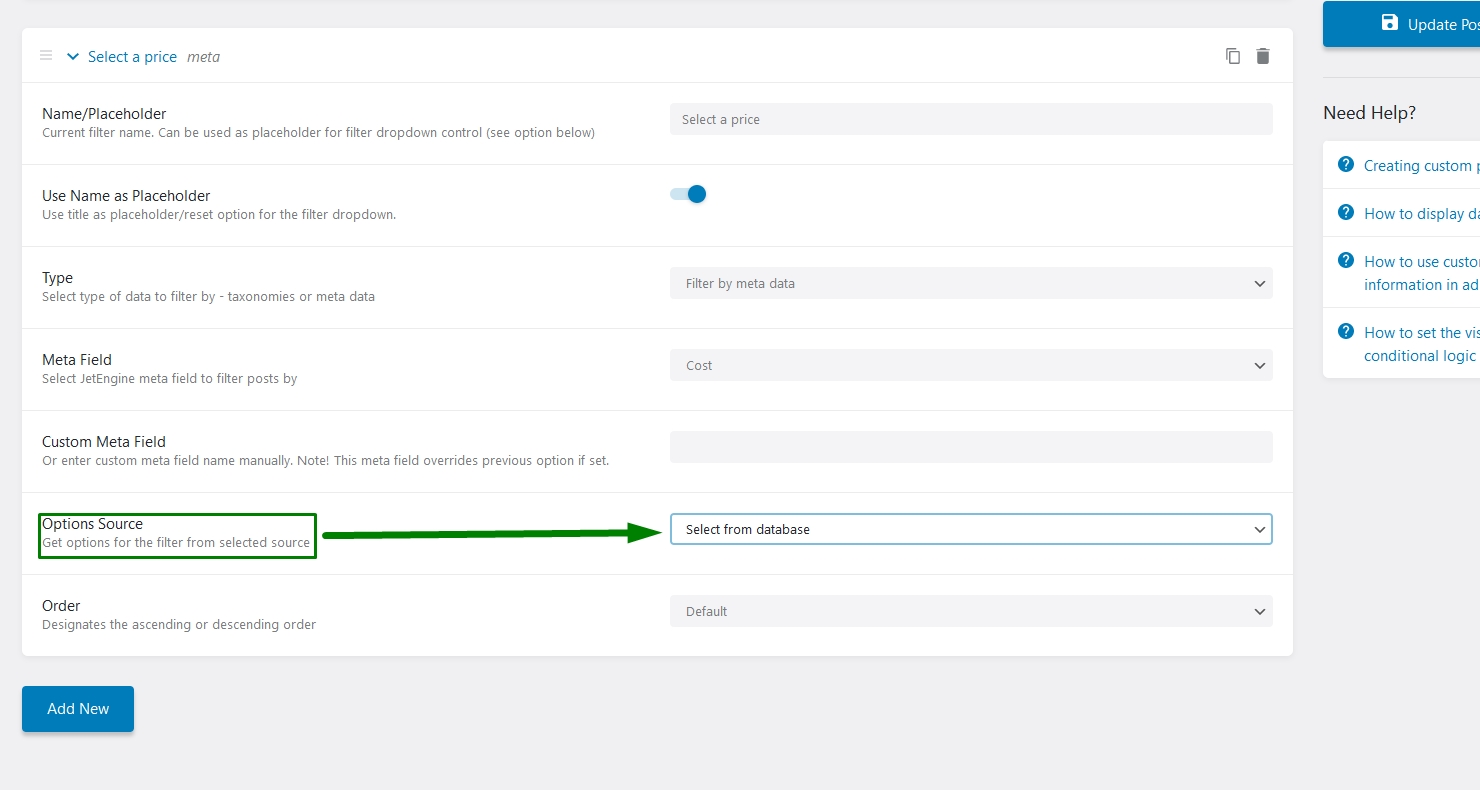
Now we will create another admin filter, but the “Select from database” or “Field options” configuration will be used in the current case. It depends on the meta field type.
This option pulls the value out of the meta field from each post that has a value inside the selected field.
In this example, a filter is by the text field, which shows a cost for a specific room according to the Custom Meta Field key.
The same result can be achieved by selecting the exact meta field from the list. You may see the configuration in the picture below.
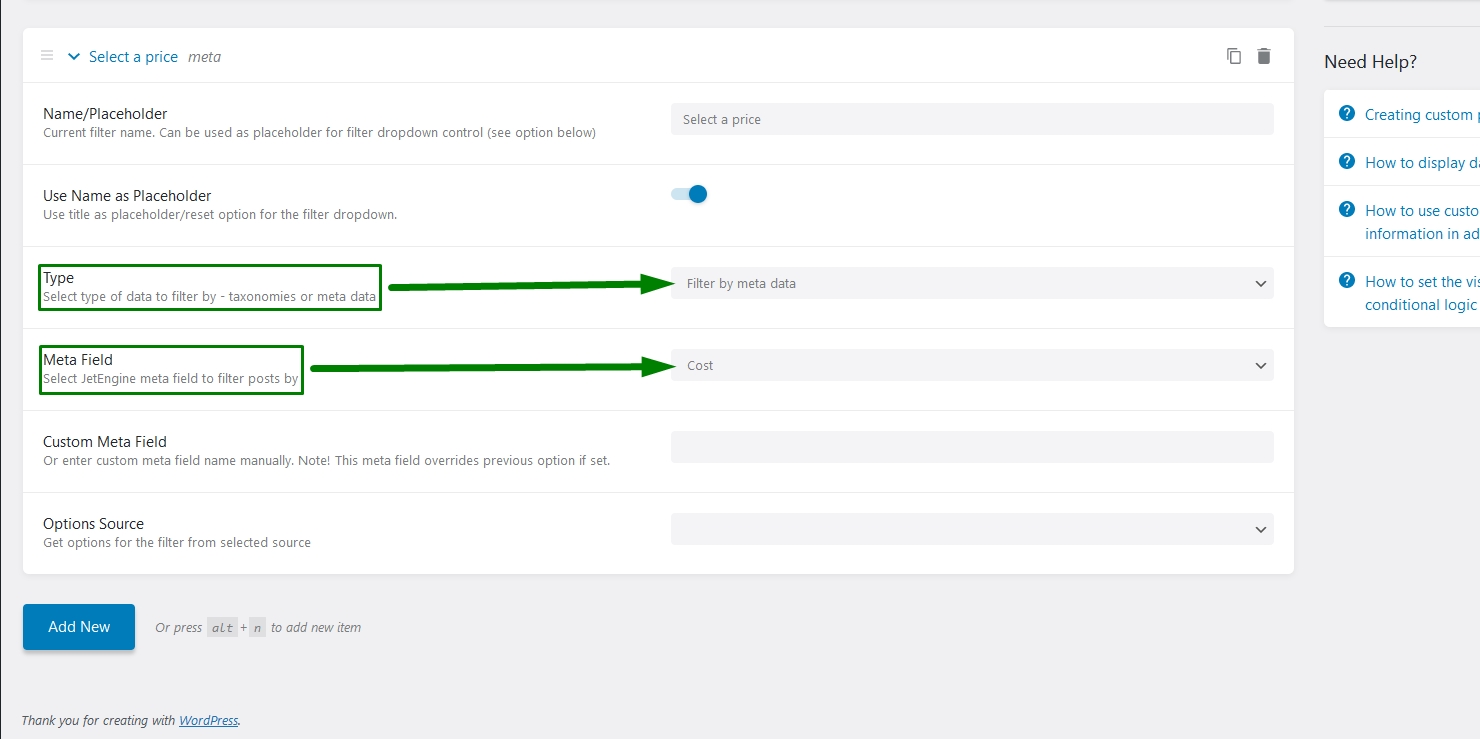
In this case, we should choose the “Select from database” Options Source. This option can be different depending on the meta field type you will use.
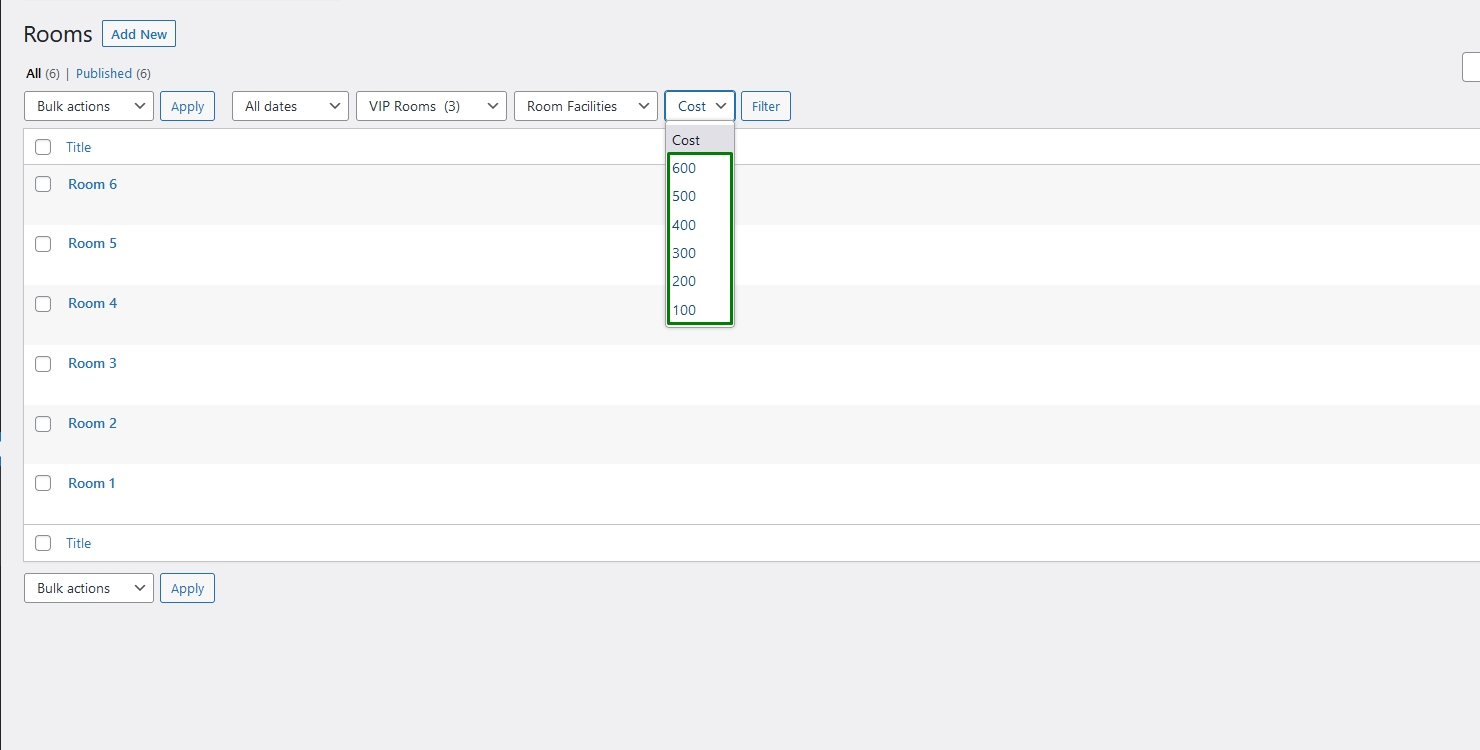
Now let’s check the result.
Set up Admin Filters by Related Items
To create this filter type, you should create a relation first. Please follow the How to Create Relationships Between Posts tutorial.
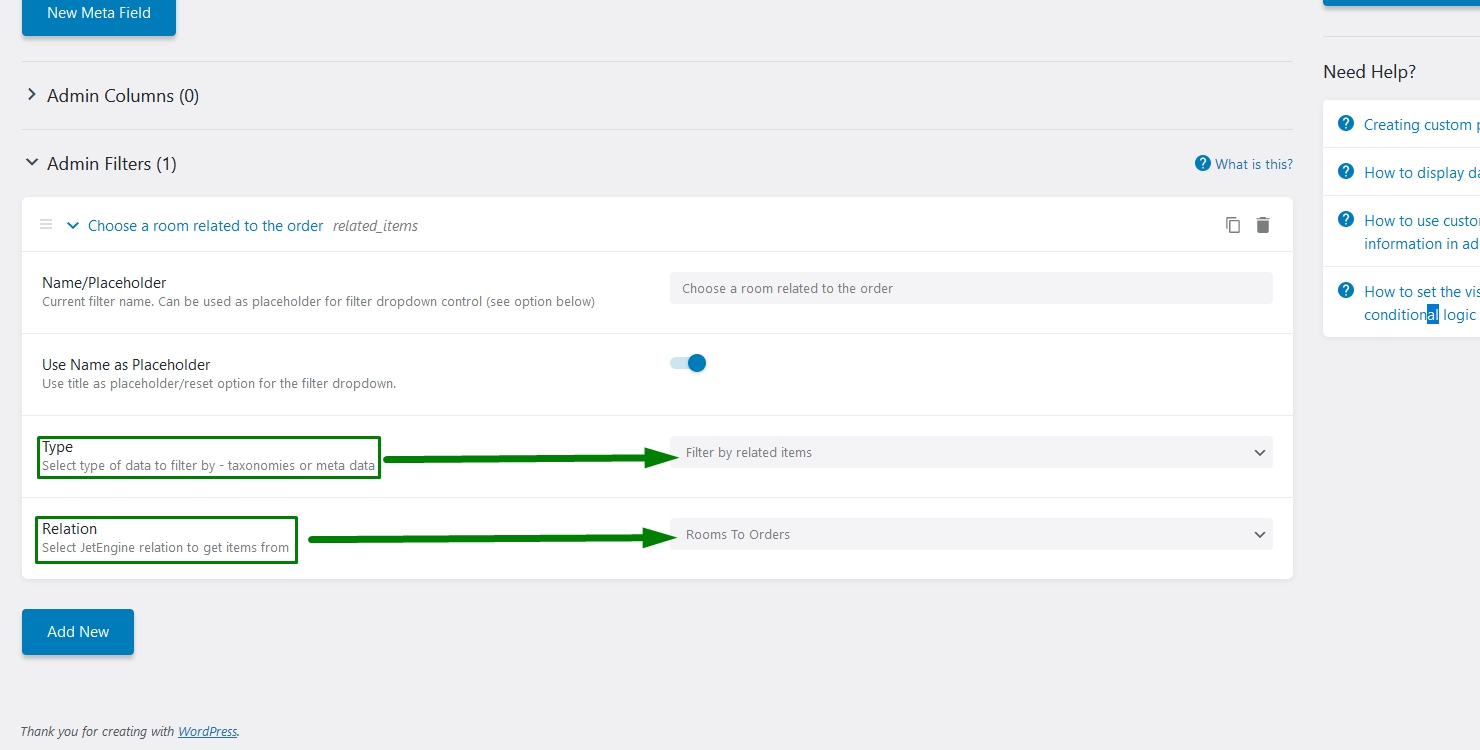
Now we will create a filter for “Orders” Custom Post Type by related “Room” posts.
Select the needed filter Type and choose the Relation by which posts will be filtered.
Save the changes and check the results.
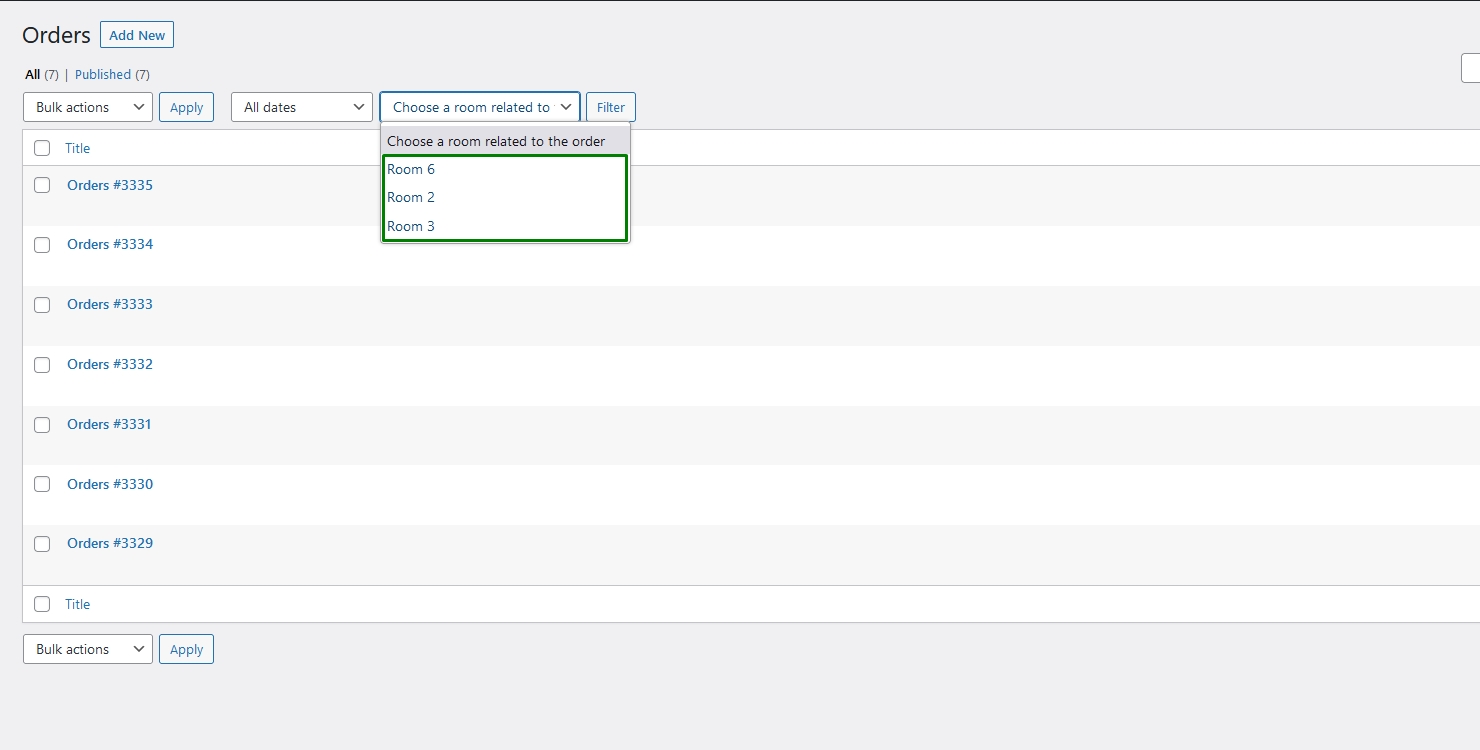
That is it. The admin filters are set. Now you know how to create the admin filters for your Post Types.