How to Create Filters with Query Builder Source
From this guide, you will discover how to build filters based on the JetEngine Query Builder and JetSmartFilters plugin.
Before you start, check the tutorial requirements:
- Elementor (Free version) or Block editor (Gutenberg)
- JetEngine plugin installed and activated
- JetSmartFilters plugin installed and activated
Create Custom Query
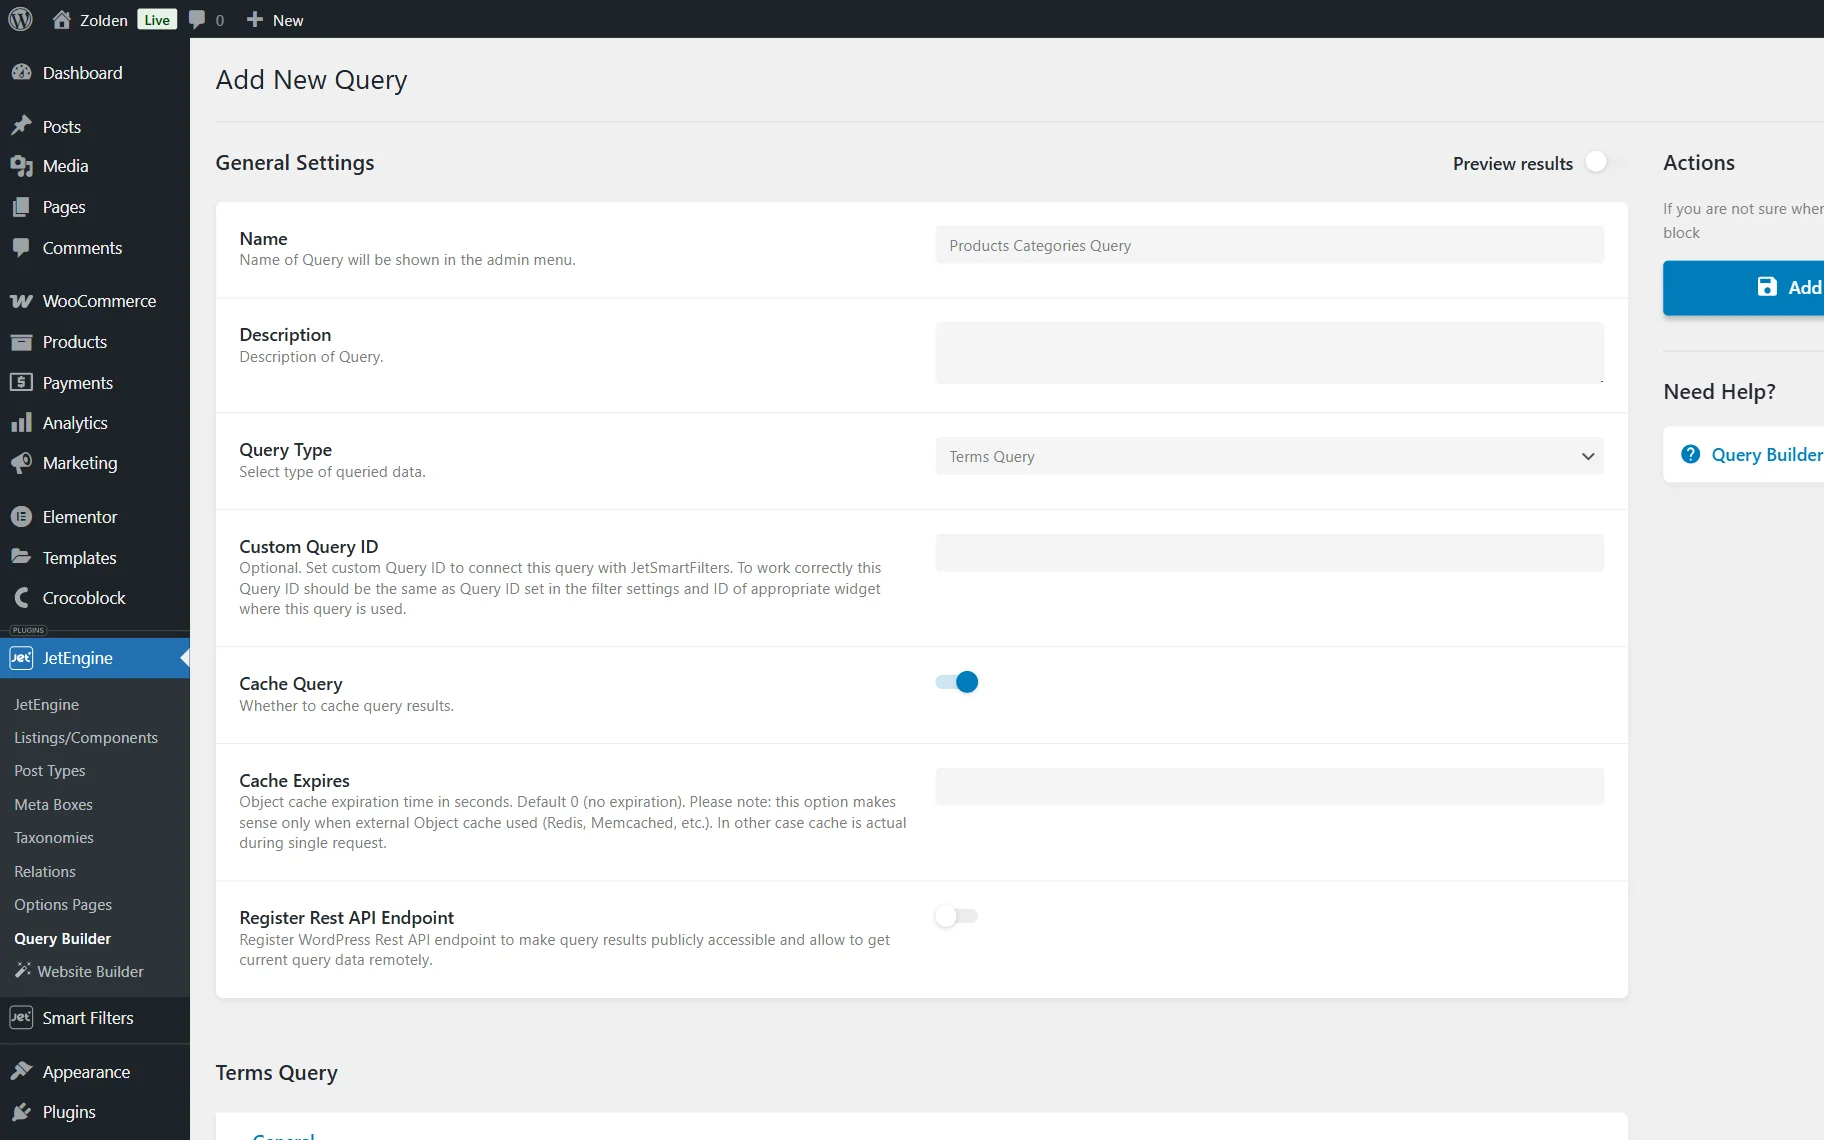
Proceed to WordPress Dashboard > JetEngine > Query Builder and create a new query by clicking the “Add New” button.
Write the Name of the custom query and select the needed Query Type.
In the provided example, we want to display a list of product categories ordered by a term name to override the default order by the created date. It means that a custom query can be used if the order of items needs to be altered in the filter by custom taxonomy.
Therefore, we select a “Terms Query” Query Type.
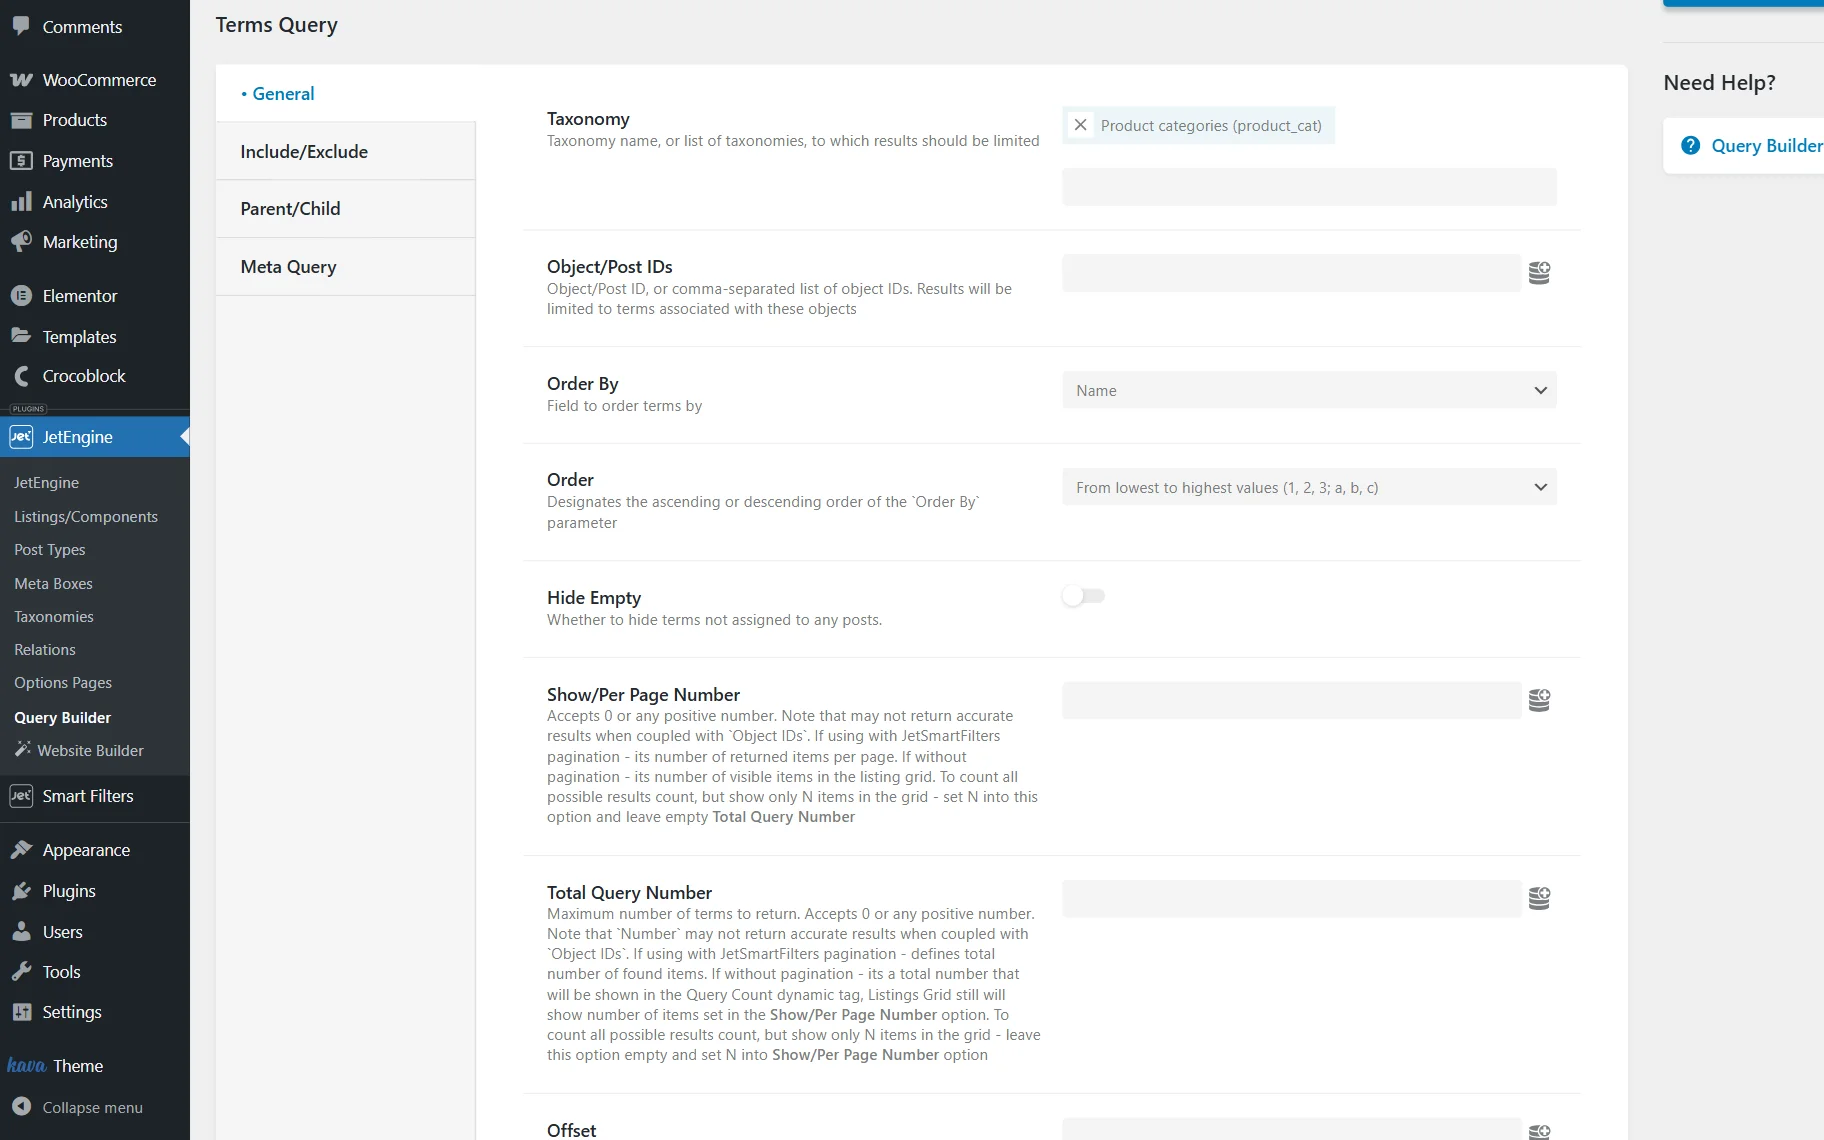
Then, the “Product categories” option is picked as a Taxonomy.
In the Order By field, we choose the “Name” option and set the ascending “From lowest to highest values” Order.
Next, we head to the Include/Exclude tab and set the ID of the “Uncategorized” category in the Exclude field so this category will not be shown in our filter later.
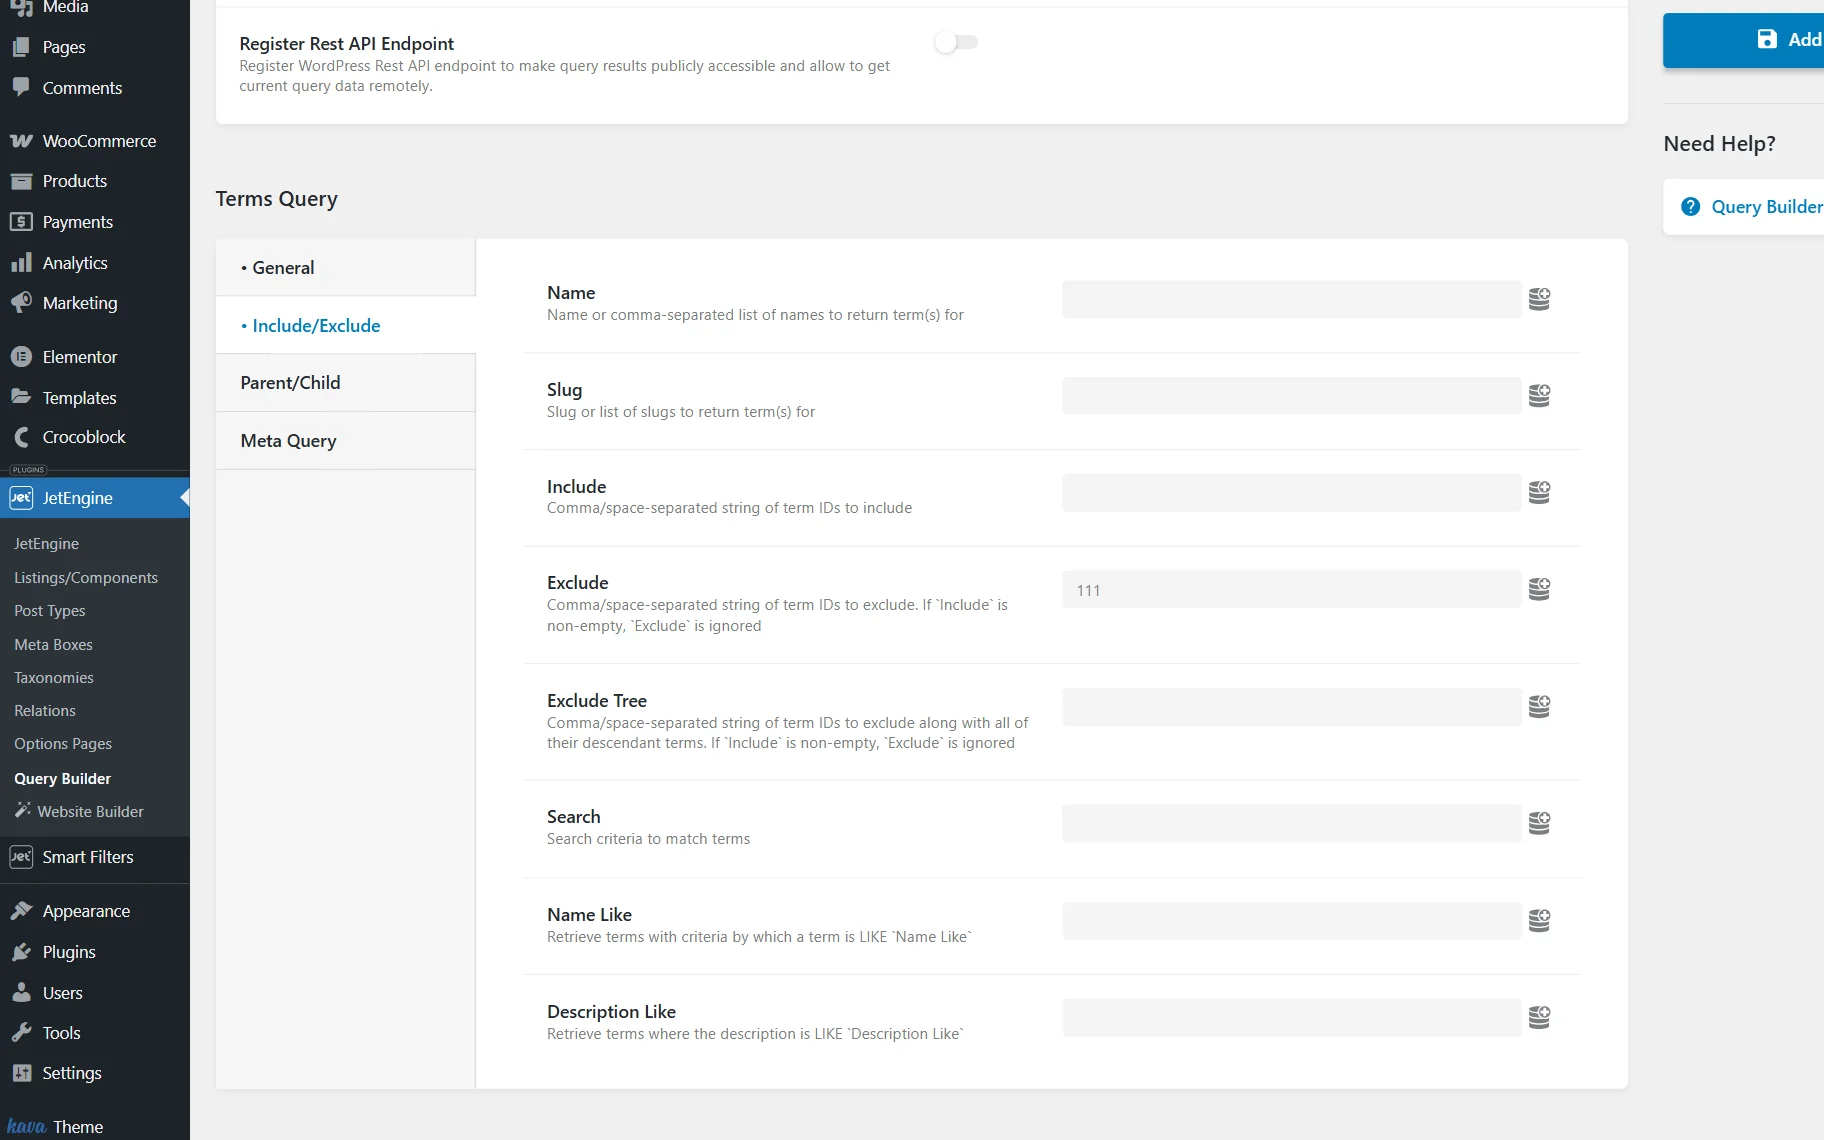
At this point, the query can be saved to be later used in the filter. To do so, press the “Add Query” button.
Create Filter with Query Builder Source
Go to WordPress Dashboard > JetSmartFilters > Add New to create a filter for a “Terms” Query.
Select a Filter Type: “Radio,” “Checkbox,” or “Select.” and pick a “JetEngine Query Builder” Data Source.
In the Select Query field, a custom query from Query Builder from which the filter options are filled should be chosen.
In the described case, a previously created “Terms” Query with the terms order is picked.
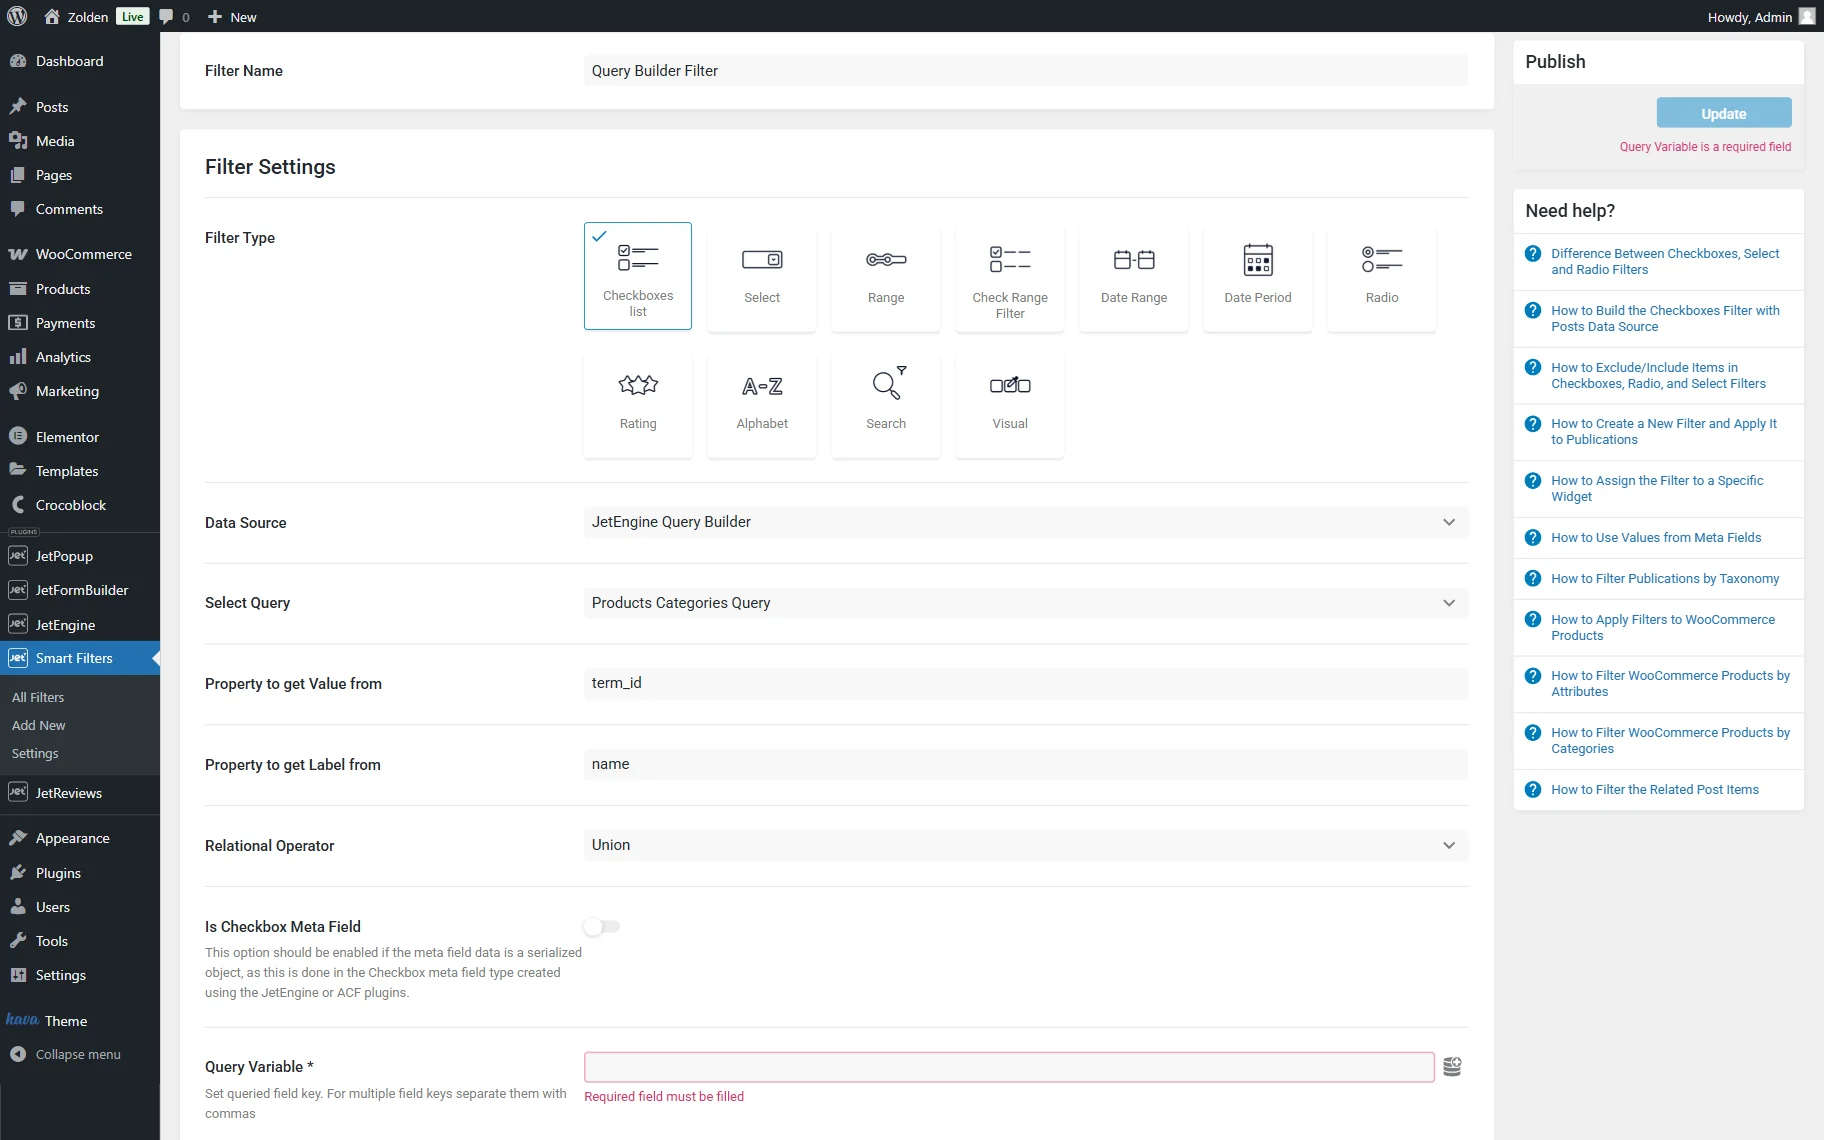
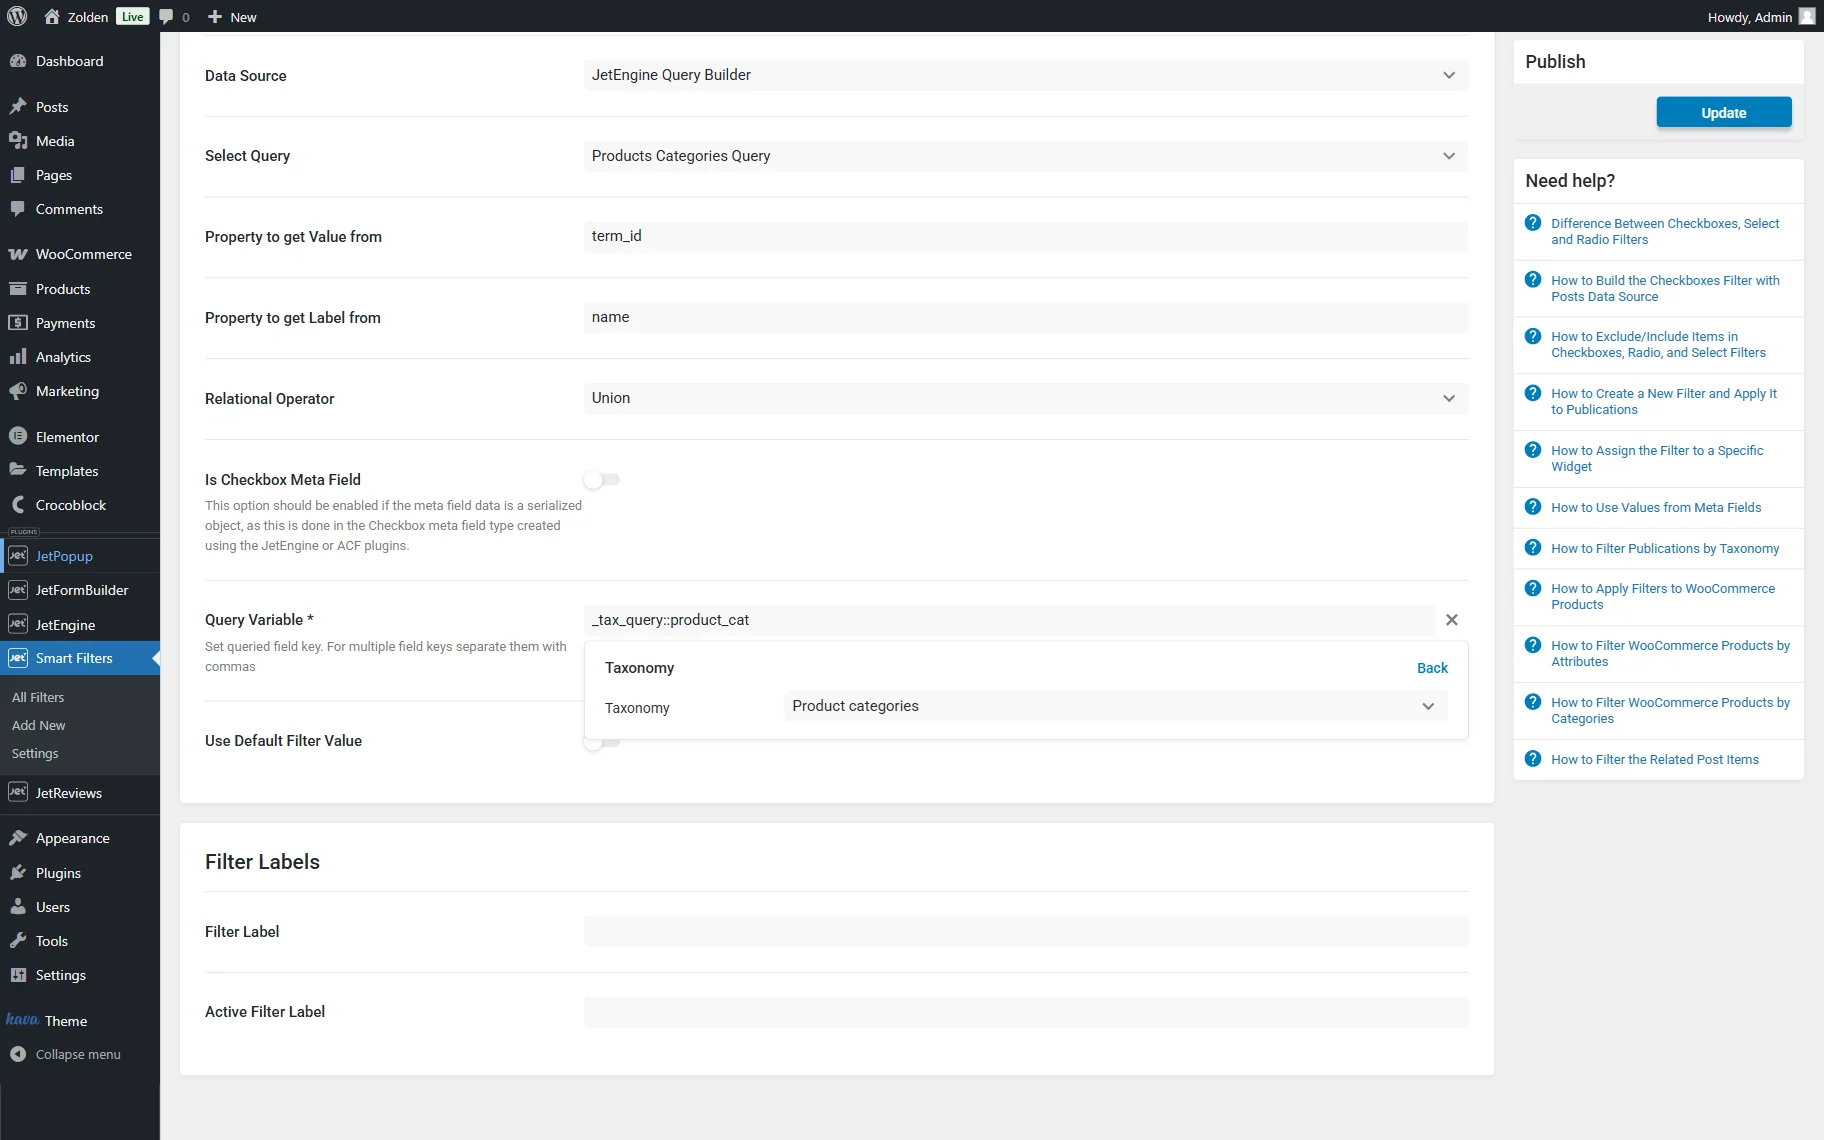
The Property to get Value from defines the property based on which the filtering is performed.
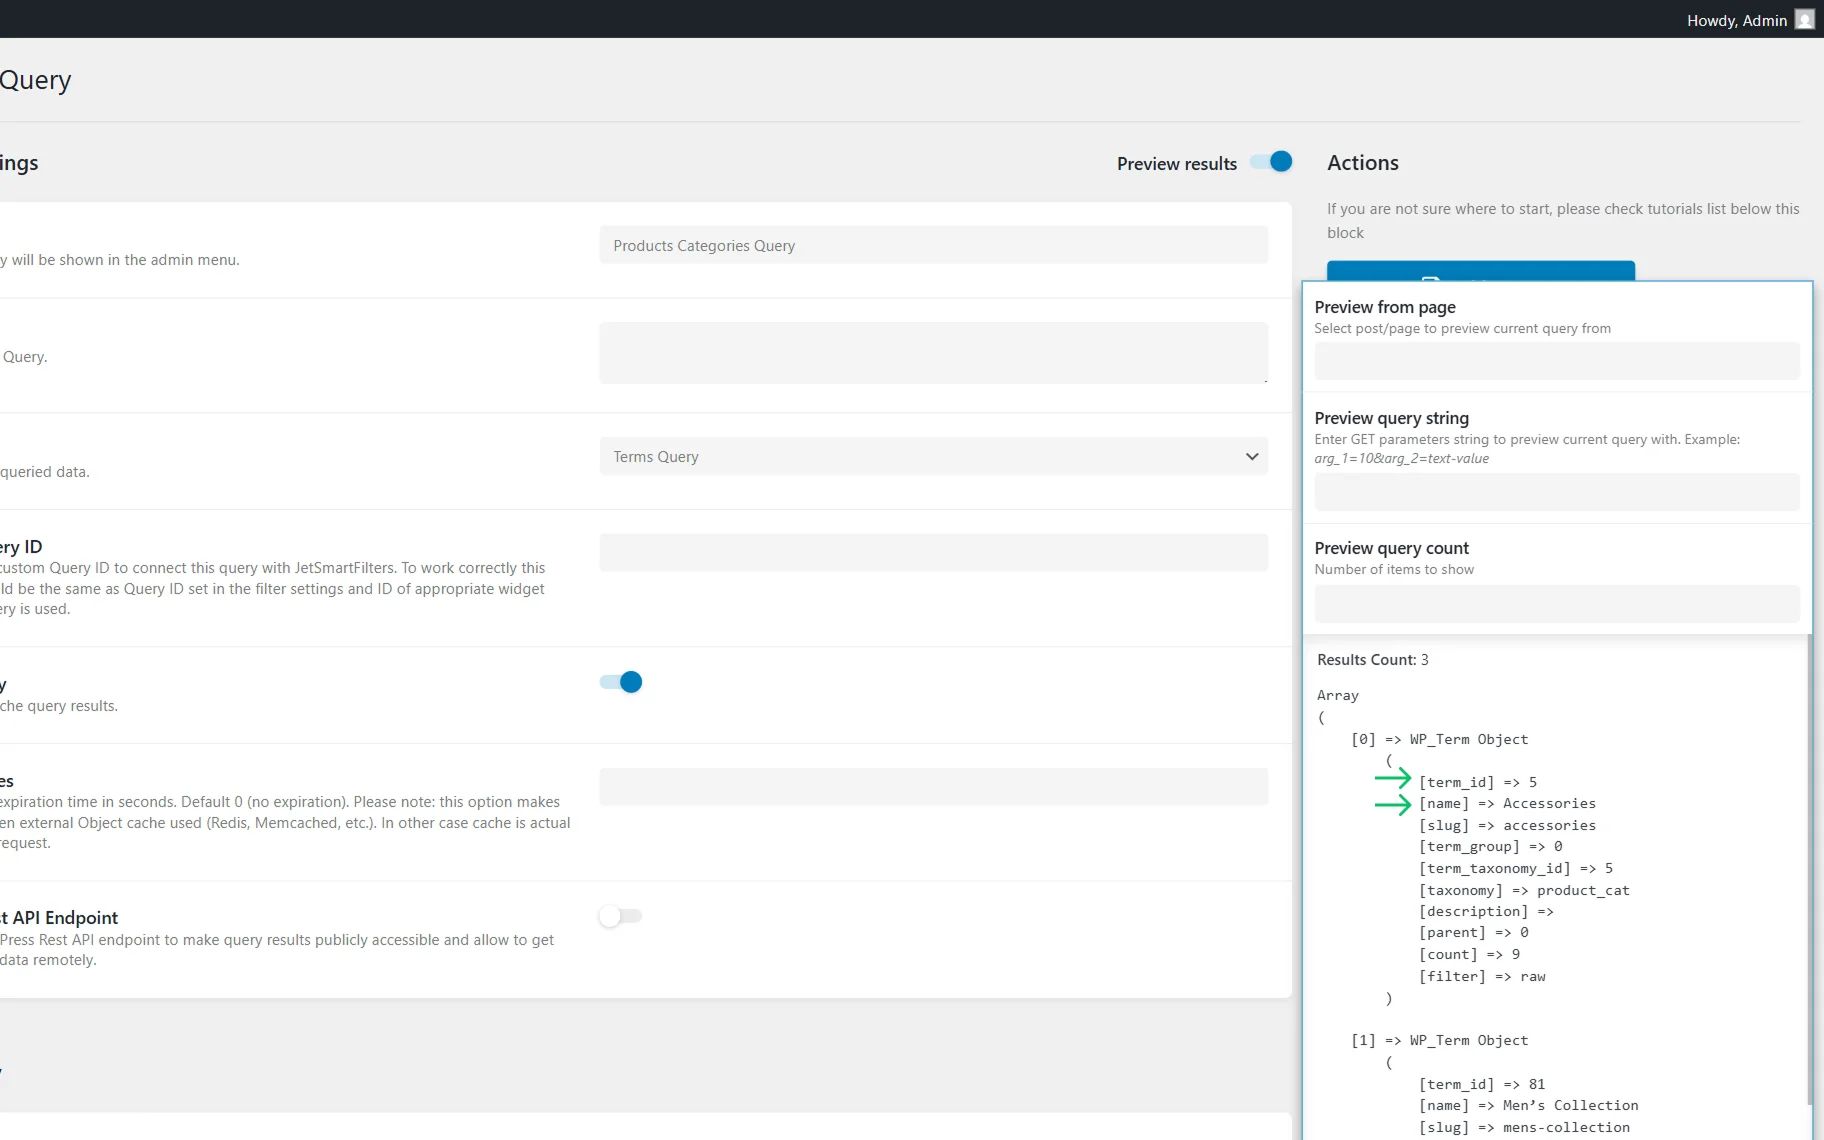
According to the used query, the ID of the term is the value. You can go back to the custom query in the Query Builder and click the “Preview results” button to see how the ID property of the term is named. In the described case, it’s “term_id.”
The Property to get Label from is what a user sees on the front end as a label of an option. According to the described case, the field containing the term’s name is “name”.
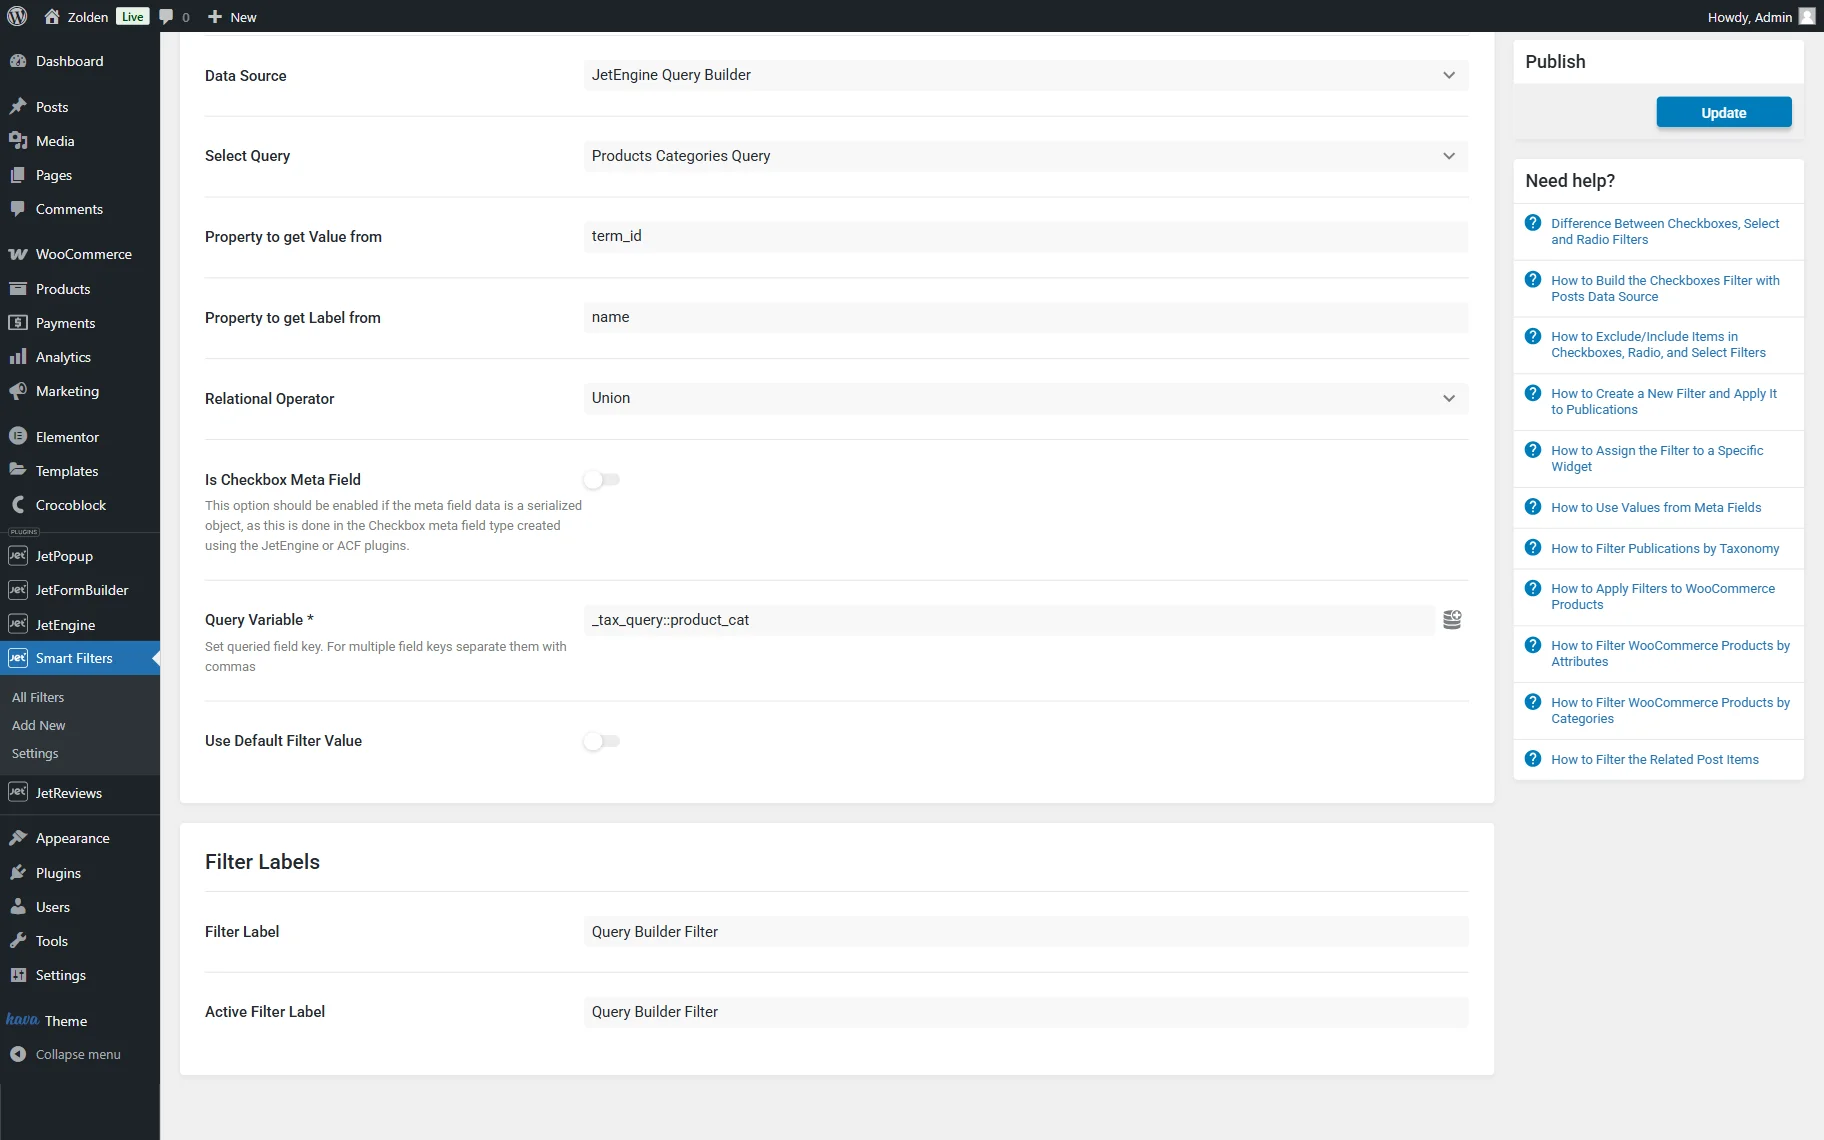
Lastly, the Query Variable should contain the taxonomy to filter by. It can be selected by pressing the “Dynamic Tag” button next to the field. In the appeared list, select the “Taxonomy” option and pick the “Product categories” option as the Taxonomy.
Complete the Filter Labels section and press the “Update” button to save the WordPress custom taxonomy filter.
Add Filter to Page or Template
Open a page or a template in a preferred editor. Now, we will use Elementor.
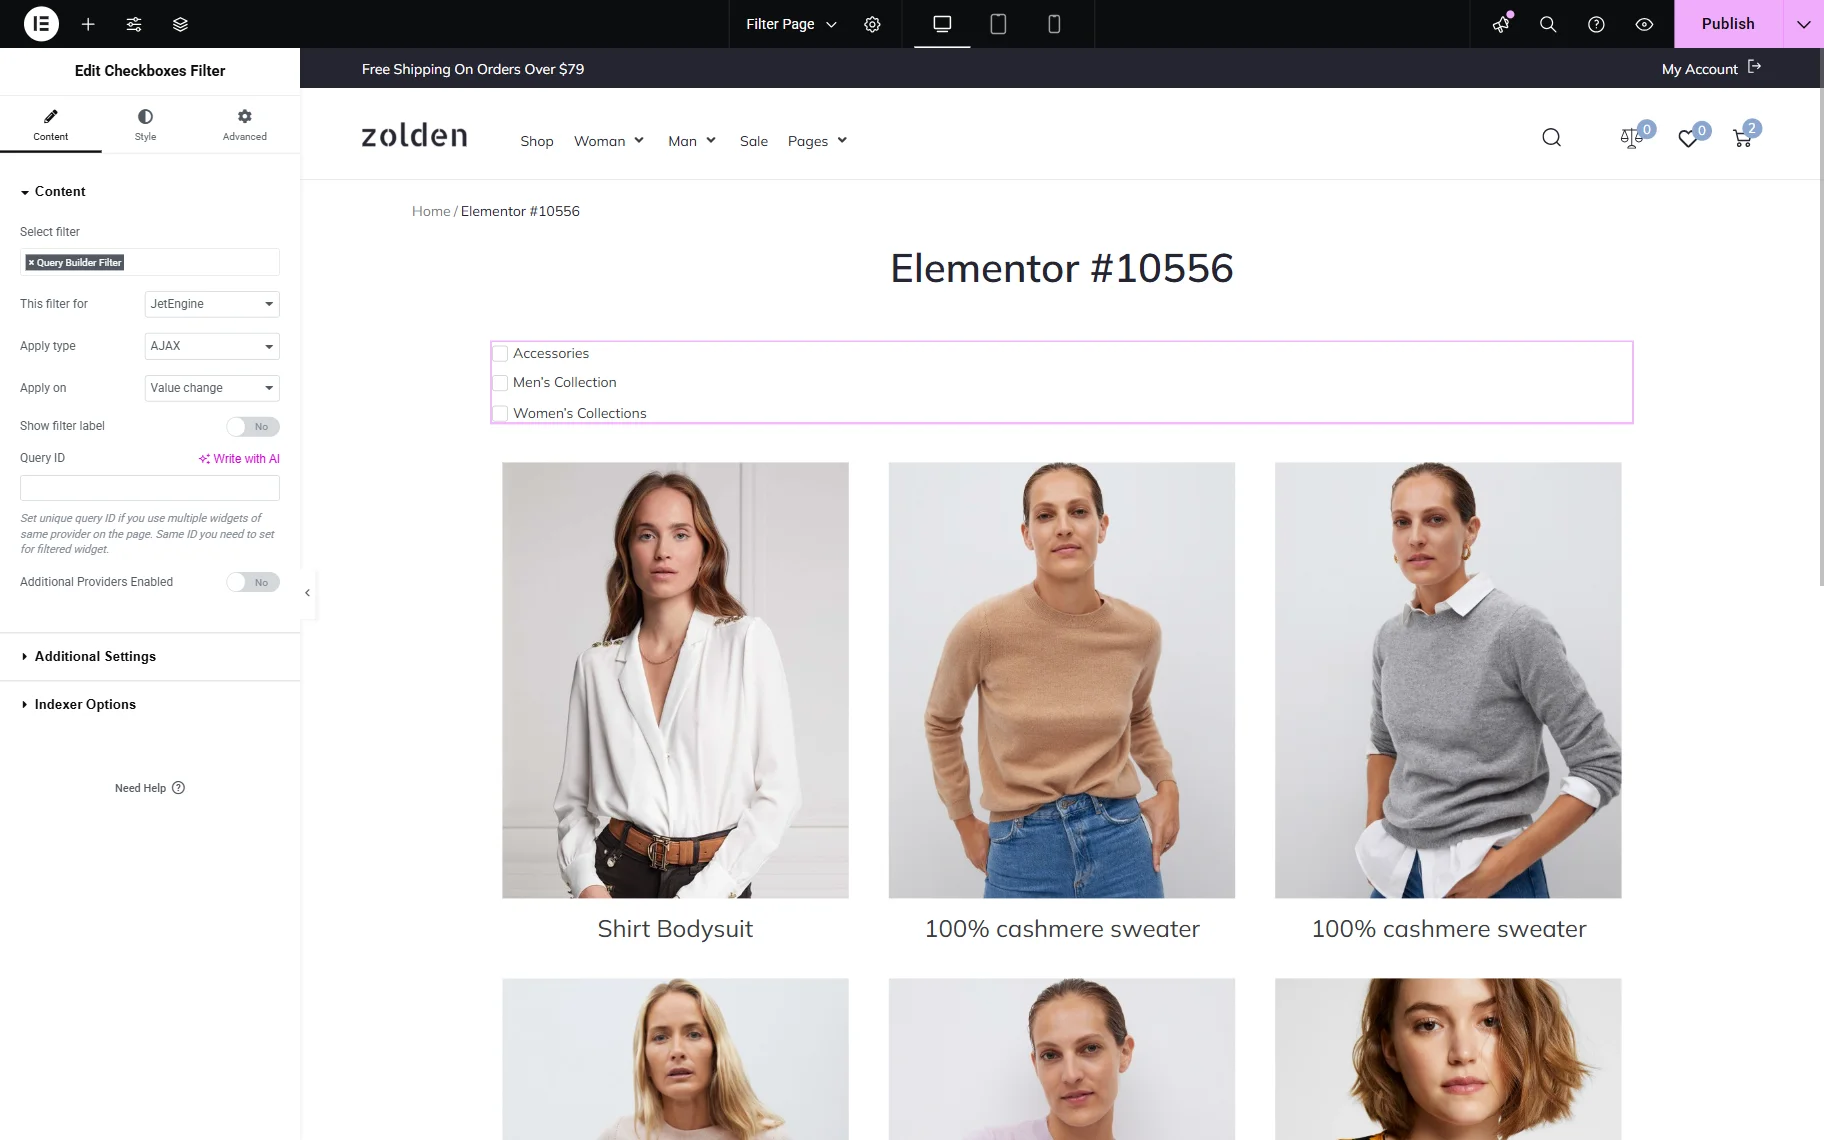
Add a filter widget to the editing area (corresponding to the one that you built earlier). In our case, it’s a Checkboxes Filter widget.
Pick the just-built filter in the Select filter field and pick the needed provider in the This filter for field. In this case, we select “JetEngine” as the provider because we will filter the Listing Grid.
So, we also add a Listing Grid widget to the page and adjust it as needed.
Check the Result
Open the page you have just edited on the front end to check the result.
As you can observe, the options are now ordered in alphabetical order. The filter works, and the products are filtered according to the selected product category.

That’s all; now you know how to create an Elementor custom query filter by using JetEngine and JetSmartFilters on your WordPress website.