How to Display Array Elements from REST API Endpoint Using Sub Query Addon
Find out how to display array elements retrieved from a REST API endpoint as a nested listing using the Sub Query addon of the JetEngine plugin.
Before you start, check the tutorial requirements:
- Elementor (Free version) or Block editor (Gutenberg)
- JetEngine plugin installed and activated with the REST API endpoint connected
The Sub Query addon allows retrieving array elements from a parent object property. Use it to fetch array elements in objects passed in a REST API endpoint and display them conveniently as a nested listing.
Connect to a REST API Endpoint
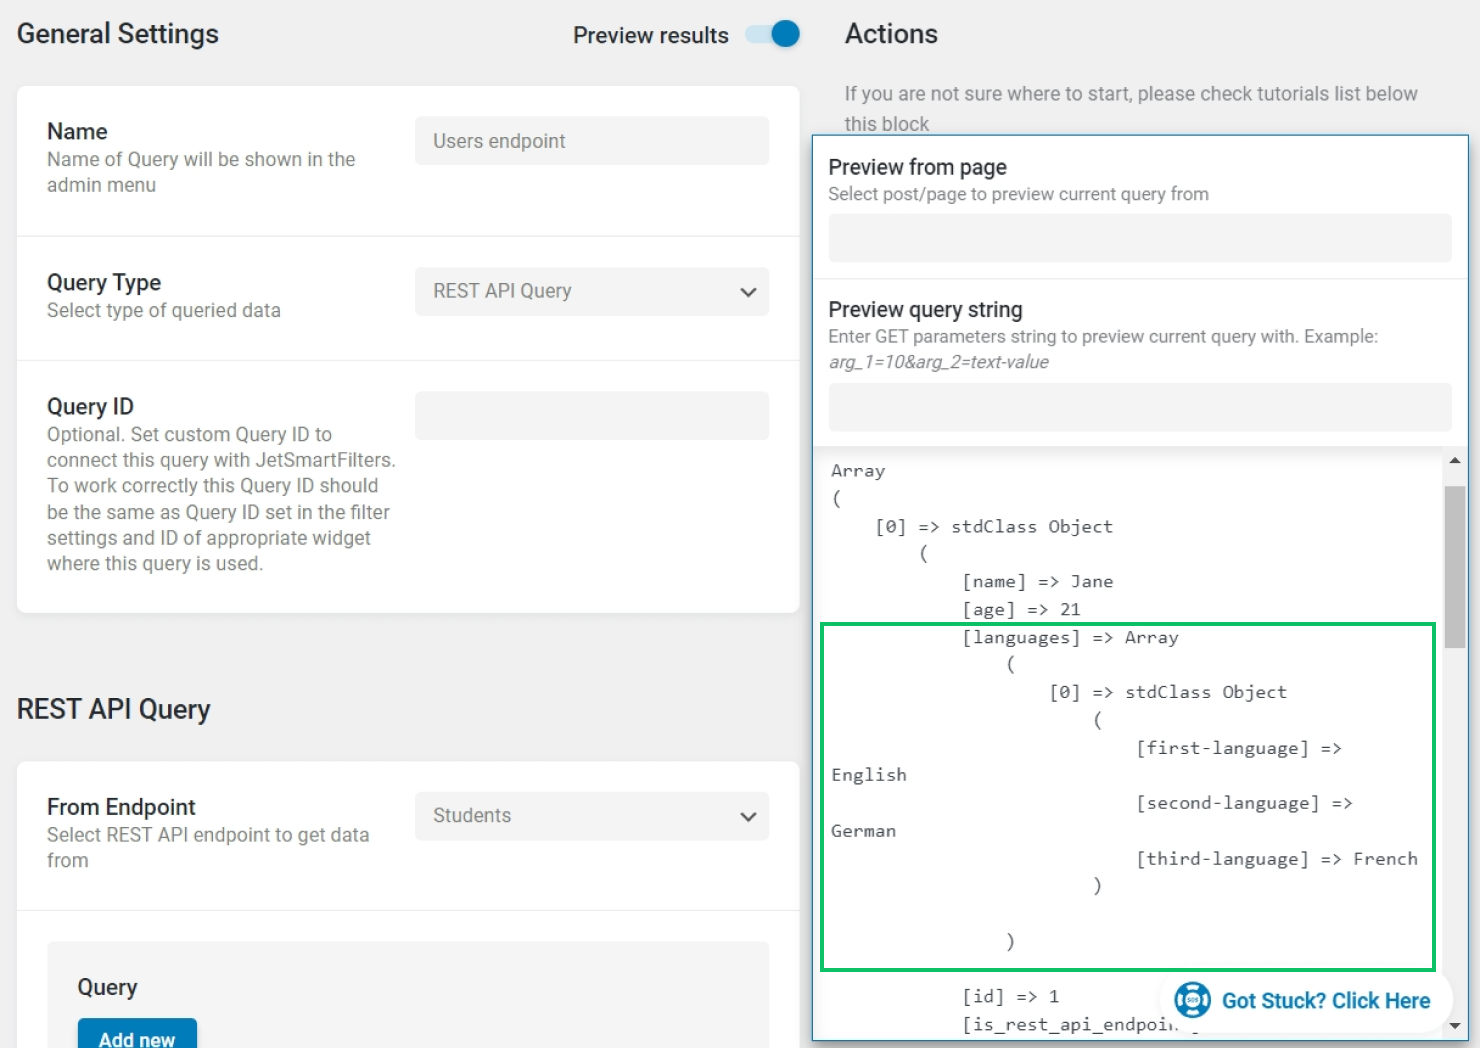
If you haven’t connected to a REST API yet, navigate to WordPress Dashboard > JetEngine > JetEngine > REST API Endpoints and connect your endpoint.
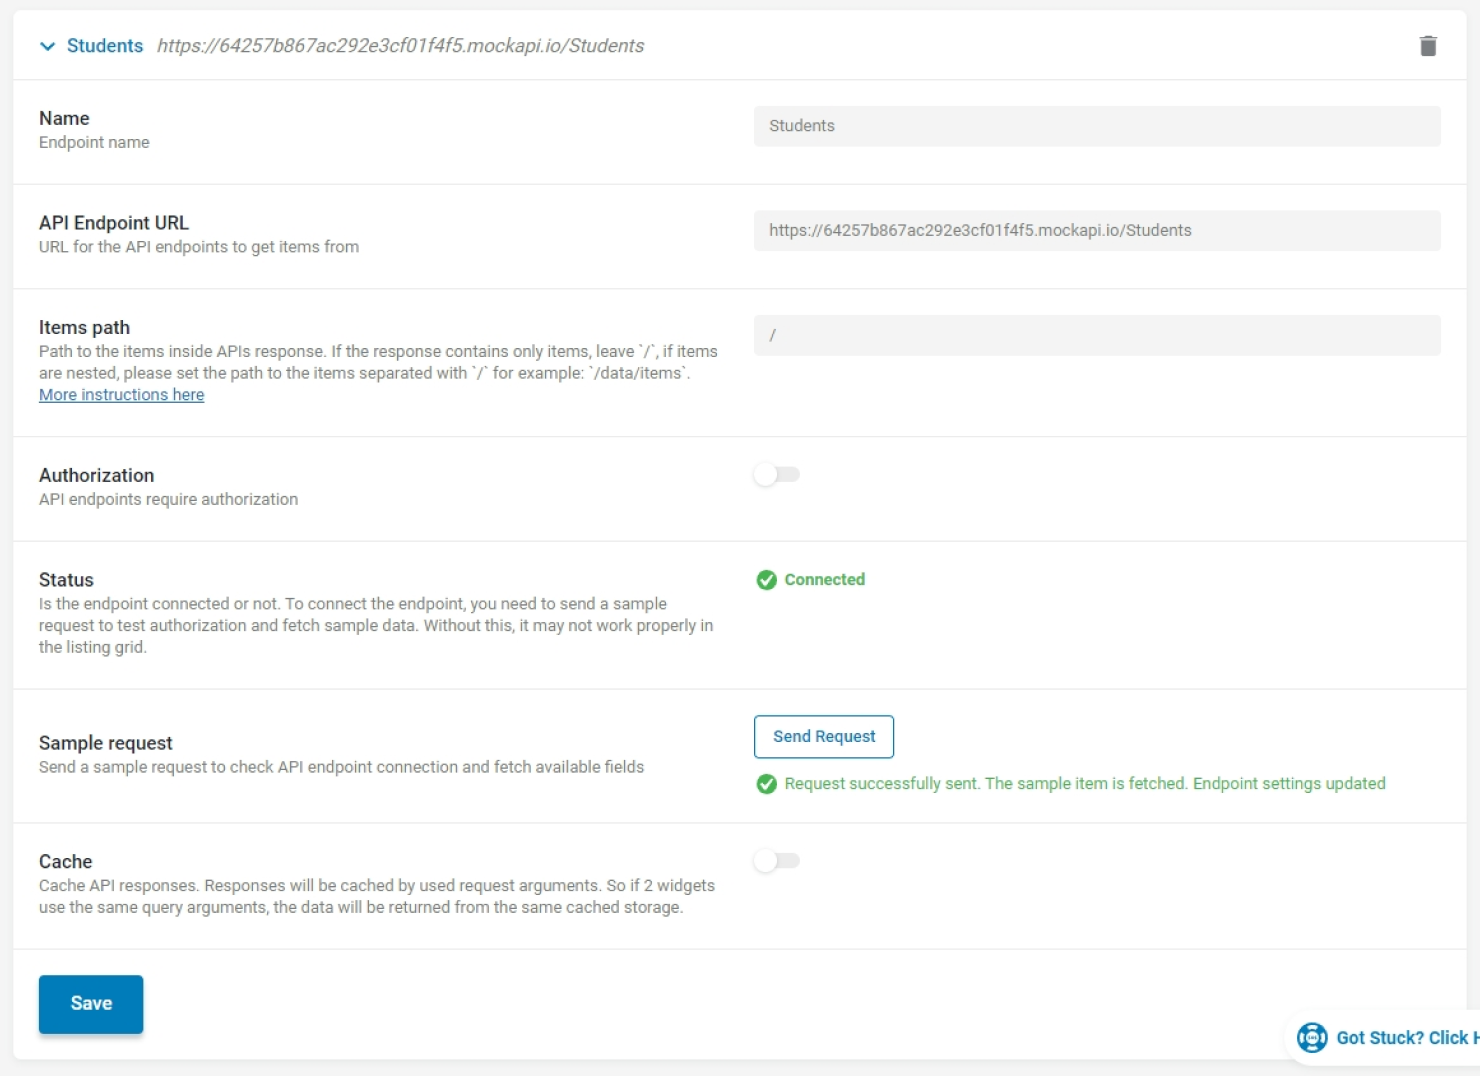
Click the “Send Request” button to ensure the request is successfully sent and the data is retrieved in the correct format. Don’t forget to save this endpoint.
Set Up a Custom Query for the REST API Endpoint
To create a custom query, go to WordPress Dashboard > JetEngine > Query Builder > Add New to create a custom query for the connected endpoint. Later, we will use this query to build the main listing for the REST API data.
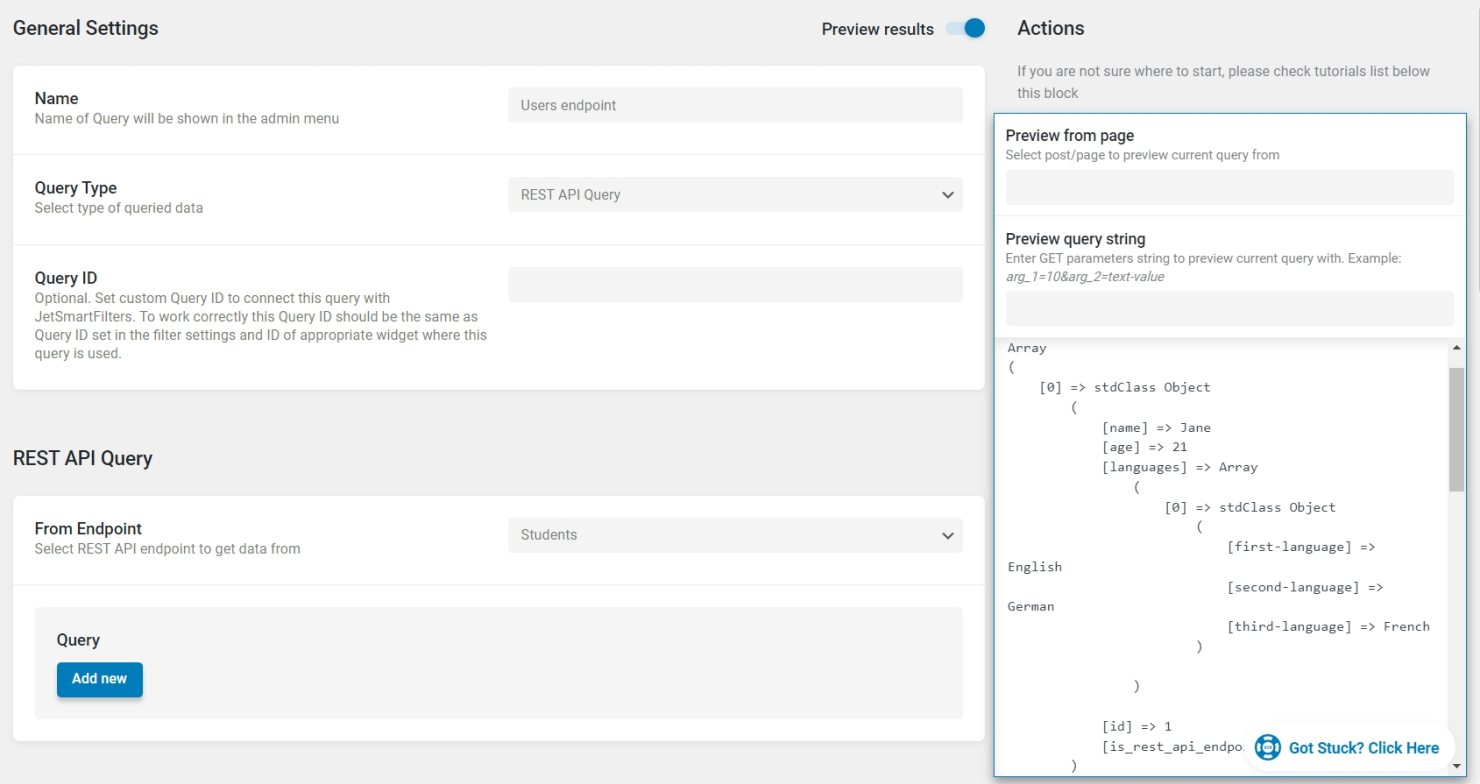
In the settings of the custom query, select “REST API Query” as the Query Type. Then specify the endpoint in the From Endpoint dropdown from the REST API Query section. If necessary, add more query clauses to narrow down the results.
Save the query and enable the Preview results toggle to preview the data retrieved by the query.
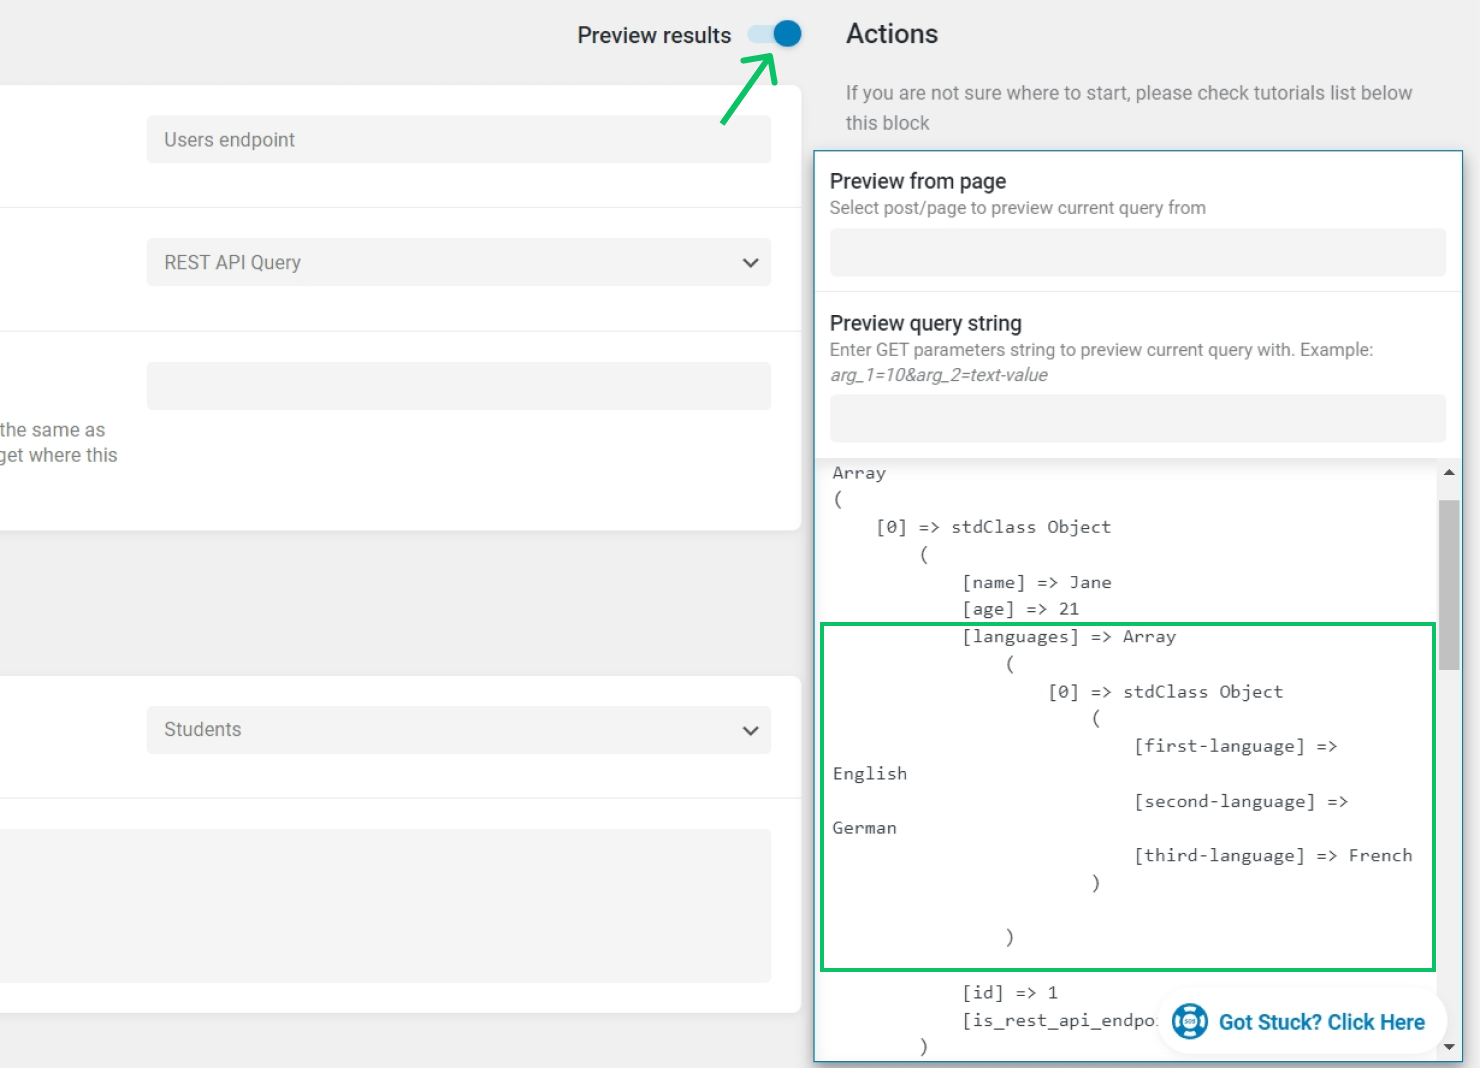
In our example, we receive a list of students and specific data associated with them. In each object (student), there is a “languages” array property containing an object with three properties — “first-language”, “second-language”, and “third-language”.
There is also an “extra-activities” array containing just string values instead of objects.
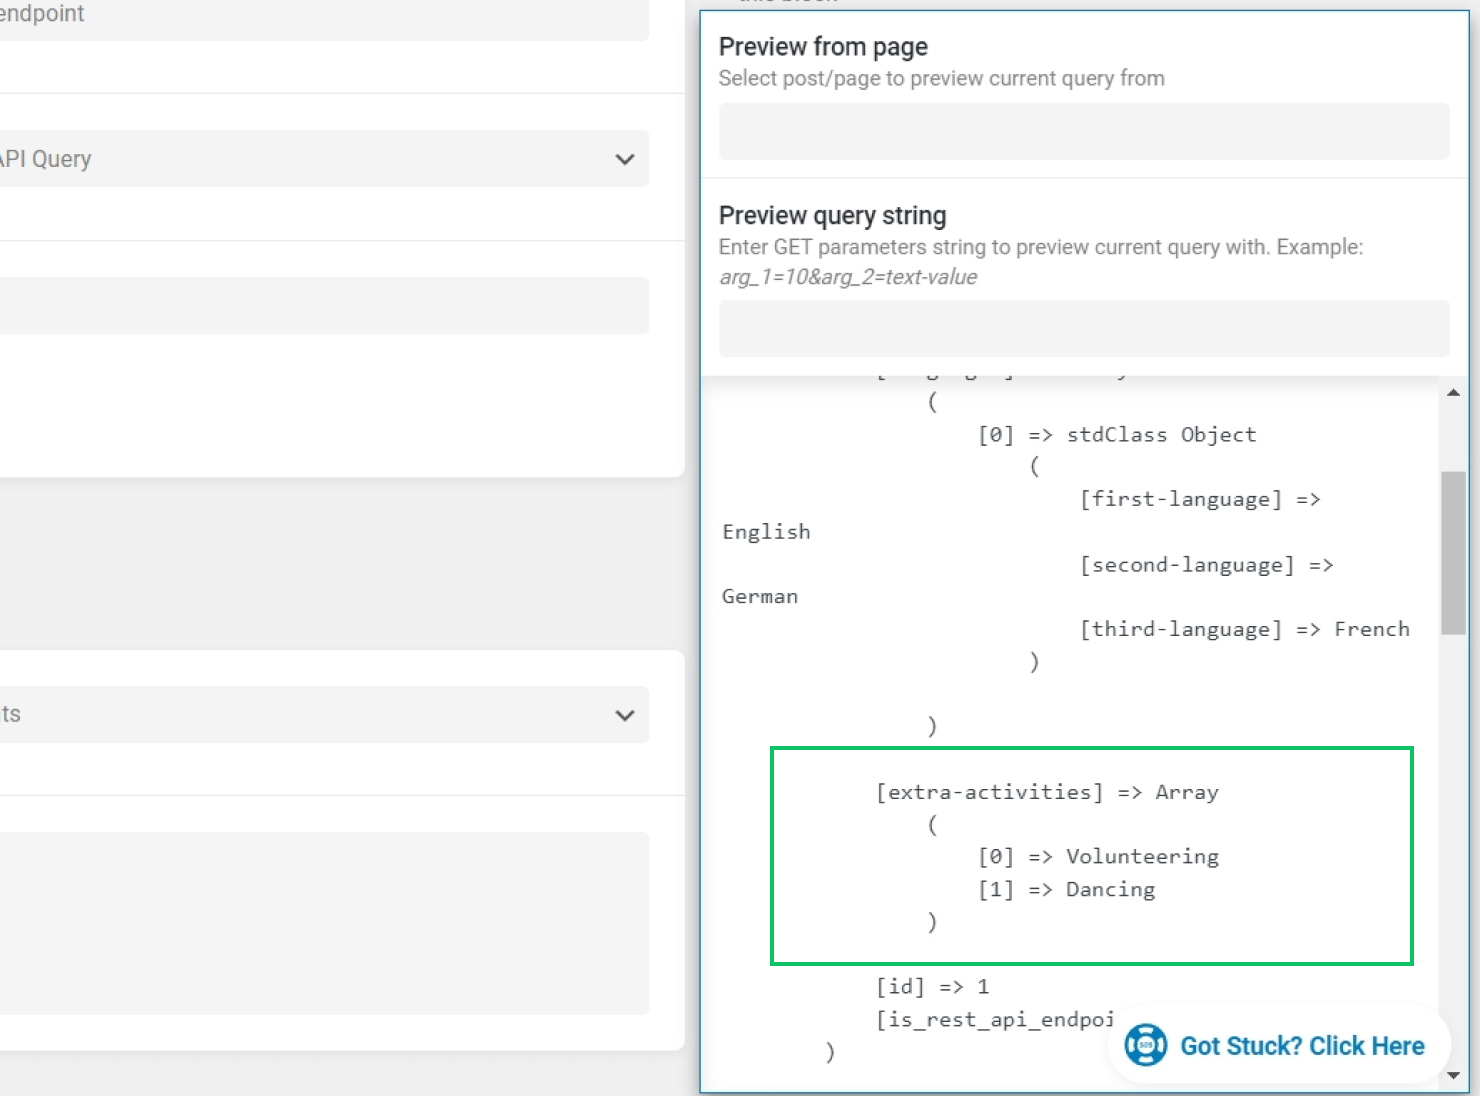
The elements of both arrays can be displayed as a nested listing with the help of the Sub Query addon.
Download and Install the Sub Query Addon
All the free addons for JetPlugins are listed on the DevTools page. Navigate to that page, filter the addons by JetEngine, and search for the Sub Query addon. Click the “Download” button.
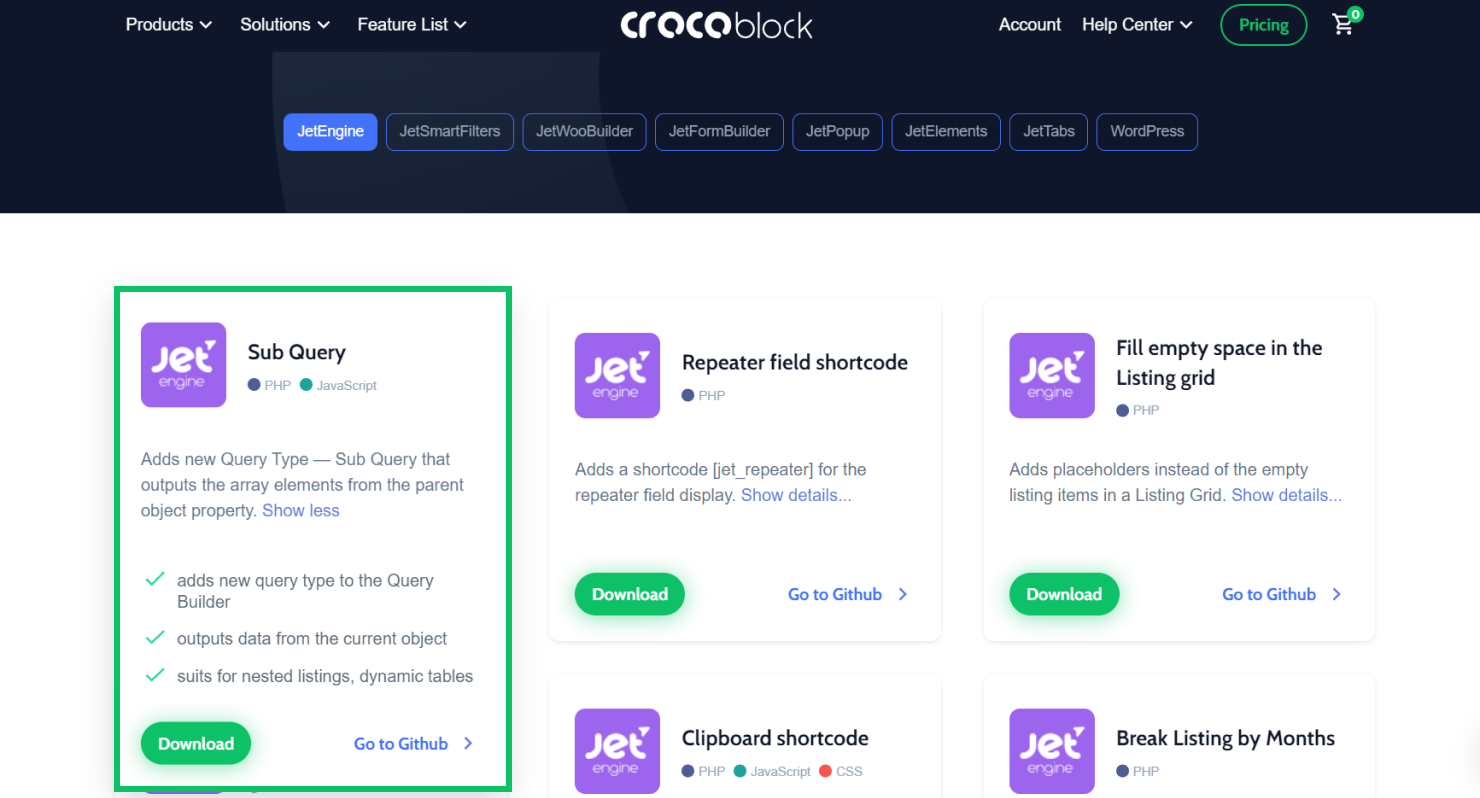
Afterward, return to the WordPress Dashboard > Plugins tab, and press the “Add New” button to add the add-on. Then, activate the plugin.
Set Up a Sub Query to Retrieve the Array of Objects
Now, we will use the Sub Query to retrieve elements from the array of objects.
Create a new custom query in WordPress Dashboard > JetEngine > Query Builder > Add New. Give a name to the query and choose the new “Sub Query” Query Type from the corresponding drop-down.
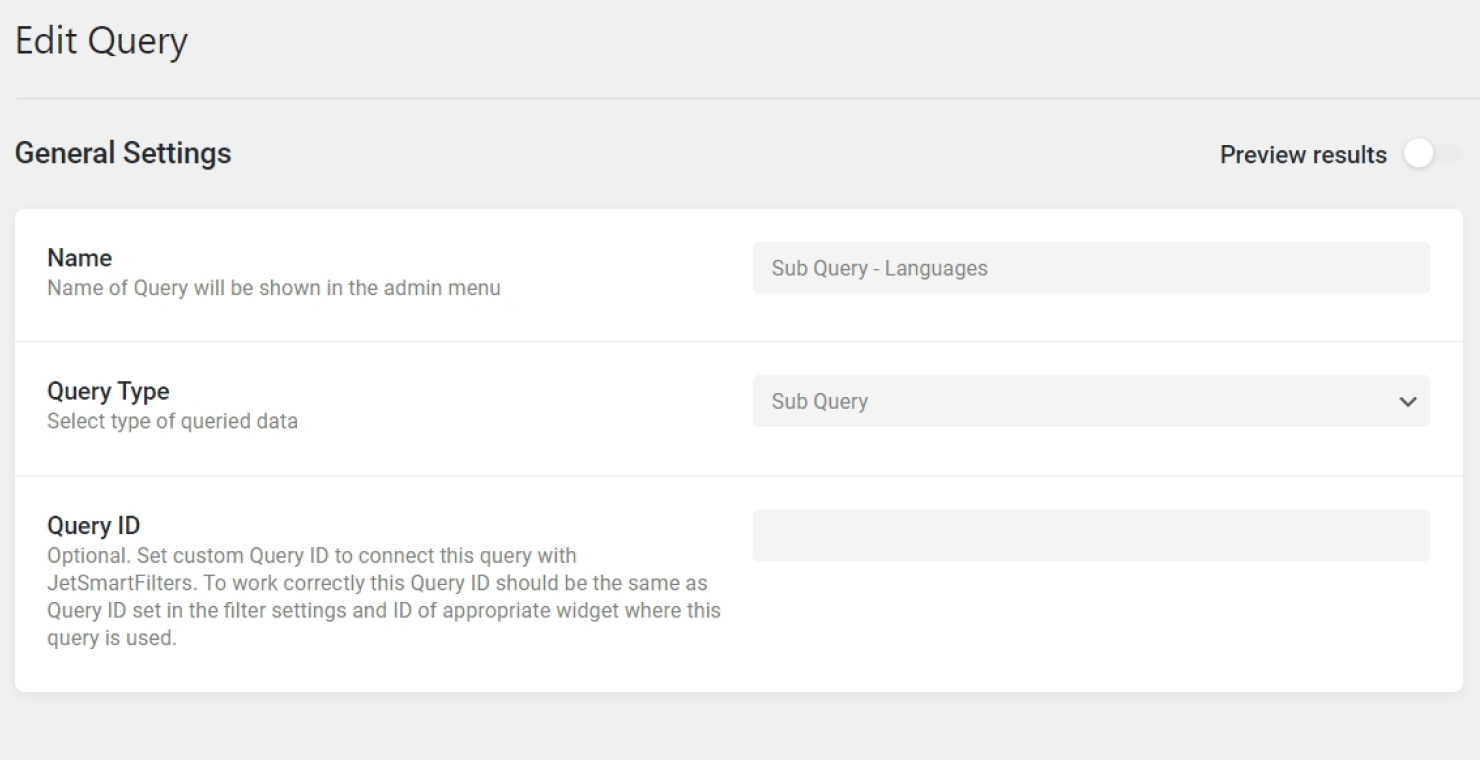
Move to the body of the query, the Sub Query section.
The query is intended to work with nested listings. That means the Listing Template that will be later built based on this query will be placed inside the main Listing Template. The Sub Query retrieves data from the parent object property, and in our use case, the parent object is the listing for REST API data.
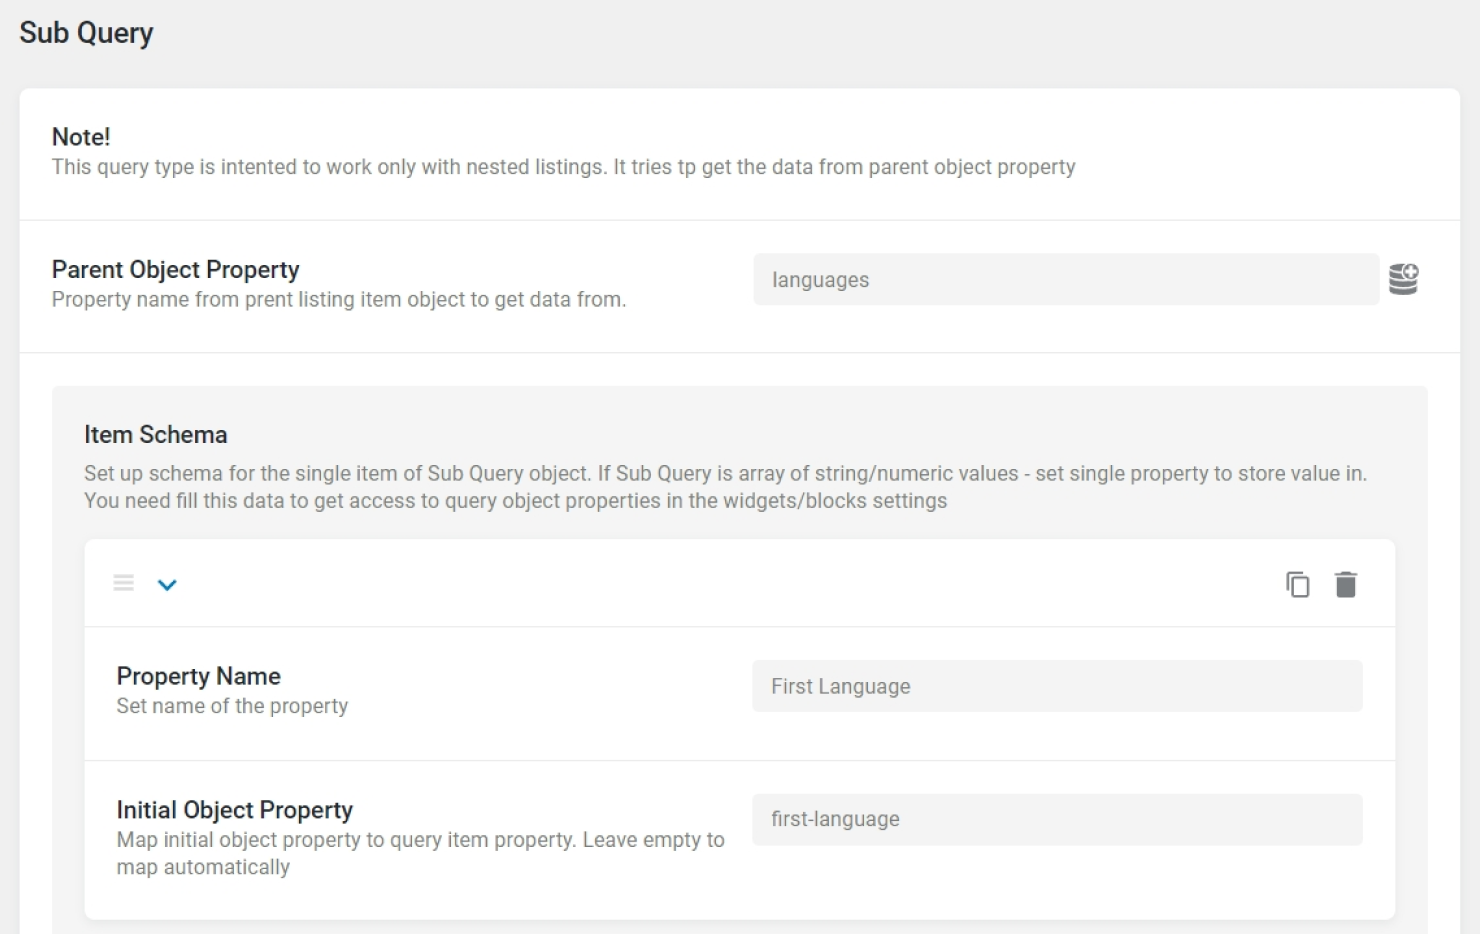
The first required field is the Parent Object Property field. It expects the name of the parent property from where the data should be retrieved. In this query, we will retrieve array elements from the “languages” property of a REST API object. Therefore, we specify “languages” as the parent object to get data.

Now, set up the Item Schema for the single item of the Sub Query object. In the schema settings, we indicate which fields each item of the Sub Query should consist of. It is needed to fill in this data to get access to these elements in the widgets/blocks settings. Therefore, add only those properties that will be displayed in the nested listing, as it is not required to use all available properties in the array.
The Property Name sets the label of the query item property. It will define how the initial object property is labeled in the query results. The Initial Object Property specifies the actual name of the property from the array. In our case, it is “first-language”.
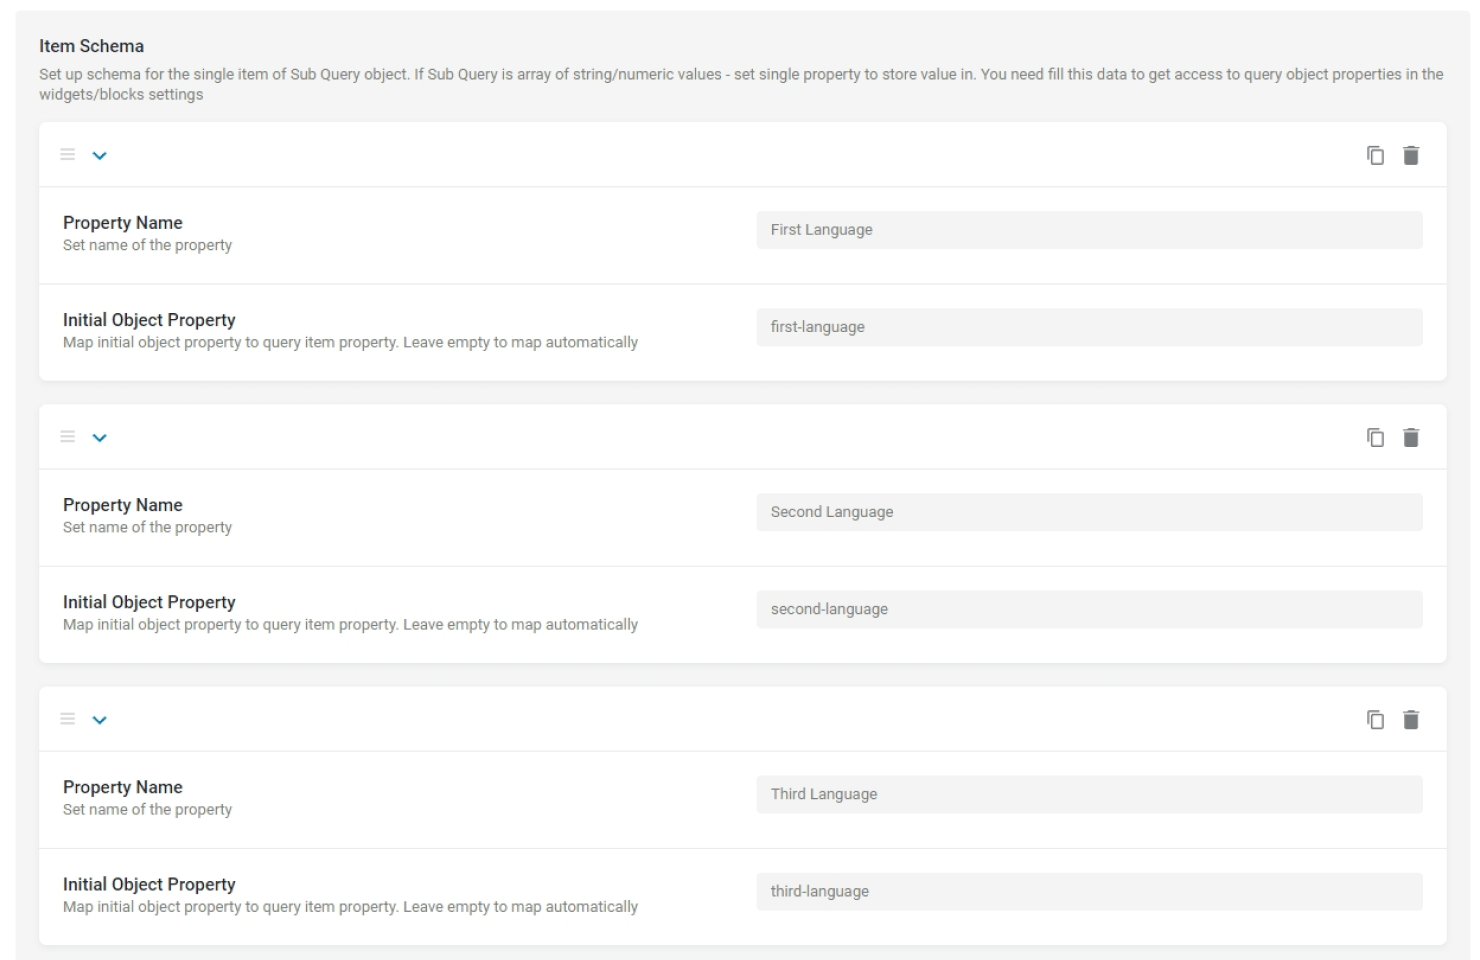
Add as many properties as needed to build the query item schema. Once done, save the changes.
Set Up a Sub Query to Retrieve the Array of String Values
We will build another Sub Query to retrieve elements from the “extra-activities” array. This array consists of string values instead of objects.

Create a new custom query of the “Sub Query” type and proceed to the query settings.
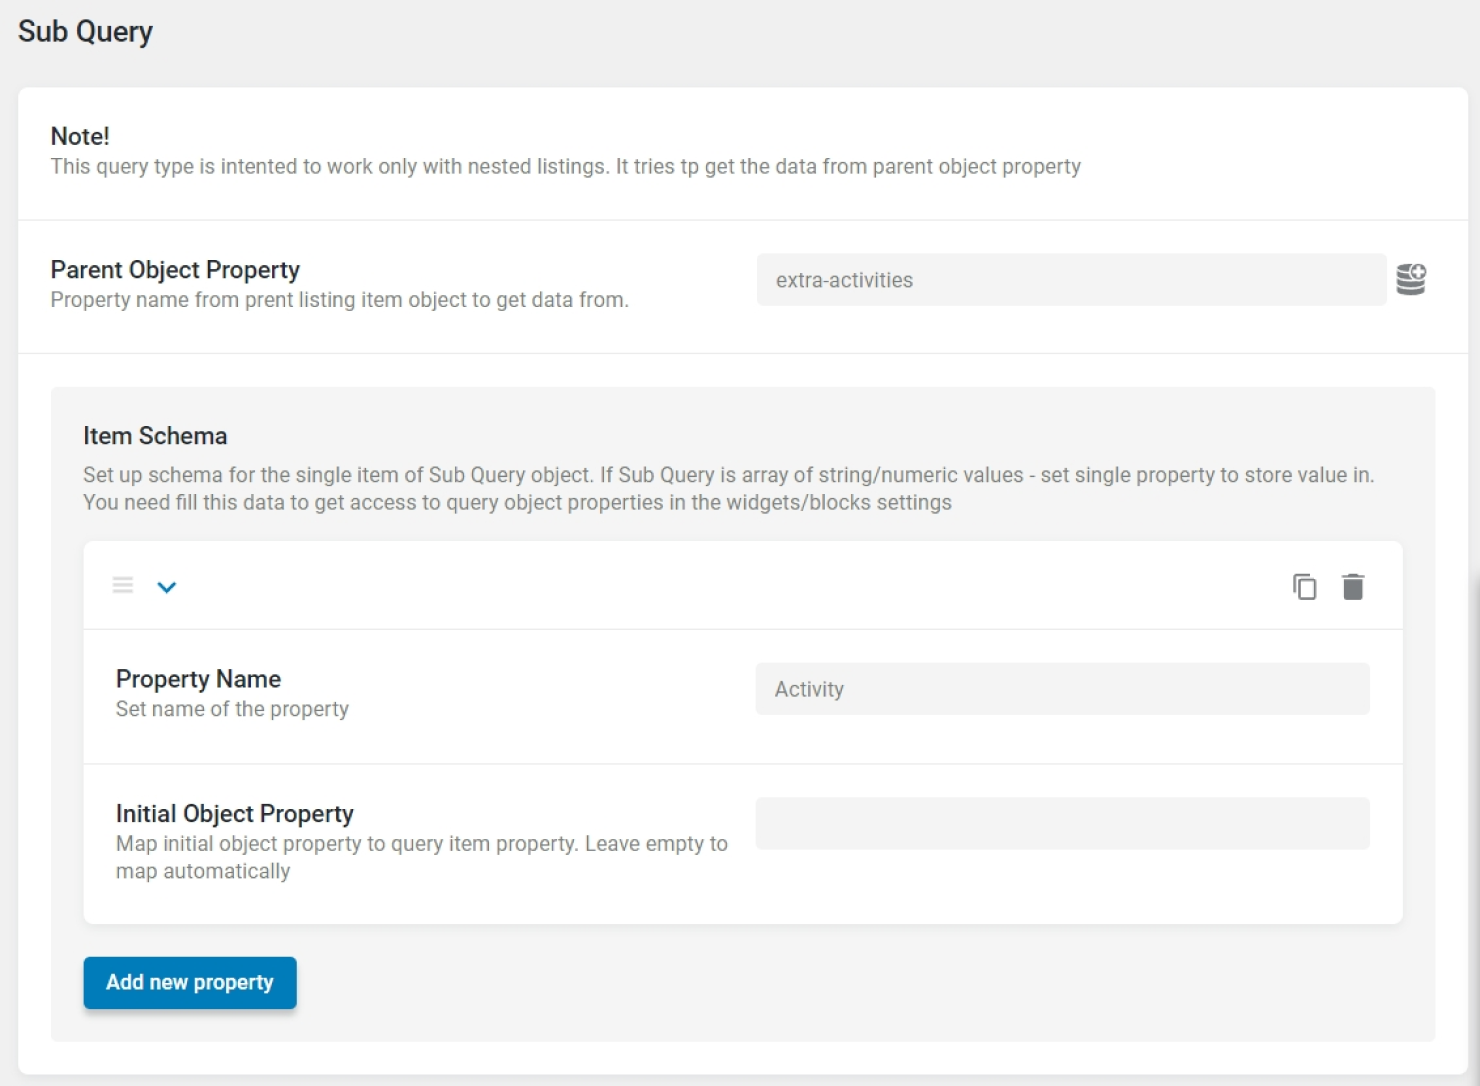
As the Parent Object Property, we specify the “extra-activities” property.
Move on to the Item Schema.
If the array contains string or numeric values, it is needed to set one single property to store the value. The list of elements will be populated automatically. Therefore, add only one property to the schema and give it a name. Leave the Initial Object Property field empty.
Save the query by pressing the corresponding button.
Create Nested Listings Based on the Sub Queries
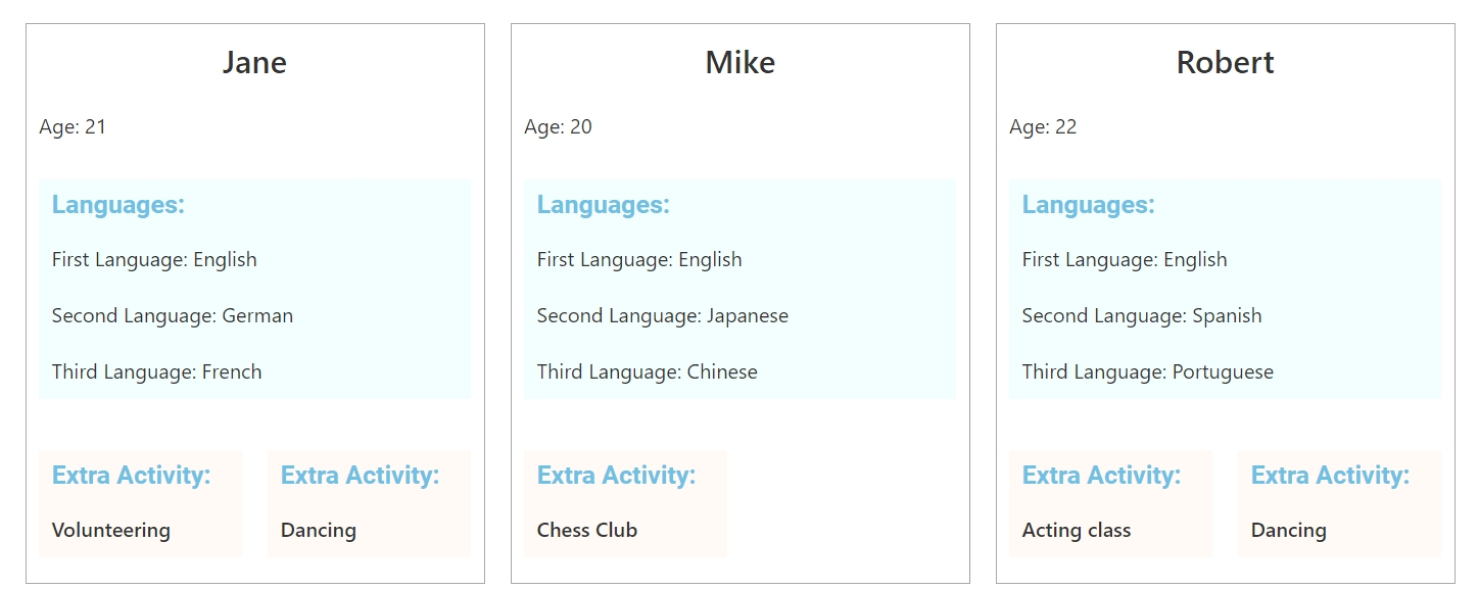
The next task is to build a nested listing that will output the elements inside our arrays. In the picture below, the “Languages” and “Extra Activity” items represent nested listings based on sub queries.
Create the listing template in Elementor
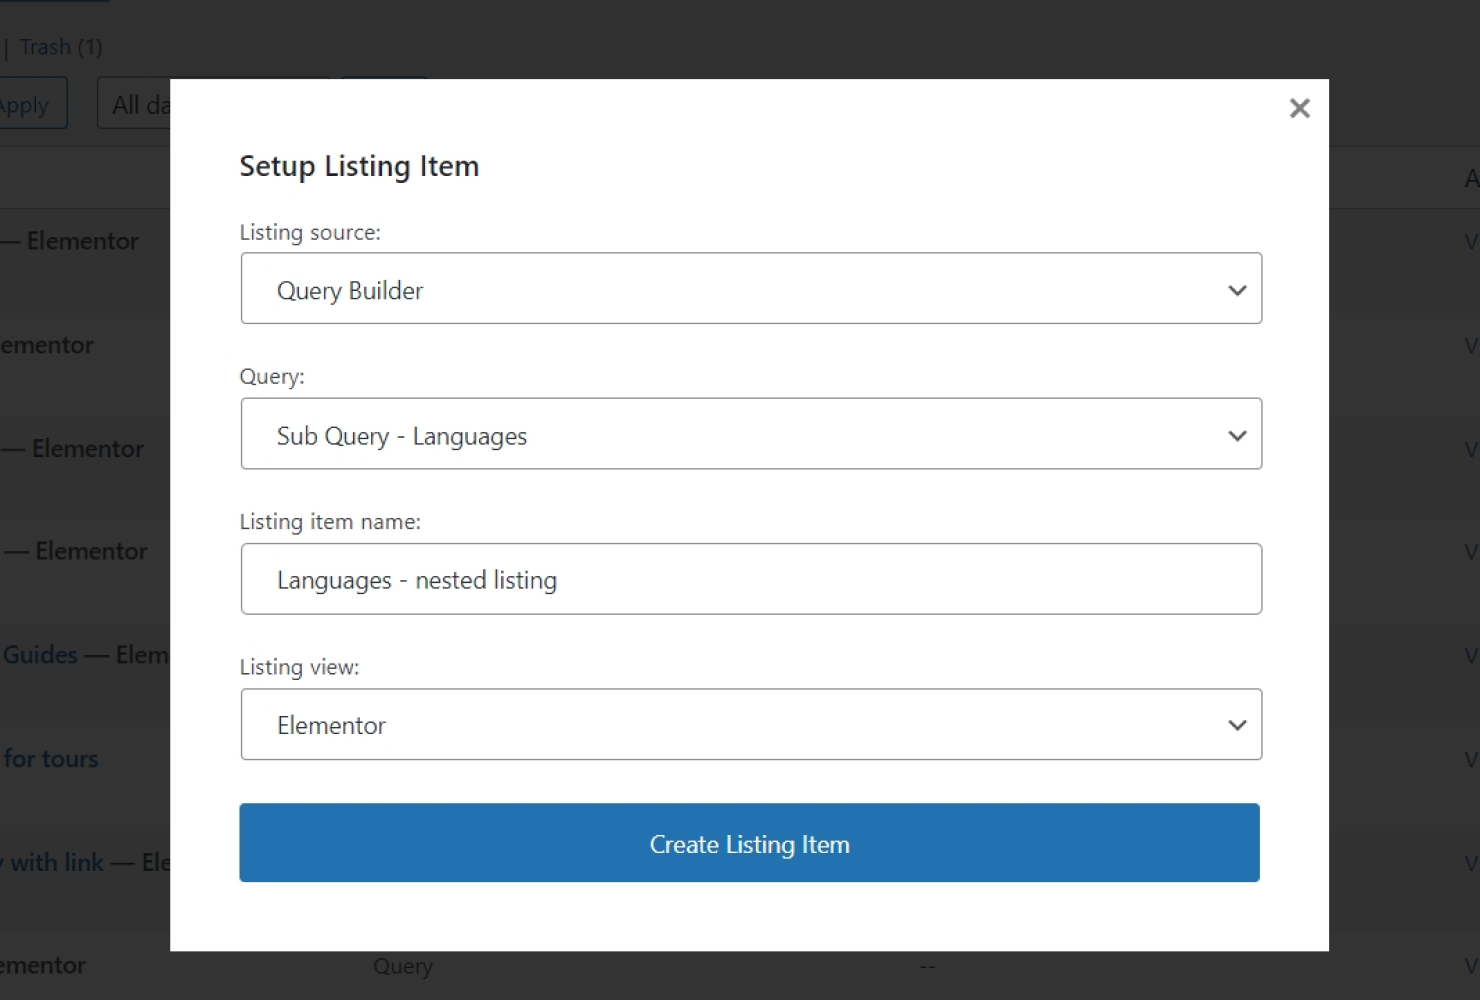
To create a new listing, navigate to WordPress Dashboard > JetEngine > Listings. Click the “Add New” button to call a Setup Listing Item popup.
Select “Query Builder” as the Listing Source and find the previously created Sub Query in the dropdown of custom queries. Give a name to the listing and hit the “Create Listing Item” button.
Search for the Dynamic Field widget and place it on the template. As a Source of the widget, leave the “Post/Term/User/Object Data” option. Then, open the Object Field drop-down and search for the name of your Sub Query. Under the name of the query, there is a list of elements retrieved by the query. Using these elements, build your listing layout.
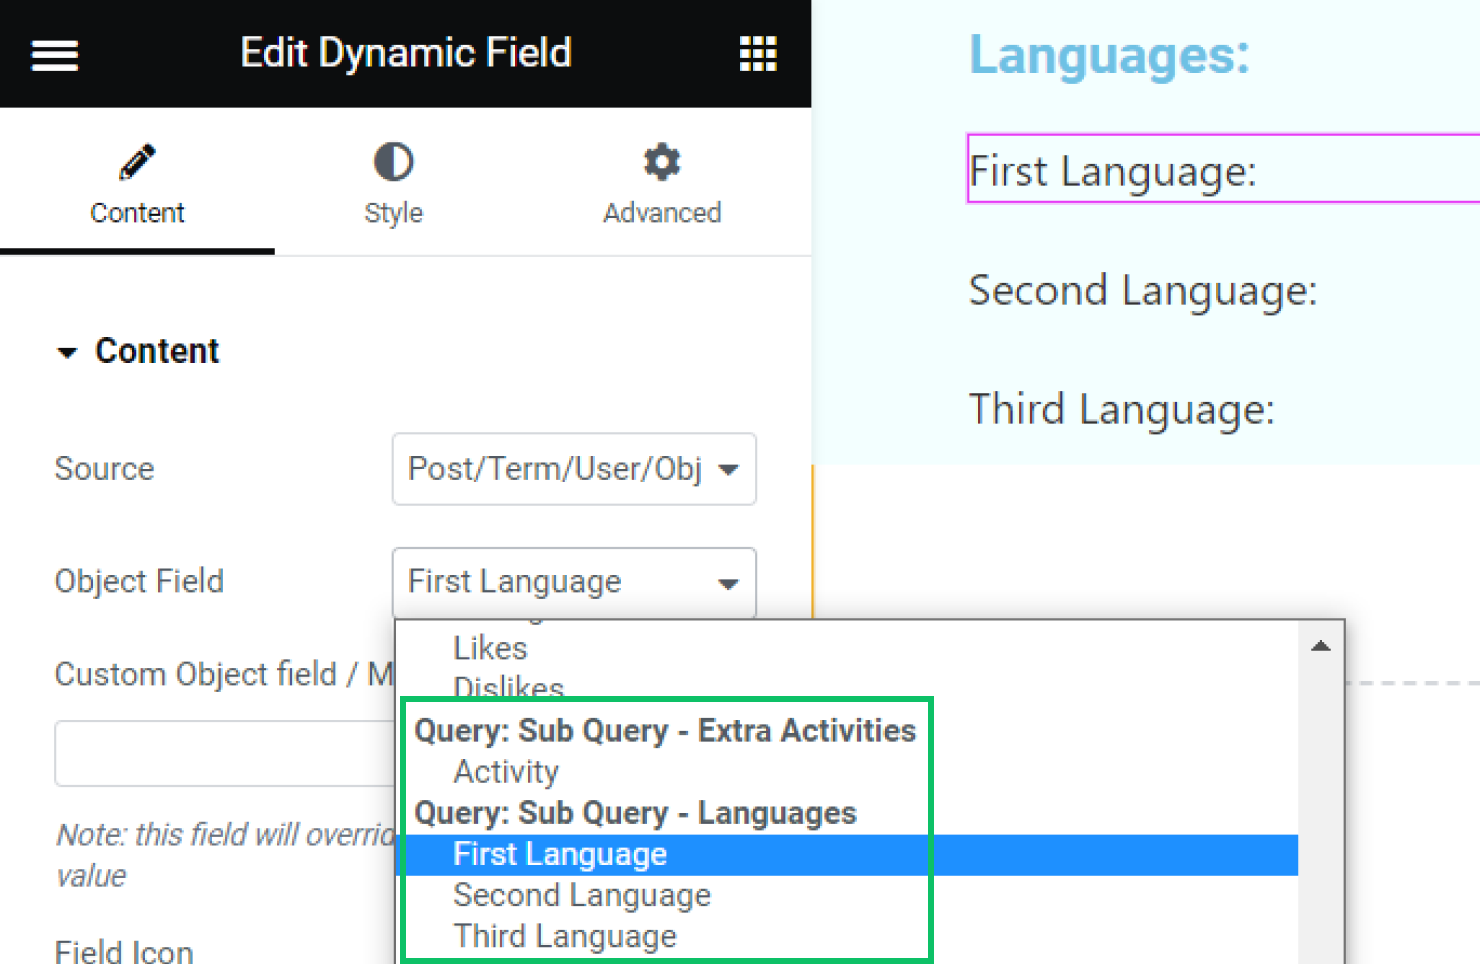
Don’t worry if you don’t see anything on the preview, as the elements will appear once you place the nested listing inside the primary listing.
Once done with customizing, save the template by pressing the “Publish/Update” button.
Create the listing template in Block Editor (Gutenberg)
To create a new listing, navigate to WordPress Dashboard > JetEngine > Listings. Click the “Add New” button to call a Setup Listing Item popup.
Select “Query Builder” as the Listing Source and find the previously created Sub Query in the drop-down of custom queries. Give a name to the listing, select “Blocks (Gutenberg)” for the Listing View, and hit the “Create Listing Item” button.
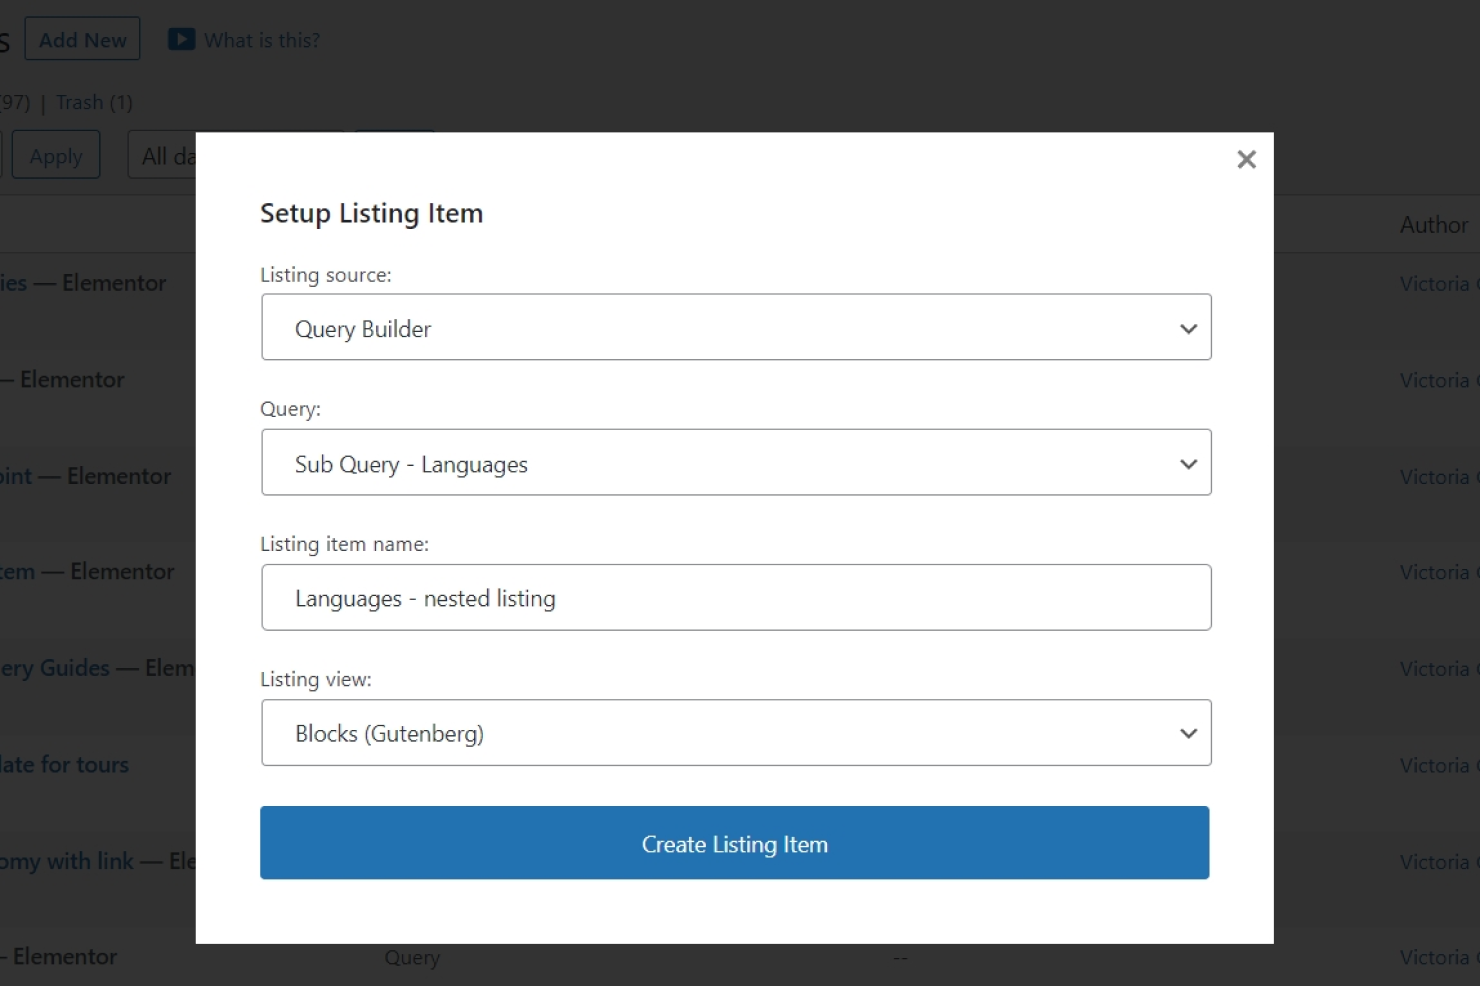
Search for the Dynamic Field block and place it on the template.
As a Source of the widget, leave the “Post/Term/User/Object Data” option. Then, open the Post Object drop-down and search for the name of your Sub Query. Under the name of the query, there is a list of elements retrieved by the query. Using these elements, build your listing layout.
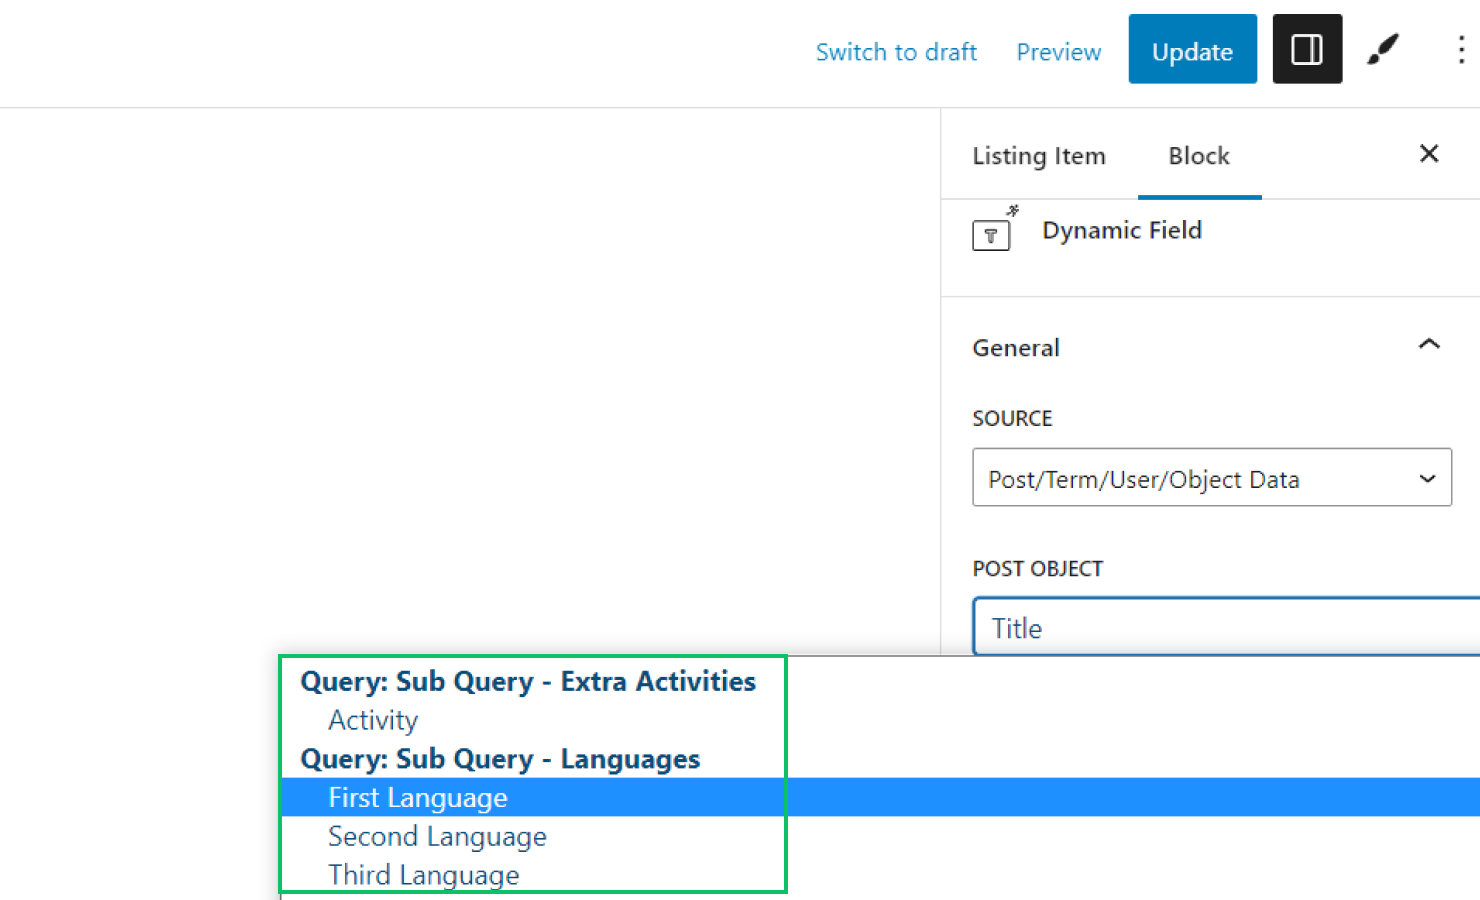
Don’t worry if you don’t see anything on the preview, as the elements will appear once you place the nested listing inside the primary listing.
Once done with customizing, save the template.
Create the Main Listing to Display the Endpoint Results
It is time to build the main listing to showcase the rest of the properties from the REST API endpoint. Add a new listing in WordPress Dashboard > JetEngine > Listings. As a Listing Source, select one of the options: “REST API Endpoint” if you didn’t create a REST API query; “Query Builder” if you created a REST API query.
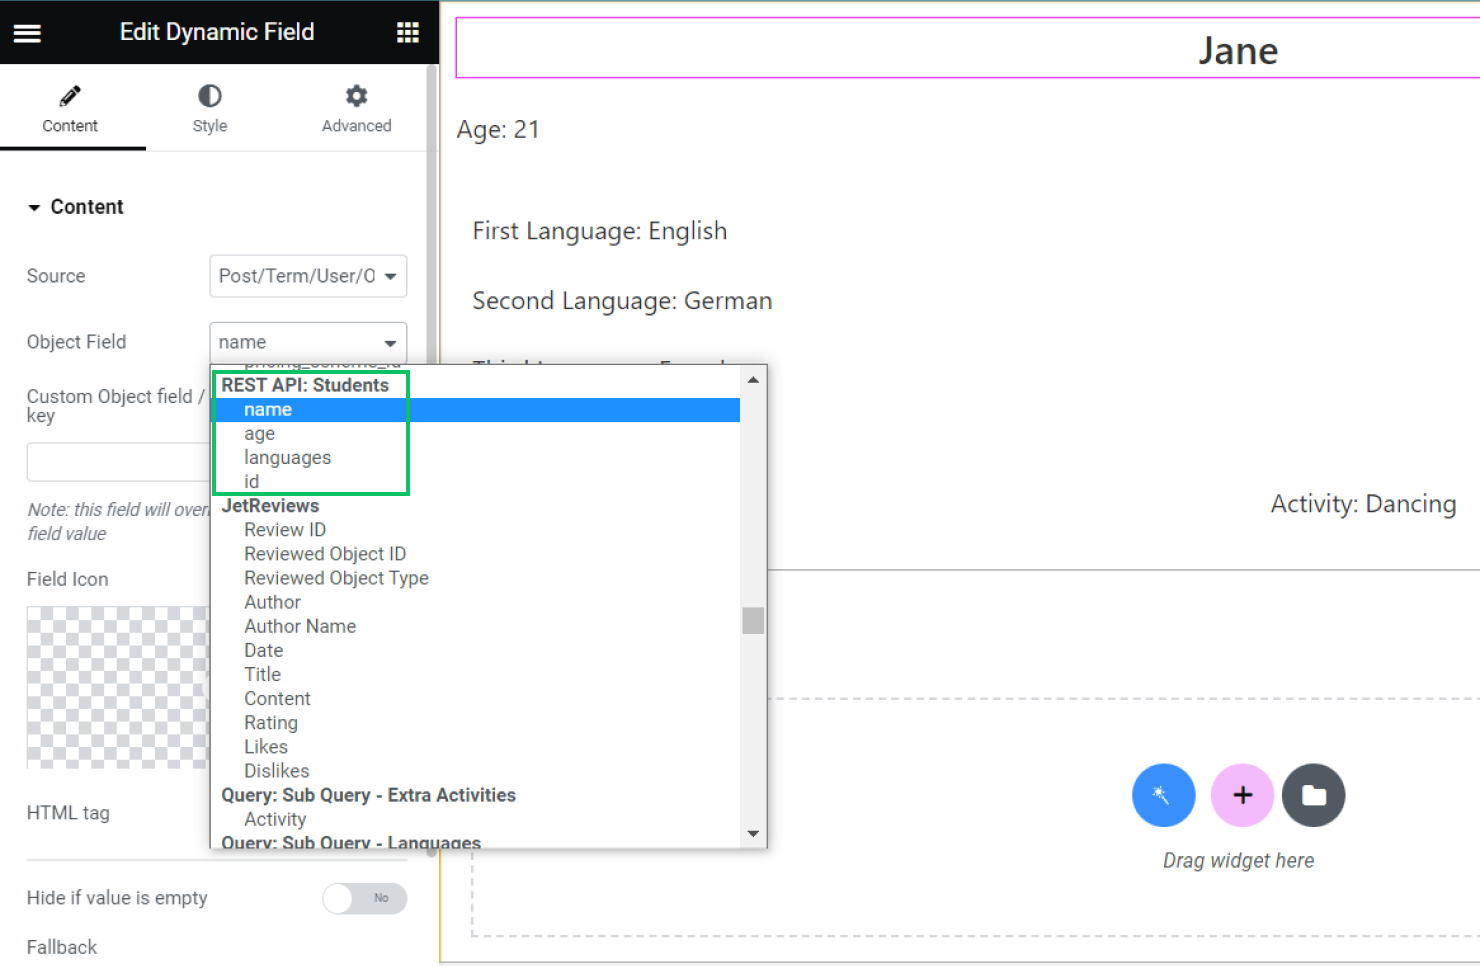
The same settings can be applied for the Gutenberg (Block Editor) view.
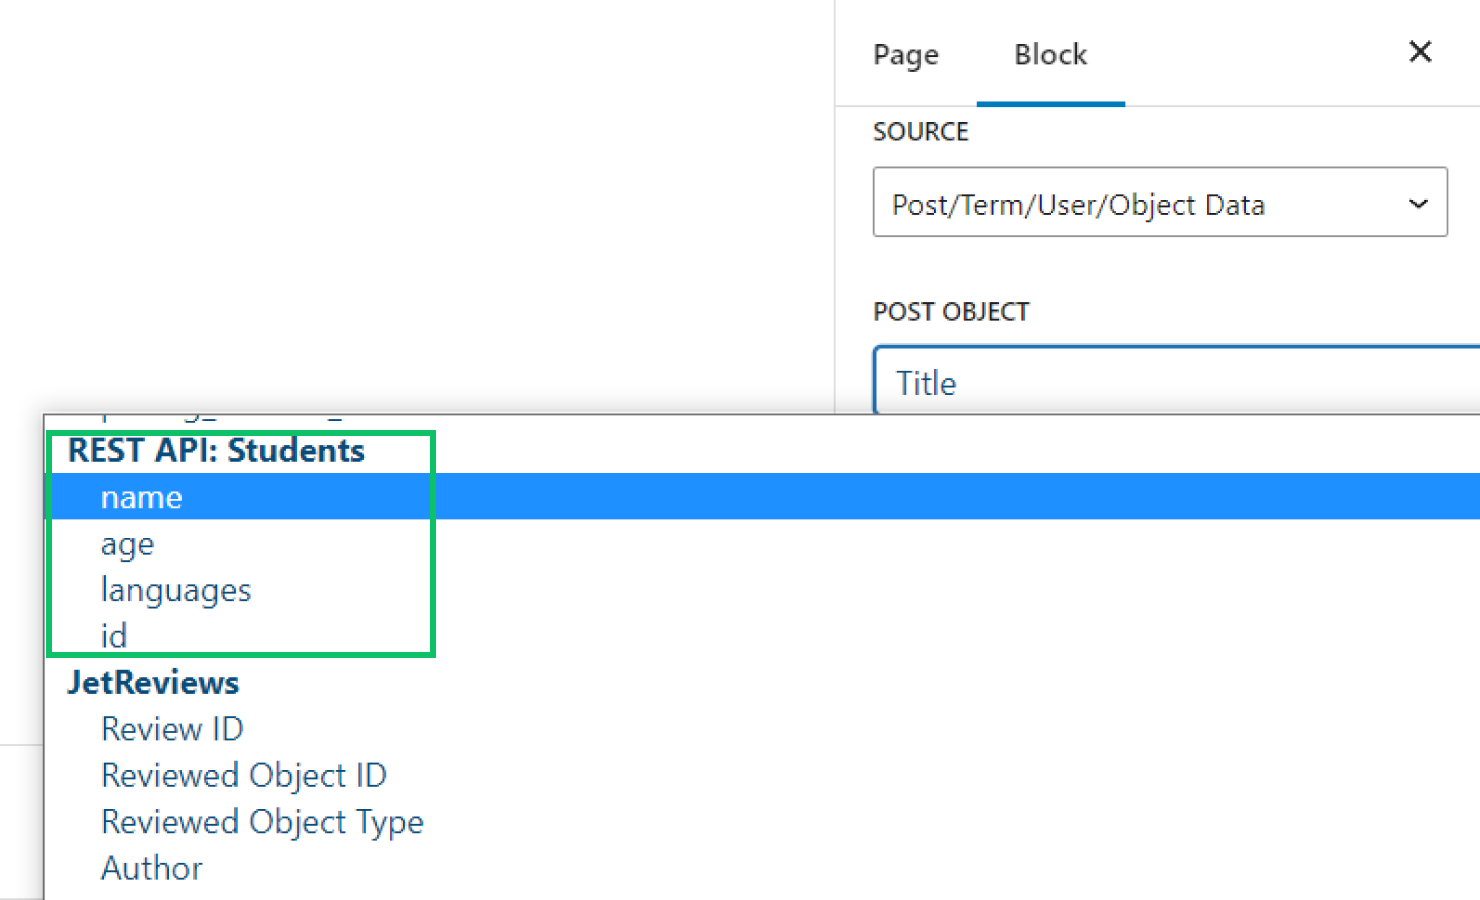
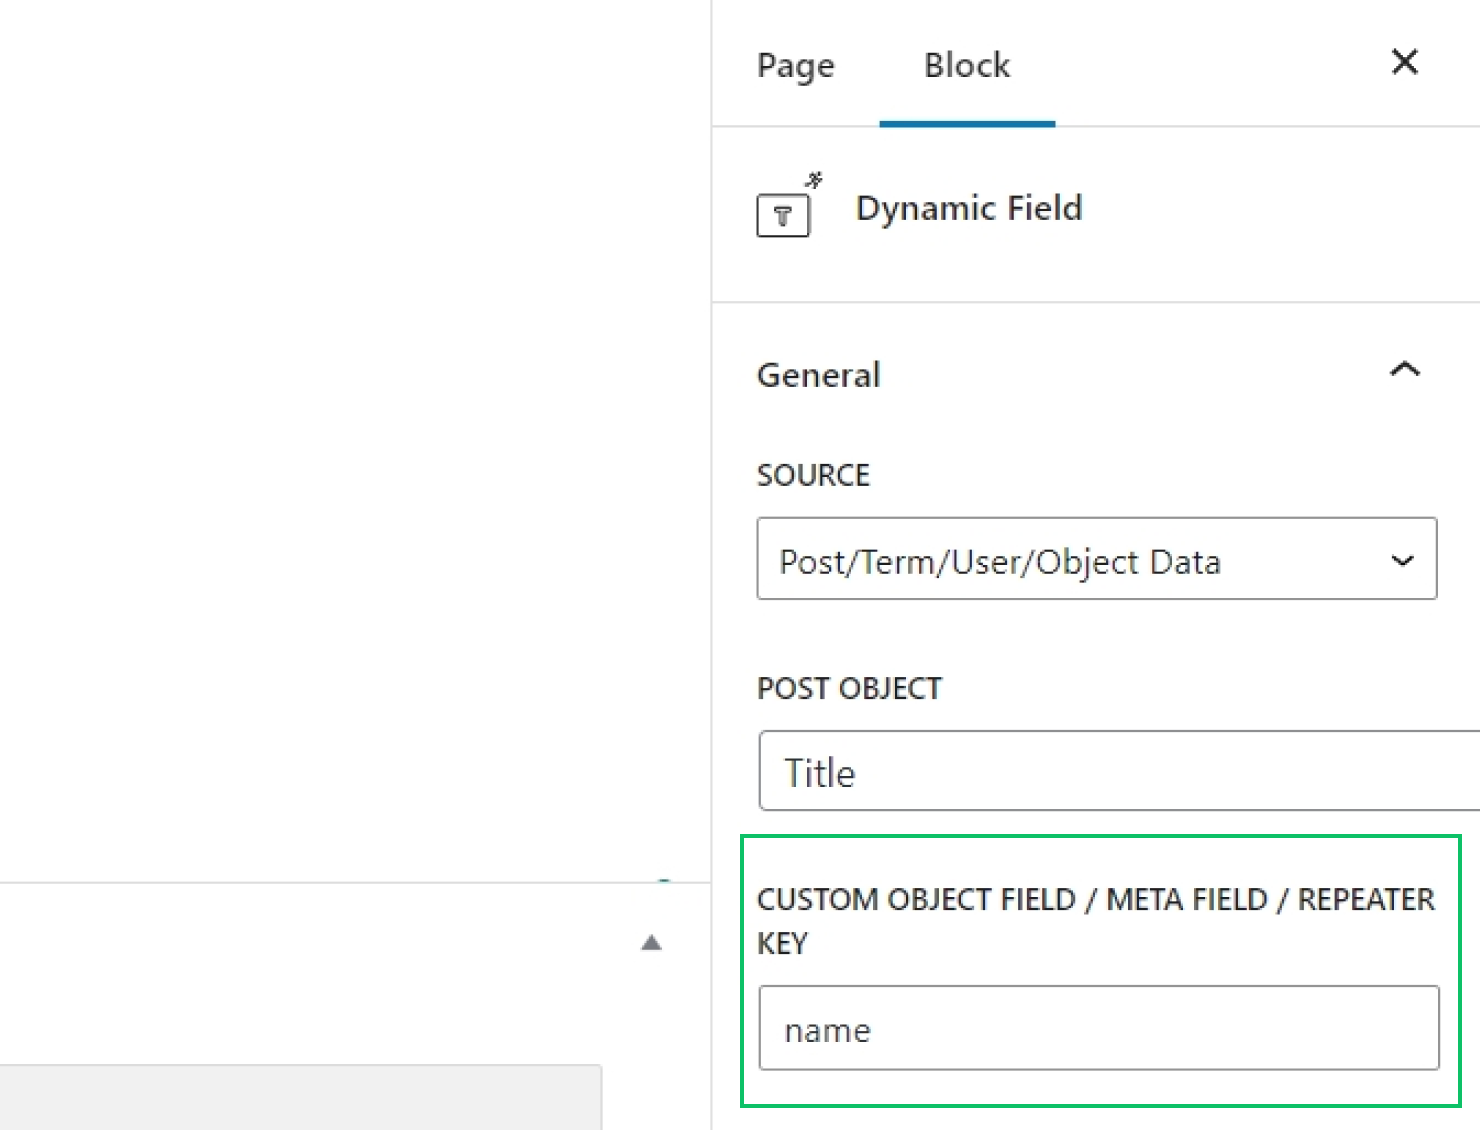
If the source of the Listing Template is “Query Builder,” find the name of the custom query in the Object Field drop-down and select any of the fields available. If the field did not appear in the dropdown, specify it manually in the Custom Object field / Meta field / Repeater key input field.
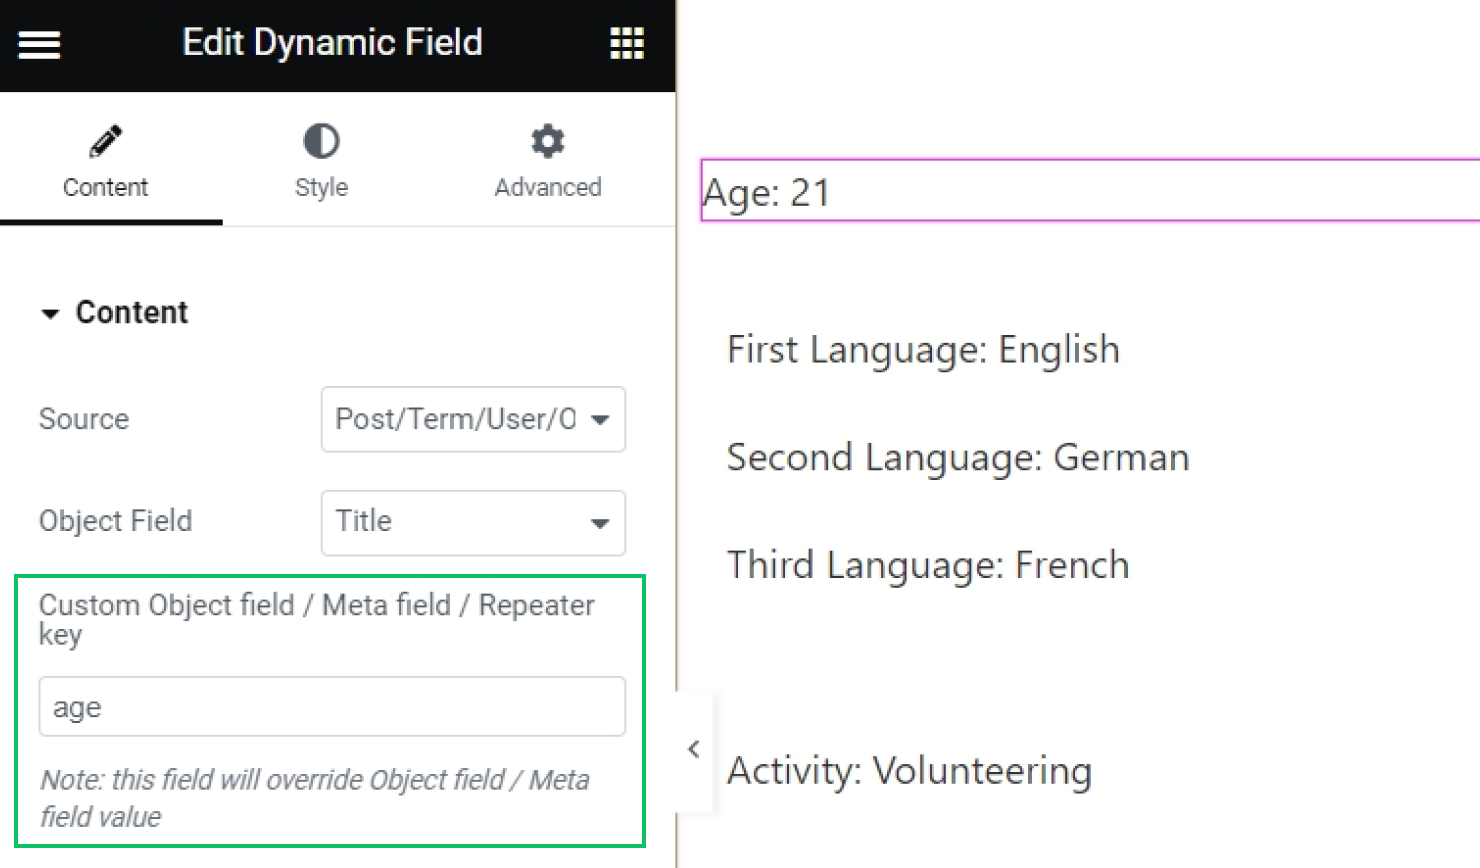
The same settings are applicable for Block Editor (Gutenberg) view.
Lastly, find the Listing Grid widget/block and put it on the template. Use it to display the nested listings created previously.
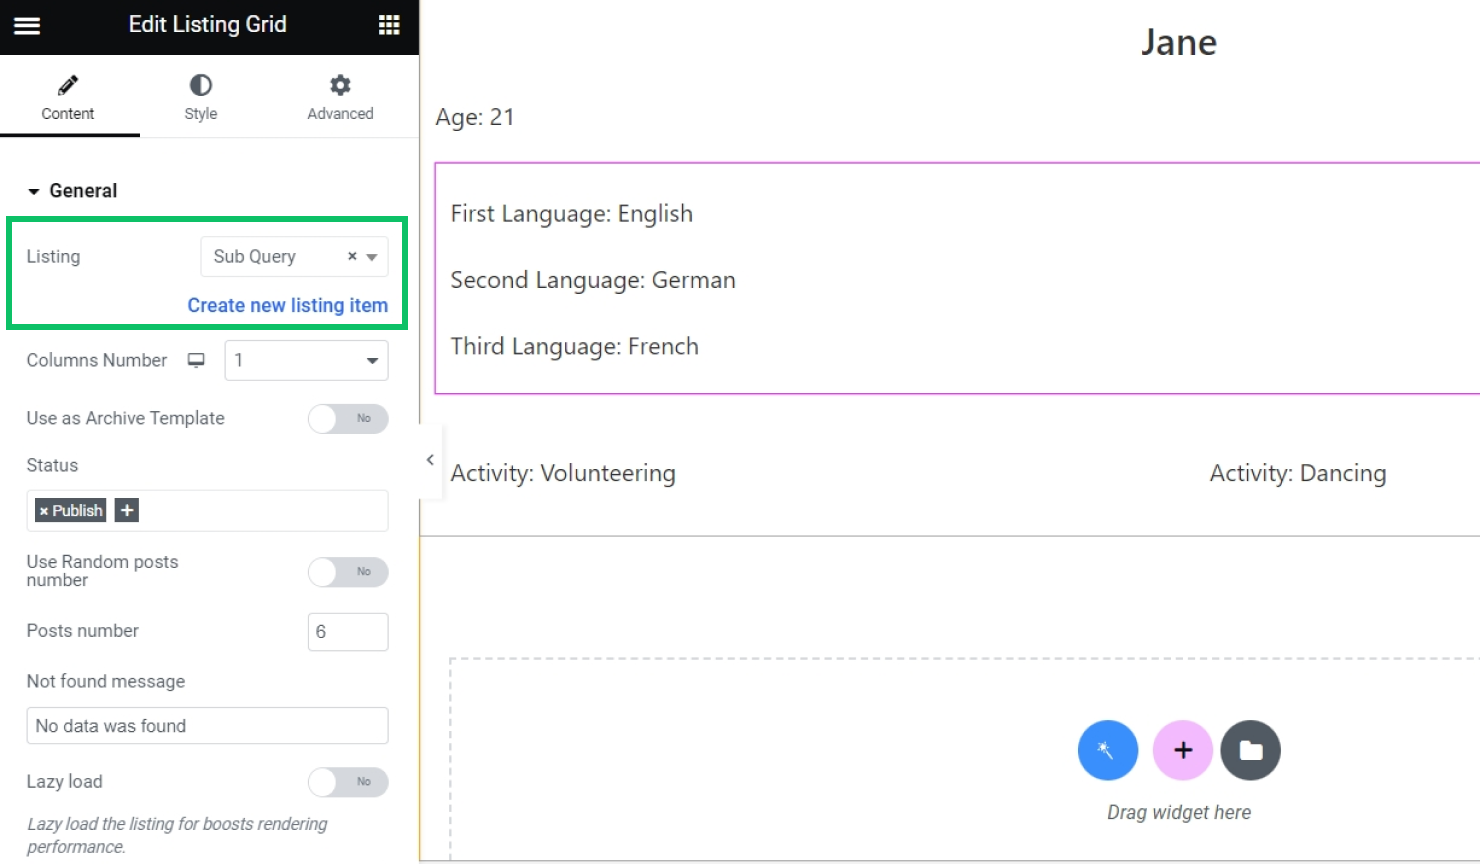
Note that it is not necessary to apply the Sub Query in the Custom Query tab of the Listing Grid widget’s/block’s settings. The listing will still retrieve data from the custom query, which is the source of the Listing Template.
Once you are finished, navigate to the page or template where the listing with REST API data should be visible and place the main listing on that page. The main listing will contain nested listings that output data from the parent object property.

That’s all about the Sub Query addon available for free as a part of the JetEngine plugin for your WordPress website.