How to Link a Dynamic Field Value to a URL Anchor
From this tutorial, you will find out how to link Dynamic Field to the page section with the JetEngine plugin.
Before you start, check the tutorial requirements:
- Elementor (Free version) or Block editor (Gutenberg)
- JetEngine plugin installed and activated
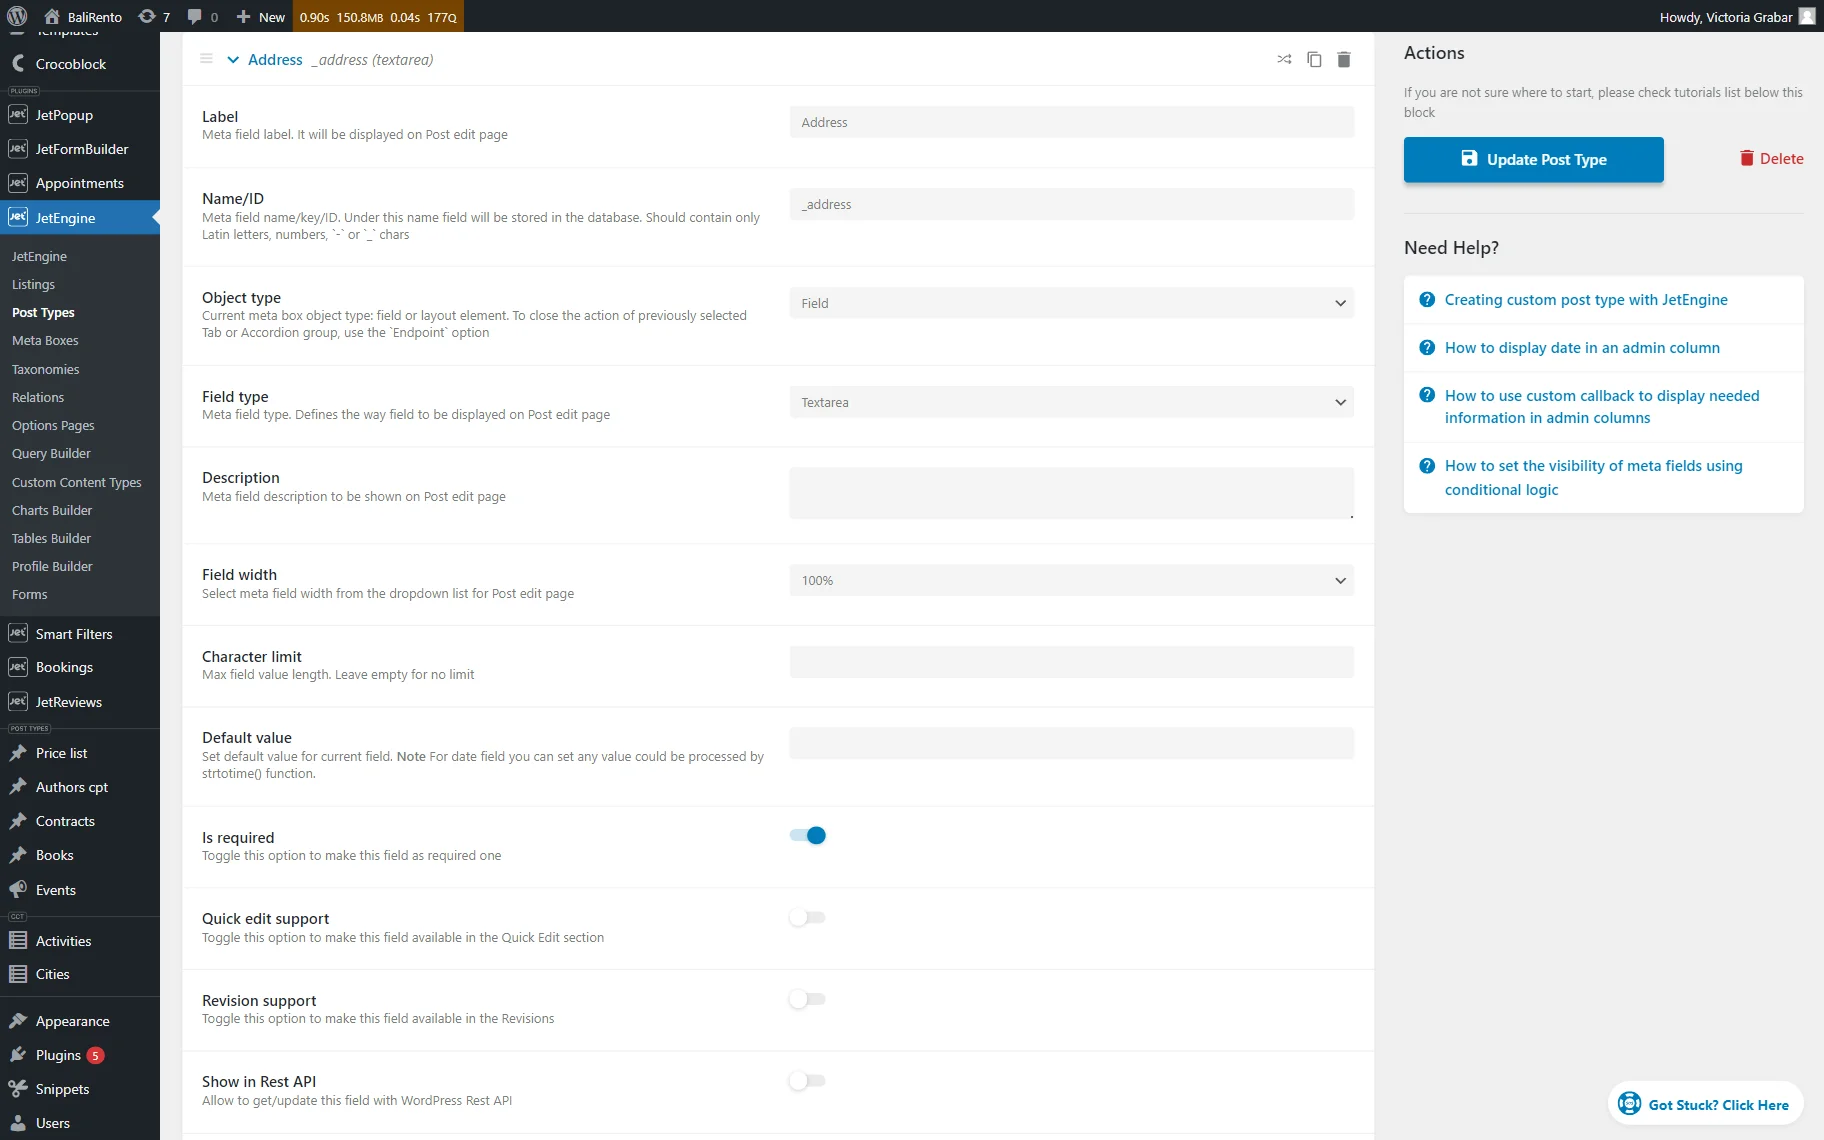
Let’s imagine that you run a property listing website, and the properties are stored as a Custom Post Type. The “Properties” Custom Post Type contains a “Textarea” meta field for the property address.
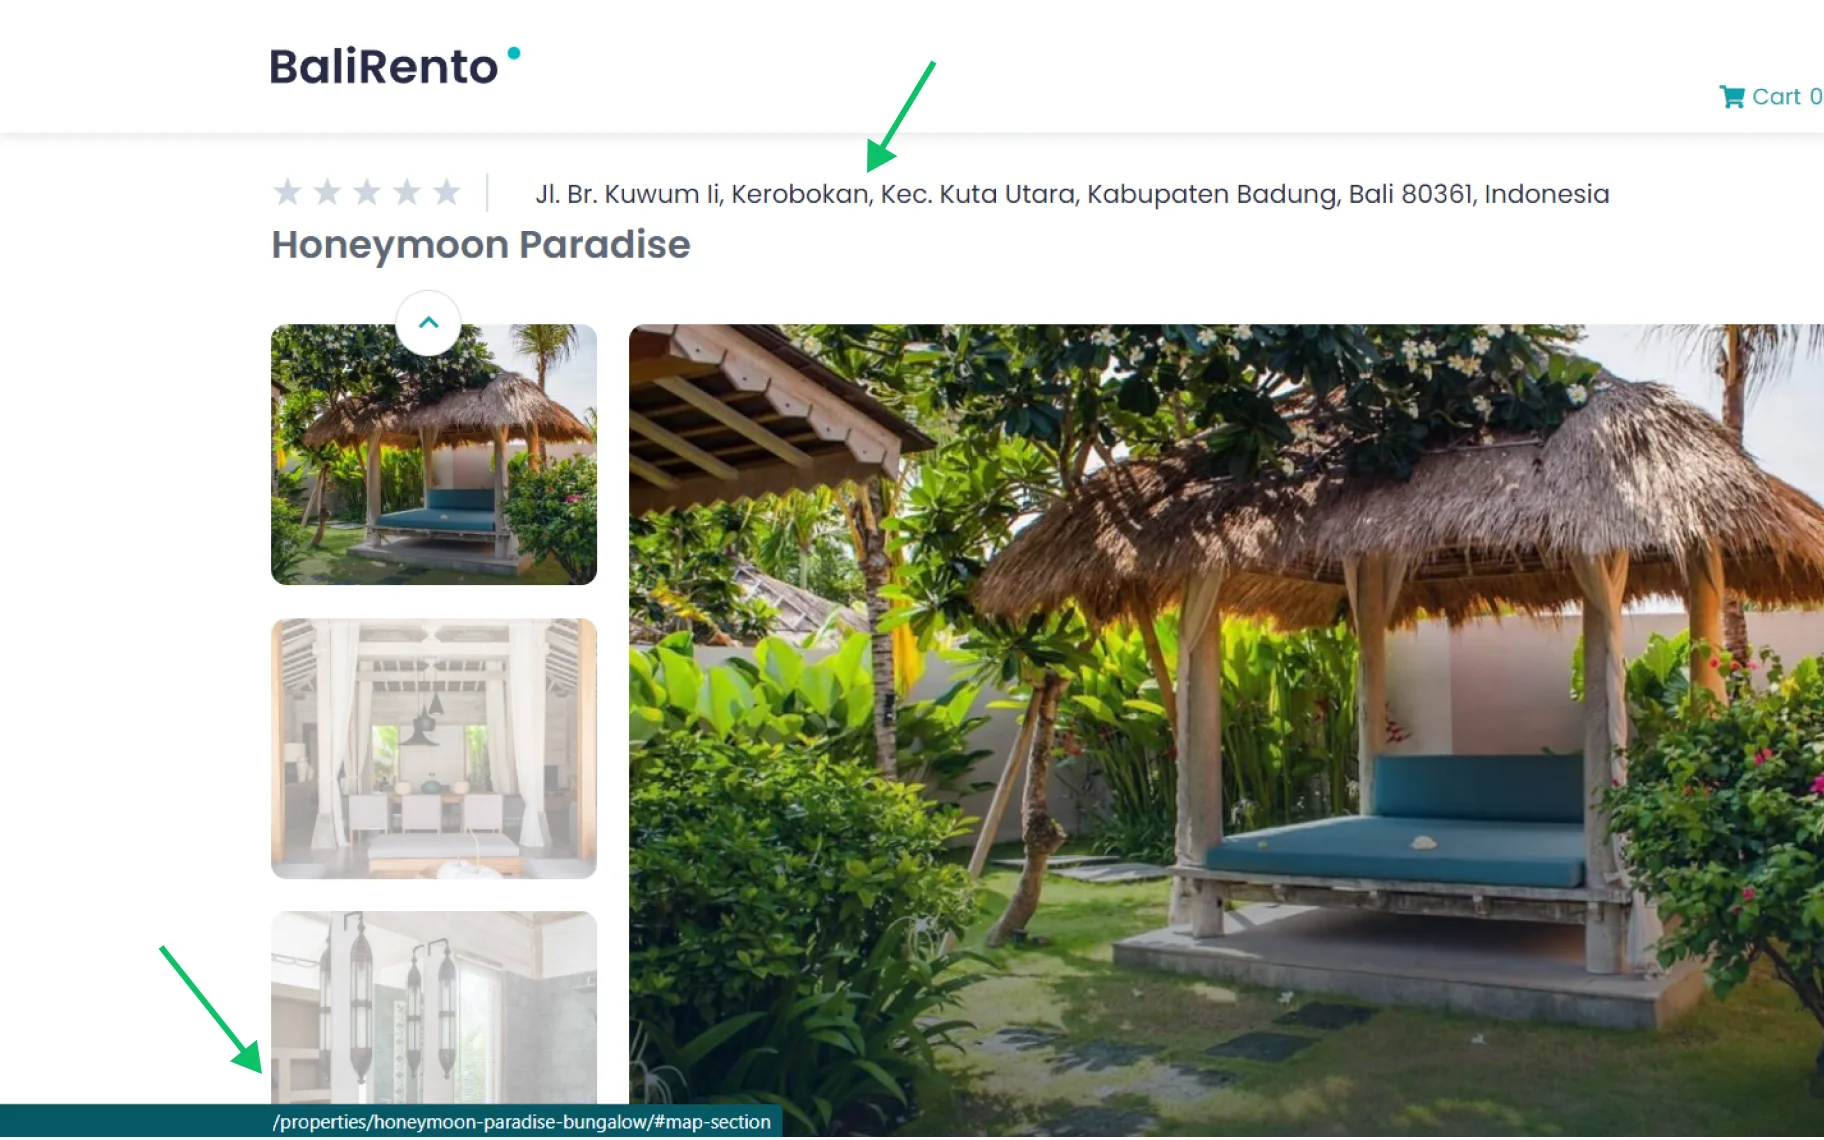
The goal is to display the address on a Single Page of the property and link this address to an interactive map below, enabling users to scroll to the map by clicking the address.
Add a Link to the Dynamic Field Widget in Elementor
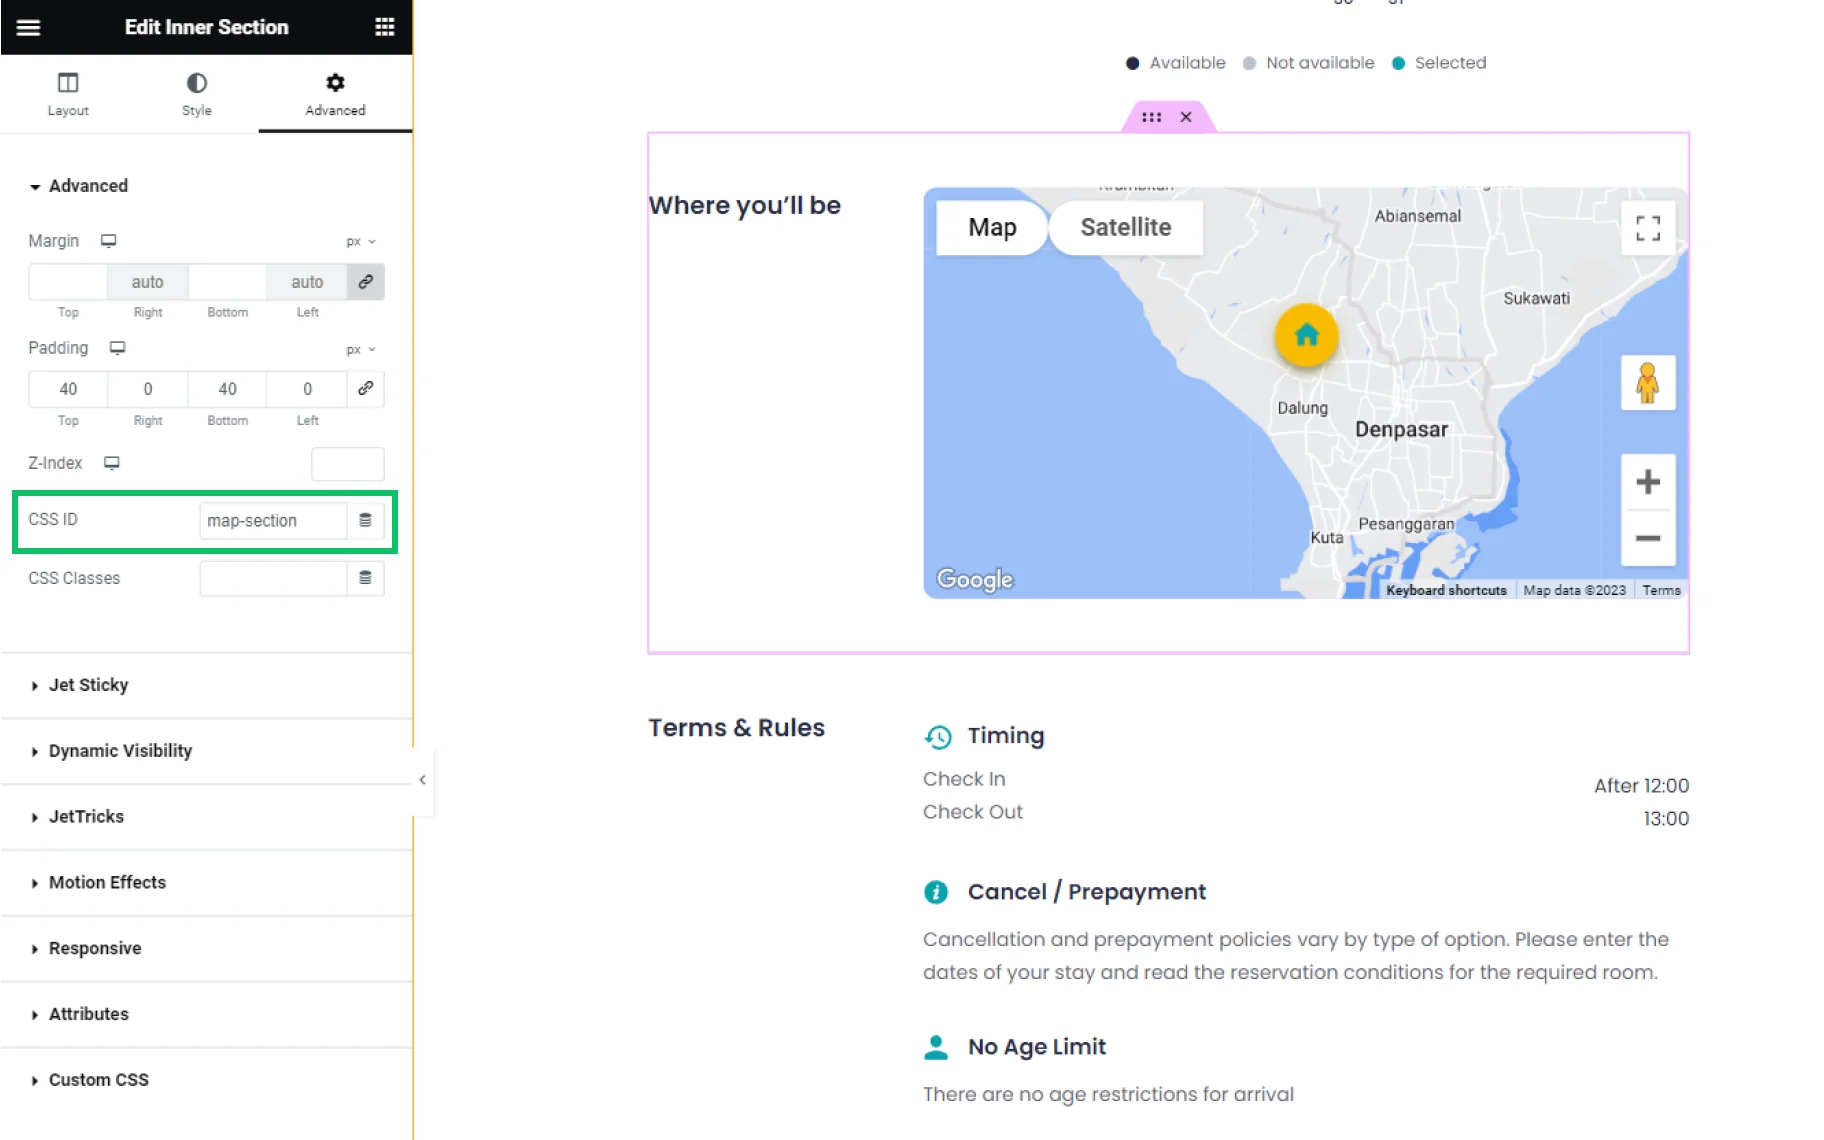
Give the section a CSS ID
Open the Single Post Template in the Elementor editor.
Find the target section or container and enter the Advanced settings. In the CSS ID field, enter a unique ID that will be used as an anchor link.
Copy this ID.
Add the Dynamic Field widget
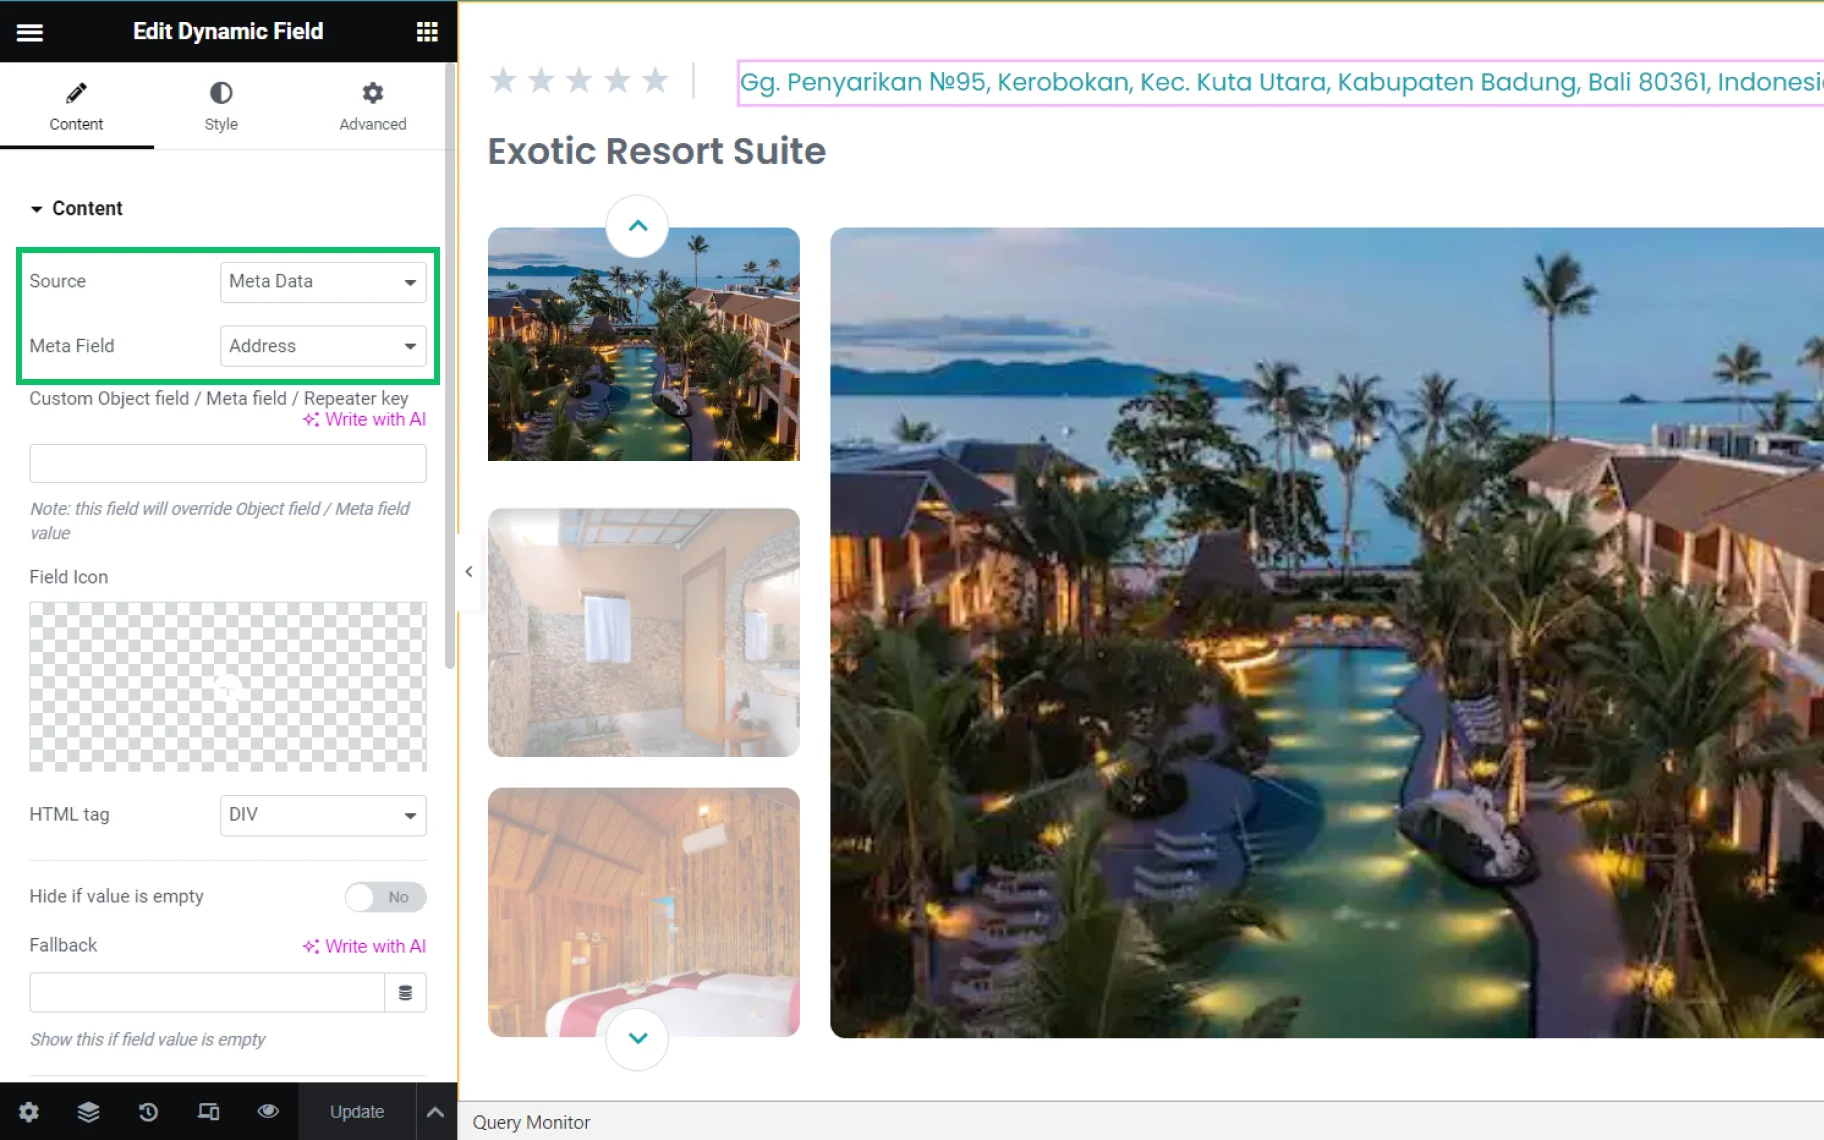
Add the Dynamic Field widget to the page where the dynamic data from the meta field should be displayed. In our case, we place it near the post title on top of the template.
Select the “Meta Data” Source and find the needed Meta Field option from the drop-down list below.
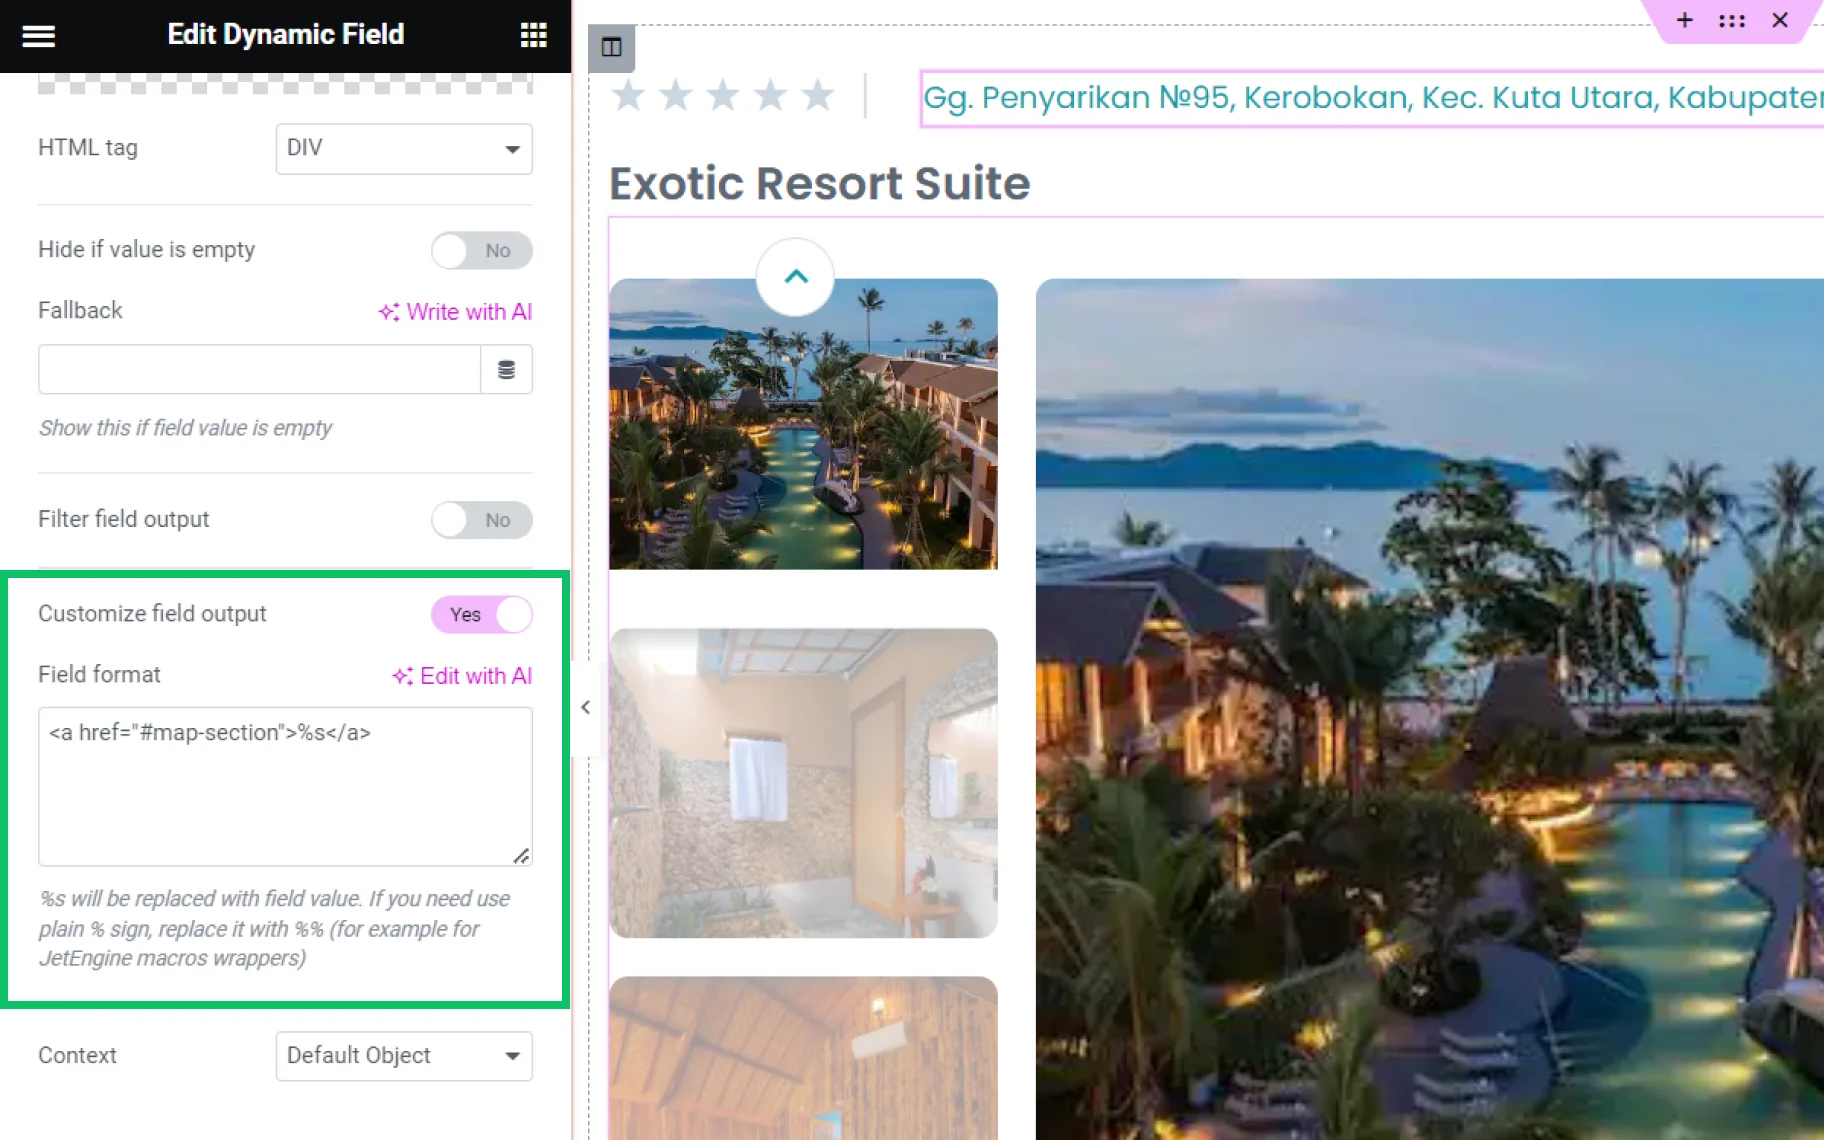
Configure the Customize field output setting
Scroll down the settings of the Dynamic Field widget and enable the Customize field output toggle. This setting helps to customize the output of the value retrieved by the Dynamic Field widget.
In the Field Format text area, insert the below HTML code:
<a href="#map-section">%s</a>Here, “%s” stands for the value of the Dynamic Field, and the “#map-section” anchor stands for the CSS ID assigned to the section with the map. Feel free to replace the anchor link with the URL of your choice.
Now, update the changes.
Add a Link to the Dynamic Field Block in Block Editor
Create an anchor
Open the Single Post Template or the post in Block Editor.
Find the target section and add the Heading block on top of it. Unfold the Advanced tab of settings and enter an HTML Anchor.
Copy this anchor ID.

Add the Dynamic Field widget
Add the Dynamic Field block to the page where the dynamic data from the meta field should be displayed. In our case, we place it on top of the template.
Select the “Meta Data” SOURCE, and find the needed META KEY option from the drop-down list.
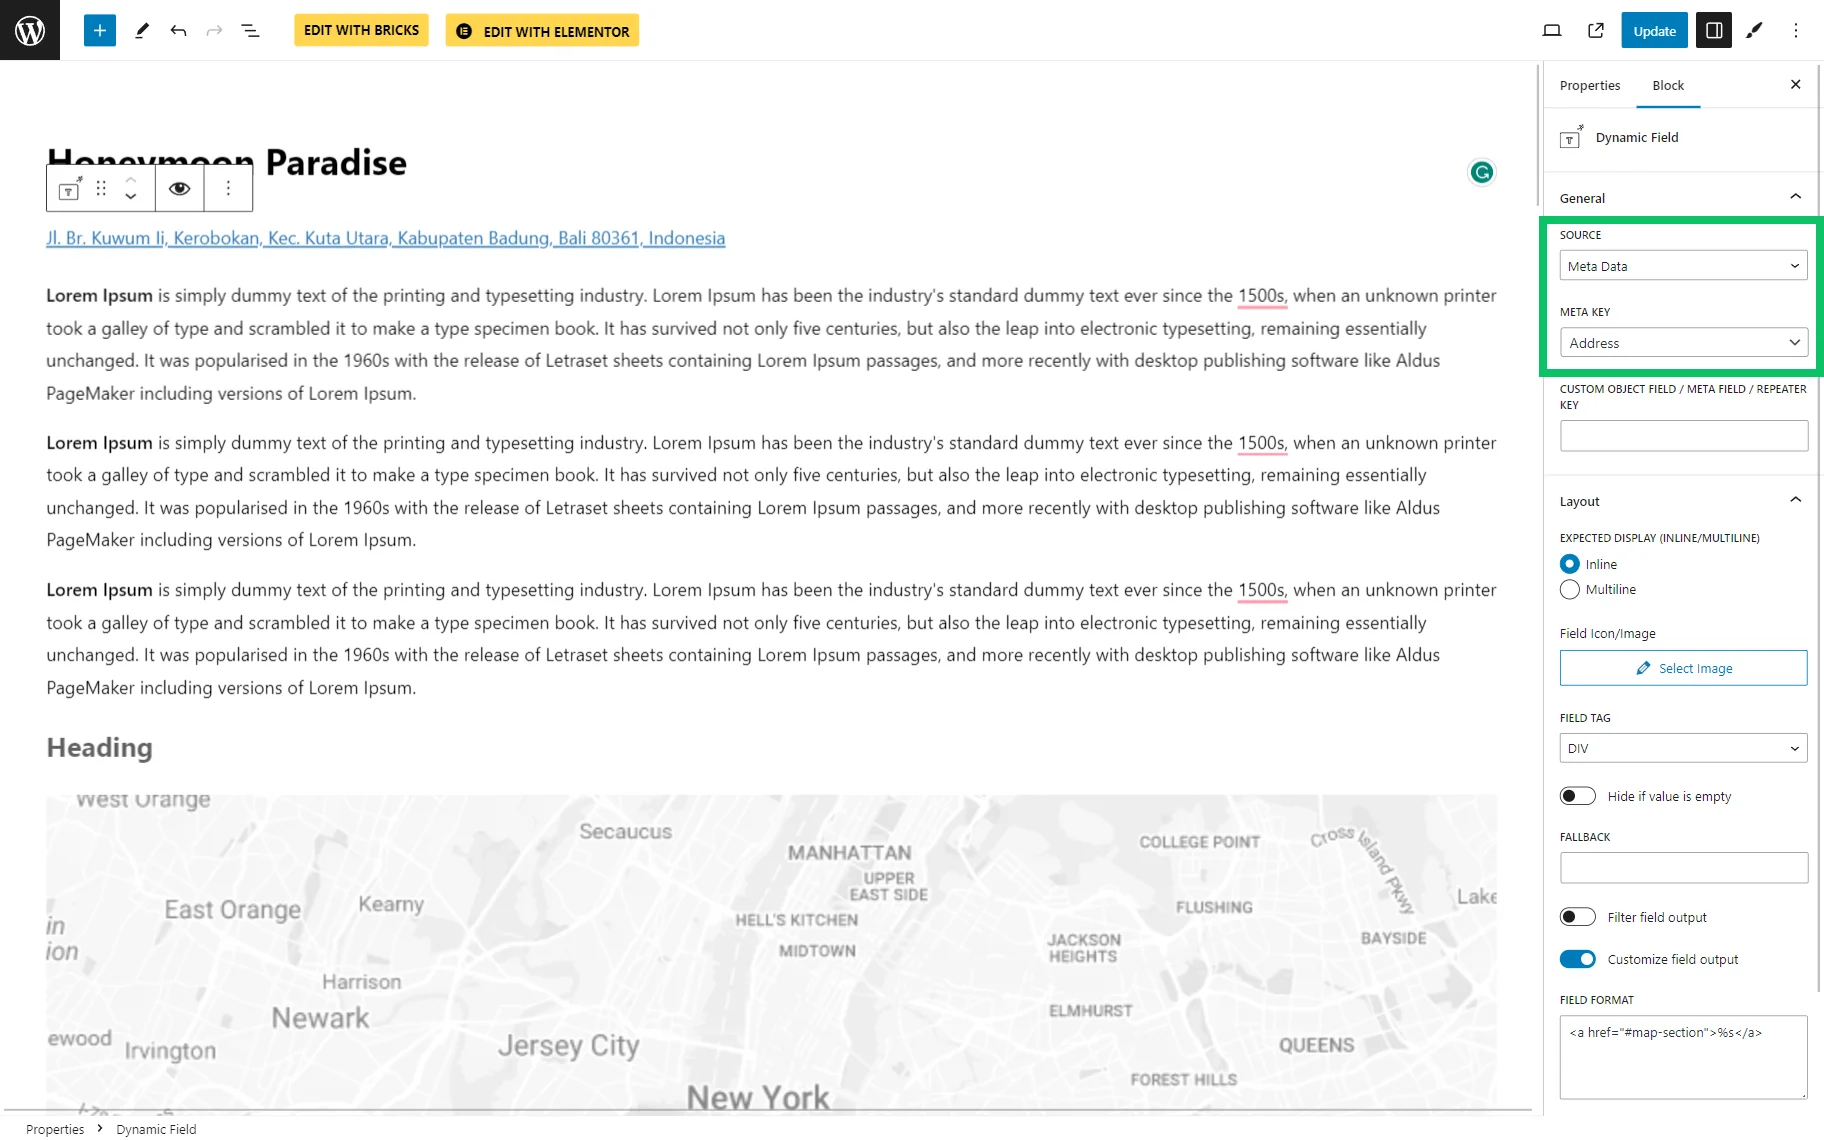
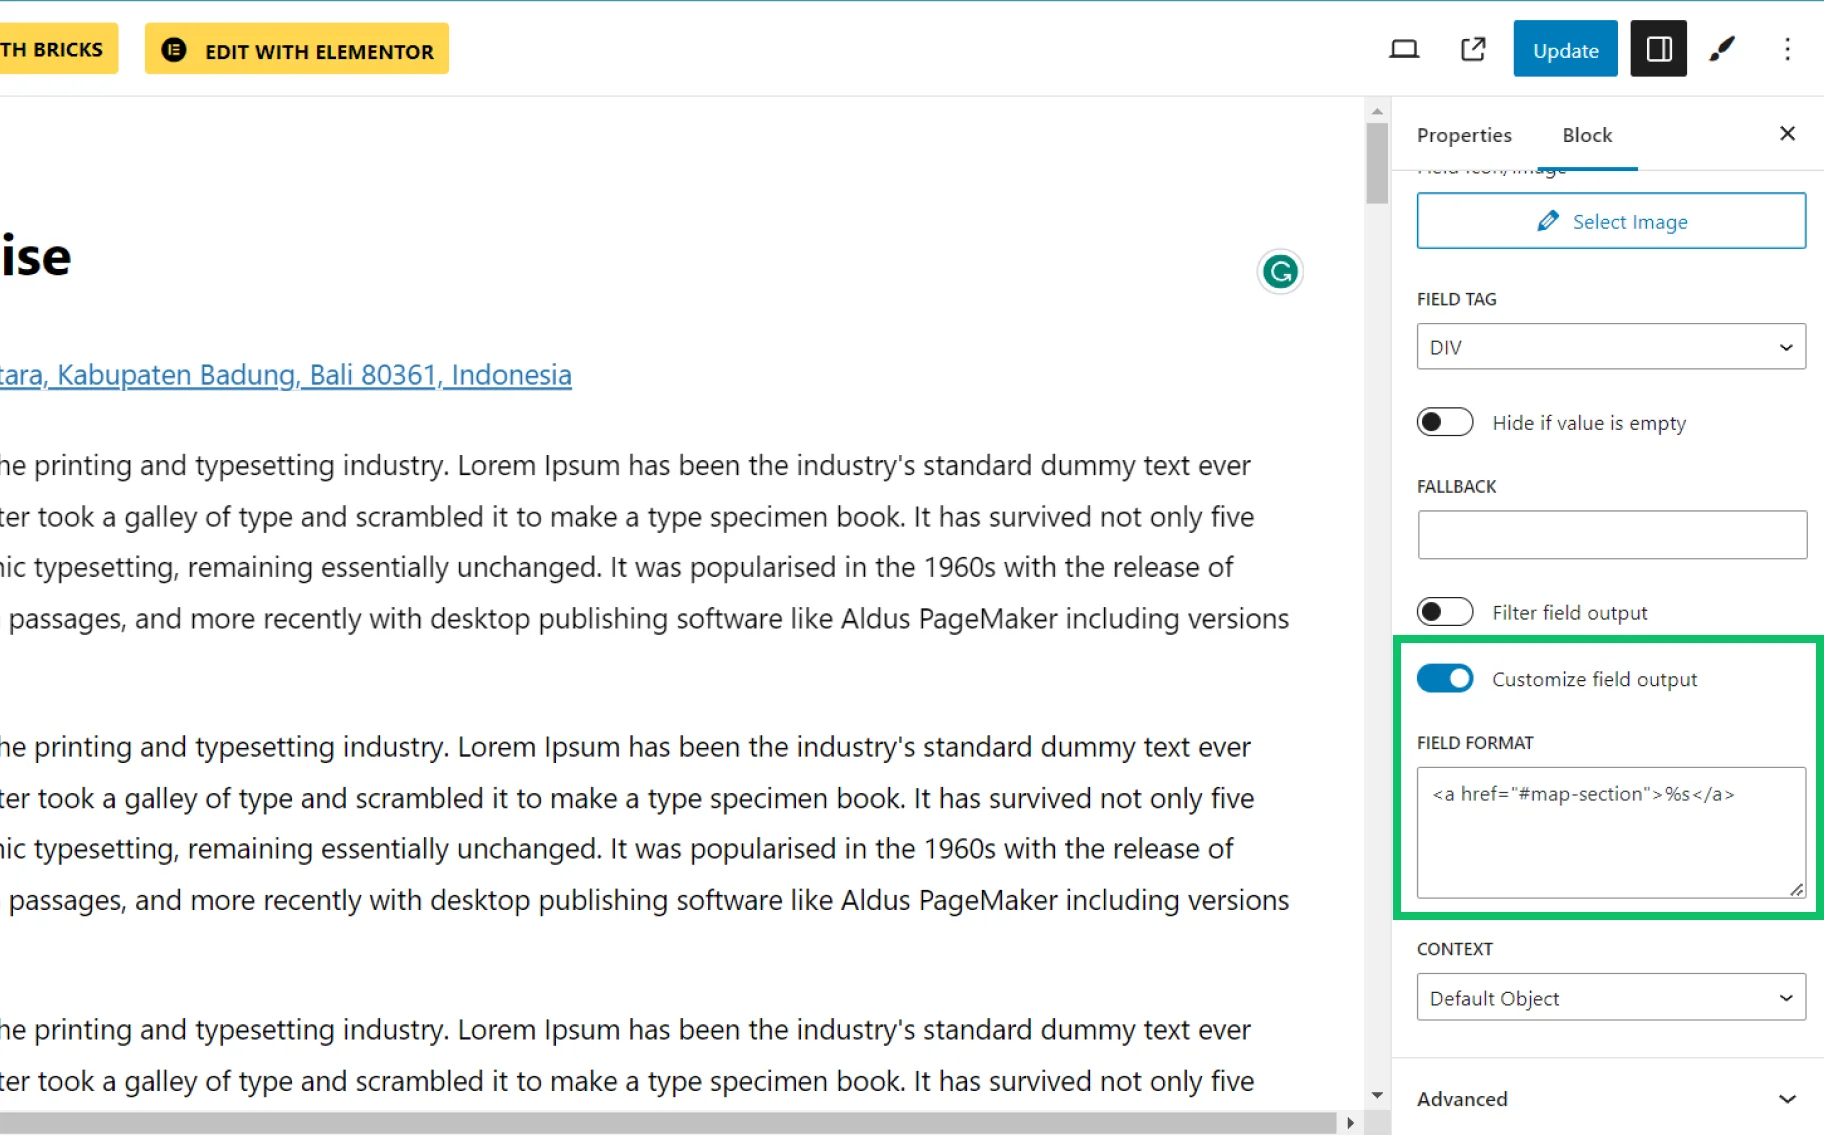
Configure the Customize field output setting
Scroll down the settings of the Dynamic Field block and enable the Customize field output toggle. This setting helps to customize the output of the value retrieved by the Dynamic Field block.
In the FIELD FORMAT text area, insert the below HTML code:
<a href="#map-section">%s</a>Here, “%s” stands for the value of the Dynamic Field, and the “#map-section” anchor stands for the CSS ID assigned to the section with the map. Feel free to replace the anchor link with the URL of your choice.
Now, update the changes.
Add a Link to the Dynamic Field Element in Bricks
Add a CSS ID to the section
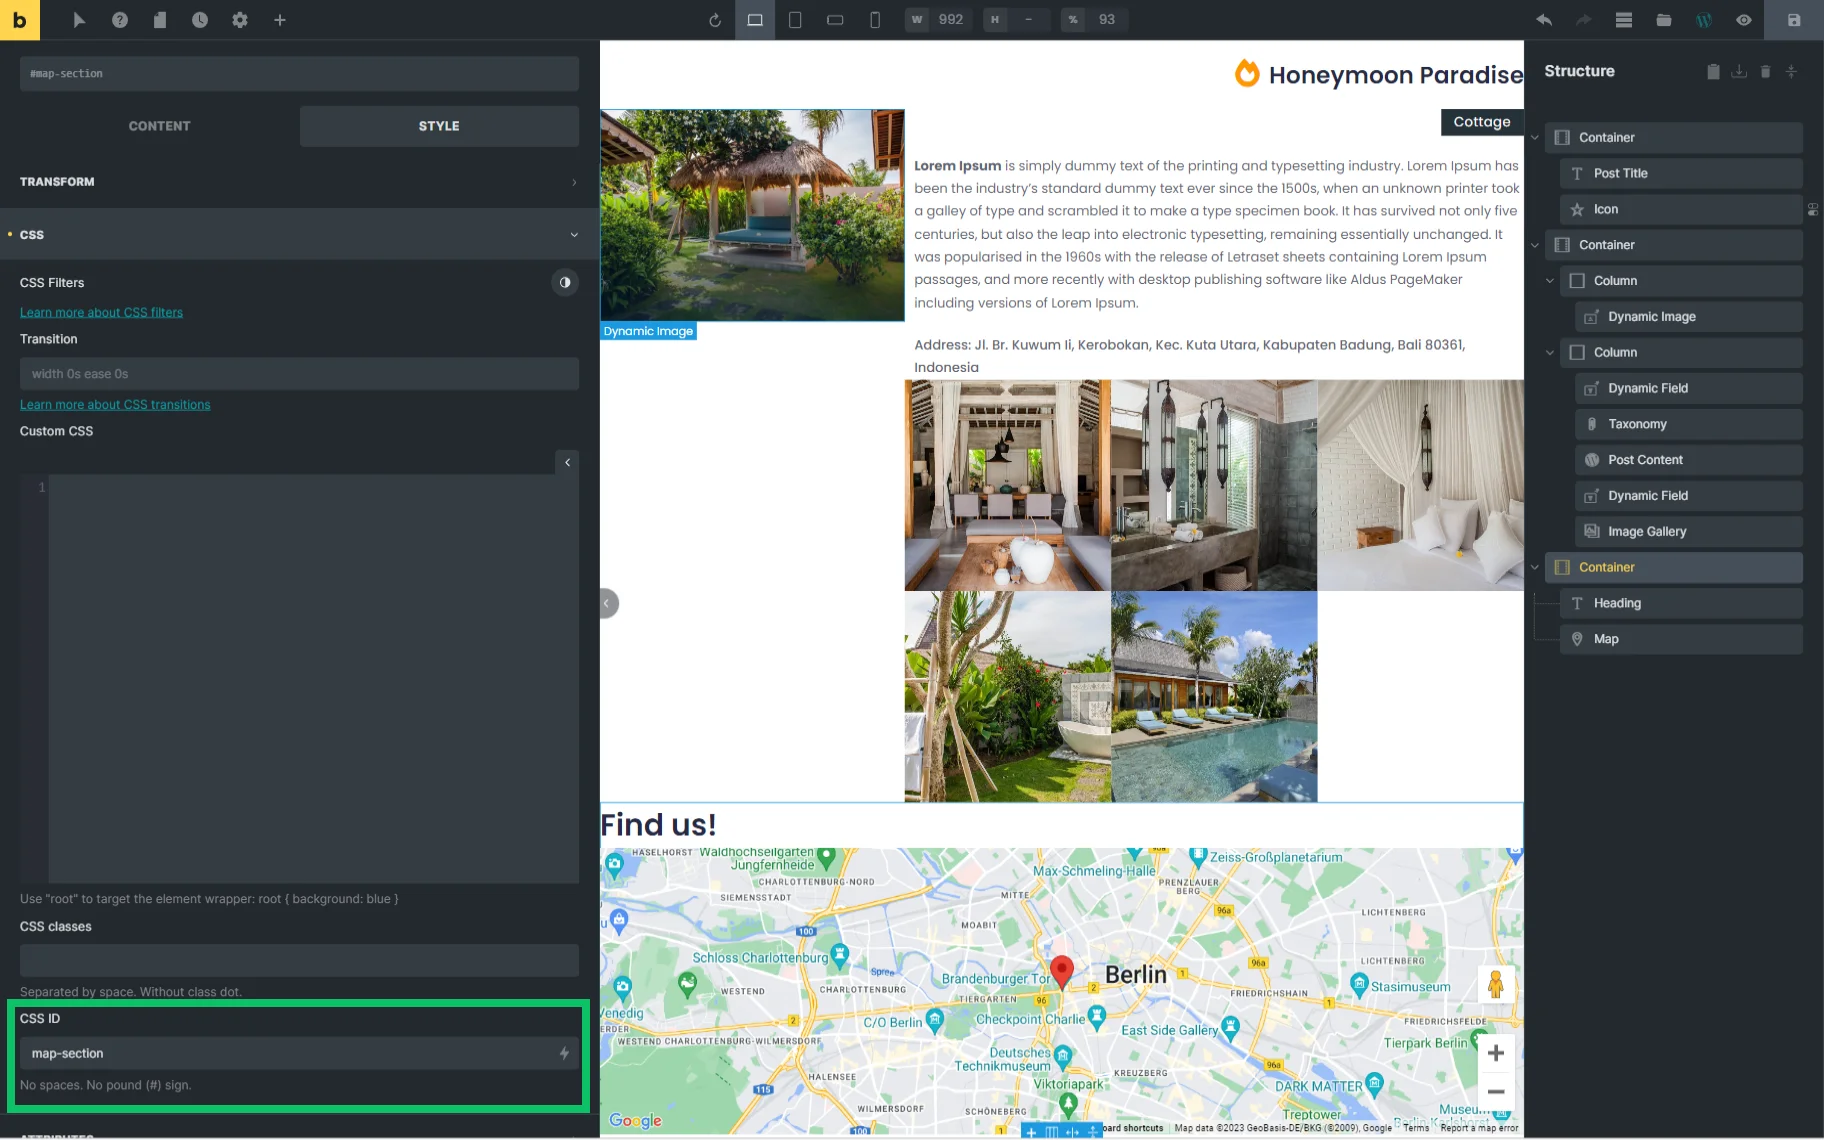
Open the Single Post Template in Bricks.
Find the target section or container. Switch to the STYLE settings, unfold the CSS settings, and enter a unique ID into the CSS ID field. This ID will serve as an anchor.
Copy this anchor ID.
Add the Dynamic Field element
Add the Dynamic Field element to the place on the page where the dynamic data from the meta field should be displayed. In our case, we place it on top of the template.
Select the “Meta Data” Source, and find the needed Meta field option from the drop-down list below.
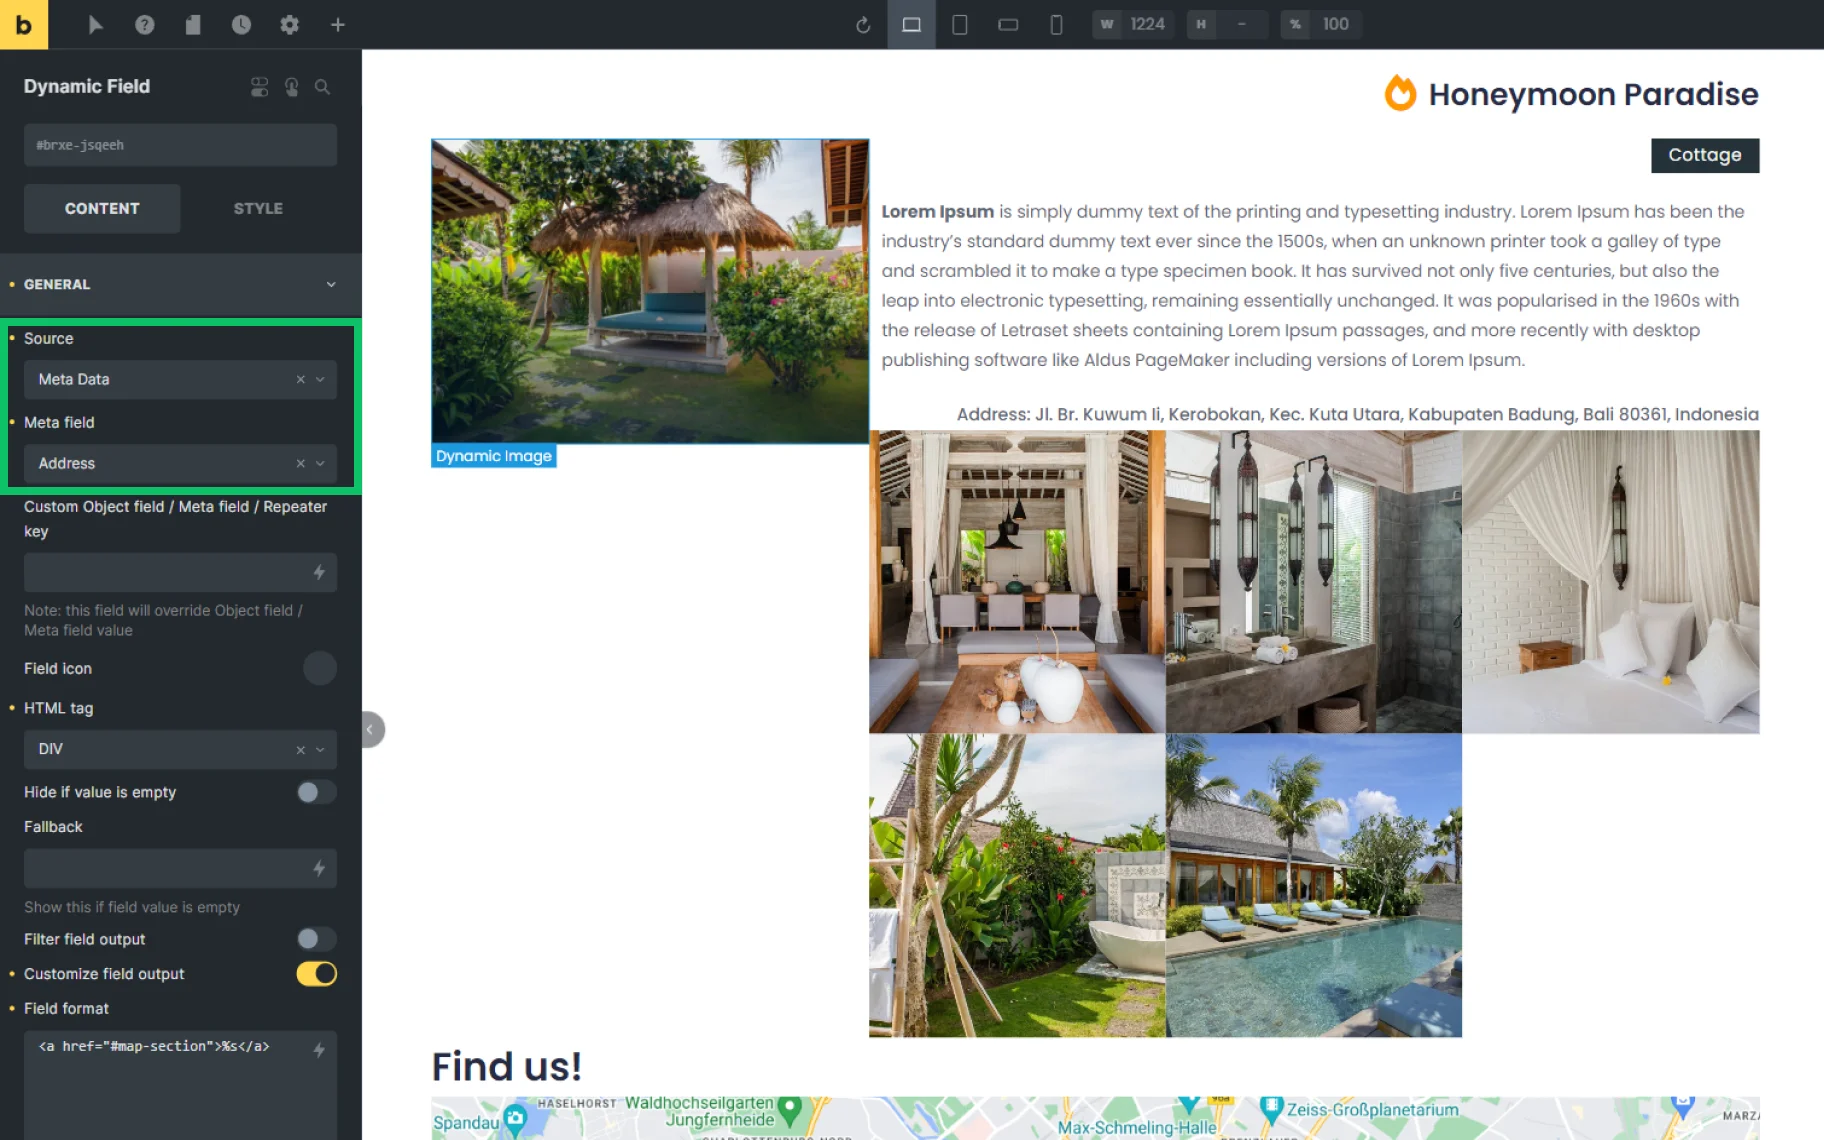
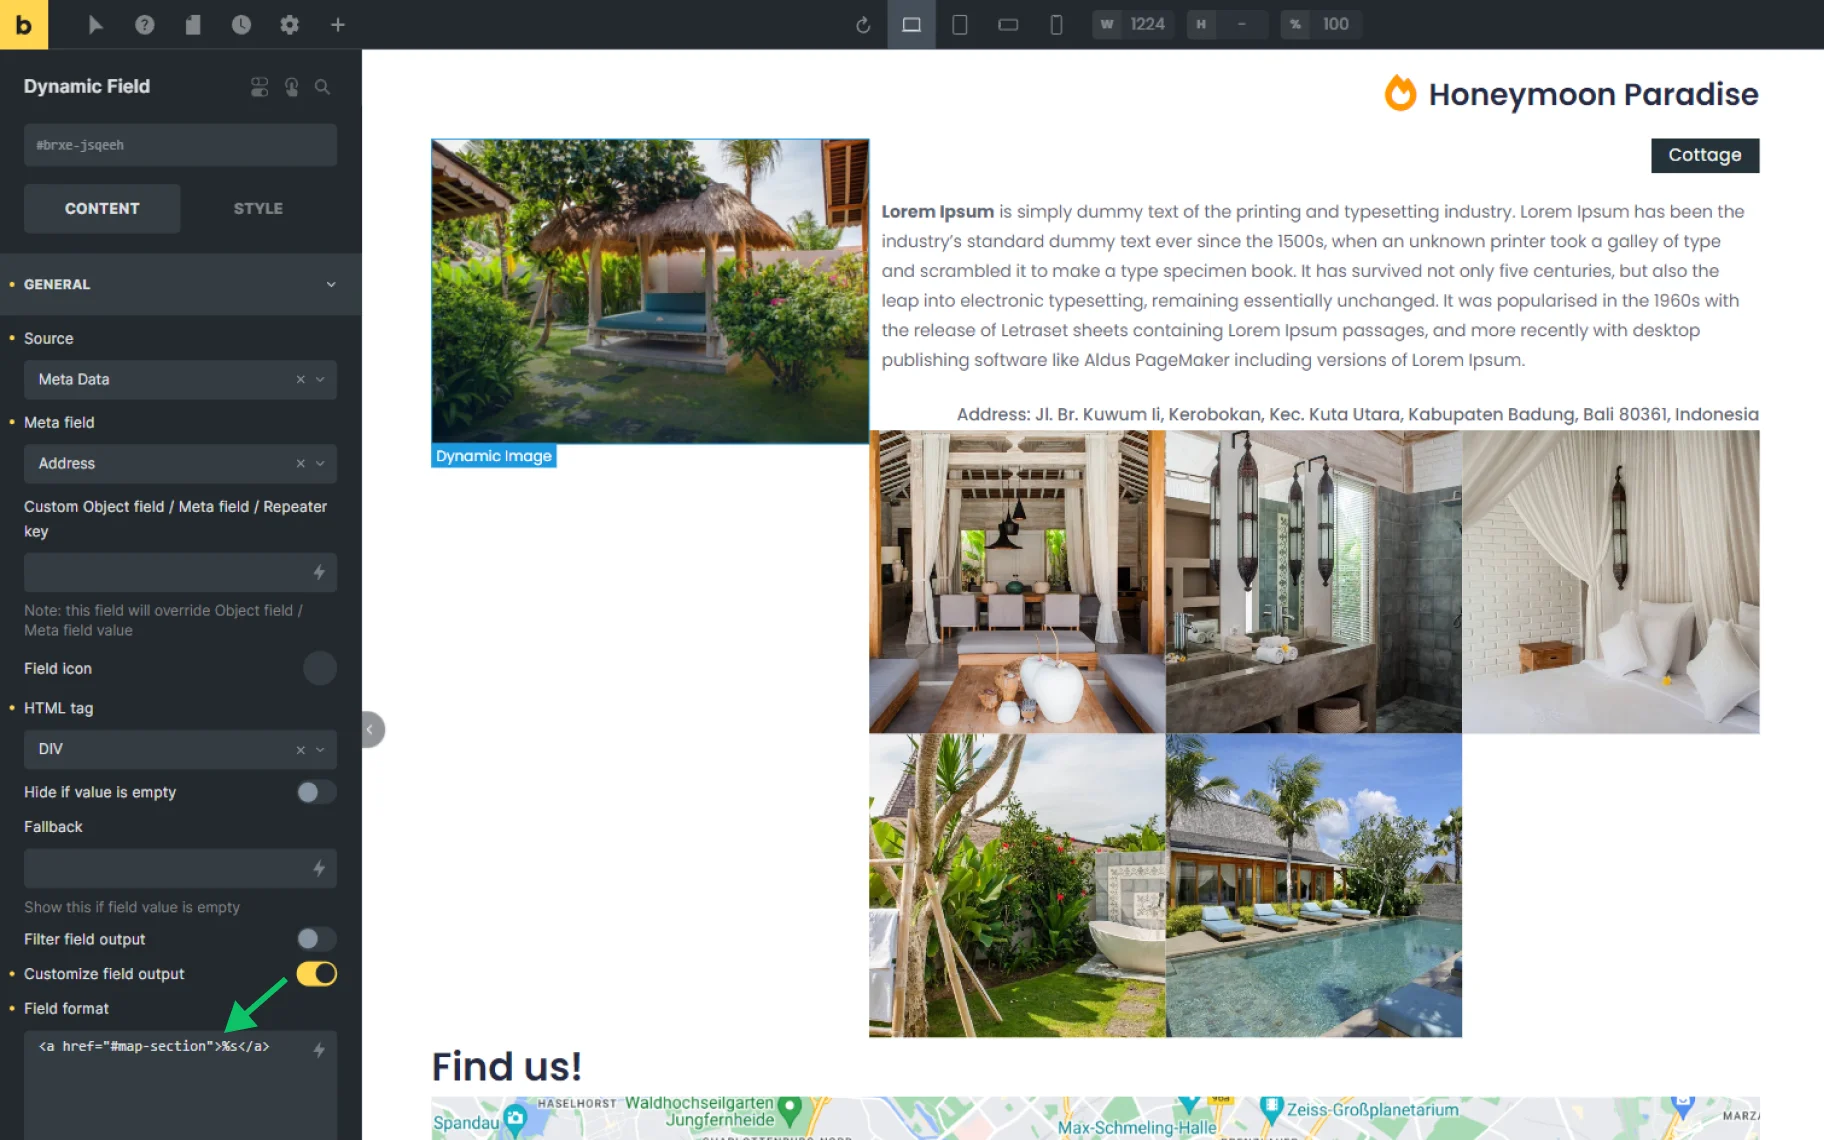
Configure the Customize field output setting
Scroll down the settings of the Dynamic Field element and enable the Customize field output toggle. This setting helps to customize the output of the value retrieved by the Dynamic Field element.
In the Field format text area, insert the below HTML code:
<a href="#map-section">%s</a>Here, %s stands for the value of the Dynamic Field, and the #map-section anchor stands for the CSS ID assigned to the section with the map. Feel free to replace the anchor link with the URL of your choice.
Now, update the changes.
Check the Result
Test the link on the front end. The page should scroll to the linked section after clicking the Dynamic Field widget/block/element.
That’s all about how to link the Dynamic Field value to the URL with the help of the JetEngine plugin for WordPress.