How to Set the Visibility of Meta Fields Using Conditional Logic
With the help of this tutorial, you will learn how to set the visibility of meta fields in the admin dashboard using the Conditional Logic section.
If your Custom Post Type (CPT) includes numerous meta fields, filling them out can be time-consuming — especially when many of those fields are not always required.
The JetEngine plugin enables the use of the Conditional Logic function to customize the visibility of each meta field, displaying only the fields that meet specific conditions.
Add the Conditional Logic
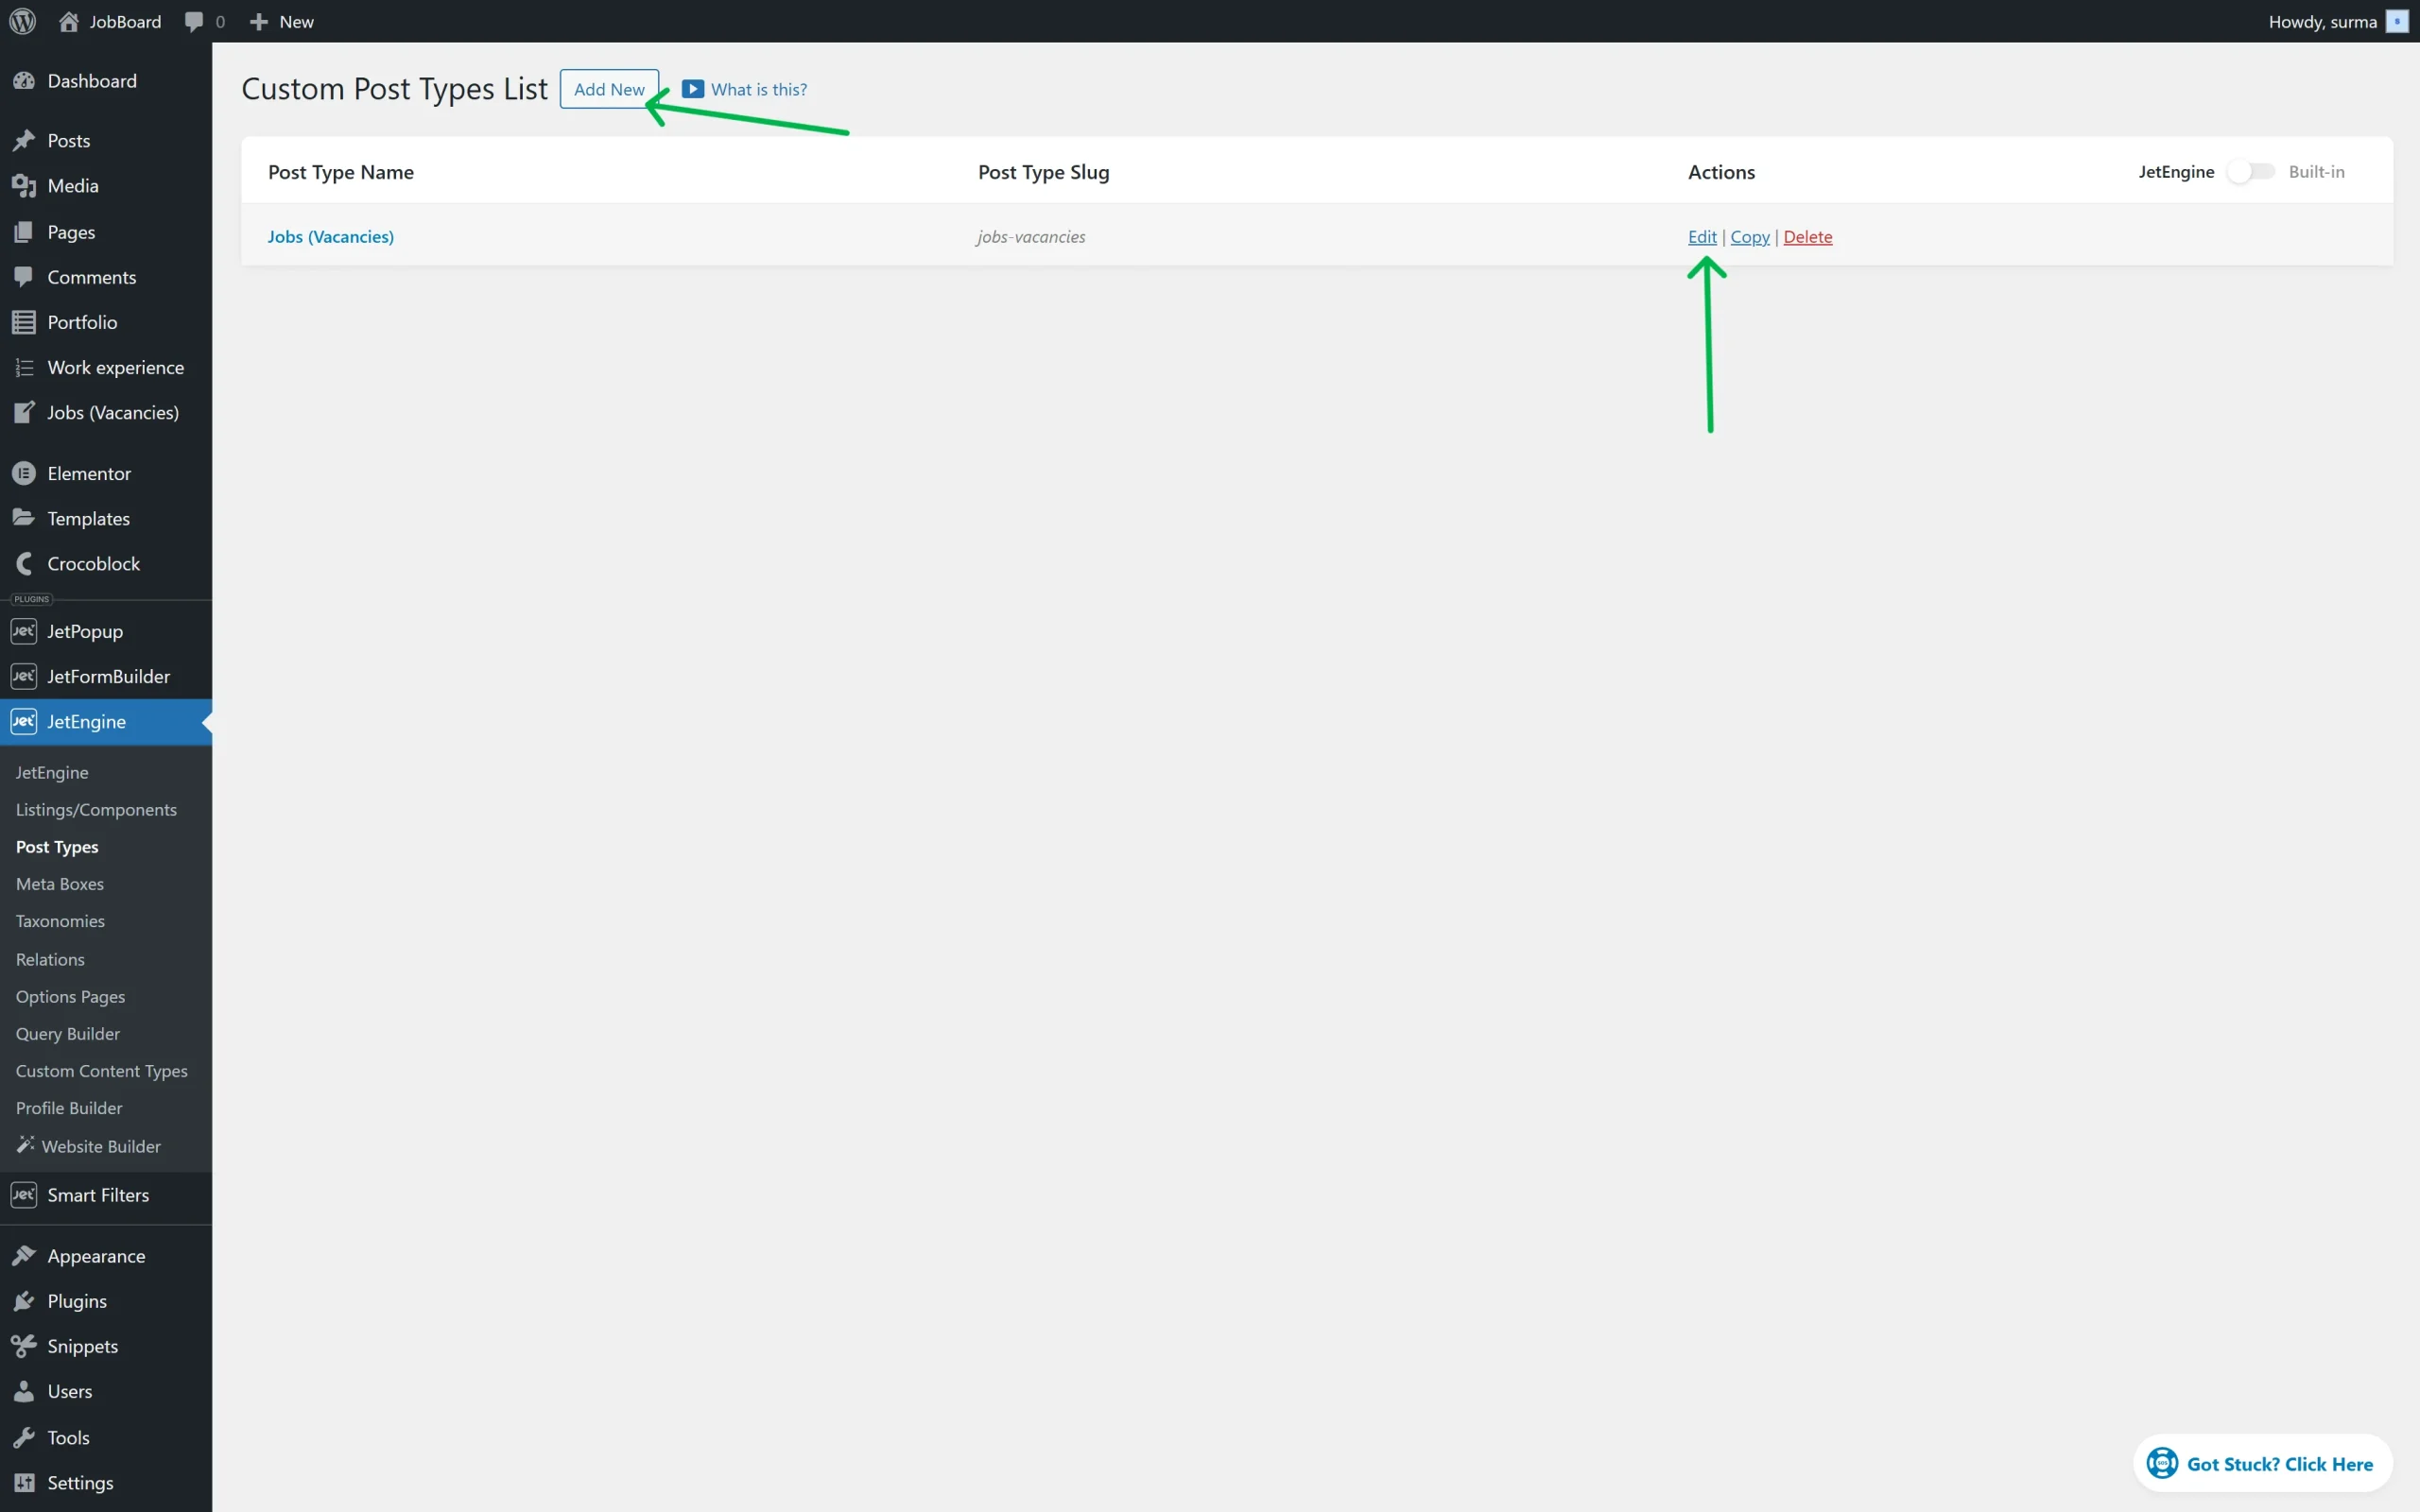
To set up the Conditional Logic for the meta fields, proceed to WordPress Dashboard > JetEngine > Post Types and click the “Edit” button of the needed CPT or create a new one.
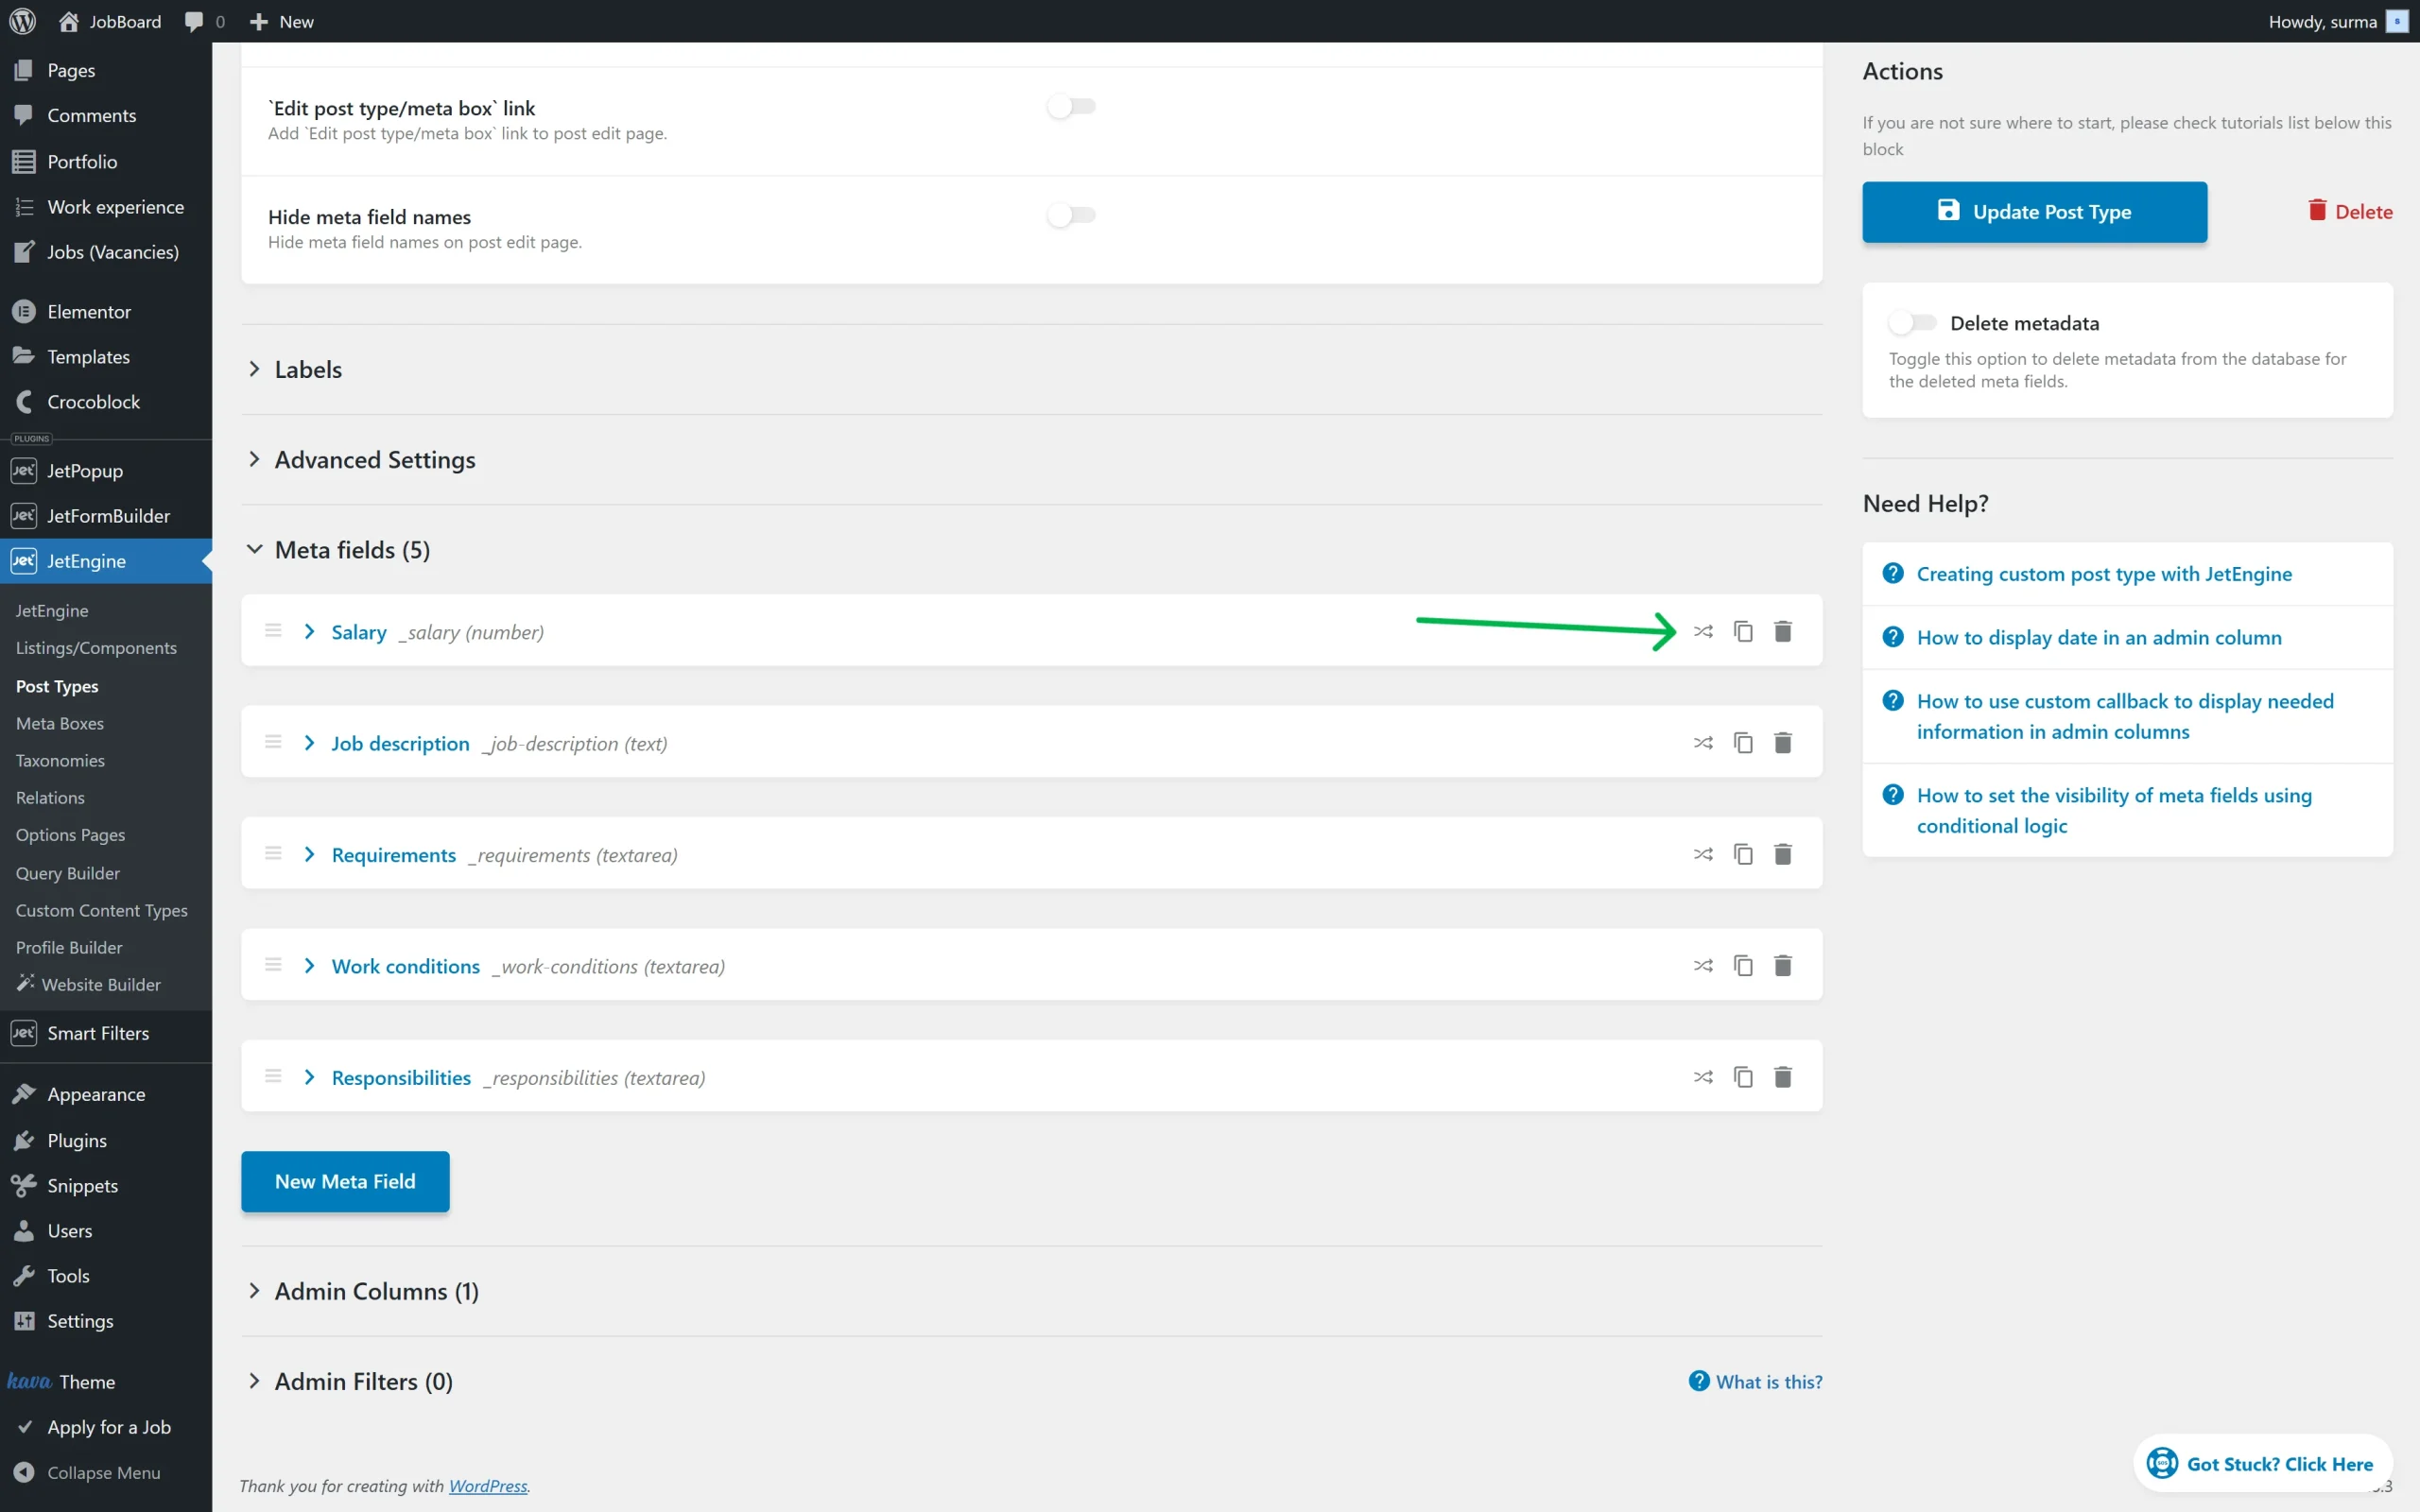
Scroll down to the Meta fields tab, and on the right side of each field, click the “arrows” icon to add the Conditional Logic.
Adjust the Conditional Rule
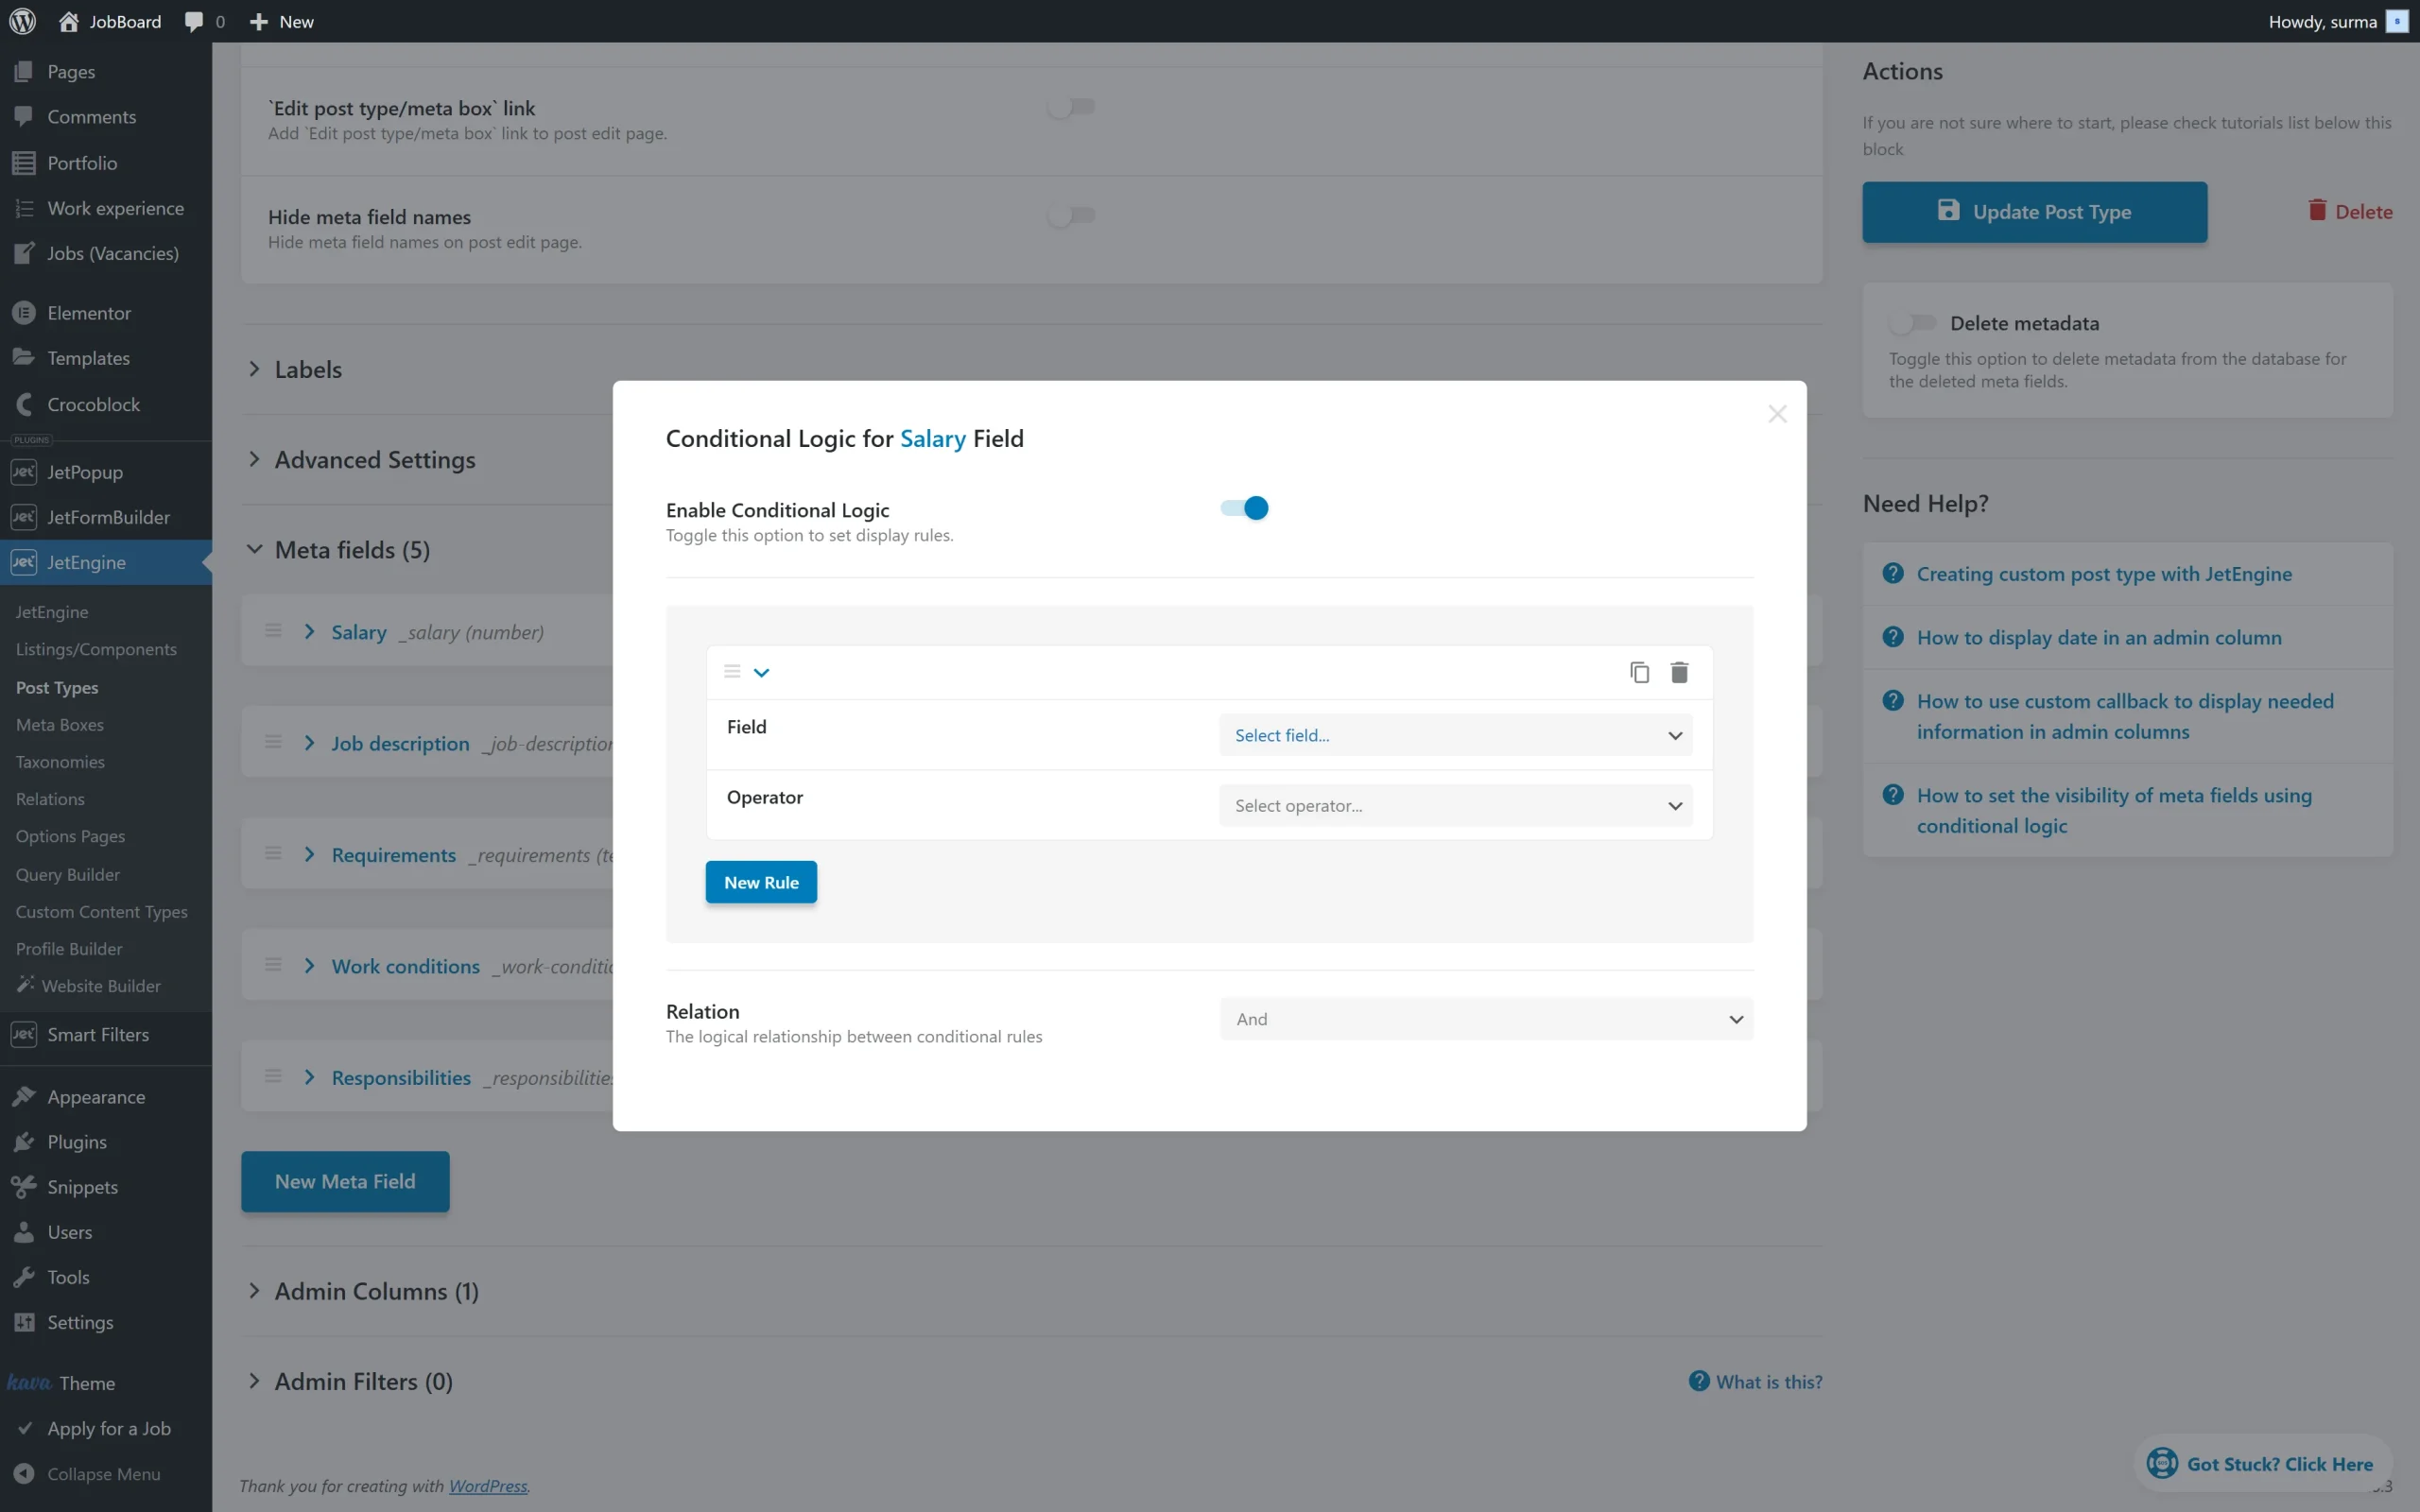
When the button is clicked, the pop-up will be opened.
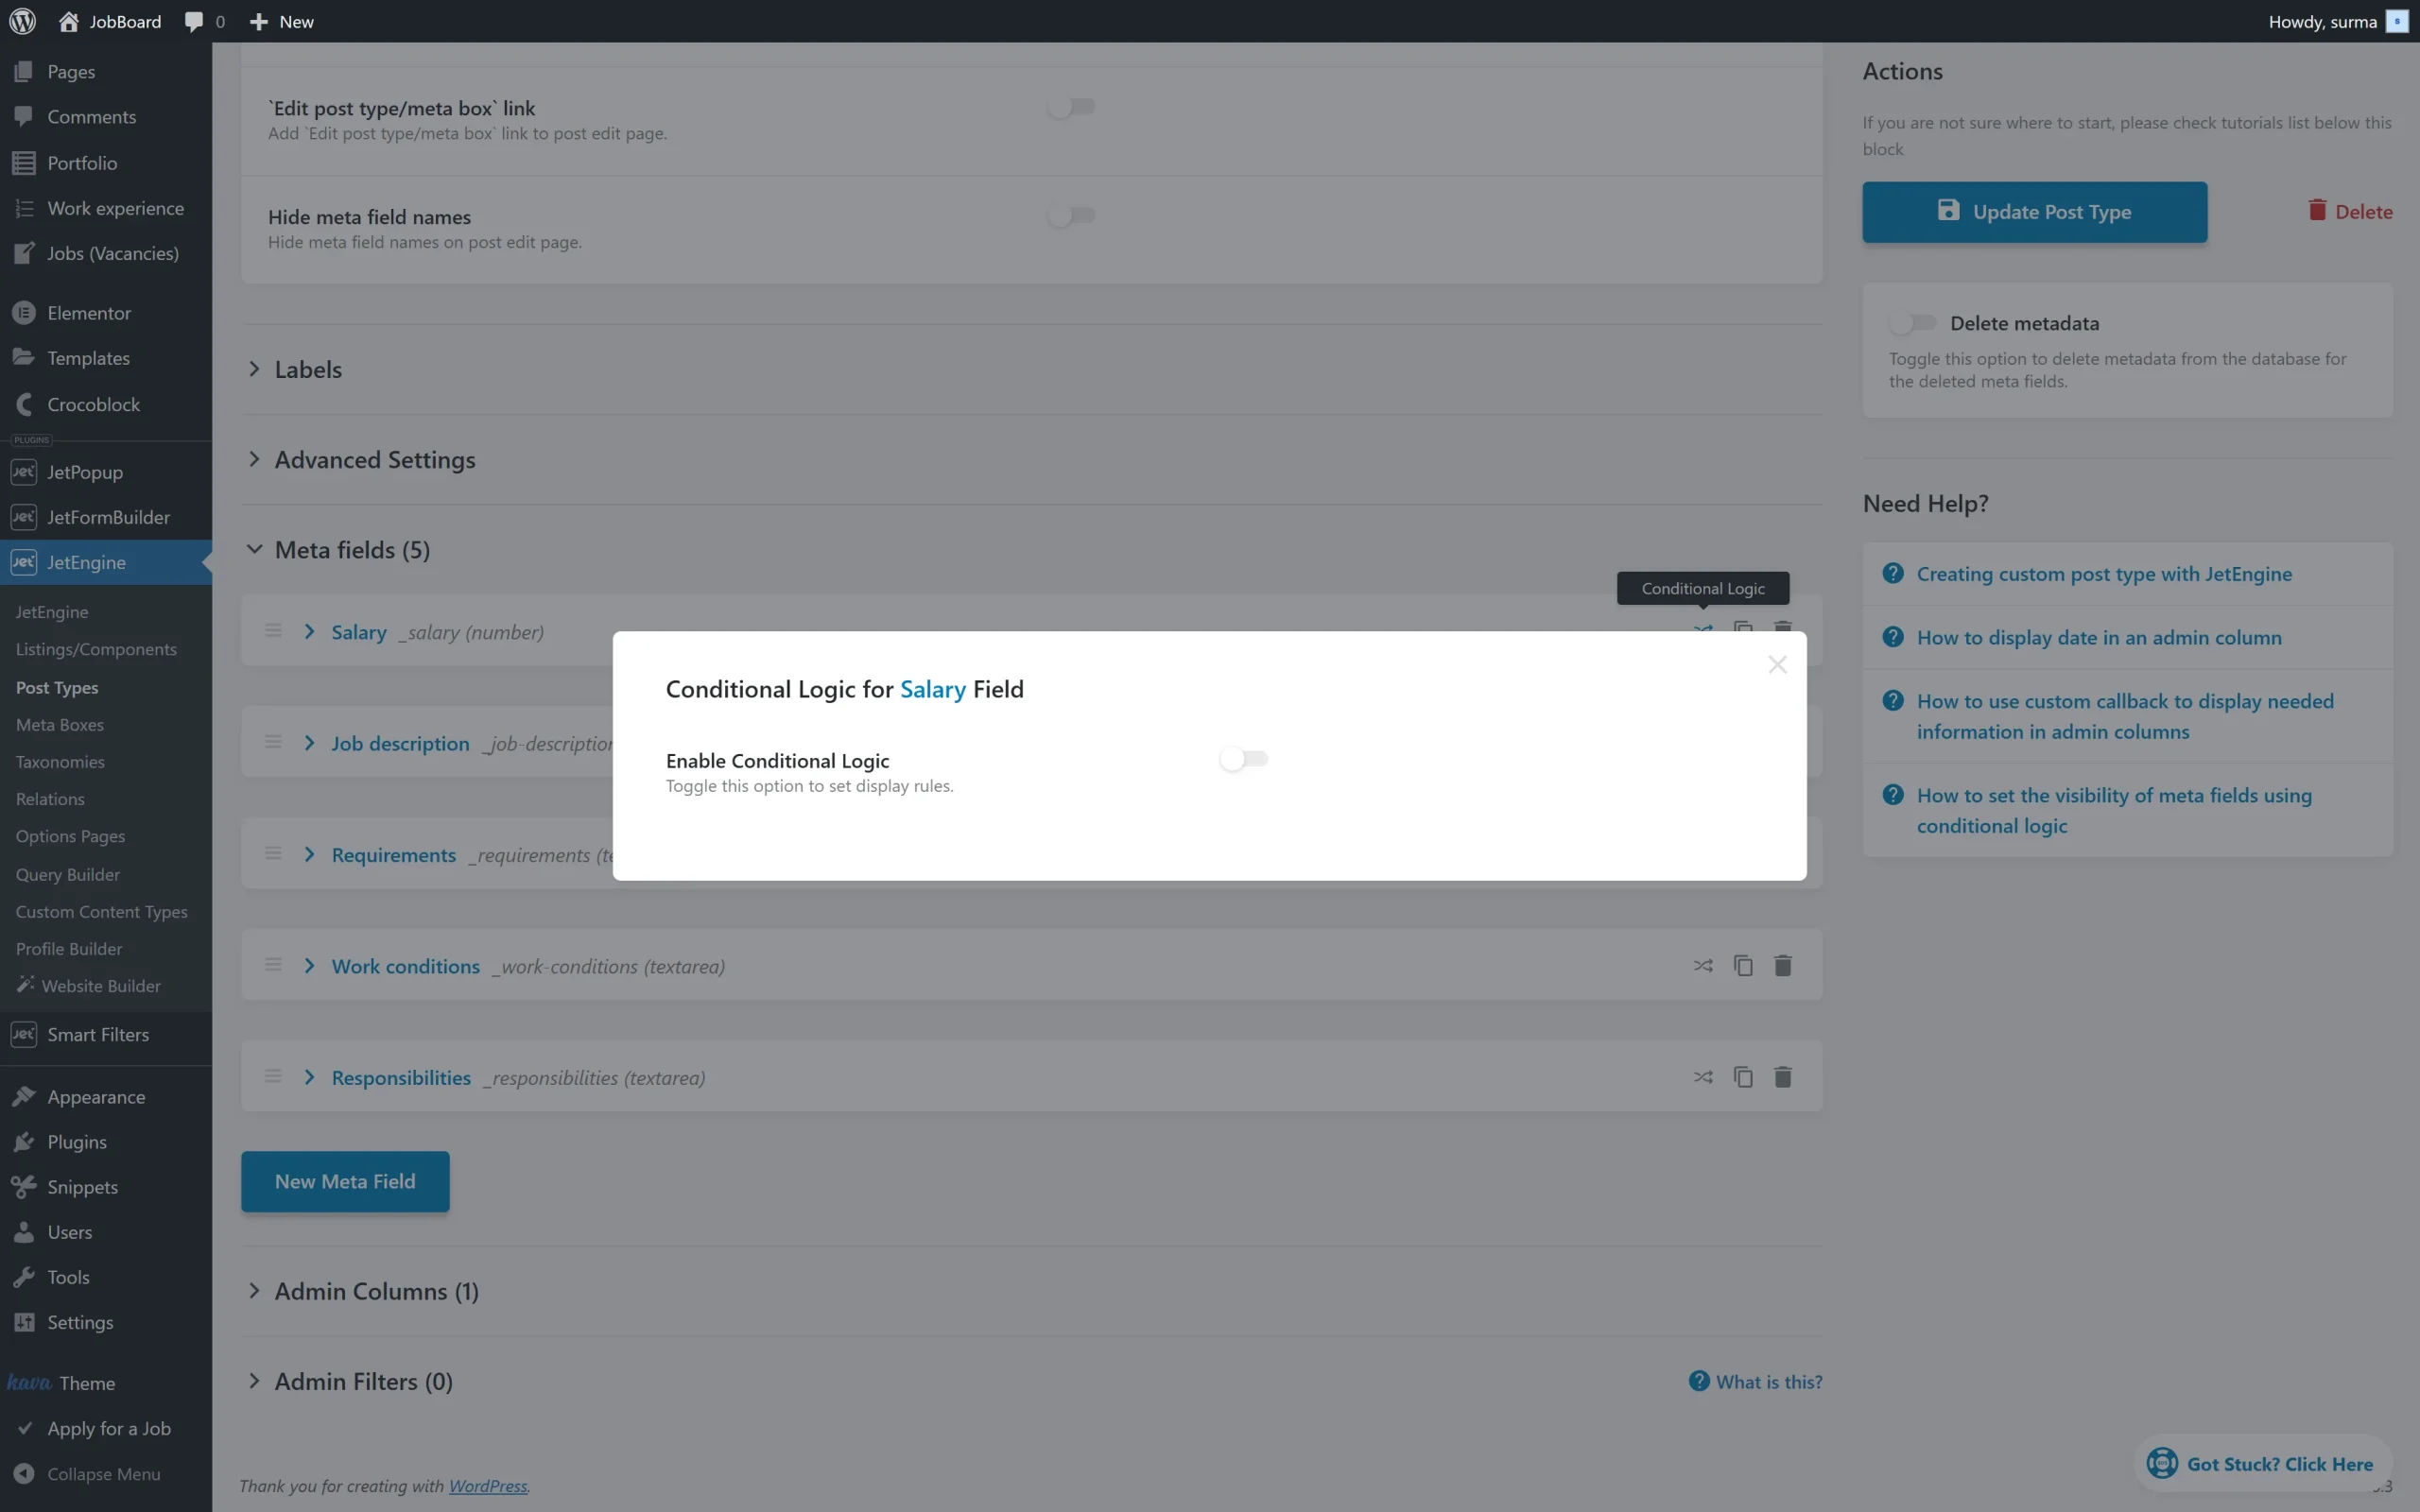
Turn the Enable Conditional Logic toggle on. Then, click the “New Rule” button.
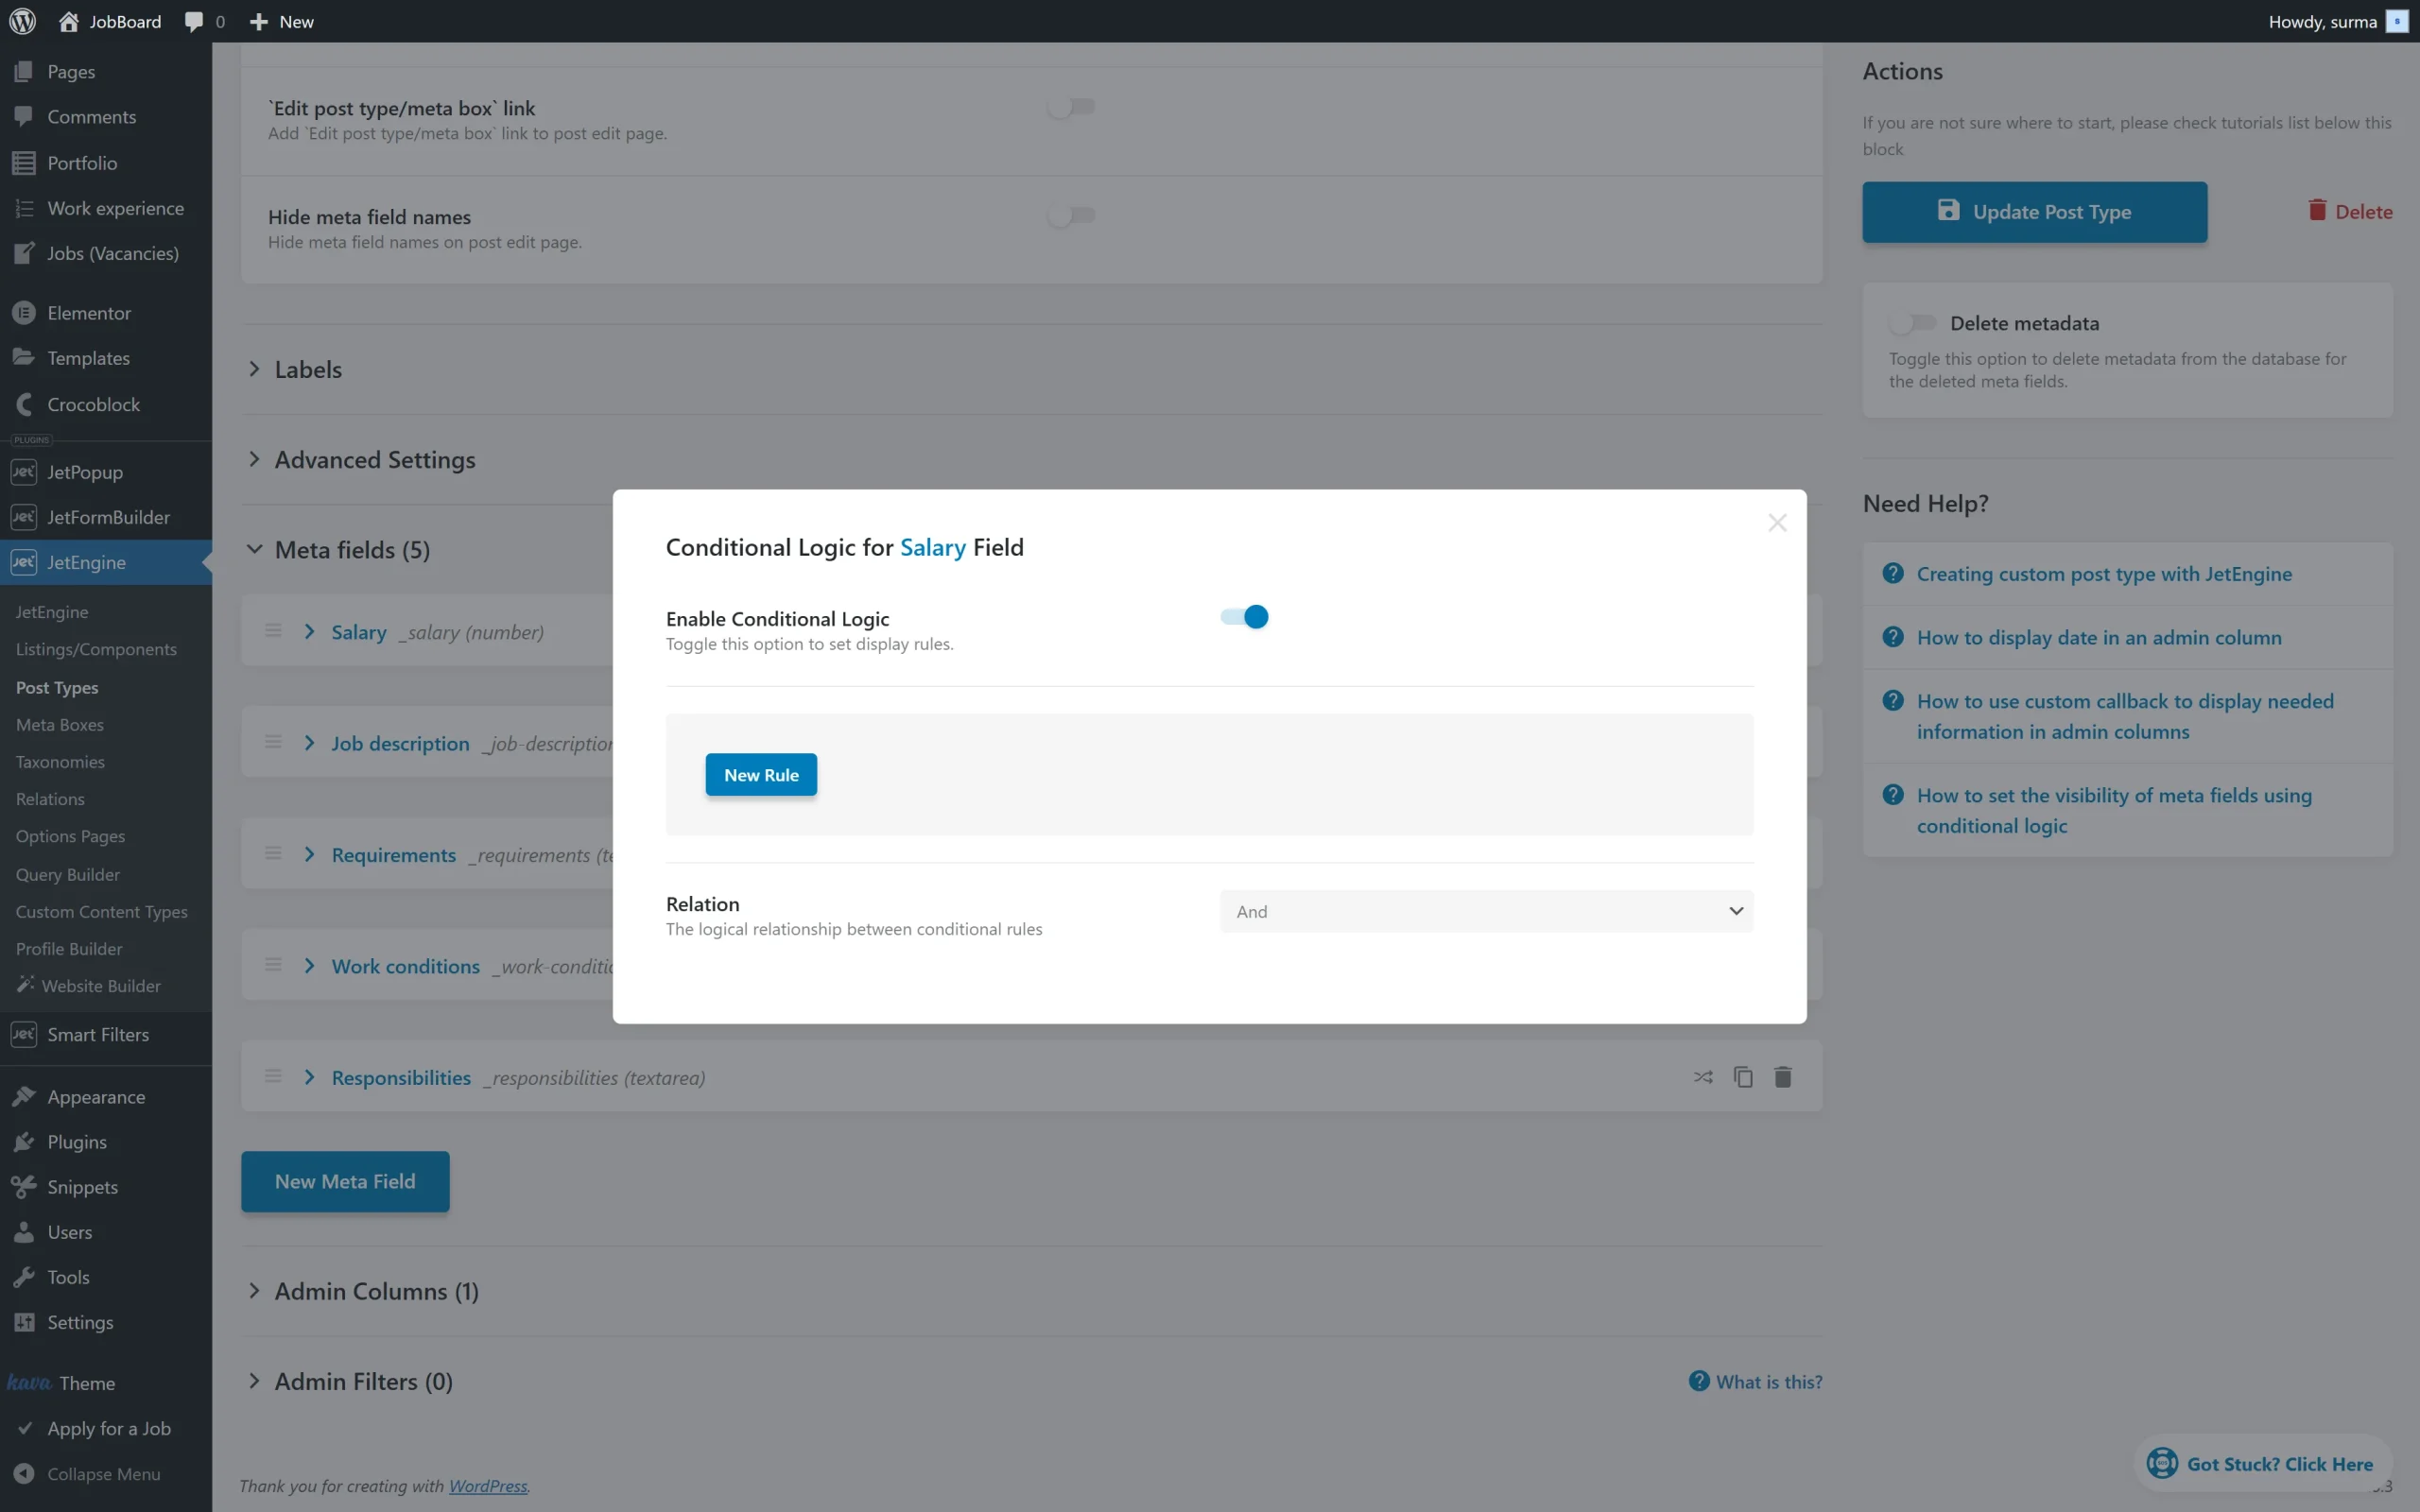
New fields appear:
In the Field input, you can choose one of the other meta fields that are also attached to this CPT. They are automatically added to the drop-down menu, so you can simply select the one you need. The meta field you are editing will depend on the one you choose in this input.
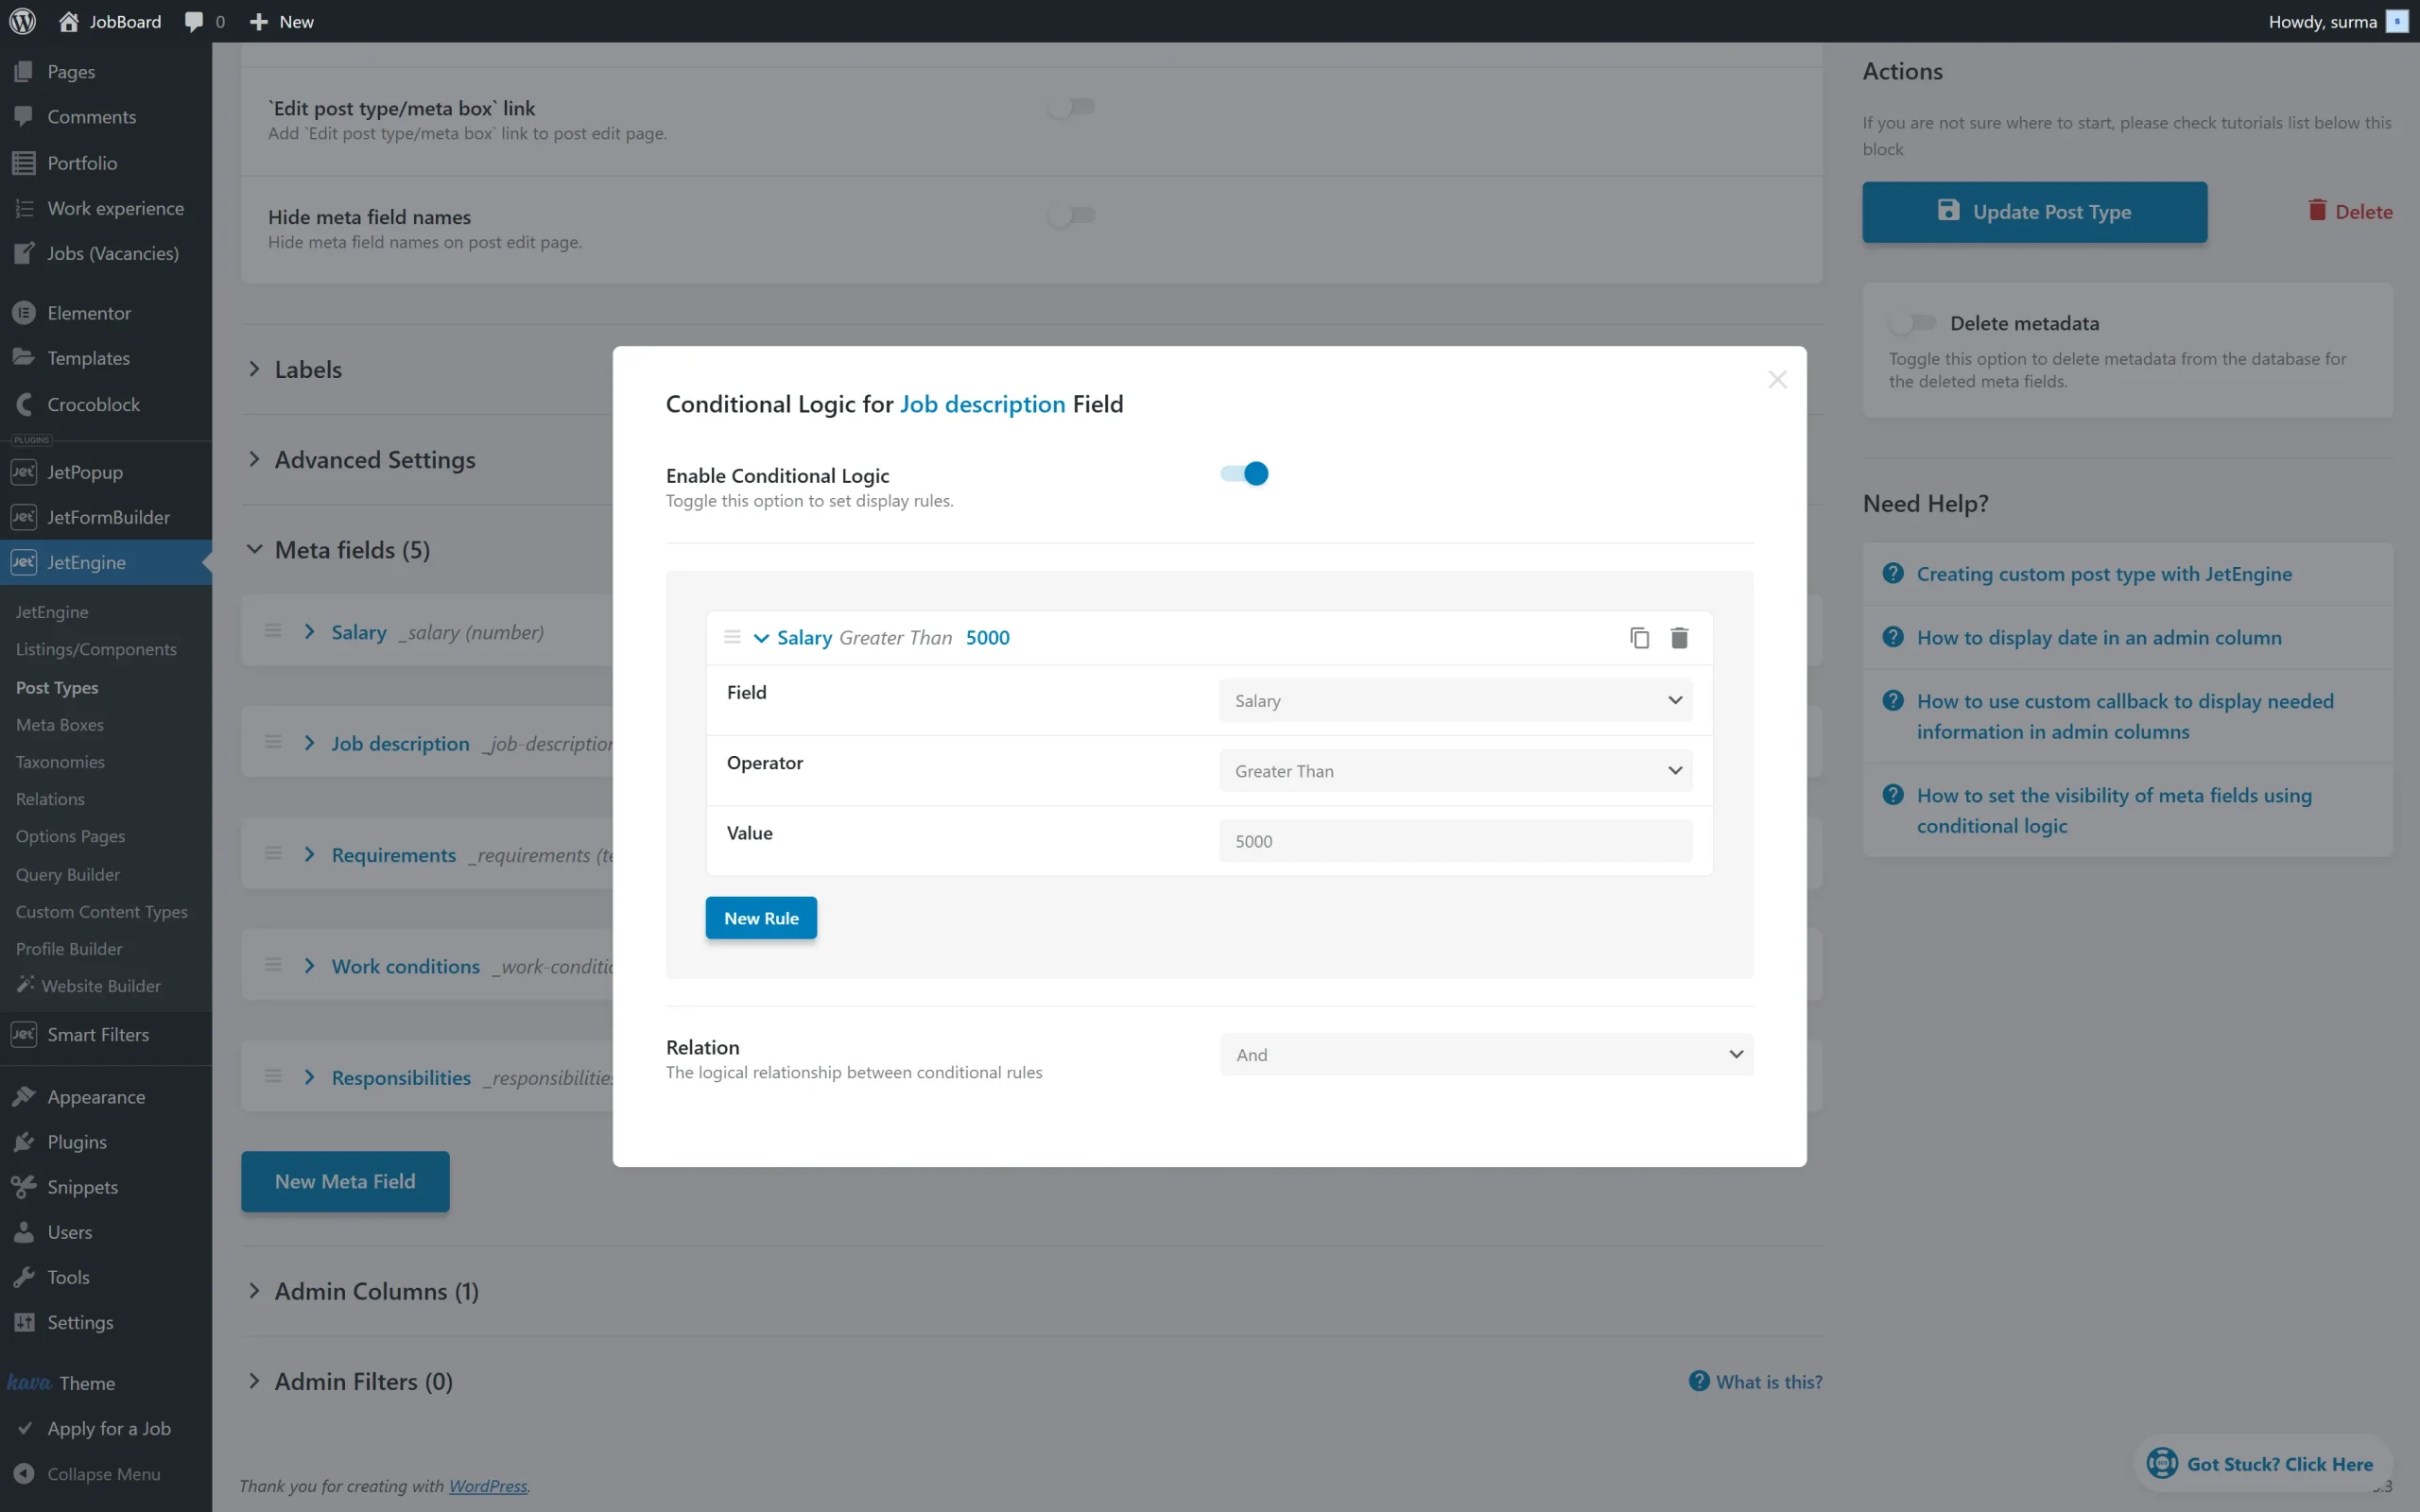
The Operator dropdown defines how to compare the value entered in the Values bar with the one from the chosen field. There are four options here:
- Equal — if those values are similar, the dependable field is shown;
- Not Equal — in this case, the dependable field will stay visible until the data in the Value text area becomes equal to the value of the meta field that was chosen in the Field drop-down;
- In the list — this and the next operator work with the radio, select, and checkbox meta field types. If the value (or values, in the case of a checkbox) selected from the list is similar to the one you put into the Value bar, the dependent field will be shown;
- Not in the list — that’s the opposite case. The dependent field will remain visible until the value, similar to the one you placed in the Value text area, is chosen from the list;
- Empty — displays the dependent field if the selected meta field has no value (is empty);
- Not Empty — displays the dependent field if the selected meta field contains any value;
- Contains — displays the dependent field if the value from the selected meta field includes the text or number entered in the Value bar;
- Not Contains — displays the dependent field if the value from the selected meta field does not include the text or number entered in the Value bar;
- Regexp — displays the dependent field if the value from the selected meta field matches the regular expression pattern specified in the Value bar;
- Not Regexp — displays the dependent field if the value from the selected meta field does not match the regular expression pattern specified in the Value bar;
- Number of characters is greater than — displays the dependent field if the number of characters in the selected meta field’s value is greater than the number entered in the Value bar;
Number of characters is less than — displays the dependent field if the number of characters in the selected meta field’s value is less than the number entered in the Value bar.
The Value input can be filled either manually or automatically. If you have chosen the meta field with pre-set variants (like radio, checkbox, or select) in the Field drop-down, they will be automatically added here as a drop-down menu. In other cases, you can type in the value you need.

Once you are ready with the rules settings, you can simply close the pop-up, and the settings will be saved automatically.
Click either “Add post Type” if it is a new CPT or the “Update Post Type” button if you edit the existing CPT.
In our case, we show the textarea field only if the value of the number field is greater than “5000”.
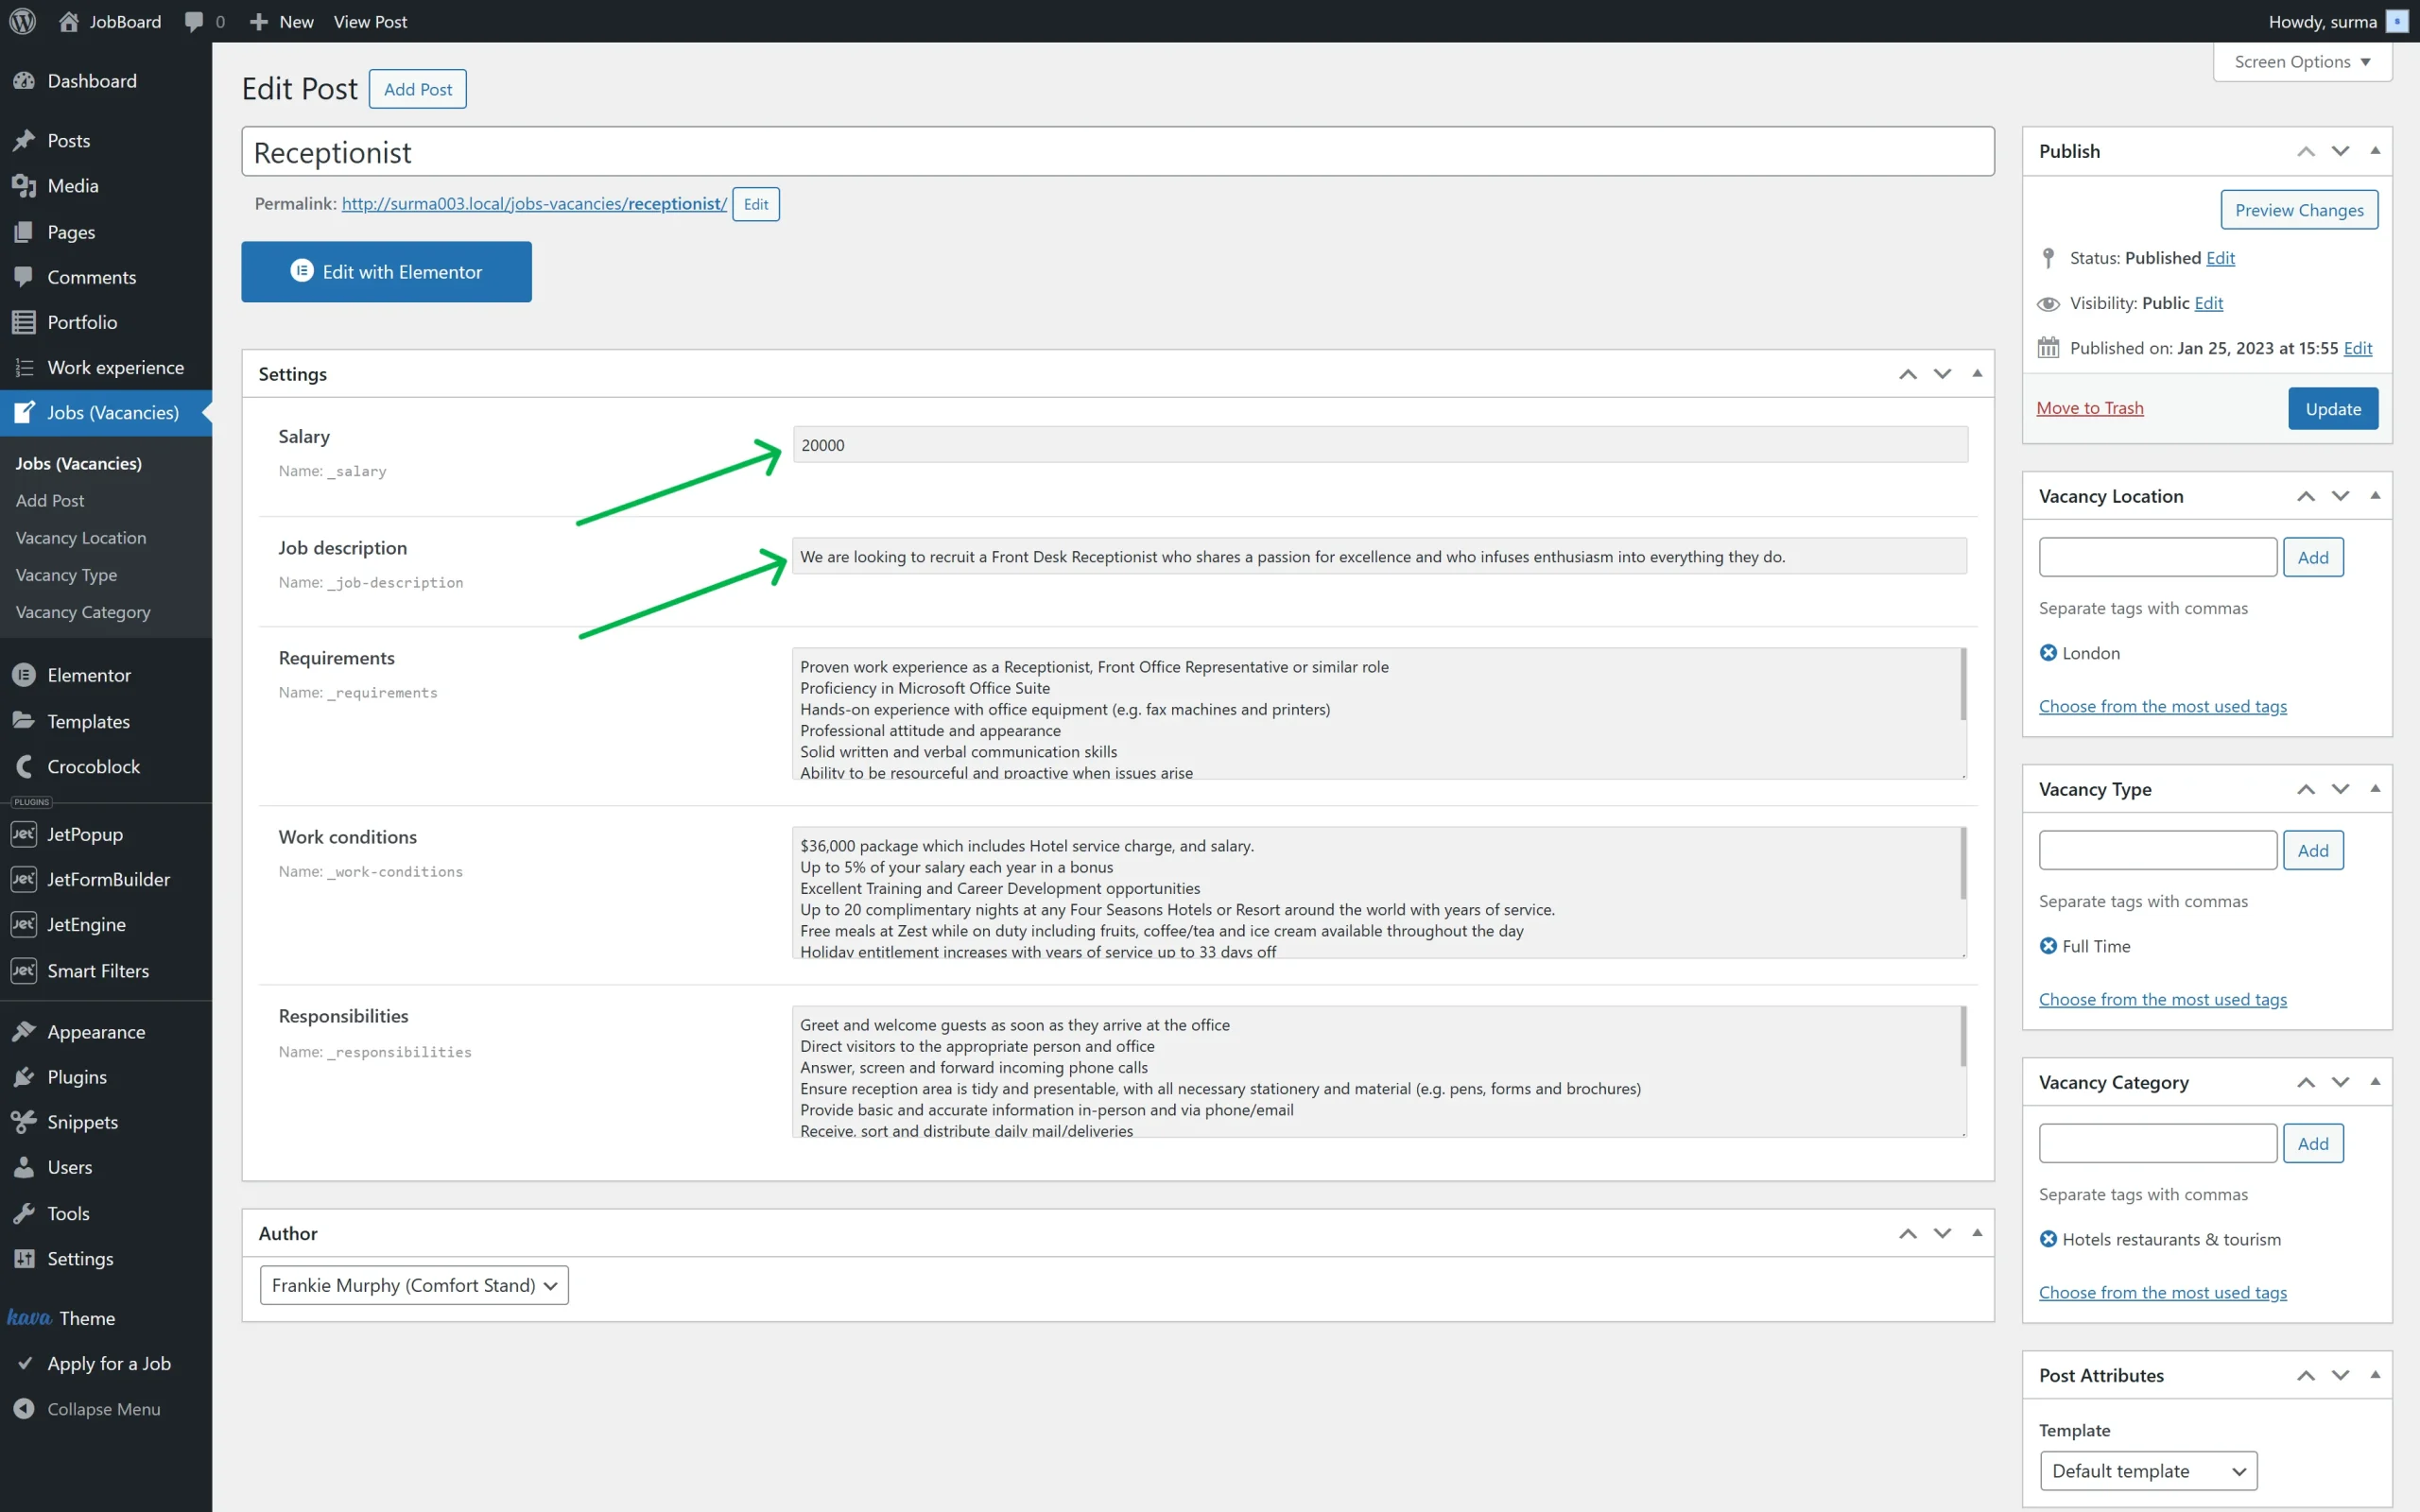
So, when we proceed to the post from the edited CPT, we check if the conditional rule works. Here, we see the “Job description” textarea is visible when the number field has a value greater than “5000”.
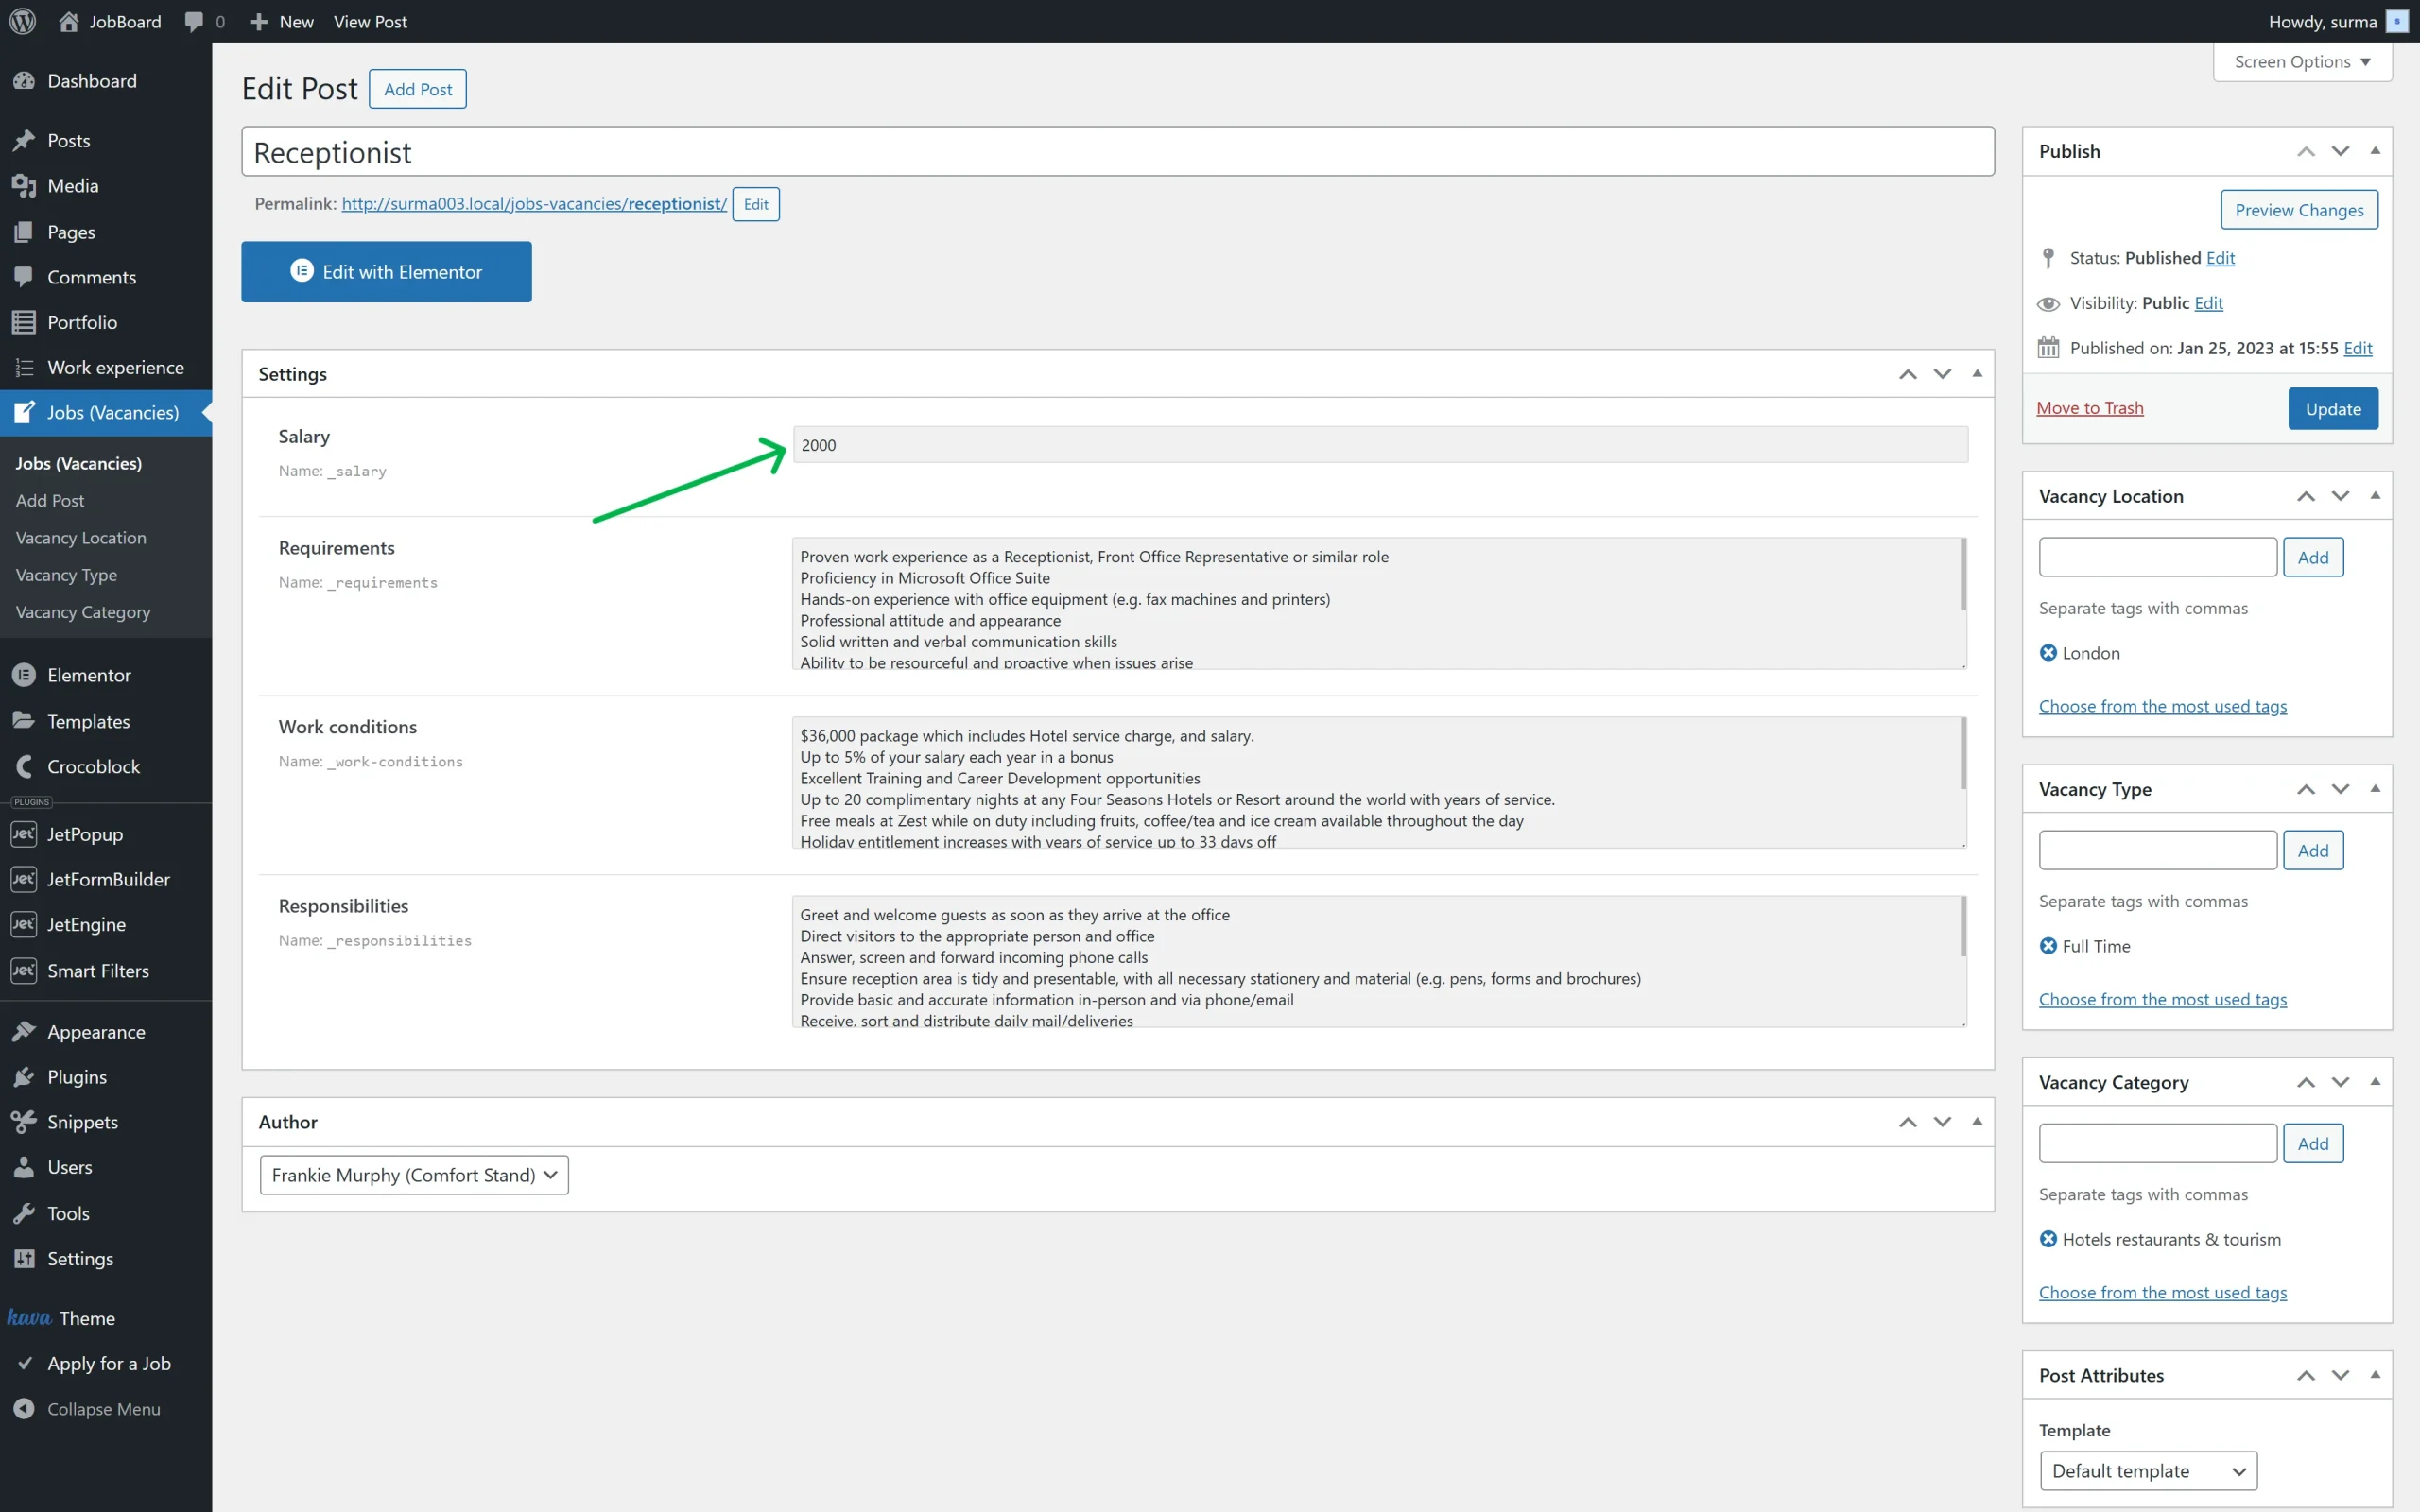
When the number’s field value is less than “5000”, the textarea is hidden.
That’s it. Now, you know how to set up the Conditional Logic for the meta fields using the WordPress JetEngine plugin.