How to Display Switcher Meta Field Values with the Dynamic Field Widget
In this tutorial, you will learn how to create and display a switcher custom field type values with the help of the Dynamic Field widget.
Creating Switcher Meta Field
Creating a meta box
Open your WordPress Dashboard and go JetEngine > MetaBoxes. Click the Add New button to create a meta box.
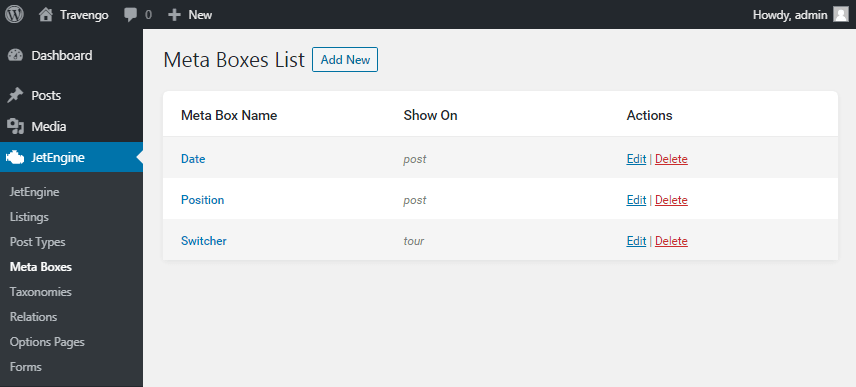
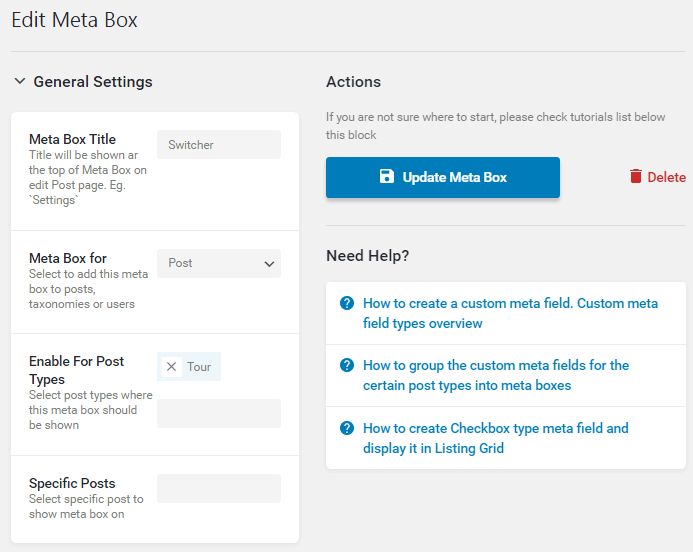
In the General settings block, give your meta box a name and define what it will be applied to.
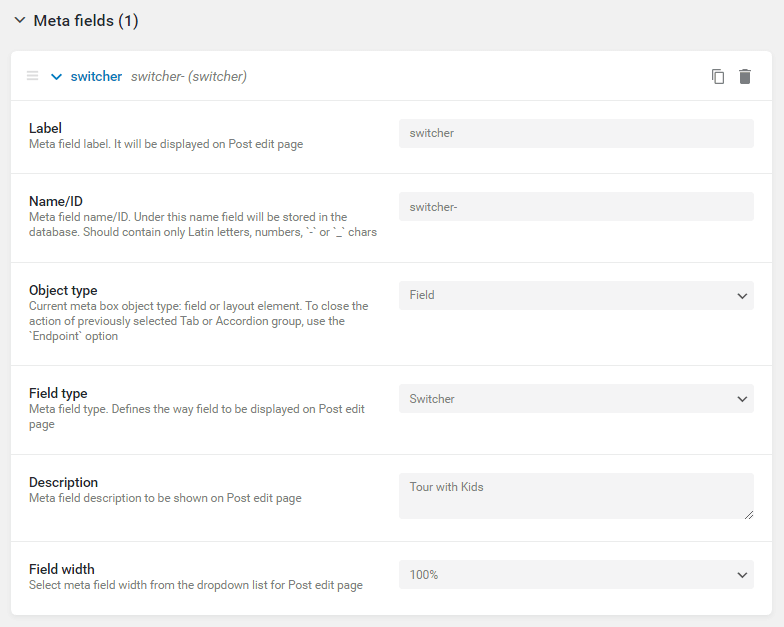
Creating a switcher meta field
Navigate to the Meta fields block and create a new meta field with the Switcher Field type.
Activating Switcher
Go to the posts, where you want your switcher to be active and toggle the switcher option to Yes. Don’t forget to click the Update button to save the changes.

Creating a Listing
Proceed to JetEngine > Listings and create a listing.
Dynamic field editing
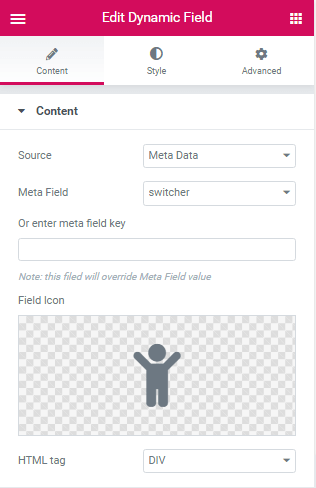
Find the Dynamic Filed in the Elementor panel, drag-n-drop it on the page. Go to the settings of the Dynamic Field widget and in the Source drop down select Meta data option. In the Meta Field drop down, choose the Switcher option.
Activating output
Scroll down to the Filter field output option and activate it. Navigate to the Callback drop down and select the Switcher field values option. Type in the text which will be displayed if the switcher is enabled and disabled in the following fields. In our case, it is “yes” and “no” respectively. Click the Publish button to save the changes.
Displaying the Switcher
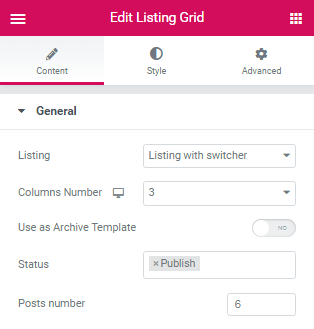
Go to the page and find the Listing Grid widget. Drag and drop it on the page. In the General > Listing drop down select the one we have just created in the previous step. Make all the necessary styling changes, and that’s it.
You can see the switcher displayed on your page.
