How to Translate Custom Post Type Slugs Using WPML
In this guide, we will look through the translation process of the JetEngine’s Custom Post Type slugs with the WPML plugin.
Before you start, check the tutorial requirements:
- WPML plugin installed and activated
- JetEngine plugin installed and activated
with the Custom Post Type created
WPML allows you to translate not only the JetEngine’s Custom Post Types (CPTs) but also their slugs. In this guide, we will show how to use WPML to translate custom post type slugs, ensuring that website URLs are fully localized. This process is a part of the broader WPML slug translation and WPML URL translation functionality.
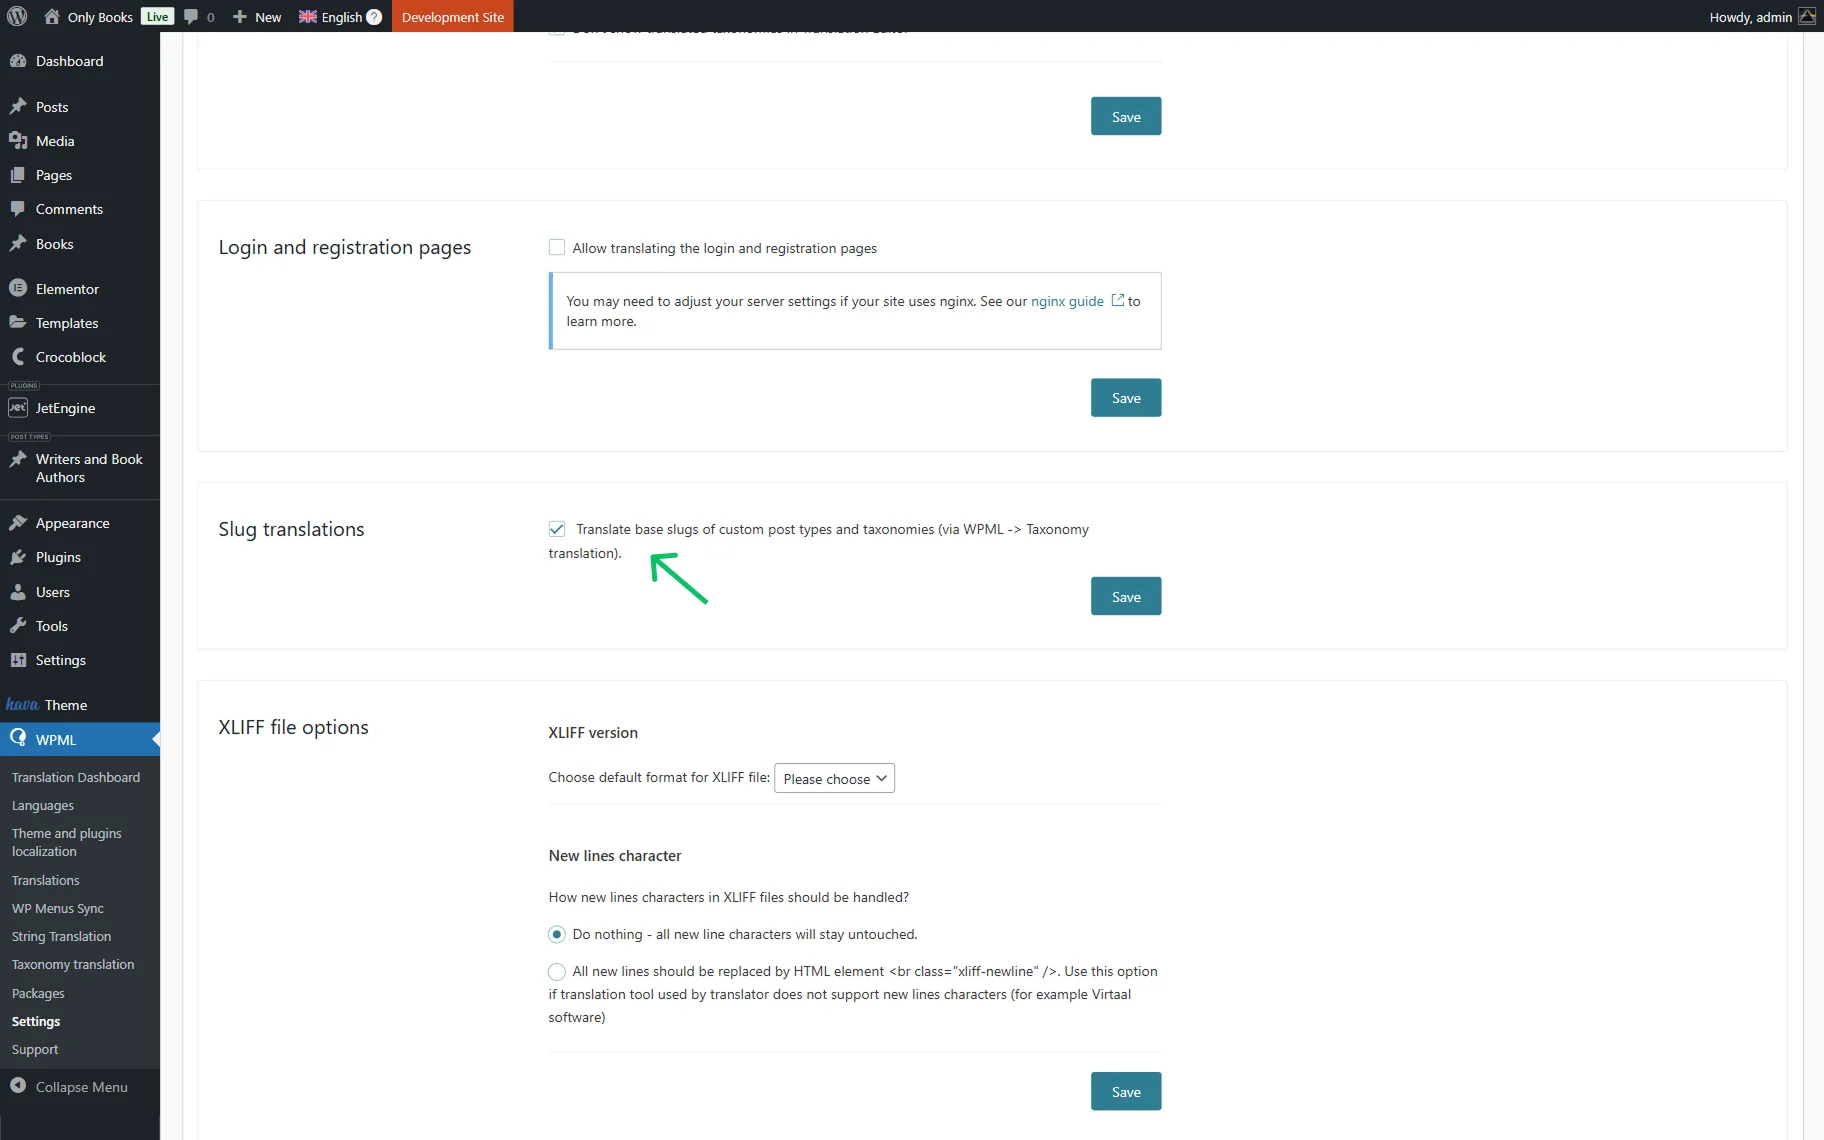
To start, follow the WordPress Dashboard > WPML > Settings path.
Head to the Slug translations section to make sure you have checked the Translate base slugs of custom post types and taxonomies (via WPML -> Taxonomy translation) option to allow the slug translation. This setting enables WPML to translate slugs and helps you translate URL structures on multilingual websites.
Don’t forget to push the “Save” button.
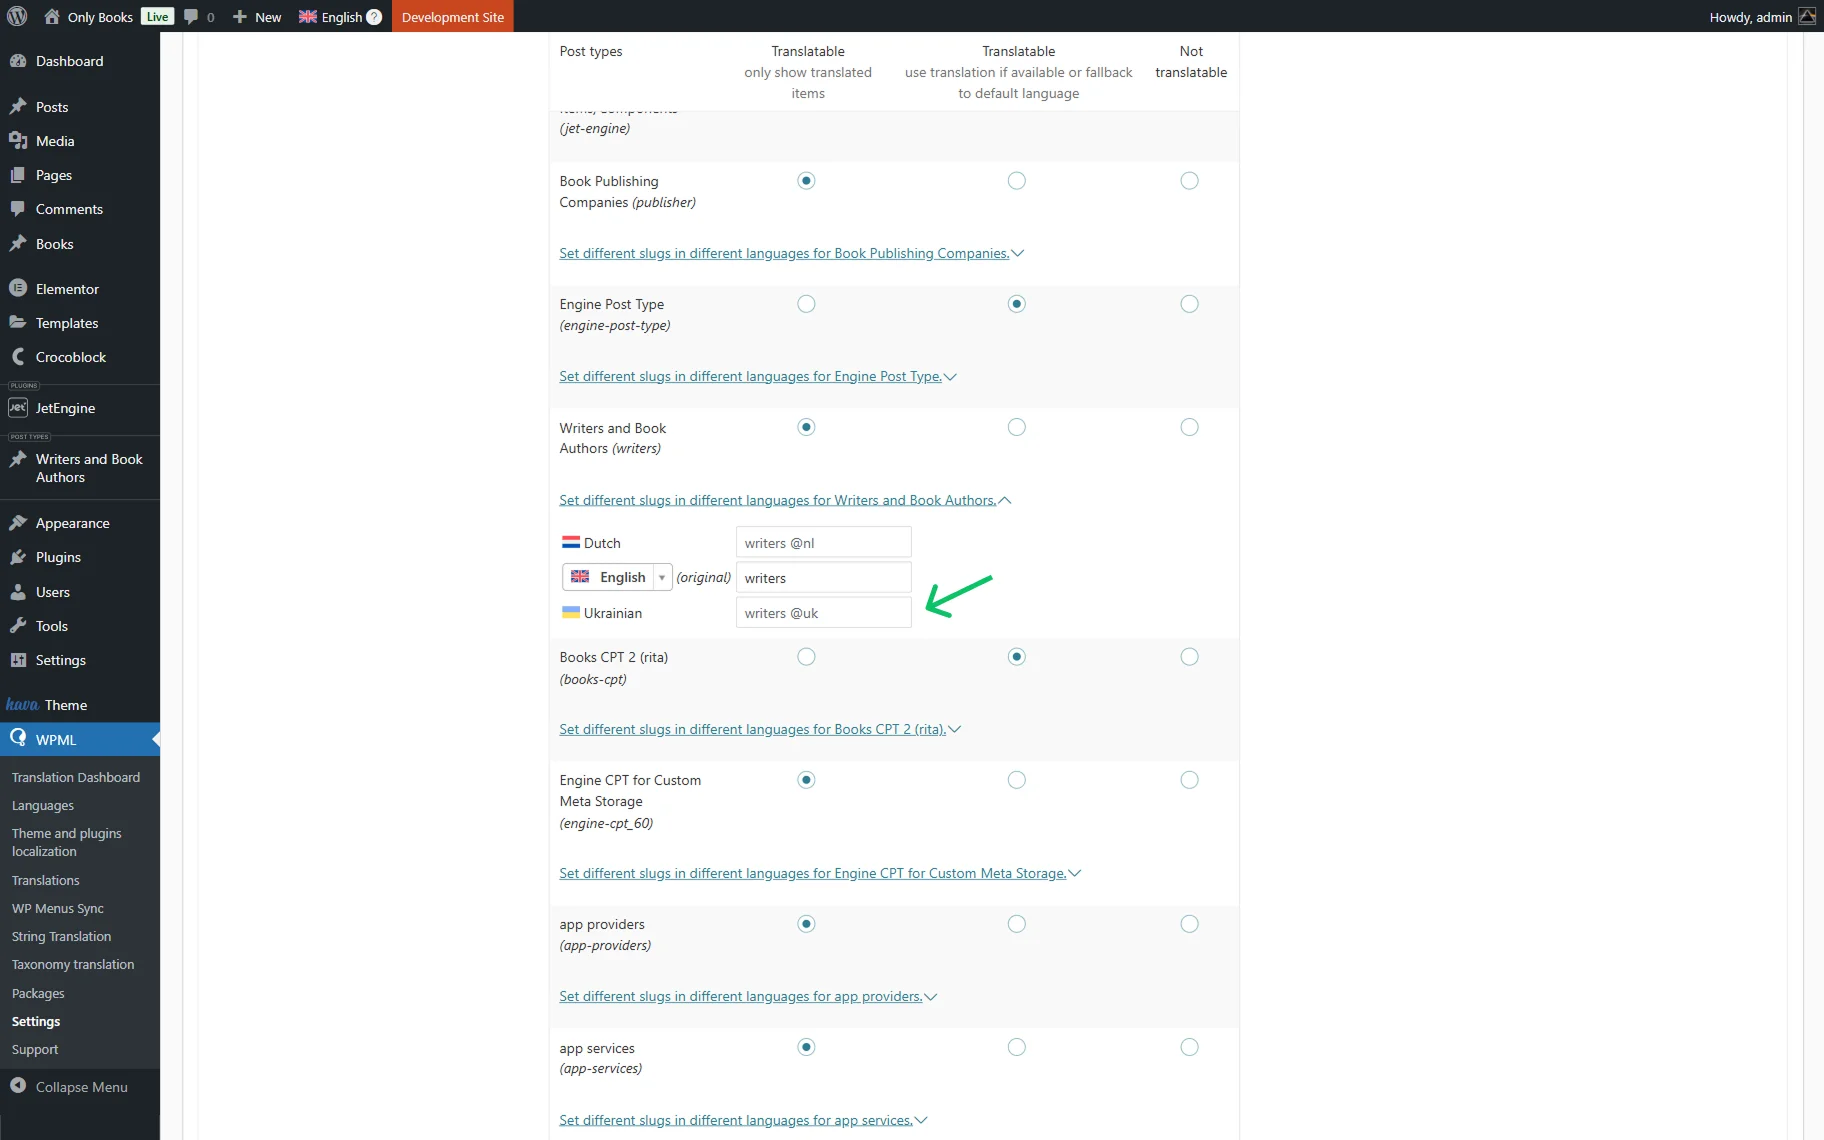
Scroll down to the Post Types Translation section and ensure the required CPT is set to the “Translatable” option (this applies to both available “Translatable” options).
Here, you can translate slugs by pressing the “Set different slugs in different languages for {Your CPT Name}.” This step ensures proper behaviour for WPML translating links and URL across all languages.
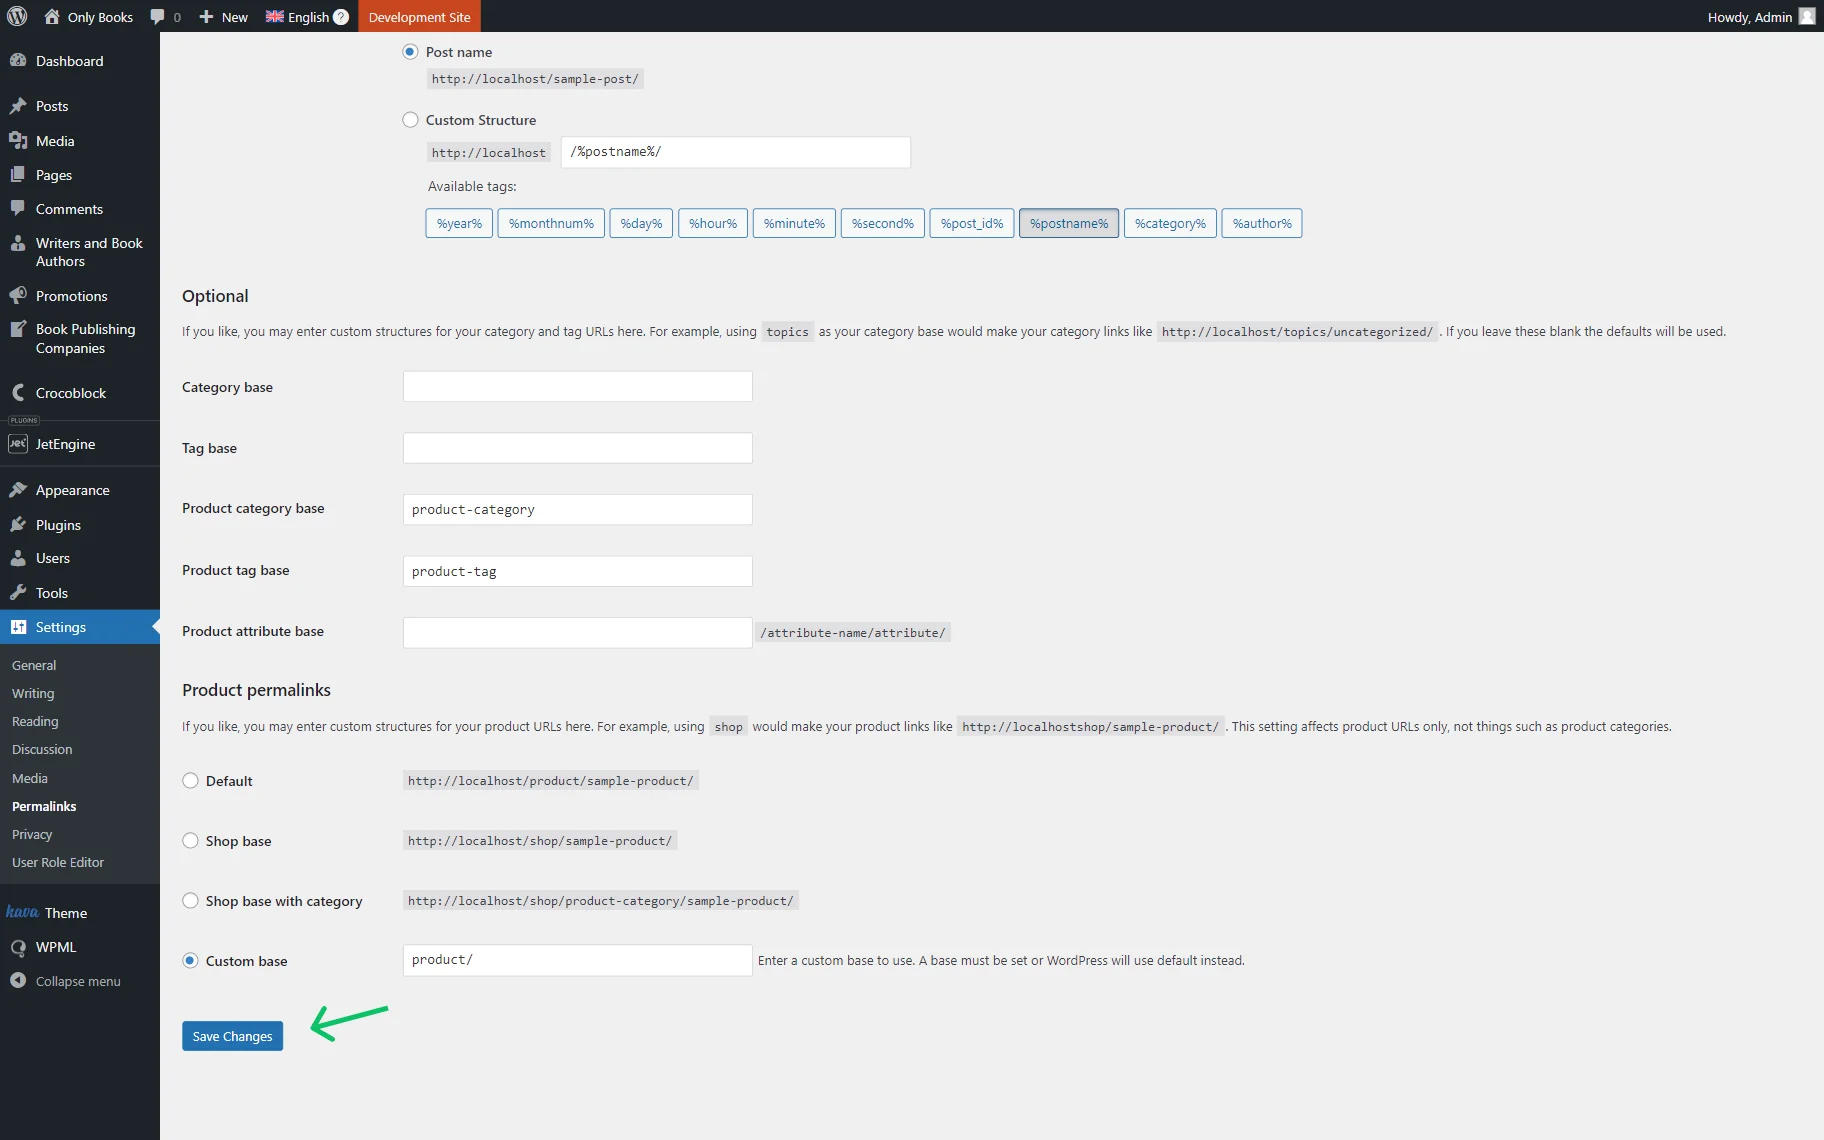
After these steps, the permalinks should be refreshed. Go to WordPress Dashboard > Settings > Permalinks and click the “Save Changes” button to reapply the translated URLs.
Permalinks and rewrite rules are now flushed, ensuring accurate slug and URL translation.
Check out How to Make a JetEngine-Built Website Multilingual guide to make your JetEngine-built website fully translatable.
That’s all about the translation process of the JetEngine’s Custom Post Type slugs on WordPress websites using the WPML plugin.