How to Translate Custom Post Types, Listing Items, and Components Using WPML
In this guide, we will show how to translate the JetEngine’s Custom Post Types (CPTs), Listing Items, and Components into any target language with the WPML plugin.
Before you start, check the tutorial requirements:
- WPML plugin installed and activated
- JetEngine plugin installed and activated
with the Custom Post Typeand/or Listing/Component built
WPML is now fully compatible with the JetEngine plugin. Let’s find out how to prepare your WordPress website for the translation process: which features should be activated, where to find the translation editor, and how to translate CPTs and Listing Items/Components. This guide covers WPML custom post type translation and how to translate custom post type WPML setups.
Proceed to the WordPress Dashboard > WPML > Settings page and find the Post Types Translation section. Make the custom post types translatable. Then, click the “Save” button.
Here, JetEngine Components Crocoblock and Listing Items can also be set to be translatable.
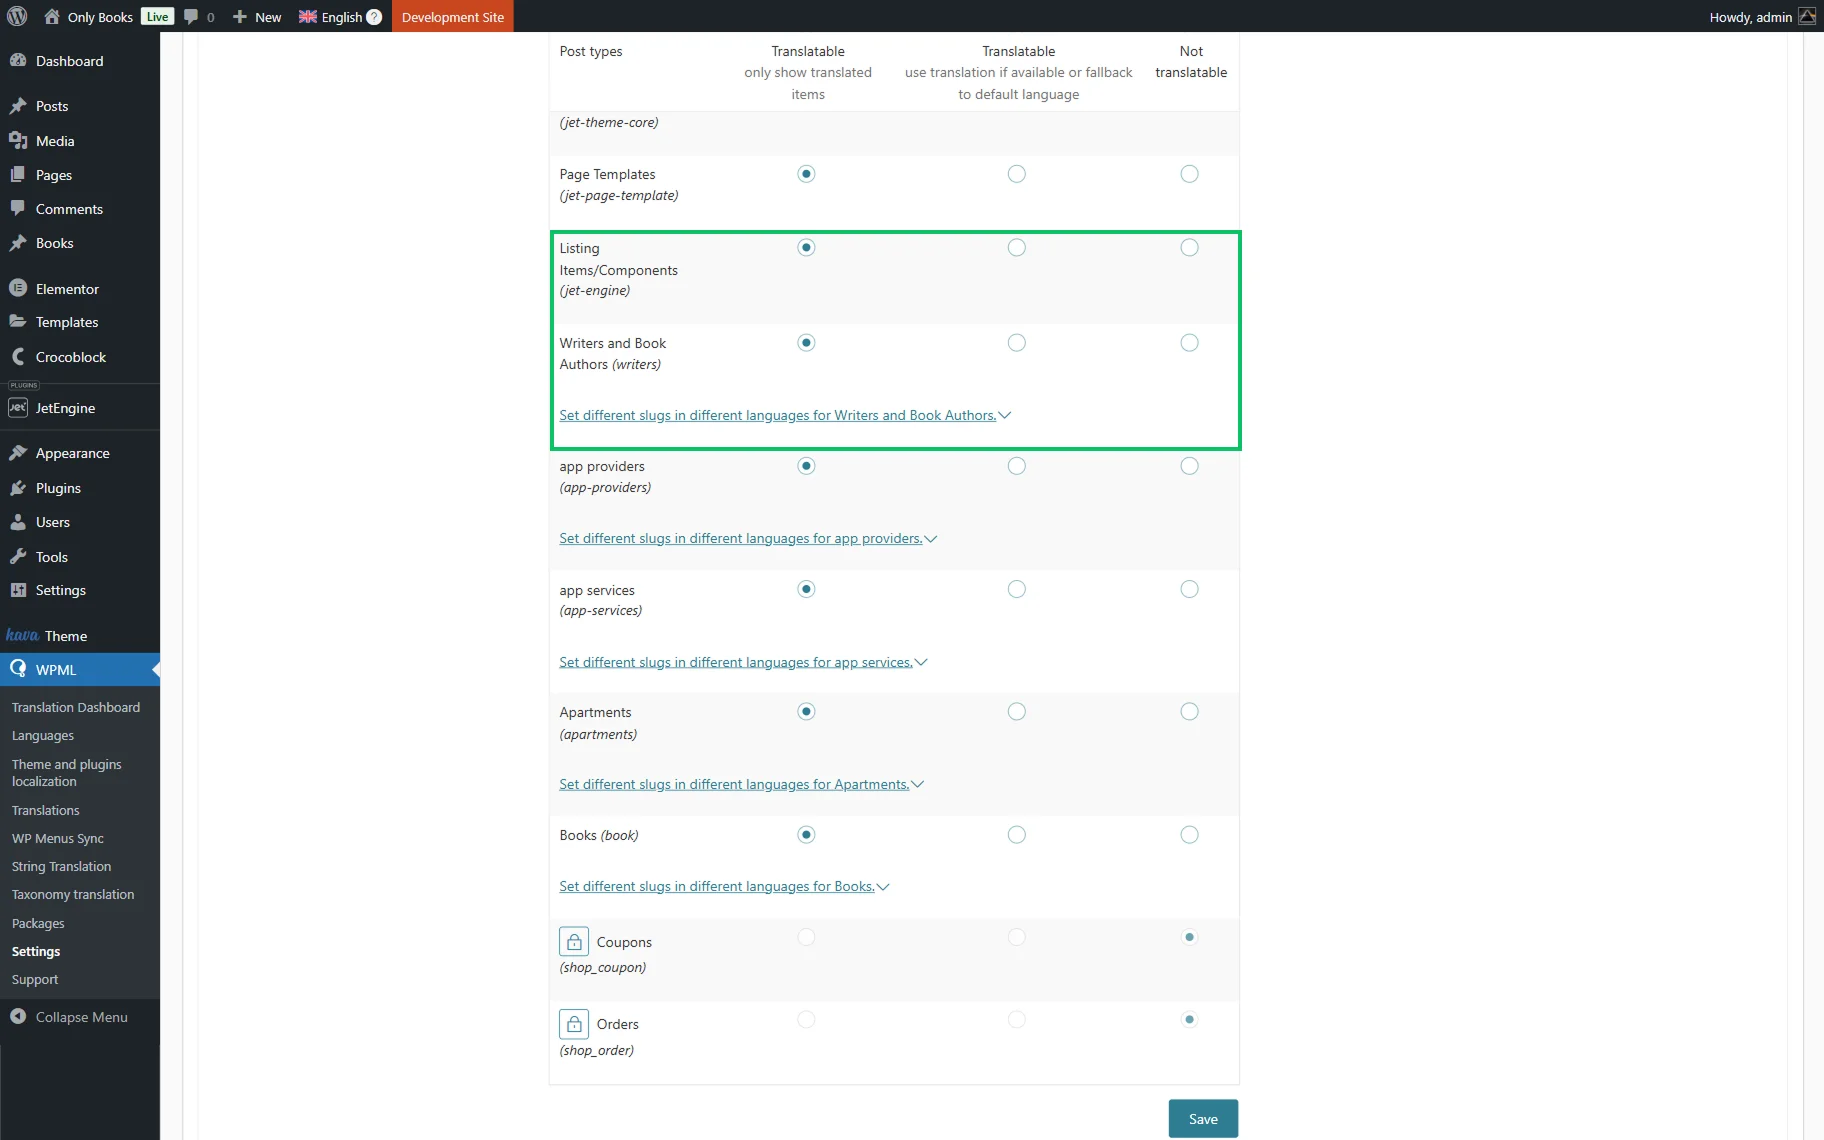
There are three options available for you here:
- Translatable – only show translated items — tick this radio button to display on the front end only those items you translated;
- Translatable – use translation if available or fallback to default language — this option will output the content translation if you’ve provided it, and the items with no active translations will be shown “as is”;
- Not translatable — a self-explanatory option.
Click the “Save” button.
Afterward, open your post type in the admin panel, and you’ll see that small “+” icons appear next to post type titles.
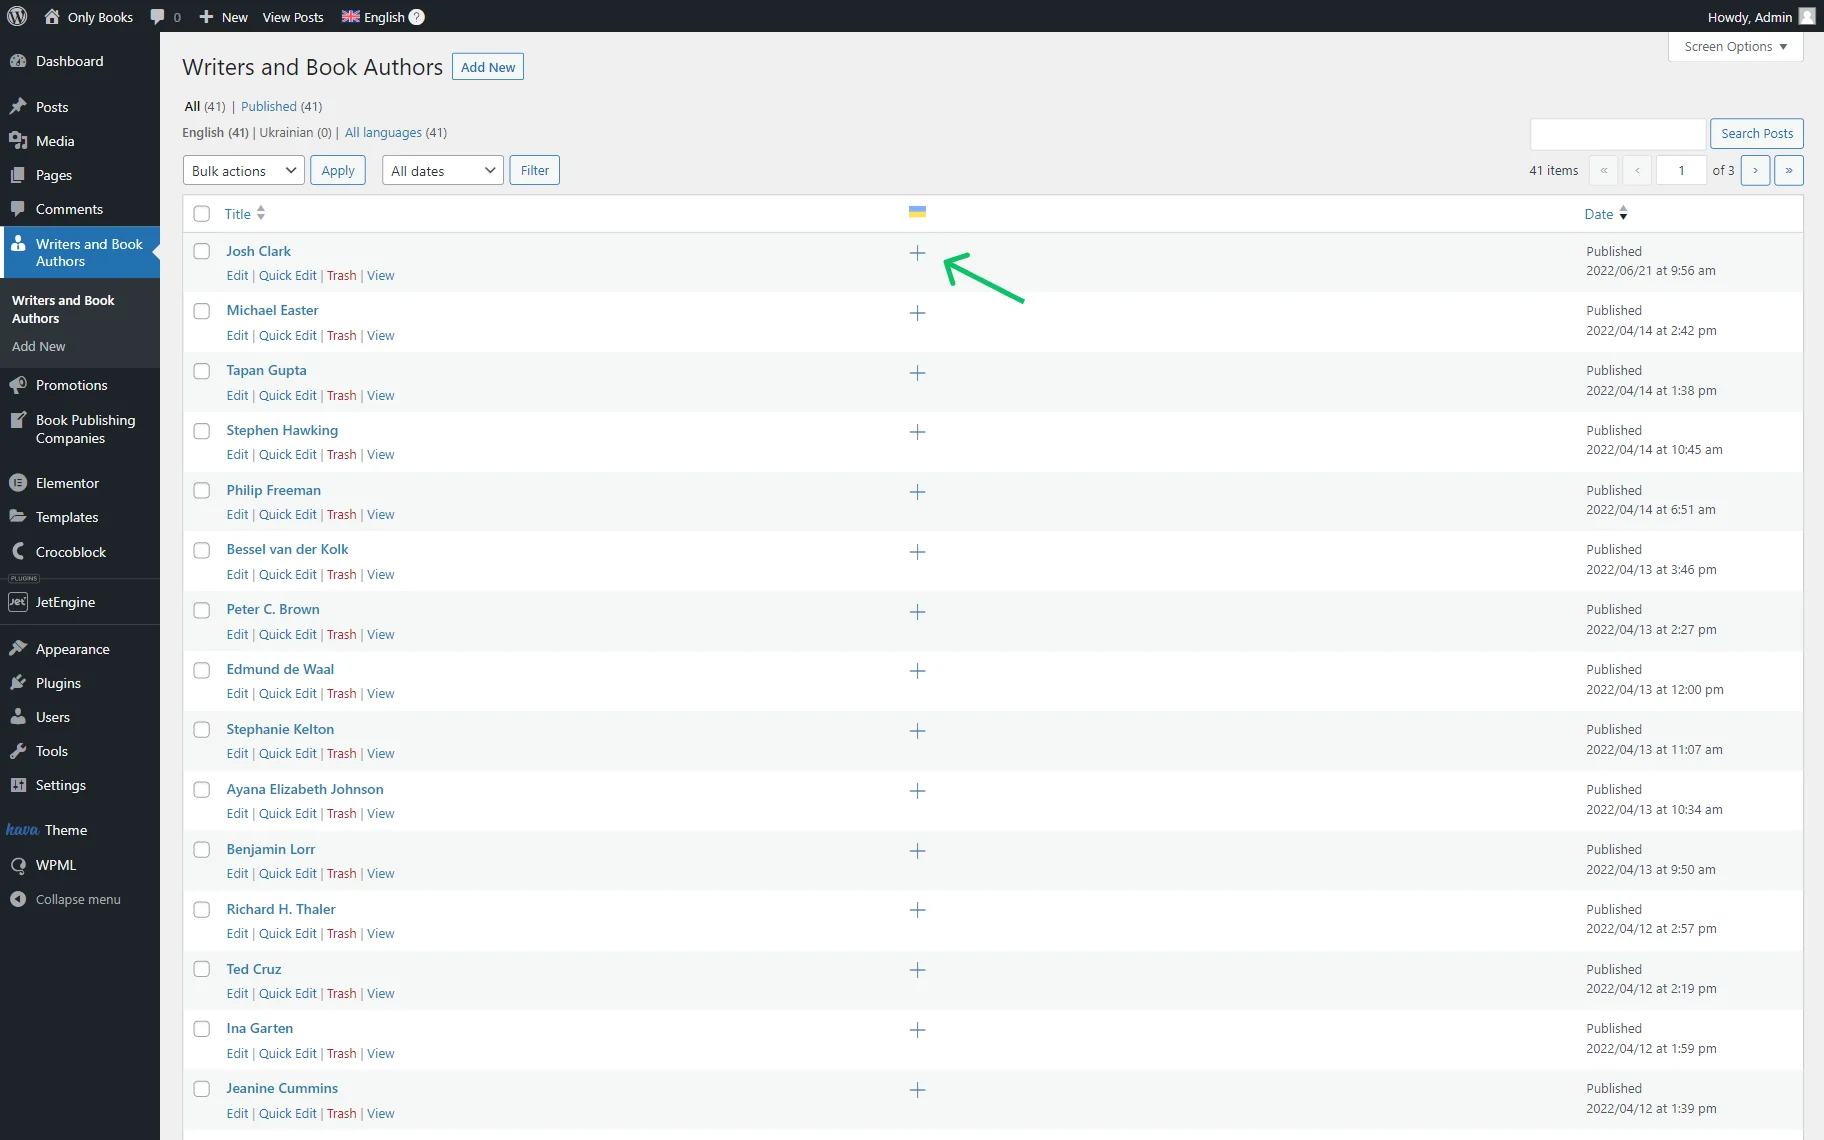
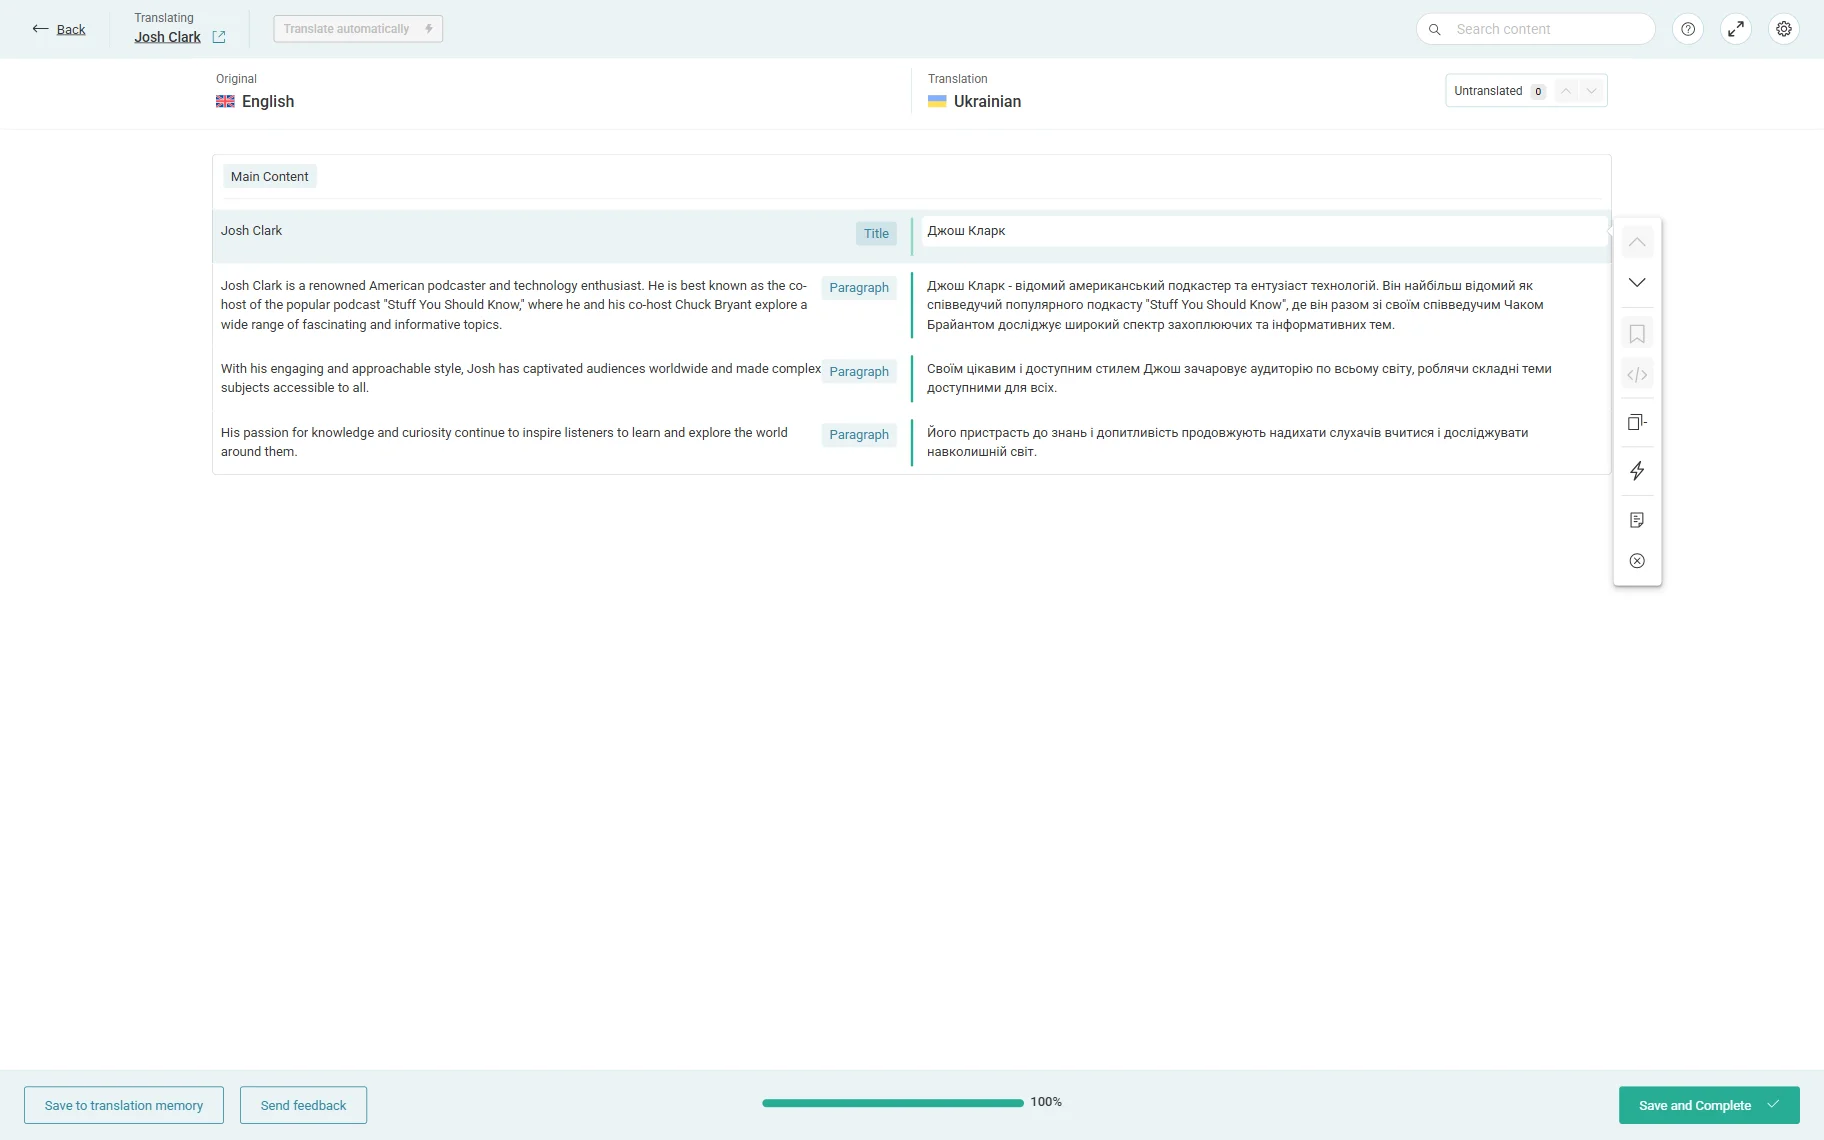
Press one of these buttons to be redirected to the WPML Advanced Translation Editor window. You can translate WordPress posts and CPT, translate the whole section yourself, or use an automatic translation tool. Don’t forget to confirm each row separately; the bottom scale won’t let you quit until it is 100% full.
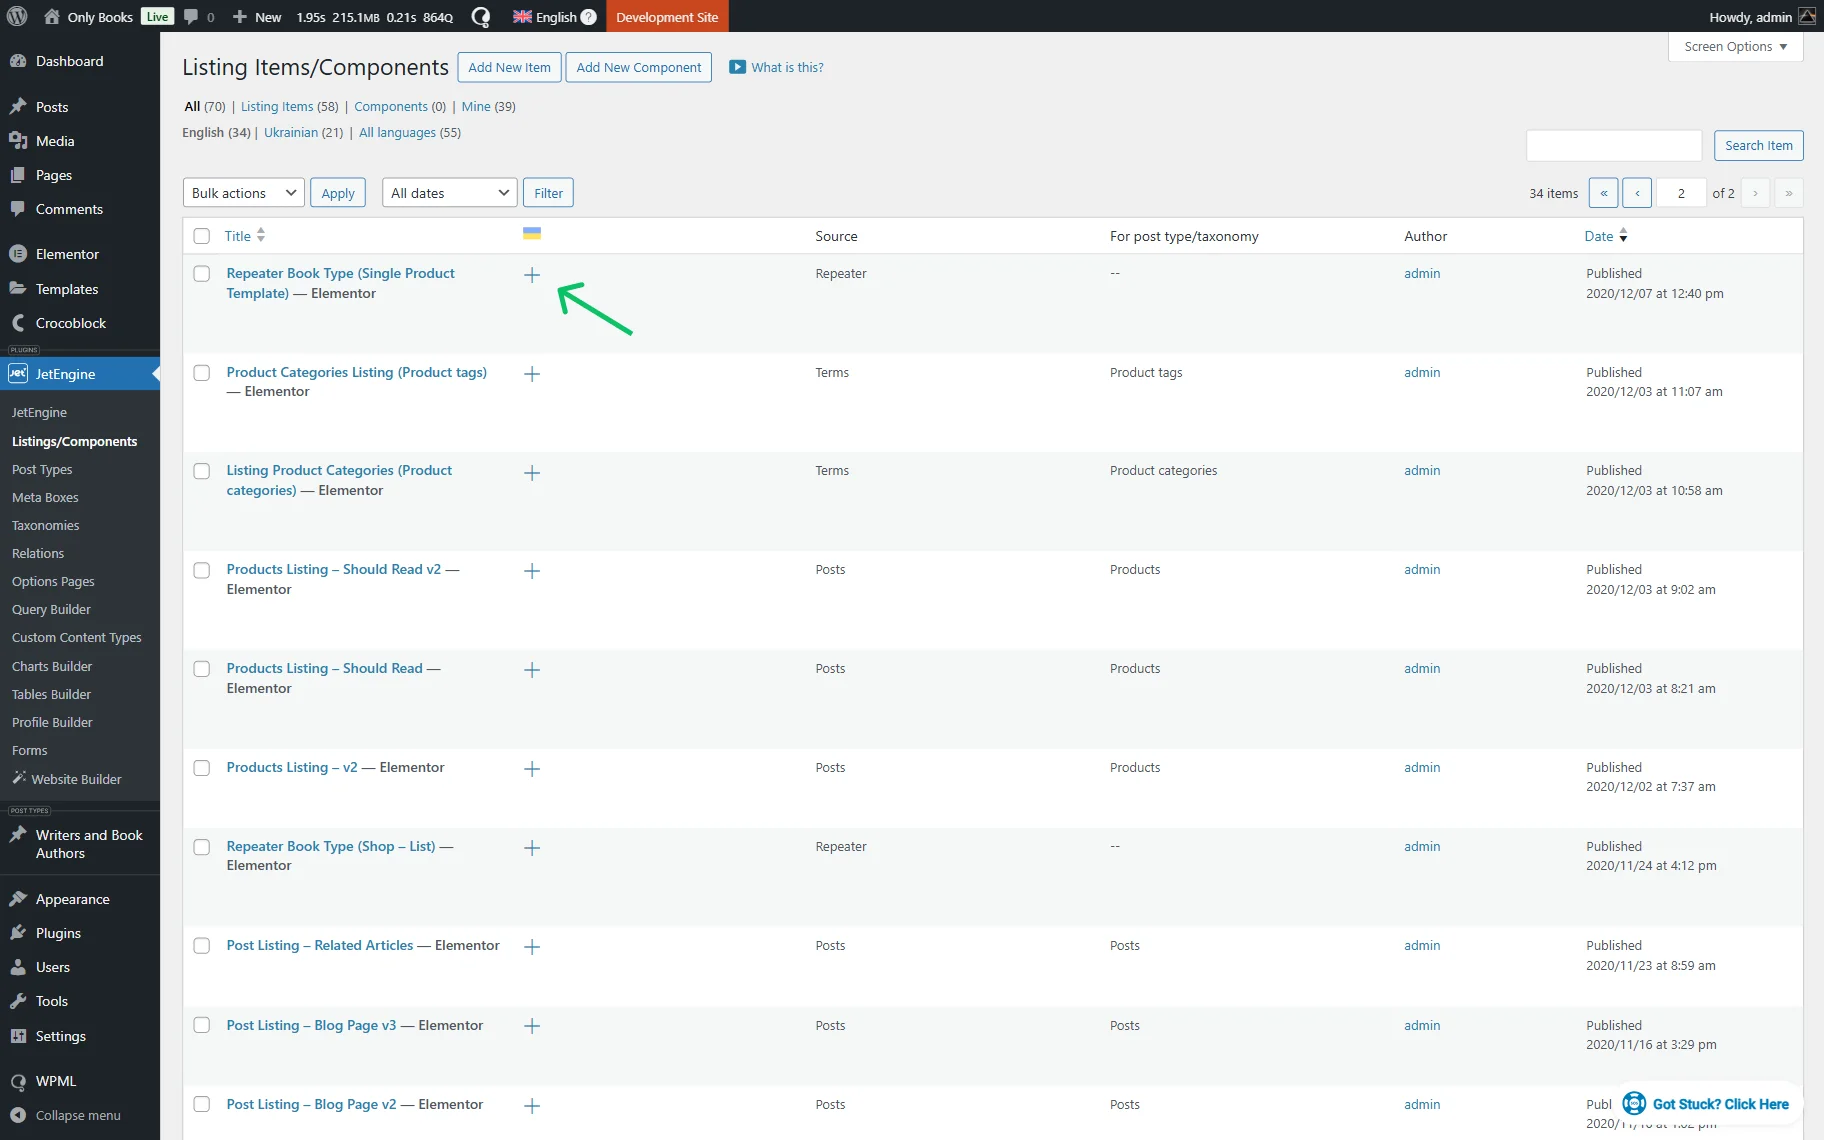
You can translate the Listing Items/Components in the exact same way:
- Make them translatable in the Post Types Translation section;
- Go to WordPress Dashboard > JetEngine > Listings/Components;
- Open the desired Listing Item/Component translation editor by clicking the “+” icon;
- Enter the translation manually or automatically;
- Press “Complete.”
Also, check our guide on How to Translate the Custom Post Type Slugs.
That’s it; now you know how to perform the JetEngine’s CPT translation and translate its Listing Items and Components on WordPress websites with the WPML plugin.