How to Create a Vertical Mega Menu for a Bookshop Site
From this tutorial, you’ll find out how to recreate a vertical menu similar to the one represented in the Only Books live demo with the JetMenu plugin.
Before you start, check the tutorial requirements:
- Elementor (Free version) or Block editor (Gutenberg)
- JetMenu plugin installed and activated
In this guide, we will explore how to build a vertical menu from the Only Books dynamic template, as demonstrated in the JetMenu live demo.
Prepare Menus
We will create two menus: the main menu and a submenu that will be included within it and displayed vertically.
Submenu
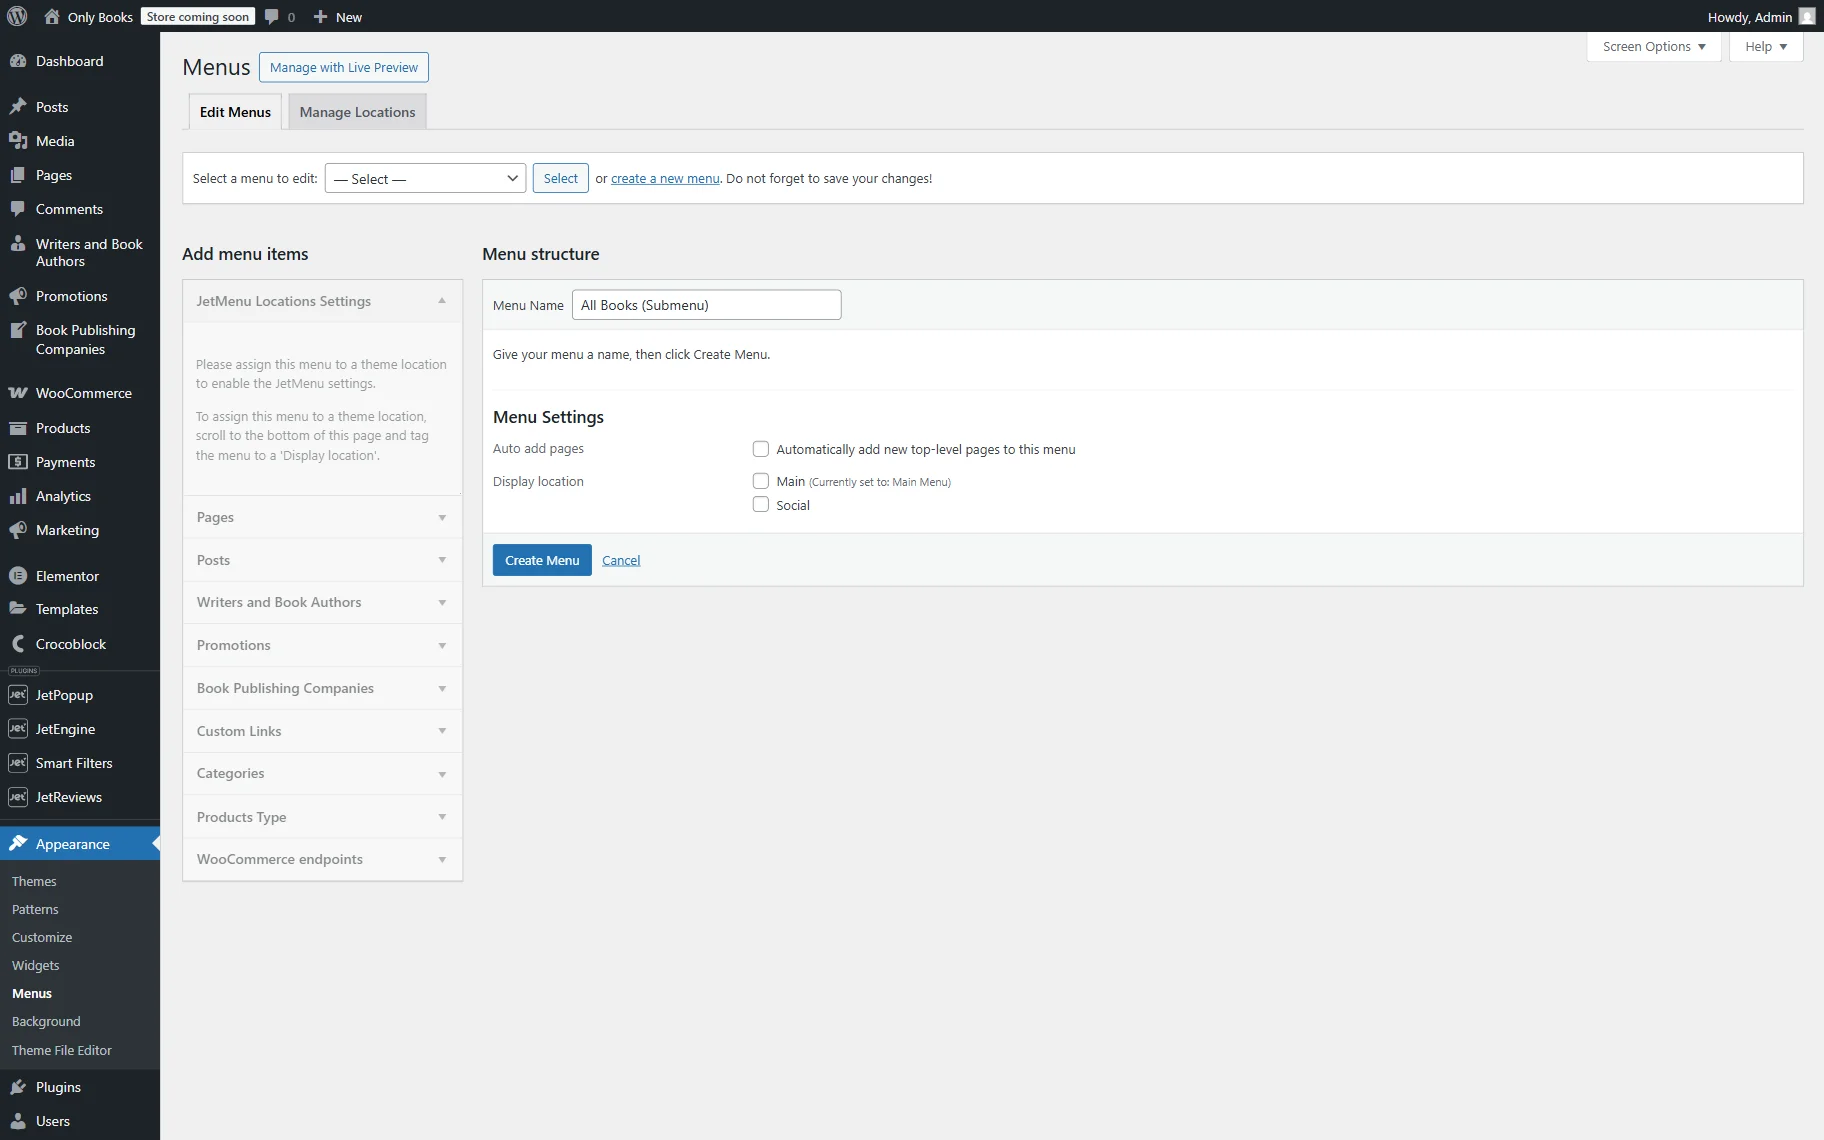
First, let’s create a custom menu that will be displayed vertically later. For this purpose, open the WordPress Dashboard > Appearance > Menus tab.
Here, click the “create a new menu” button, name your new menu (here, “All Books (Submenu)”), and apply it to the needed location (e.g., “Main”). We don’t assign the location now, as we will later display the menu in the header with JetThemeCore.
Press the “Create Menu” button.
Now, it’s time to add content to the menu.
For example, first, we will proceed to the Products Type tab and tick the “Select All” checkbox to add all product types to the menu. Then, click the “Add to Menu” button.

Now, three items are added to the menu: “Paper Book,” “E-book,” and “Audio Book.”
Next, let’s add three more items with the help of the Custom Links tab. Here, paste the URL where you want to lead the user and set the Link Text.
This way, we add “Authors,” “Promotions,” and “Publisher company” links.

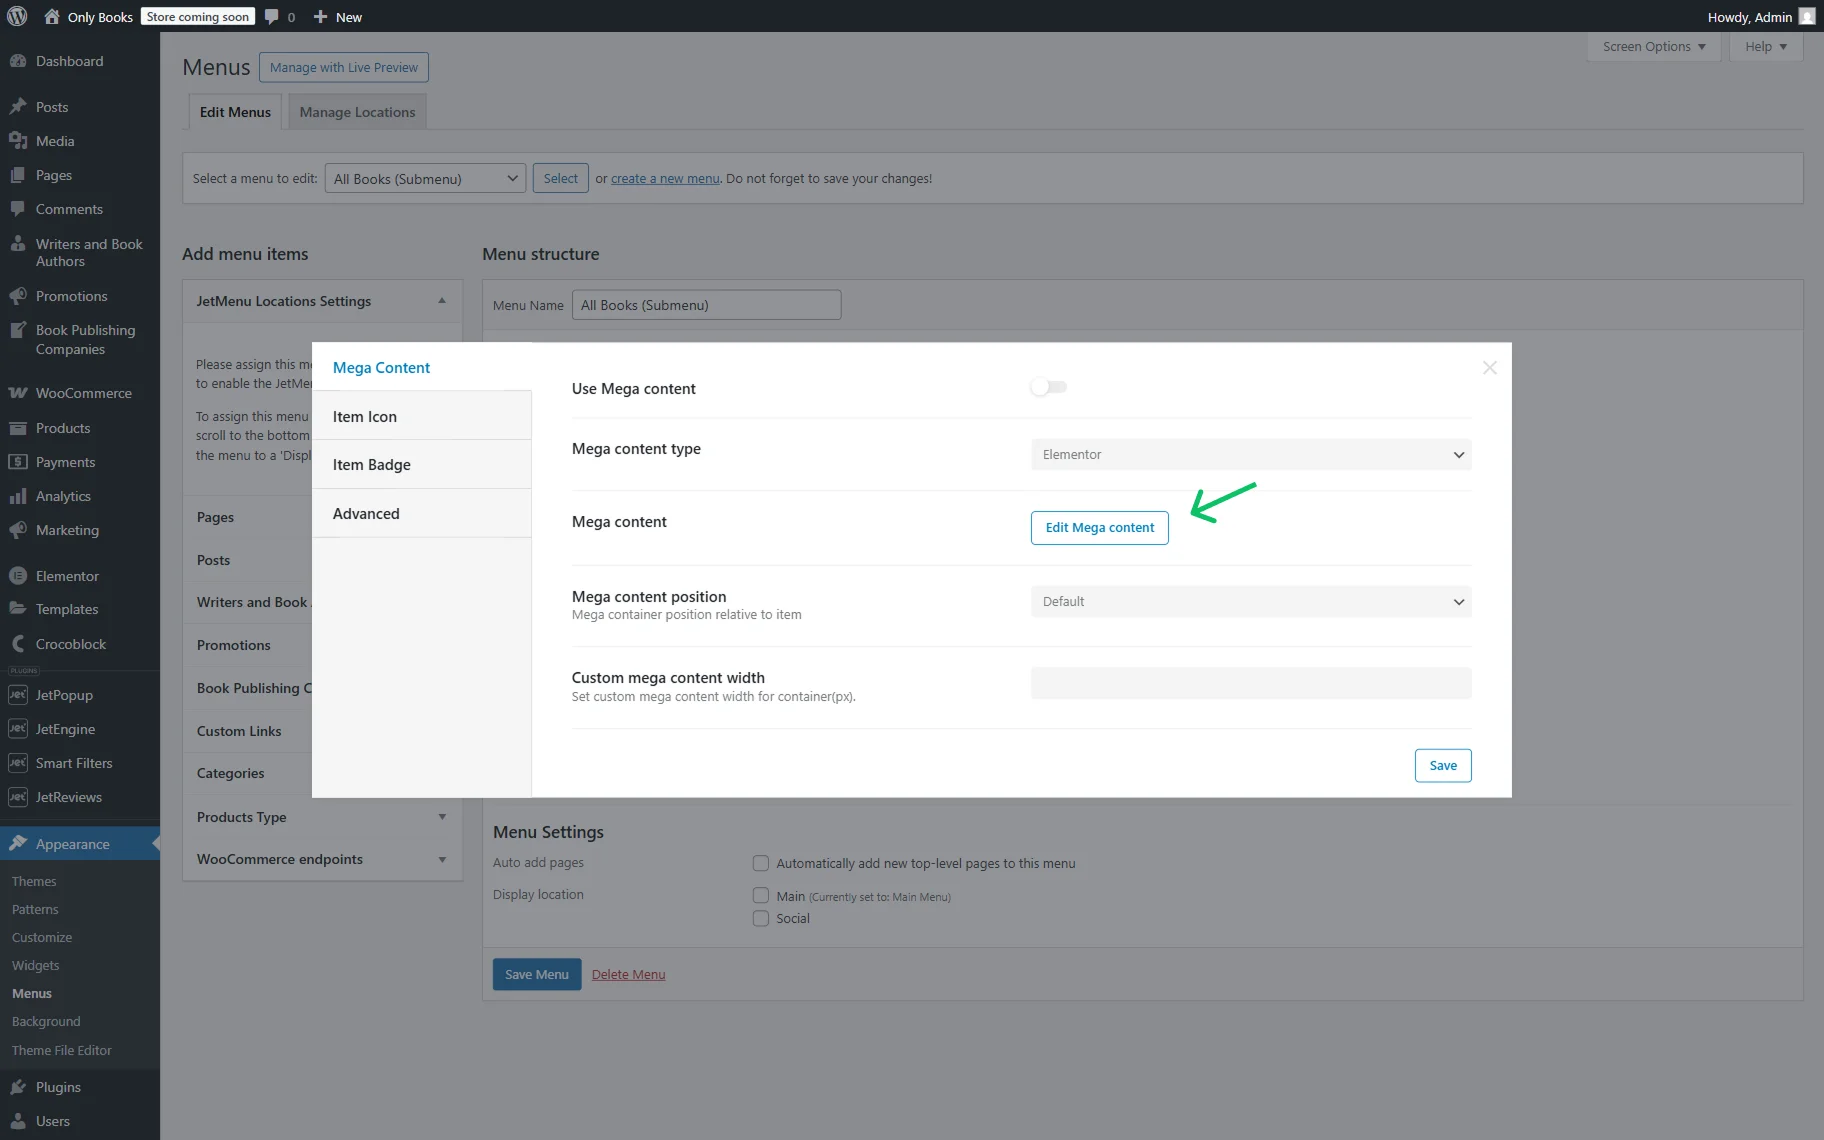
Hover over the first item to activate the “Settings” button. Click it to open the menu item’s settings pop-up.

To adjust a mega content, press the “Edit Mega content” button in the opened Mega Content tab.
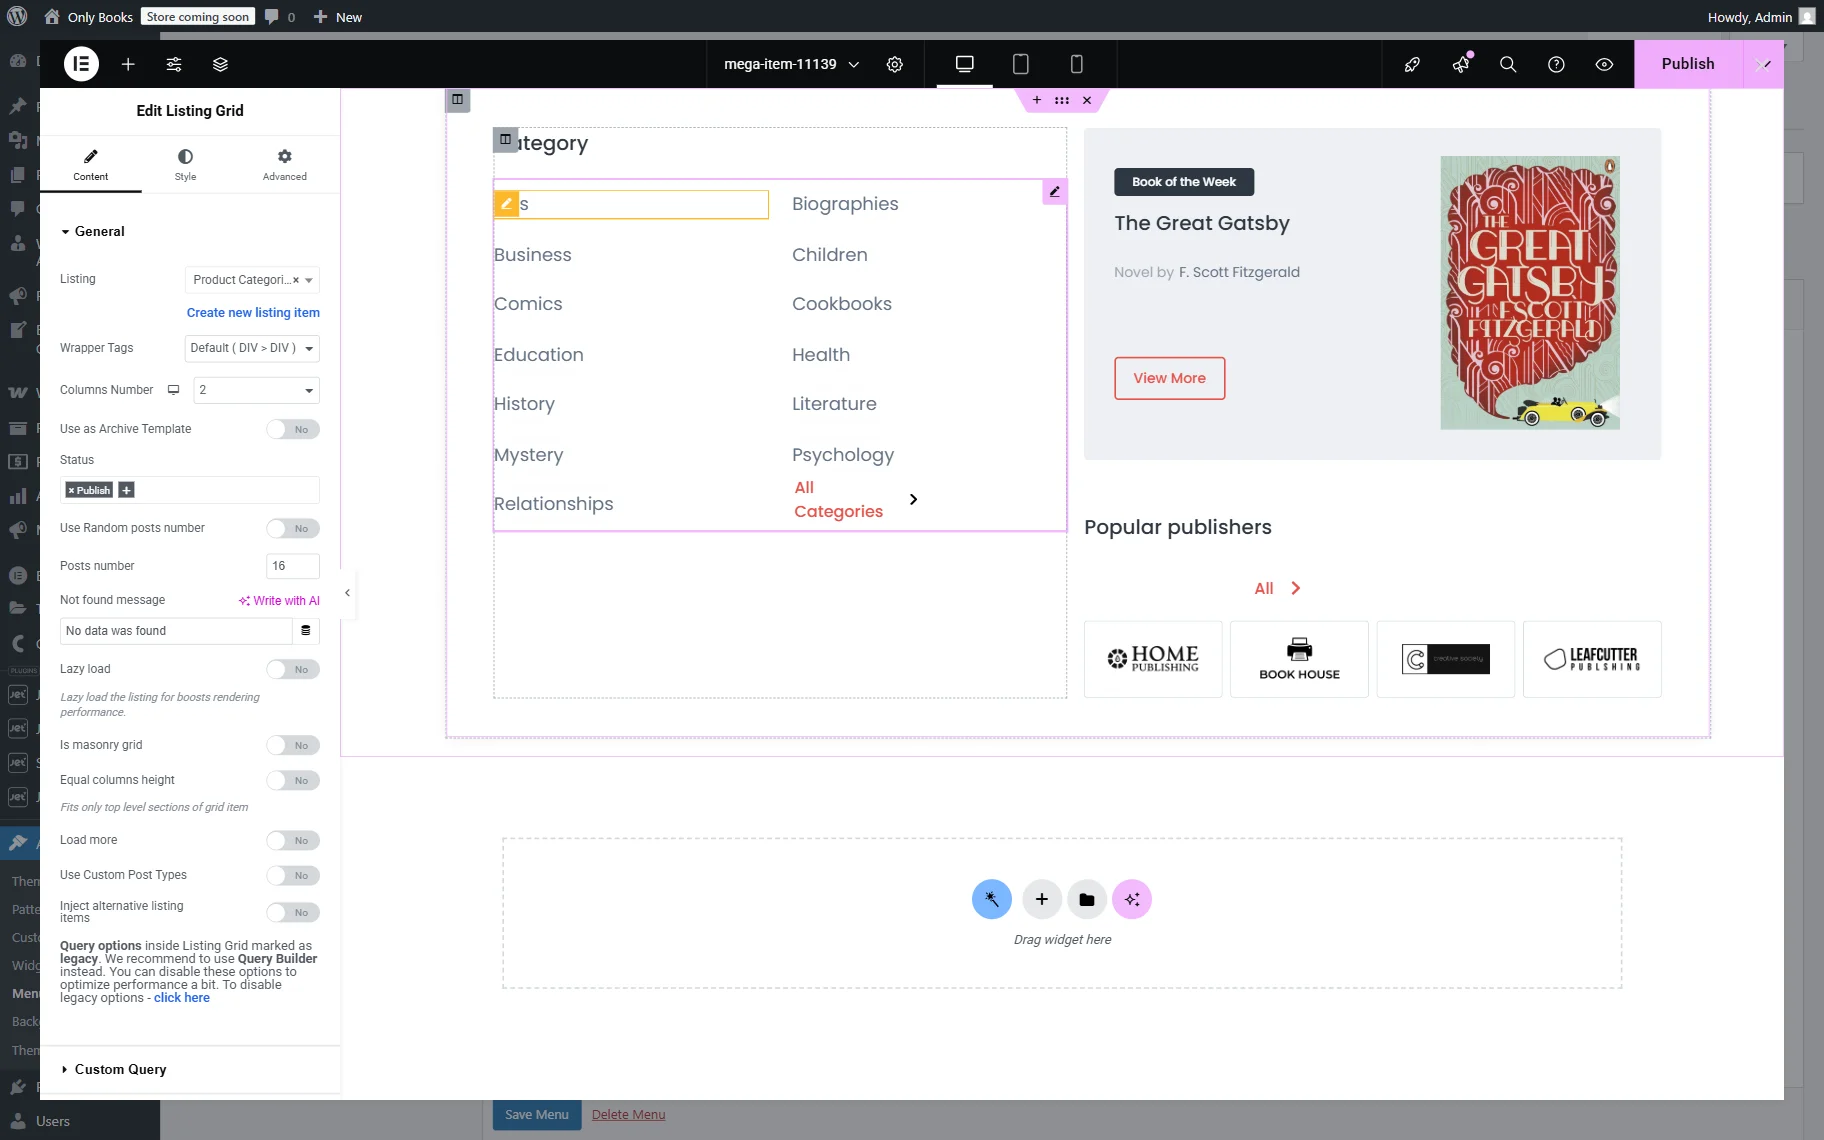
In the editor (Elementor in our case, but you can use Gutenberg if preferred), we add two columns.
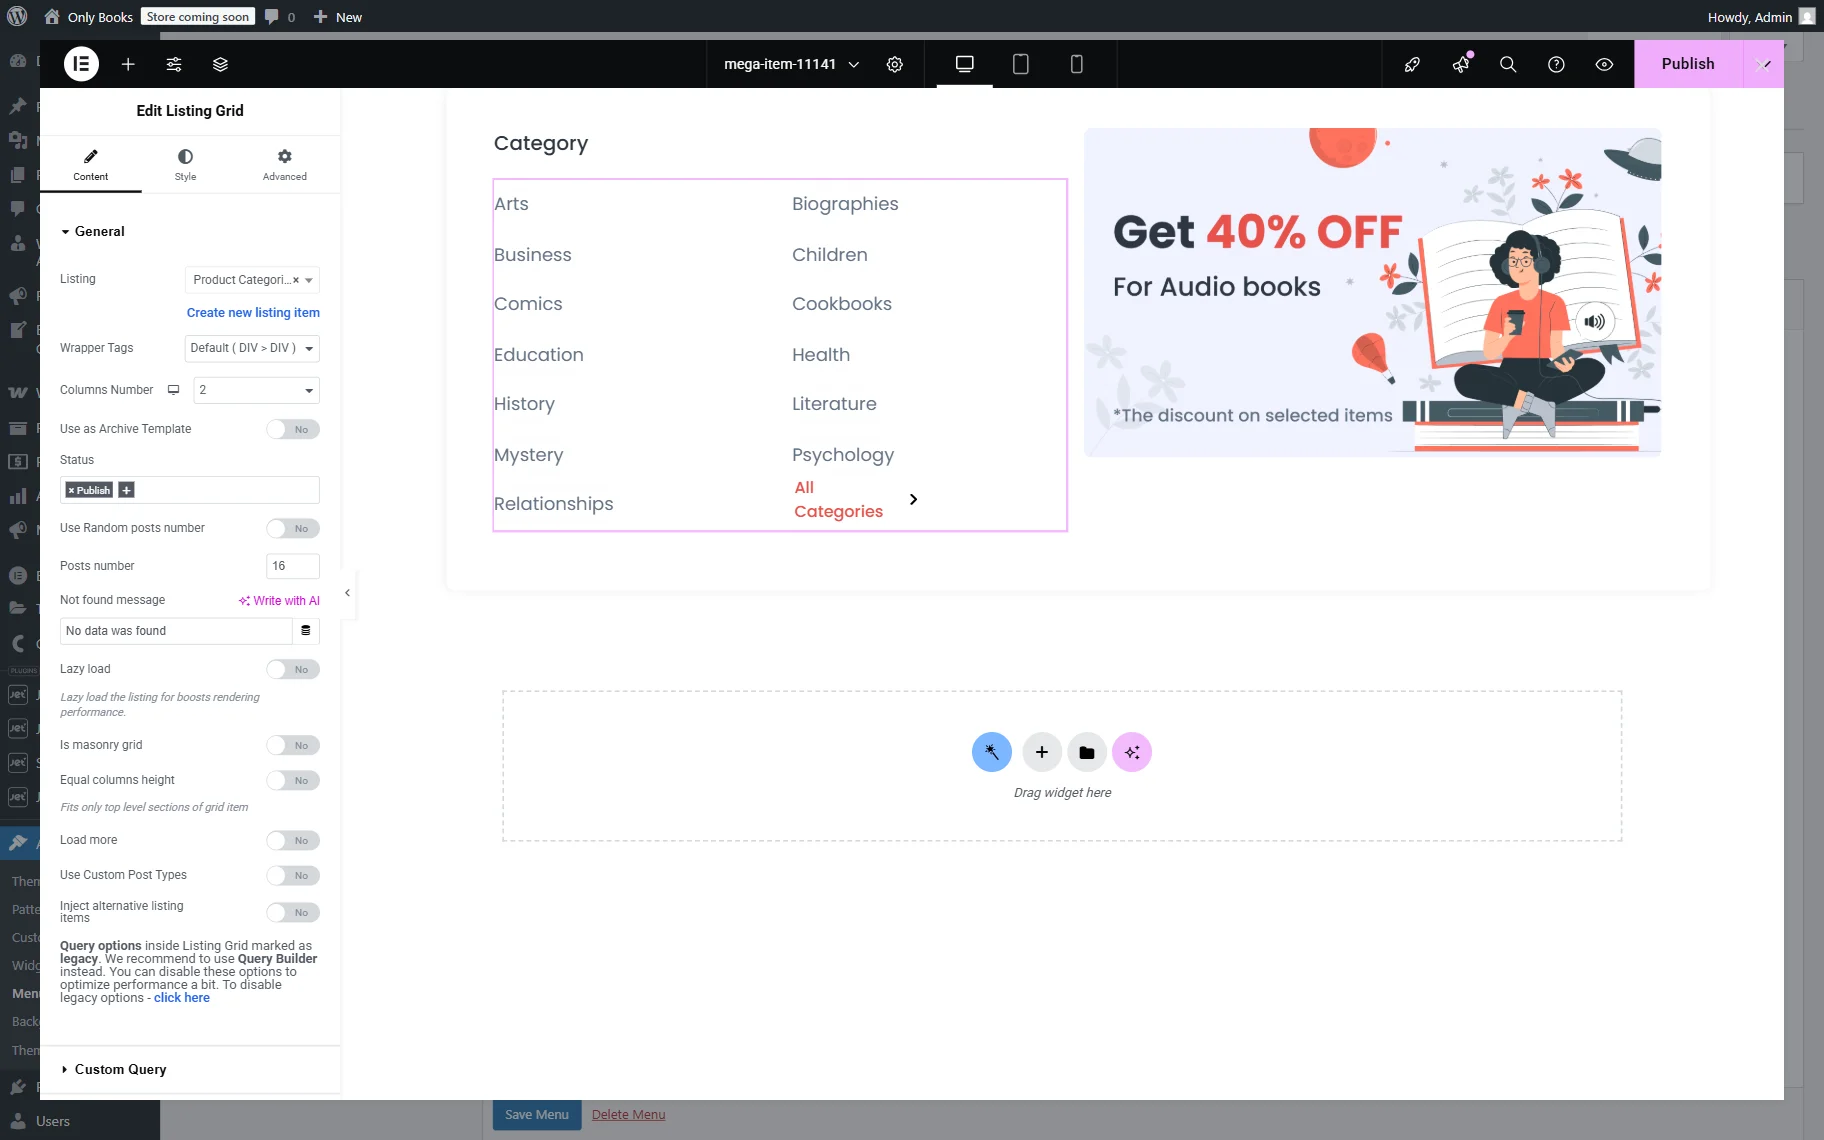
In the first column, we first put a Heading with the text “Category”.
Then, we add a JetEngine’s Listing Grid widget. In the Listing field, we select the previously built “Product Categories by Paper Book (for All Books Menu (submenu))” listing, which displays the product categories. Create a listing using our Listing Template Overview for assistance.
Additionally, we place the “All Categories” Dynamic Link button with “Options” selected as the Source.
In the second column, we place one more Listing Grid with the “Book of the Week” listing, “Popular publishers” Heading, “All” Button, and one more “Publisher Company for Menu” Listing Grid.
Customize the style settings, and when the template is ready, press the “Publish” button.
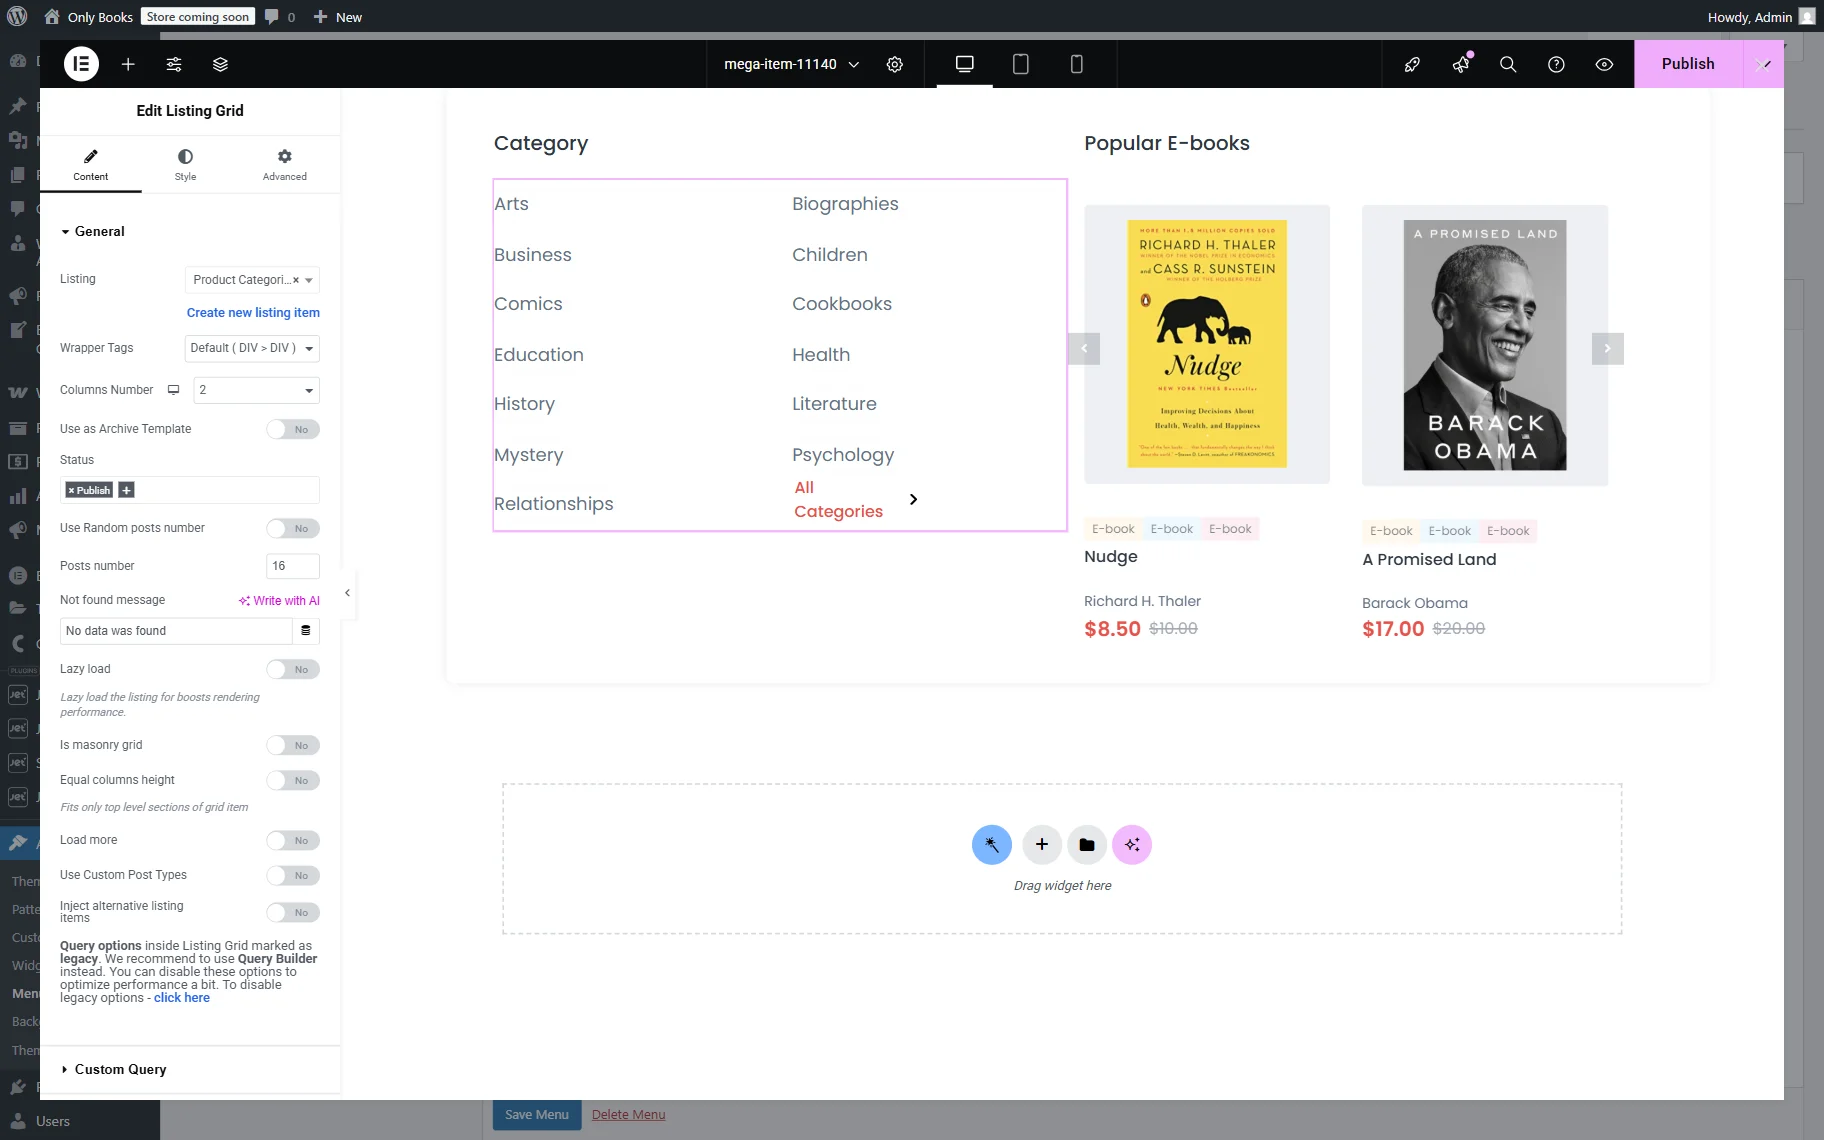
Next, we repeat the same procedure with the “E-books” menu item to open the Mega Content Editor.
This time, we add two columns to the section as well.
The first columns will be the same as in the previous case: a “Category” Heading, a “Product Categories by Paper Book (for All Books Menu (submenu))” Listing Grid, and an “All Categories” Dynamic Link.
The second column includes the “Popular E-Books” Heading and a “Product Grid for Menu” Listing Grid.
When the template is fully customized, press the “Publish” button.
Then, we create the mega content for the “Audio Books” menu item in the same way.
Again, we build a two-column layout.
The first column is the same: “Category” Heading, a “Product Categories by Paper Book (for All Books Menu (submenu))” Listing Grid, and an “All Categories” Dynamic Link.
The second column contains the “Promotion Listing for Menu” Listing Grid this time.
When all the changes are made, press the “Publish” button.
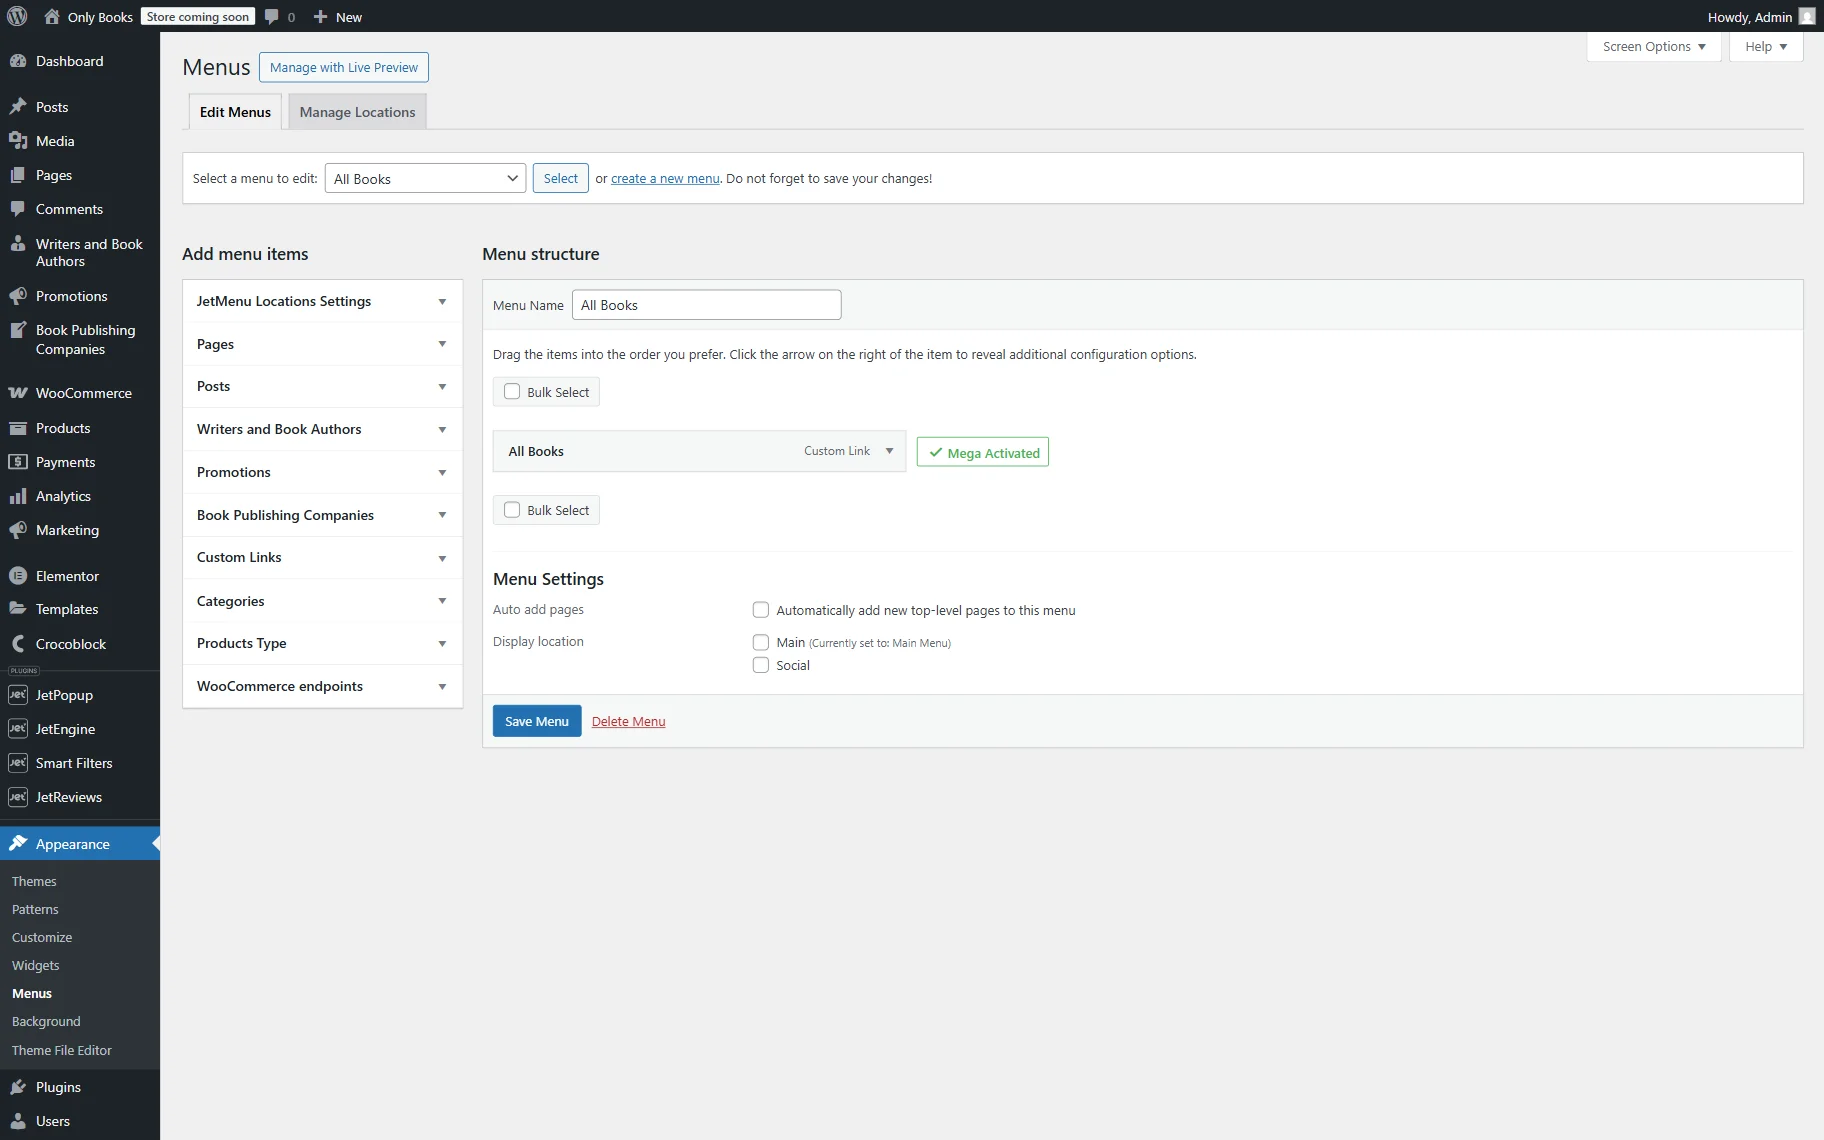
When we return to the menu, we observe the “Mega Activated” sign next to the items to which we added mega content.
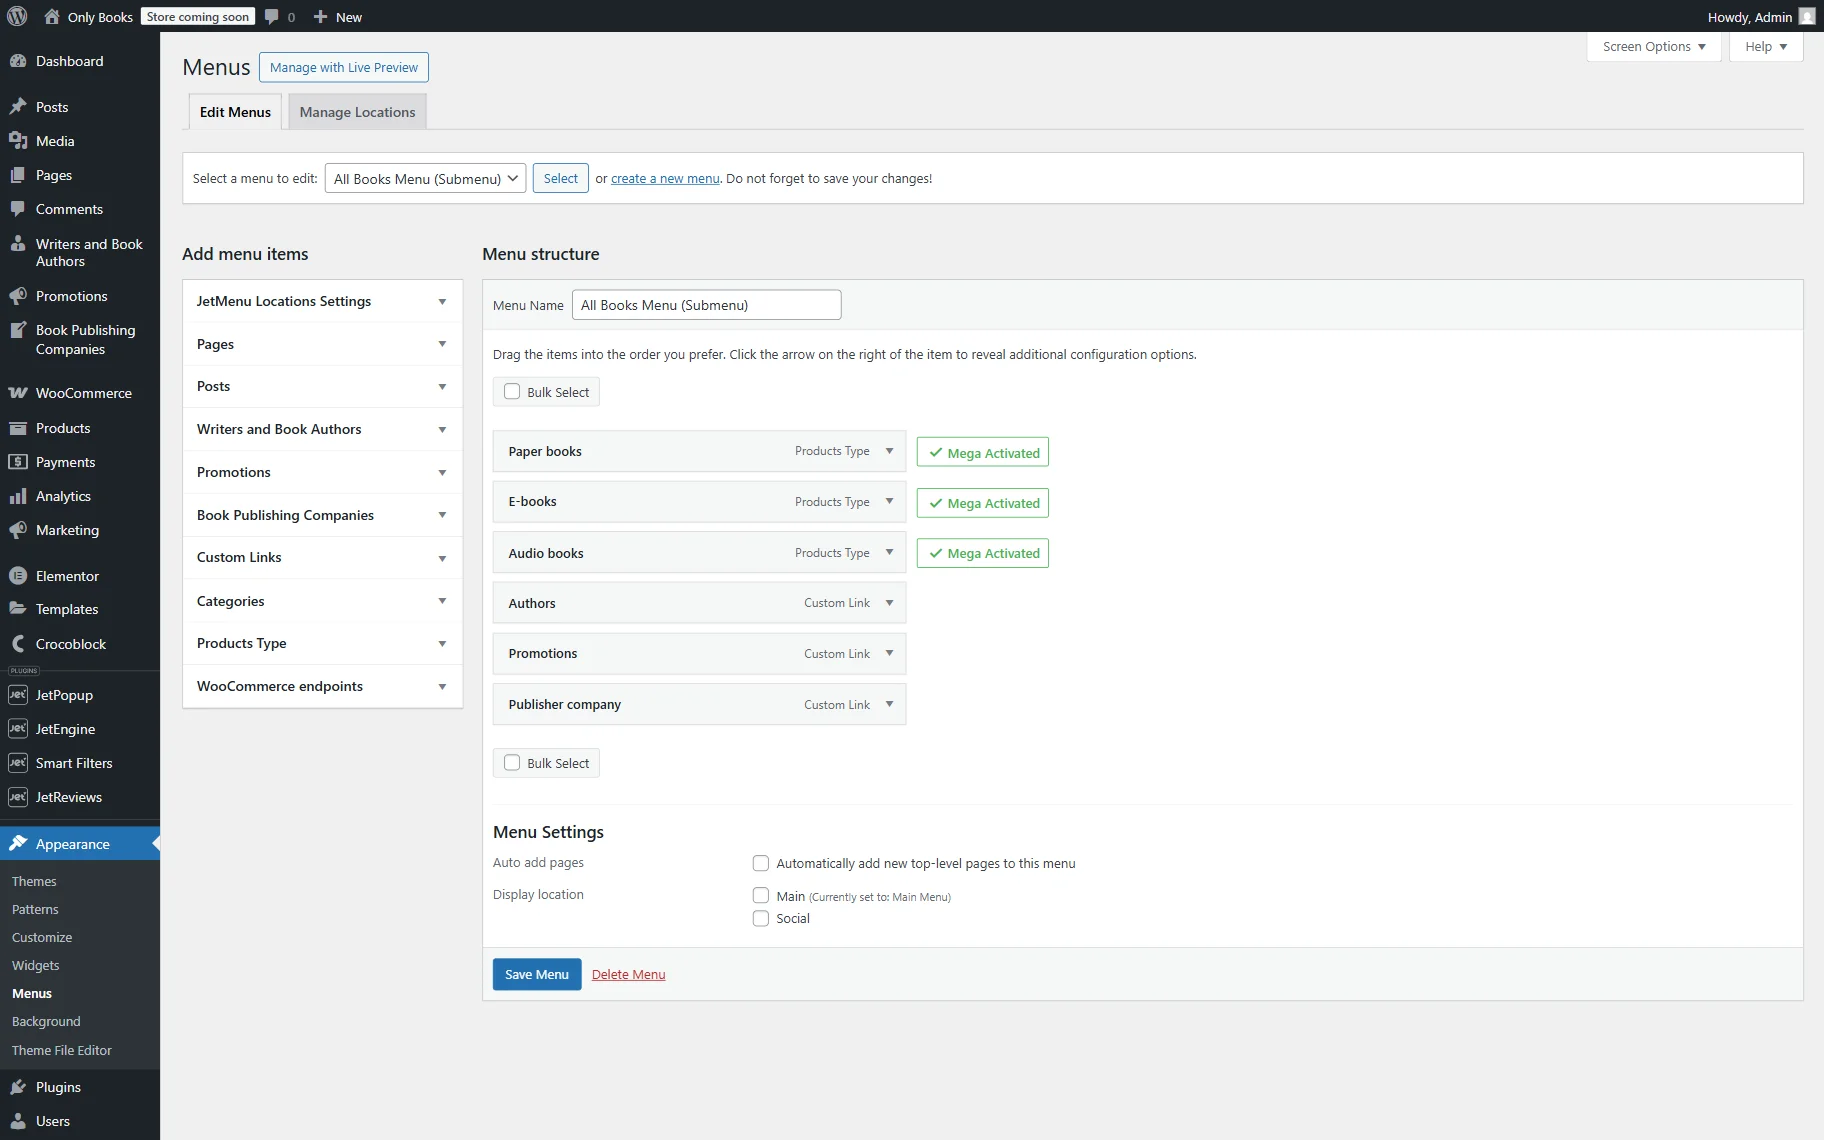
When the menu is ready, click the “Save Menu” button.
Main menu
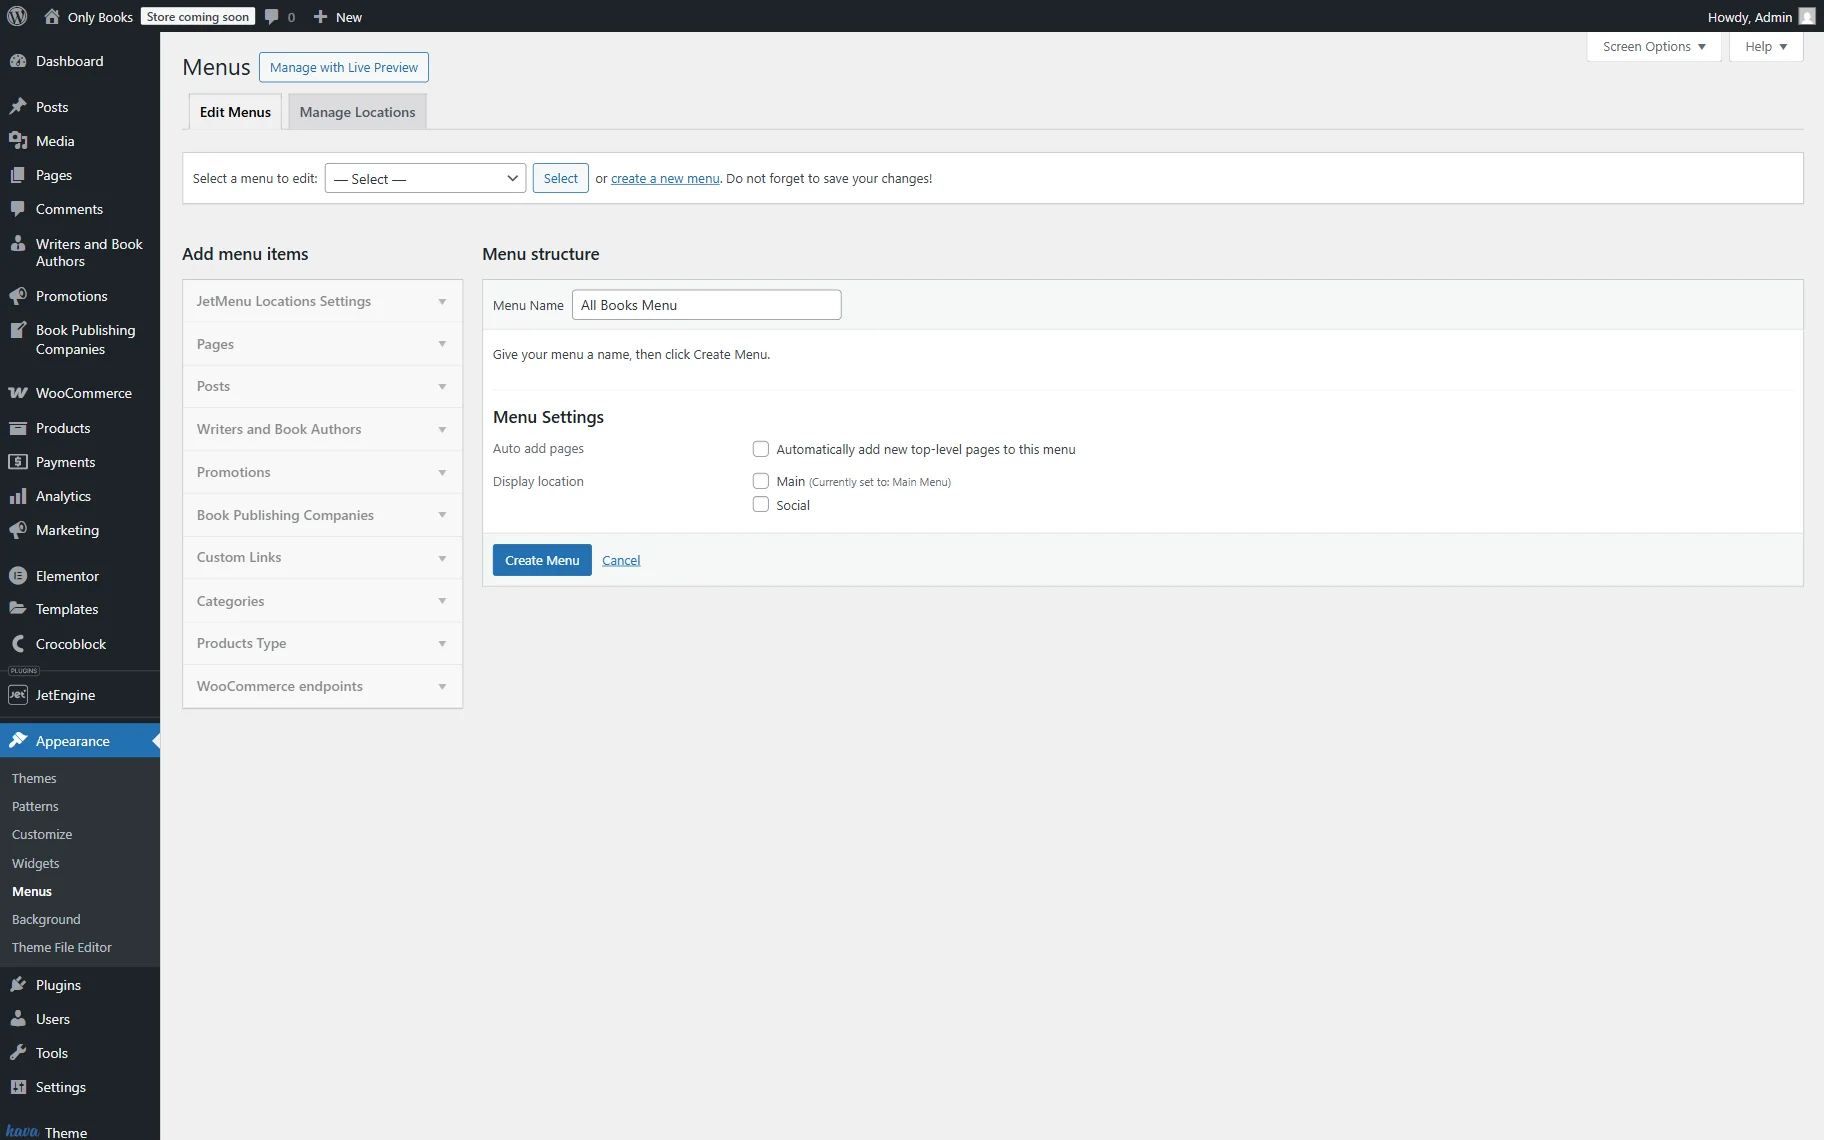
Let’s build a main menu that will contain the previously built “All Books Menu (Submenu)” inside. To do so, push the “create a new menu” button.
Set the menu name (here, “All Books Menu”) and press the “Create Menu” button.
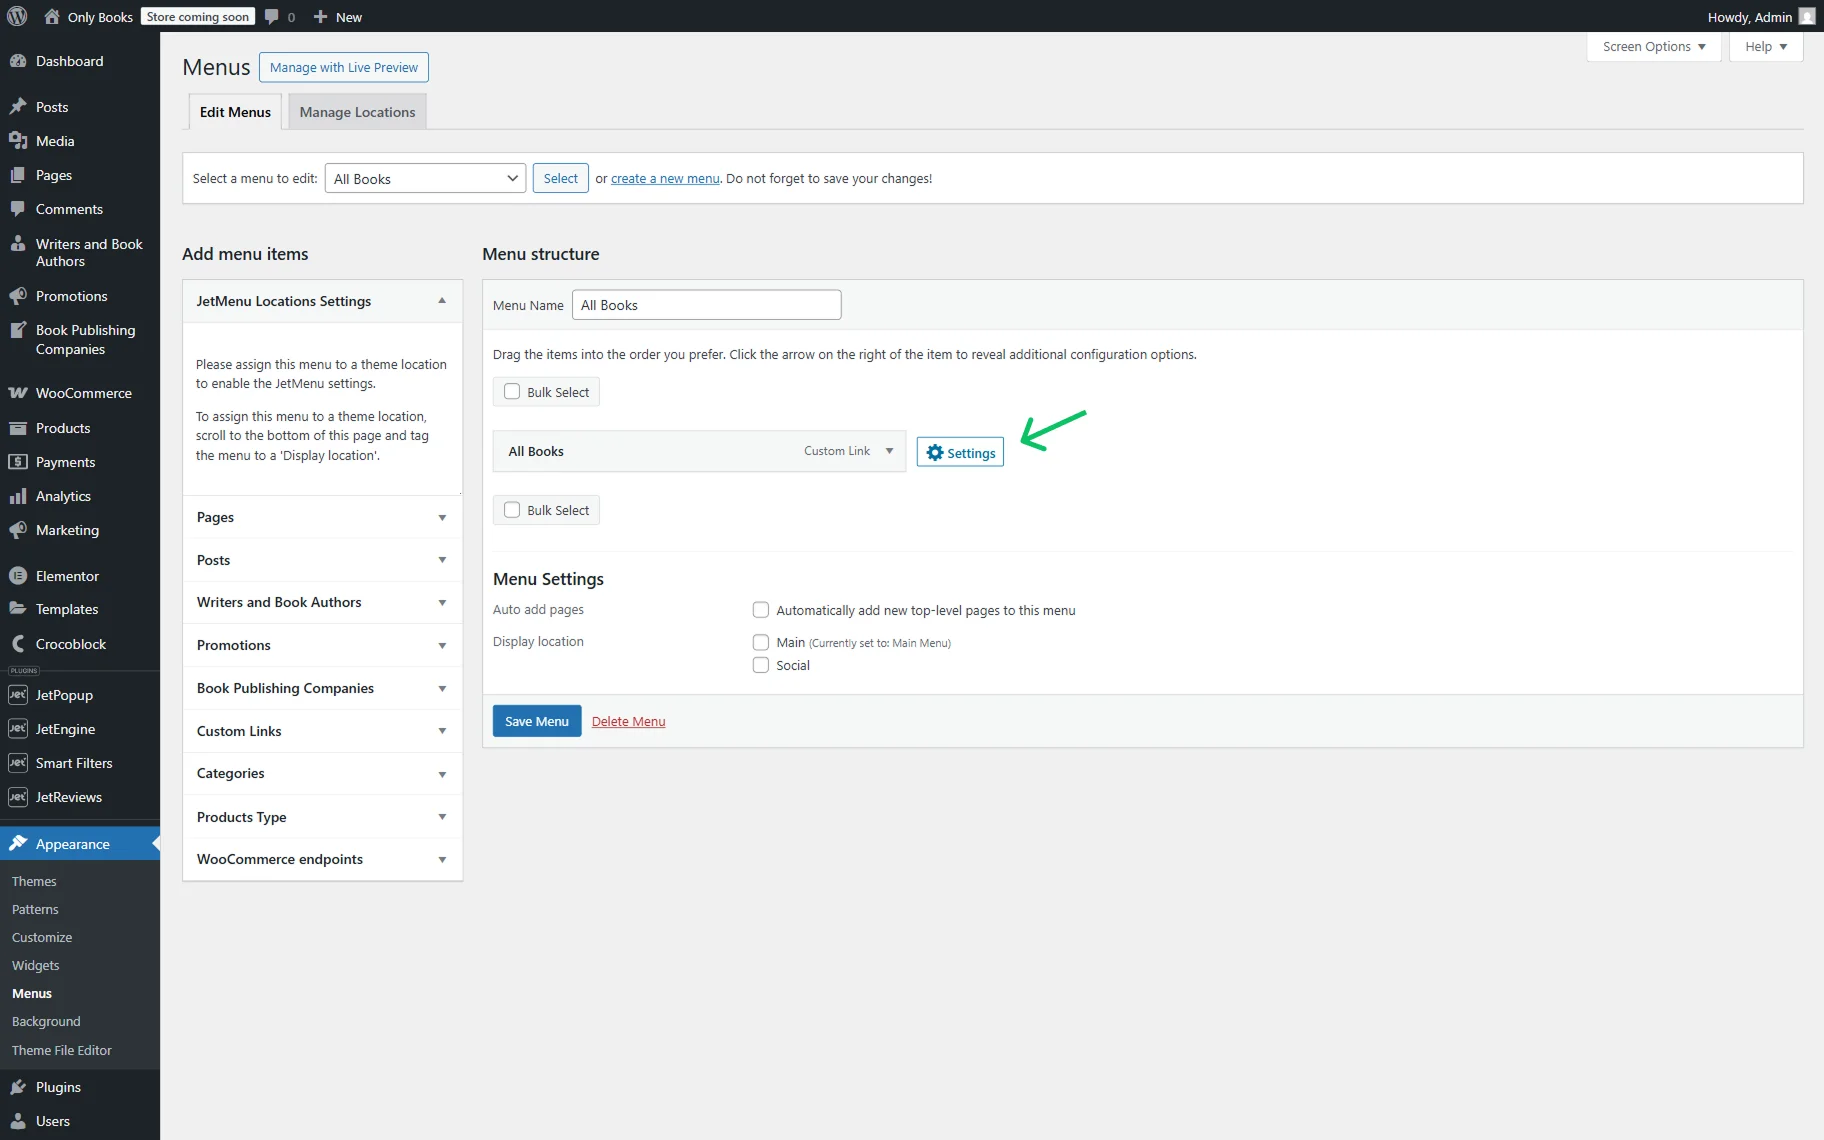
Open the Custom Links tab and set “#” as the URL (to use it as a placeholder). Then, set the Link Text to “All Books” and click the “Add to Menu” button.

Next, press the “Settings” button that appears once you hover over the item.
In the opened pop-up, press the “Edit Mega content” button to open the mega content editor.

Initially, we add two columns.
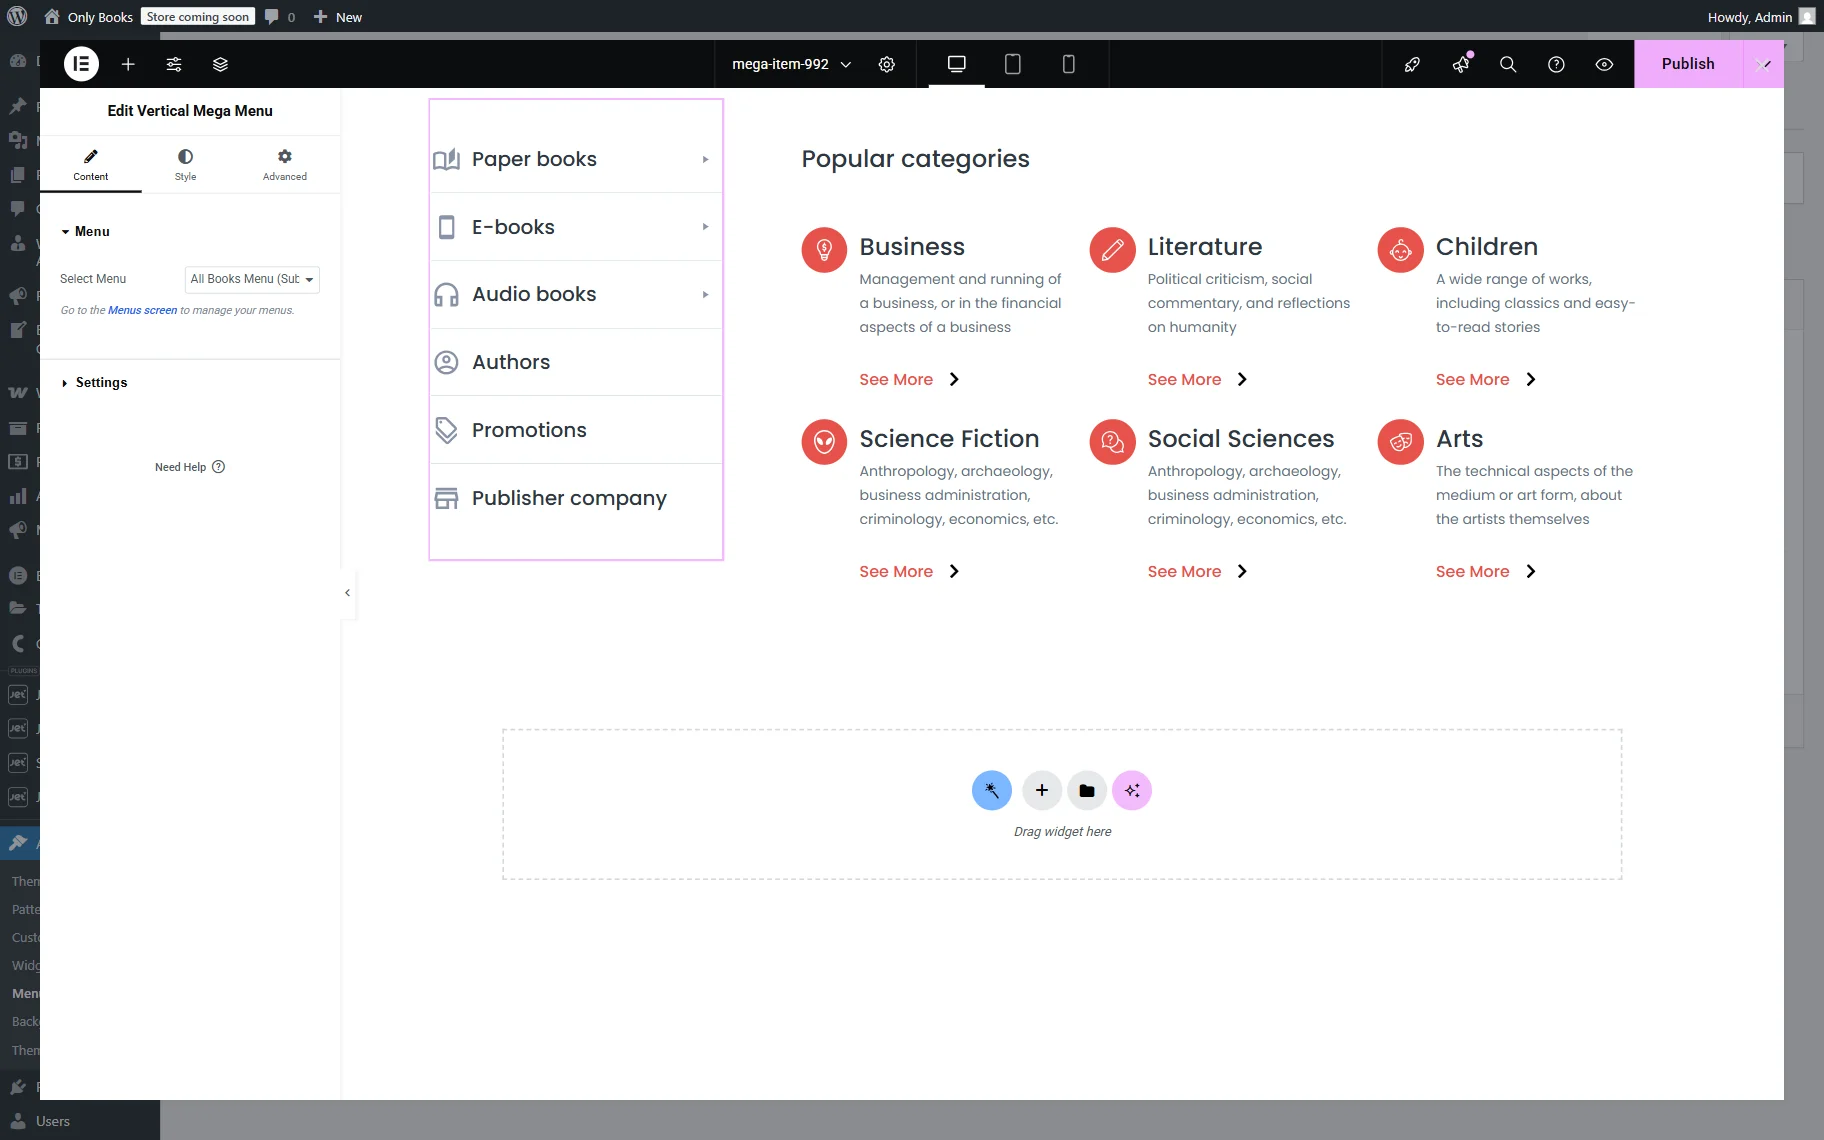
In the first column, we place the Vertical Mega Menu widget and pick the just-built “All Books Menu (Submenu)” in the Select Menu dropdown.
In the second column, we put the “Popular categories” Heading and the “Product Categories Listing for Mega Menu (default page)” Listing Grid.
Press the “Publish” button when the template is ready.
If the menu is ready, press the “Save Menu” button.
Add Menu to the Header
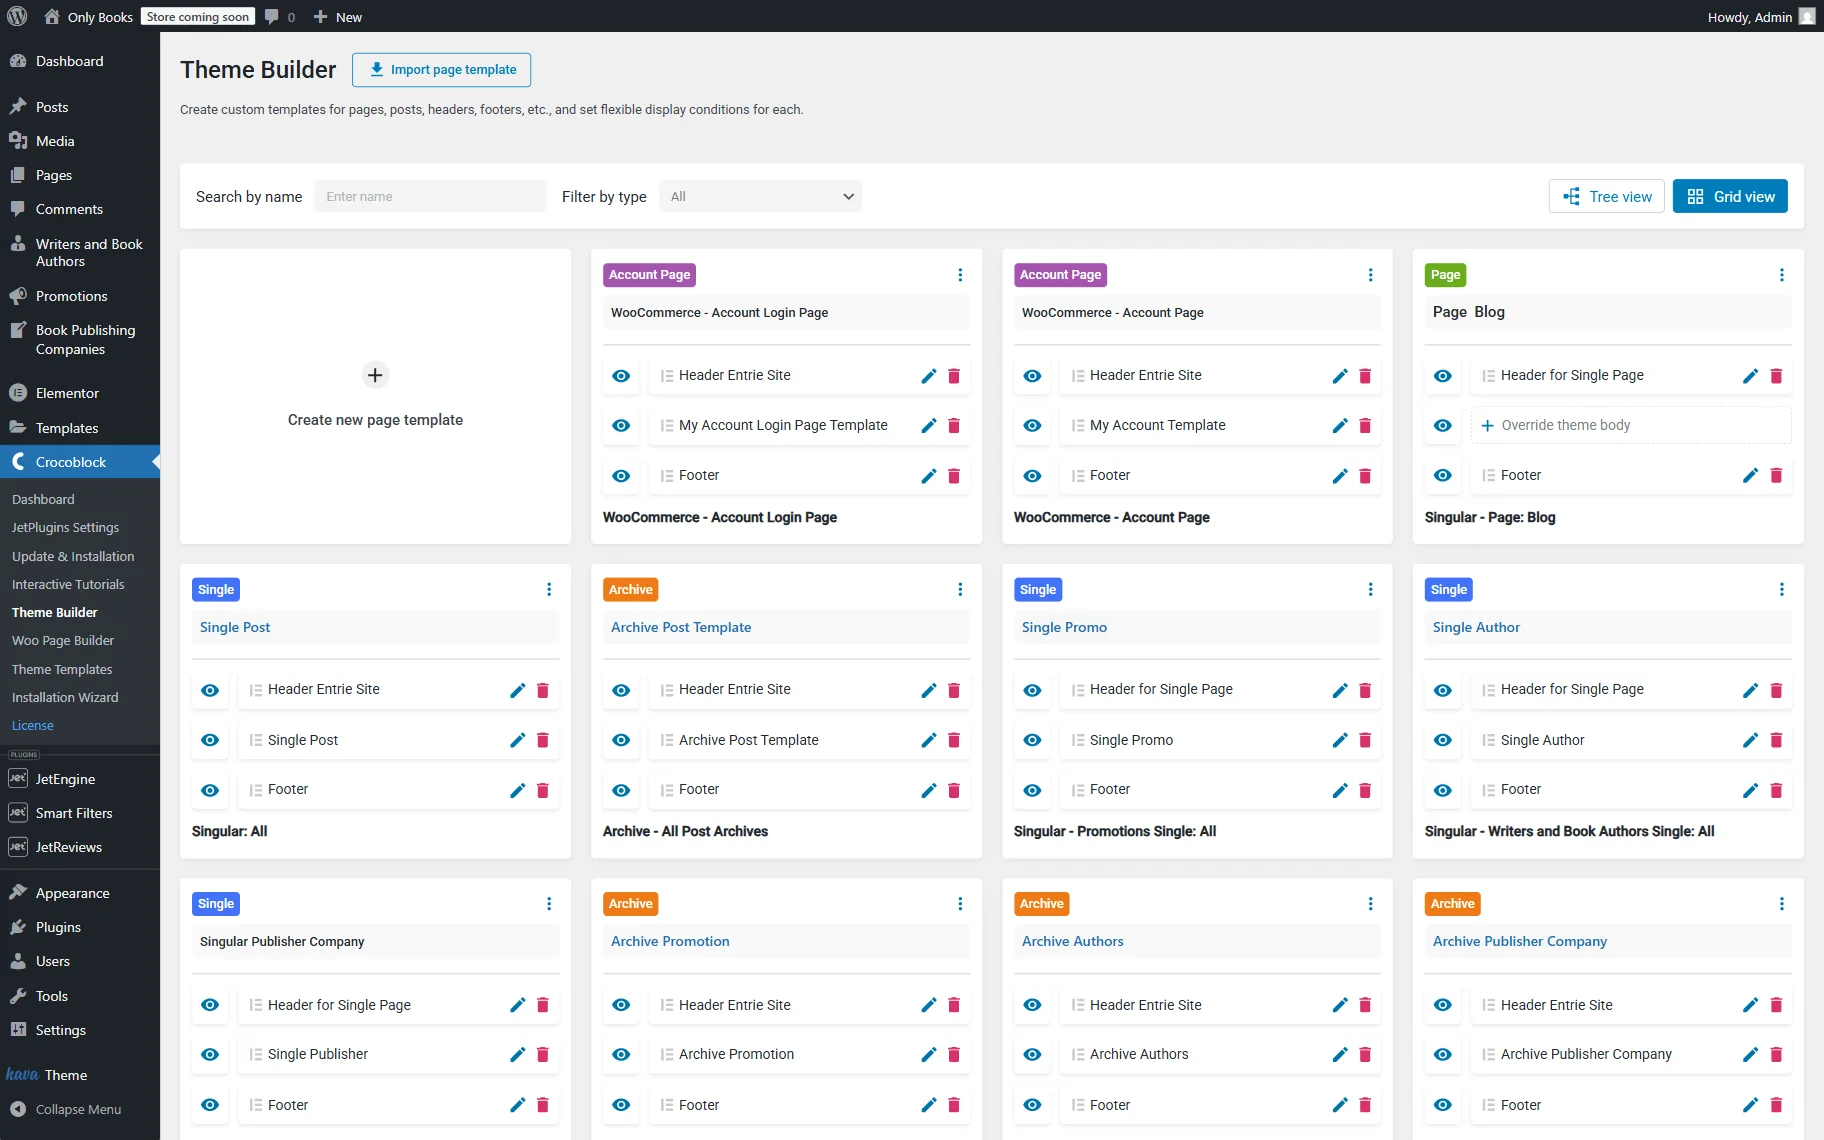
Let’s add a created menu to the header. For this purpose, we will use the JetThemeCore plugin and its Theme Builder.
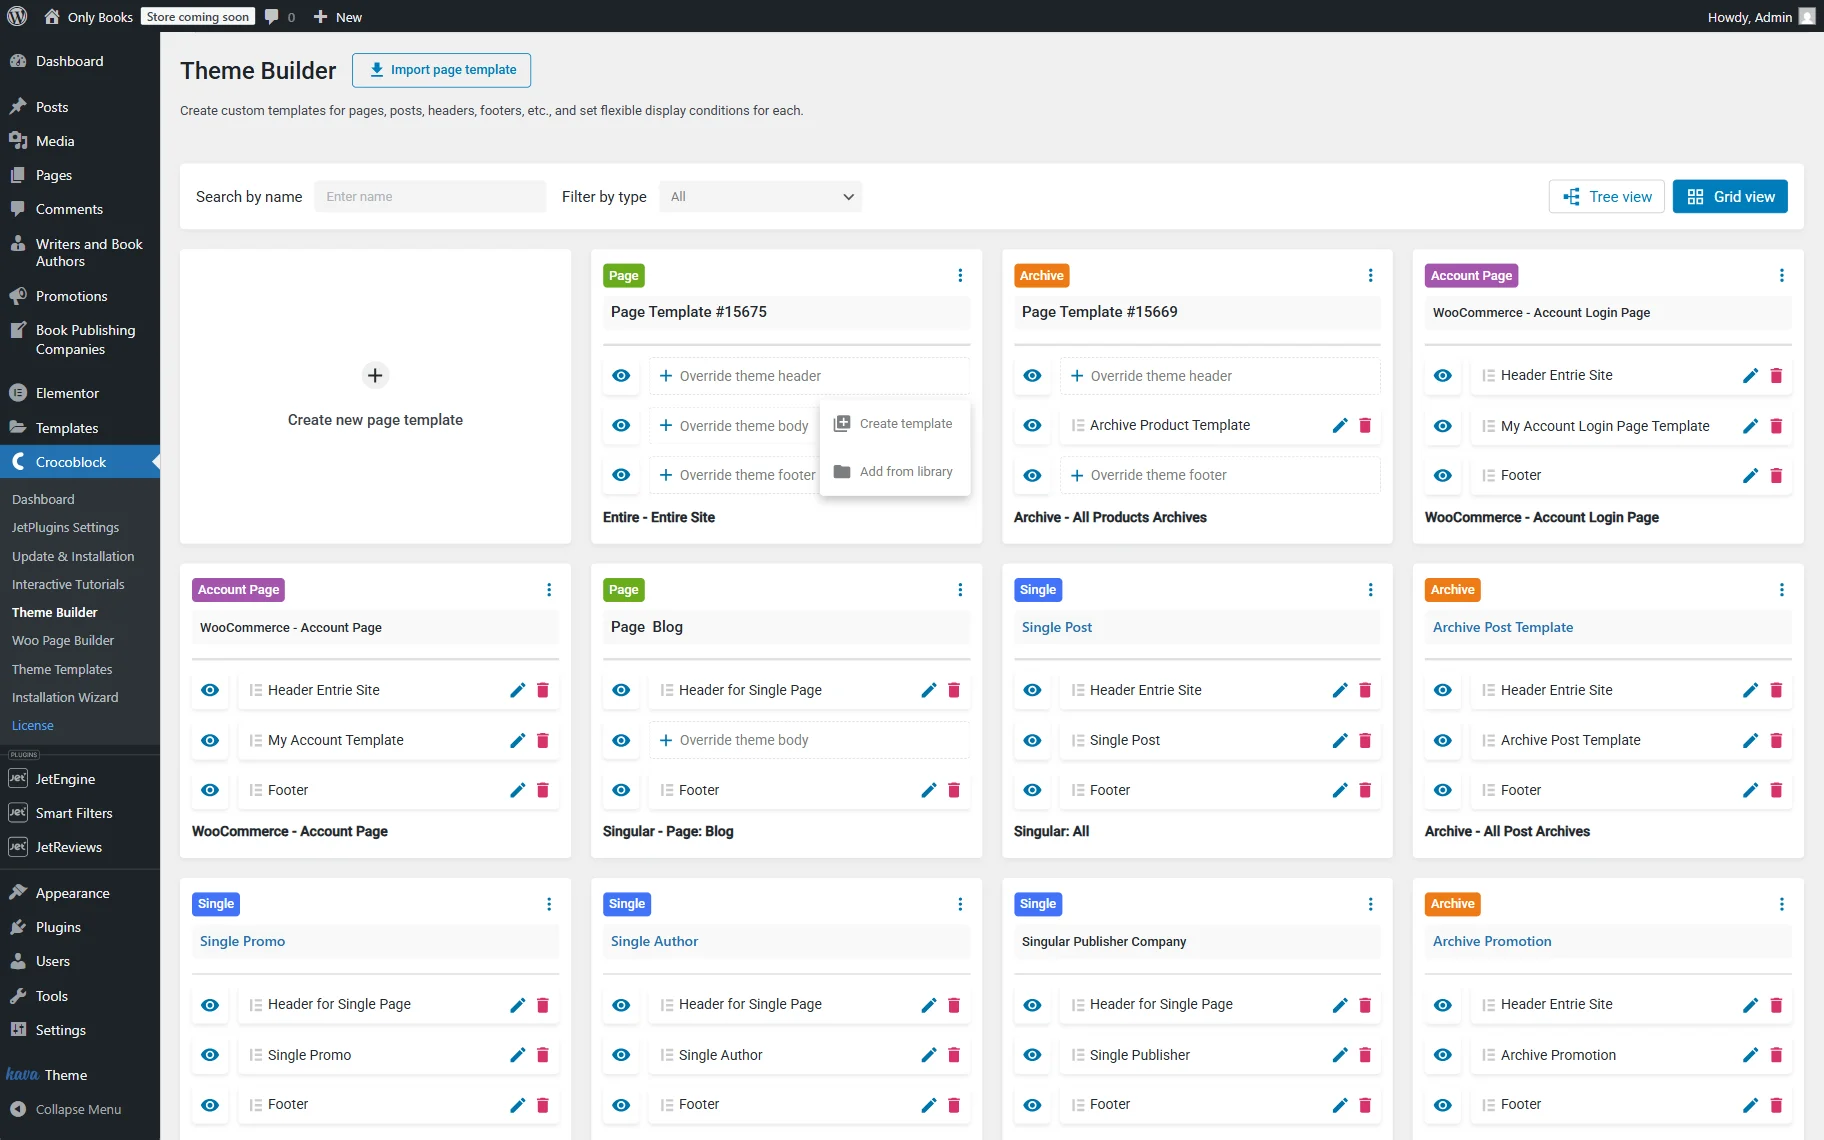
By proceeding to the WordPress Dashboard > Crocoblock > Theme Builder, click on the “Create new page template” button to build a new theme template or select a ready one.
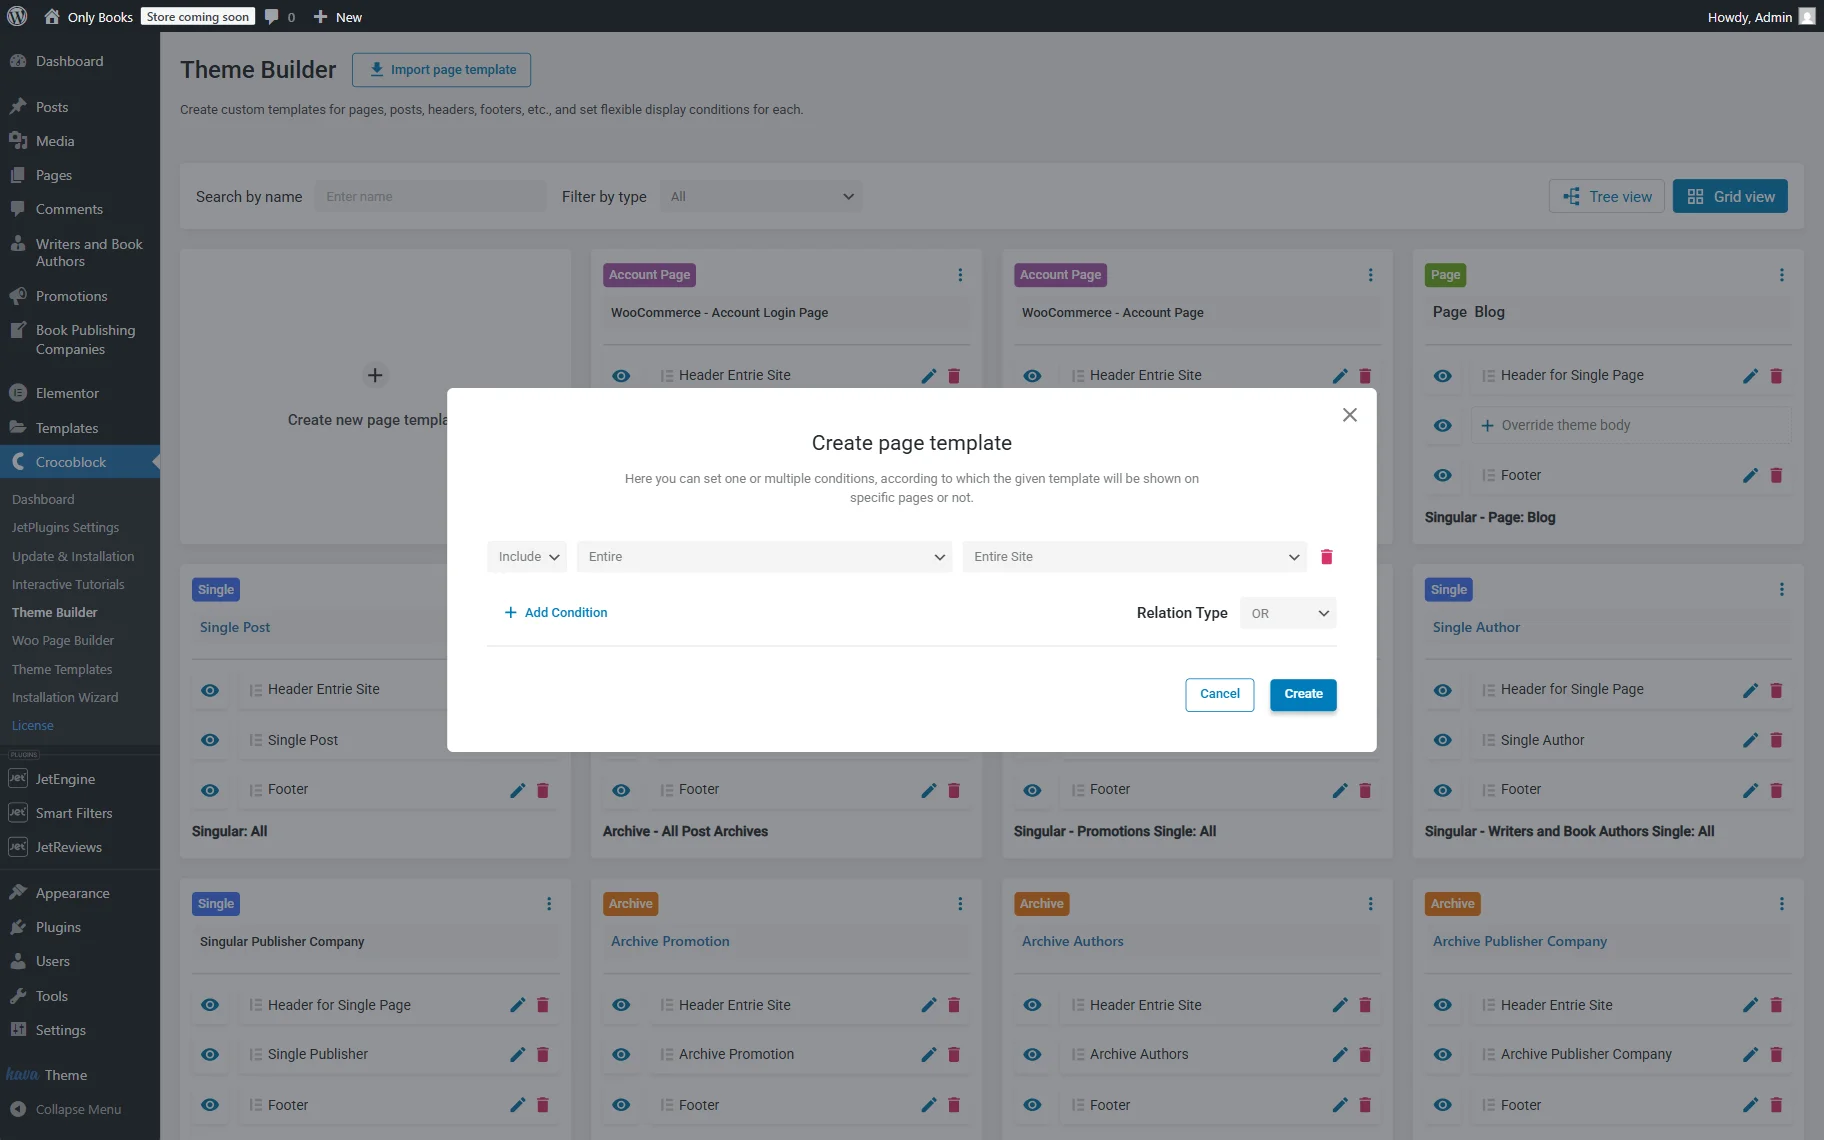
If you create a new template, set up the conditions for the template by clicking the “Add Condition” button and selecting the needed options (for example, here we leave the default “Include,” “Entire,” and “Entire Site” options).
Press the “Create” button.
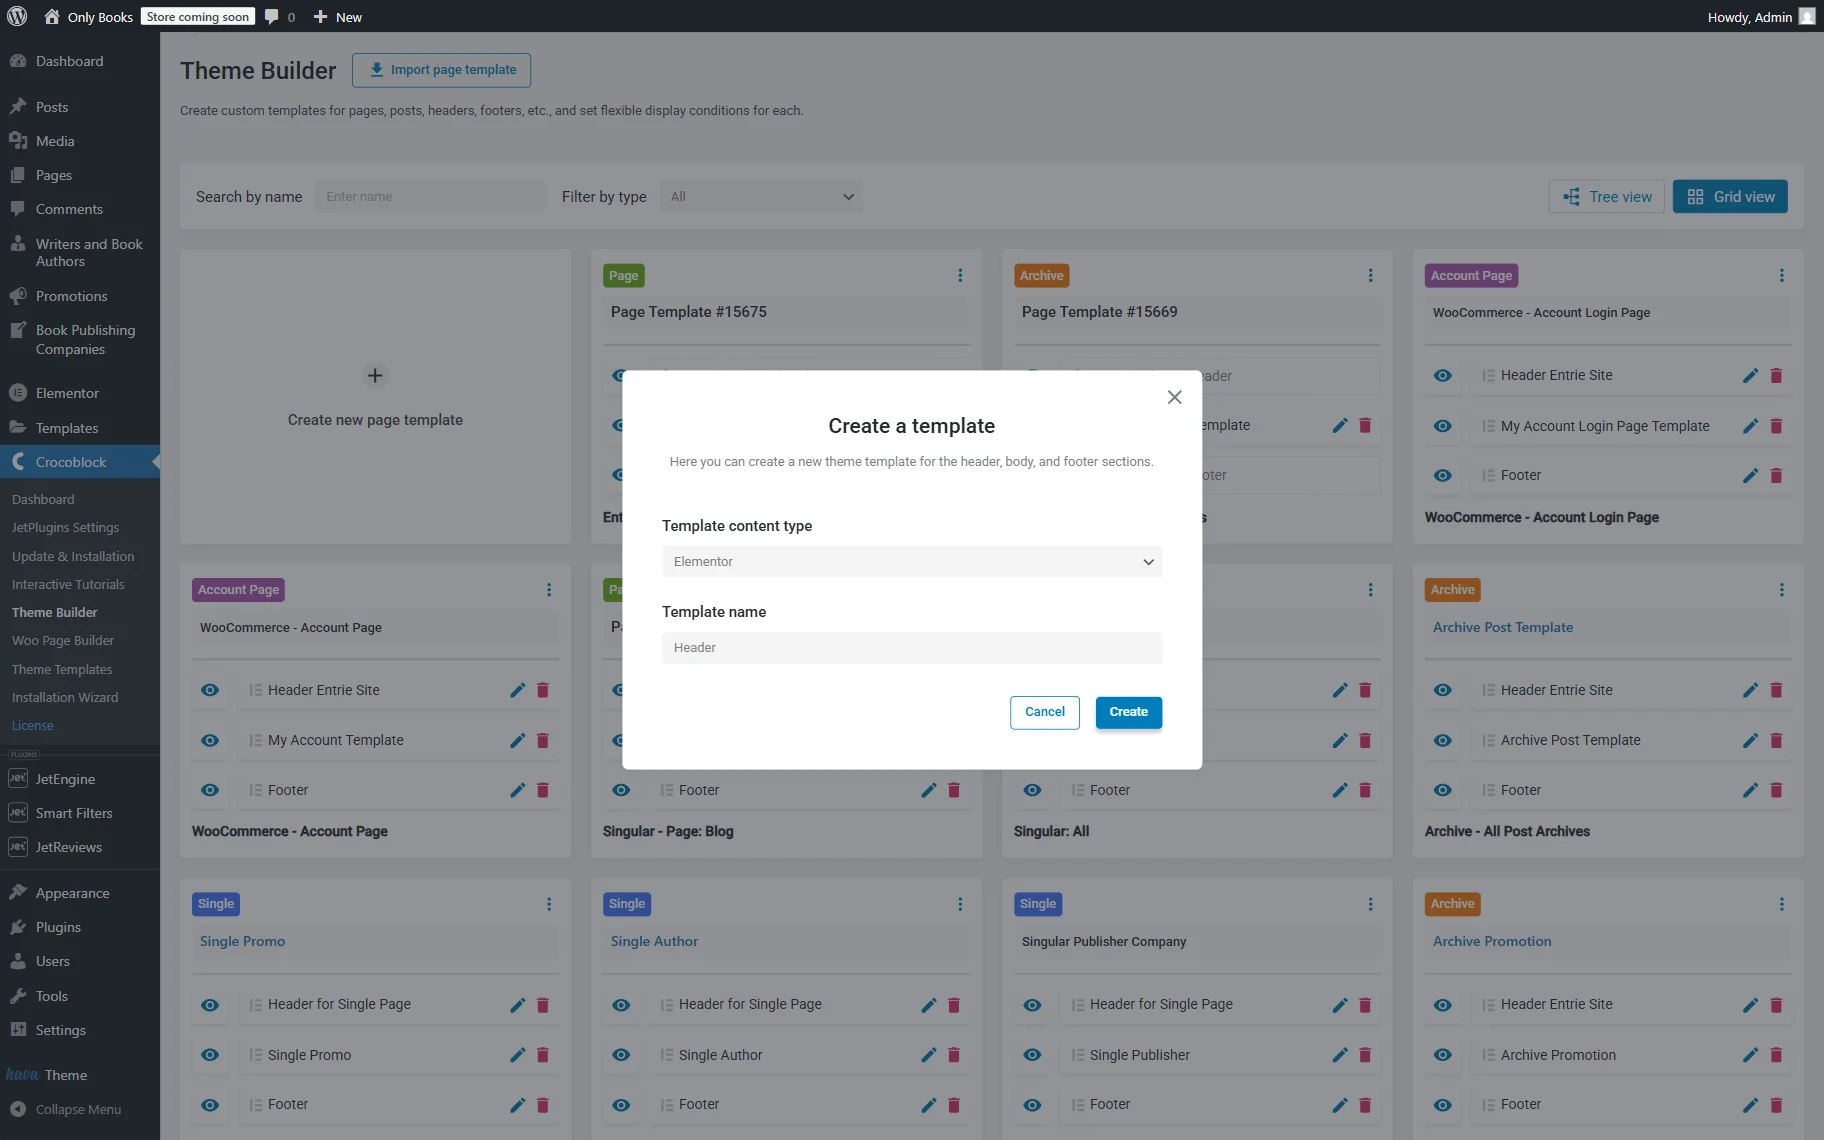
In the new template, click the “Override theme header” button, and if you create a new header, click the “Create template” button.
In the Create a template pop-up, select the preferred Template content type (we chose “Elementor”) and set the Template name (we set it to “Header”).
Click the “Create” button to proceed to the header template editor.
In the editor, find the Mega Menu widget and place it on the template.
Pick the Menu you have built earlier and adjust its settings.
We change the Animation to “Fade,” Sub Menu Trigger to “Click,” Mega Container Width Type to “Selector”, and set the Selector itself to “.elementor”.
Also, we deactivate icons and adjust the style settings.
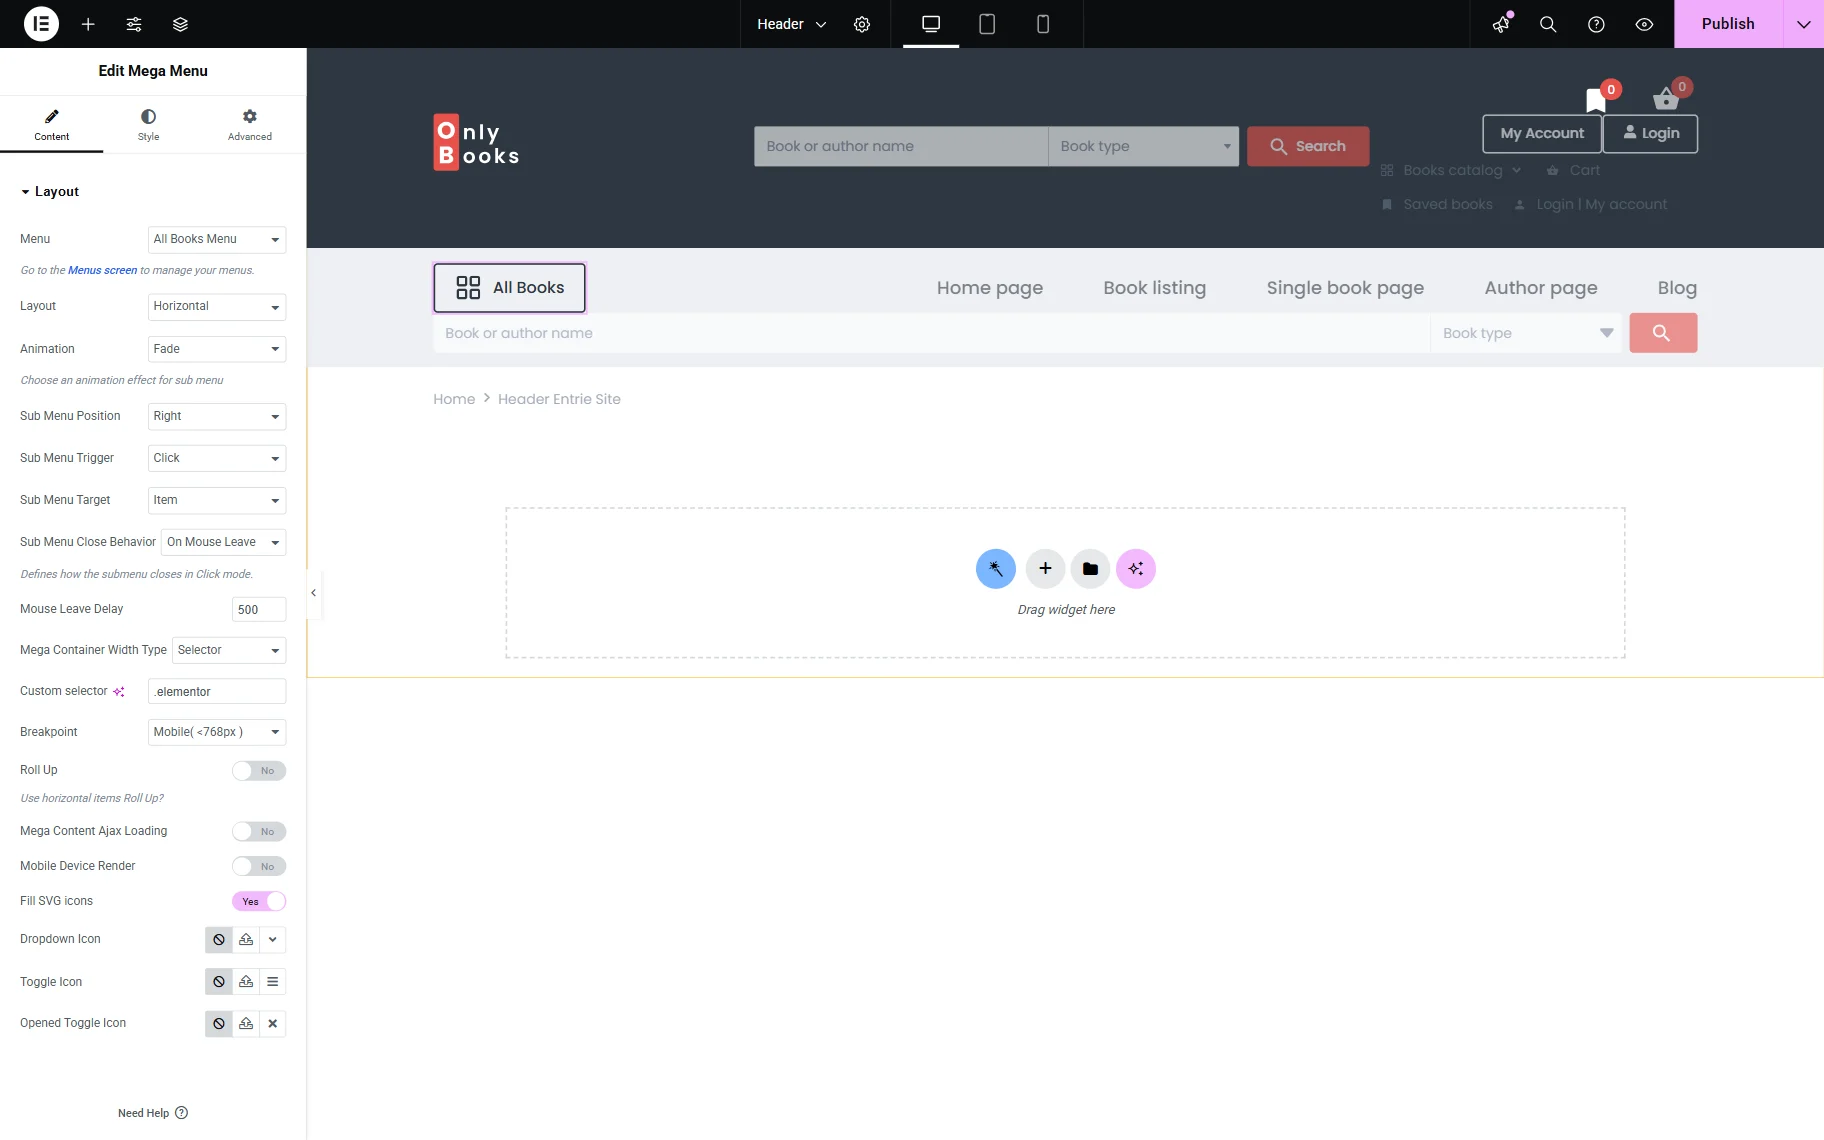
Add the other needed widgets, and once the template is ready, press the “Publish” button.
Check the Result
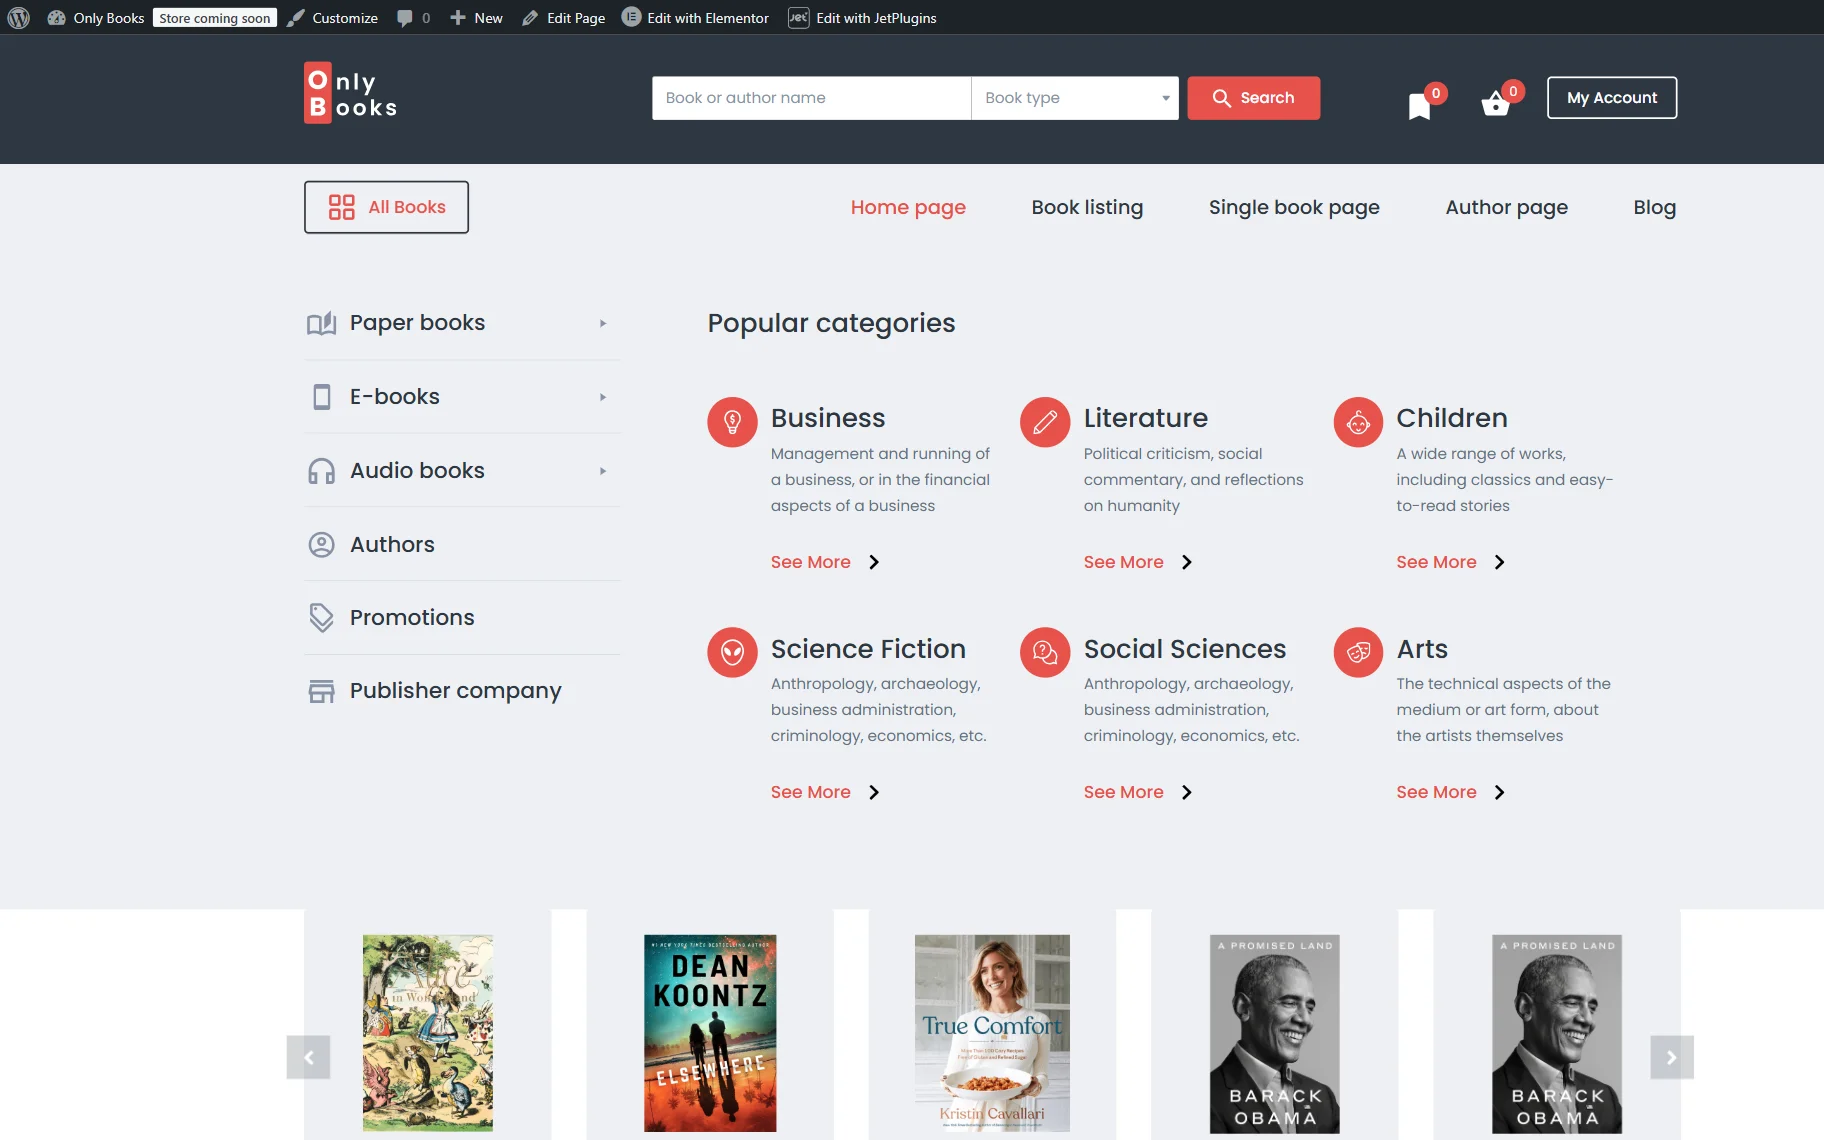
Open one of the pages you assigned the header to to view the results. For instance, we open the home page as we have assigned the header to the entire website.
The menu you’ve created should now be displayed in the header. In our case, it can be accessed via the “All Books” button.
As you can see, a vertical mega menu opens to display mega content when you hover over the items.
That’s all. Now you know how to create a vertical mega menu for a WordPress bookshop site, like in the JetMenu plugin demo page.