
How to Add Filters for WooCommerce Products to a Classic Theme's Sidebar
From this guide, you will find out how to add the filters from the JetSmartFilters plugin for the WooCommerce products pages sidebar in your WordPress theme.
Before you start, check the tutorial requirements:
- WooCommerce plugin installed and activated
- JetSmartFilters plugin installed and activated
In this tutorial, we will go through the process of adding filters to the WooCommerce shop page sidebar step by step.
In the described case, we will work with the Astra theme’s sidebar; however, you can use any other popular classic theme that supports sidebars.
Build a Filter
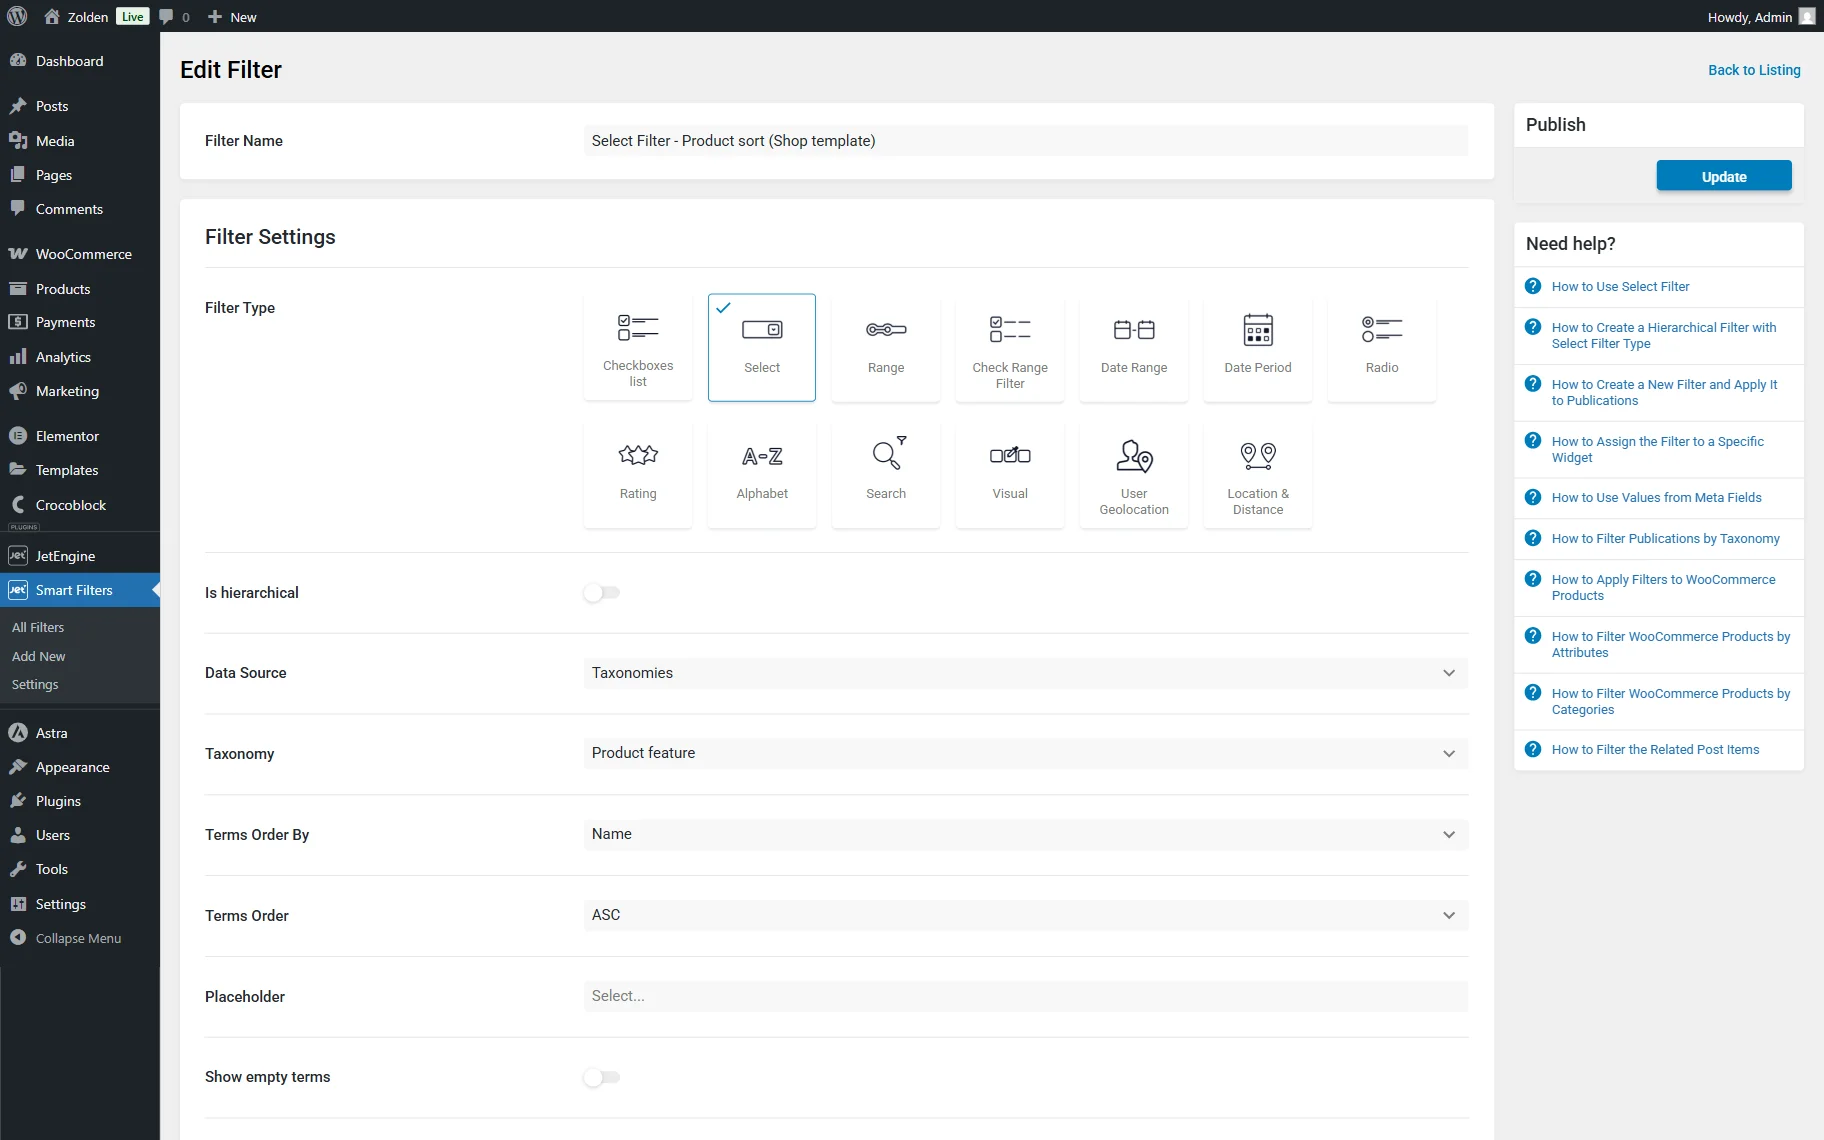
First, go to WordPress Dashboard > Smart Filters > Add New to build the needed filter. You can select any preferred Filter Type; for example, we create a “Select” one.
Adjust the filter settings. In this case, we select the “Taxonomies” as the Data Source and “Product feature” as the Taxonomy.
Once the filter is ready, press the “Update” button.
Customize the Sidebar
Now, head to the WordPress Dashboard > Appearance > Widgets tab.
Here, find the WooCommerce Sidebar tab and unroll it.
Initially, we will add a Heading block with the “Shop by” text.
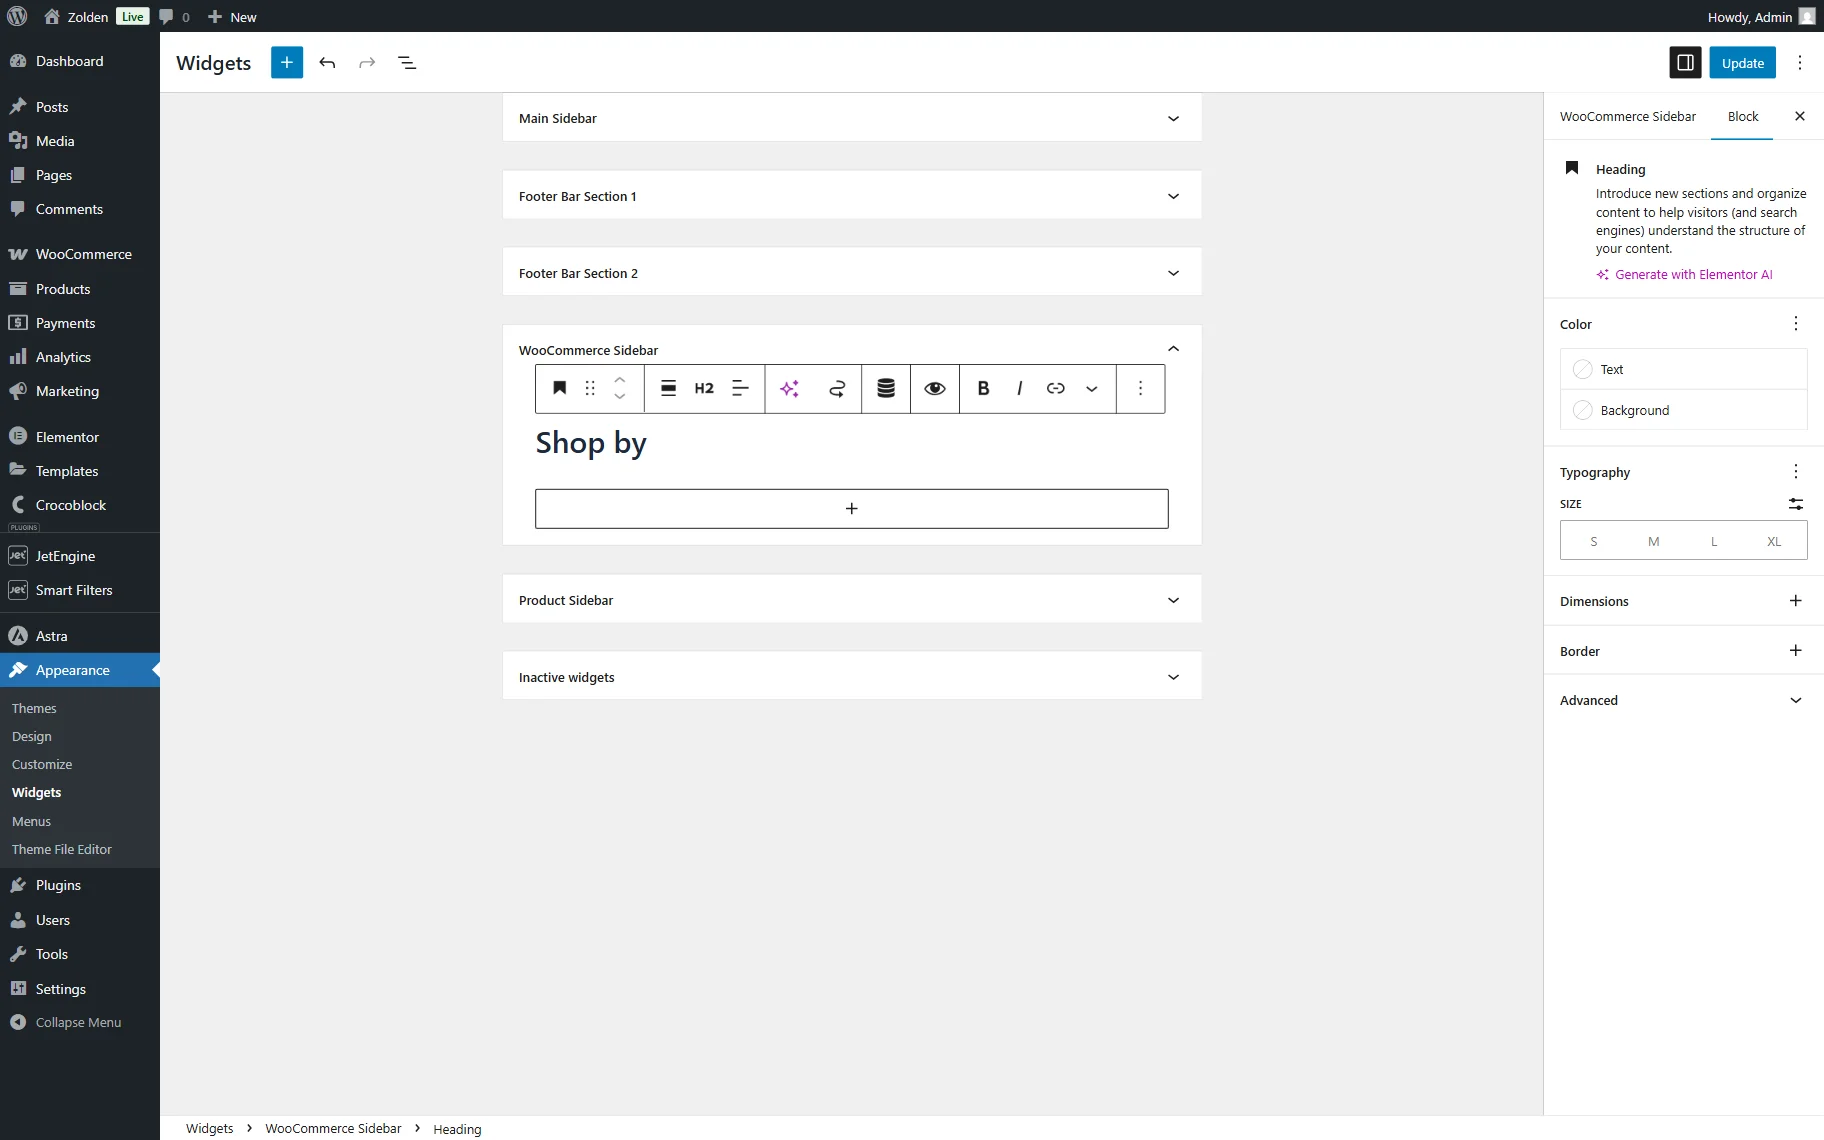
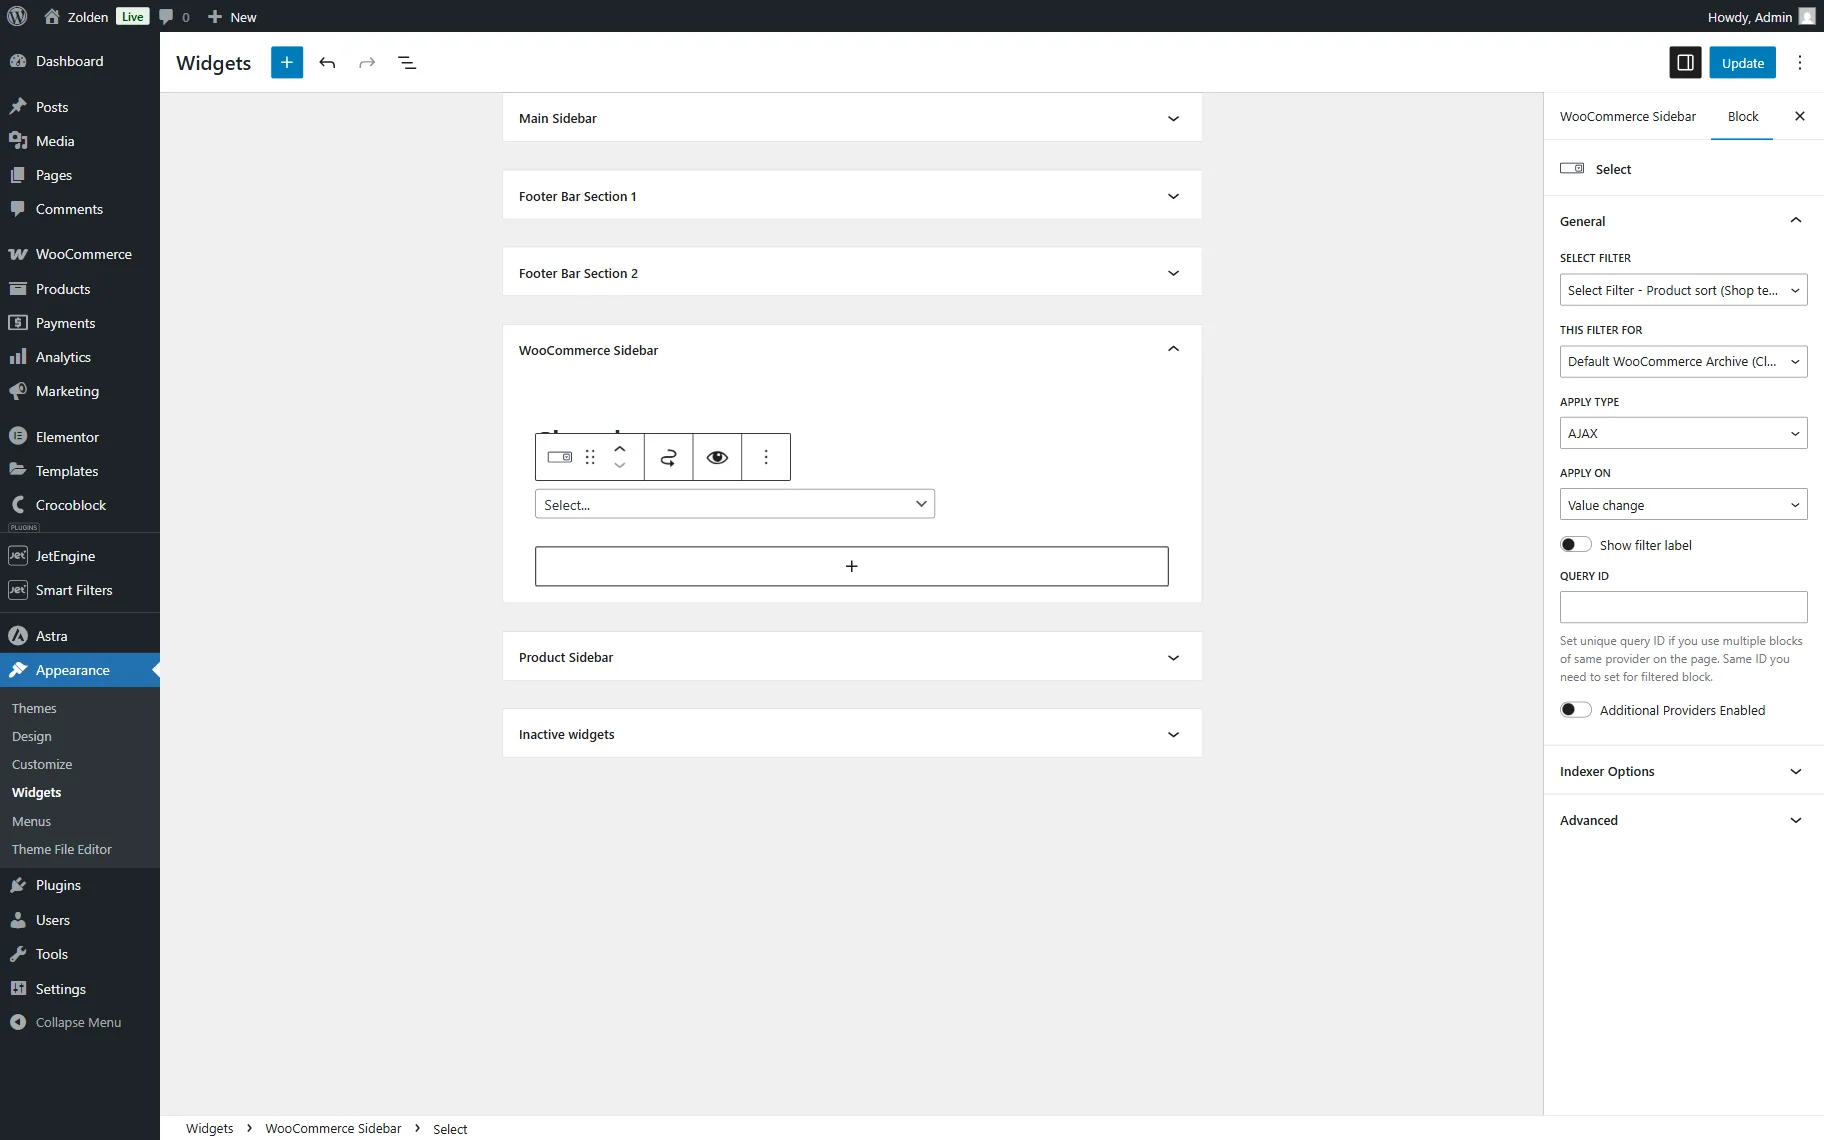
Next, add the filter block. In our case, it’s the Select Filter block accordingly.
In the General settings, pick the just-built filter in the SELECT FILTER dropdown and the “Default WooCommerce Archive (Classic)” option in the THIS FILTER FOR field.
Adjust the following settings fields if needed.
Once all the desired blocks are added to the section, press the “Update” button.
Set Up Compatibility with Pagination
Now, you should go to the WordPress Dashboard > Smart Filters > Settings directory and open the Compatibility tab.
Here, pay attention to the Pagination Container CSS Selector and Pagination Item CSS Selector. You can read more about these settings in the Compatibility chapter of the Filters Overview.
If you work with Astra as we do in this tutorial, there is no need to change the values added in this field by default.
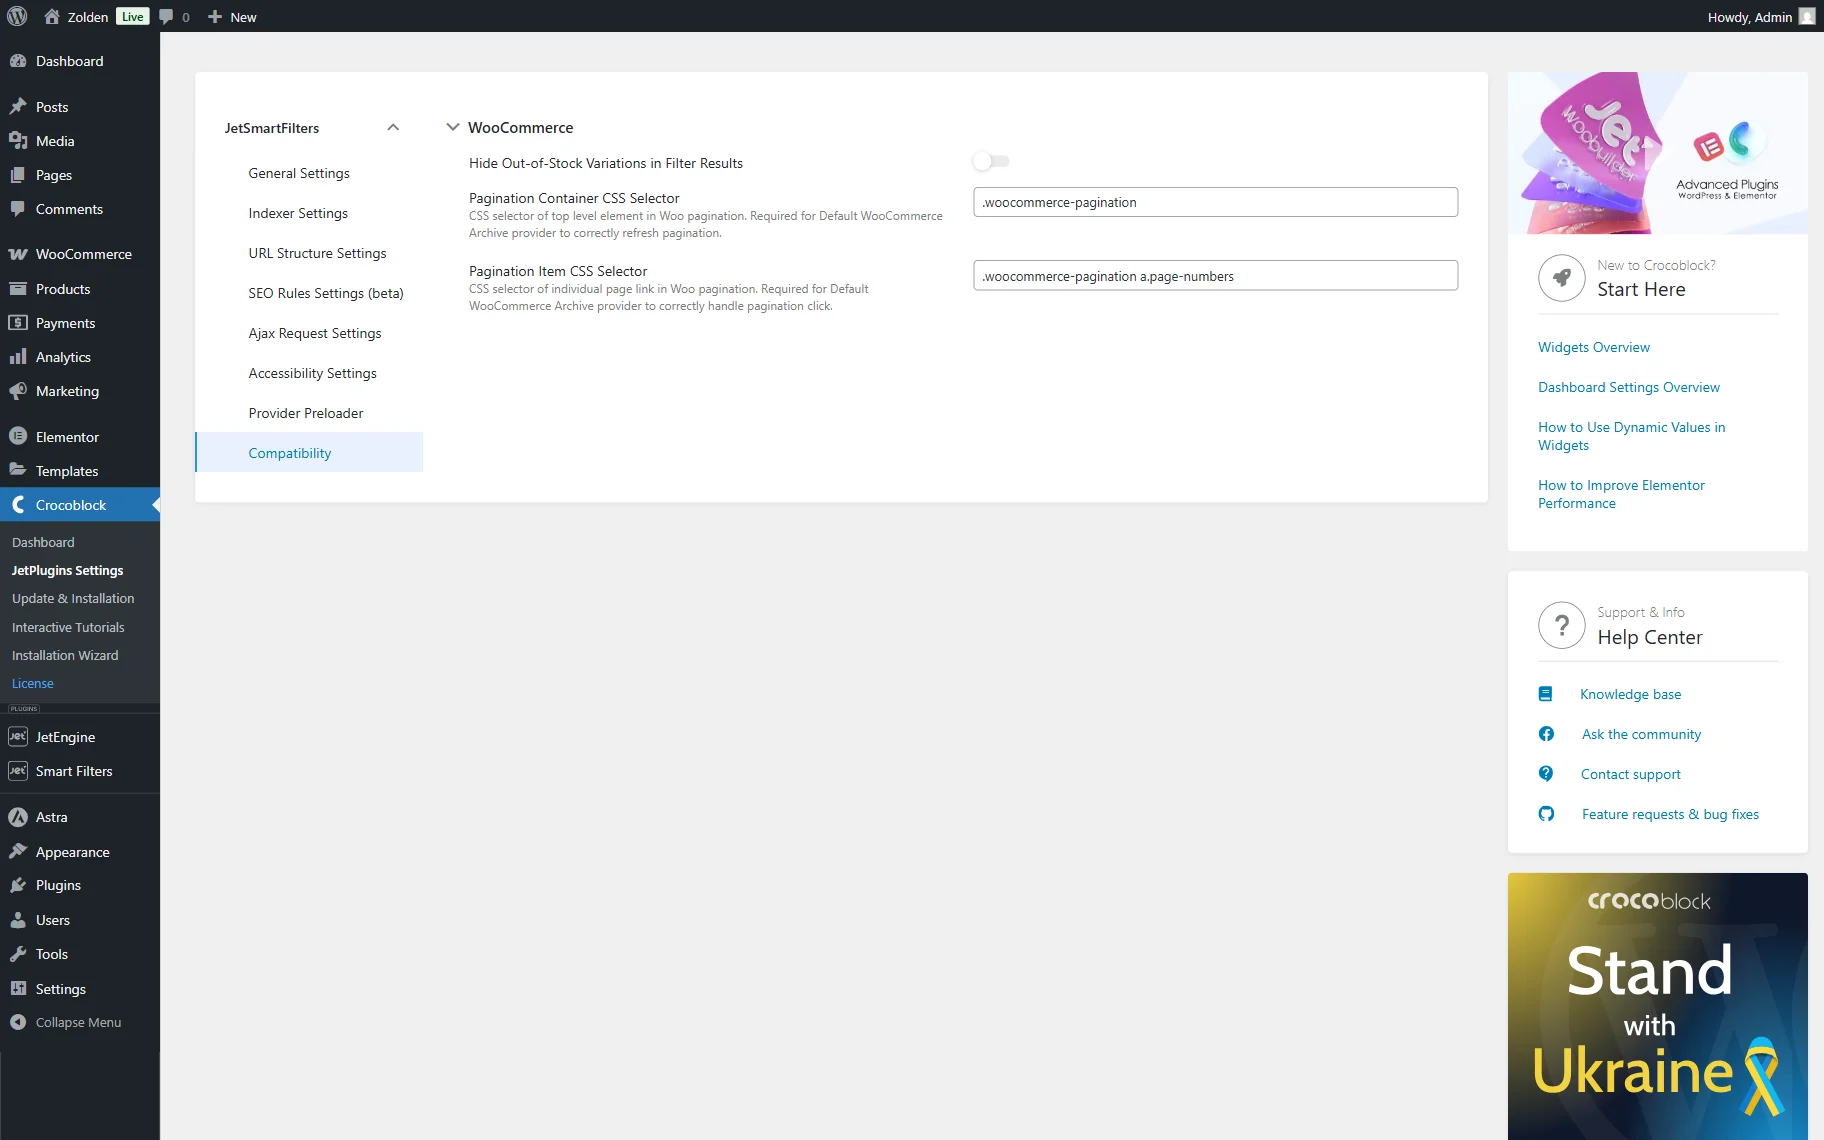
Although if you work with other themes, ensure to change the values to the needed ones.
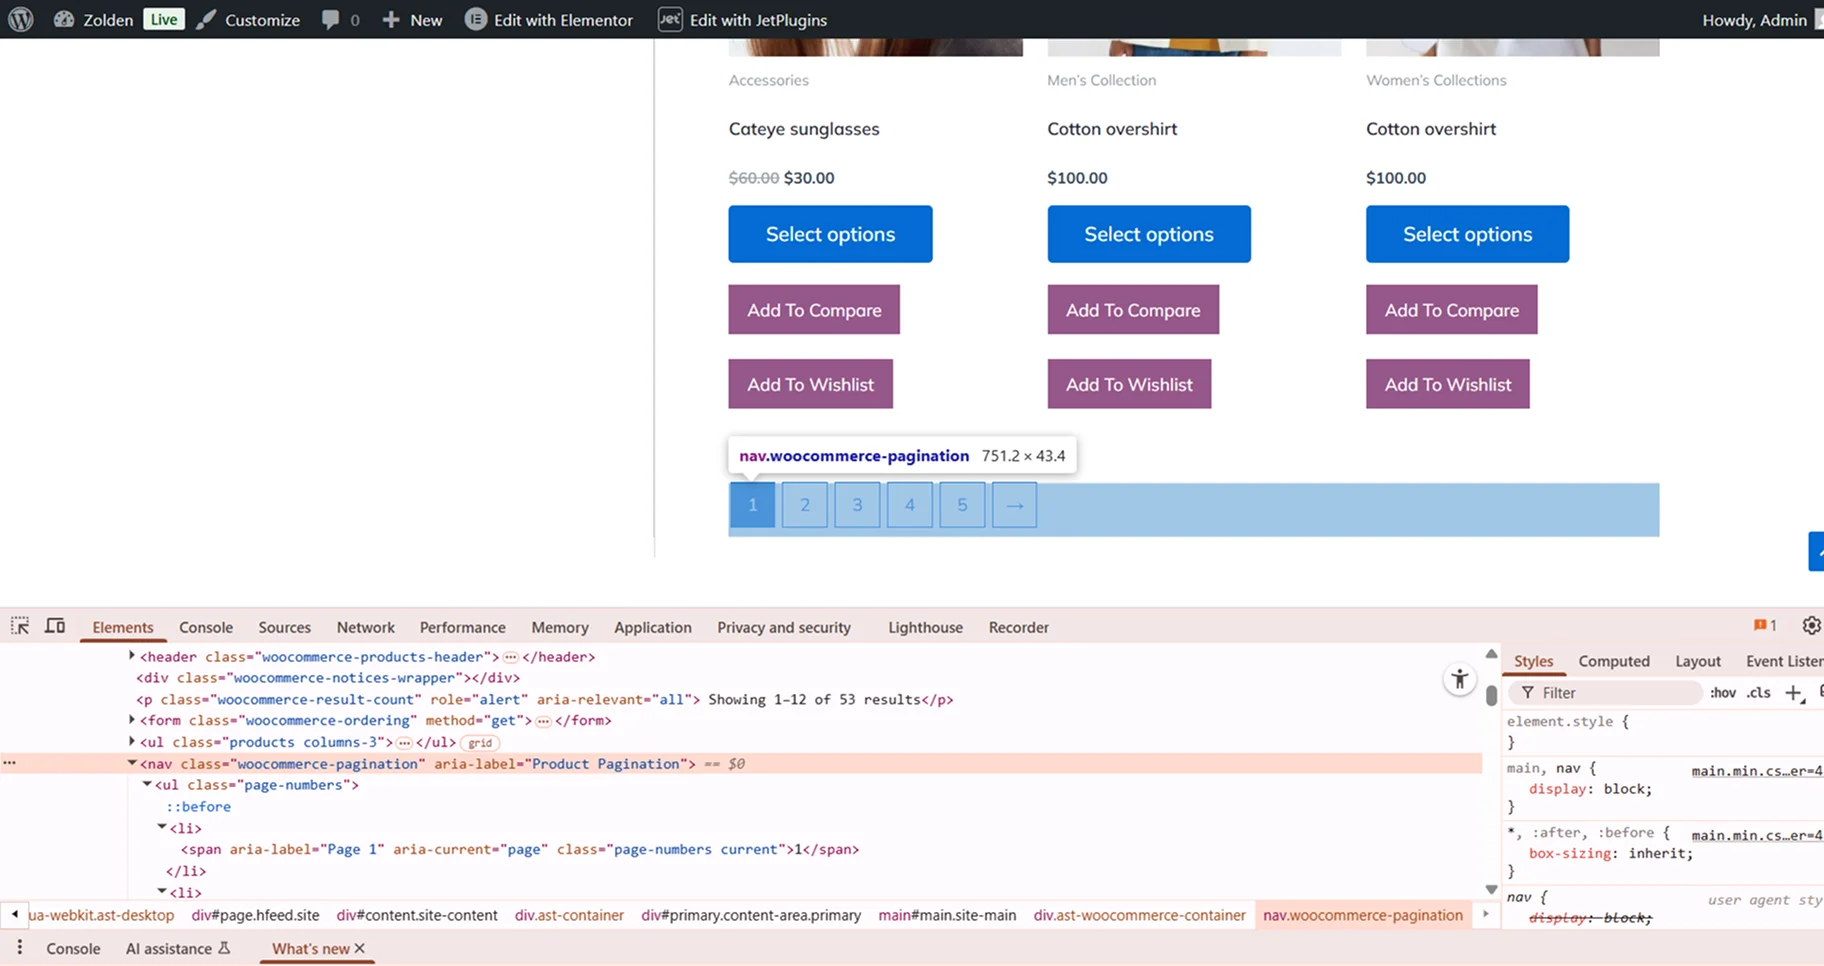
To check what values should be added to these fields, go to your Shop Page.
Here, open the Developer tools of your browser and select the pagination container to check its class. For example, in our case it’s “woocommerce-pagination”.
Copy and paste it in the Pagination Container CSS Selector of the Compatibility settings.
Next, on the Shop Page, select one of the pagination items and copy its class as well (here, “a.page-numbers”). Return to the Compatibility tab and paste the class in the Pagination Item CSS Selector field with the container class before it, so it looks like this:
.woocommerce-pagination a.page-numbers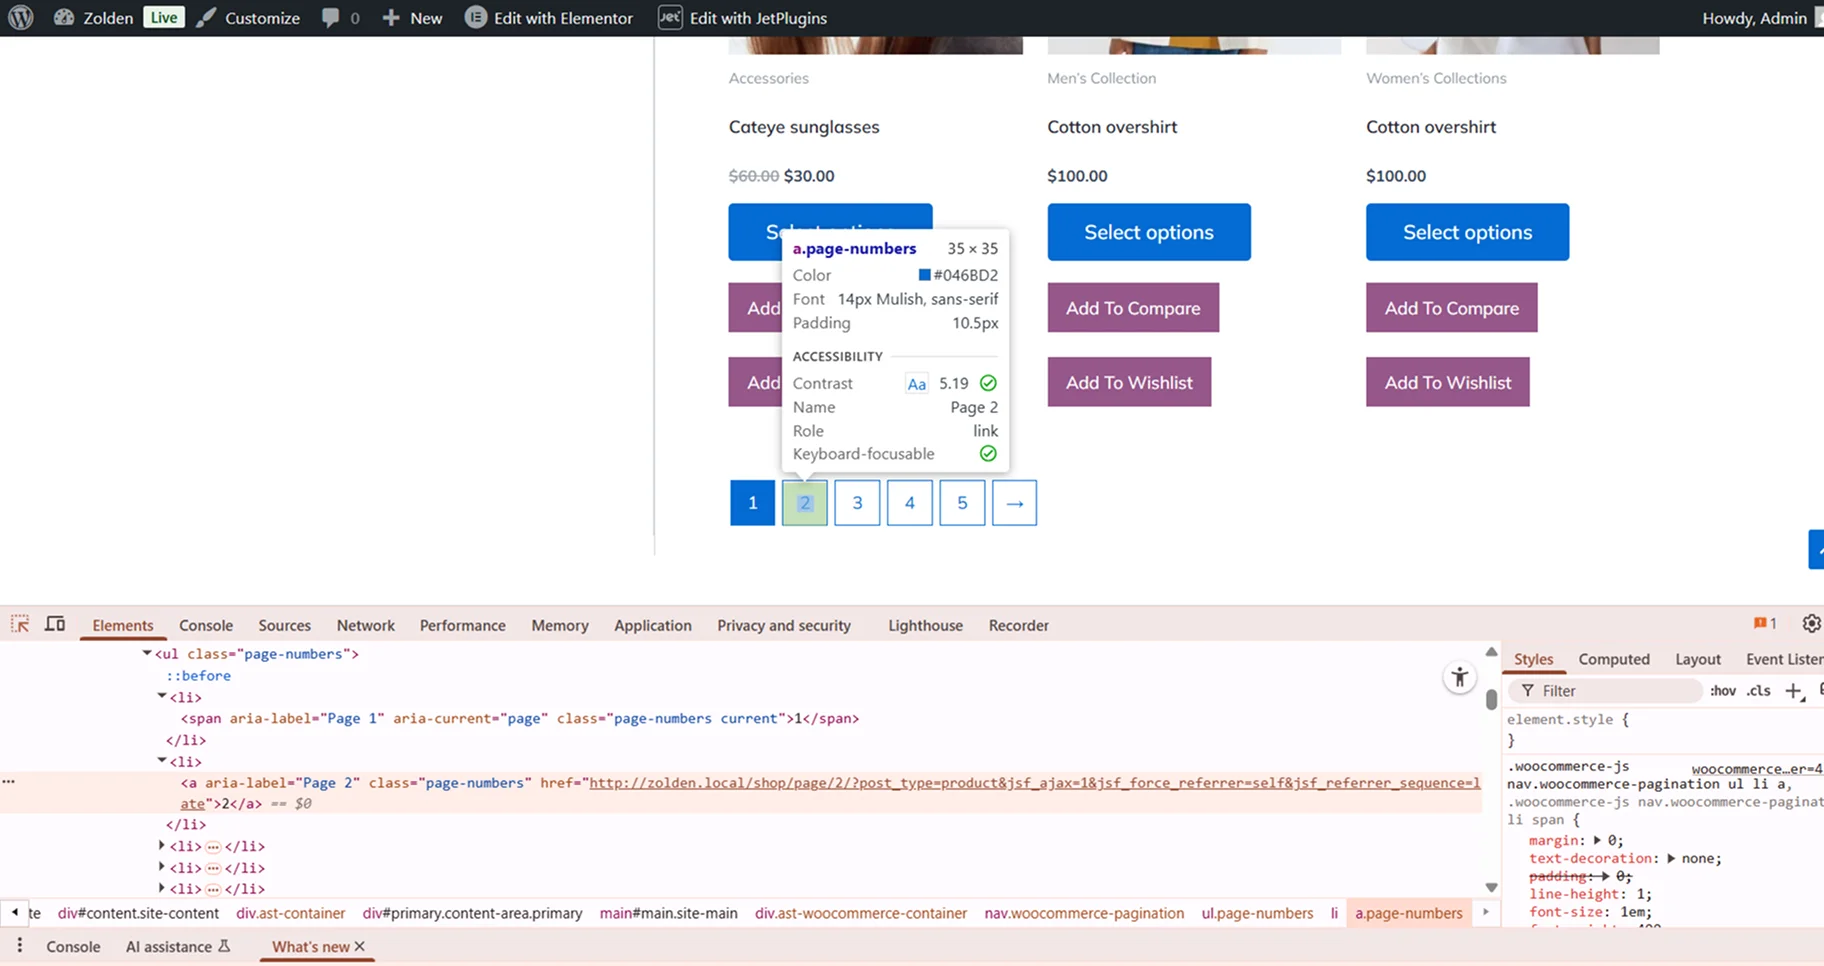
Adjust Shop Page
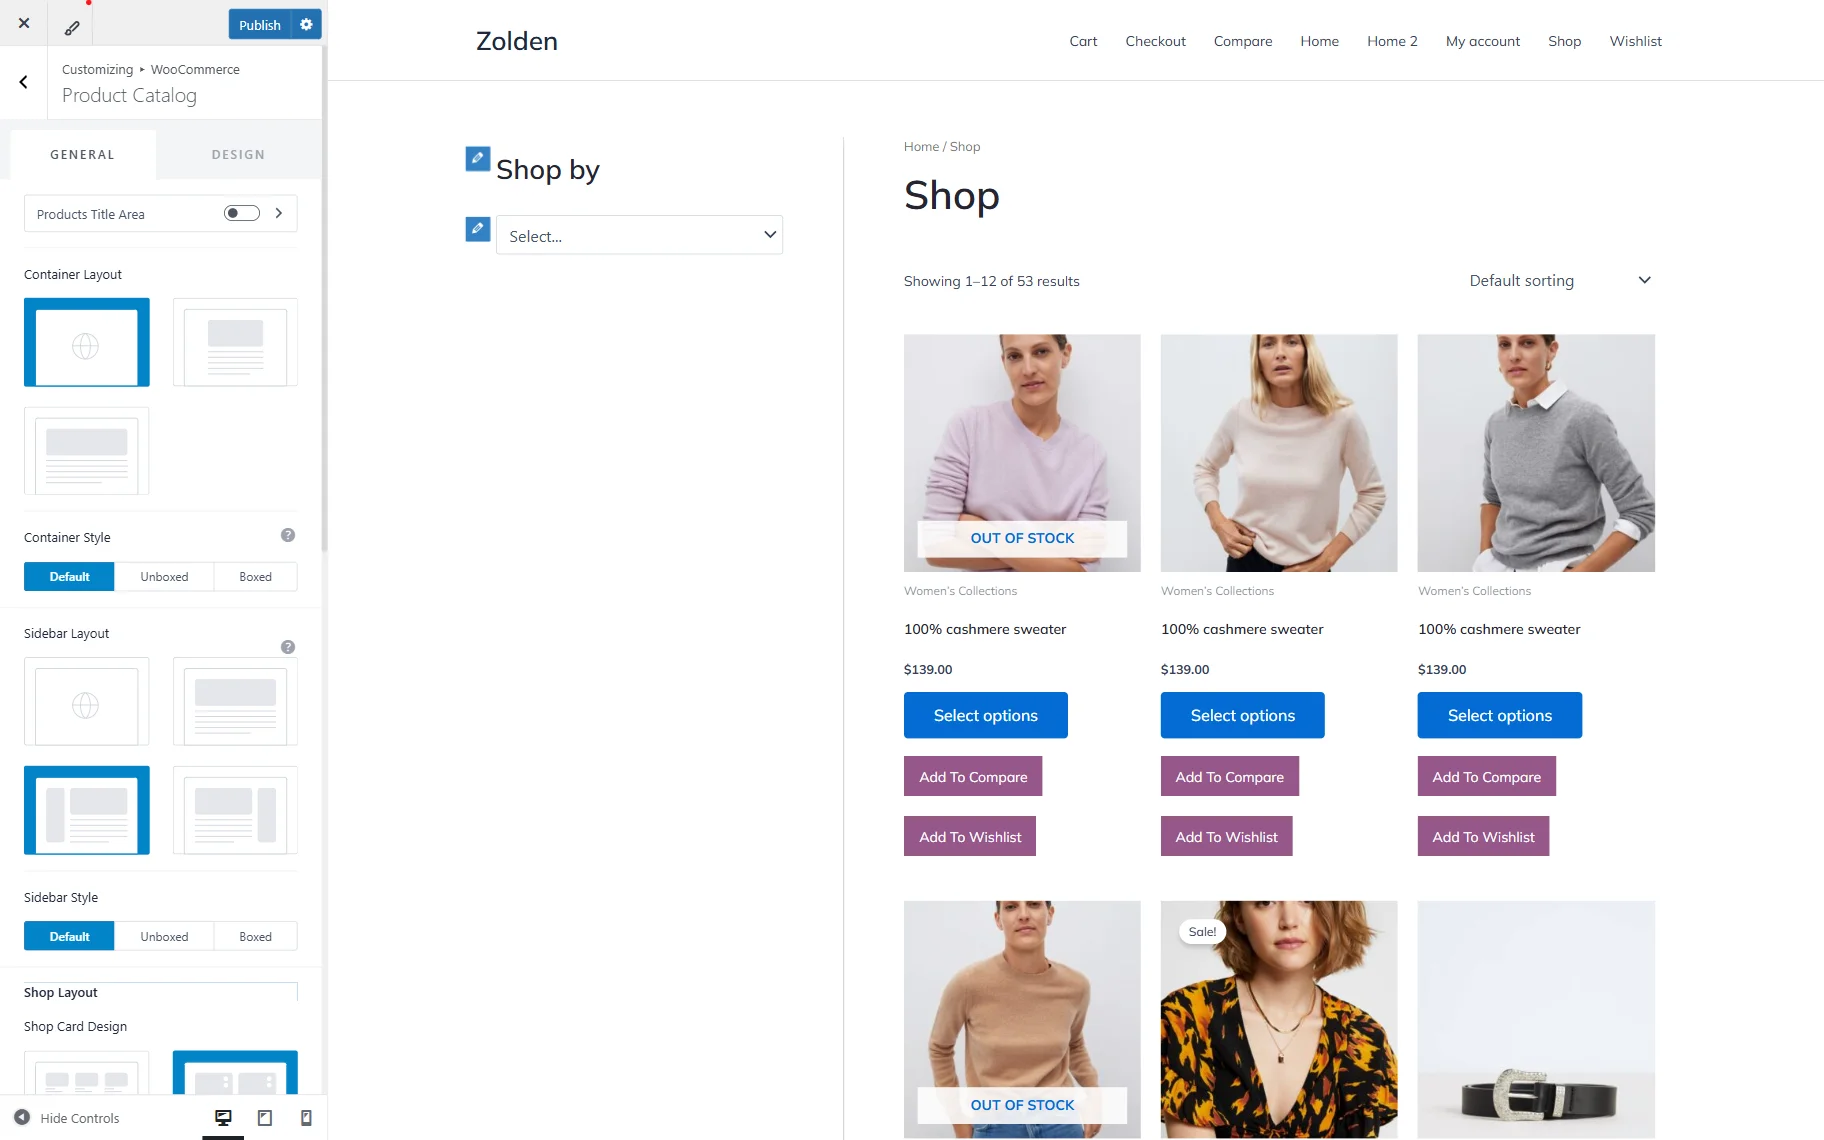
You can also adjust the Shop Page appearance if you haven’t done it before. To do so, go to the WordPress Dashboard > (Your Theme Name) > Customize page.
In the opened customizer, proceed to the WooCommerce and Single Product tabs.
Here, customize the layouts and other available settings, and when ready, press the “Publish” button.
Check the Result
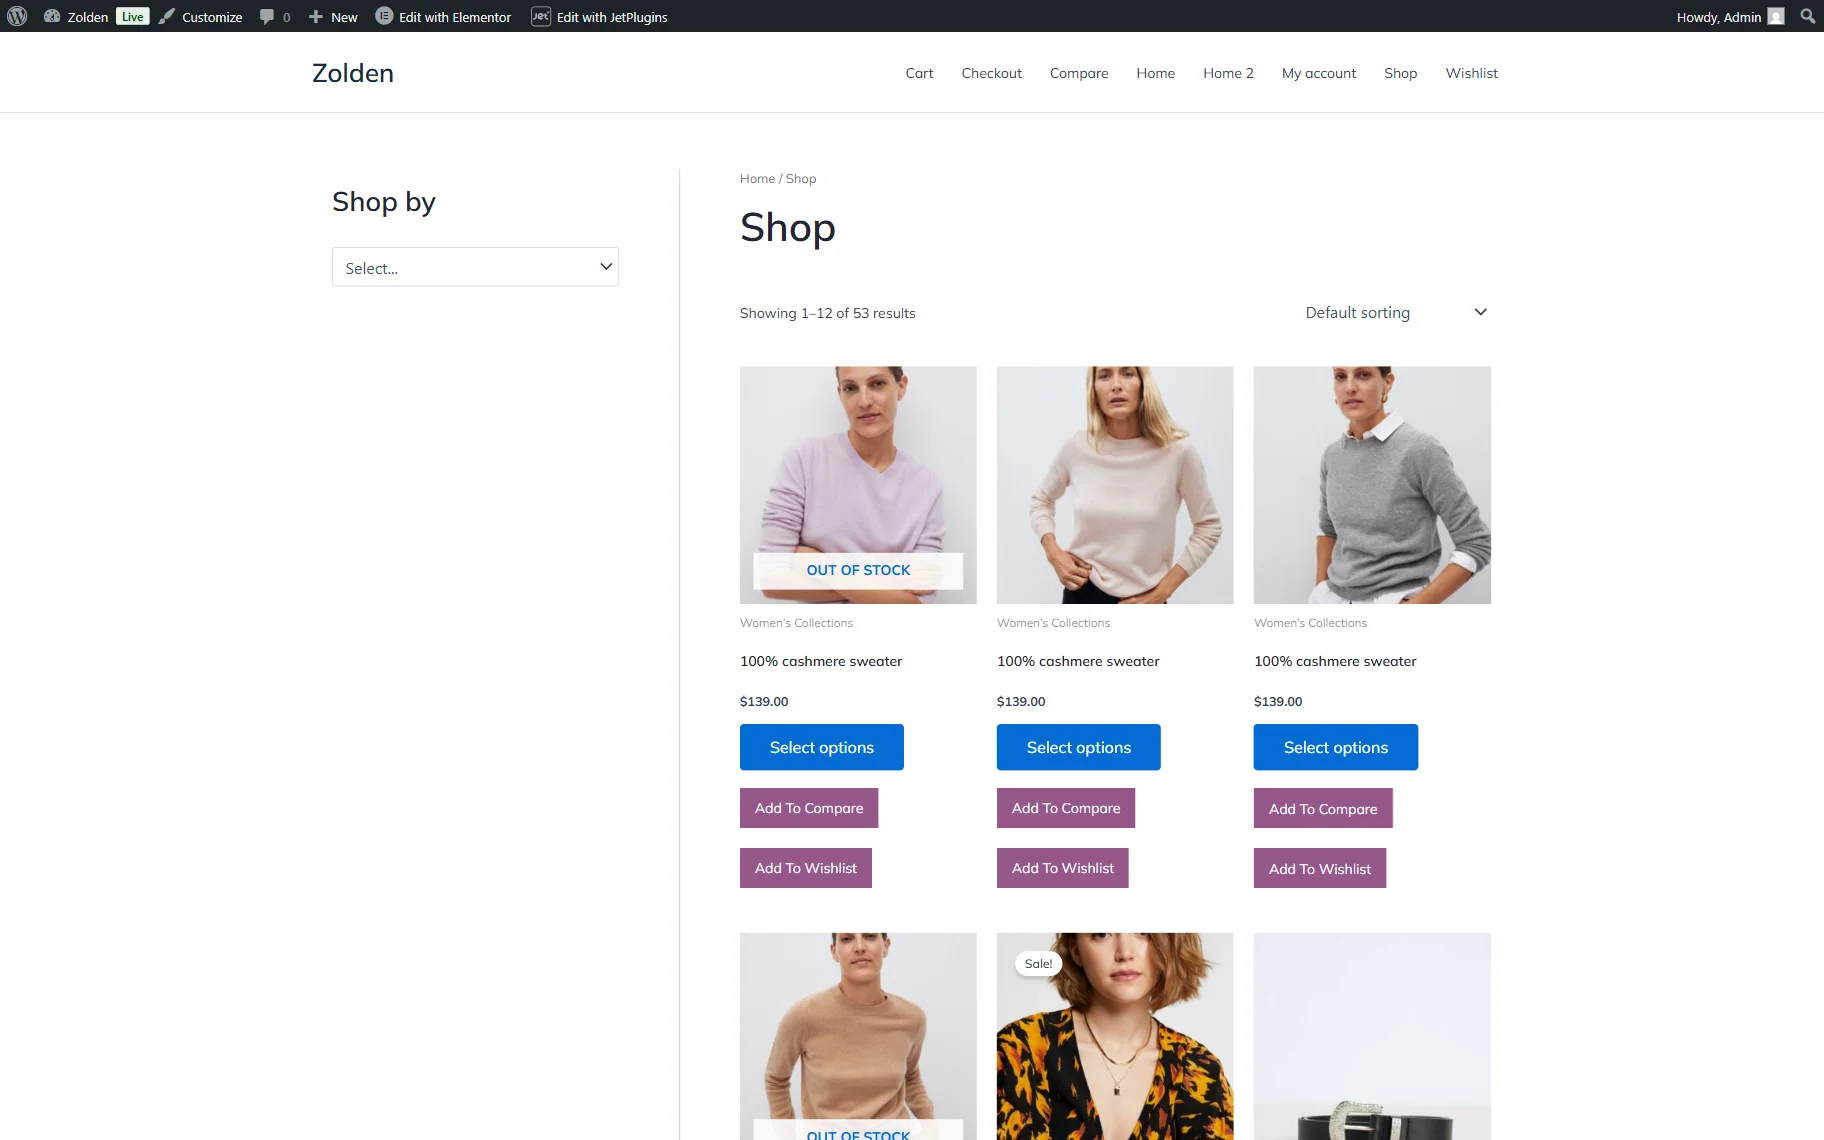
Now, you can open the Shop page on the front end to check the result.
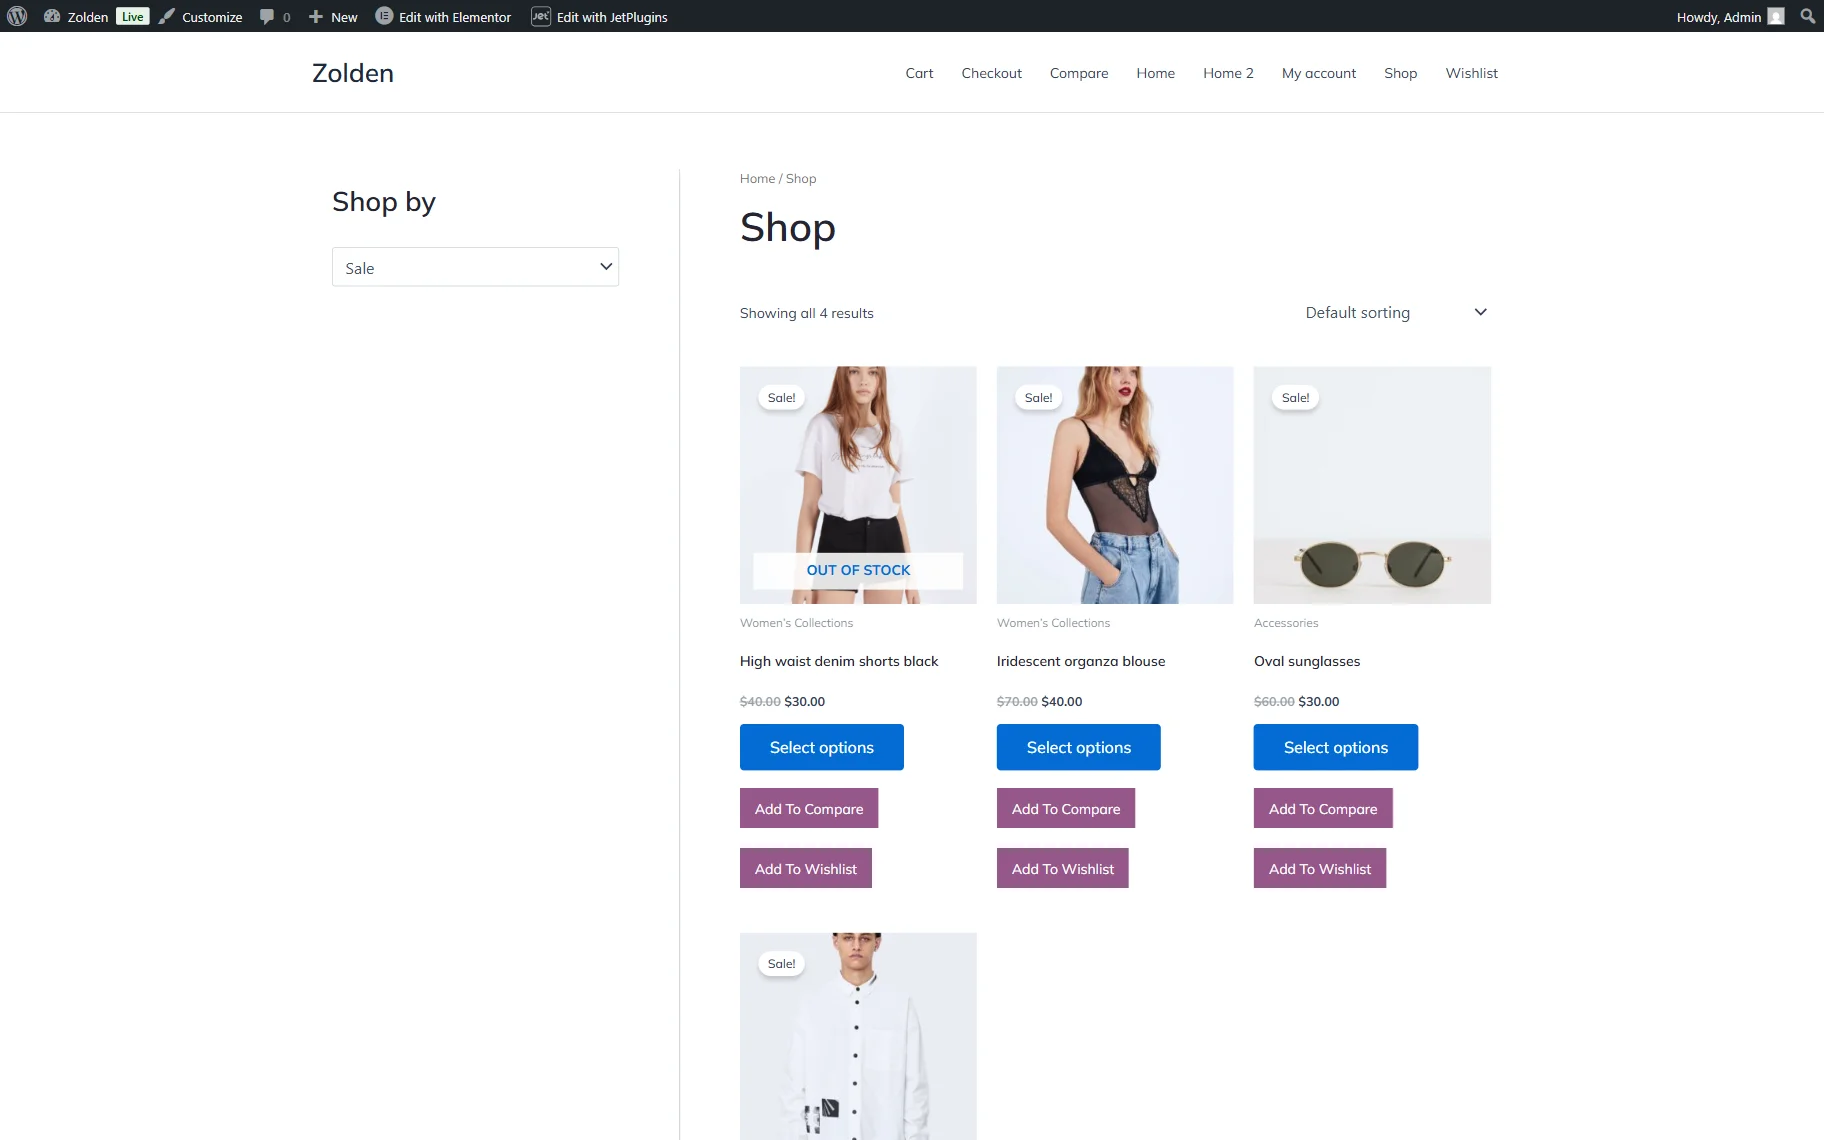
Here, you will see the added filter.
Select one of the options to check how the filter works. For example, we pick the “Sale” option and see the filtered products.
The filter works with the WooCommerce pagination, results counter, and sorting as well.
That’s all; now you know how to add JetSmartFilters filters for the WooCommerce products on the classic theme’s sidebar of WordPress websites.