Additional Providers List Option Overview
This tutorial will show you how to apply a JetSmartFilters filter to the widgets of several providers.
If you like Elementor Page Builder, it is possible that you have updated it to Pro and used some other tools made especially for it. In this case, there could be several widgets of different providers placed on the same page. And you may want to apply one filter to several of them. From this tutorial, you’ll learn how to filter the data of different providers’ widgets with the help of the JetSmartFilters plugin.
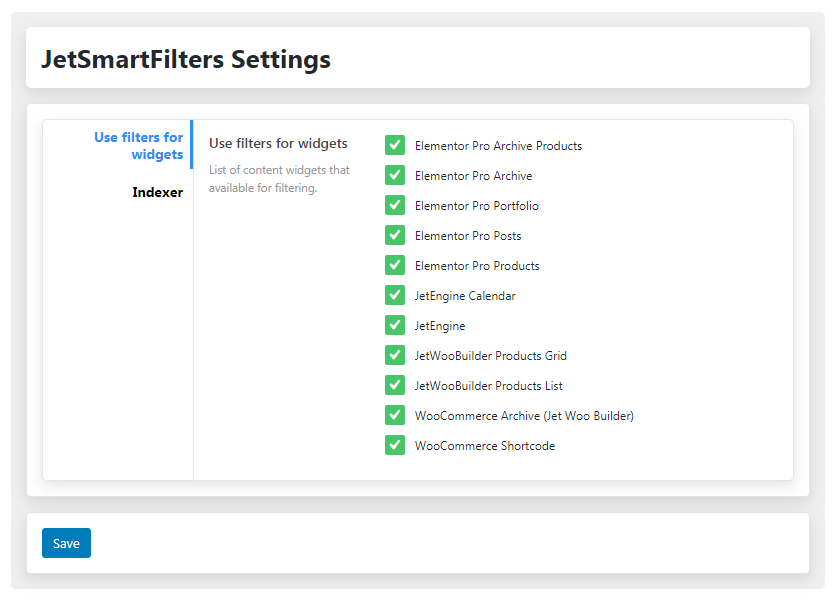
There is a limited list of providers that are compatible with JetSmartFilters. To find them, go to Elementor > JetSmartFilters Settings. There you will see the list of the available providers and can disable some of them that you don’t need.
For example, you can filter widgets from JetEngine, JetWooBuilder, and Elementor Pro at the same time. Now, let’s have a closer look at this process.
Preparation
Firstly, you need to create the content that you’ll be further filtering with the JetSmartFilters plugin. In this case, we will be filtering the posts displayed in the Listings Grid and Maps Listing widgets from the JetEngine plugin, but you can also filter widgets from the JetWooBuilder plugin or Elementor Pro’s widgets.
If you need a hint, please, check this Custom Post Type creation tutorial or a Listing item creation guide. Also, have a look at our guide on how to use the Maps Listing widget.
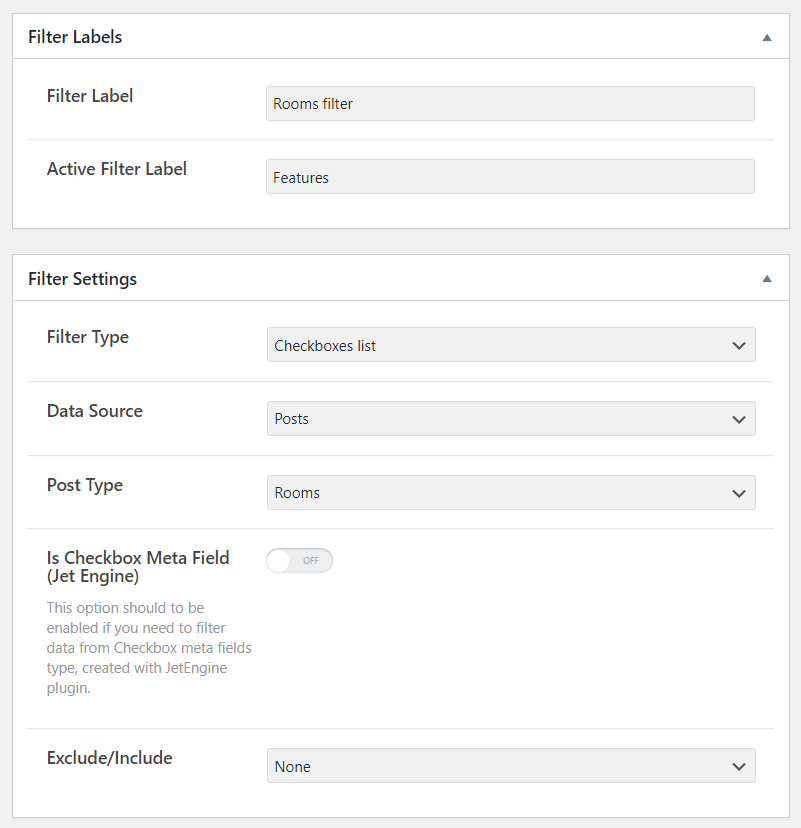
After that, you need to create a filter. Let’s assume it will be a Checkboxes list filter to sort posts by the name of the country. If you have problems with it – check out our Filter creation tutorial.
Once you’re done, navigate to the page where you would like to display your content.
Additional Providers List Option
Now, let’s use Listing Grid and Maps Listing widgets to display the content from the posts and apply a Checkbox filter to them. Drag-n-drop the Checkboxes filter widget to the page. Define all the settings. If you need an insight – go through the Filter assignment tutorial.
After that, turn on the Additional Providers Enabled toggle.
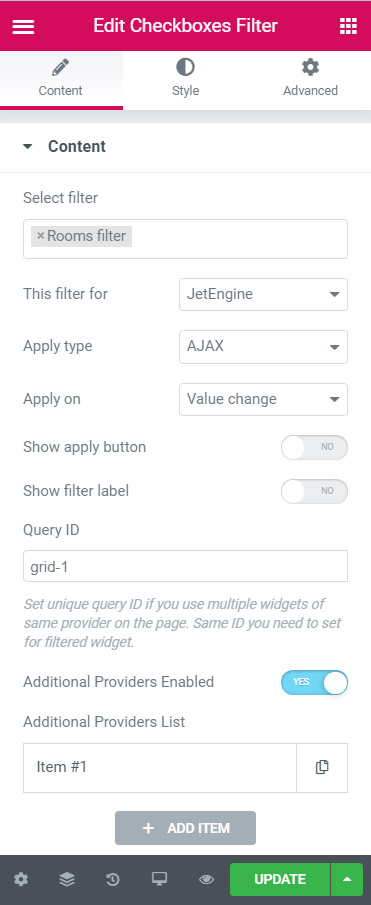
Afterward, you’ll see the Additional Providers List item where you’ll need to choose Additional Provider and type in the Additional Query ID. If you don’t know how to assign the filter to a widget – check out this tutorial.

That’s all. Now when you choose the option in the filter, it will be applied both to the widget of the provider you select in This filter for the option and the Additional Provider drop-down list.
Now you know how to filter the widgets of more than one provider with the help of the filter from the JetSmartFilters plugin.