How to Translate JetTabs Using WPML
This tutorial shows you how to set up WPML on your WordPress website and translate JetTabs widgets, including Tabs and Switcher, for a multilingual experience.
JetTabs provides dynamic Elementor widgets, and translating their content with the WPML plugin provides a seamless multilingual experience for website visitors. Let’s go through the process step by step.
Create a Page
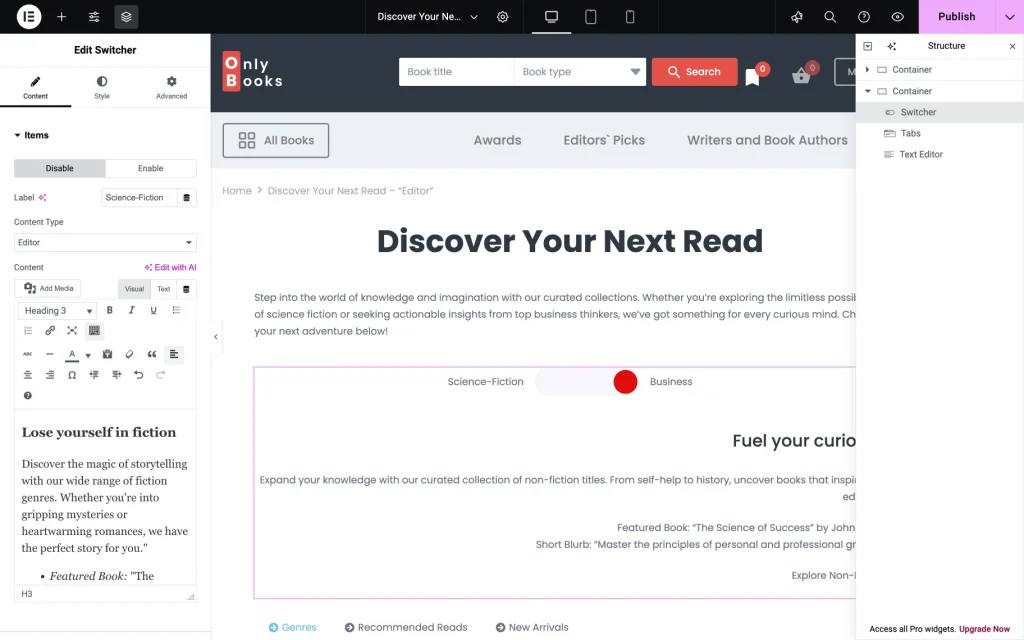
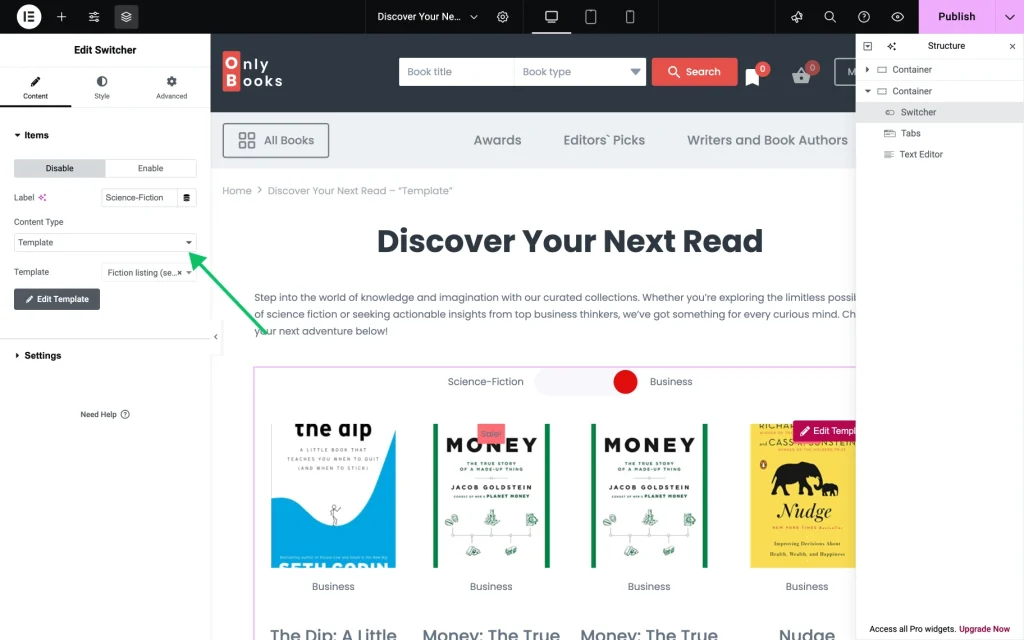
To demonstrate WPML translation capabilities, we’ll create a page with two JetTabs widgets: Switcher and Tabs. Both widgets allow us to display content as plain text added as an “Editor” Content Type or as a template with a pre-defined set of Elementor widgets added as a “Template” Content Type.
“Editor” Content Type
When added to a page, the “Editor” Content Type looks like a basic text section.
Switcher widget
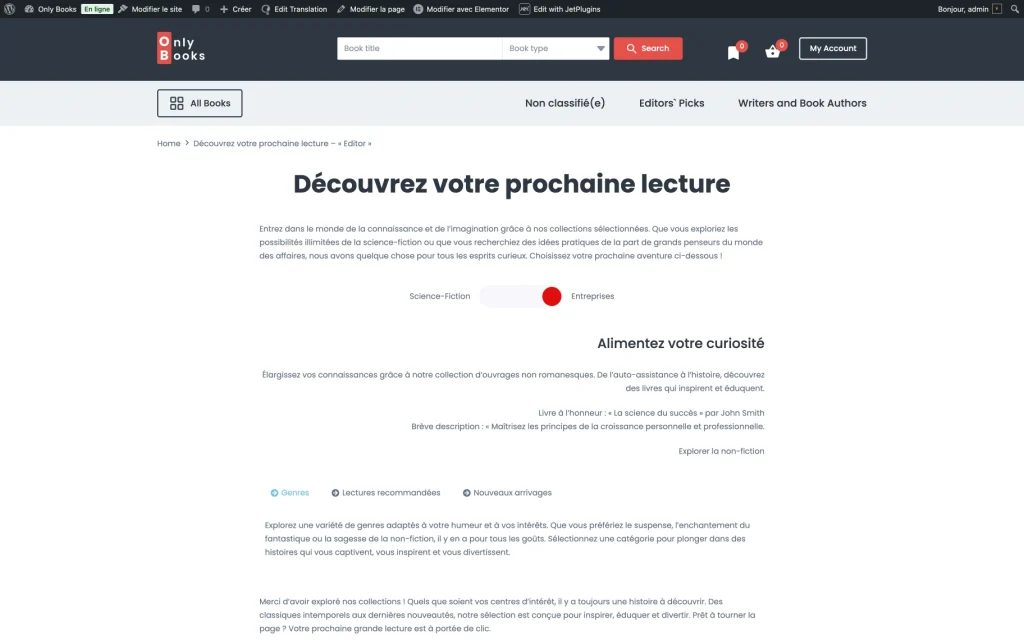
The Switcher widget showcases content related to the “Business” and “Science-fiction” book categories. Each switcher position includes a brief text description and displays a link to curated content specific to the selected category.
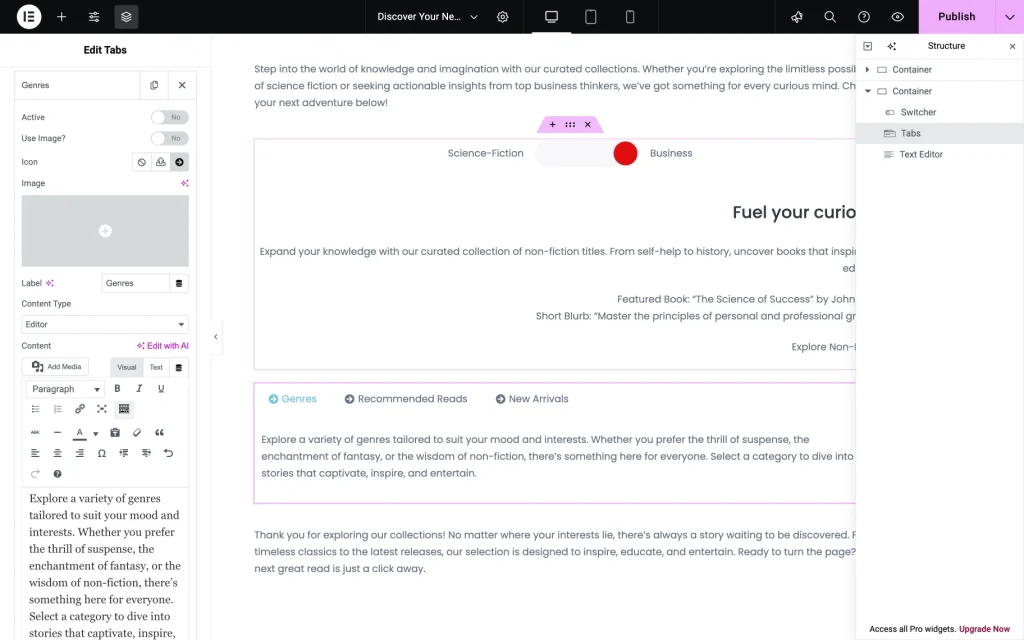
Tabs widget
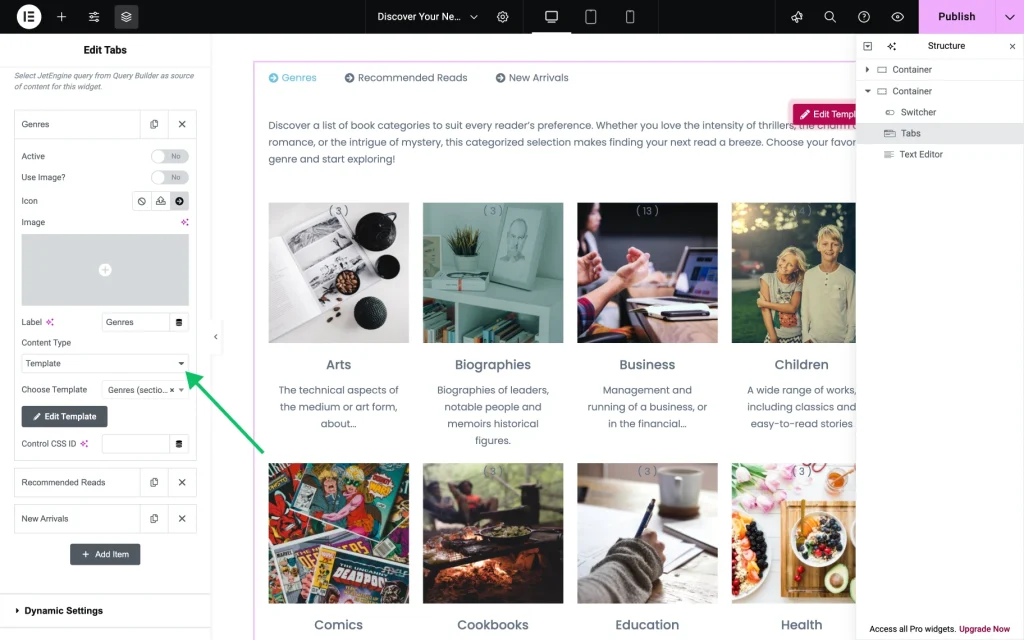
The Tabs widget organizes detailed information about the bookstore’s offerings, which are categorized into three sections: “Genres,” “Recommended Reads,” and “New Arrivals.” Each tab contains text descriptions that guide users through the bookstore’s collection.
“Template” Content Type
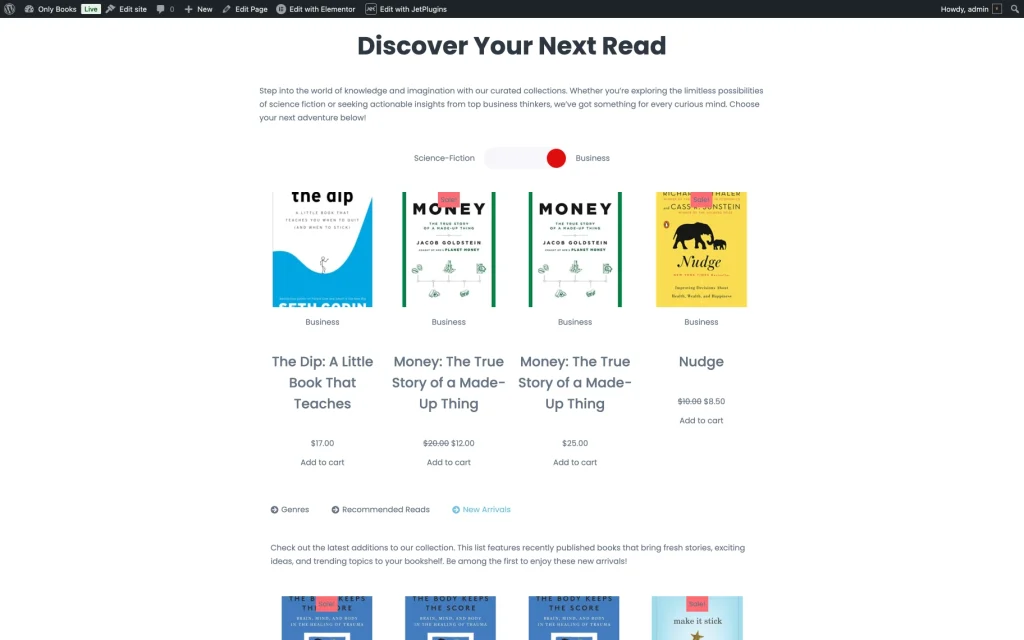
After making all the necessary edits one can preview how the “Template” Content Type looks when added to a page. Within the template, one can add all kinds of Elementor widgets, including WooCommerce products or even dynamic listings created with JetEngine.
Switcher widget
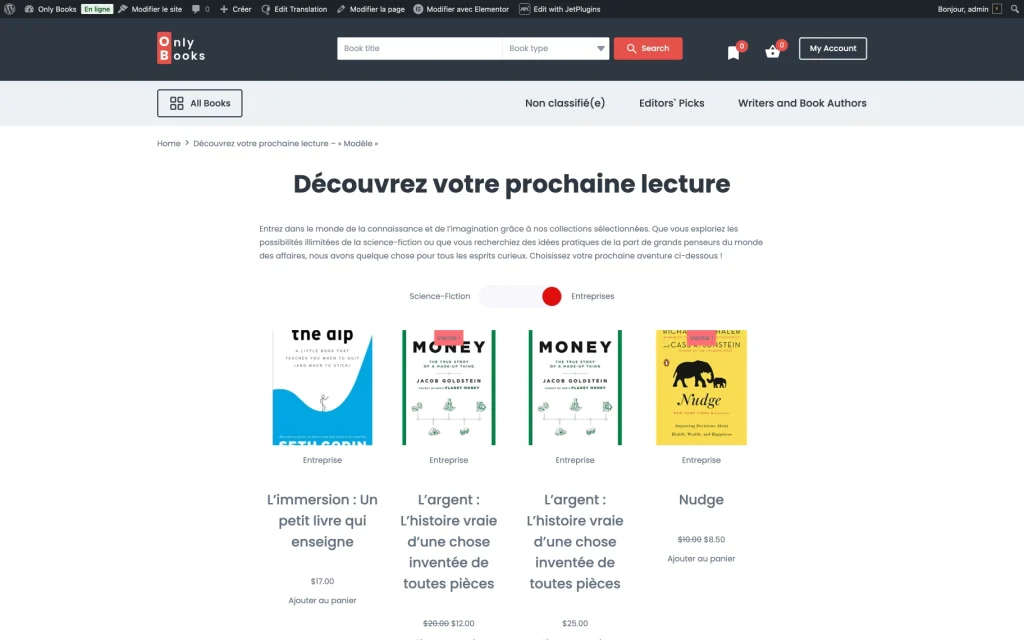
The Switcher widget contains two tabs, Disable and Enable; each item corresponds to a specific template:
- Enable — displays a “Fiction listing” section template featuring fiction genre books;
- Disable — displays a “Business listing” section template featuring business genre books.
Both templates include a JetWooBuilder’s Product Grid widget showcasing relevant books.
Tabs widget
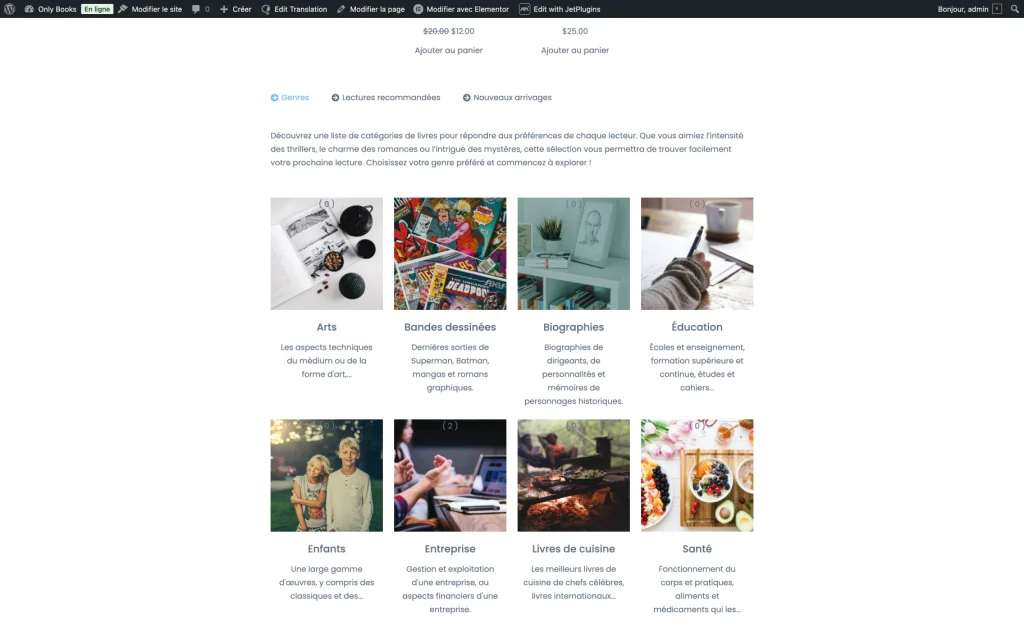
The Tabs widget contains three tabs, each displaying a unique section template:
- Genres tab/template:
- Paragraph Widget — introduces the available genres;
- Categories Widget — showcases book genres;
- Recommended Reads:
- Paragraph Widget — provides context for recommended books;
- Product Grid Widget — features top book recommendations;
- New Arrivals:
- Paragraph Widget — highlights the latest releases;
- Product Grid Widget — displays newly added books.
Now, let’s walk through the translation flow.
Translate “Editor” Added Content
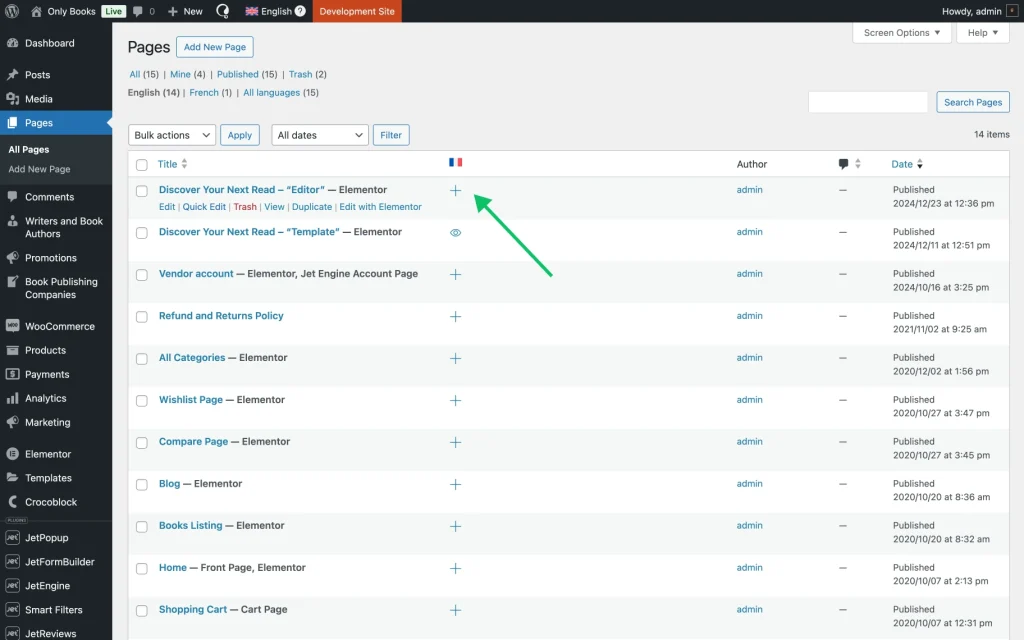
Go to WordPress Dashboard > Pages and choose a page that you want to translate. Alternative path: WordPress Dashboard > WPML > Translation Management > Translation Dashboard > Pages.
After installation and activation of the WPML plugin, a new column (with a country flag) will appear, displaying the availability of the translation.
If a page is not translated, a “+” icon will appear in this column. To translate a page, click the “+” icon in the localization status column. The WPML plugin will automatically translate the page content, including the text of our JetTabs widgets, and will redirect you to the Advanced Translation Editor.
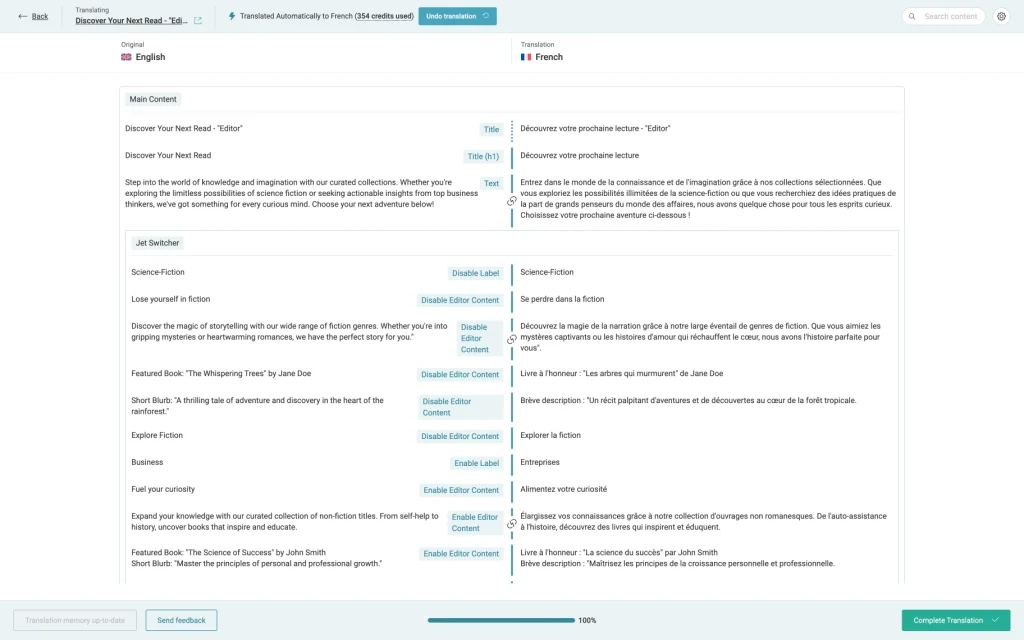
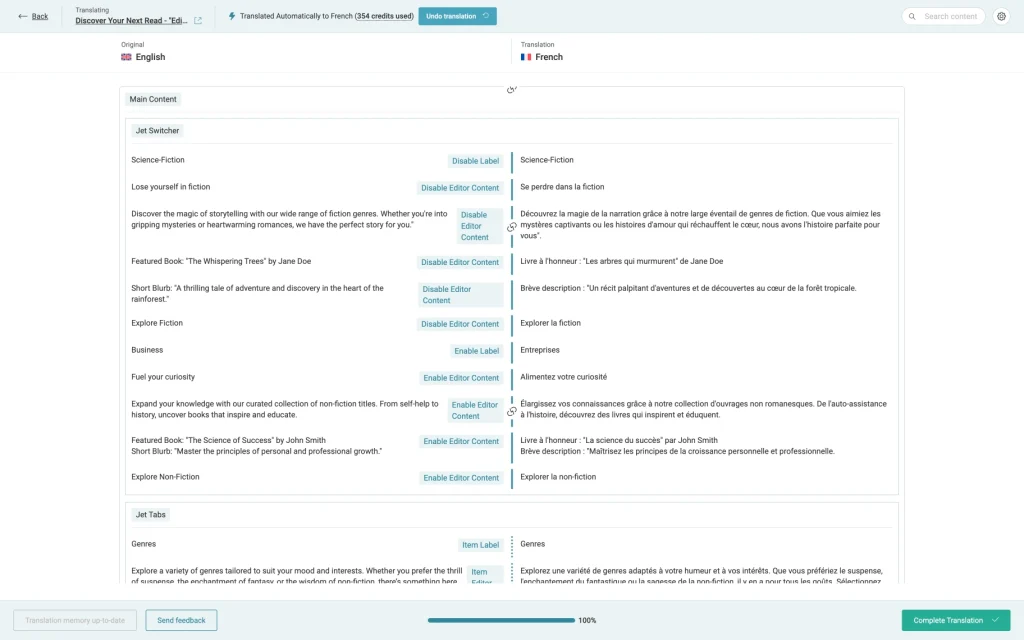
Within the Advanced Translation Editor, all text values on the page (including the JetTabs values in the Switcher widget) will be displayed alongside their translations into the target language.
The widget text content has been fully translated. In this step, you can review the translation, and if you’re satisfied with its quality, click the “Complete Translation” button. After that, you’ll redirected back to the Pages.
Once the page content has been translated, the “+” icon will be replaced with a “pencil” icon. Clicking the “pencil” icon will redirect you to the Advanced Translation Editor.
Translate “Template” Added Content
Since the widgets in the second version of our page contain section templates (that include products and product categories), we need to translate these items separately to create a fully localized page. This is a must-follow step because the WPML plugin is not able to render and translate content that’s added as templates inside our widgets.
Translate templates
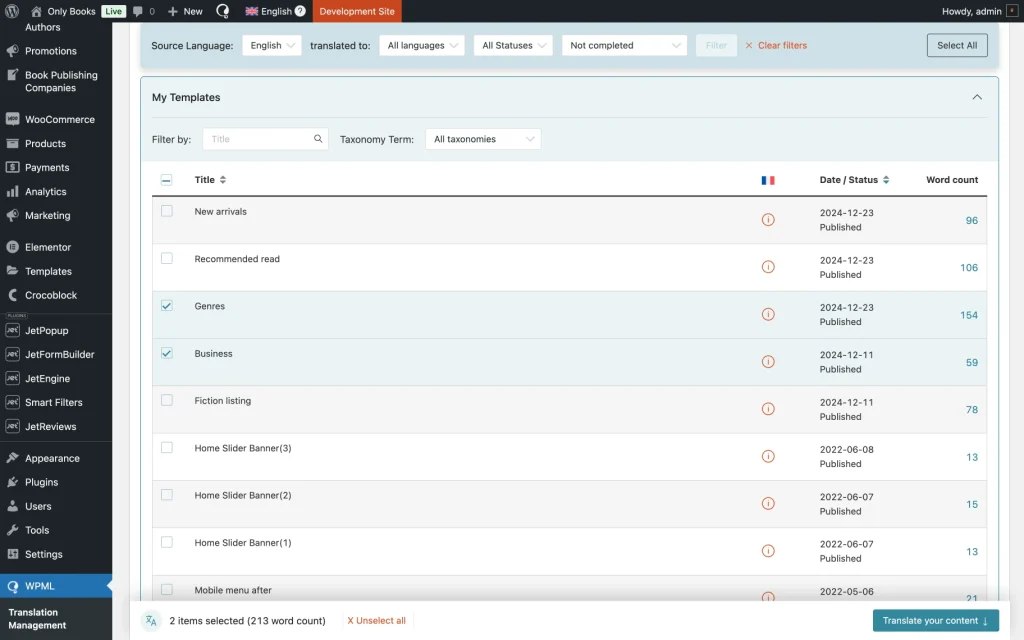
Go to WordPress Dashboard > WPML > Translation Management > Translation Dashboard > My Templates and choose a template that you’re going ot use in any of the JetTabs widgets.We’re going to begin with “Genres” and “Business” templates.
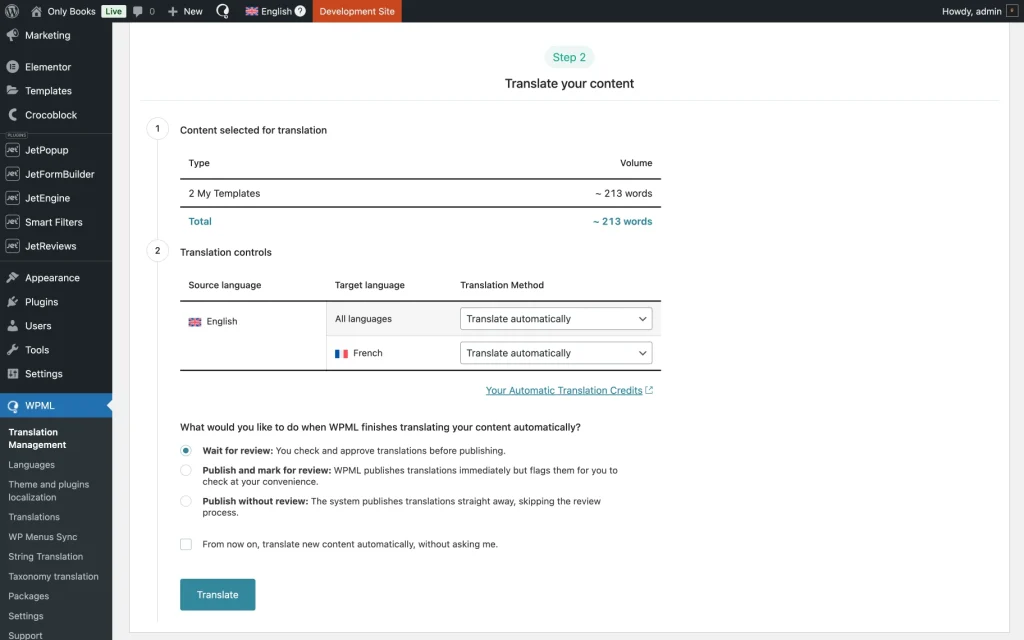
When selected, scroll to the bottom to review translation methods. WPML supports multiple translation methods, including manually (by yourself), automatically using machine translation, or with professional translation services.
Choose a language and one of the available Translation Method options.
- Translate automatically — if this option is selected, the plugin will automatically translate the content; when selected, the following options are revealed:
- Wait for review — if this radio button is activated, translations require approval before publishing;
- Publish and mark for review — if this radio button is activated, translations are published immediately and flagged for later review;
- Publish without review — if this radio button is activated, translations are published without review;
- Translate myself — if this option is selected, you’ll be redirected to Advanced Translation Editor to perform translation manually;
- Assign a translator — if this option is selected, it reveals a field called Choose a translator:
- Choose a translator — a select field that allows choosing a translator from those listed in the WordPress Dashboard > WPML > Translation Management > Translators section;
- Assign a translation service — if this option is selected, you can choose among translation services activated in the WordPress Dashboard > WPML > Translation Management > Translation Services section;
- Duplicate content — if this radio button is activated, the original content will be duplicated to a localized version of the page;
- Do nothing — if this radio button is activated, neither translation nor content duplication will be performed.
You can enable each of these settings individually for every language, allowing for customized configurations per language.
When you’re done, click the “Translate” button.
Translate taxonomies
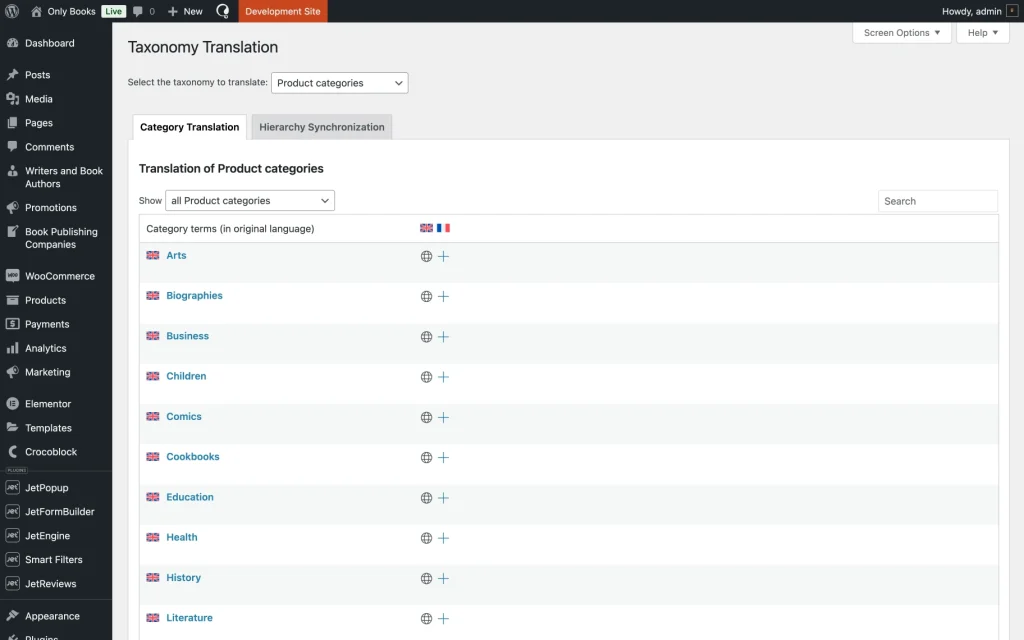
Since one of the templates includes a Categories widget, we need to translate the categories descriptions so we can have a fully localized page. To do that, go to WordPress Dashboard > WPML > Taxonomy Translation.
In the Taxonomy Translation WPML section, you need to complete the same translation flow, click on the “+” icon, and add the name, URL, and description in the target language.
Translate products
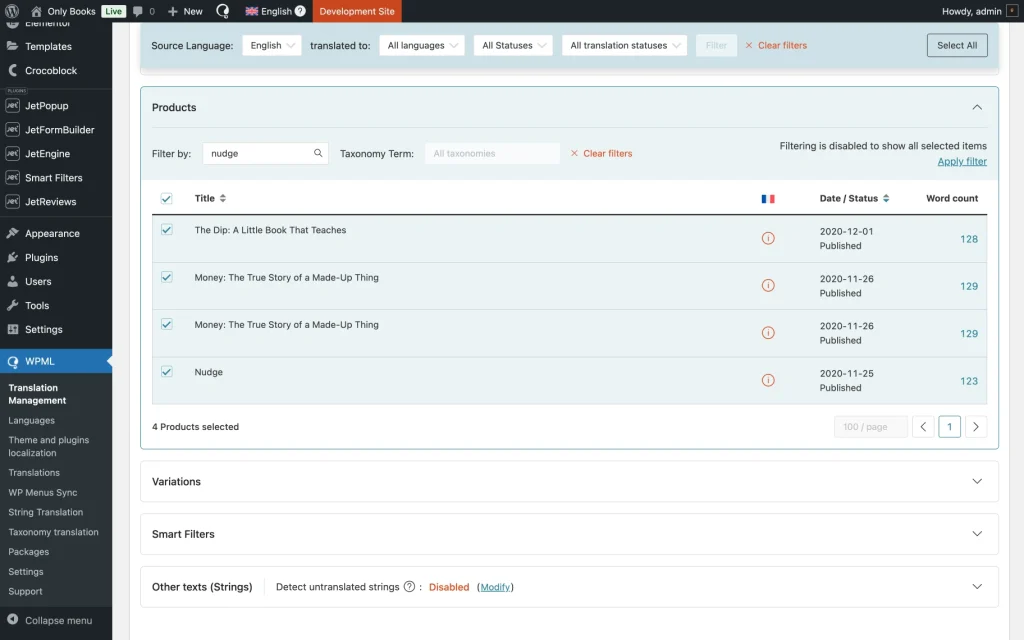
To translate your WooCommerce products, go to WordPress Dashboard > WPML > Translation Management > Products and use the search to find products for the first translation batch.
Then, scroll the page to the bottom and complete the translation flow.
After translating the templates, you need to repeat the translation flow for the page.
Go to WordPress Dashboard > WPML > Translation Management > Translation Dashboard > Pages, find your page, and translate its content that is not included in the templates.
Preview Translated Content
After verifying the translations, go to the front end to preview.
First, we check how the localized content appears on the page where it was added using the ‘Editor’ content type in the French translation.
Then we preview how the Switcher widget appears on a localized French page where content was added using the ‘Template’ content type.
Lastly, we preview how the Tabs widget appears on a localized French page where content was added using the ‘Template’ content type.
That’s it. By following these steps, content in JetTabs Elementor widgets can be efficiently translated using the WPML plugin, providing a localized experience for users in multiple languages on a WordPress website.
