How to Translate Woo Page Templates Using WPML
From this tutorial, you will learn how to prepare a WooCommerce shop website to be translated with WPML modules and how to use them to translate the JetWooBuilder templates.
Before you start, check the tutorial requirements:
- WPML plugin installed and activated
- JetWooBuilder plugin installed and activated
JetWooBuilder is a WooCommerce page builder for Elementor. Using its 60+ widgets, you can create unique Elementor product page layouts and templates for My Account, Thank You, Cart, Checkout, and other pages. If you don’t want to build page templates from scratch, you could use custom Woo page templates.
JetWooBuilder is now WPML-compatible, which means you can translate its templates and widget-added content into multiple foreign languages. This tutorial will take you through basic preparation steps and show how to translate JetWooBuilder templates step-by-step.
Enable JetWooBuilder Templates Translation
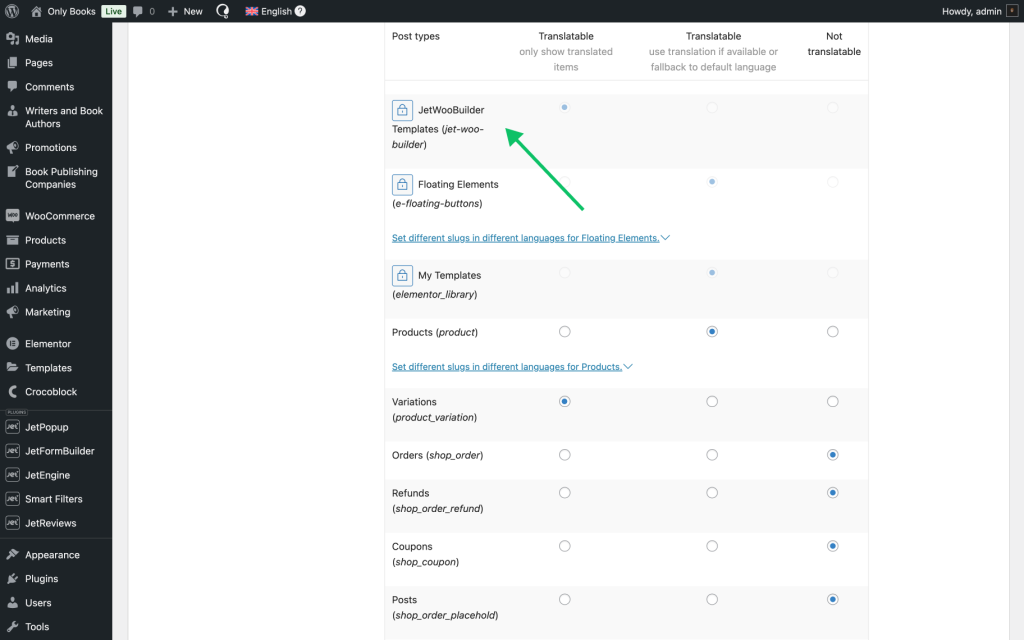
First of all, you need to enable the ability to translate JetWooBuilder templates; go to WordPress Dashboard > WPML > Settings.
Within the Multilingual Content Setup tab, locate the Post Types Translation section. In this section, find the option “JetWooBuilder Templates (jet-woo-builder)” and set the radio button under the Translatable column.
When done, click on the “Save” button to confirm these settings.
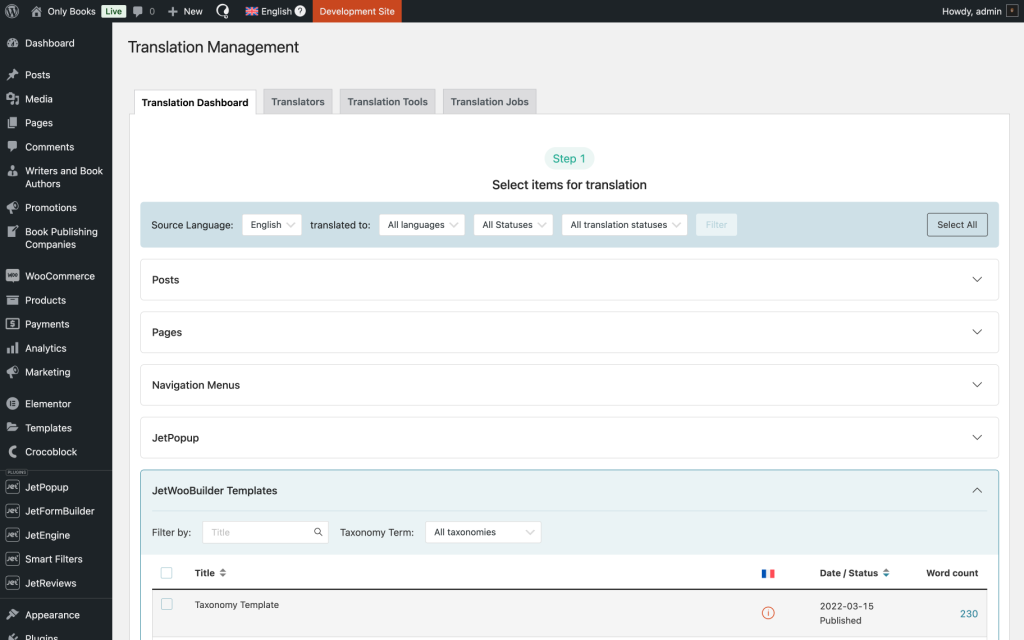
Access Translation Management
Translate a JetWooBuilder Template with WPML
Once the ability to translate JetWooBuilder templates has been enabled, individual templates can be translated by following these steps.
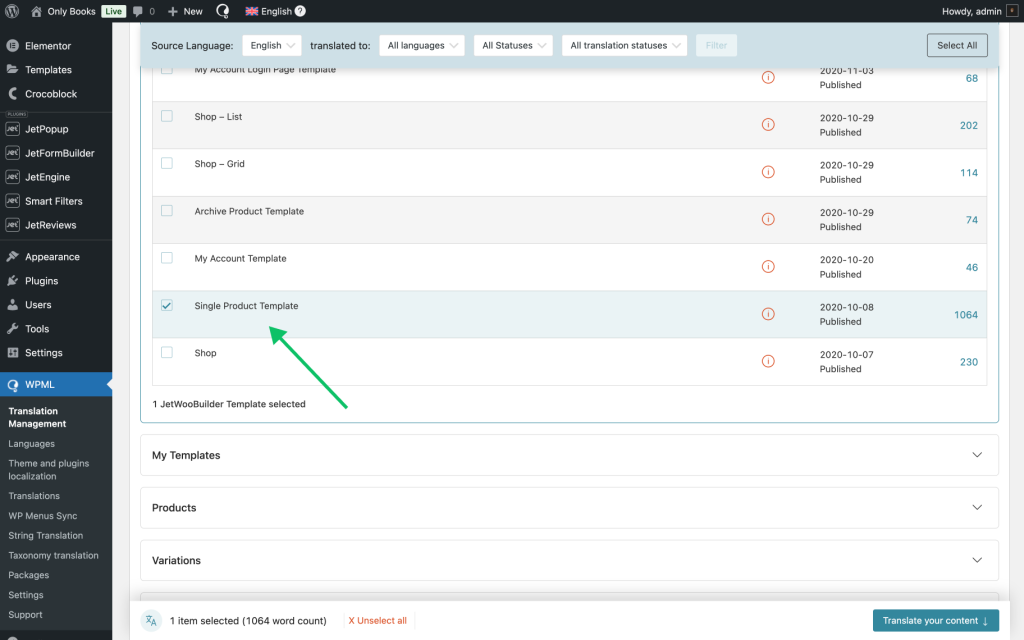
Locate the template for translation
The desired template should be located in the list of JetWooBuilder templates in the WordPress Dashboard > WPML > Translation Management directory.
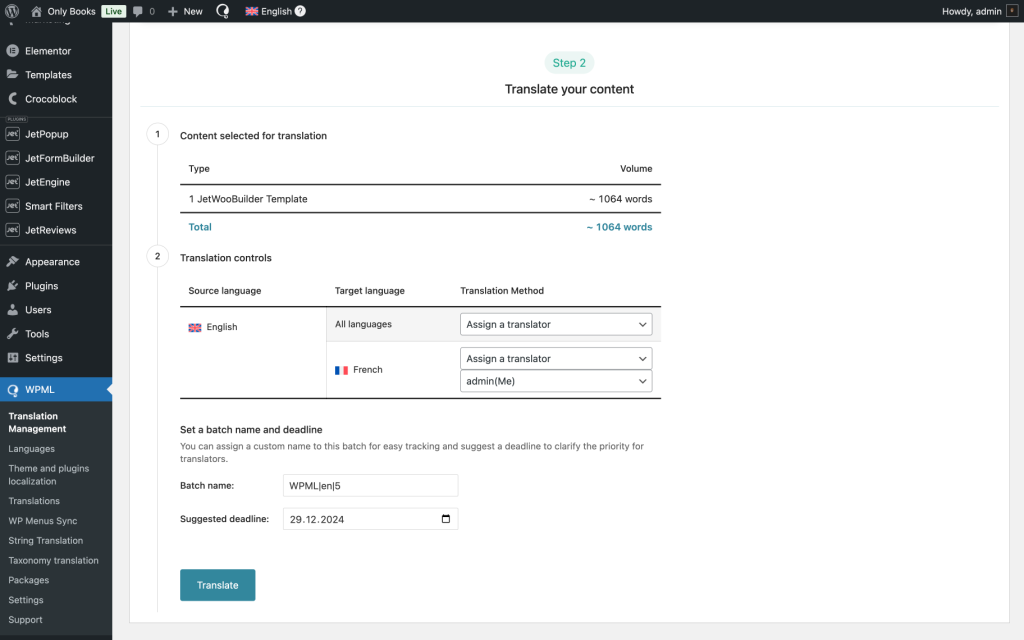
Once selected, click on the “Translate your Content” button, and you’ll be redirected to the next step. Alternatively, you can scroll the page to the bottom to choose your translation method in the Translate your content section.
- Translate automatically — if this option is selected, the plugin will automatically translate the content; when selected, the following options are revealed:
- Wait for review — if this radio button is activated, translations require approval before publishing;
- Publish and mark for review — if this radio button is activated, translations are published immediately and flagged for later review;
- Publish without review — if this radio button is activated, translations are published without review;
- Translate myself — if this option is selected, you’ll be redirected to Advanced Translation Editor to perform translation manually;
- Assign a translator — if this option is selected, it reveals a field called Choose a translator:
- Choose a translator — a select field that allows choosing a translator from those listed in the WordPress Dashboard > WPML > Translation Management > Translators section;
- Assign a translation service — if this option is selected, you can choose among translation services activated in the WordPress Dashboard > WPML > Translation Management > Translation Services section;
- Duplicate content — if this radio button is activated, the original content will be duplicated to a localized version of the page;
- Do nothing — if this radio button is activated, neither translation nor content duplication will be performed.
To begin the translation process, click the “Translate” button.
Review translations
If you’re translating automatically, the next step is to review translations. This step is optional but recommended when translating important pages. Let’s examine our Single Product Template, which is translated into French.
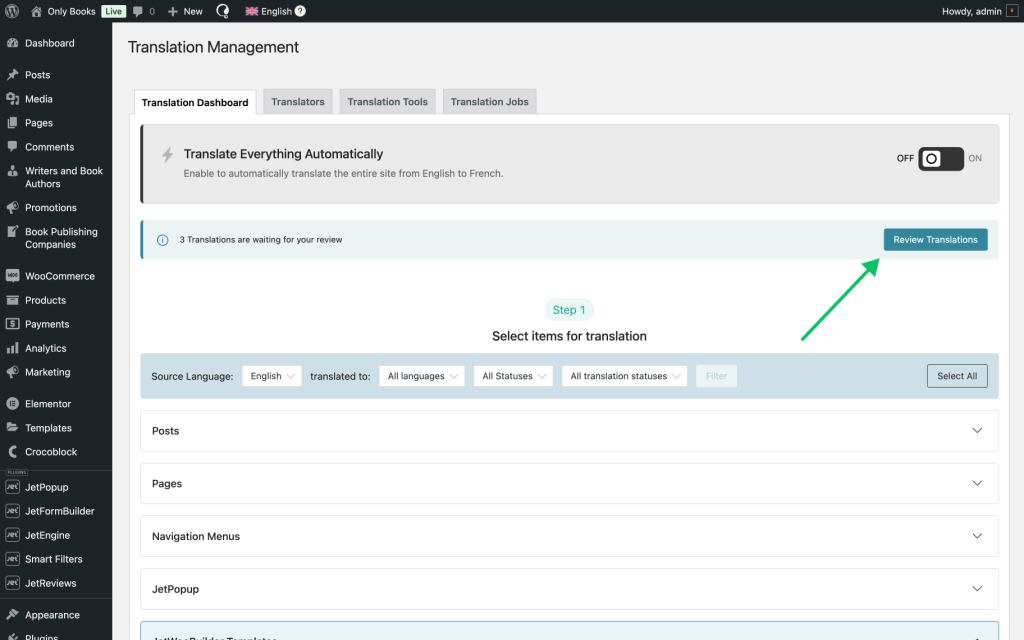
After performing the previous step within the Translation Management section, click on the button that says “X translation(s) waiting for review.” Alternatively, this section can be accessed via the following path: WordPress Dashboard > WPML > Translations.
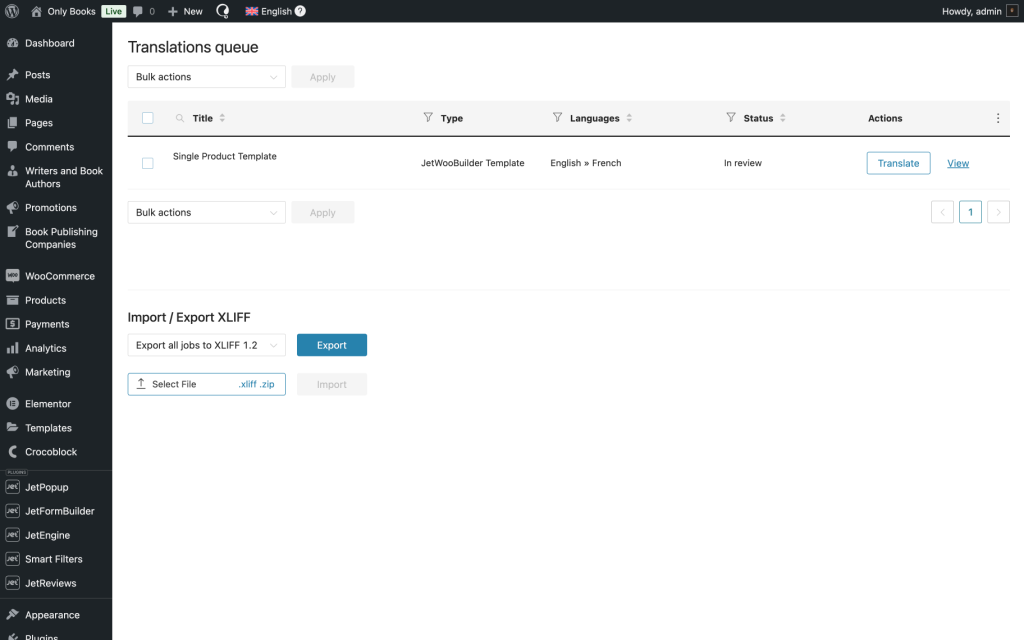
You’ll be redirected to the Translations queue page, where one can access all pages that are ready to be reviewed. The page status will be “In review”.
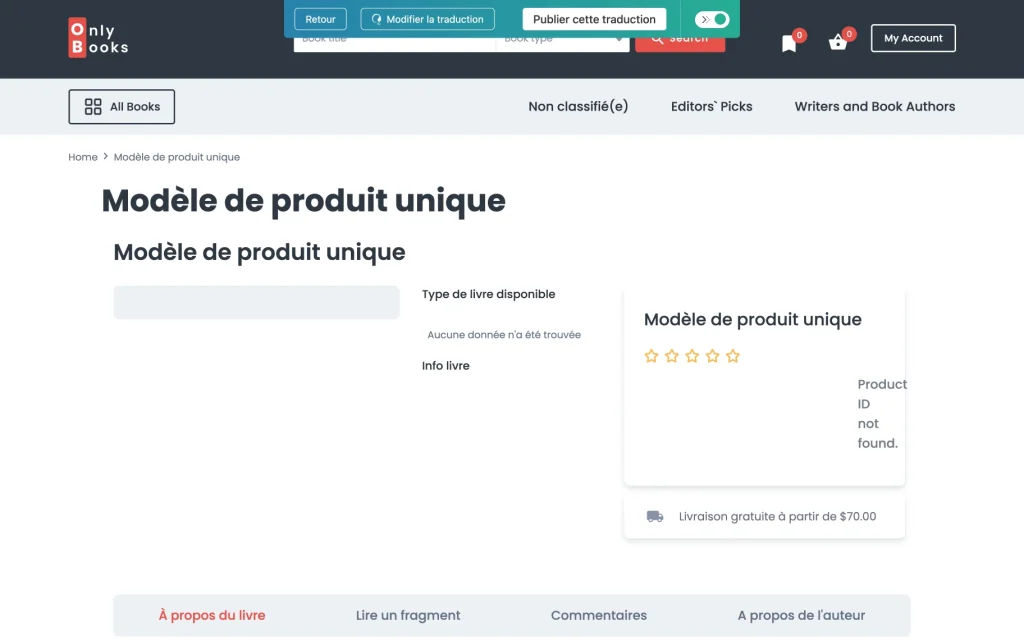
The “Translate” button will open the WPML’s front-end editor, where one can preview translations as they appear on your website.
If you’re satisfied with the quality, click the “Publish translation” button (in our case, the button says “Publier cette traduction” since the page is displayed in French) to display translations on your website.
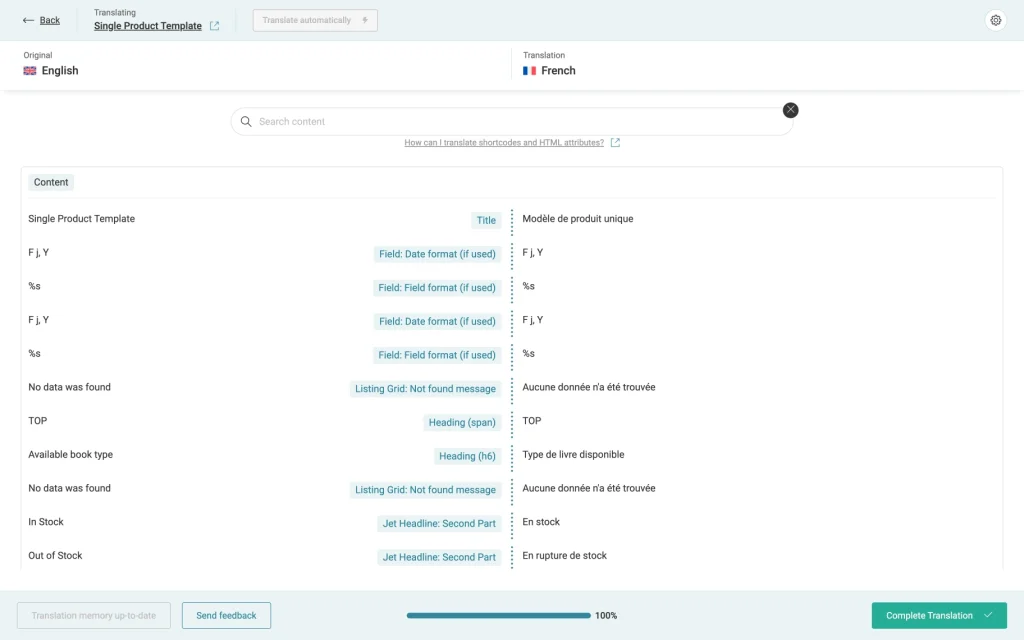
If you want to make changes, click the “Edit translation” button (in our case, the button says “Modifier la traduction”). This will open the Advanced Translation Editor, where you can make any necessary changes.
Once done, click the “Complete Translation” button to publish translations. You can now view your translations by visiting the page on your website and switching languages.
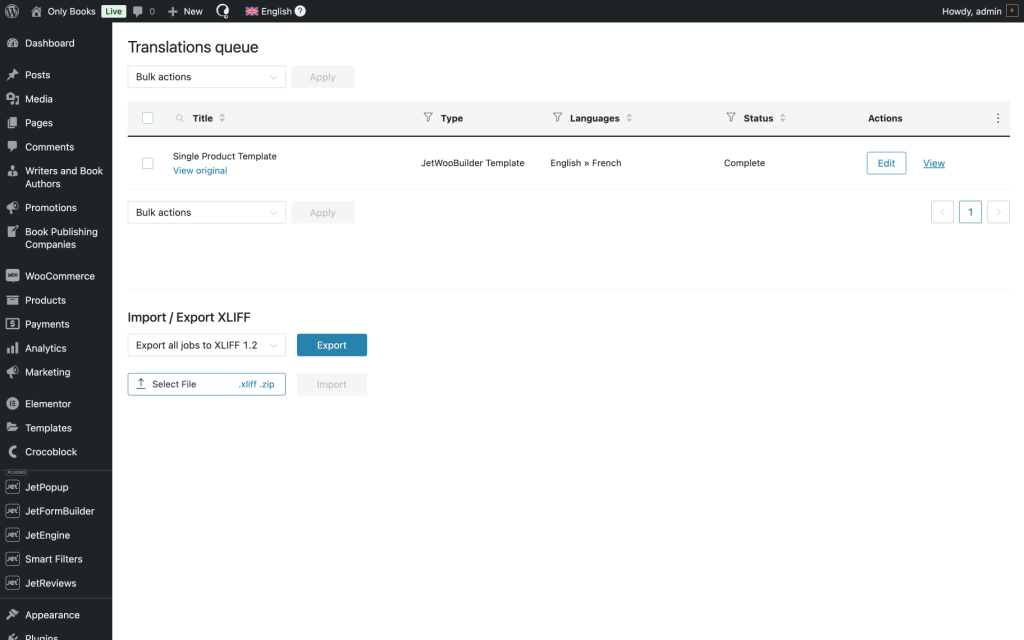
After publishing the translation, you’ll be redirected back to the Translations queue section.
The status of the translation will change to “Completed.”
By following these steps, the JetWooBuilder templates can be prepared for translation in a WooCommerce store using WPML. This ensures that custom templates are accessible to customers in all supported languages on your WordPress website.
