Adding Navigation to Woo Category Pages with Select Filter or Select Form Field
Learn how to redirect users to a prefiltered results page based on their dropdown selection. This guide shows methods with JetSmartFilters Select Filter and JetFormBuilder forms.
Before you start, check the tutorial requirements:
- WooCommerce plugin installed and activated, with products created and categories attached
- Elementor (Free version)
- JetSmartFilters plugin installed and activated
- JetFormBuilder plugin installed and activated
This tutorial focuses on redirecting users to a prefiltered results page based on their dropdown selection. This guide shows methods with JetSmartFilters Select Filter and JetFormBuilder forms.
Redirect to a Prefiltered Results Page with the Select Filter
Create a filter
Go to WordPress Dashboard > Smart Filters > Add New.
Create a Select Filter, select “Taxonomies” as the Data Source, and choose “Product categories” from the Taxonomy dropdown menu.
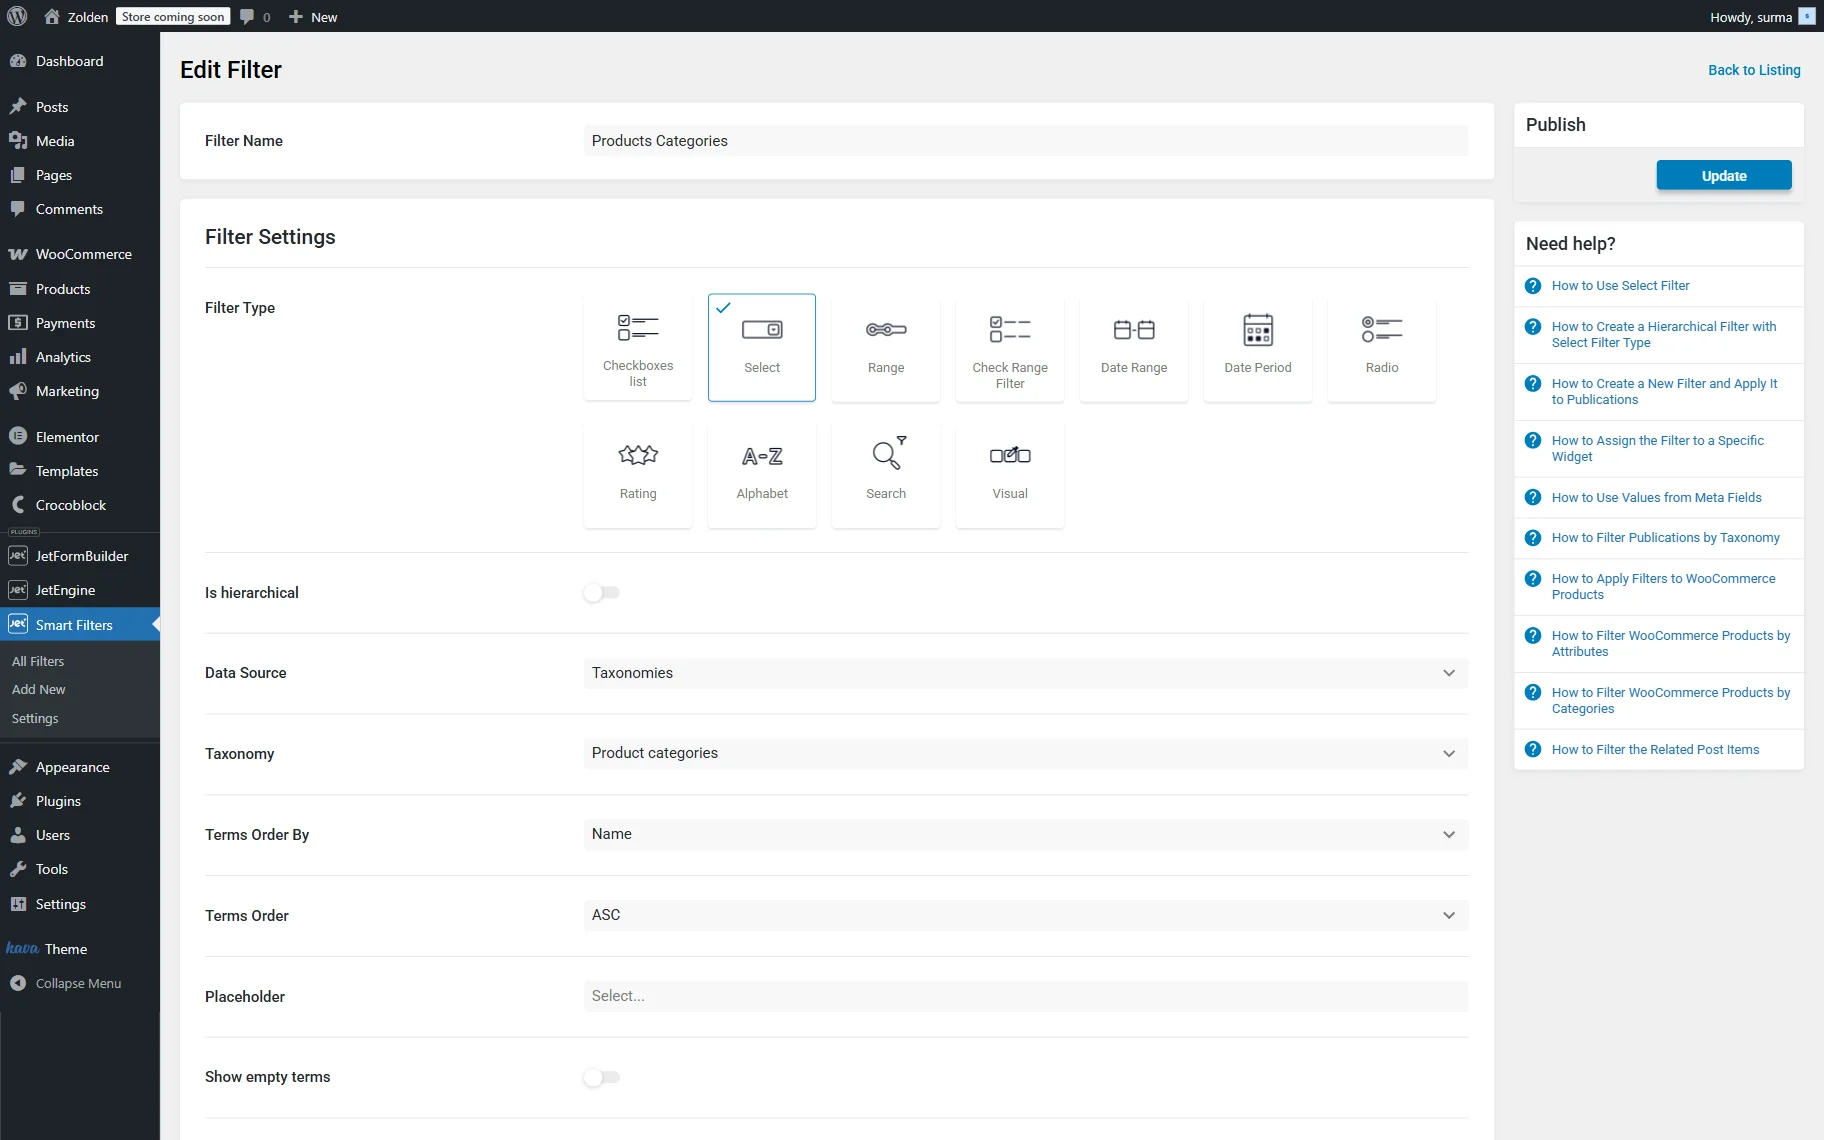
Click the “Update” button once you are ready.
Create a page with a product listing and a filter
Firstly, you need to create two pages. The first one will be a result page where you will add filters.
The second page will be a search page. This page should contain the same filters.
Create a new page or open the needed page in the Elementor Page Builder.
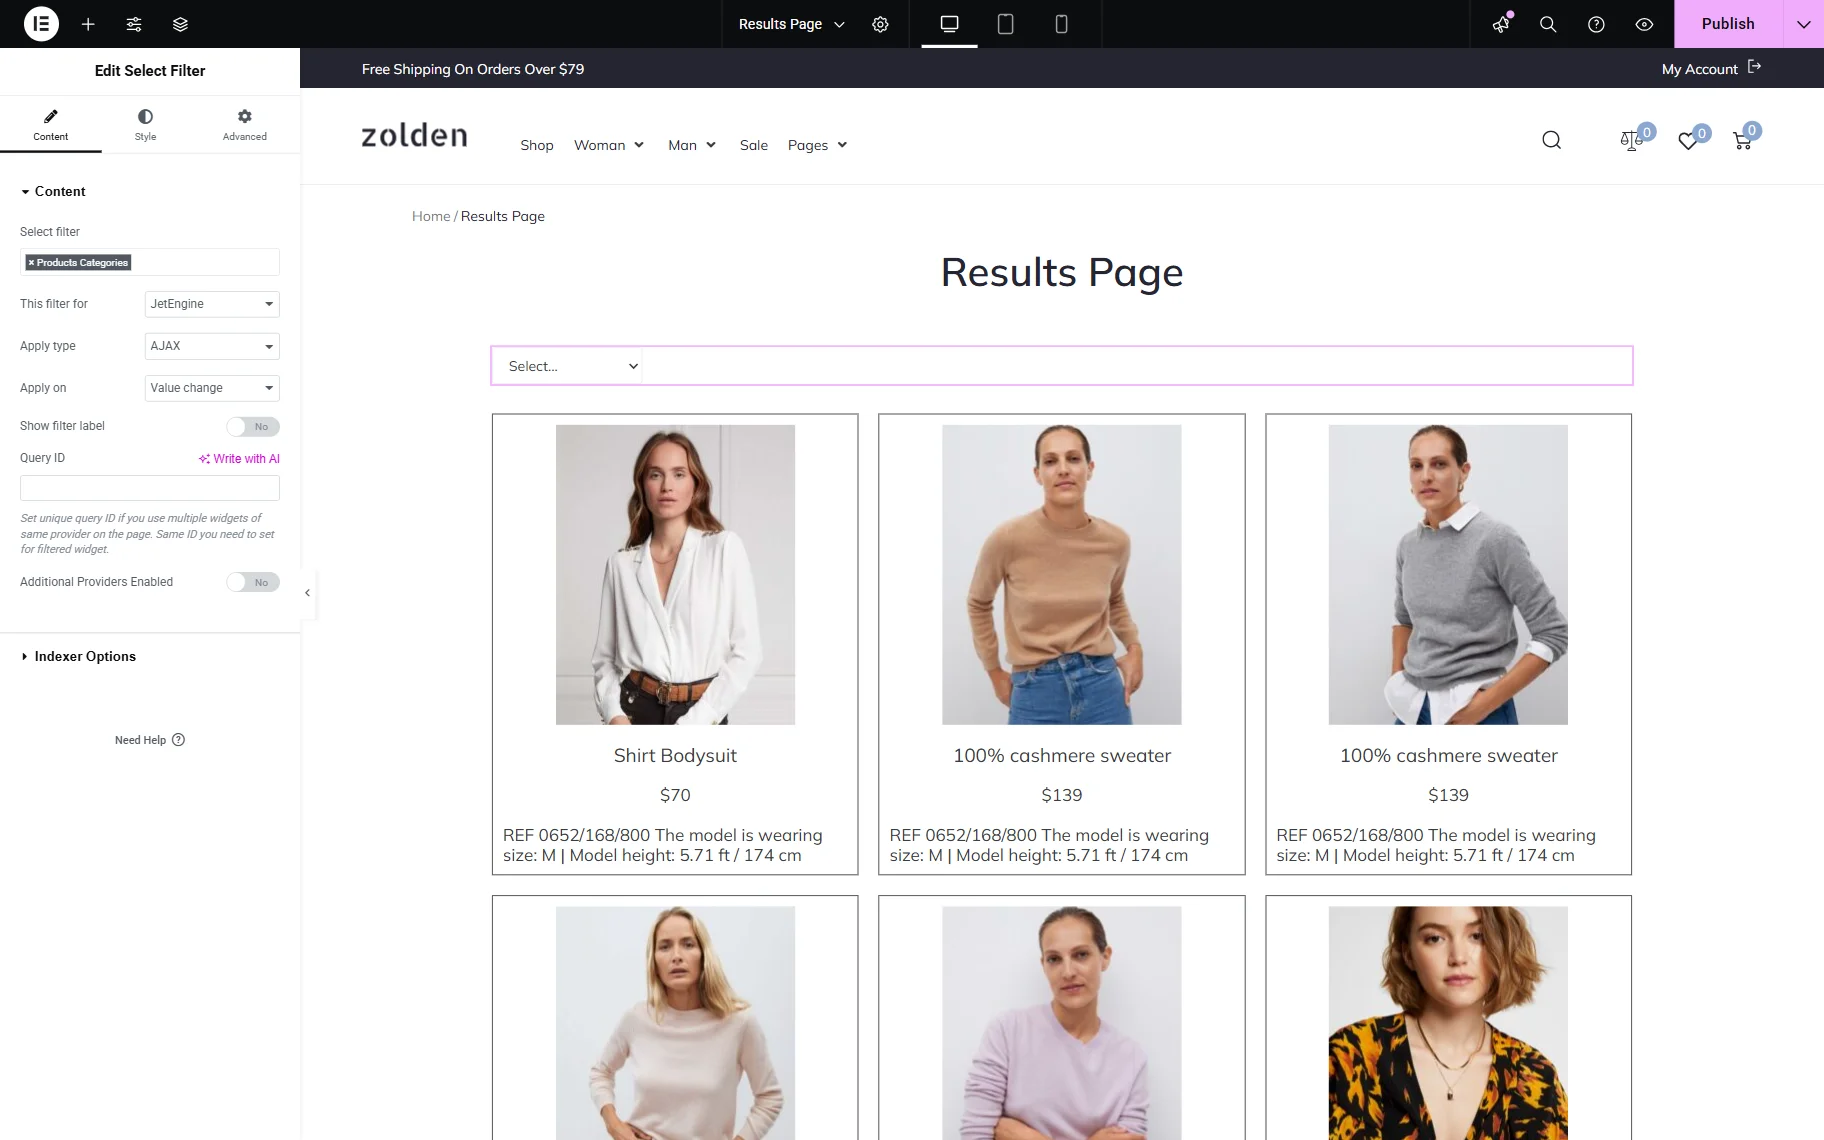
Drag and drop the following widgets into the page: Select Filter and Listing Grid.
Click the “Publish” button.
Add a filter to the needed page
Open the needed page in the Elementor page builder. In the described case, we create a new page.
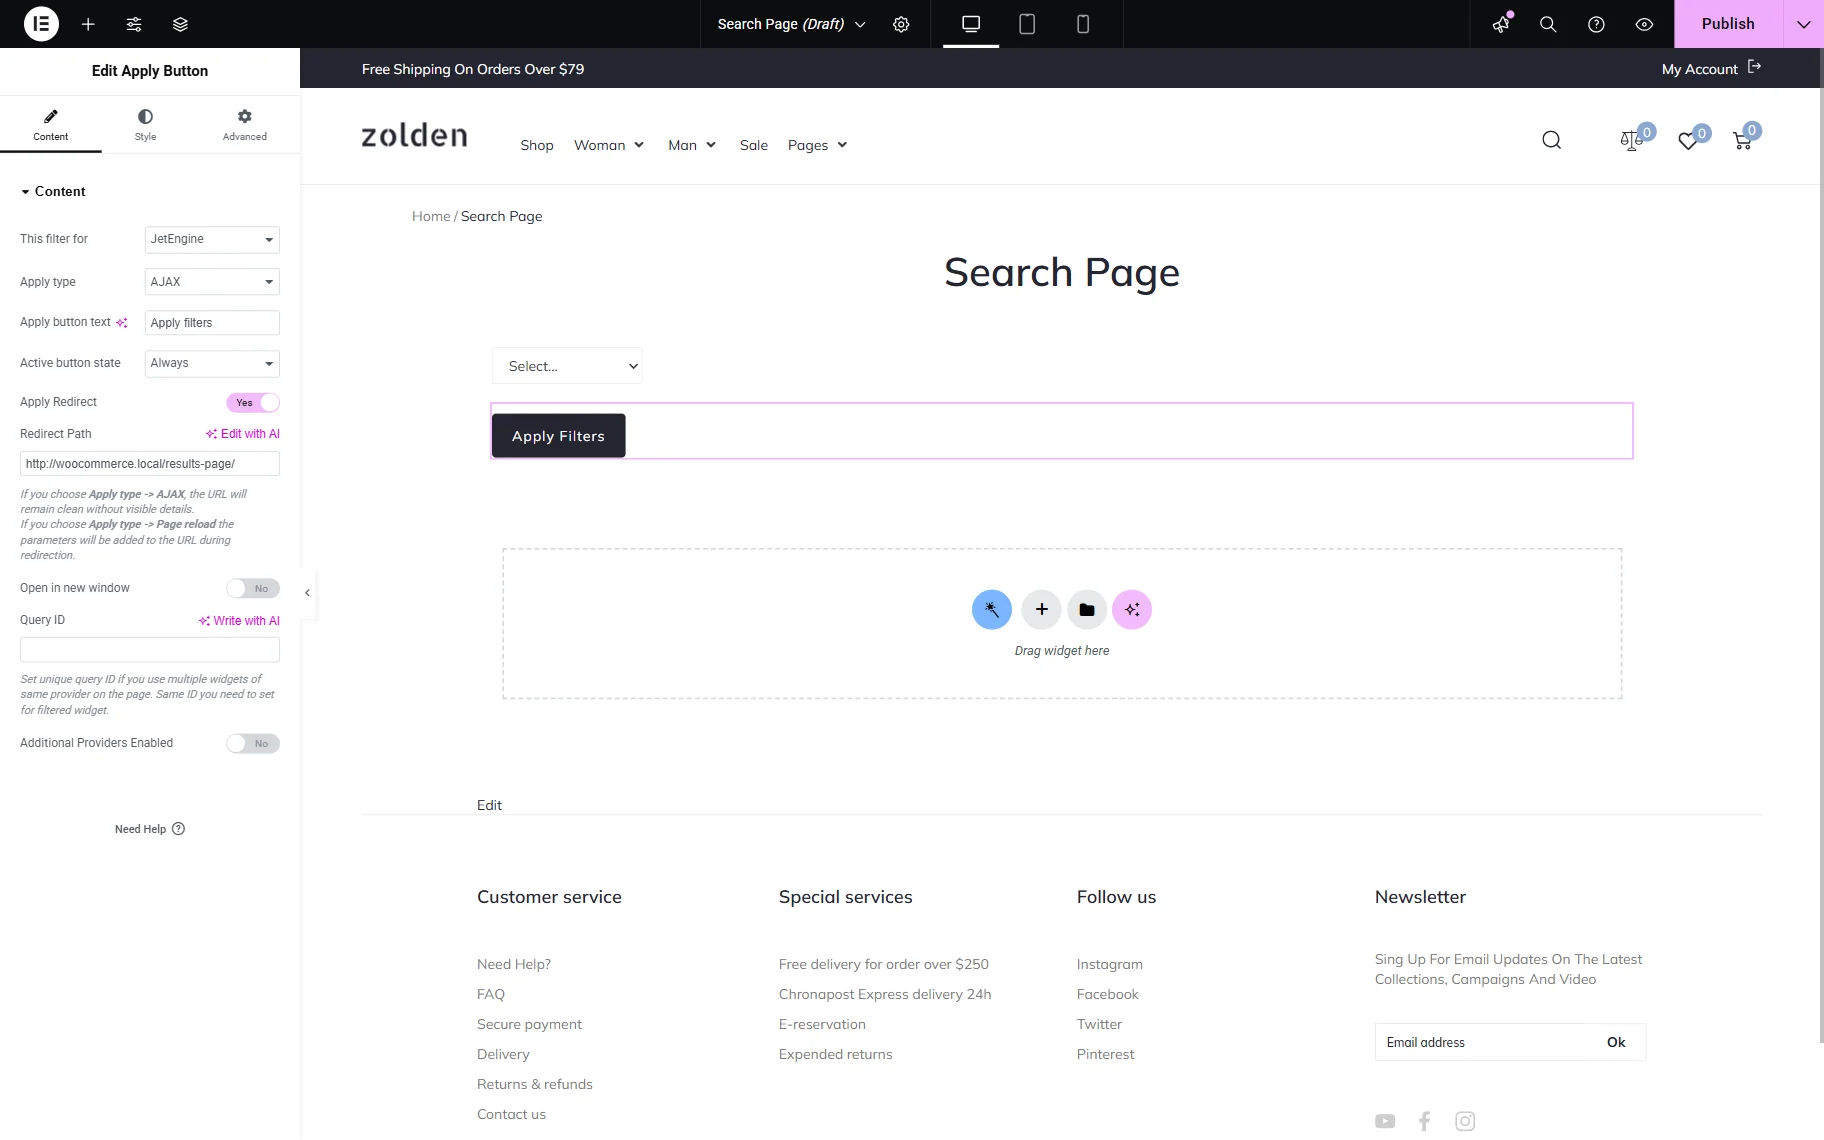
Drag and drop the Select Filter and the Apply Button widgets.
Add the Apply Button widget in the second column and enable the Apply Redirect option. In the Redirect Path section, add the URL of the page to which the user will be directed after applying the filter.
Go to the front end to check the result.
Select any filter and click the “Apply Filters” button.
You will be redirected to the page with the Listing Grid sorted by the category you specified earlier.
Redirect to a Prefiltered Results Page with the Select Form Field
Similar functionality can be achieved with the help of the JetFormBuilder form Select Field.
Create a form
Proceed to WordPress Dashboard > JetFormBuilder > Add New Form. Enter the form’s title – in this case, it is “Form with Select Field”.
The Welcome block appears by default. From here, you can select a form pattern or generate a form with OpenAI. Otherwise, you can hit the “Start from scratch” button and use the three fields added by default; otherwise, you can delete them to begin anew.
In this case, we build our form from scratch. We also delete the default fields.
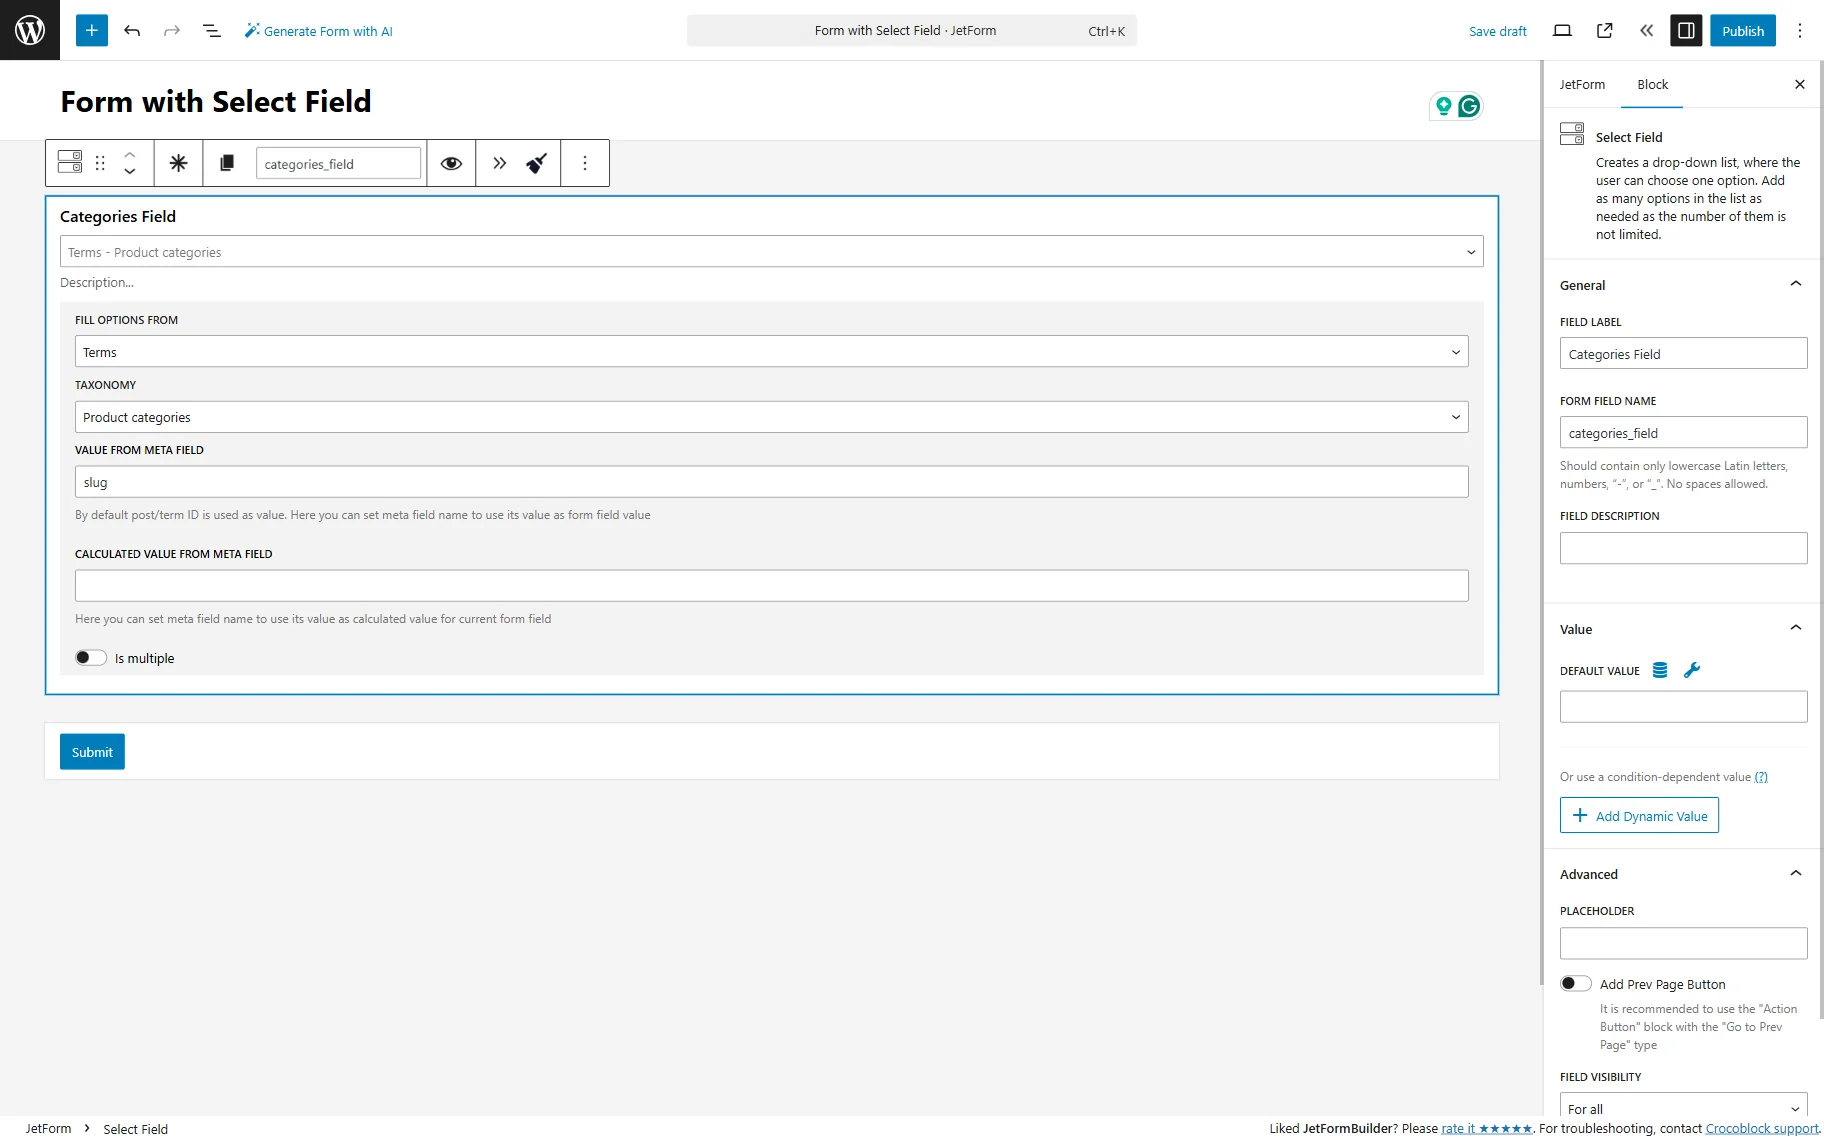
First, we add a Select Field for the products’ categories. For the FIELD LABEL, we put “categories_field”. Then, from the FILL OPTIONS FROM dropdown, we select the “Terms” option. In the TAXONOMY field, we select the “Product categories”. In the VALUE FROM META FIELD input, put the “slug” value.
Then, proceed to the JetForm tab and to the Post Submit Action section. Here, press the “+ New Action” button. In the opened pop-up, find and click the “Redirect to Page” action to add it.
Now, you should see a pop-up that provides the settings for this action. Select the “Custom URL” option for the REDIRECT TO field. To the REDIRECT URL, add the link to the category archive page on your site that the user should be redirected to.
Add the Select Field name to the URL; thus, the URL structure should look like this:
https://domain/taxonomy-slug/%field-name%/
In our case, we use the “http://woocommerce.local/product-category/%categories_field%/” REDIRECT URL.
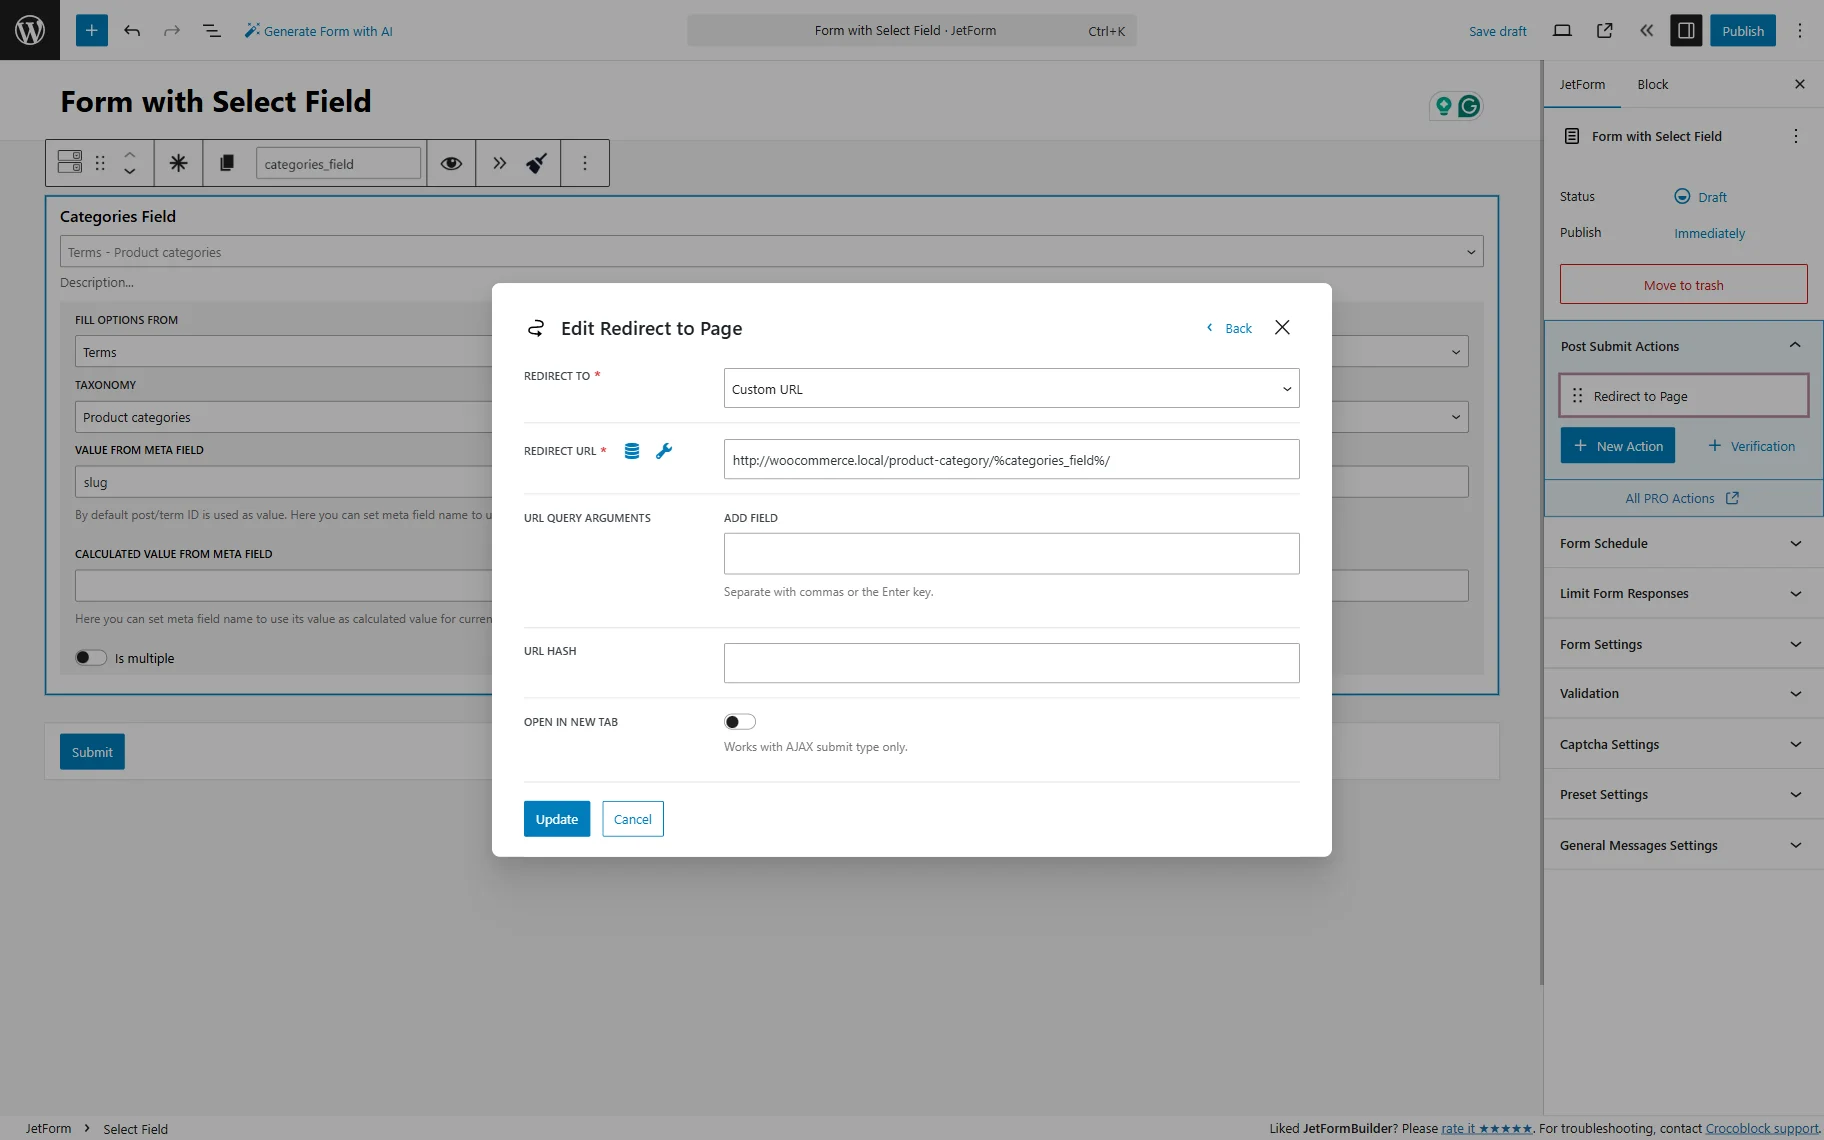
Click the “Update” button to save the post submit action settings. Then, click the “Publish” button.
Add the form to the page
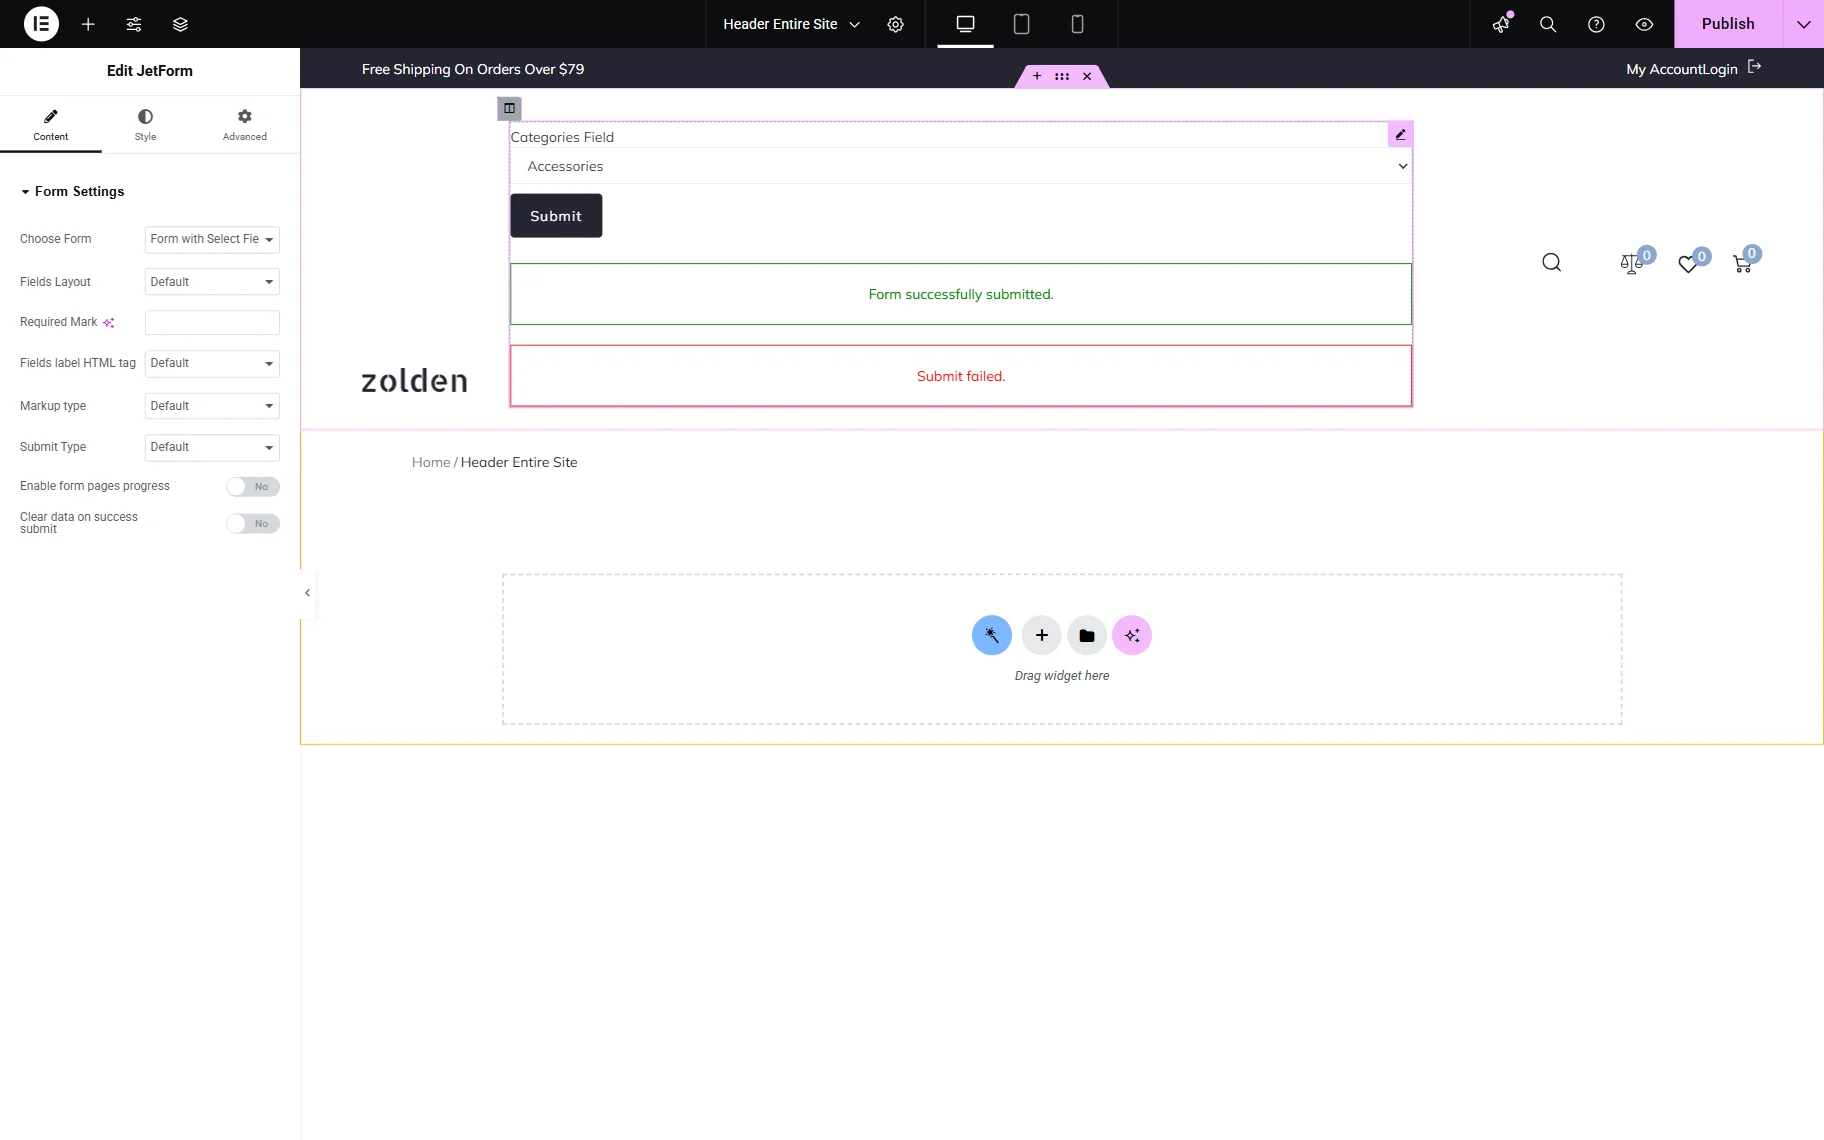
Proceed to the page where you need to display the Select Filter dropdown. Following the How to Display a Form on the Front End guide, we add it to the header.
Add the JetForm widget and select the form you created in the Choose Form input.
Click the “Publish” button once you are ready.
Check the Result
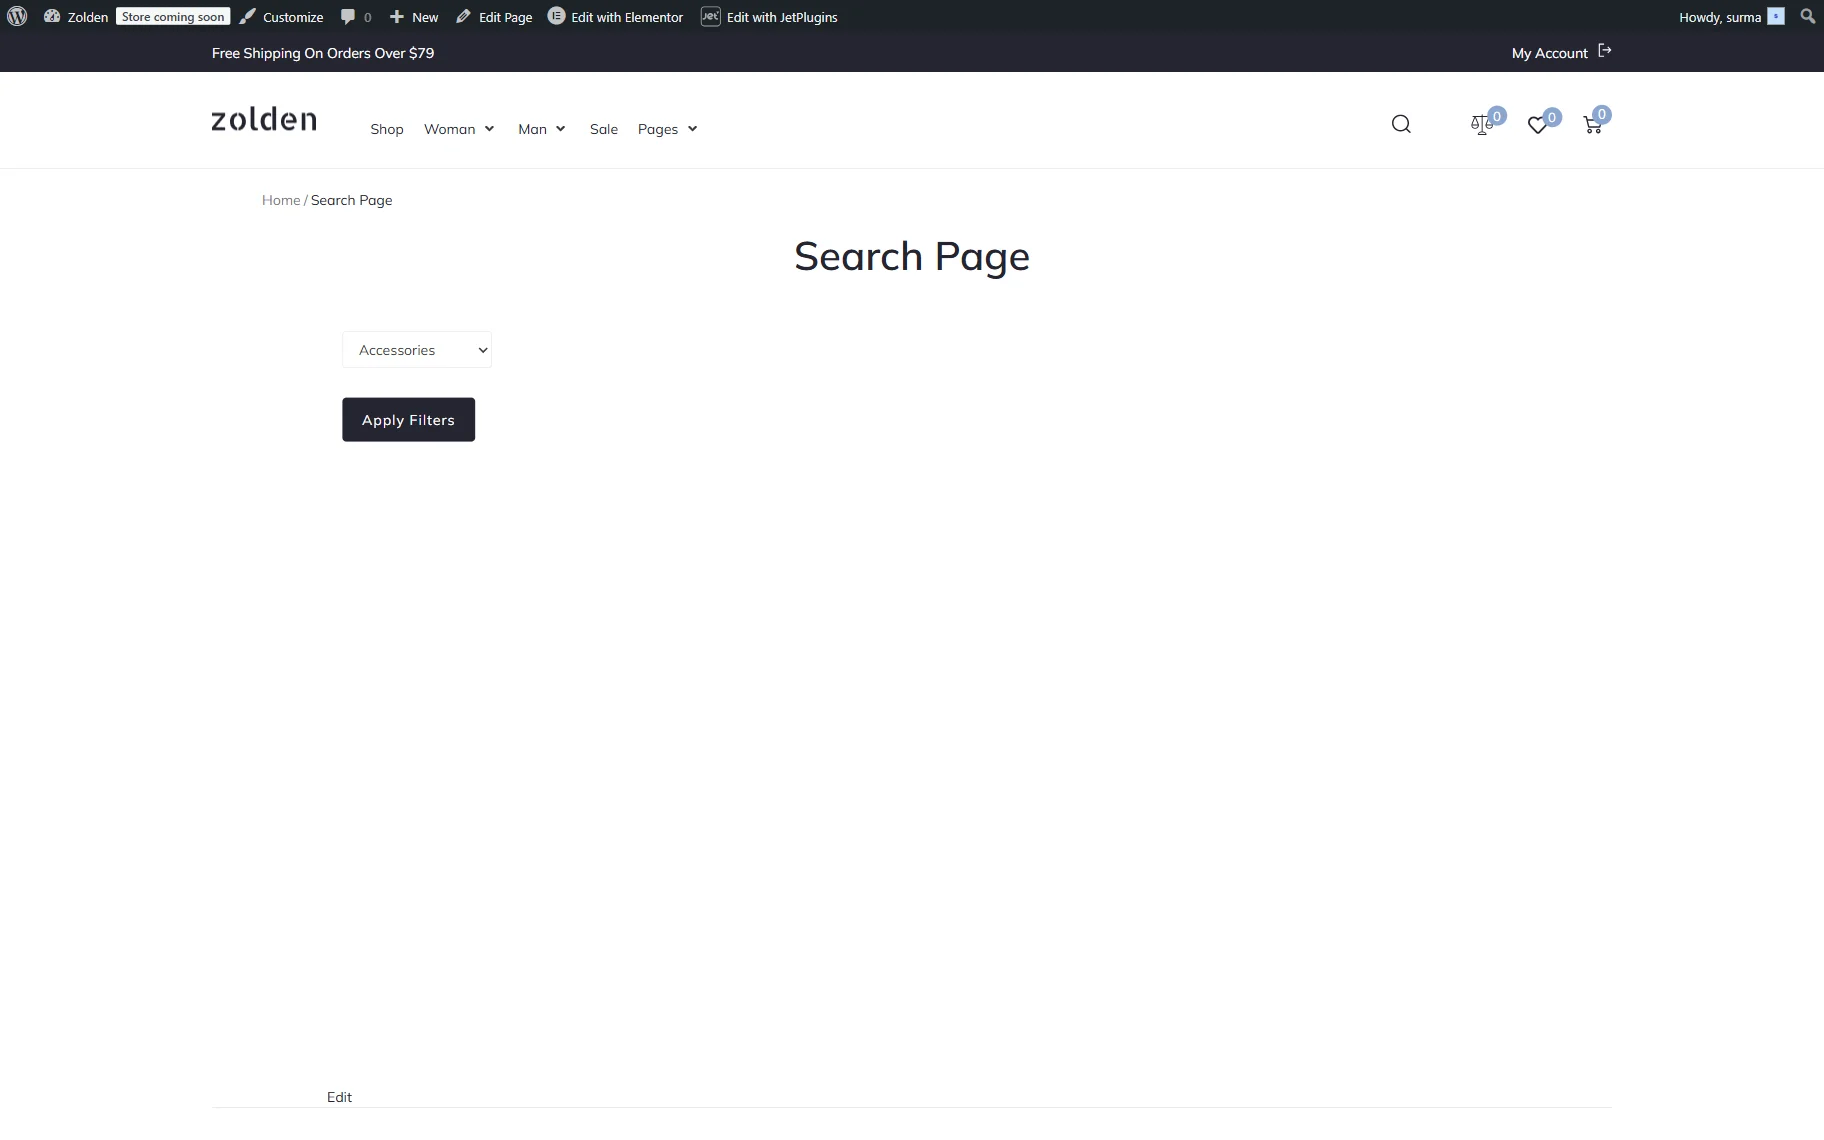
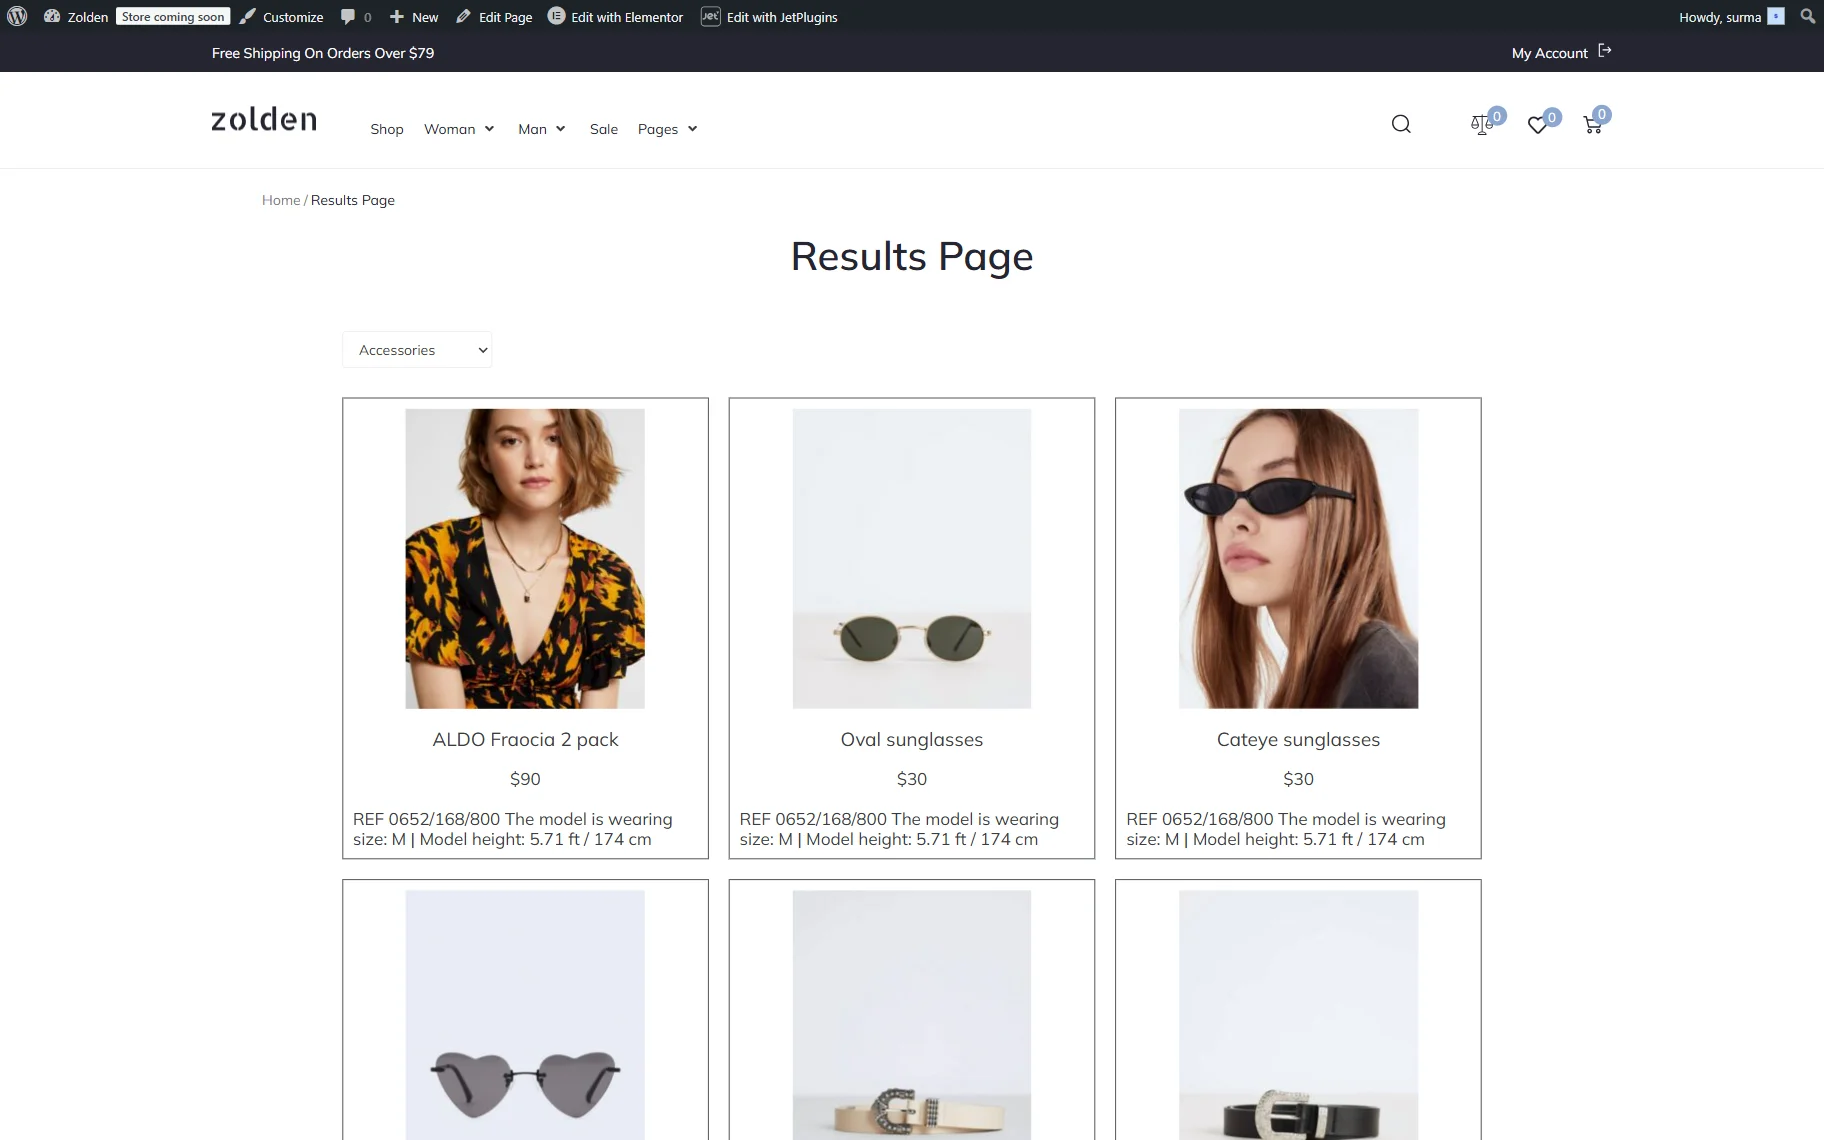
Proceed to the front end page and select an option from the Select Field. We chose the “Accessories” as an example.
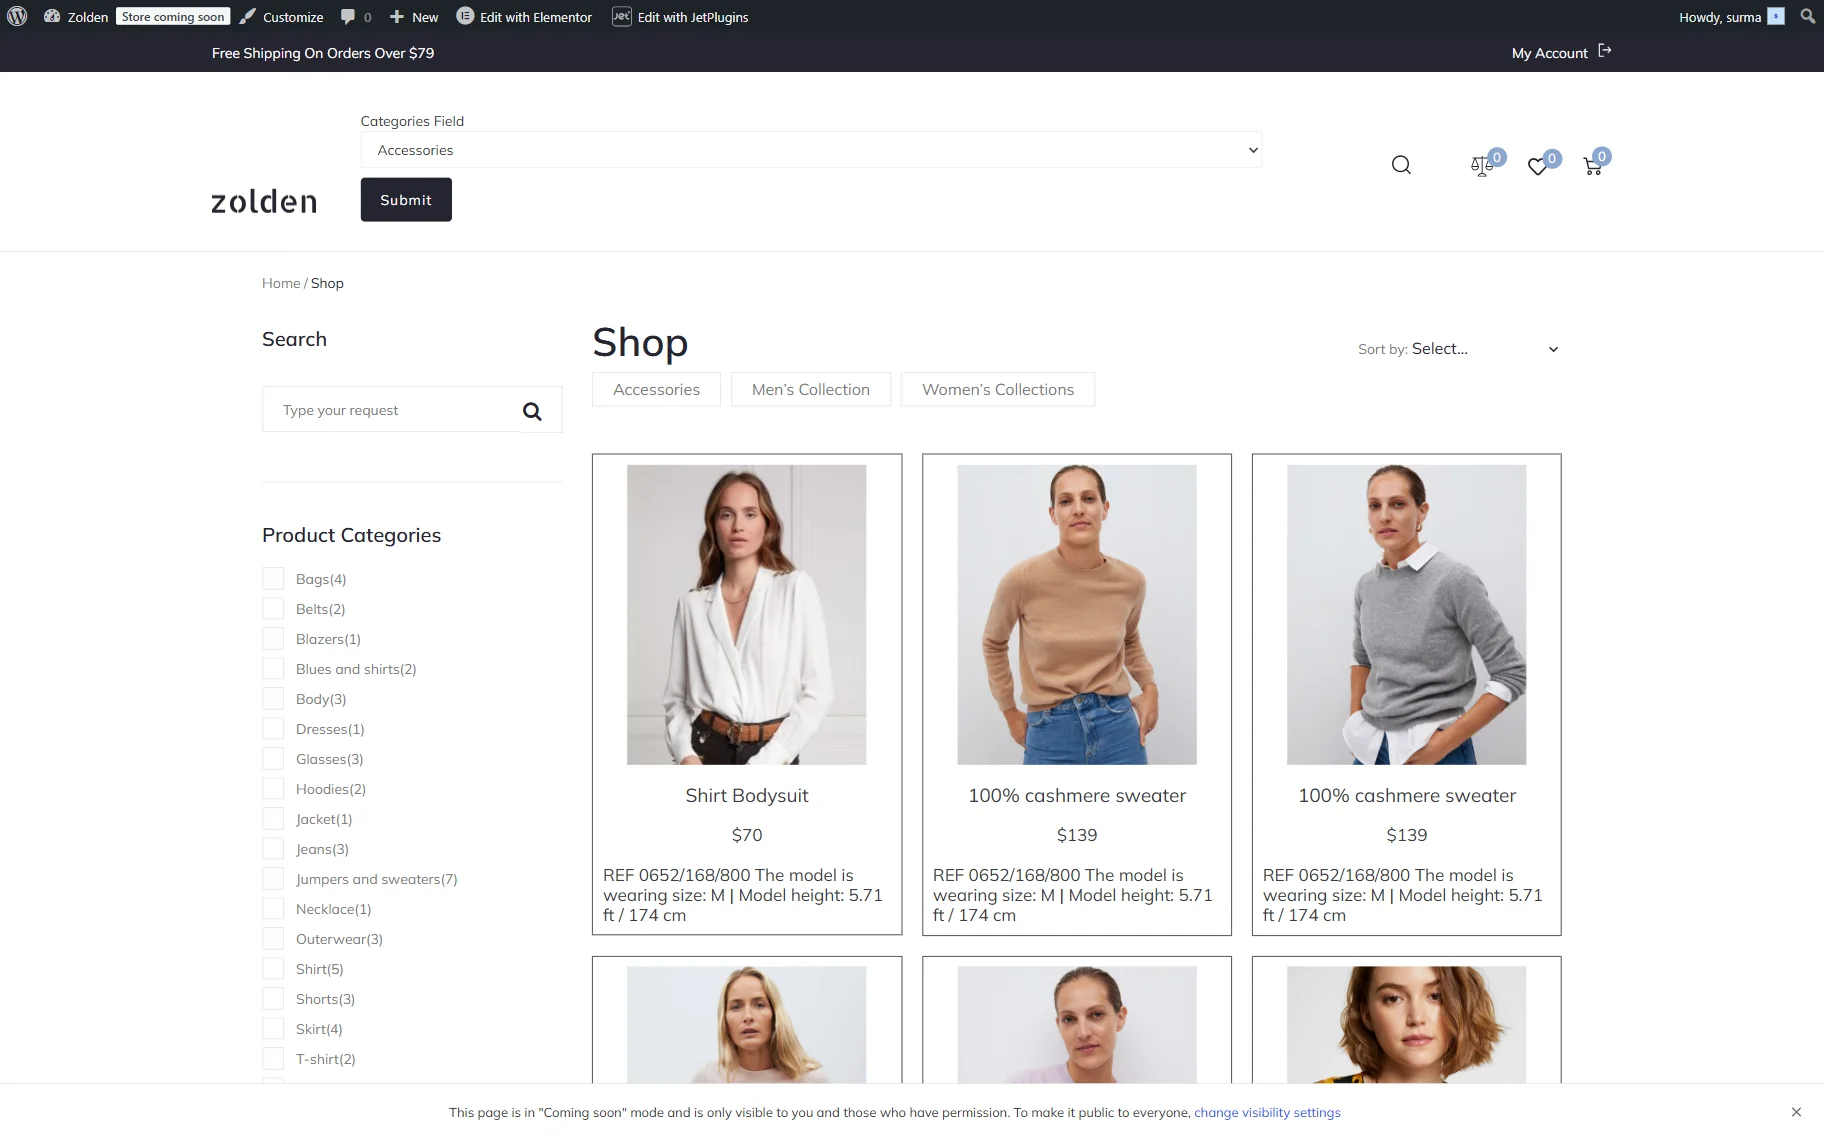
Click the “Submit” button, and you are redirected to the “Accessories” category page.

That’s it. Now you know how to redirect users to a prefiltered results page based on their dropdown selection using either JetSmartFilters Select Filter or JetFormBuilder forms.