Changing Listing Items and Their HTML Tag Wrappers
Learn how to add HTML tag wrappers to the whole listing and its compounds using a specific code snippet to provide better HTML semantics, SEO, and the code flexibility.
Before you start, check the tutorial requirements:
- Elementor (Free version), Block editor (Gutenberg), or the Bricks theme
- Code Snippets plugin installed and activated.
Add the Code Snippet
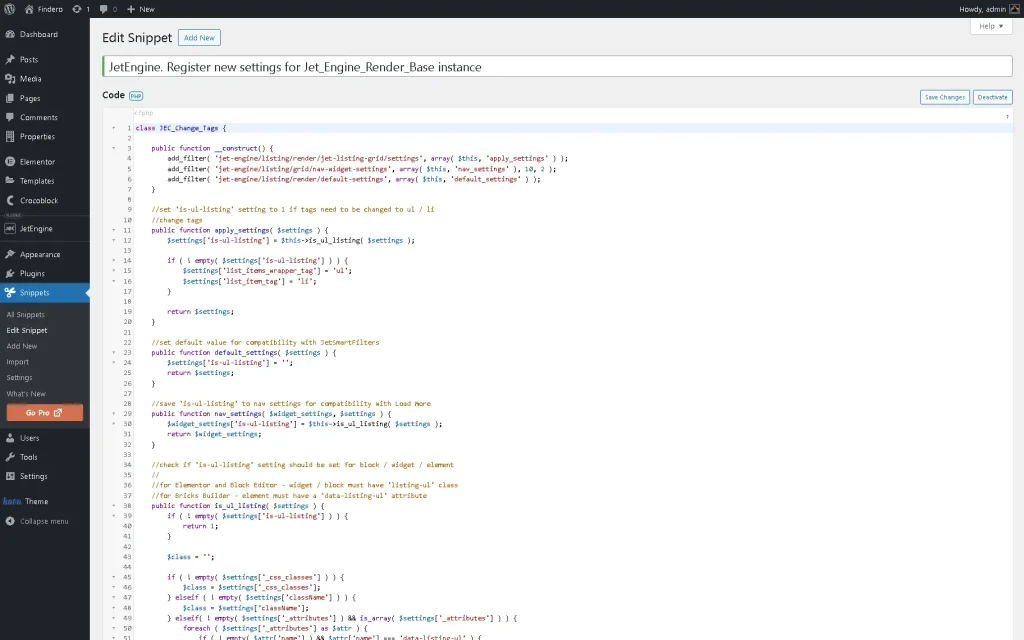
Navigate to the WordPress Dashboard > Snippets > Add New page and add the snippet’s name (here, the “JetEngine. Register new settings for Jet_Engine_Render_Base instance” text). Then, insert the following code into the Code block.
class JEC_Change_Tags {

	public function __construct() {
		add_filter( 'jet-engine/listing/render/jet-listing-grid/settings', array( $this, 'apply_settings' ) );
		add_filter( 'jet-engine/listing/grid/nav-widget-settings', array( $this, 'nav_settings' ), 10, 2 );
		add_filter( 'jet-engine/listing/render/default-settings', array( $this, 'default_settings' ) );
	}

	//set 'is-ul-listing' setting to 1 if tags need to be changed to ul / li
	//change tags
	public function apply_settings( $settings ) {
		$settings['is-ul-listing'] = $this->is_ul_listing( $settings );

		if ( ! empty( $settings['is-ul-listing'] ) ) {
			$settings['list_items_wrapper_tag'] = 'ul';
			$settings['list_item_tag'] = 'li';
		}

		return $settings;
	}

	//set default value for compatibility with JetSmartFilters
	public function default_settings( $settings ) {
		$settings['is-ul-listing'] = '';
		return $settings;
	}

	//save 'is-ul-listing' to nav settings for compatibility with Load More
	public function nav_settings( $widget_settings, $settings ) {
		$widget_settings['is-ul-listing'] = $this->is_ul_listing( $settings );
		return $widget_settings;
	}

	//check if 'is-ul-listing' setting should be set for block / widget / element
	//
	//for Elementor and Block Editor - widget / block must have 'listing-ul' class
	//for Bricks Builder - element must have a 'data-listing-ul' attribute
	public function is_ul_listing( $settings ) {
		if ( ! empty( $settings['is-ul-listing'] ) ) {
			return 1;
		}

		$class = '';

		if ( ! empty( $settings['_css_classes'] ) ) {
			$class = $settings['_css_classes'];
		} elseif ( ! empty( $settings['className'] ) ) {
			$class = $settings['className'];
		} elseif( ! empty( $settings['_attributes'] ) && is_array( $settings['_attributes'] ) ) {
			foreach ( $settings['_attributes'] as $attr ) {
				if ( ! empty( $attr['name'] ) && $attr['name'] === 'data-listing-ul' ) {
					$class = 'listing-ul';
					break;
				}
			}
		}

		return false !== strpos( $class, 'listing-ul' ) ? 1 : '';
	}
}

//create an instance of a class
new JEC_Change_Tags();
After that, tick the “Run snippet everywhere” selector below the Code block and press the “Save Changes” button.
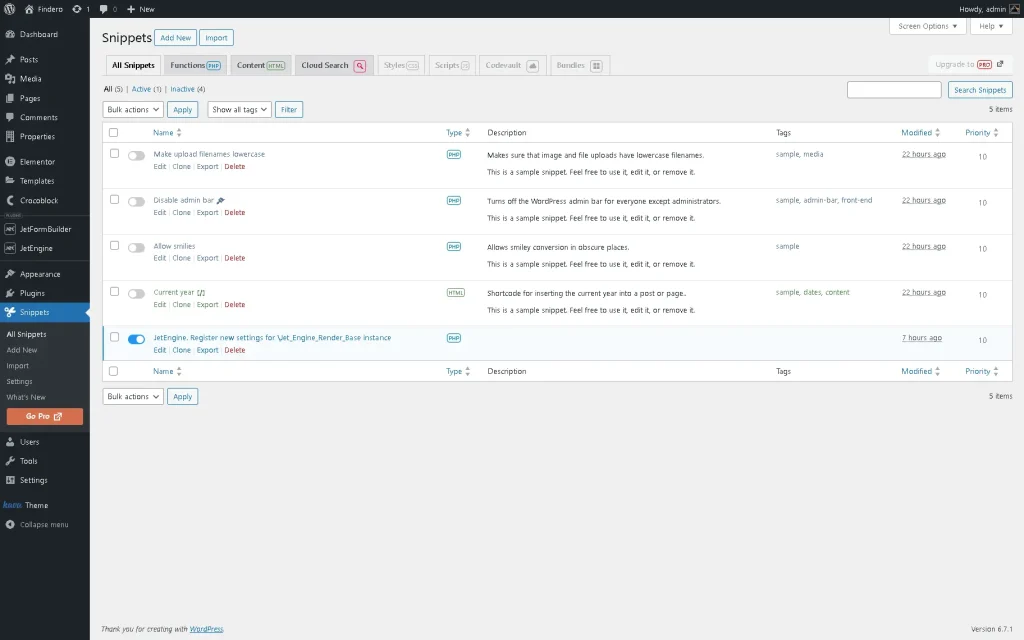
In the next step, move to the WordPress Dashboard > Snippets > All Snippets page and activate the newly-created snippet.
Change the Listing Grid Settings in the Block Editor
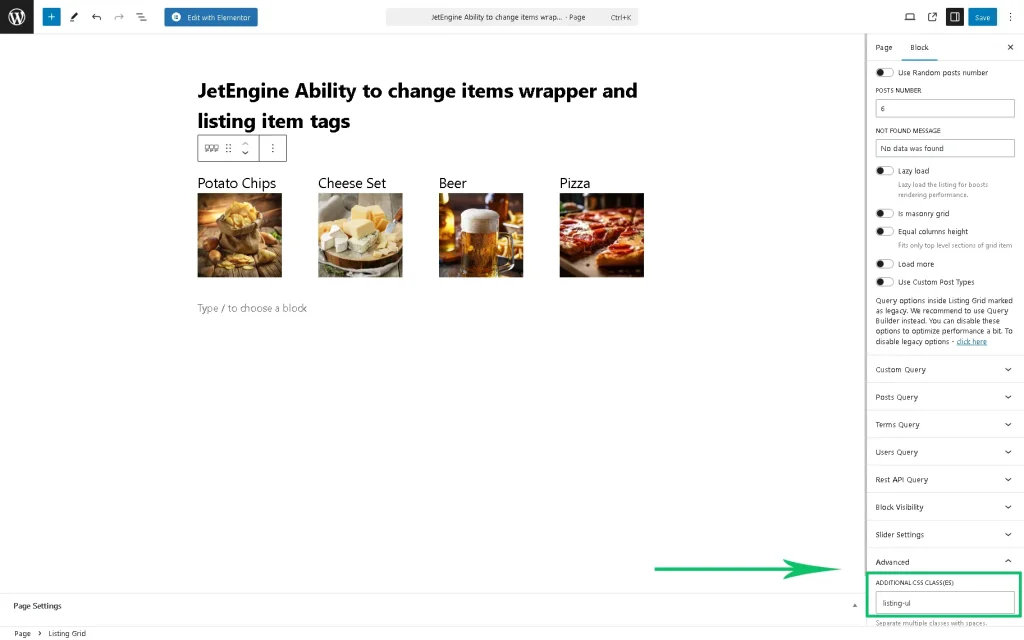
Create a page or open a previously created one and insert the Listing Grid block. Add the needed LISTING and configure other settings. Next, scroll the Block settings down and unroll the Advanced tab. Here, add the “listing-ul” class into the ADDITIONAL CSS CLASS(ES) field.
Once added, click the “Publish/Save” button.
Change the Listing Grid Settings in the Elementor
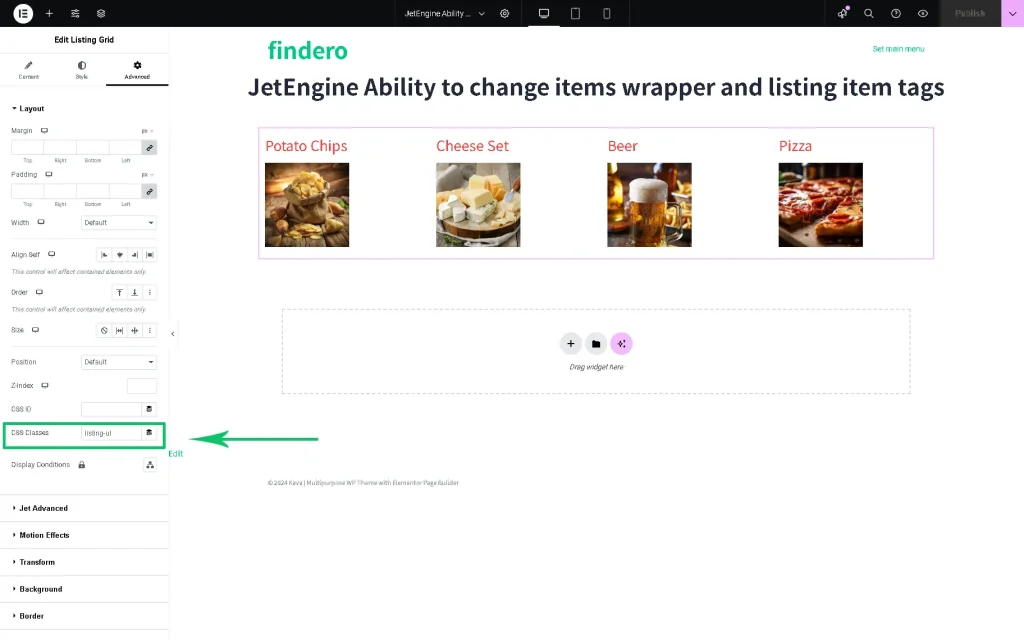
As in the Block Editor, сreate a page or open a previously created one and insert the Listing Grid widget.
Configure the needed settings. Then, unroll the Advanced tab and add the “listing-ul” class into the CSS Classes field.
Finally, click the “Publish/Save” button.
Change the Listing Grid Settings in the Bricks Theme
As in the Block Editor, сreate a page or open a previously created one and insert the Listing Grid element.
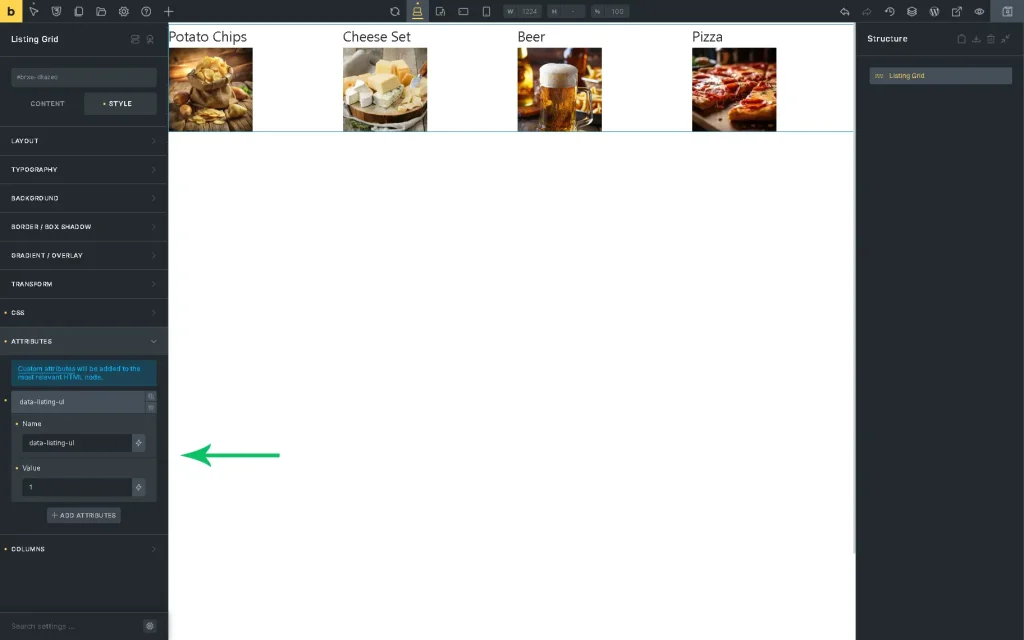
Adjust the needed settings. Then, unroll the STYLE tab and move to the ATTRIBUTES tab. Here, unfold this tab, add the “data-listing-ul” value into the Name field, and type a random value into the Value field (in this case, “1” text).
Finally, save the page.
Site Code Changes
After the actions mentioned above, the Listing Item’s code will be changed from the following one:
<div class="jet-listing-grid__items">
<div class="jet-listing-grid__item"></div>
<div class="jet-listing-grid__item"></div>
</div>
To the code presented below:
<ul class="jet-listing-grid__items">
<li class="jet-listing-grid__item"></li>
<li class="jet-listing-grid__item"></li>
</ul>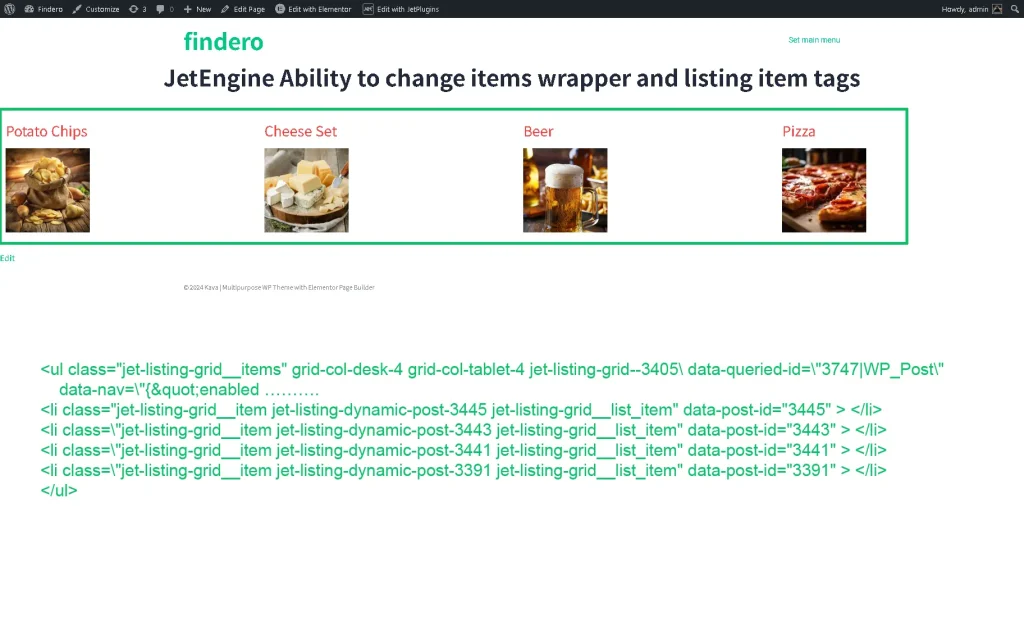
That’s it. Now you know how to add HTML tag wrappers to the listing and its compounds using the specific code snippet to provide better HTML semantics, SEO, and code flexibility using the JetEngine plugin for WordPress.
