What if you want to let the user submit a guest post on your WordPress website? It’s more than possible, and this full tutorial will help you create a guest post submission form with the JetFormBuilder WordPress plugin.
Before we dive into form creation, let me first cover what guest posting means, its pros, and threats.
📚 If you want to learn about more use cases of front-end post submission, check this article.
Table of Contents
What Is Guest Posting?
Basically, guest posting is the process of writing content for other blogs. It helps the author (guest author) to attract more attention to their website or personality.
Furthermore, guest authors build awareness across their industry and get a backlink to their website, social media, etc. It’s one of the best ways of improving personal branding.
Why accept user-submitted content?
But why your company website or personal blog should accept guest posts? There are a few reasons to allow user-submitted content:
- bring more expertise to your blog;
- generate valuable and relevant content from guest authors;
- check how your audience reacts to user-generated content;
- communicate with professionals;
- diversify the on-site content.
Guest posting threats
Among all guest posting perspectives, there are also a few threats that you can easily avoid.
- Spam. You’ll constantly face spam/irrelevant content submissions after opening a guest posting opportunity on your website.
- No submissions. Sometimes it also happens, and you need to attract guest authors to contribute content to your platform.
- Not following your guidelines. Brrr… Of course, not everyone will strictly follow your blog rules. And you have to edit the article by yourself or decline the post written by a guest author.
But, no worries, if you know your audience’s interests, have strict article guidelines, and read each article carefully before posting, you’ll successfully avoid guest posting threats. Hence, none can be assured in spamming emails or articles, so you need to accept this first.
Nevertheless, guest posting is a fantastic opportunity for each blog, and only you choose the strategy you want to follow.
📚 Read also: Why you should use WordPress?
At this cheerful point, let’s create our guest-posting WordPress form using the JetFormBuilder plugin. If you prefer video instead of written instructions, we have one on our YouTube channel:
How to Create a Guest Post Submission Form?
Customizing the Custom Post Type
Before we start creating the form, let’s sum up what information we need from the user:
- author name
- author email
- article title
- article content
- article category
- article excerpt
Now, it’s time to decide which post type you want to use for the guest posts and turn this WordPress form to post. Most probably, if you use the standard “Post” post type for your blog and want guest authors, just add their articles there.
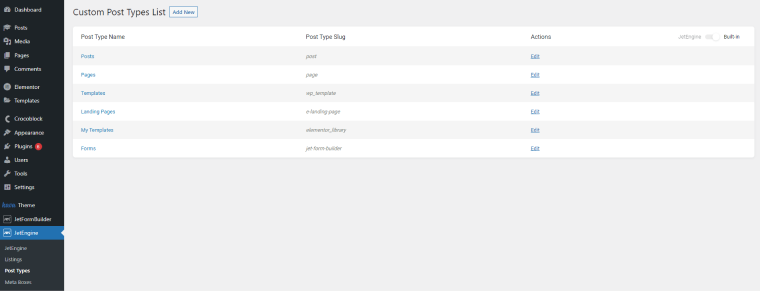
Most fields are already available in WordPress Posts, but I want to create some additional fields. For this, I’ll edit the default “Post” post type. Thus, go to JetEngine > Post Types, toggle built-in post types, find the Posts type, and press the “Edit” action.
If there is a new user, just use these instructions and functionality to register them.
There is a paid add-on by JetFormBuilder that logins the registered user right away. Check it out; it’s one of the 16 premium form add-ons for $49 a year.
NOTE
You can show registration fields conditionally after activating the Dynamic Visibility JetEngine module and the Custom Visibility Conditions add-on.
The plugin will check whether the user is logged in or not, as well as whether they are the current user, and display the registration/log-in fields in case the user is not logged in or registered.
The great thing about JetEngine is that you can use Profile Builder to create a full-fledged user profile for anyone who wants to register on your website as a contributor or an author. And because of this functionality, they can get a great interface that works perfectly not only for your blog’s contributors but also for members in the blog or membership website that gets monetization thanks to such activity.
Add a new guest post submission WordPress form
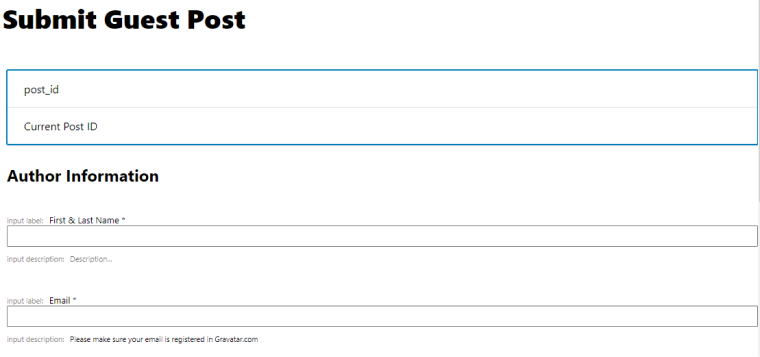
Now we are ready to create our guest post submission form. Navigate to JetFormBuilder and press the “Add New” button. I’ll name my form “Submit Guest Post” and add the form fields.
The first form section will be author details:
- First & Last name (Text field);
- Email (Text field).
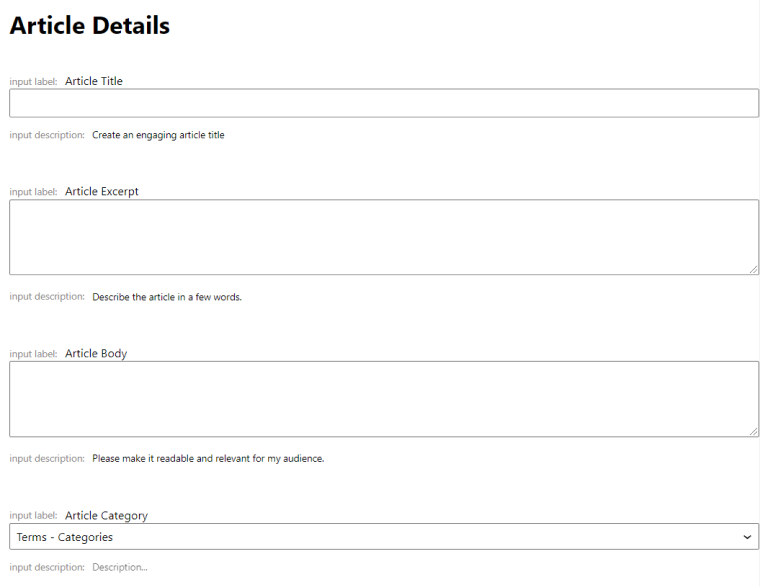
The second form section will be about article details, including:
- Article Title (Text field);
- Article Excerpt (Textarea field);
- Article Body (WYSIWYG field);
- Article Category (Select field, I’ve set it to pre-fill options from the Terms – taxonomy as Category).
Set up Post-Submit Actions
After creating the form fields, we need to let our form understand what to do after submission.
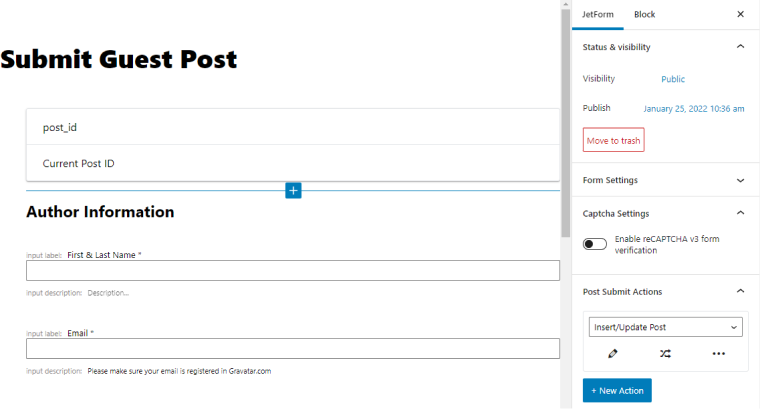
For this, a bunch of post-submit actions exist. We need the Insert/Update Post one to make our guest post submissions go directly to our Posts.
Therefore, navigate to JetForm post-submit actions, choose “Insert/Update Post,” and press the “Edit” button:
First, we need to choose the relevant post type to store guest posts. In my case, it’s an inbuilt Posts post type. Secondly, select the post status:
- Draft (save the article as a draft);
- Pending Review (set pending review status; I’ll go with this option);
- Private (publish the article privately);
- Published (instantly publish the guest post on your blog).

In case you add a new user, don’t forget to add a Register User post-submit action and map the fields.
And now, map all the fields in the Post-Submit Action section (the pencil icon):
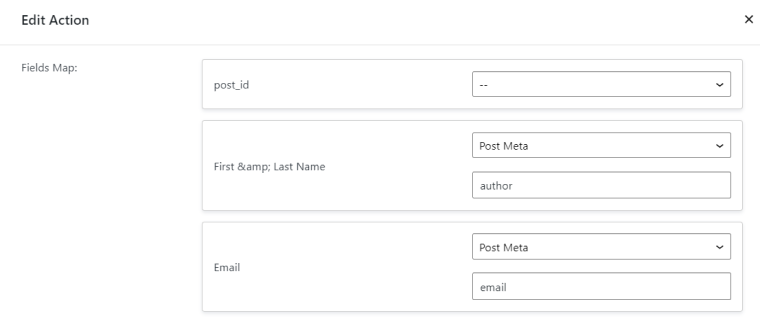
- Article Title is the inbuilt meta field Post Title;
- Article Excerpt maps with Post Excerpt;
- Article Body is our Post Content;
- If users can assign categories to their posts, consider giving them a Select field and map the list of categories with the corresponding field of your form.
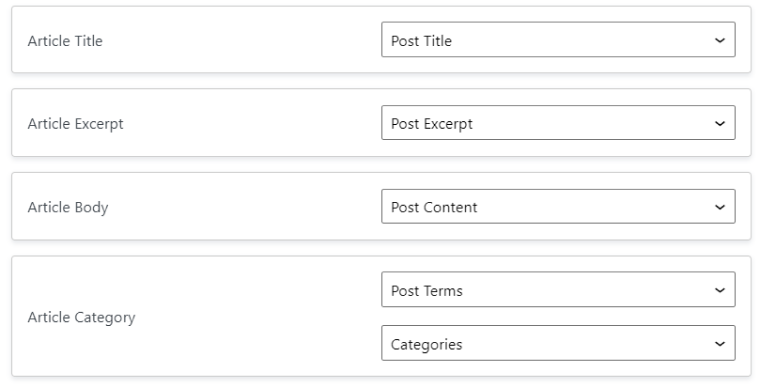
After mapping form fields with meta fields, press the “Update” button. You can also add more post-submit actions like Send email, Redirect to a page, etc.
Besides, we are done with creating the WordPress guest submission form, and now let’s add it to a page.
Add guest post form to the page
I’m using the WordPress Block editor. There are two ways to add the form to the page:
- via the JetForm block;
- via a Shortcode (copy the form shortcode, and add it to the needed page).
If you use Elementor, there is a JetForm widget that is very powerful in terms of style customizations for any form. Just don’t forget to match the Submit Type in the form creation mode and in the Elementor widget – they should match.
I’m using the JetForm block. So, I go to the WordPress page where I want to add my form, press the Plus icon, and choose the JetForm block. After this, you are asked to select the form; I’ll go with my Submit Guest Post form and press “Publish.”
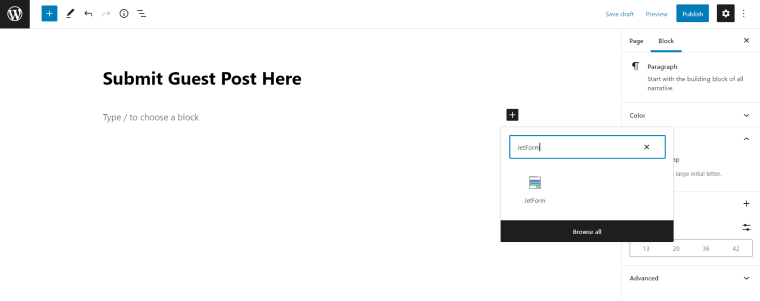
Hence, we’ve created a WordPress form for guest posting and successfully added it to the page.
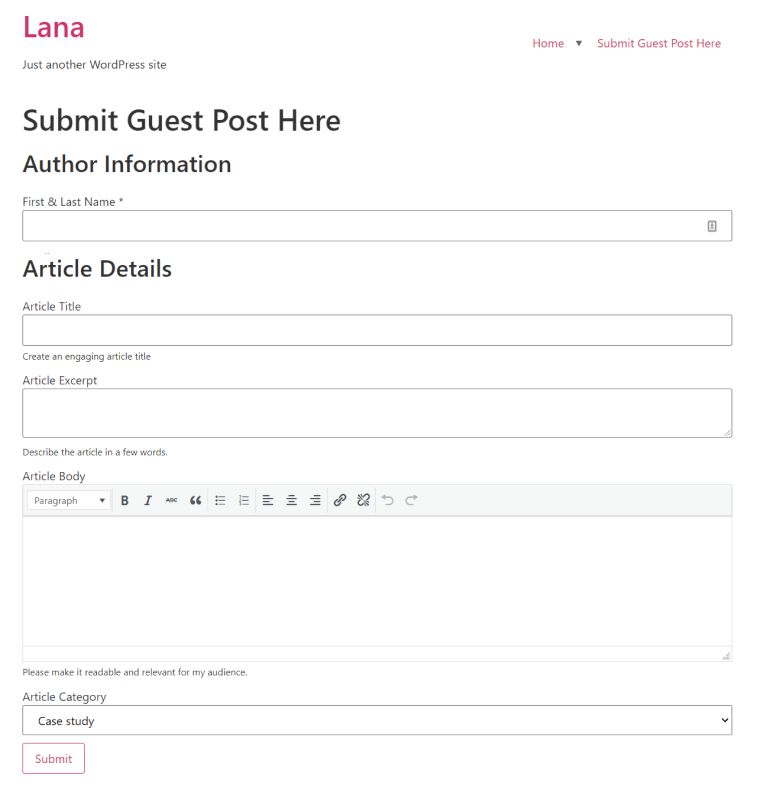
Testing and submitting a post
Let’s check how our guest post submission form works. I’ve submitted the article text from our Gutenberg Editor: Threats, Missing Features and Future, and it immediately appeared in my WordPress dashboard:

Now, I can review/edit the article.
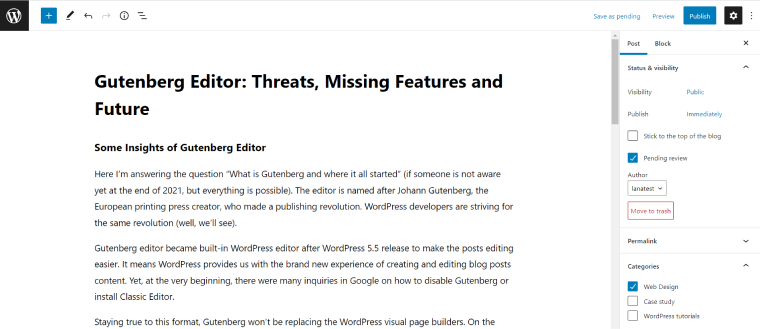
Additional information (author and email) is displayed right after the article. So, I can use the details for creating an author account in WordPress (if appropriate).

It works amazing, doesn’t it?
NOTE
Oh, boy! I totally forgot about form styling. I like my minimalistic style, but would you like to style each form block? JetStyleManager free WordPress plugin is here for you. Check out the styling documentation.
FAQ
If the guest post contains helpful content and is relevant to your site’s topic, it’s perfect for SEO. However, if the publication is spam or the article is not informative, it can harm SEO. Therefore, before publishing guest posts, re-read and edit them.
Yes, you can do it with additional plugins or code.
It benefits both the author and the site where the article is written. The author makes the most of their name and gets backlinks, and the website gets helpful material and a new audience.
No. Guest posting helps create recognition and expertise, but you must use different tools to develop your brand.
TL;DR
The guest post submission form helps you to make the guest posting easier. The article is sent directly to your WordPress posts, which allows you to review, edit, and publish the articles faster.
Here are a few insights I’ve come up with while preparing this WordPress guest post creation guide:
- Think about where you want to store your article submissions: in a new custom post type or inbuilt CPT (like Posts).
- Add/edit additional meta fields to your custom posts (if needed).
- Create a WordPress form with all necessary fields.
- Set up post-submit actions (what the form needs to do after the user submits it).
- Be attentive to mapping form fields with post meta (ID/Name must be the same).
- Make special requirements for your guest writers to follow.
Feel welcome to submit your questions or share your guest forms created with JetFormBuilder in the Crocoblock community.


