How to Use the Custom Quantity Selectors Addon
Learn how to use the Custom Quantity Selectors addon within the JetWooBuilder WordPress plugin functionality.
Before you start, check the tutorial requirements:
- WooCommerce plugin installed and activated
- Elementor (Free version)
- JetWooBuilder plugin installed and activated
This tutorial focuses on setting the Custom Quantity Selectors addon within the JetWooBuilder WordPress plugin functionality.
Install the Addon
The Custom Quantity Selectors addon allows you to add and customize buttons to increase or decrease the number of products for purchase.
Before installing the addon, ensure that you have an up-to-date version of the JetWooBuilder plugin. Then, download the addon from the DevTools Crocoblock page, where this and other features are available for free.
Next, navigate to Plugins on the WordPress Dashboard, click the “Add New” button, and then select the “Upload plugin” button. The last step is to activate the plugin.
Addon Usage
The Custom Quantity Selectors addon works in Products Grid, Products List, Add to Cart (on the Single and Archive Page templates), Cart Template, and Cart Table widgets.
First, ensure that you have created the Shop page using JetWooBuilder. Refer to the How to Create a Shop Page Template guide for instructions.
Open the Shop page in the Elementor page builder and locate the Products Grid or Products List widget.
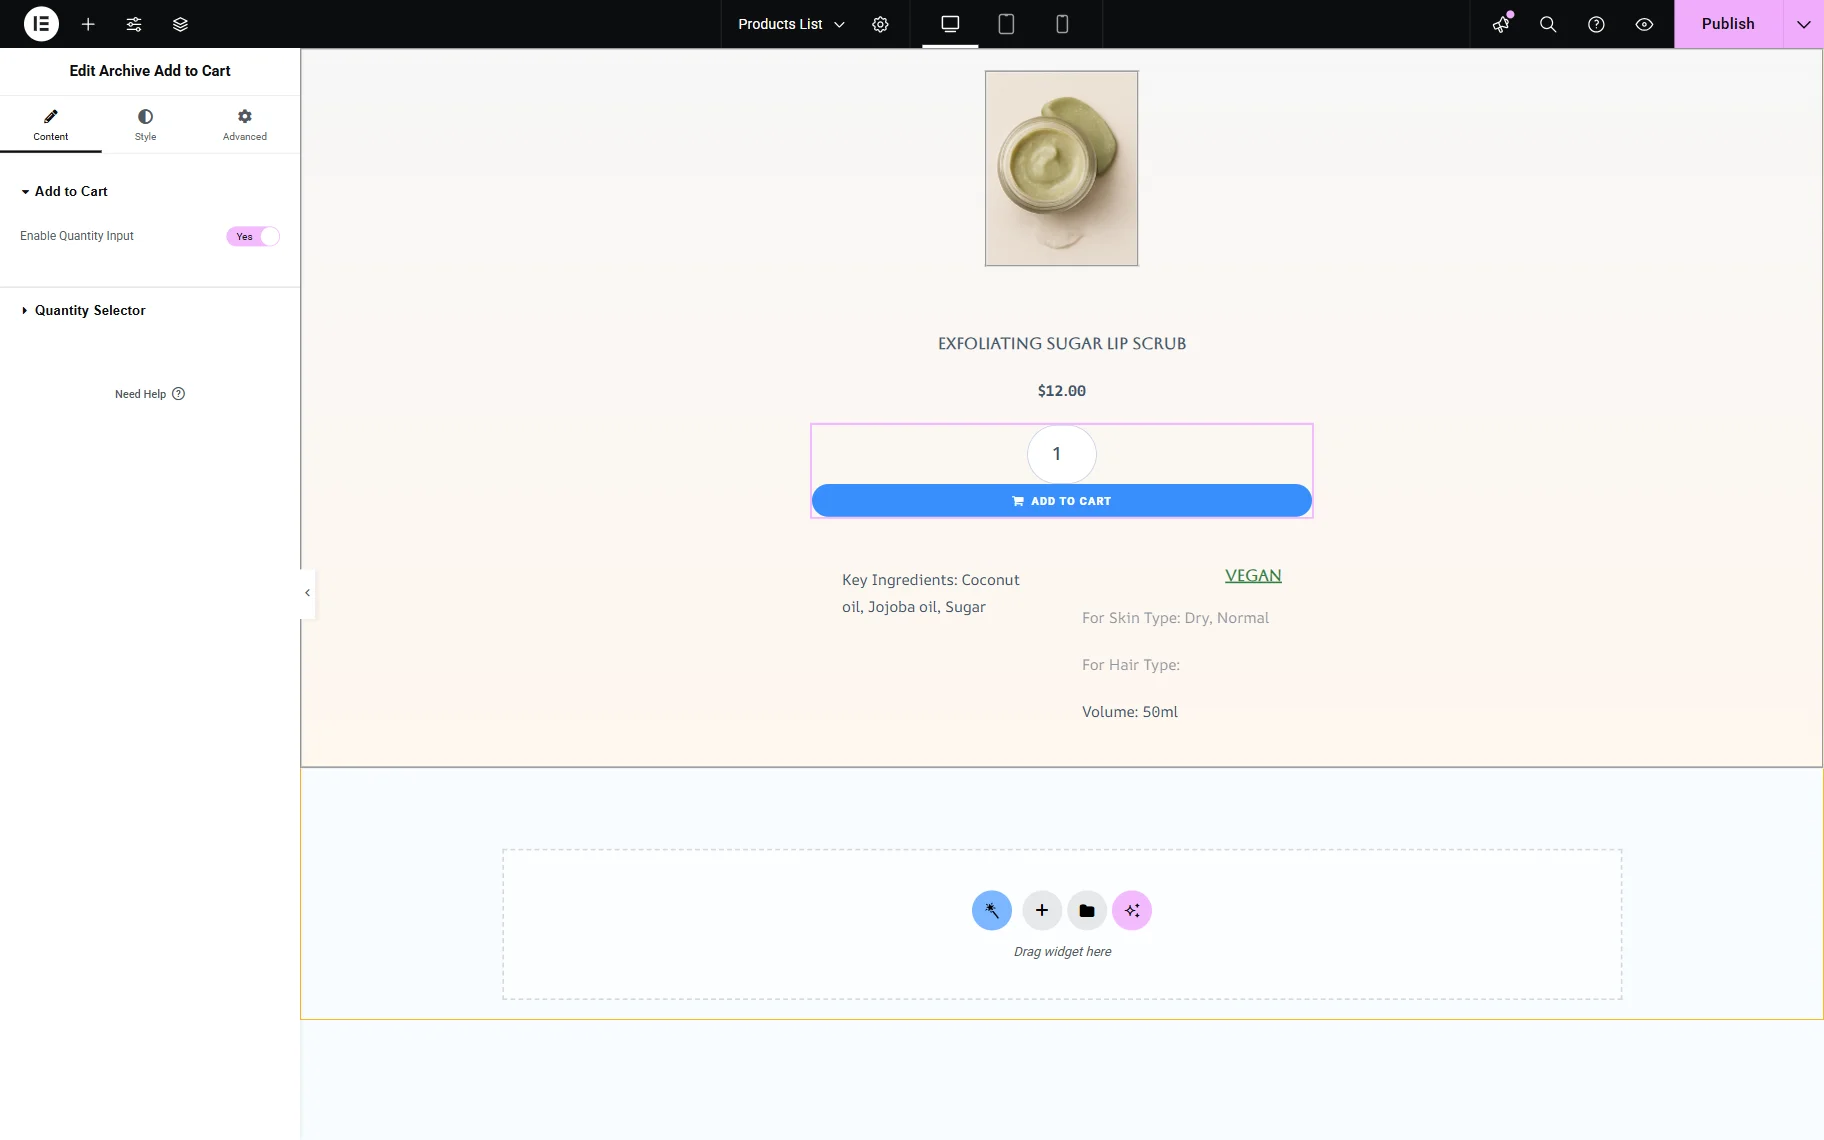
After that, navigate to the General settings block. Here, enable the Quantity Input toggle. To see that toggle, ensure that the Add To Cart Button is also toggled on.
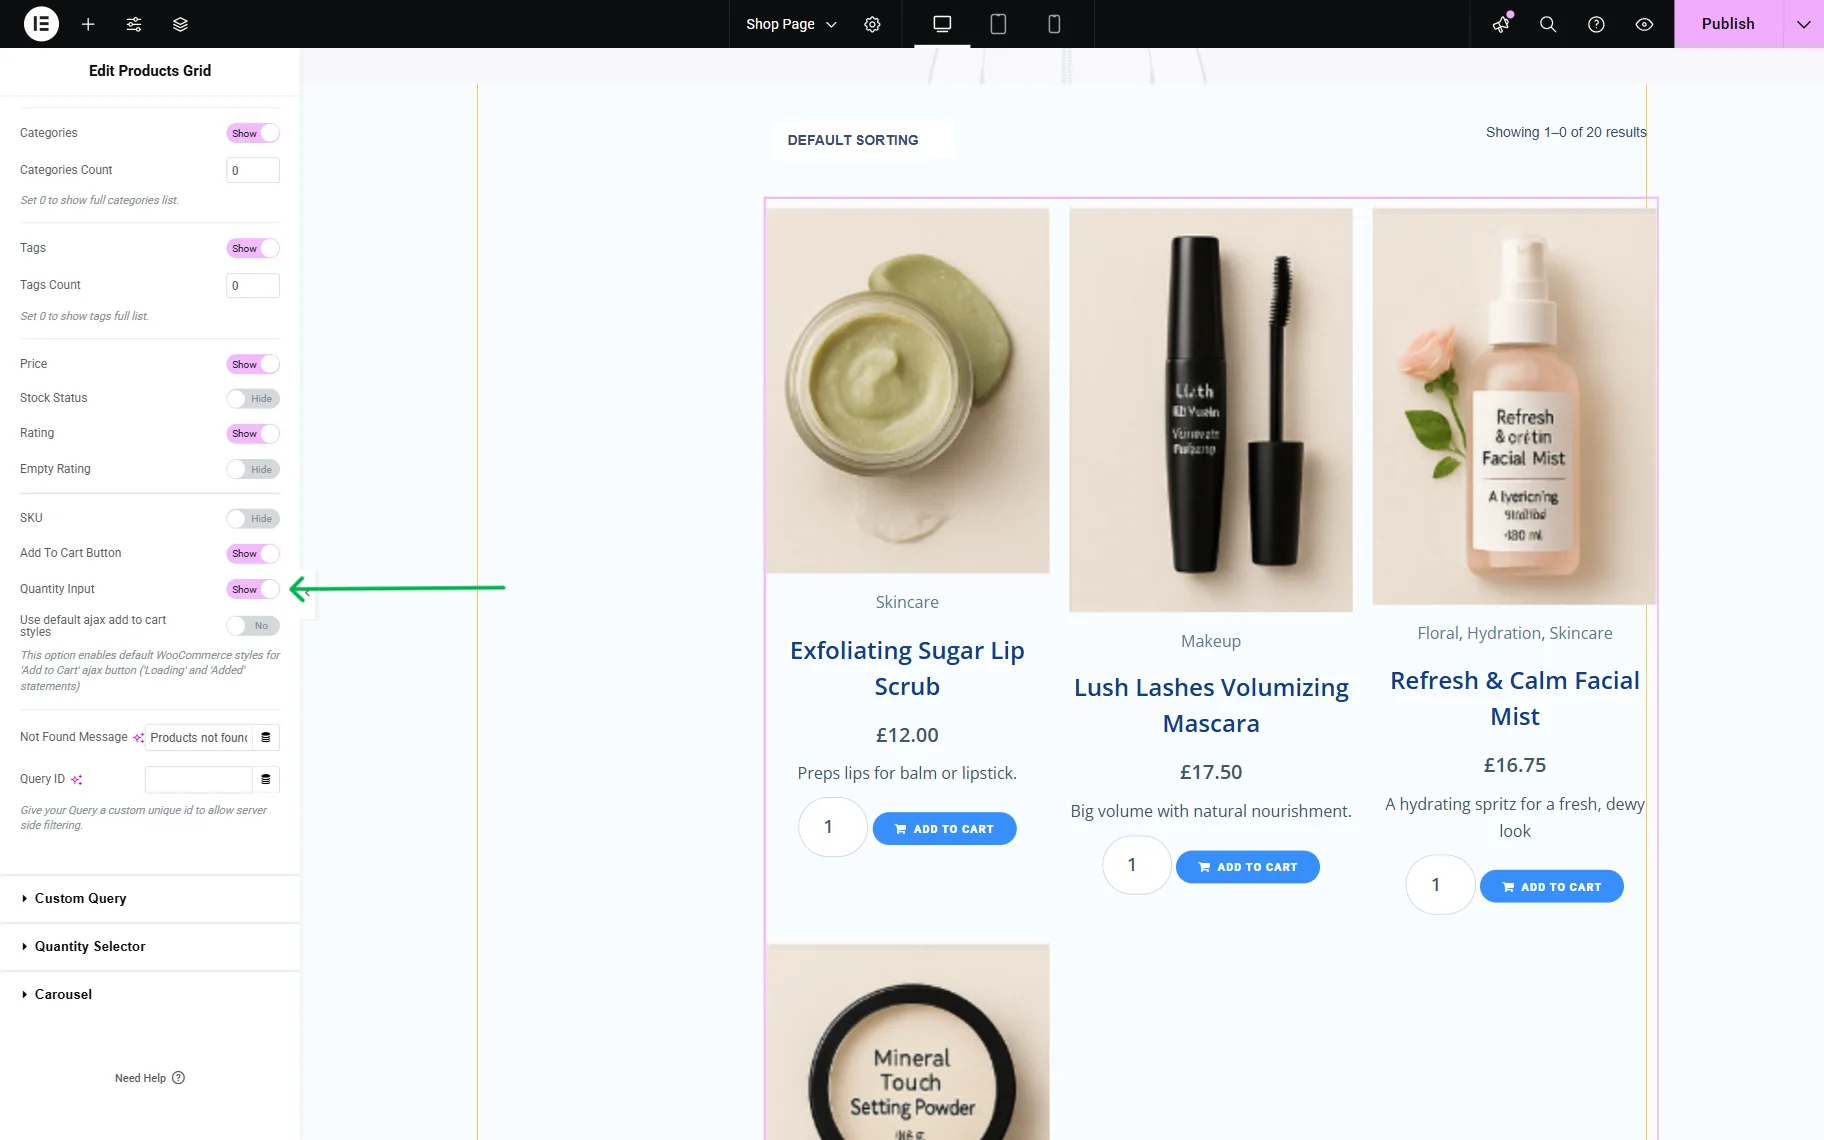
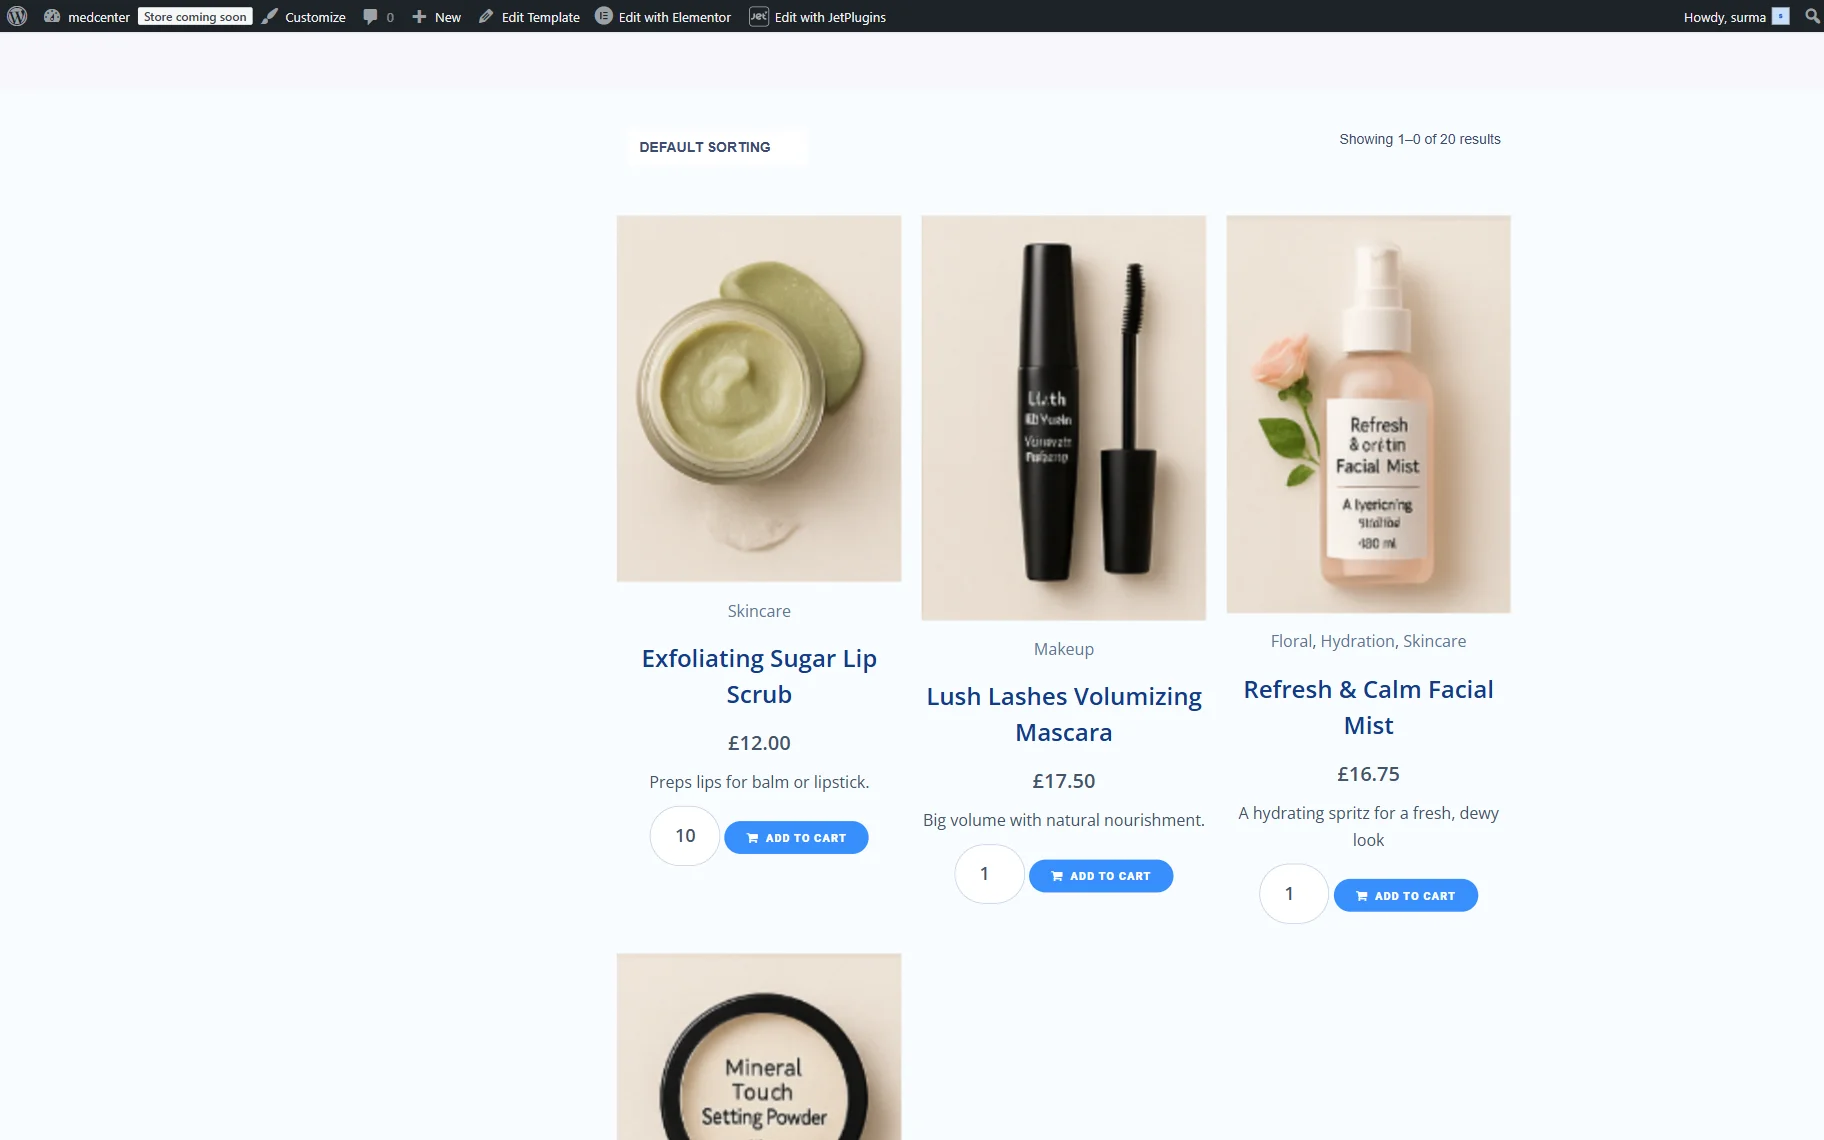
Then, you can notice the quantity input appears next to the “Add to cart” button in the Products Grid or Products List widget on the page. Additionally, the new Quantity Selector tab shows up in the Content settings block. You can turn on the Enable Quantity Selector and customize it according to your preferences.
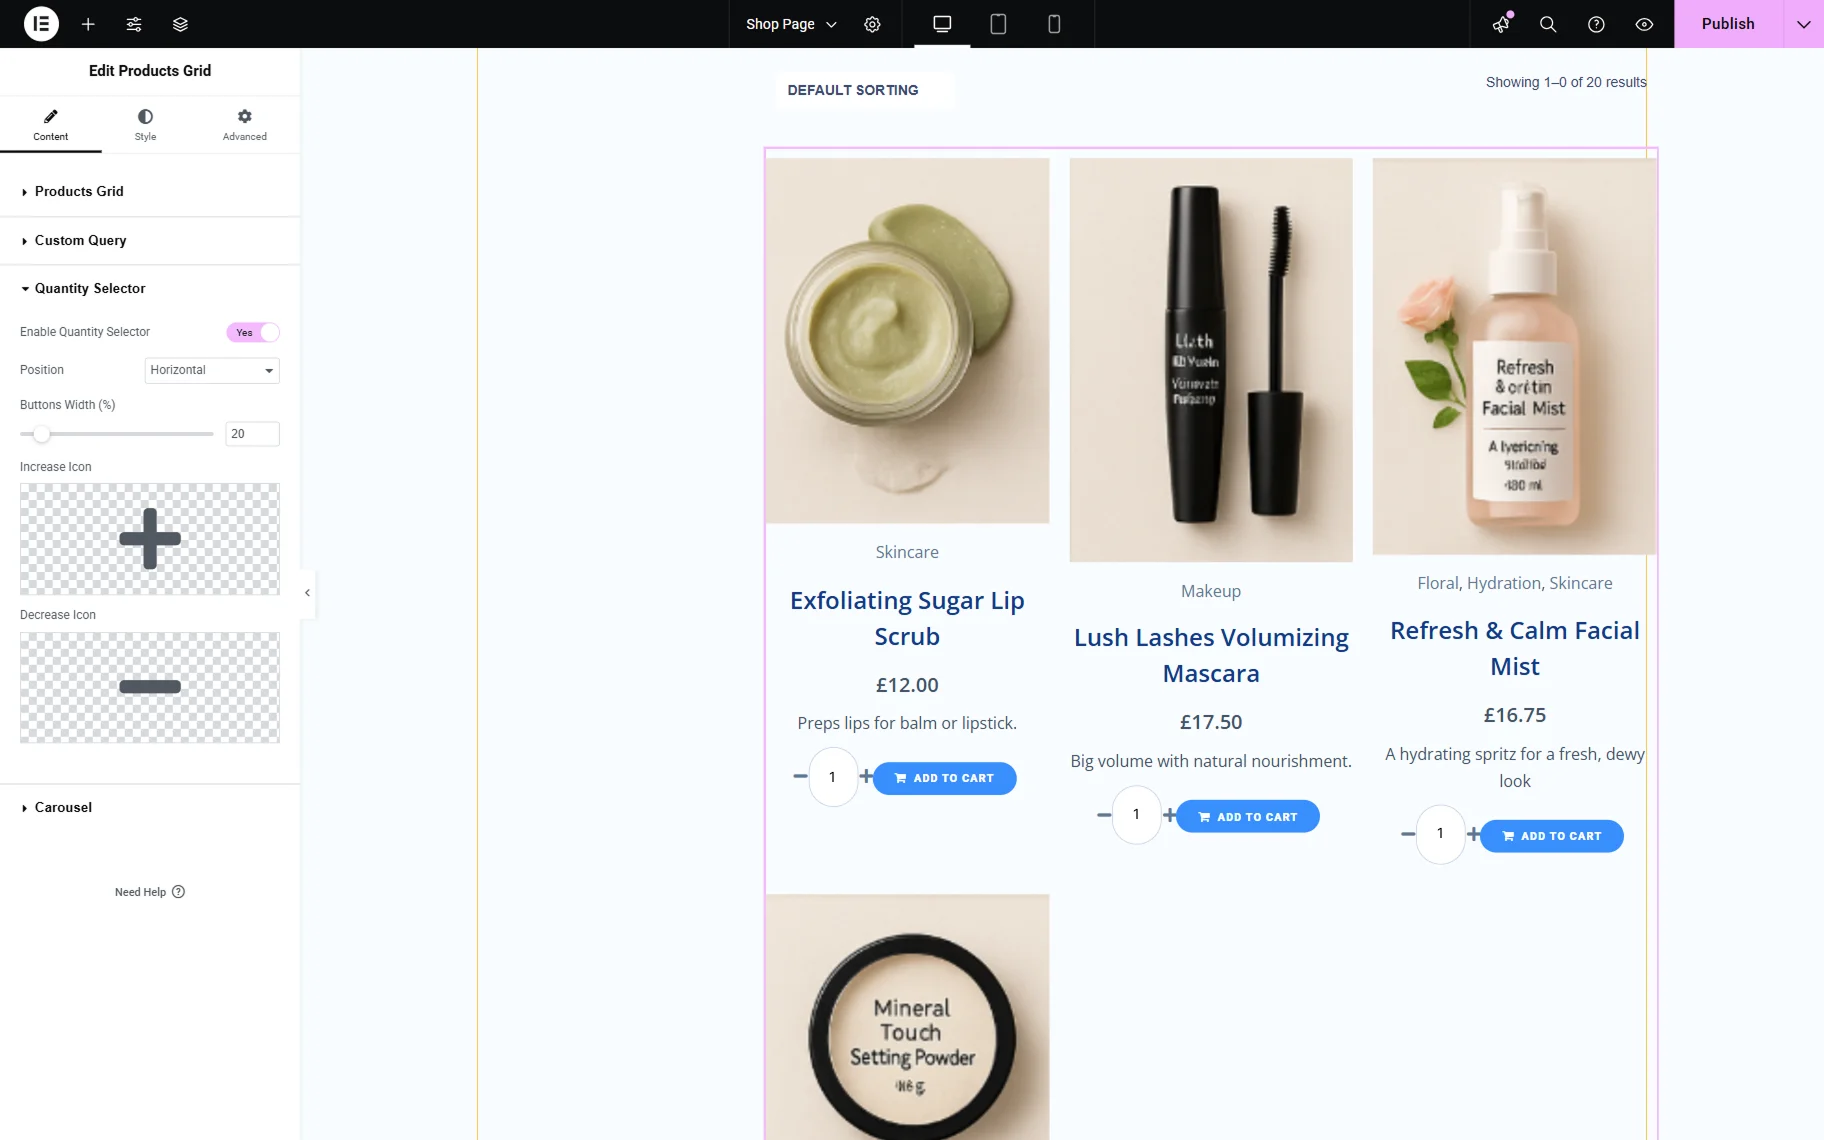
The buttons to increase and decrease the count of products appeared on the sides of the quantity inputter. In the Quantity Selector settings block, you can select the buttons’ Position, Width, and Increase and Decrease Icons.
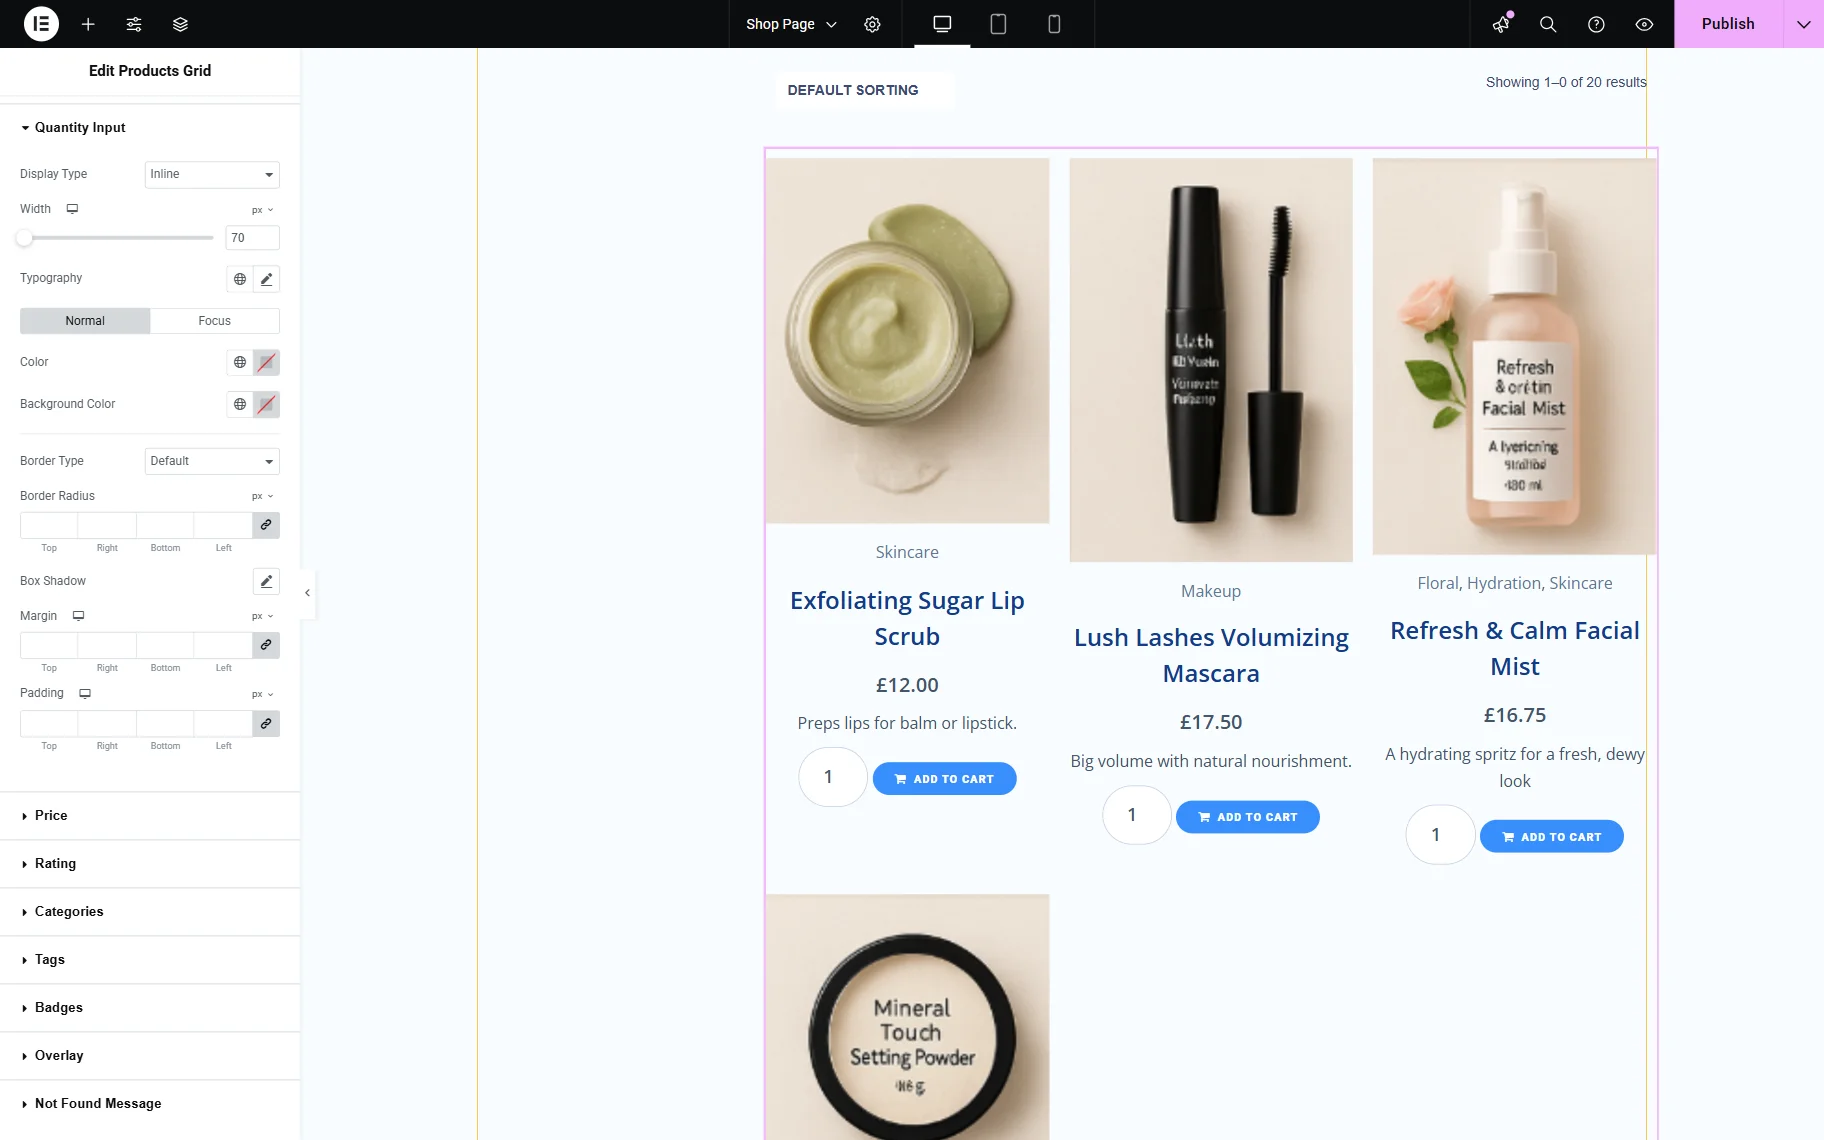
Other customization options can be found in the Style settings block. Here, you can adjust the icon Size, customize the Hover Effect, change the Color and Background, add a Border and Box Shadow, and adjust the Margin and Padding.
The same settings you can discover in the Add to Cart widget.
Limiting Selected Units
To limit the number of selected products, add the code below to the functions.php file of your current active child theme or to the Code Snippets plugin (or any other similar plugin that allows adding PHP snippets).
In this case, we proceed to the WordPress Dashboard > Snippets > Add New and add the code:
add_filter( 'woocommerce_quantity_input_args', 'set_max_quantity_for_all_products', 10, 2 );
function set_max_quantity_for_all_products( $args, $product )
{ $args['max_value'] = 10; // Set the maximum quantity to 10
return $args;
}
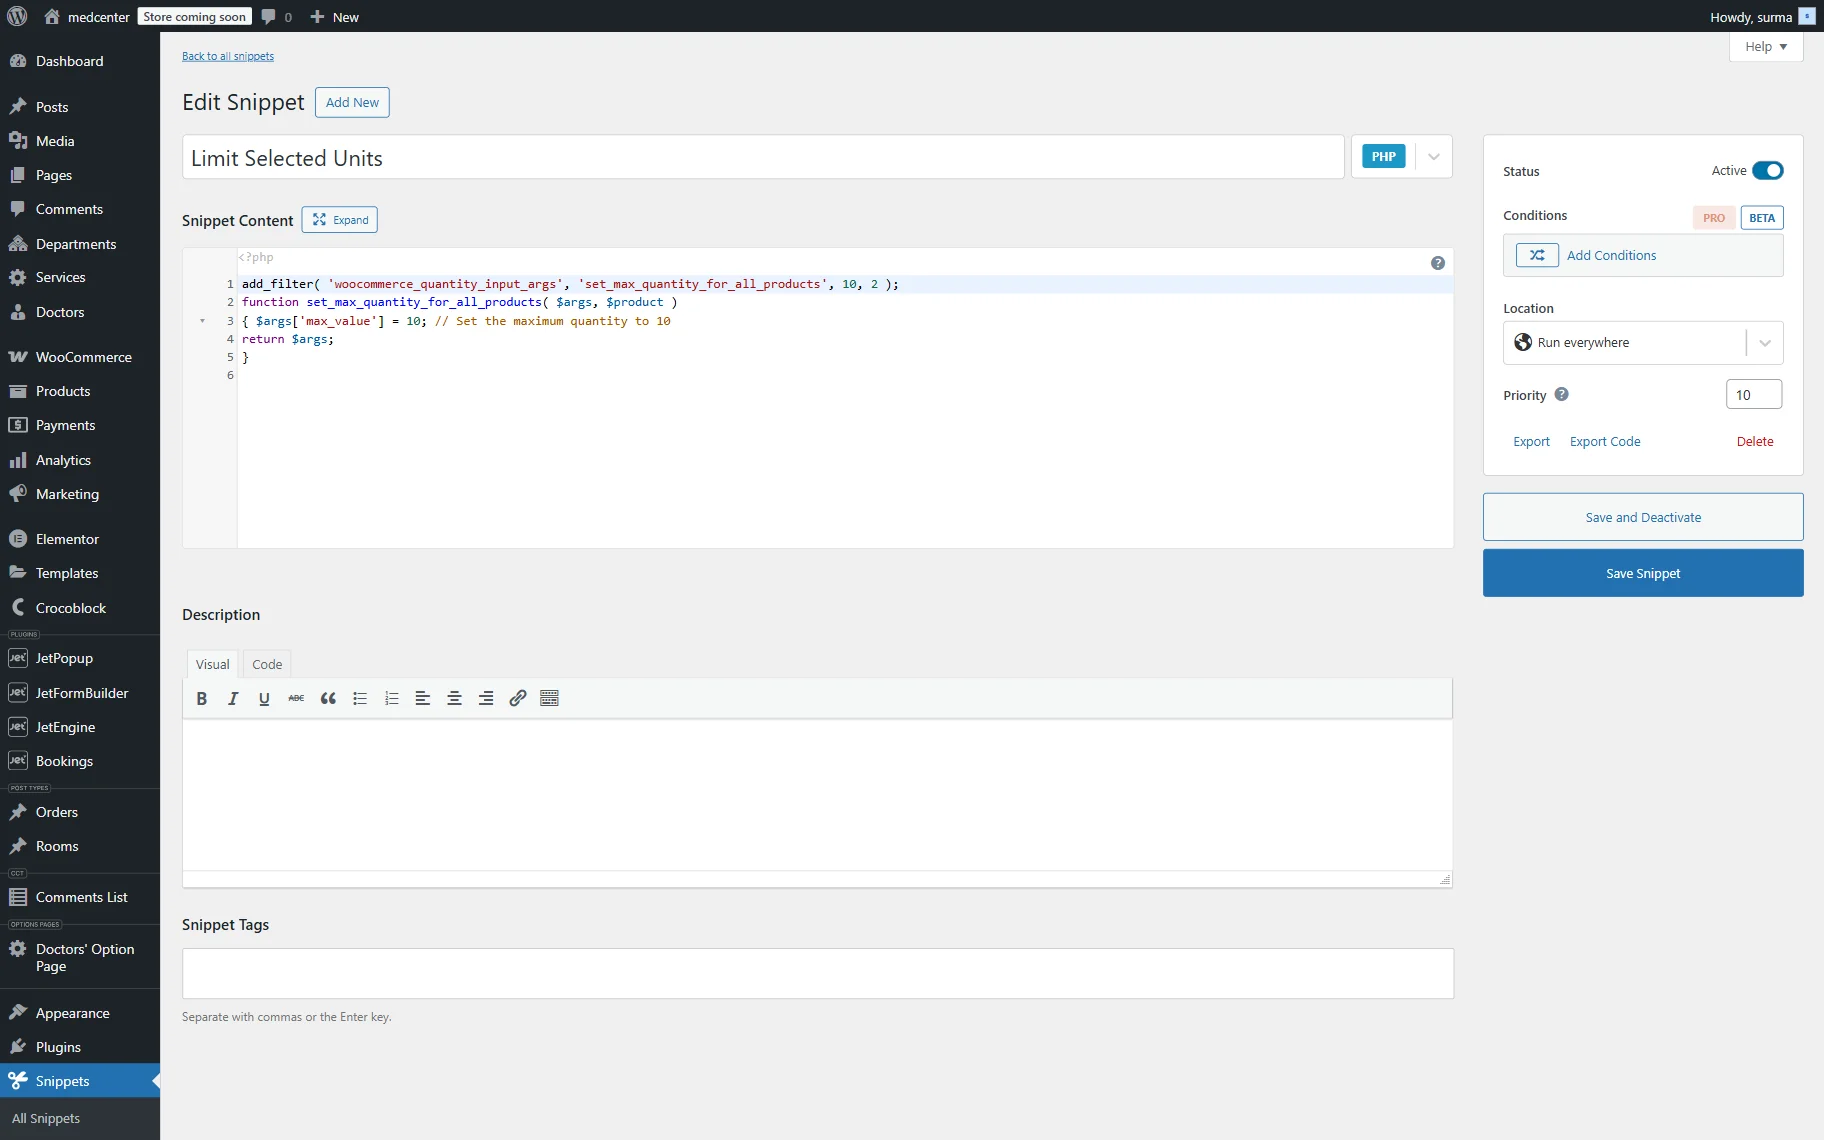
On the front end, we cannot add more than 10 units of the product to the cart.
That’s all. Now you know how to use and customize the Quantity Selector in your store created in the JetWooBuilder WordPress plugin.