Admin Filters Overview
From this tutorial, you will learn how to use JetEngine’s Admin Filters to organize Custom Post Types and what makes it so useful.
Admin Filters Functionality
The Admin Filters is an additional back-end tool of the WordPress admin dashboard to filter a CPT list by glossaries, taxonomies, and metadata.
WordPress can filter the CPTs by Dates by default. For example, the back end of a real estate site looks as follows.
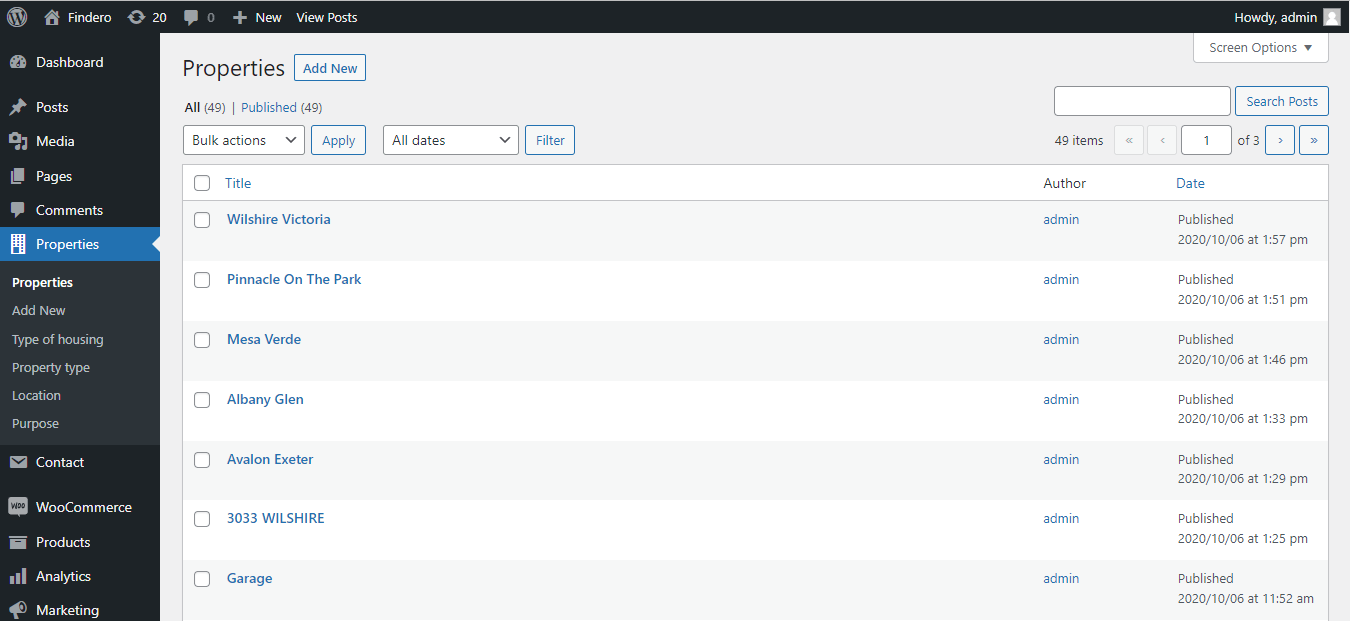
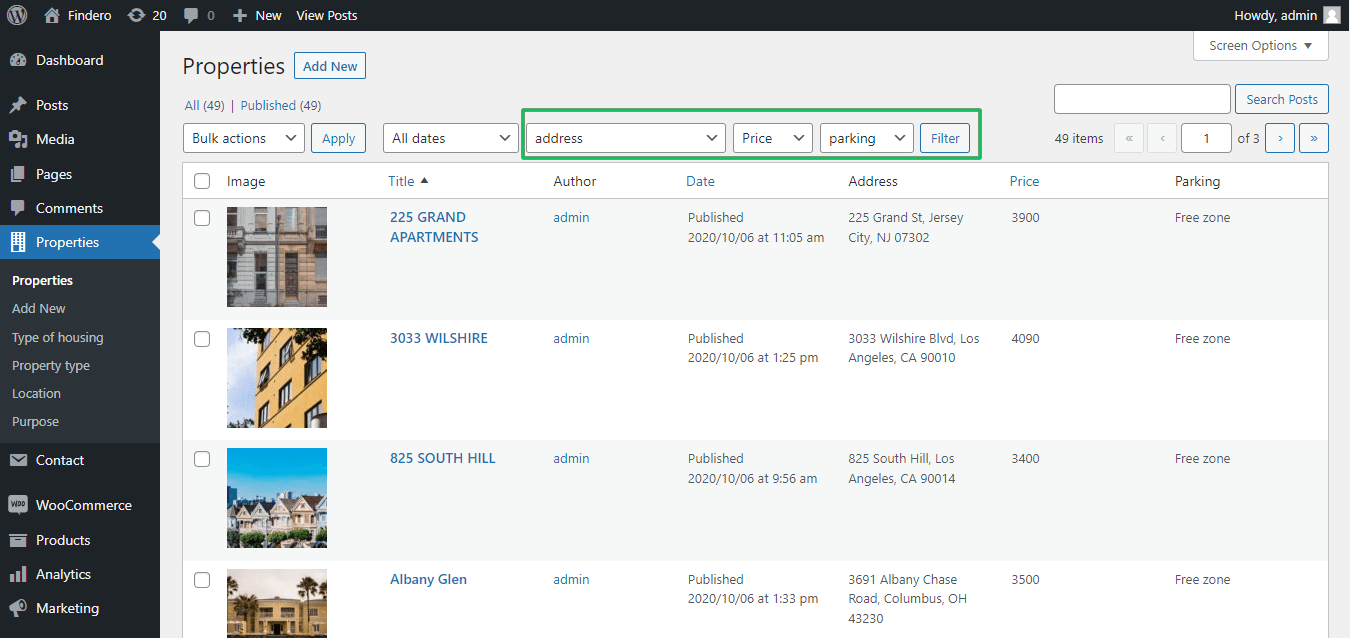
The JetEngine plugin adds Admin Filters dropdown menus on the panel’s top. Users can apply the Admin Filters filters for any meta field, including Text, Numeric, Date and Time, and related fields (Select Boxes, Checkboxes, or Radio Button fields). Unroll the dropdown menu of the appropriate filter and set the necessary conditions.
The number of displayed Admin Columns limits the number of applied Admin Filters.
The tutorial Admin Columns Overviews the Admin Column settings.
Admin Filters Location
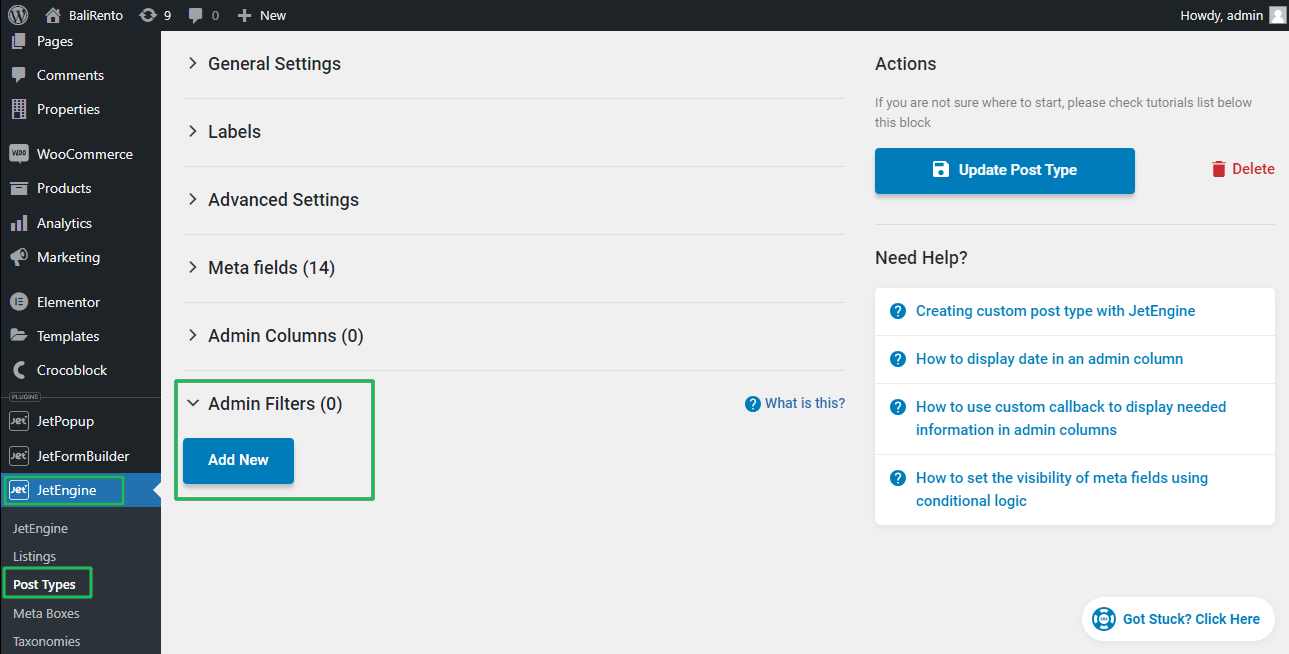
The settings to manage the Admin Filters to the CPT list are located at JetEngine > Post Types of the WordPress dashboard. Pressing the “Add New” button adds a new Admin Filter.
The tutorial details Creating Admin FIlters for the Custom Post Type with JetEngine.
Admin Filter Settings
The Admin Filter settings are:
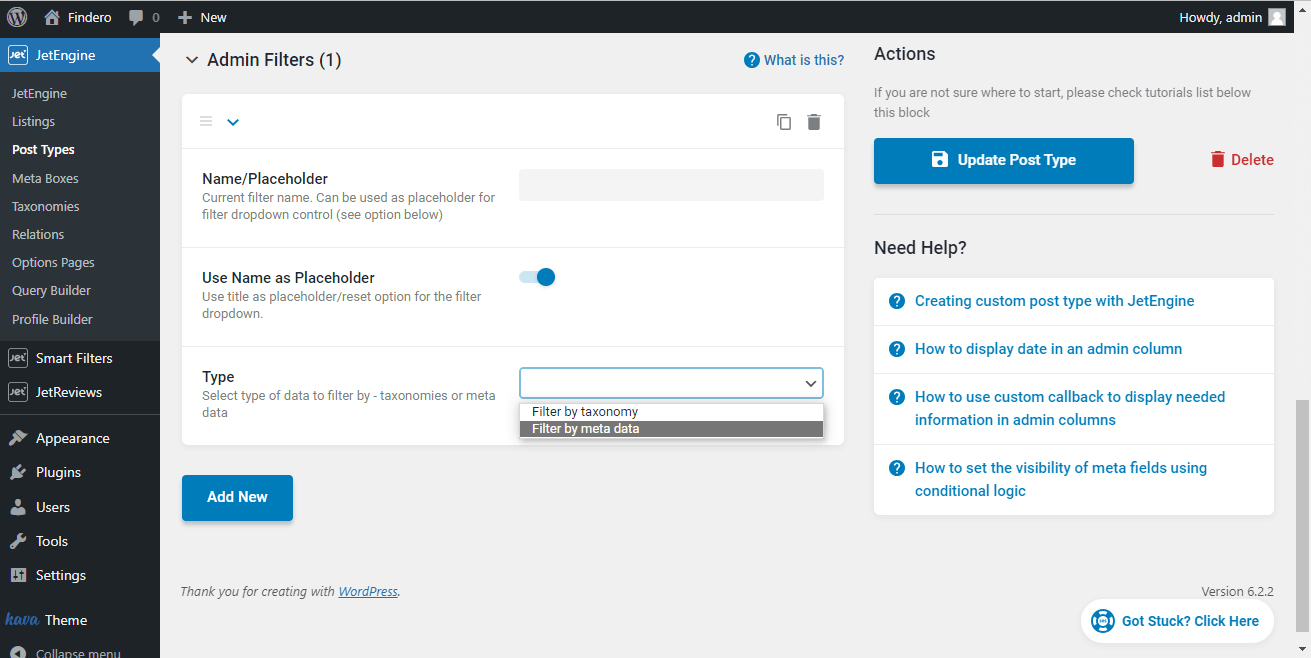
- Title/Placeholder is a field to type the name of the filter (to identify it in the list of filters) and can also be used as a placeholder/empty value for the filter itself on the posts page;
- Use Title as Placeholder is a switcher turning on the possibility to use the filter name as the placeholder in the list of Admin Filters available in the drop-down menu. If enabled, the filter title will be added as the first option to the Admin Filters drop-down list; overwise, the list will display only those options that can be found according to other filter settings;
- Type drop-down menu allows selecting the taxonomy or meta field option to filter the CPTs;
The different fields are available according to the option selected (taxonomy or meta field).
The tutorial details Creating Admin FIlters for the Custom Post Type with JetEngine Meta.
Taxonomy Admin Filter
For the Filter by taxonomy option, the following settings are available:
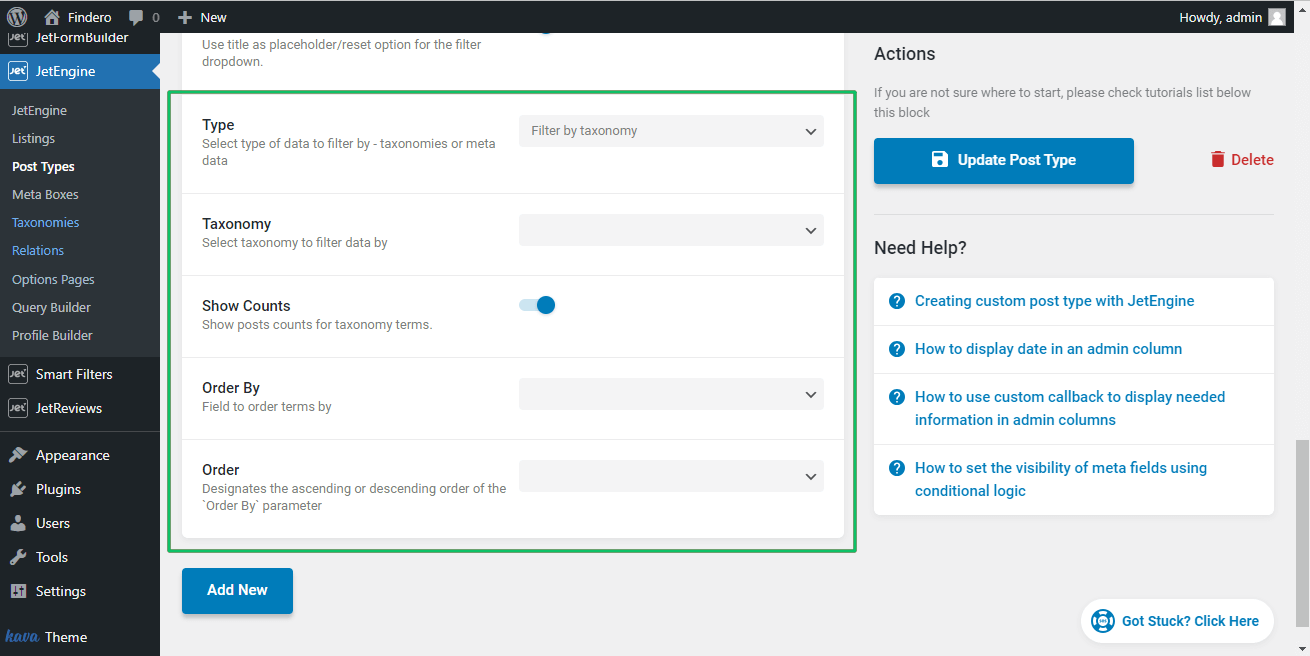
- Taxonomy drop-down menu displays all JetEngine taxonomy data from the current CPT available to filter;
- Show Counts toggle, if enabled, displays the total number of the taxonomy terms shown;
- Order By drop-down menu to order terms by Name, Slug, Term group, Term ID, and more;
- Order drop-down menu to specify the ascending or descending order of the “Order By” option.
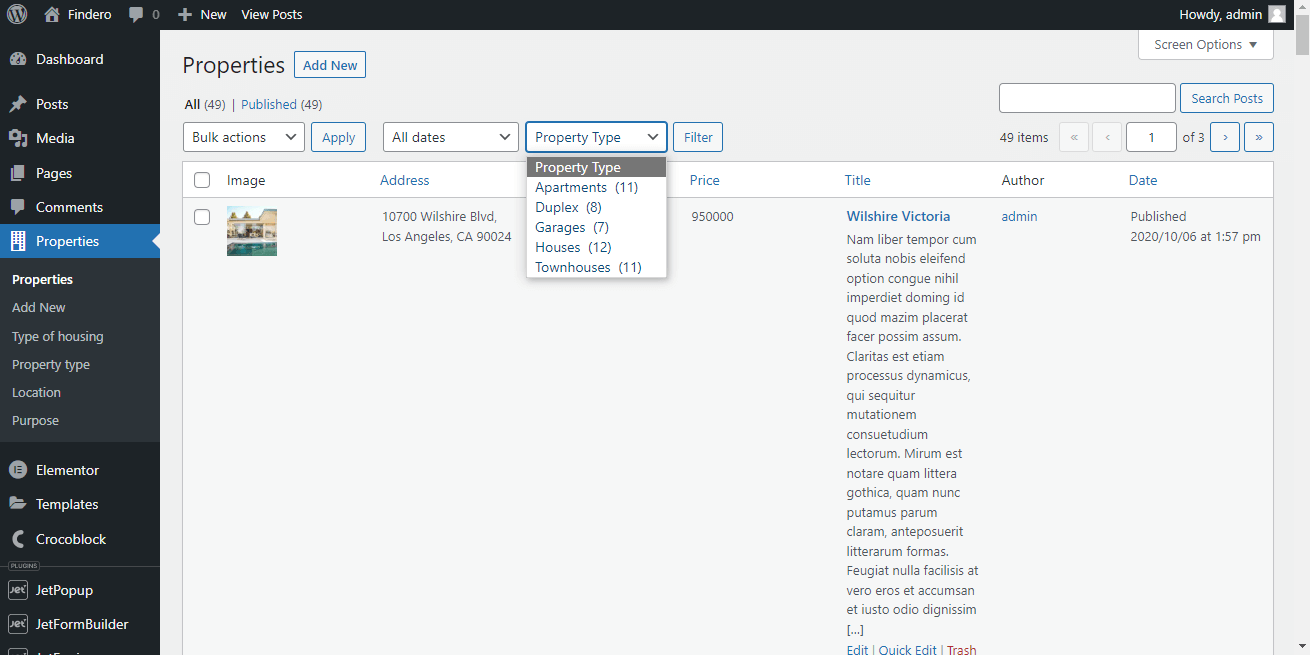
The created Admin Filter (the Show Counts option is toggled) for the taxonomy (here, Property Type) looks as follows:
Metadata Admin Filter
For the Filter by metadata option, the following settings are available:
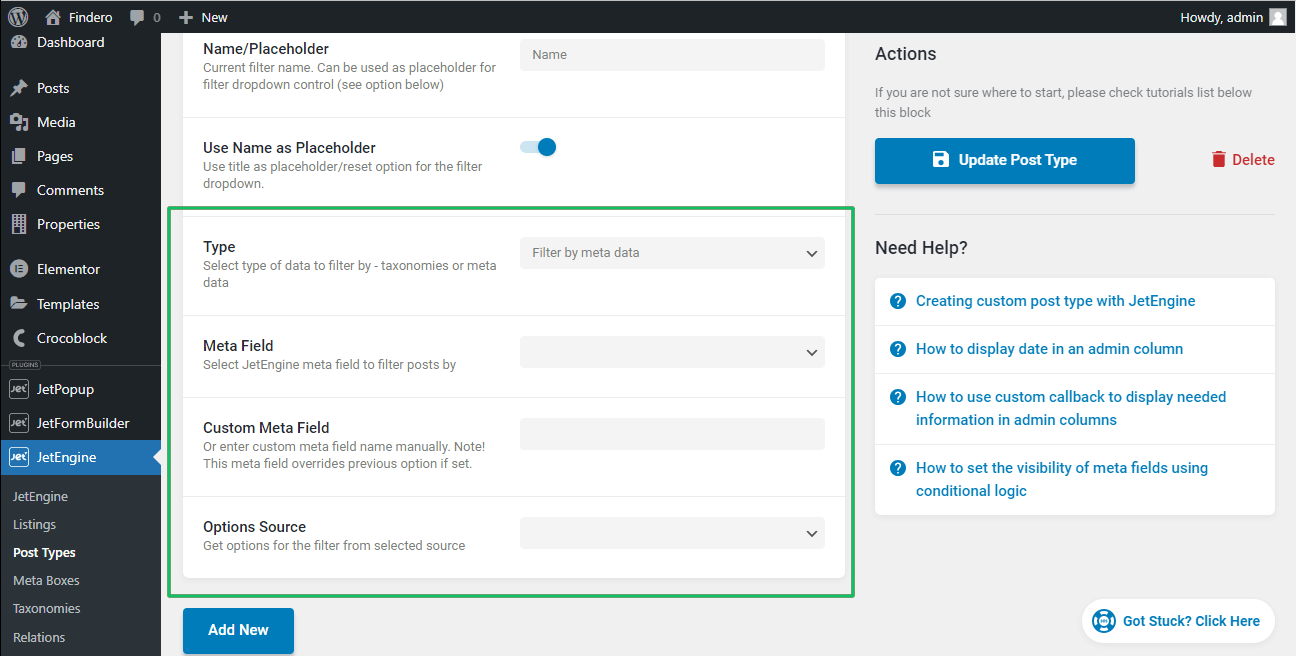
- Meta Field drop-down menu allowing selecting the JetEngine meta field to filter posts;
- Custom Meta Field field to type; this setting has priority over the Meta Field drop-down menu settings (if they both are selected);
- Options Source is a drop-down menu to choose a source to filtering as Glossary and Select from database:
- if selected, the Glossary option selects a glossary for data filtering. It turns on the Glossary drop-down menu with a list of all glossaries available;
The tutorial Glossaries Functionality Overview details glossaries usage.
- if selected, the Select from database turns on the Order dropdown menu to choose the ascending or descending order of the metadata:
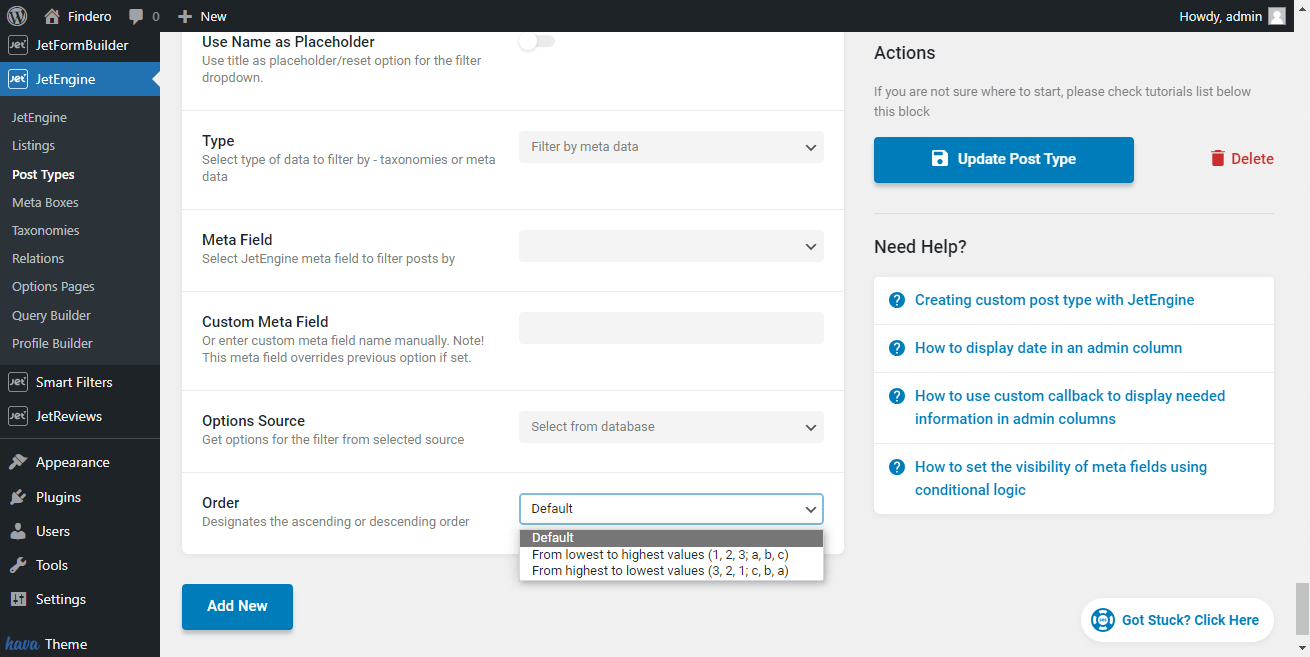
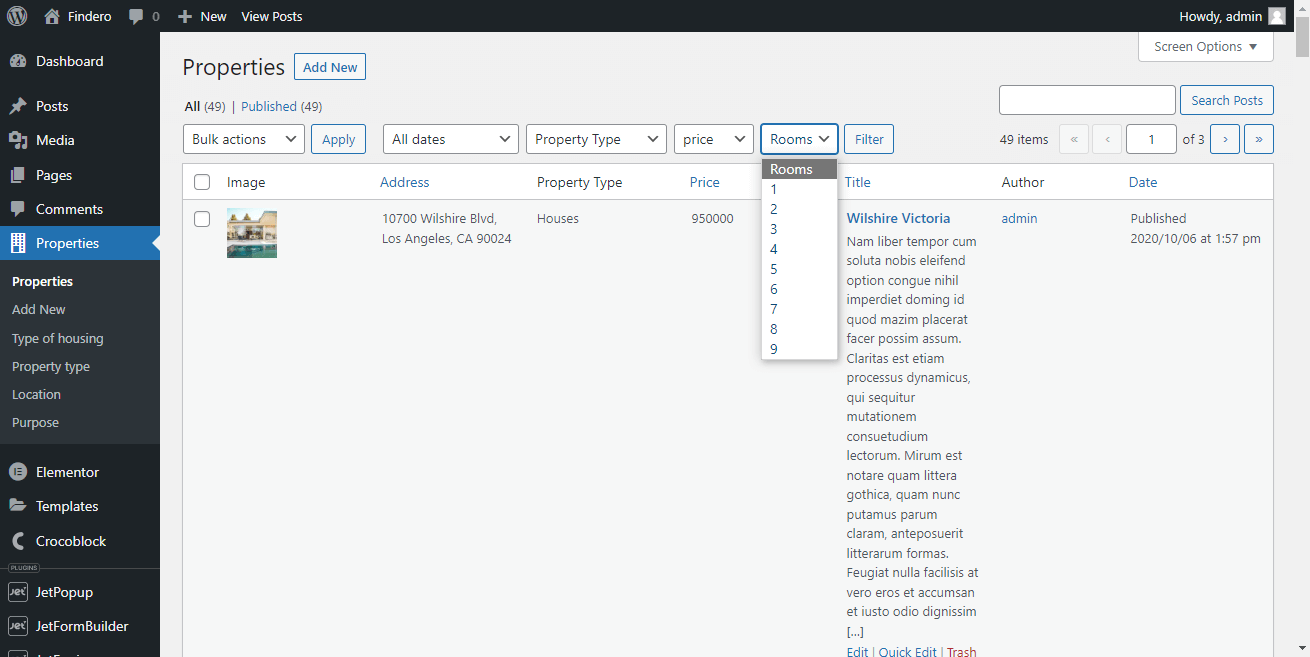
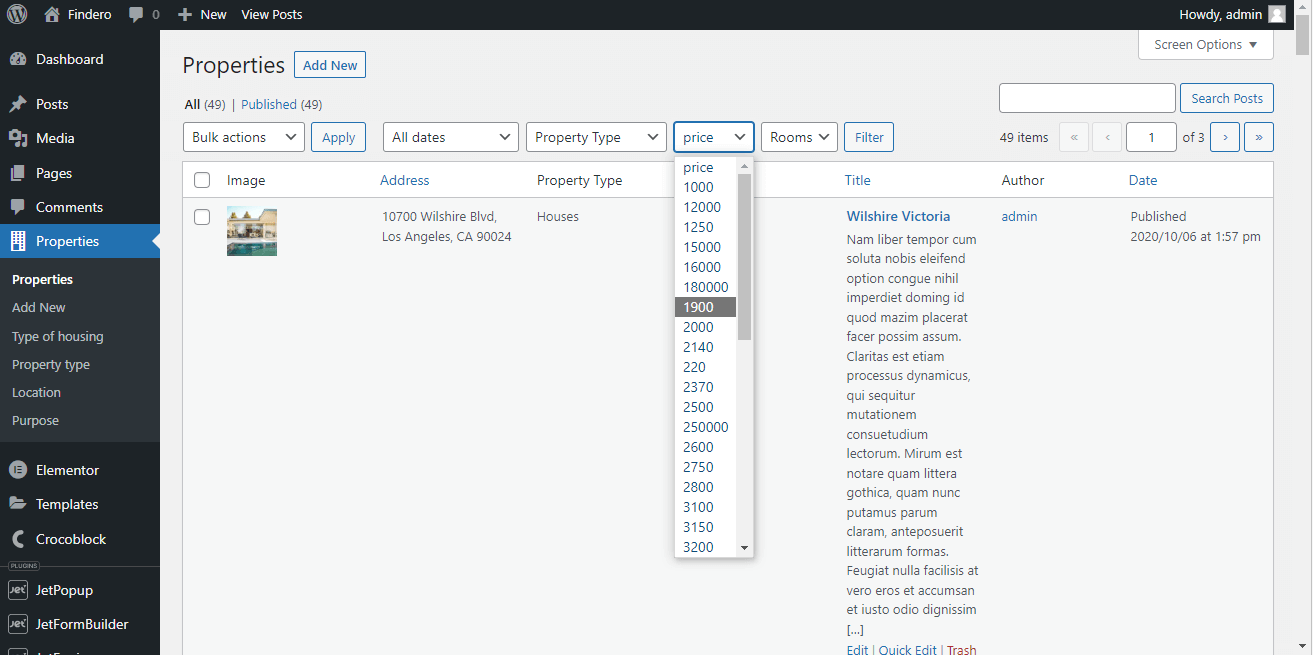
The customized filter pulls its options from the database directly. The created Admin Filter for the data selected from the database (here, Price) applied looks as follows:
That’s it. Now you know how Admin Filters work.