How to Connect Users to Custom Content Type Items via Form
Learn how to connect users to the Custom Content Type posts via the select/checkbox/radio field in the JetFormBuilder form.
Before you start, check the tutorial requirements:
- Block editor (Gutenberg)
- JetFormBuilder plugin installed and activated
- JetEngine plugin installed and activated with a Custom Content Type created
JetFormBuilder form fields, in combination with JetEngine queries as a source for options, open the door for a vast range of possibilities, one of which is connecting WordPress users to Custom Content Type items via Post-Submit action.
Let’s check how this can be achieved step-by-step.
Create New Users Query
The first step is creating a base for retrieving options for the form field. In this case, options will be retrieved from the Users query.
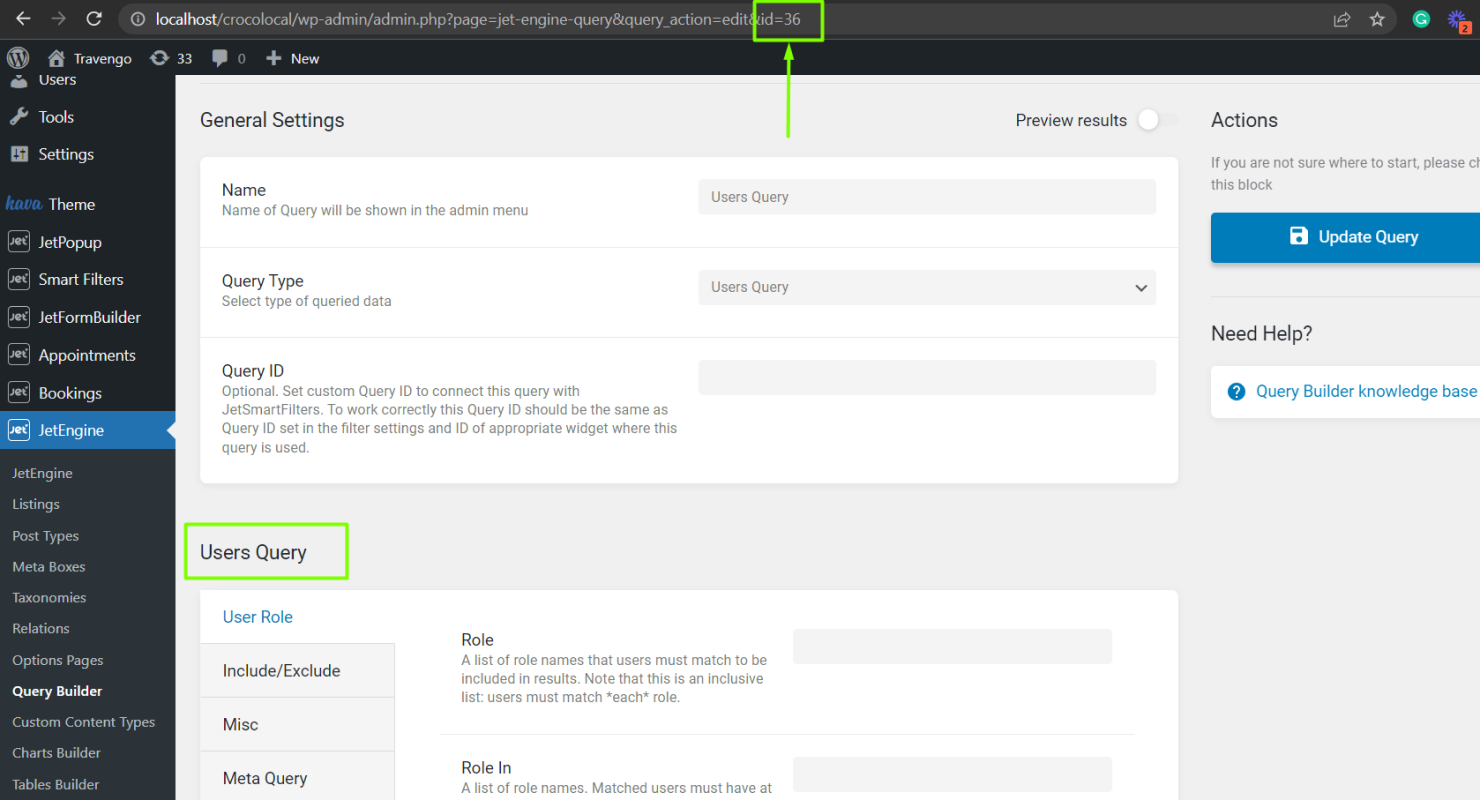
Go to WordPress Dashboard > JetEngine > Query Builder and press the “Add New” button.
Create a Users Query, specify the parameters in the Users Query section if needed, and save the query.
Add Select, Checkbox, or Radio Field to Form
Create a new form or edit an existing one in WordPress Dashboard > JetFormBuilder > Forms.
Add Checkbox, Select, or Radio field to the form and select the “Generate Dynamically” option in the Fill Options from field. This option is available for Multi-Optional fields.
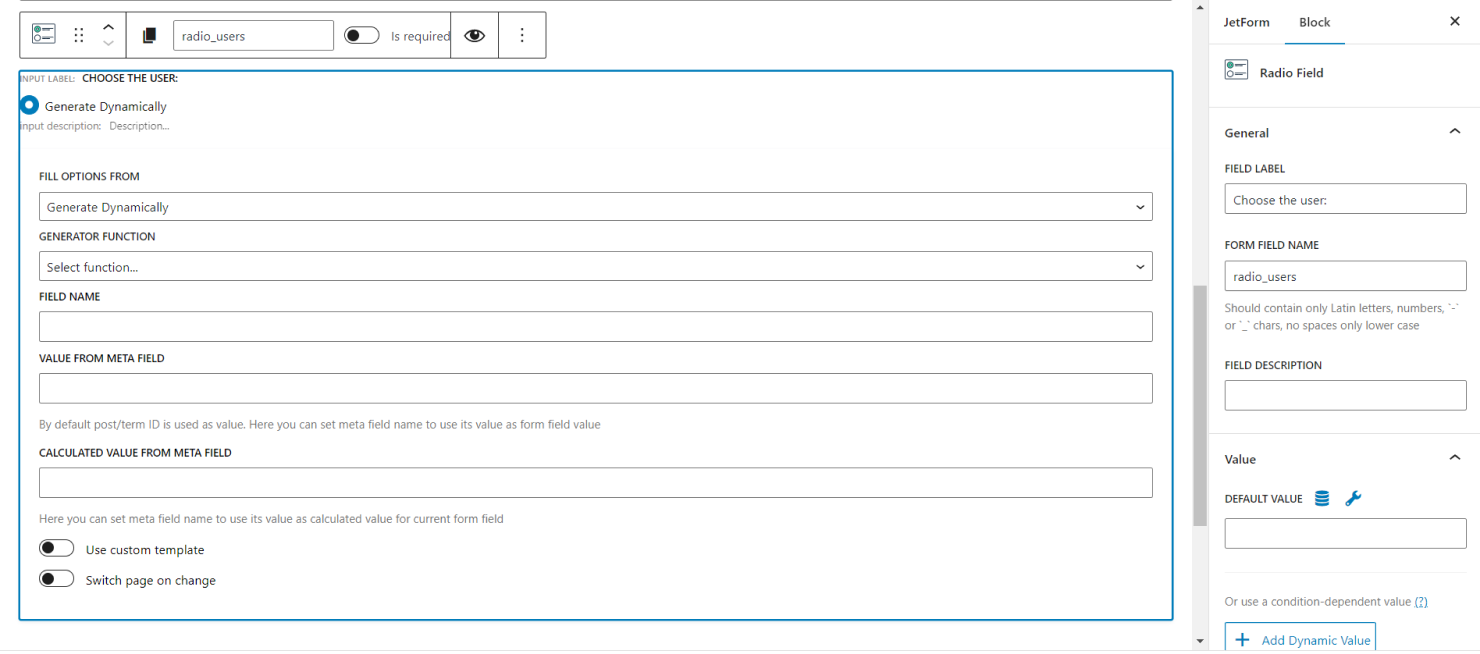
Select “Get values list from JetEngine Query” as the Generator Function, and type the following combination in the Field Name:
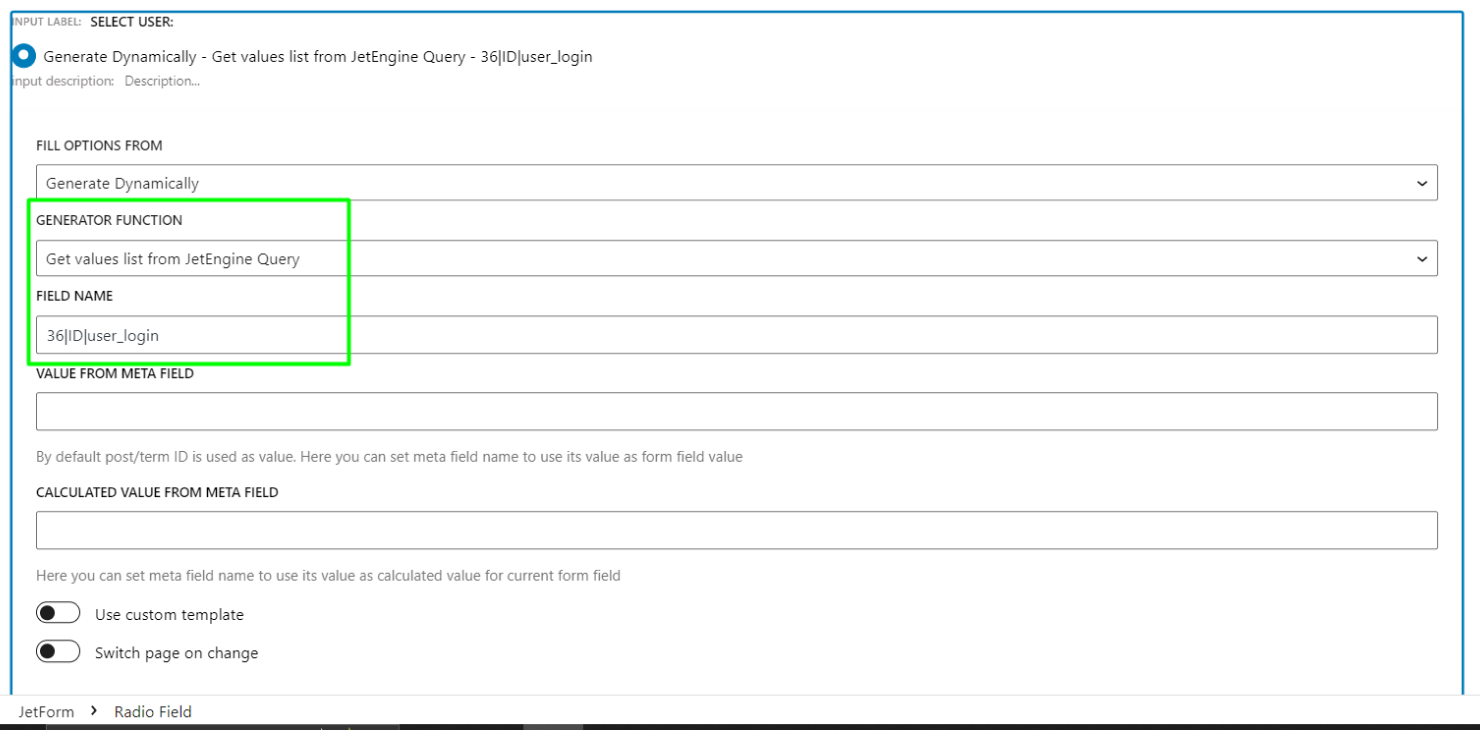
“36|ID|user_login”, where:
- ‘36’ is the Query ID (change it to the ID of your query);
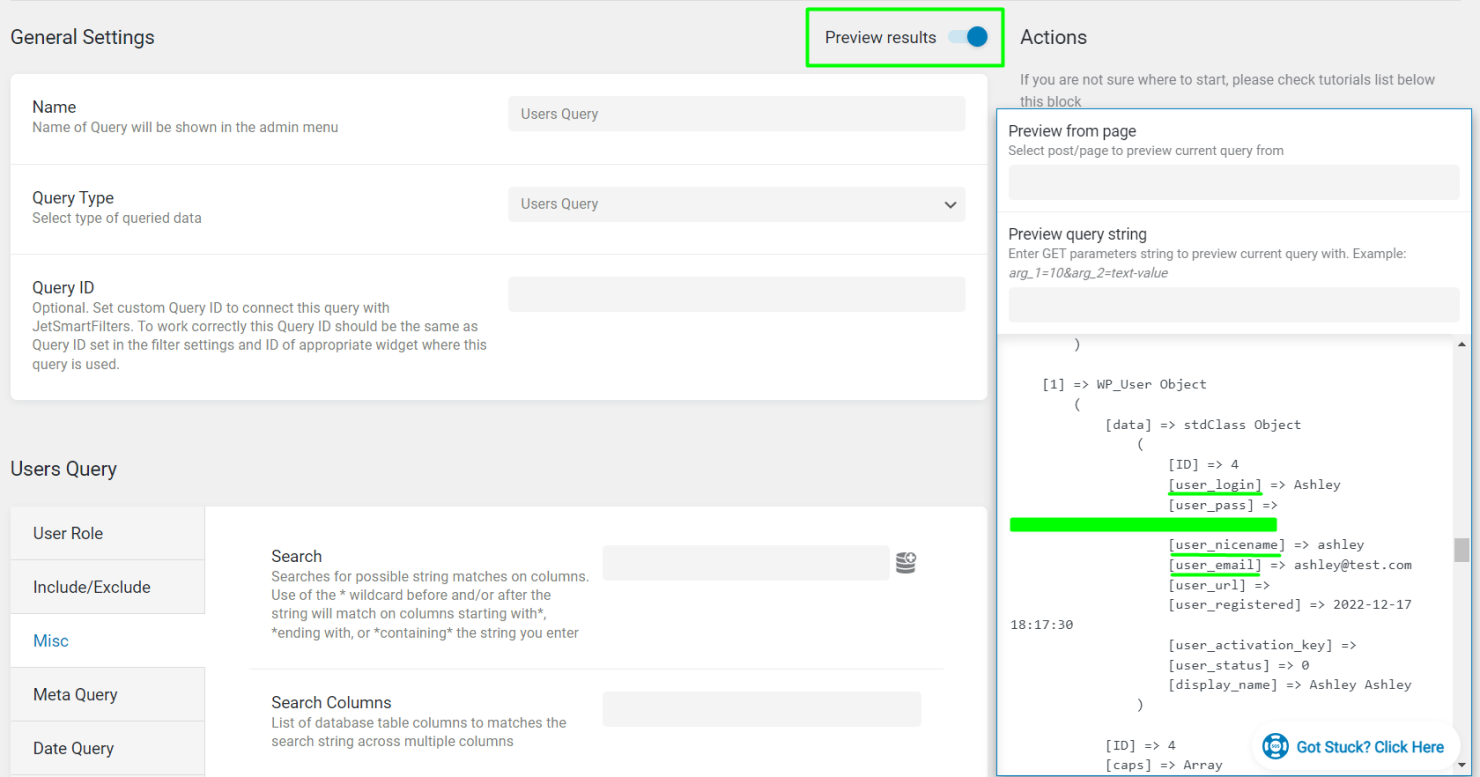
- ‘ID’ is the property from which values will be filled;
- ‘user_login’ is the property from which labels will be filled.
Set Preset for the Form Field
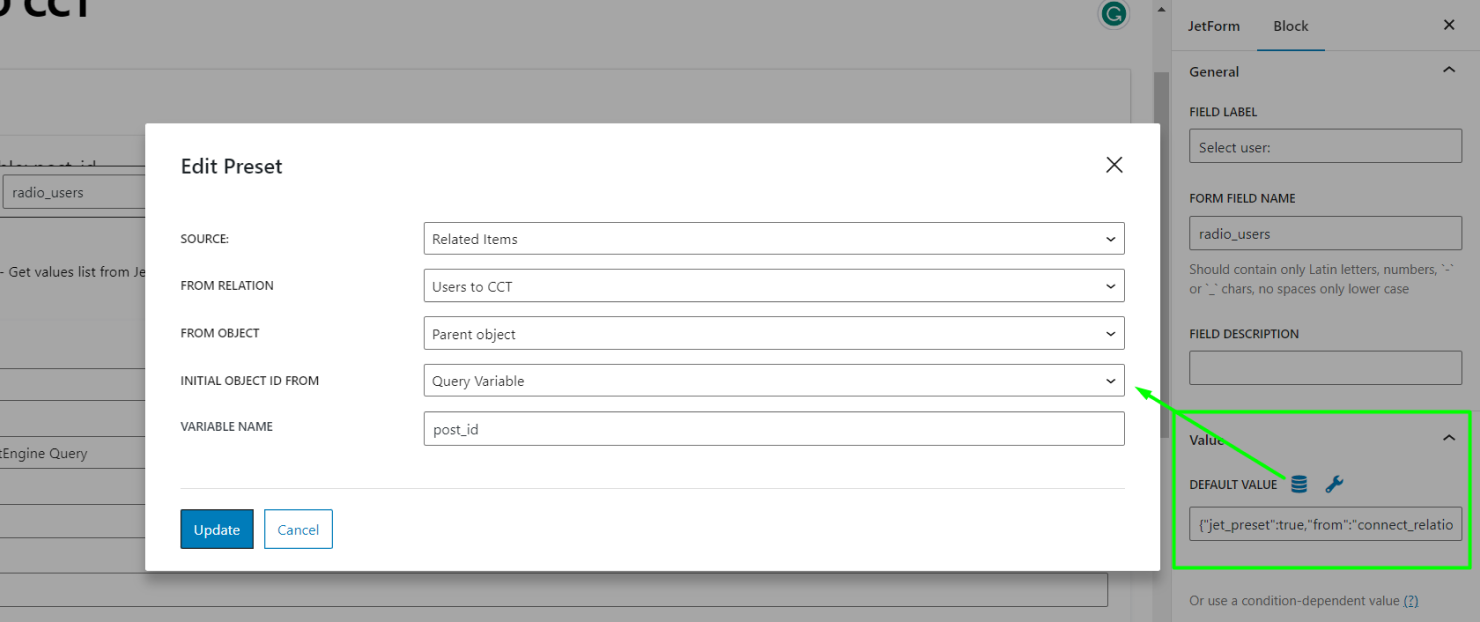
If Users are already connected to the existing Custom Content Type item, it’s possible to set the Default value for the Radio field in the Value tab.
In this example, “Users” is the parent, and “CCT” is the child of the relation.
Don’t forget to press the “Update” button to save the applied changes.
Set Connect Relation Items Post-Submit Action
Now it’s possible to use the Radio field in the Connect Relation Items Post-Submit action.
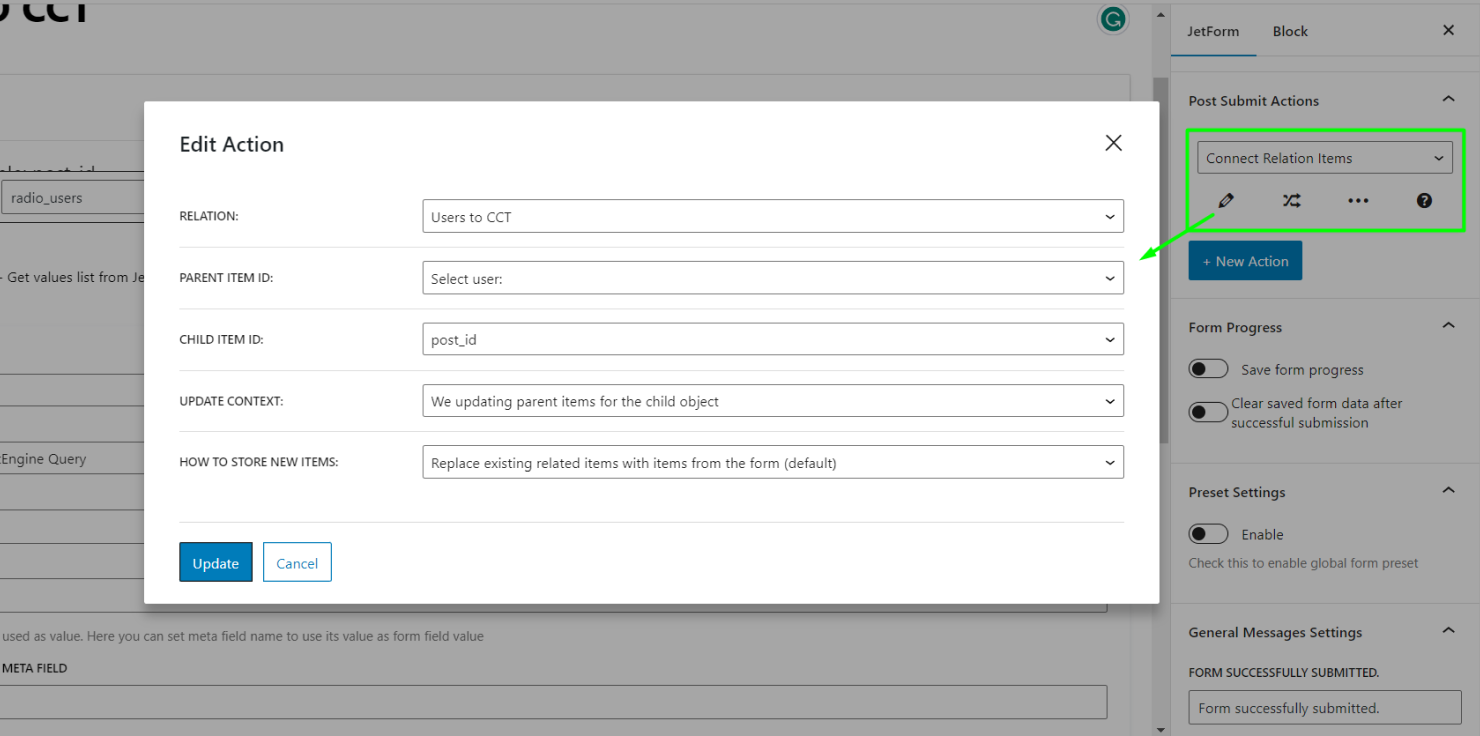
Custom Content Type Item ID (for the Child Item ID field) can be retrieved from the Current ID if the form is in the popup or URL Query Variable if the form is located on the Account page. Learn more about how the CCT item can be updated in this tutorial.
Click the “Update” button to save the action settings and publish/update the form.
Check the result on the front end; now, the list of users is displayed in the form field, and it’s possible to connect them to the Custom Content Type item.

That’s all; now you know how to connect WordPress users to JetEngine Custom Content Type posts via the JetFormBuilder form on your WordPress website.